Artisan bread class at King Arthur Flour, Day 1
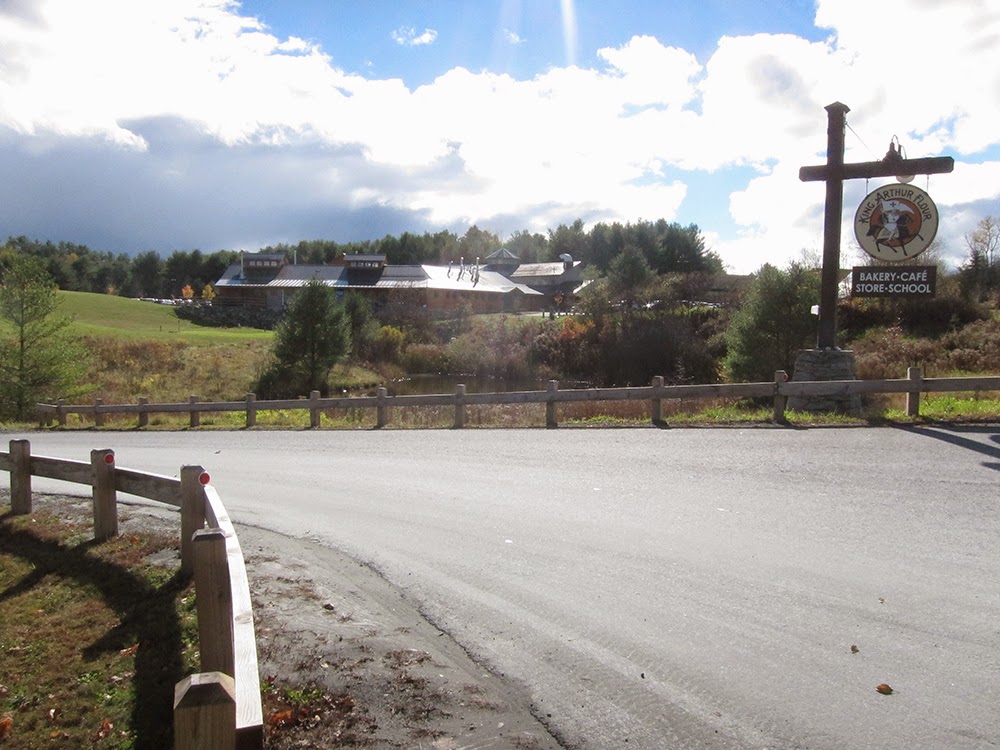
On Sunday, October 26, 2014 I wended my way north from Providence amidst beautiful autumn colors, arriving at the Hampton Inn in White River Junction, VT several hours later. My purpose - to attend a 4 day artisan bread class at King Arthur Flour in Norwich, VT, just a few miles north of my lodgings.

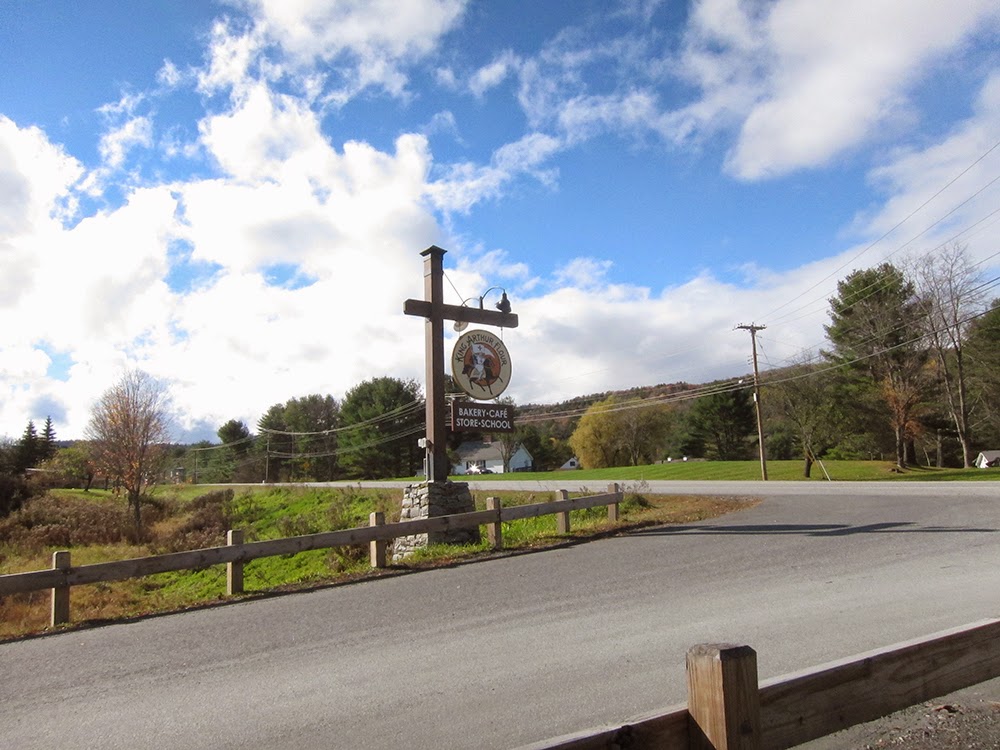
When Steve and I lived in Vermont some years ago, I visited the King Arthur baking store on a few occasions, but little did I know what awaited me this time around. The new Baking Center is a stunning piece of VT architecture, right down to its quintessential metal roof.

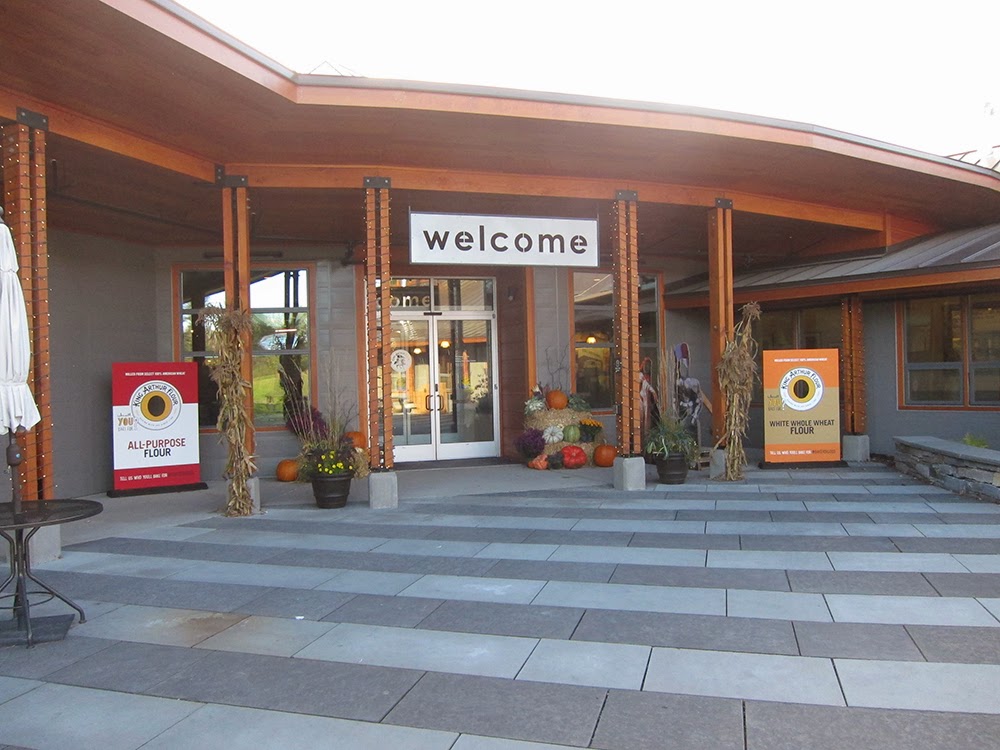
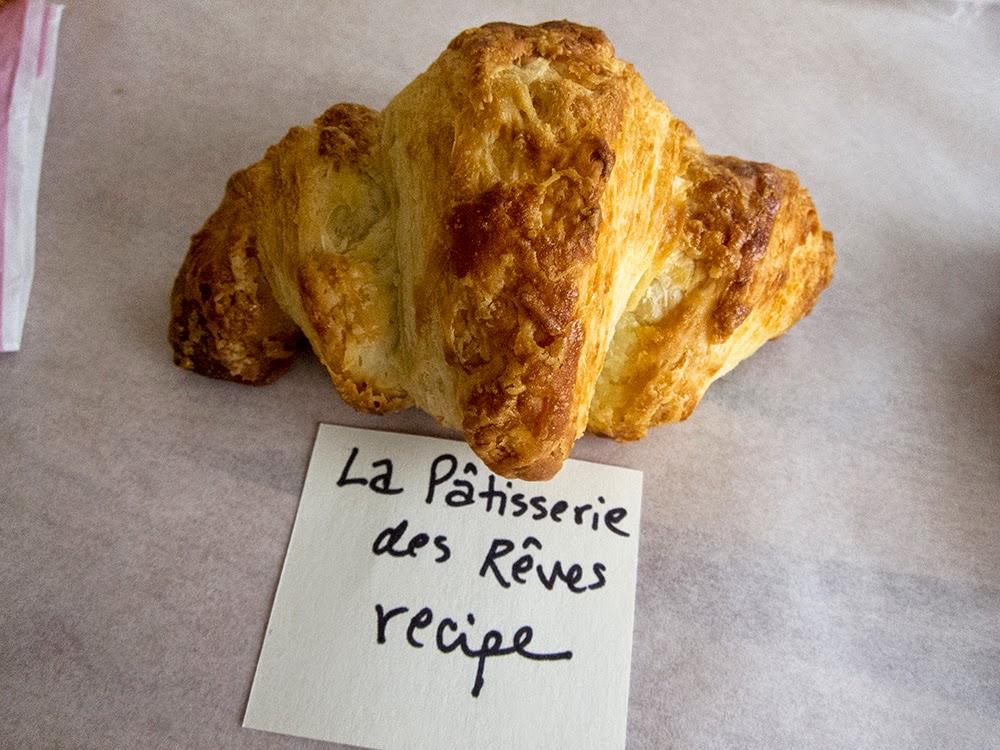
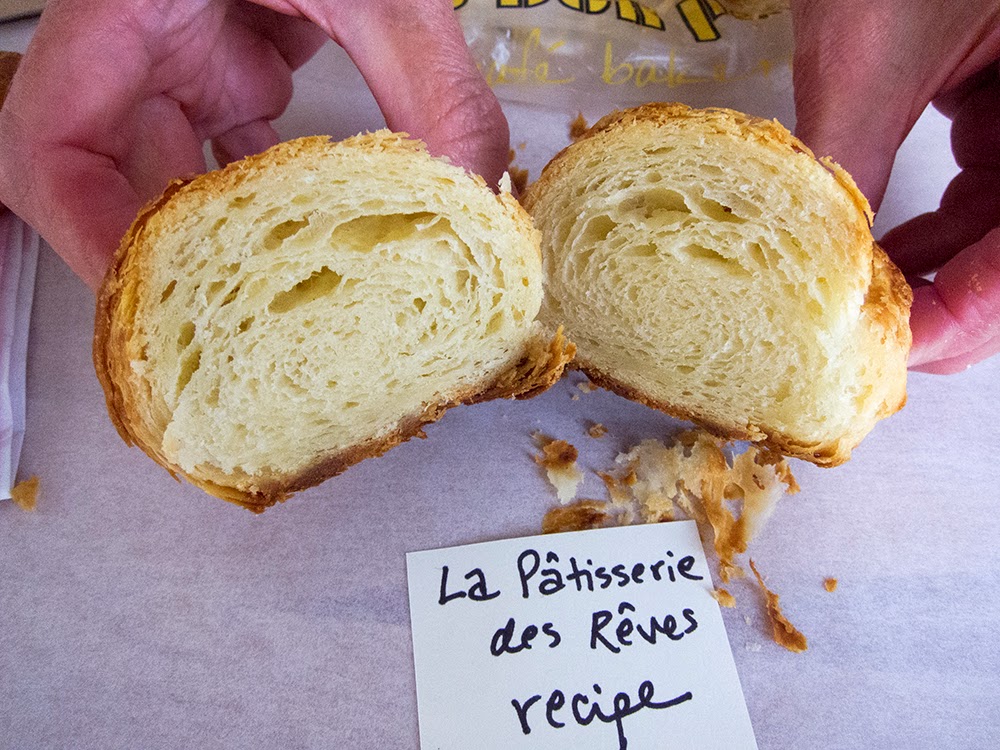
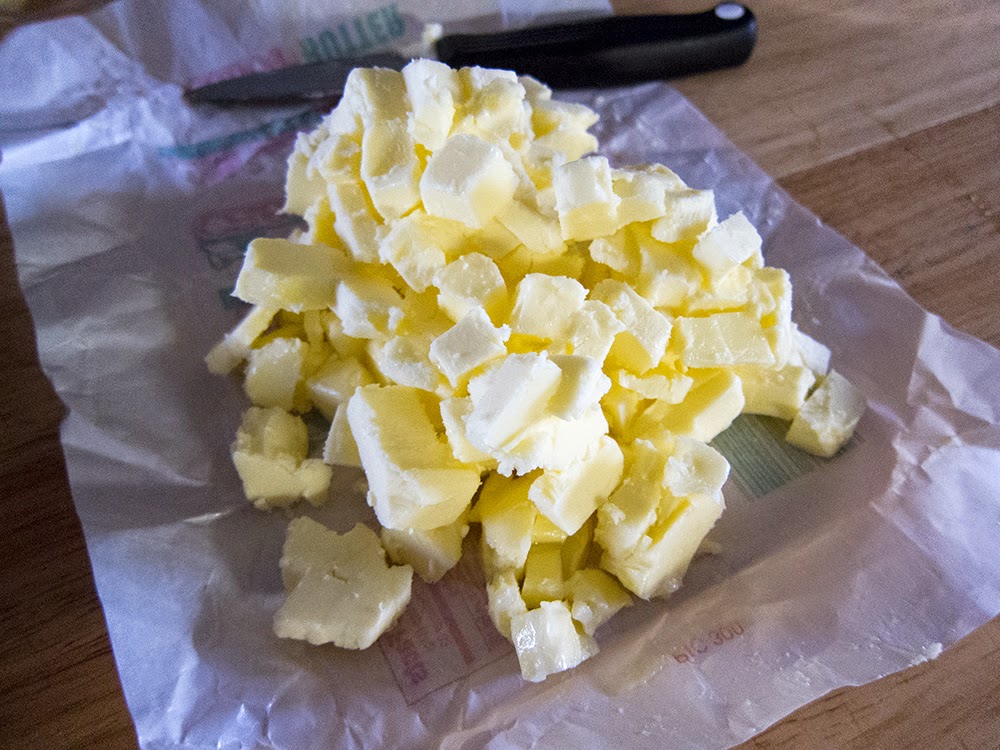
Inside one finds a cozy café, the bakers retail store and a couple of large production kitchens where you can watch what's going on - so cool!  I especially got a kick out of seeing the large blocks of butter being formed for croissants and danish, followed by the butter being enveloped in the dough in preparation for sheeting - bordering on massive compared to my small, hands-on batches of croissants!

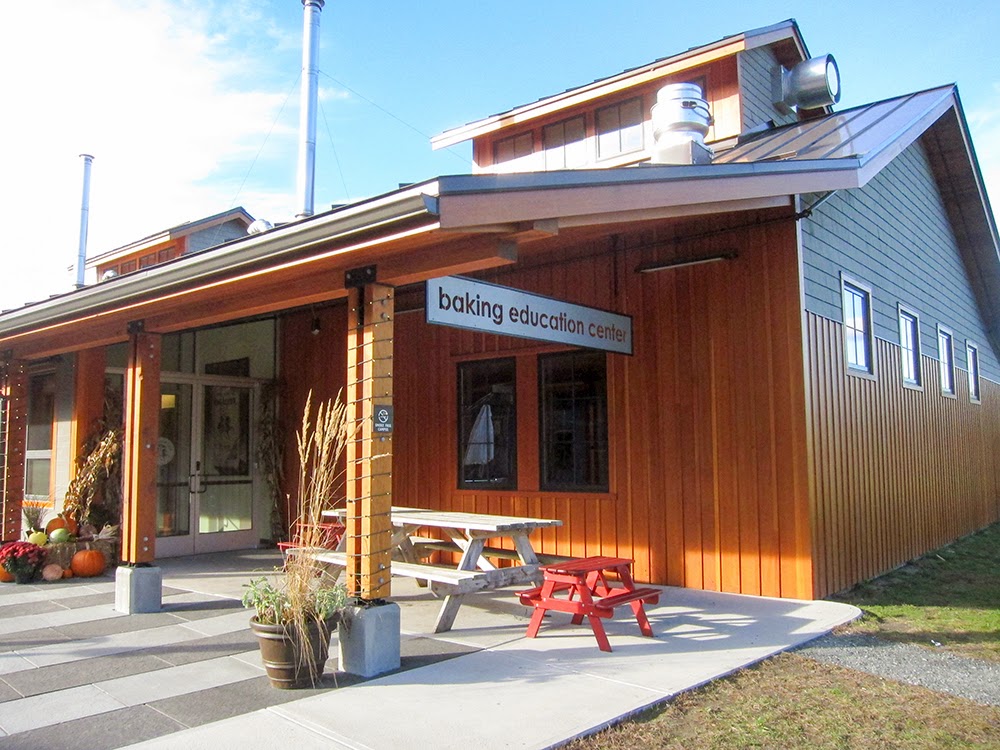
Then there is the baking center where many have honed their skills and enhanced their knowledge as they pursue their passion for baking.

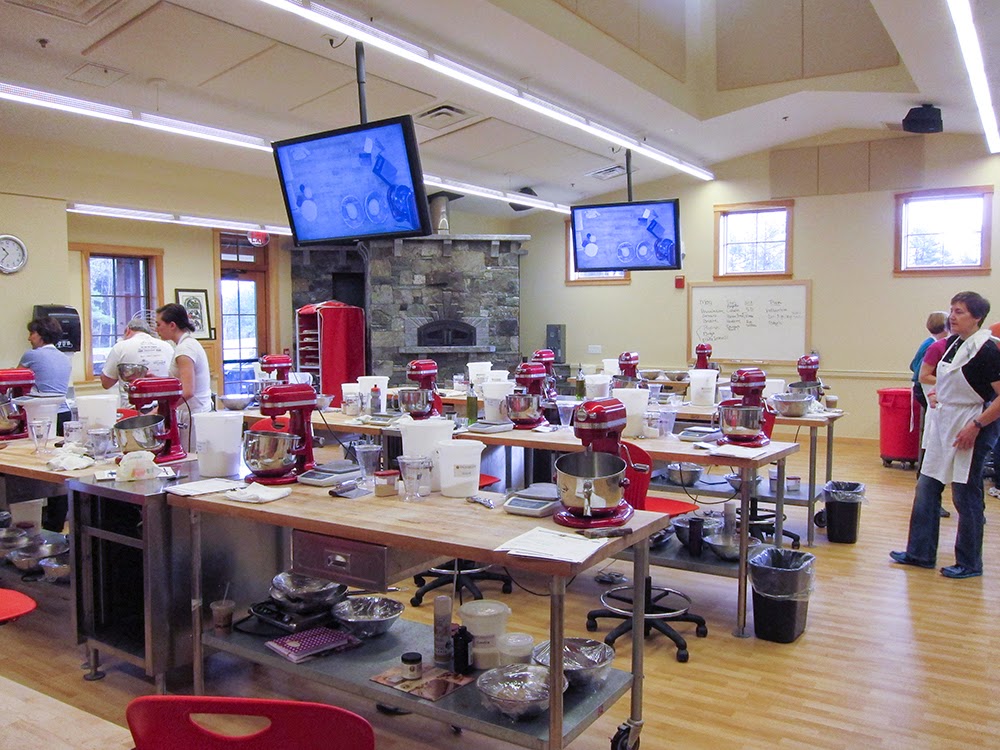
I and 10 fellow students were warmly greeted by Robyn, our instructor for the first day. Free coffee cards were handed out as we each settled in at what would be our "bench" spot for the remainder of the class.

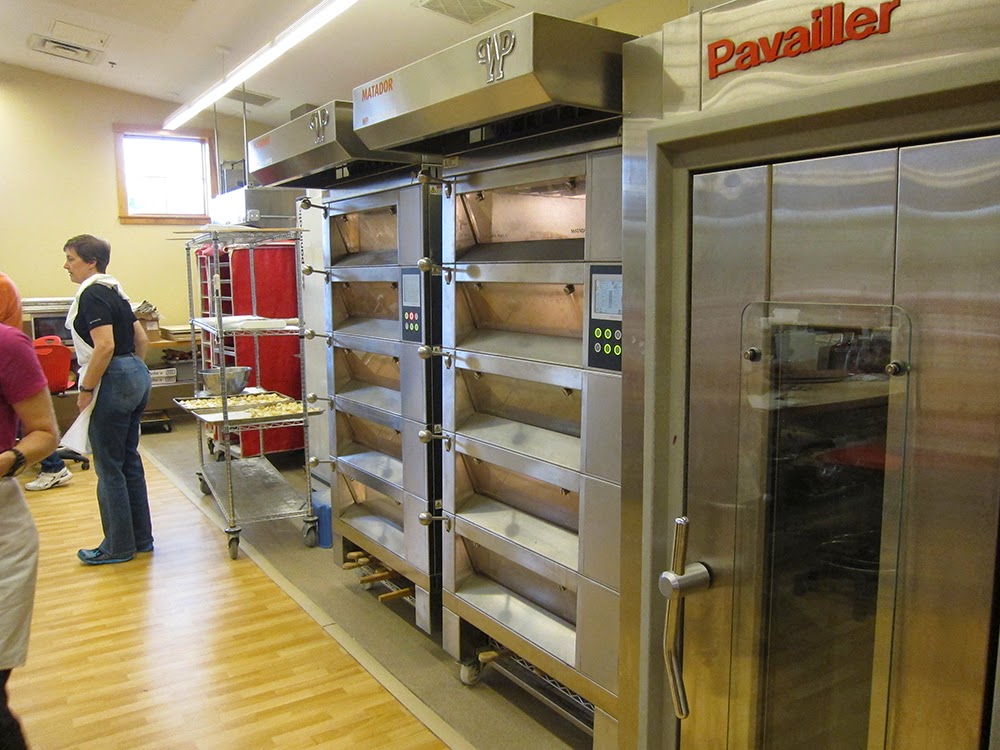
The teaching kitchen is open, airy, extremely well equipped with impressive tiered deck ovens, proofing cabinets, roll in refrigerators, cheery red KitchenAid stand mixers and more. What a great place to learn!

The plan for the week:

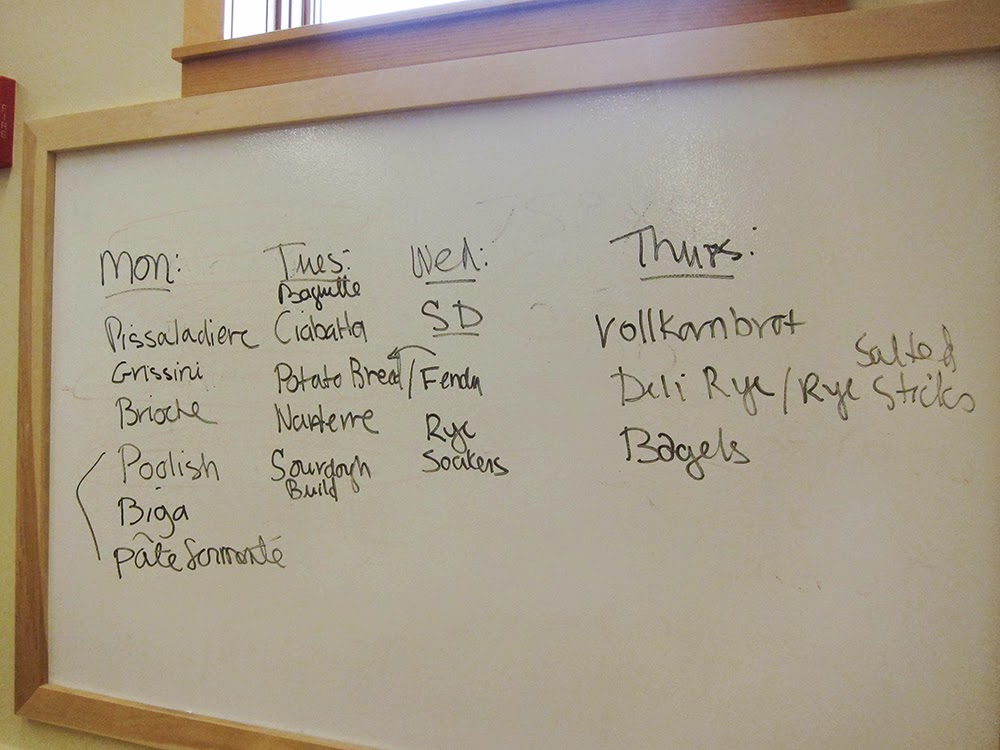
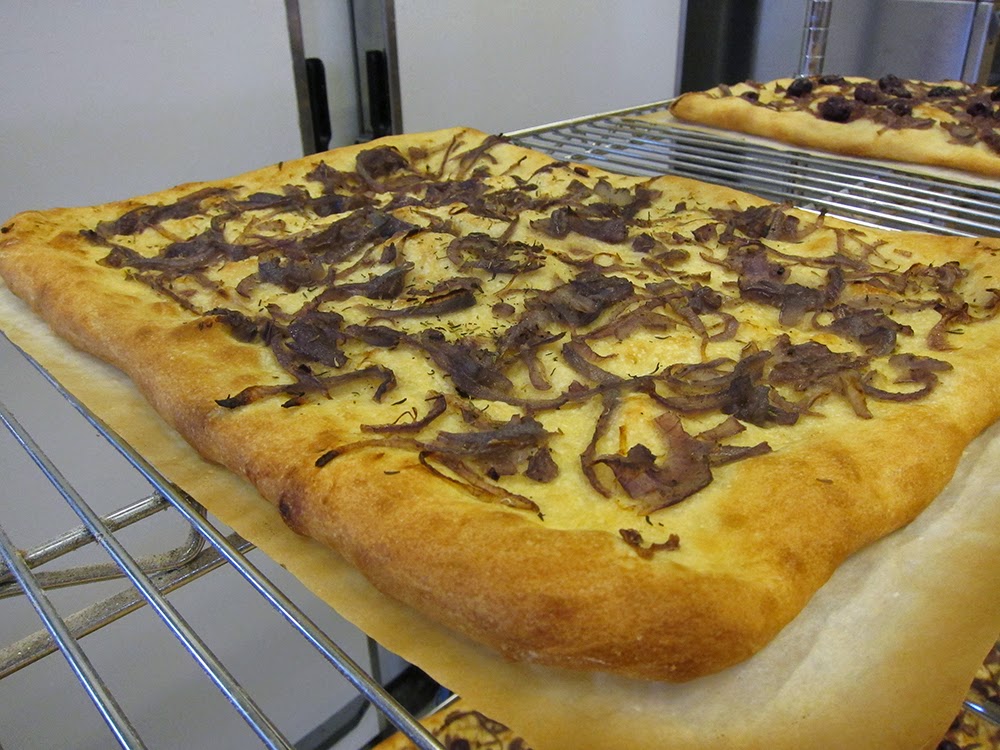
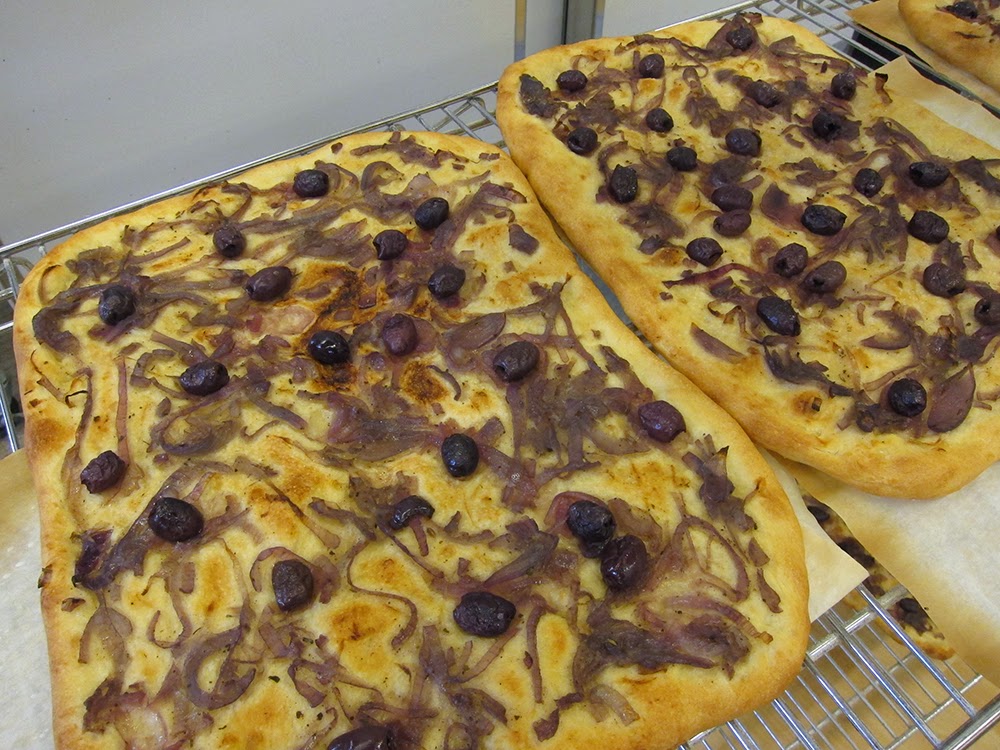
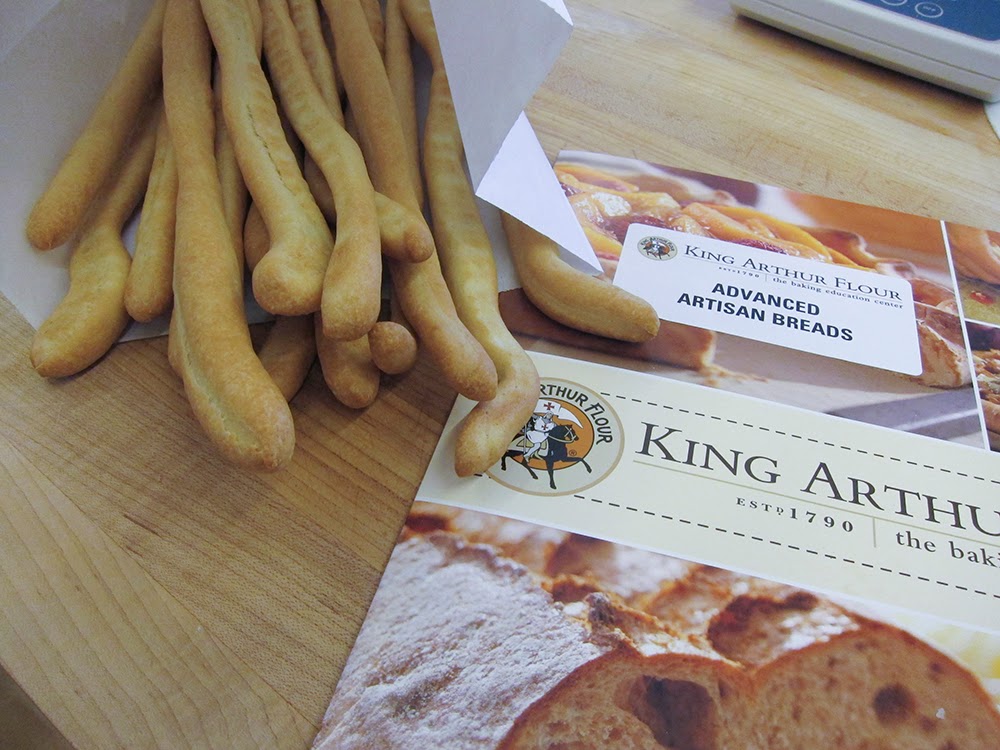
We began with a couple of "straight" doughs (also known as direct doughs) which are made and baked the same day. We made pissaladiere (a classic southern French pizza-like dish typically topped with caramelized onion, olives and anchovies) and grissini (bread sticks).

Both of these doughs were very user-friendly, came together smoothly with a silky feel.  Then after kneading, some resting/rising time and shaping, they were baked in the hot deck ovens. Since I'm not an olive lover, I chose to top my pissaladiere with only the caramelized onions (seasoned with herbes de provence and pepper), although my classmates all happily embraced the olive-onion combo.

The grissini were a bit chubby, some twisty and crooked since everyone put their own spin on the shaping process:

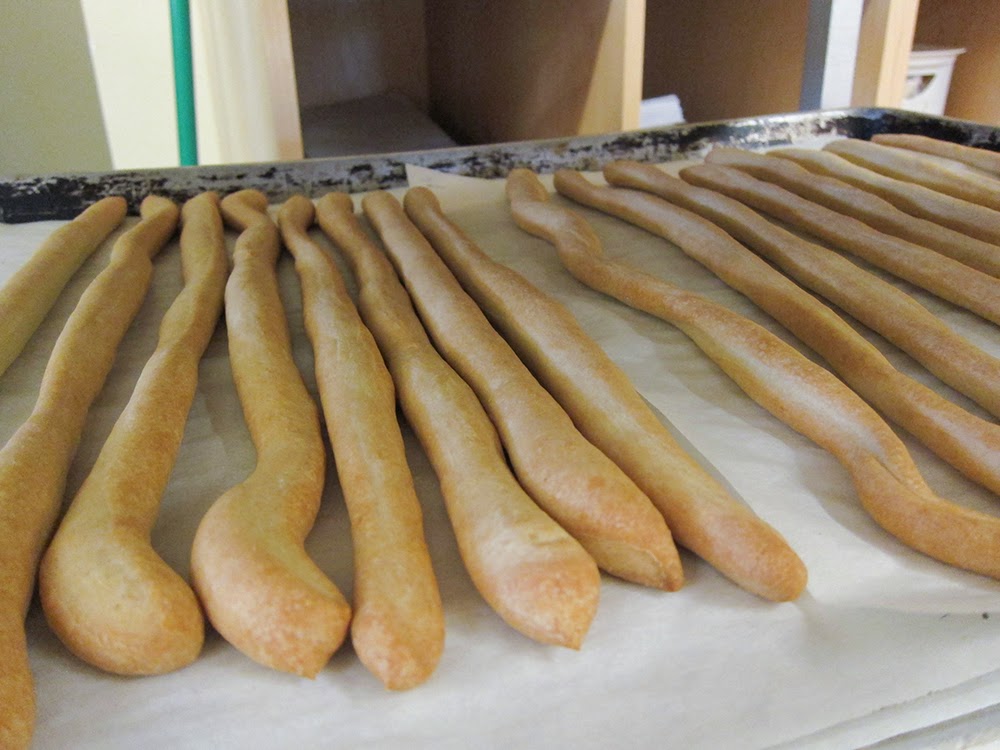
We had the option of keeping our results or leaving them on the wire racks to be donated to a local food cause. Since there wasn't any chance I would (or could) eat all of these, I chose the second option, both for the pissaladiere and the grissini.

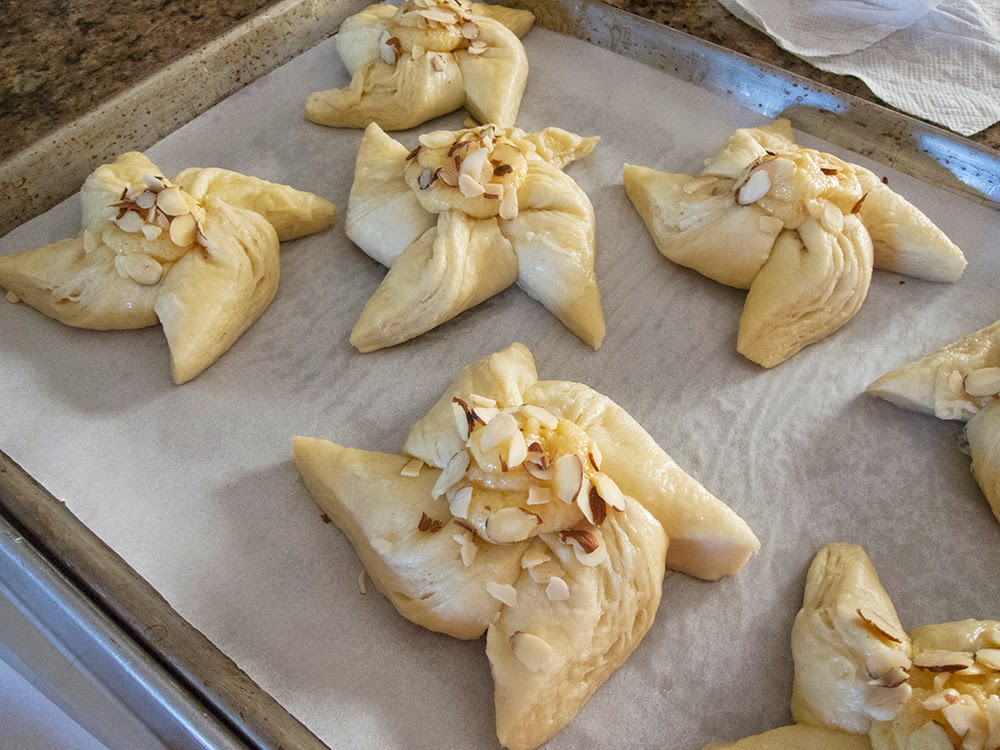
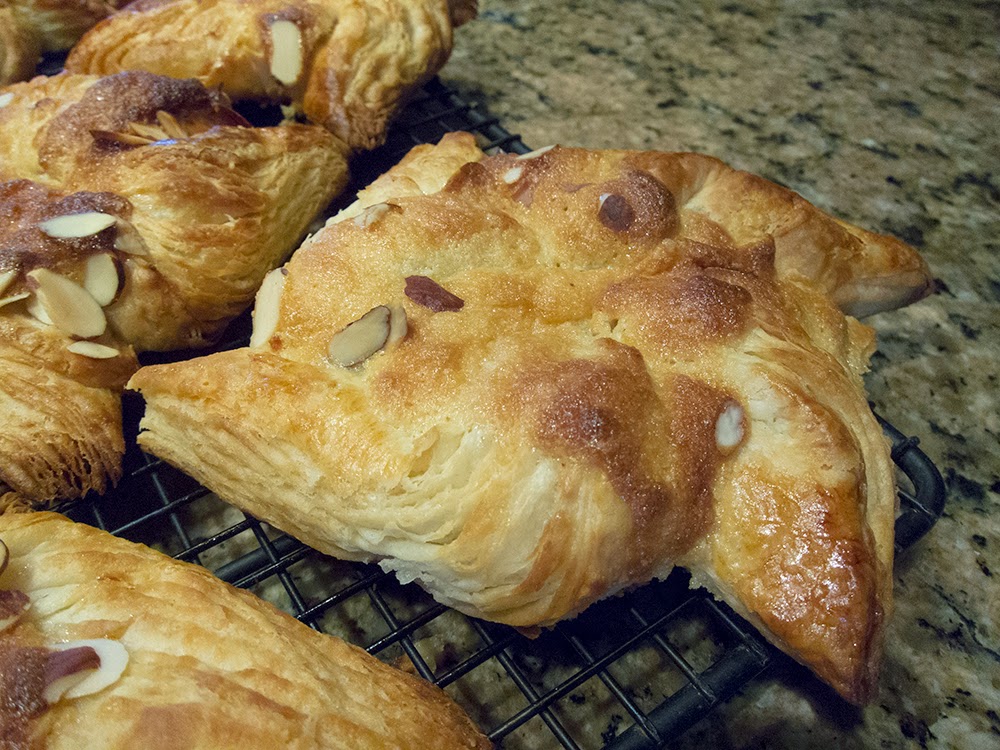
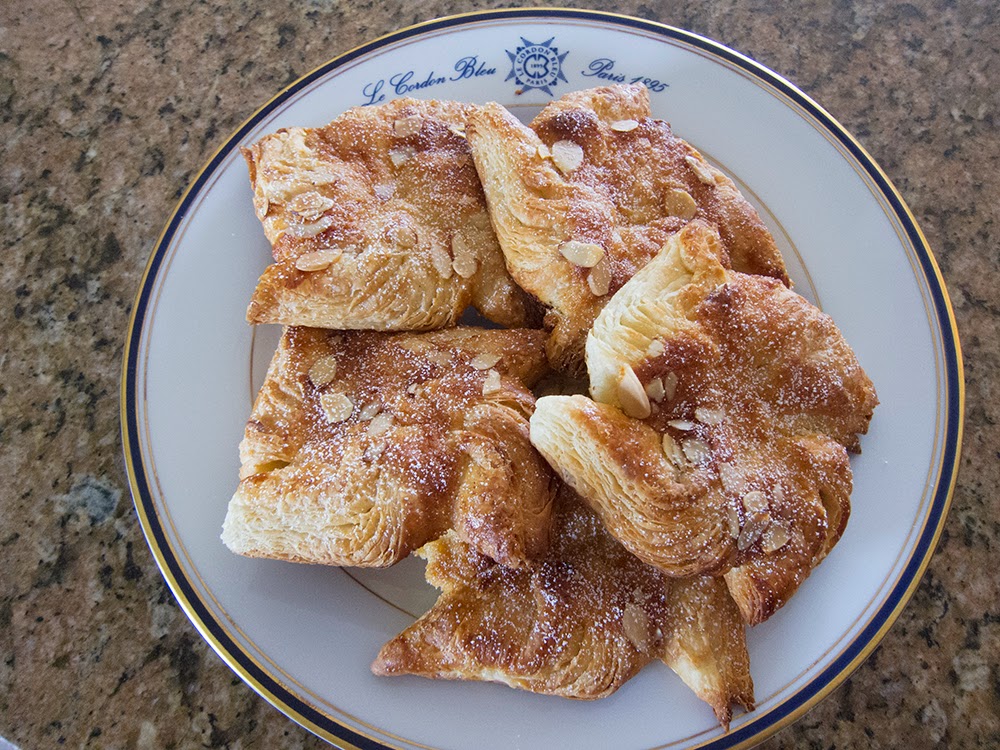
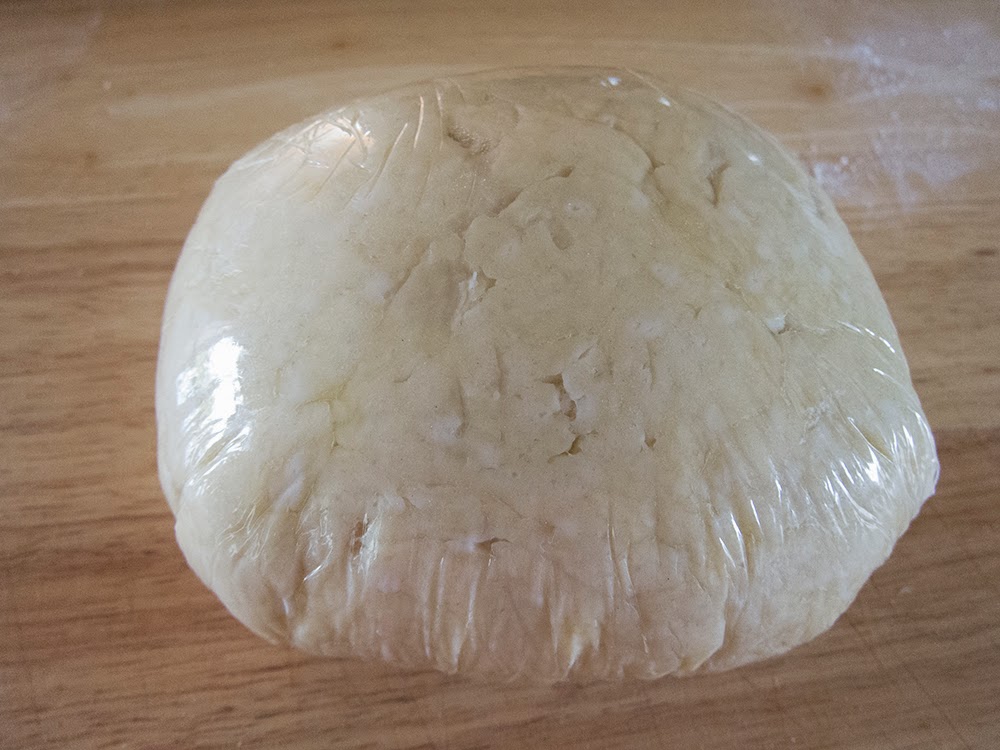
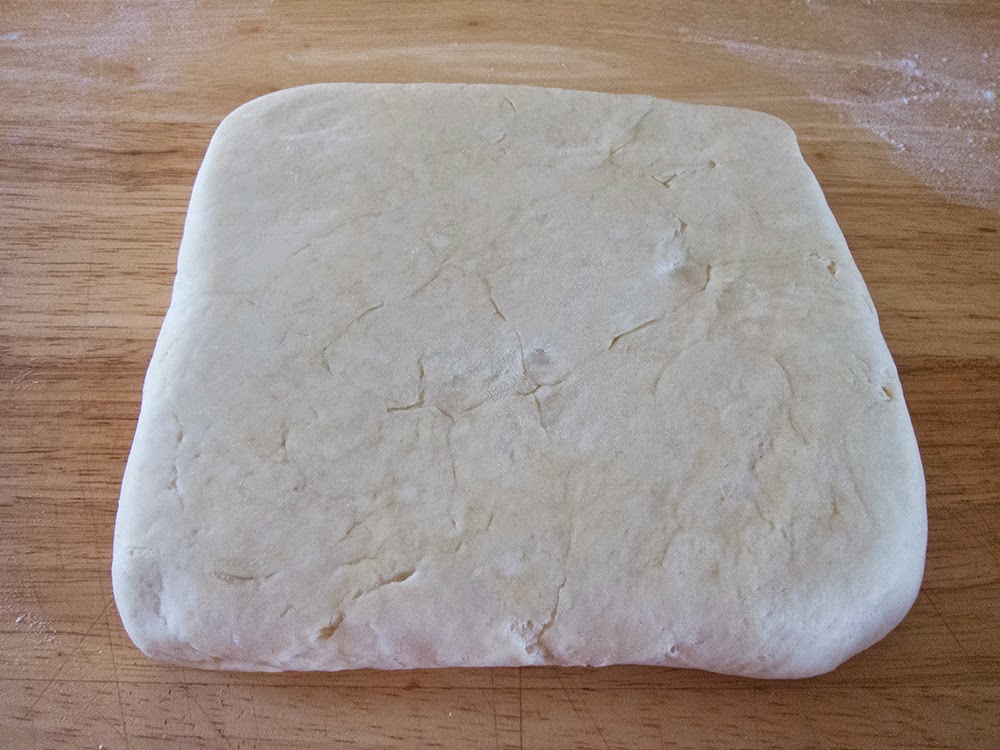
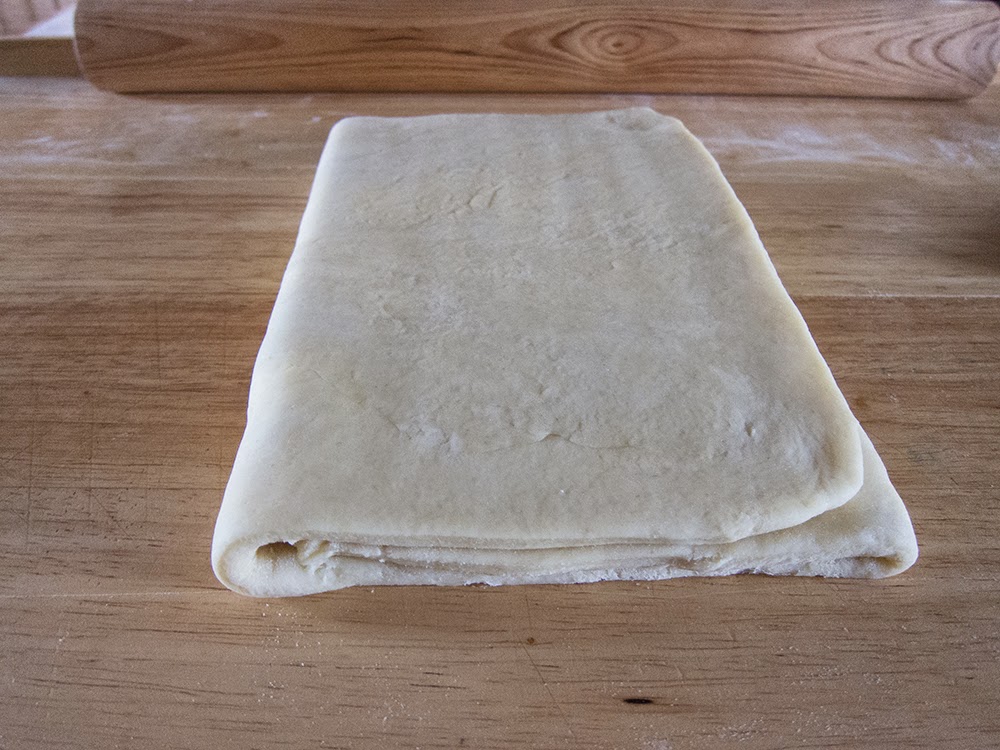
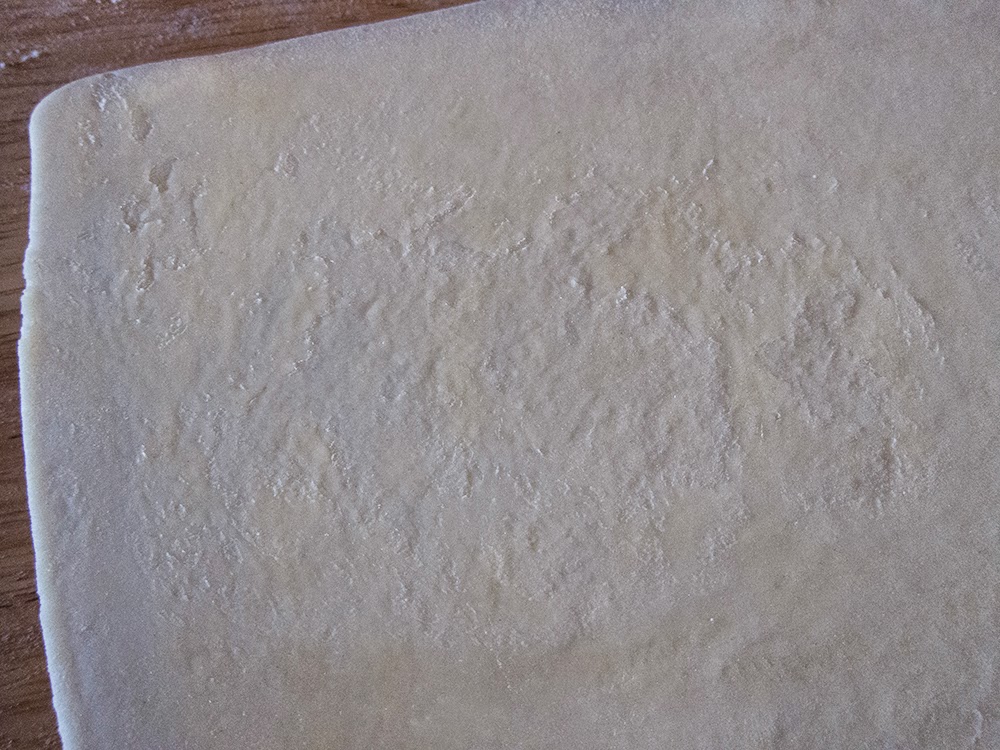
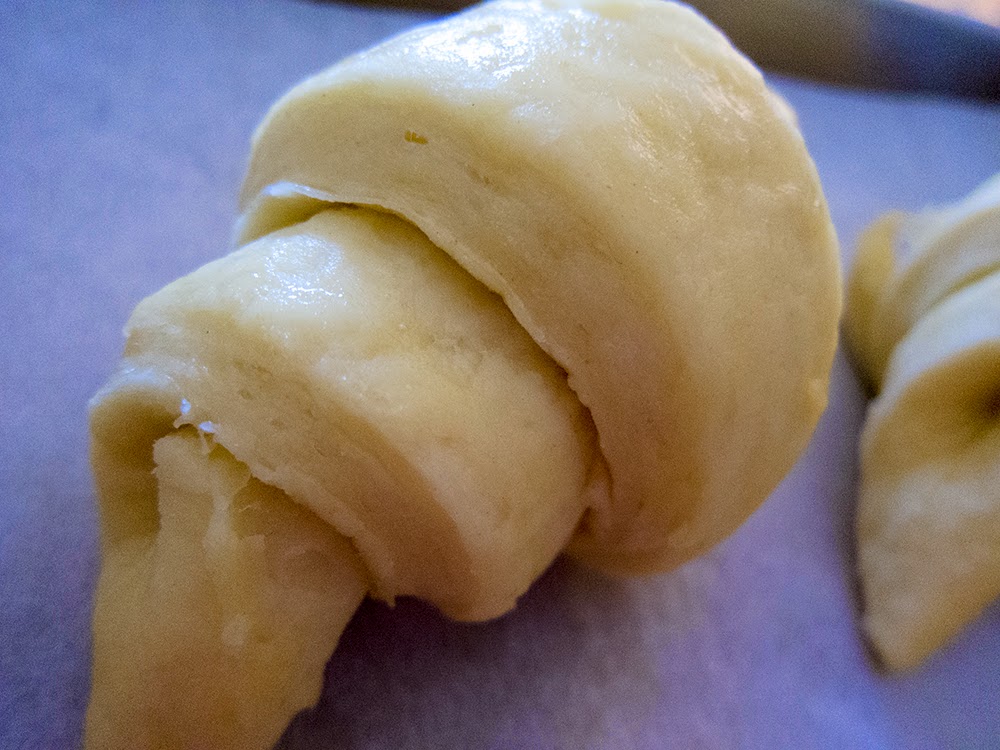
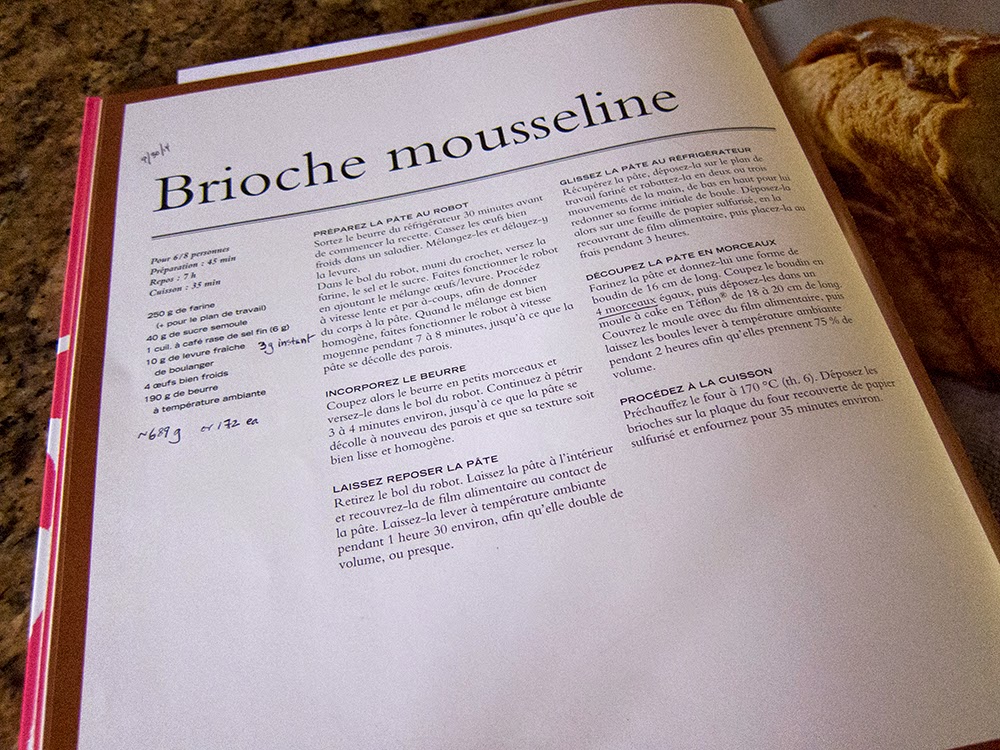
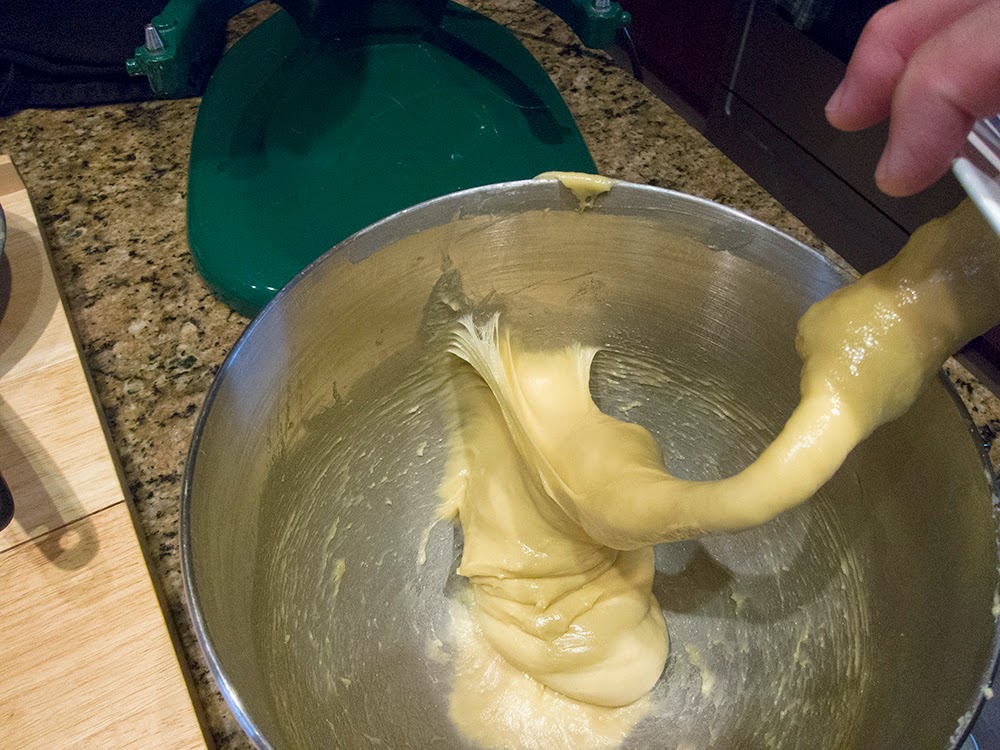
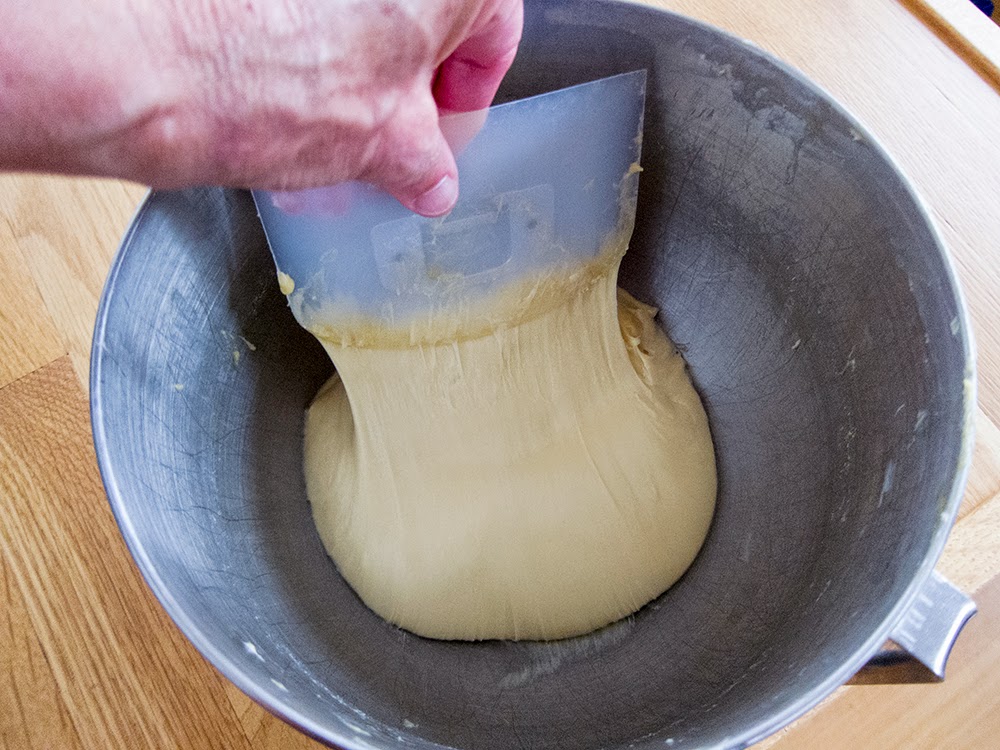
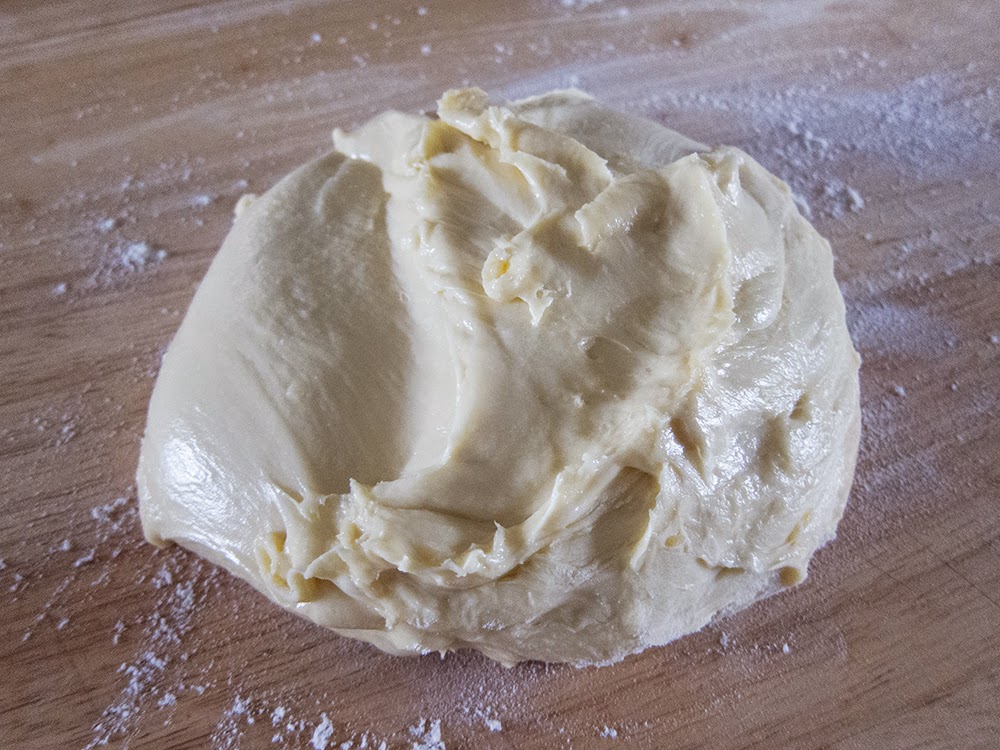
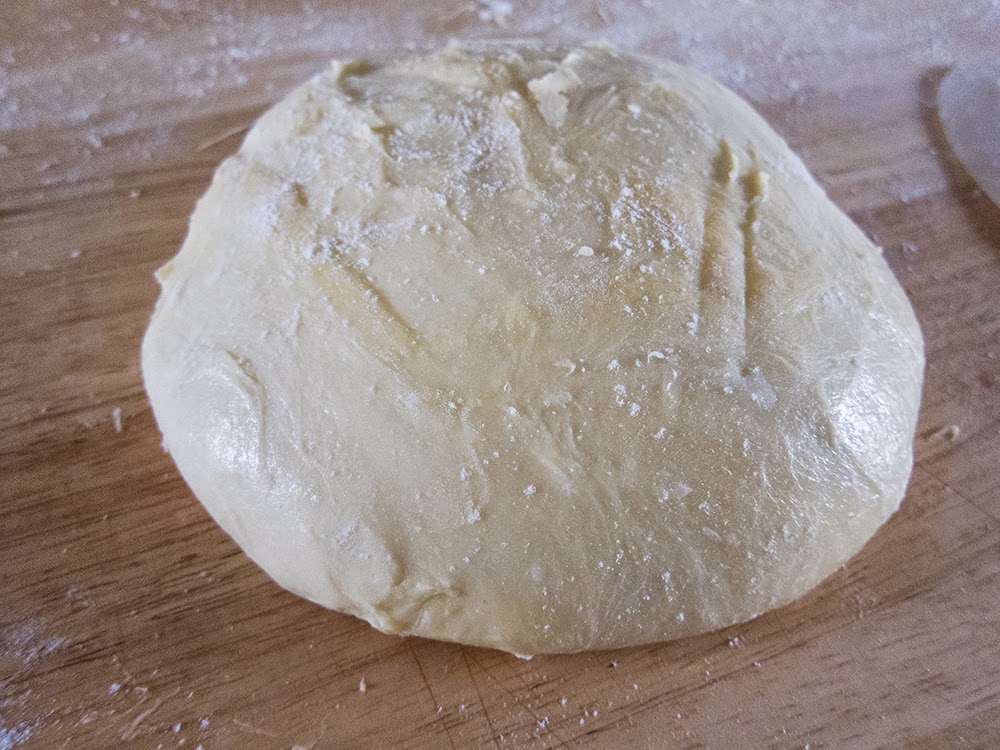
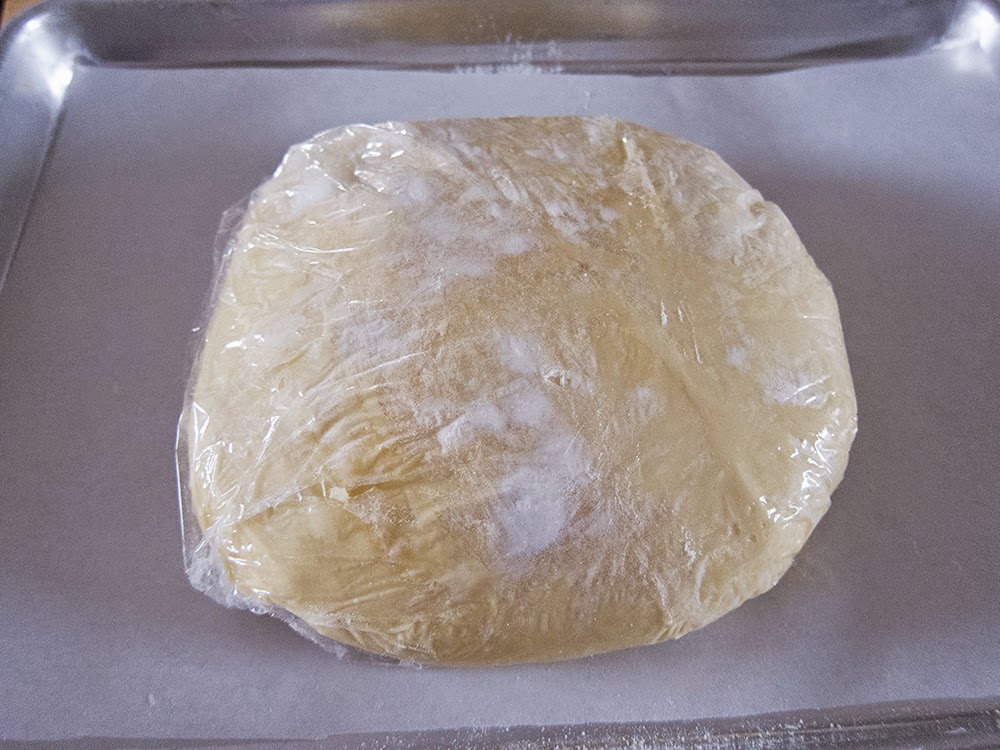
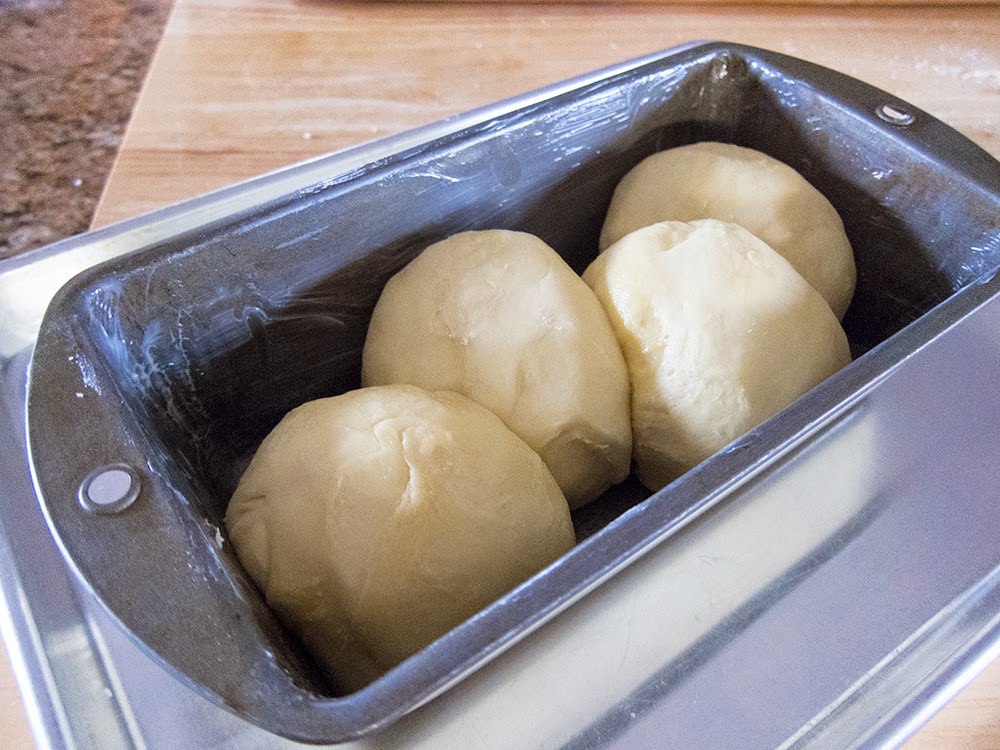
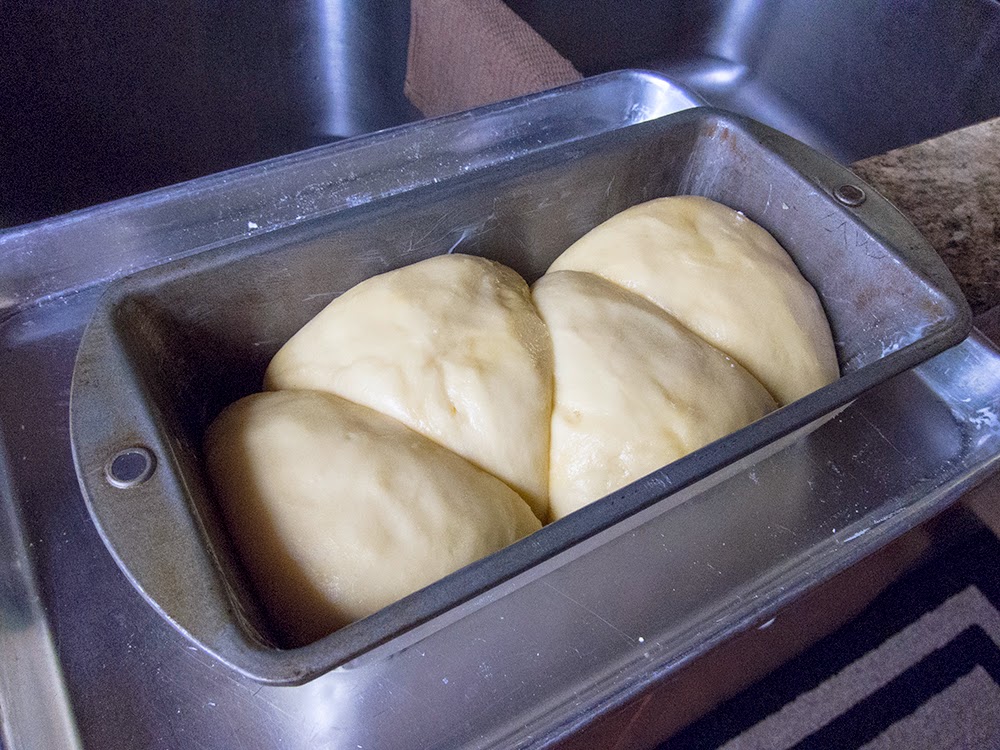
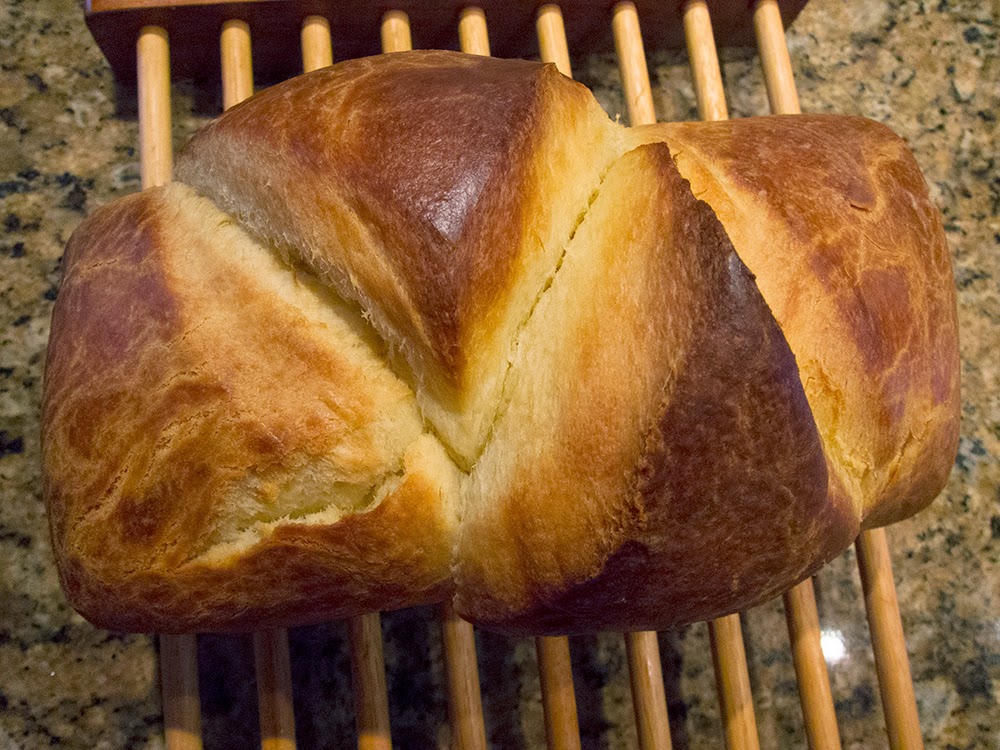
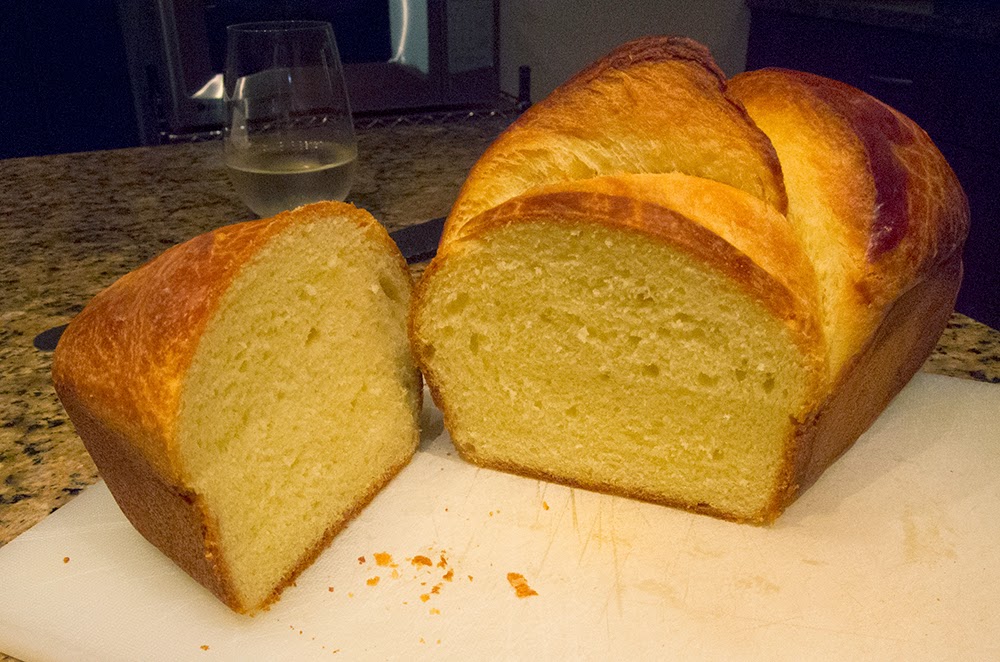
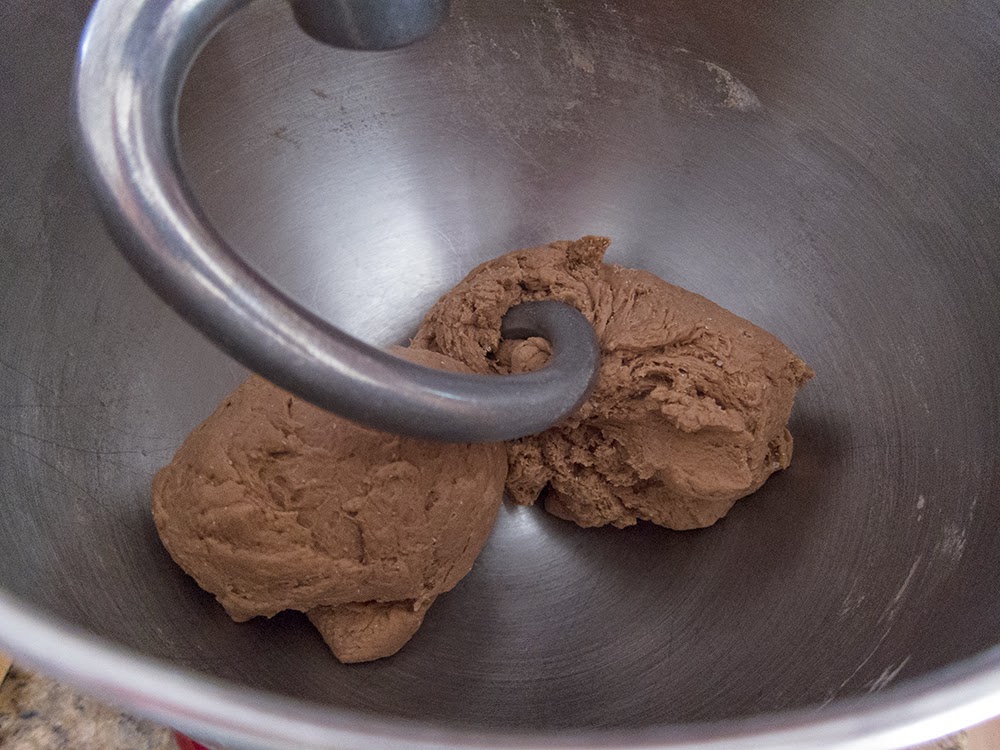
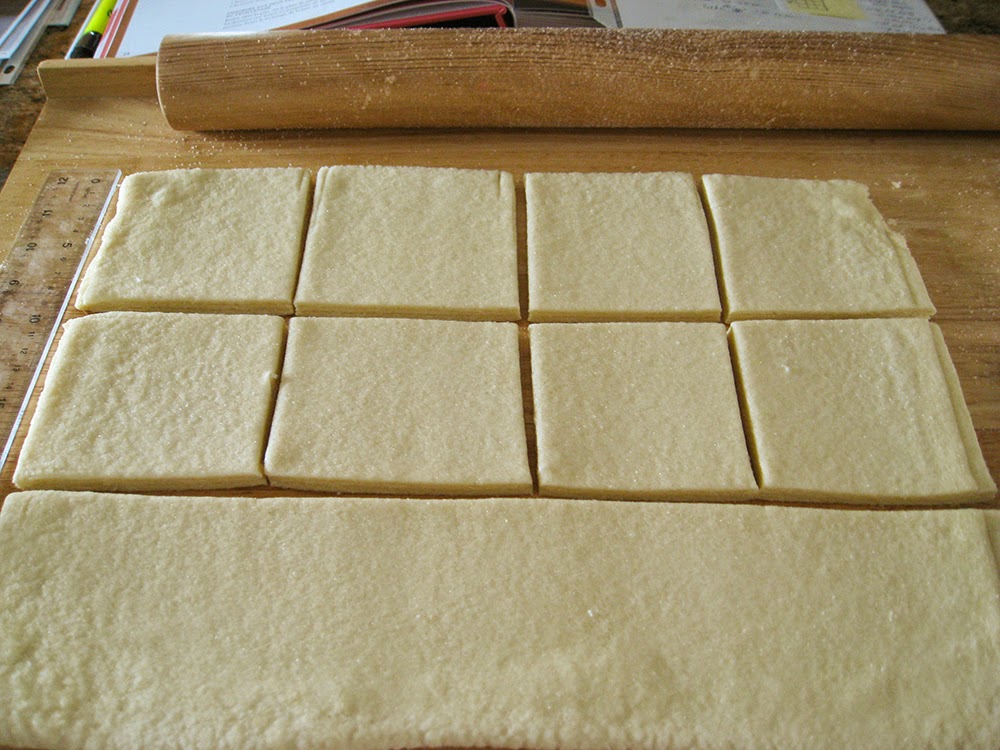
Day 1 also included making brioche dough which would be refrigerated overnight for use on Day 2. I found the recipe and process less time consuming than the recipe I normally use (from my stage days at Pâtisserie Pascal Pinaud), and the end result was as silky and smooth as could be.  I'll show you what we did with this dough in Day 2's post.

We then focused on the group of doughs called "pre-ferments". These are portions of dough that are typically made a day ahead and then incorporated into the final dough the following day. They are important for flavor, structure and extended shelf life, and many feel that doughs made in this manner are superior to "straight" doughs for those very reasons.

There are many types of "pre-ferments" and many more references available to explain the difference and variables among these, including King Arthur's web site. Or you could sign up for a class yourself!!

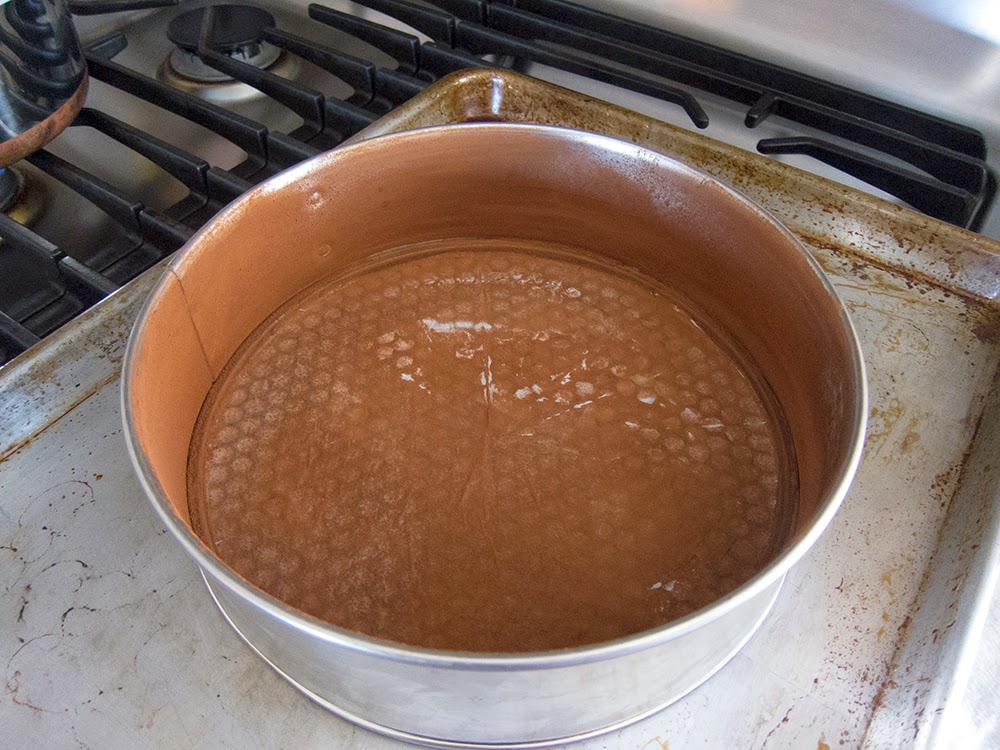
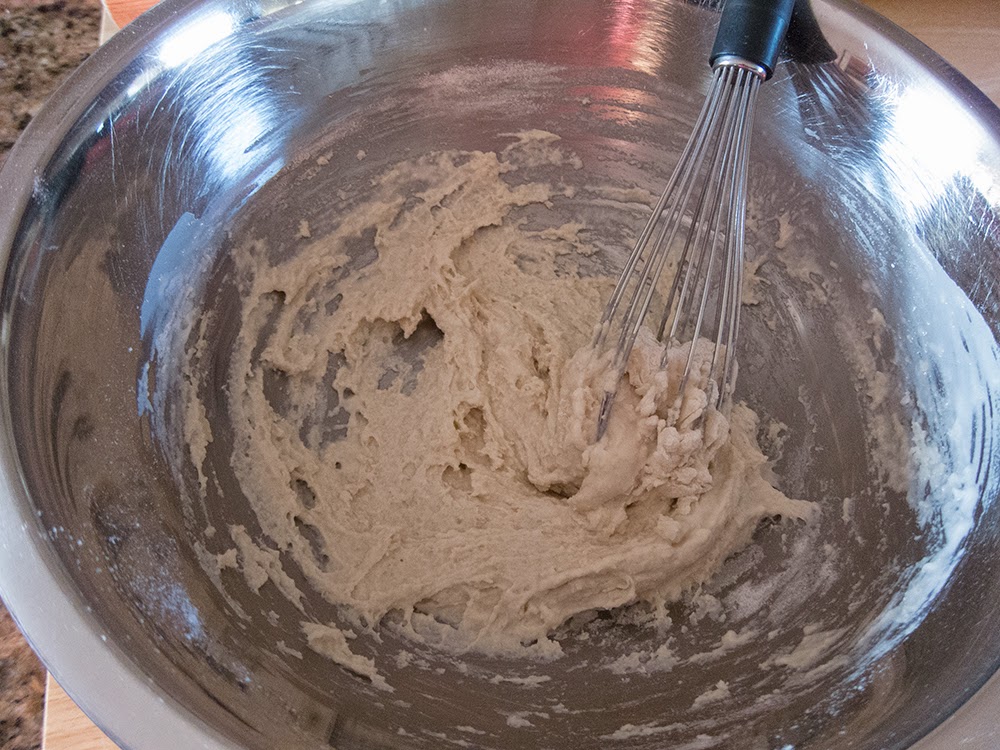
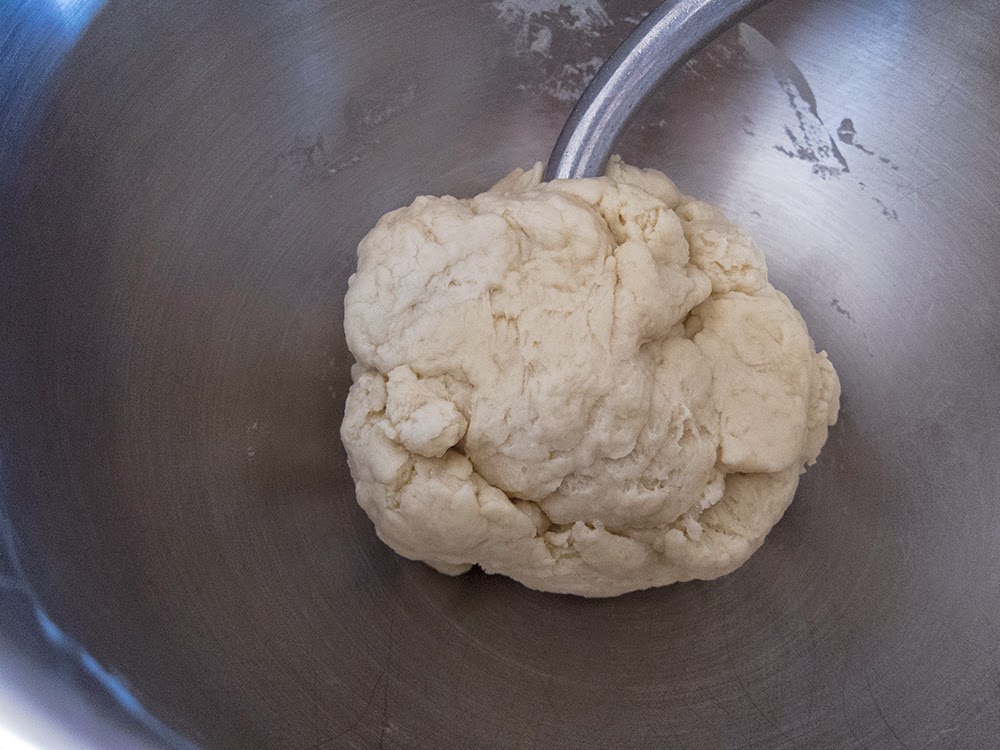
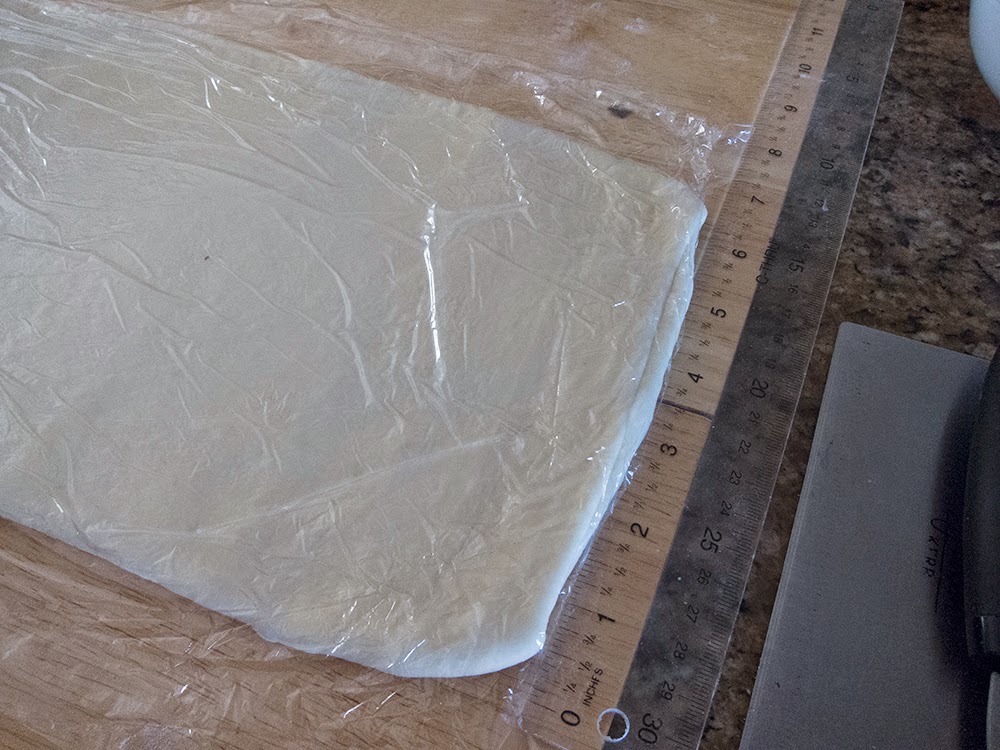
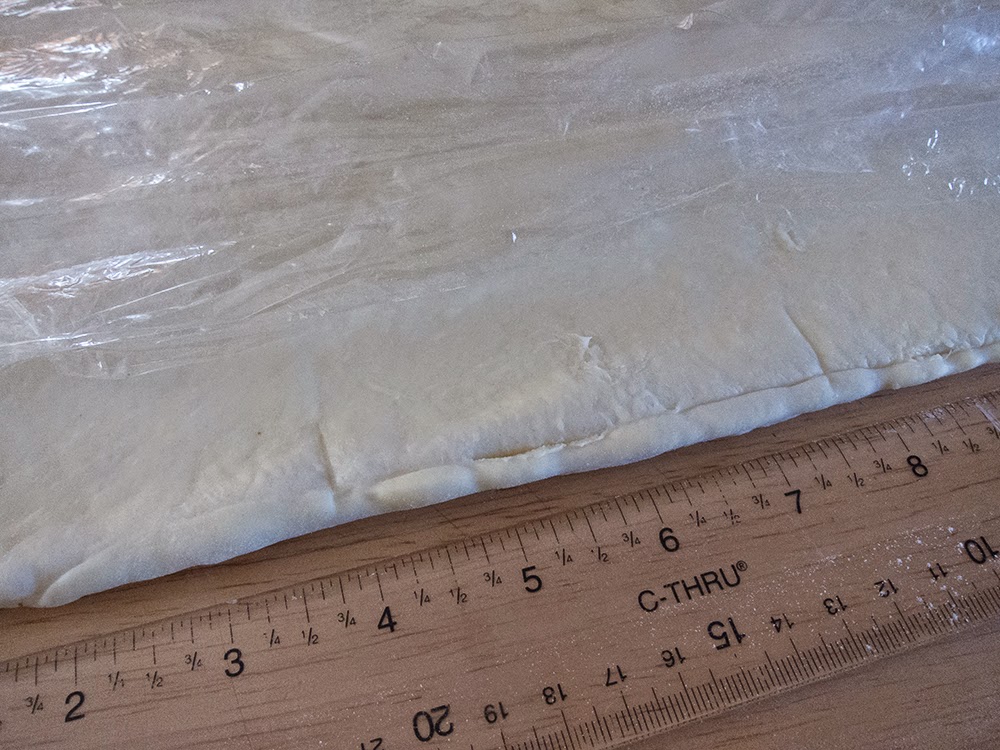
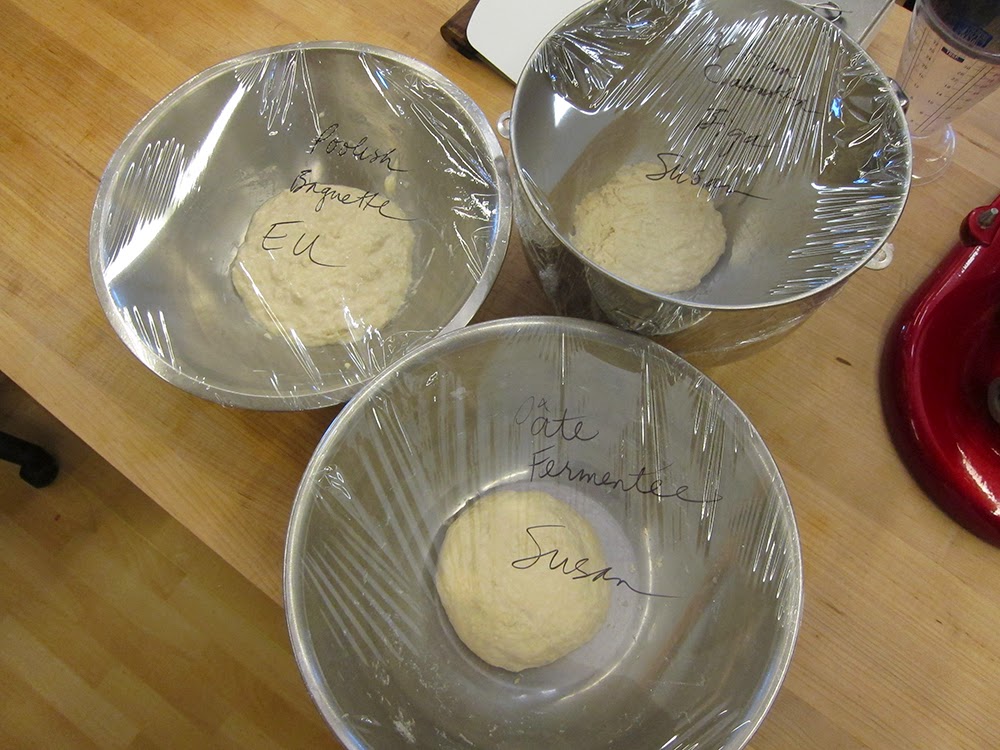
The three we made today were pâte fermentée (for roasted potato bread), biga (for ciabatta) and poolish (for baguette). 

They mix together in the nick of time, are covered, held overnight at room temperature, and then incorporated into the final dough the following day. You can see below that they have different structure and moisture content, the poolish being the wettest.

We were off to a great start! Next up - Day 2!

Moulins à vent

This next recipe in La Pâtisserie des Rêves by Philippe Conticini brings home ever more clearly the importance of proper recipe testing and editing.

Remember, I'm using this book as a springboard for discussions regarding recipe interpretation, techniques and dos and don'ts.  It is NOT my intention to follow the recipe to a T!  Au contraire!  I use what I've learned over the years to adjust the recipe and its steps in a manner that makes sense to me.

Here's the page from the book: 

Here is the plan I developed based on my experience with similar doughs:

Rather than using a poolisch I made the dough as I would a détrempe for croissants, basically combining the ingredients for la poolisch and la pâte and reducing the total amount of yeast to 8 gm of instant.  I also had to add more water than the recipe indicated in order to moisten the obviously dry dough mixture.

I gave it a good overnight rest in the refrigerator (where it develops some of its structure and flavor.)

The butter block is ready:

The dough is rolled out into a diamond and the butter placed in the center.  I found this dough to be a bit stiff and dry, even with the additional water I added during mixing.  Ultimately it did hold together OK, but see how the edges are somewhat cracked?.

The butter is enveloped by the dough:

Then rolled out into a rectangle:

And the first three-fold and turn is done:

I found this dough to be similar to that in les croissants recipe - stiff, not easy to roll and the butter tending to break through. 

This dough gets two more turns and a final rest in the fridge before rolling it out for cutting and shaping.

Now, here's a major flaw with this recipe.  It states the yield is 15 moulins and instructs that each piece be cut into a 15x15cm square.  In order to roll this quantity of dough out to create that many pieces of that size, you would have to roll it far larger and thinner than the 1/2 cm the recipe instructs.  Plus 15x15 cm is HUGE for an individual pastry!

I opted for 10x10cm squares (just like when making Kouign-amann), a much more reasonable size for this quantity of dough, as well as for the finished pastries.  Here are a couple of paper templates to show you the difference in sizes.

The dough is rolled out, cut into 10x10cm squares, slits cut to the corners, leaving the center intact.

Every other corner is folded into the center to create the lovely moulin pattern.  It takes me back to my quilting days!

I used egg wash on the dough tips to stick them down.  As you'll see, it wasn't that successful!

Now for a 2-2.5 hour rise at room temp.  Notice how the tips have pulled away from the center, especially in the second picture - quite a mess!

Before I garnished these with a mixture of crème d'amande and apricot jam I had to gently push the tips back into the center - not an easy task with already risen dough.

Add a sprinkle of almonds et voila!

Next time I would roll my dough a bit thinner before cutting the squares since I ended up with 10 pieces  instead of 15.   I should have let it rest and relax a bit more before rolling it to my originally planned 30x50 cm rectangle.  Patience, patience Susan!

The baking time of 20-25 minutes was pretty consistent with the recipe.  Always watch how the browning is progressing and adjust your oven temp up if too pale and down if browning too fast.

And here they are!

I had hoped my windmill shape would have remained more distinct, but instead the tips kind of melded together during baking.  Perhaps rolling the dough thinner would help that.

The flavor was good, although Steve and I thought they needed a little something, so we added a schmear of apricot jam to liven things up.

All in all this was another good learning experience.  I am less and less enthralled with the book La Pâtisserie des Rêves due to the inconsistencies and poor editing I have encountered (leading me to believe that these recipes were authored by different people.)

For example, these moulins are made with laminated dough, the techniques for which should be consistent from recipe to recipe.  Yet, the instruction for the beurrage (the enveloping of the butter in the dough) for this recipe is completely different than in les croissants, which uses the same technique.  The author even forgets to tell you to fold the dough over the butter before you start rolling it out!

I'll put Philippe Conticini's book aside for awhile, although it continues to hold some allure with more enticing sections like goûters d'enfance, les classiques, et les tartes de saison, just to name a few!

In the meantime this coming week I'll be in Norwich, Vermont taking a 4 day artisan bread class at King Arthur Flour.  What a great getaway and perfect blogging opportunity!

Sacher torte

When I receive a request to make something that I haven't made for awhile, it prompts me to research recipes and re-live those practical kitchen days from pastry school. So, since I had an order for this classic Viennese cake, I made a Sacher torte.

The story goes that this cake was created in 1832 by a 16 year old apprentice chef, Franz Sacher, for Prince Wenzel von Metternich in Vienna.  The Sacher torte has since become a fixture at the Hotel Sacher Vienna, where they say the original recipe remains a secret.

Even so, there are numerous recipes out there, each with its own variables.  All of them call for bittersweet chocolate, eggs, sugar, flour, butter, a little salt (for mounting the egg whites) and usually some vanilla extract for a standard 9" cake.

Here are the steps and some of the recipe differences I encountered as I made my way to a Sacher torte!

Prep a 9" springform pan by buttering the bottom, covering it with a round of parchment and buttering that.  Some folks also flour the parchment - I chose to dust it with cocoa powder.

The chocolate is melted over a bain marie and allowed to cool to tepid before it is added a bit later. I'm using a mixture of Valrhona 64% and Trader Joe's "dark" and "72% dark" chocolates. Chocolate quantities vary from recipe to recipe, anywhere from 113-227 gms (4-8 ounces). I used 142 gm.

The butter can be melted along with the chocolate, but most recipes seem to prefer creaming it with a portion of the sugar. That's the method I used.  Butter quantities ranged from 85-250 gm  (3-9 ounces) in the recipes I reviewed. I used 126 gm.

Above: butter and confectioners sugar ready to go

My review also revealed sugar amounts from 113-225 gm (1/2 to 1 cup), some recipes using a combination of confectioners sugar (for the creaming step) and granulated sugar (for beating with the egg whites.) As you see above I used confectioner's sugar (50 gm) for the creaming step.

This cake is considered a biscuit which means the eggs are separated, and the yolks and whites are beaten separately before blending together. Egg quantities varied from 4 to 8 (most commonly 6) in my review.

Some recipes call for whisking the yolks with a portion of the sugar to the ribbon stage, and then adding the melted chocolate and butter.

In the method I used here the 6 yolks and a teaspoon of vanilla are blended into the creamed butter and sugar mixture, and then the cooled, melted chocolate is added.

Above: adding the chocolate - wheeeee!

Next sift the flour (130 gm) over the chocolate mixture and gently fold it in.

I found the amount of flour called for was most commonly one cup. However, some recipes use cake flour or cornstarch in place of all purpose, and some use almond flour as a portion of the total flour.

Also there were variations in the flour adding step - some did it before and some after the egg whites.

Now it's time to whisk the egg whites to soft peaks. Egg whites mount better at room temperature, so I usually separate my eggs early in my mise en place and let the whites start to warm up. Alternatively you can place your bowl of whites in some warm water to speed up the process.

Above: whites, salt and sugar ready to go

I like to start my mixer on low speed and let the whites and salt (1/4 teaspoon) start to foam a bit. Then I slowly add my sugar (112 gm) while the mixer is running, then increase to high to finish them off to soft peaks.

Now fold about 1/3 of the whites into the chocolate mixture to lighten it, then gently blend in the remaining whites just until a few streaks remain.

Above: whites partially blended in

Place the batter in the prepared pan.

Bake at 350ºF for approximately 35-40 minutes, or until a tester comes out clean.

Let it cool a bit, unmold and finish cooling.

Traditionally the Sacher torte is layered with an apricot jam filling. Most recipes called for slicing the cake into two layers, but a few into three. My cake was destined for two.

Filing methods include:  simply spreading apricot jam between the layers;  warming and straining the apricot jam before spreading to remove the chunks (some preferred that for mouth feel); puréeing the jam to de-chunk it;  taking a small amount of jam, diluting it with water and puréeing it to use as a glaze on each layer in addition to spreading jam between the layers. Anyway, you get the idea - to each his/her own!

Above: layered with apricot jam and glazed with apricot glaze

All recipes agreed that once the cake is "jammed" (thanks Parks and Rec!), give it a 30 minute chill before the final chocolate glazing.

The chocolate glaze recipes varied from the "add boiling water to the chocolate" method to a more traditional chocolate ganache type of glaze. The one I chose was a 3-part chocolate (170 gm) to 1-part cream (56 gm) ganache with a bit of butter (28 gm) added.  It had a nice sheen.

Now I'll admit I was lazy here and did not follow the tradition of writing the word "Sacher" on the top of the cake. Instead I made my go-to simple swirl design. Thank goodness for my small offset spatula!

C'est fini!

So choose your recipe and go for it!

If I ever get to Vienna and have a chance to try the real thing, I'll let you know!!

Providence croissant tasting

As a part of les croissants project, I decided to do a tasting of croissants from some local Providence purveyors.  I trekked around the city on a beautiful autumn morning recently and picked up croissants from Olga's, Starbucks, Au Bon Pain and Seven Stars to face off with those I made from La Pâtisserie des Rêves, as well as my own from The French Tarte.

I know I've included only a fraction of the croissants one can find in this city, but those which I highlight here are within walking distance of my home.  And I love walking!!

Above: the players

What does one look for in a croissant, you might ask?

For me it's the nicely browned appearance, that just right heft when you pick it up, the exterior crispiness and fragility which causes golden shards to shower down as you bite into it and the buttery, airy yet bodied layered interior.

Let's take them one by one.

First up, Olga's:

Just looking at this one makes me feel heavy; cutting yielded minimal crumb without any flaky shards; the interior is heavy and bready without any airiness; the texture is doughy, like an average roll, with a dull, non-buttery flavor and unappealing mouth feel.  

Next, Au Bon Pain, Westminster St. (financial district).

When I asked the staff where their croissants were made, they reported "we bake them here".  They receive them frozen and ready for the oven.

The look is appealing; cutting yielded some crisp flaking of the exterior; the interior has nice airy laminations and it feels light in the hand; the taste isn't bad but is lacking in rich, buttery goodness or that freshly made mouth feel. 

OK, so next up was Seven Stars on Broadway:

The look is very appealing; cutting demonstrated some nice exterior fragility and airy interior, but the feel is too light; the texture is rather nondescript and the taste is bland without that buttery goodness or impressive mouth feel. 

The French Tarte:

The look is so-so in the pristine croissant sense, but it'll do; cutting yielded a beautifully fragile exterior and a nicely laminated interior; it has a light heft in the hand; the texture is crisp on the outside and soft on the inside; the taste is delicious with a rich, buttery goodness without being too heavy in the mouth. 

My version of La Pâtisserie des Rêves: 

This one looks like a sad excuse for a croissant - lumpy and rough; cutting demonstrated some exterior fragility, but the interior is dense, bready and without any laminated airiness;  it feels heavy in the hand; the texture is doughy and unpleasant, and the taste is heavy and greasy.  Too bad!

Finally, Starbucks (La Boulange) at the Providence Biltmore.  When I inquired as to where the croissants were made, the staff didn't know the answer but shared that they receive them baked and flash frozen, and they thaw them on site.

The look is so-so, a bit flat; cutting yielded minimal exterior fragility, but a nice looking airy, laminated interior; the heft in the hand is on the heavy side; the texture is not crisp, a bit bready, and the taste is bland without any buttery goodness or flavor.

Costs for all the local croissants range from $2.00 to $2.75.

There is a lot that goes into making a great croissant.  Certainly large scale production is an entirely different animal than small-batch hand crafted croissants. And as is demonstrated with Philippe's recipe (see my preceding les croissants post), even that doesn't necessarily yield a delicious product!

It takes just the right ingredient proportions, a feel for handling the dough and, as always, practice, practice, practice!

Les croissants

OK.  I think I make a pretty darn good croissant.  So this next recipe in Philippe Conticini's book, La Pâtisserie des Rêves, got me a bit excited to try another take on this quintessential French pastry staple.  Little did I know. . . .

Over the years I've compared many croissant recipes and tested out a number of them.  I  considered ingredient proportions, mixing and kneading times, numbers of folds/turns, resting and rising times and came up with the recipe and process that has worked well for me.   So, you ask, why mess with (near) perfection?!  Because life is all about learning!

As I read through Conticini's recipe for this laminated dough, I quickly developed a few concerns about some of his ingredient proportions and the kneading time he recommends.  There is a higher ratio of butter to flour in this recipe than that which I typically use, and I prefer my croissants not too heavy in the butter department. Strike 1.

Pascal Pinaud taught me that the dough should be mixed ONLY until it comes together and NO MORE, so when I see a 5-minute kneading time, I start to worry.  Strike 2.

The idea is to work the dough very little at the beginning, thus avoiding development of gluten at this stage.  That will come later as you put the dough through its folds and turns, essentially kneading it with your rolling pin.

Conticini's recipe starts with making a poolisch which is a rough slurry of flour and liquid (water or milk) with yeast added.  I am certainly no expert on the use of a poolisch (also known as pre-ferment or starter), but my understanding is that it is usually a ratio of 1 flour to 1 liquid by weight to which a tiny amount of yeast  is added (0.1-0.2% of the weight of the flour).  Since 90 gm flour is called for here, by using this rule, the amount of yeast added would only be a miniscule 0.1 gm - a teensy, weensy amount!  This recipe calls for the equivalent of 6 gm instant yeast, or 60 times what would typically be used. Strike 3.    

It’s better if the pre-ferment sits for 6-24 hours (at room temp or into fridge if holding for up to 24 hours) before adding it into the final dough.  This contributes to the flavor as well as the texture, crumb and structure of the end product.  In this recipe it sits for 1.5 hours. Strike 4.

(Note:  I normally make a détrempe (the croissant dough) with minimal mixing time, let it rest for 45 minutes at room temp and then into the fridge over night, tightly wrapped.  My steps are otherwise similar to Philippe's recipe -  beurrage, 3 single folds, final rolling, shaping, proofing and baking.)

poolisch ingredients pictured above

So here goes!

For the poolisch simply mix the flour, milk and yeast, cover with plastic film and let sit at room temperature for 1.5 hours.  In the future I would use a rubber spatula rather than a whisk - a MUCH easier tool from which to scrape the sticky dough.

poolisch pictured above

You can then mise en place the remaining pâte à croissant ingredients (the recipe calls for milk and water - I used all milk) and shape and refrigerate your butter block. 

Above: flour, salt, sugar in the bowl; butter ready to be softened or melted; milk; yeast

Above: butter block 15 cm square

Give the flour, sugar, salt and instant yeast a quick whisk in the mixing bowl, add in the milk and butter and top it off with the poolisch.  Mix with the dough hook on slow speed, then, once everything is incorporated, increase the speed to medium and knead for 5 minutes.

Pretty rough.

Above: still pretty rough after a 5 minute knead, but a bit more together

Now cover with plastic film, let sit at room temp for 1.5 hours, then wrap tightly in plastic and refrigerate for 2 hours.  You want the dough cool for the next steps.

Above: after the 2 hours in the fridge

Now for the beurrage or the enveloping of the butter block.  Take your butter block out of the fridge a good 30 minutes before this step.  Tapping it with your rolling pin helps soften it a bit - you want it to be cool, yet malleable so it will spread evenly between your dough layers as you roll.

On a lightly floured surface roll your dough out into an elongated diamond, large enough so you can place your butter block in the center and fold the corners of the dough over it, so as to fully encase it (sorry I forgot to take a picture of this!).  You should have a neat package of dough and butter.

You should feel the butter out to the edges of your dough package.  Notice how rough the dough looks.

I'll note here that this dough feels pretty stiff and isn't easy to roll. Strike 5.

Now for the turns:  roll this package out to a length about 3 times its width and do a three fold (also called a single or business letter fold).

Above: rolled out, ready for the first fold

Above: first three (or single) fold; dough turned to prepare for next fold

The photo shows the "spine of the book" on your left.  That's how you want your dough positioned for the next roll/fold/turn.  Wrap and chill for 30-60 minutes then do the same thing 2 more times, resting and chilling the dough between each turn for a total of 3 turns.

Plan for a final one hour rest in the fridge before rolling the dough out for cutting and shaping.

So here is where I really knew that this would be a fiasco.  As I continued to roll the dough for the turns, it remained stiff and difficult to roll. The dough started breaking down and butter showing through - NOT a good sign. Strike 6.

I did struggle through to the final shaping, although my doubts were rising exponentially.

Can you appreciate the butter showing through the dough in the photo above?

Fortunately I had made some of my own croissant dough a couple of days before this, so I'll show you the final steps with that dough, as well as some comparison shots.

When rolling the dough out for final cutting and shaping, give it a rest every now and then.  You want it to be nice and relaxed so it won't shrink up when you cut it.

Above: almost there - resting before achieving the 9" depth

When cutting 12 croissants, I roll my dough out to about 24" across and about 9" deep.  I cut approximately 4" sections of dough, each of which is cut into 2 triangles.

Above: marking my (almost) 4 inch sections

Above: triangles cut, ready to be shaped

I cut a slit in each base, pick up a triangle, give it a gentle stretch, then place it down and roll it up snugly, tugging gently at the tip as I roll.  The tip goes DOWN on the baking sheet.

Here's a comparison:

Philippe's recipe above - a shiny, shaggy, buttery sort of mess

My dough above: smooth and looking good

if you’re not baking your croissants right away, cover them with plastic wrap and hold in the fridge until morning or pop them in the freezer uncovered and once frozen, wrap them tightly for up to a month until ready to thaw, proof and bake.

If ready to proceed with baking, brush on some egg wash and give them a decent 1.5-2 hour proof, ideally at a temperature from 70-78ºF. If you proof too warm, the butter will start melting out - not a pretty picture.

The next two photos show after the proof.

Philippe's above - layers more prominent, but it looks heavy and greasy

Mine above - layers more prominent and it looks light and shiny

Heat your oven to 425ºF, give them a second egg wash and bake about 12-15 minutes.

REMEMBER: watch what’s going on in your oven.  Every oven is different (I'll say it again and again)!!  I rotate and change positions of my sheet pans about half way through, and I gradually lower my oven temp throughout the baking time, depending on how my croissants are browning.  I want the surface to be nicely browned and the laminated edges to be tan not pale, or I risk a croissant that's doughy inside.

Above: heavy, bready center, some exterior fragility and flakiness, but feels heavy in the hand

The French Tarte above: not bad - note the little browned shards as I cut.  (Check out my next post for a tasting of some Providence croissant offerings.)

Above: nice airy lamination, exterior fragility, and has a certain lightness in the hand

It's hard to explain the feel of a good croissant, but once you've experienced it, you just know.

So if you want to make croissants, choose a recipe other than this one in Philippe Conticini's book and practice, practice, practice!

Brioche mousseline

The fourth recipe in Philippe Conticini's La Pâtisserie des Rêves is Brioche mousseline.

I typically associate mousseline with brioche that is baked in a tall cylinder mold with a parchment collar so that it rises above the mold.  It’s then sliced and used for canapés, and the leftovers can be used to make Bostock, that delicious syrup-imbibed, almond cream covered, twice baked delight.

Brioche Nanterre is another version in which dough balls are lined up in a loaf pan, proofed and baked so the balls essentially fuse together, creating a "pull-apart" look.

Since Philippe's recipe instructs the Nanterre type of line up, I was intrigued by his use of the word mousseline. My research revealed that the word has several meanings, depending on its context. In the culinary world it’s a sauce, such as a hollandaise, to which butter is added, whereas in the pastry world it’s crème pâtissière to which butter is added.

In this brioche recipe it has to do with the flour to butter ratio.  A classic "medium" brioche has a 2:1 flour to butter ratio, whereas a brioche mousseline has closer to a 5:4 flour to butter ratio.  So that's what makes Philippe's recipe a mousseline.  In a word - butter!!  Some call this "Rich man's brioche" due to the high butter content.

Now on to the process!

When making brioche dough, use a heavy duty stand mixer.  I generally plan on anywhere from 20-30 minutes of mixing time, so it's helpful to have a number of minor tasks you can perform while waiting for the process to finish.  Just be sure you keep on eye on your mixer, because it can start "walking" around your counter during the butter addition.

This recipe is straight forward.  Have 190 g cool, unsalted butter diced and ready to go. Mix 250 g all purpose flour, 40 g sugar, 6 g salt and 4 g instant yeast in the bowl of your stand mixer.  Starting out with the paddle (NOT the dough hook), add 4 large cold eggs and mix on low speed until the dough comes together.  Then continue mixing on medium speed for up to 10-15 minutes until the dough becomes very elastic and starts to clean the sides of the bowl.

Above: diced butter ready to be added

Now switch to the dough hook and start adding the butter, 1/3 at a time until each addition is incorporated.  

Above: the dough can really creep up the hook!

Above: after the butter addition, ready for a rest

The dough should be shiny, elastic and smooth.  This is one of the things I love about brioche dough at the end of the mixing - so silky and wonderful!

Cover it with plastic film and let it rest 1.5 hours at room temp.

Above: dough after room temp rest

Then place the dough on a lightly floured surface, form a rough ball, wrap in plastic and refrigerate for 3 hours or overnight. I typically make brioche dough in the evening, let it rest in the fridge overnight then shape, proof and bake the next morning. Works for me!

Above: rough ball ready to be wrapped and chilled

After the chill time (in which the dough becomes quite firm), remove the dough from the fridge and get ready to shape!

It’s important to work with the dough cool so, if you have a big batch of dough, it’s helpful to work with half of it at a time and keep the other portion wrapped in the fridge until you’re ready. This recipe makes approximately 680 g (1.5 pounds) of dough which is good for one loaf pan.

I divided the dough evenly into four 170 g pieces.

Then shaped each piece into a boule.

Have a well buttered loaf pan ready and place the boules snugly into the pan.

Cover the pan with a lightly buttered piece of plastic wrap and let rise 2 hours at room temp.

Above: after the rise

Have your oven heated to 350ºF and bake about 35 minutes.  Remember!  I'll harp on this again and again - pay attention to what's happening in your oven!!

Nice and golden brown, just waiting to be tasted.

This is one delicious brioche!  I must admit that over the years as I've tried various brioche recipes, I've been put off by the ones that have a higher ratio of butter.  But this one has changed my mind.  It has a tight, yet light, delicate crumb, and a rich buttery flavor.  Who could ask for more?!

Time for some tarts!

Tarts are my favorite desserts to make (and eat), going back to the days in the late '80s when I became a huge fan of pastry chef Emily Luchetti (then of Stars restaurant).  I used to pour over her book "Stars Desserts" and made many of the recipes, being particularly fond of the macaroon nut and the blackberry streusel tarts.

So, as I spent a fair amount of time in Grand Rapids, Michigan this past July and August, staying at my mom's, I simply had to take advantage of the summer fruits that the orchards of western Michigan produce.  I paid a visit to the Fulton Street farmers market where I scored some Michigan Red Haven peaches (BIG favorite from my childhood) and fresh local blackberries which soon went into a delicious peach-blackberry custard tart for a small family gathering. Deelicious!  Topped with sliced almonds and served with a scoop of vanilla ice cream, it was just the ticket. 

Above: peach blackberry custard tart

When I had a September request for some petits fours tartlettes, I took a break from my La Pâtisserie des Rêves project to turn out some of my favorites - lemon, chocolate ganache and caramel nut.

It's always such a pleasure to return to tart making, especially when the cool, crisp days of autumn are upon us.  Working with the cool, supple dough, lining the tart rings or petit four molds and thinking about those luscious fillings is such a delight.

The beauty of these tarts is the make ahead fillings.  You can even blind bake your crusts and freeze them ahead of time. Just thaw them briefly at room temp, warm in a 325º oven for 5 minutes to crisp up, then cool and fill.  As usual, it's all about the planning.

I've tried many lemon curd/lemon cream tart fillings over the years, always in search of the perfect one.  All can easily be made a couple of days (or more!) ahead. I normally prefer a classic pucker-y lemon curd, although this time I used a riff on Pierre Herme's (complements of Dorie Greenspan) lemon lemon cream.  It’s oh so smooth and lemony, especially garnished with a dollop of light, whipped lemon mascarpone and a fresh raspberry. 

Above: lemon cream tartlettes

The ganache tart filling (3 parts cream to 2 parts chocolate with a bit of butter added) also keeps extremely well in the fridge.  The day you wish to assemble the tart, gently warm the ganache over a bain marie to liquefy it before you pour it into a blind baked chocolate crust and allow it to set.  I garnish mine with my own chocolate cookie crumbs.

Above: garnishing the chocolate ganache tartlettes

For the caramel nut tart I toast a combination of almonds, pecans, walnuts, pistachios and blanched hazelnuts before coarsely chopping them and folding them into a caramel filling made with butter, honey, brown sugar, sugar and a little cream and vanilla extract.  The mixture is put into a blind baked pâte d'amandes crust and popped back into the oven until the filling is bubbly. Steve describes this one as the best "payday" he's ever had (and it doesn't even have peanuts!)

Above: caramel nut tartlettes

And now - leftovers!!  When making petits fours tartlettes, make plenty of filling so you'll have components on hand to create additional goodies for friends or family.  It's a great way to plan ahead for an upcoming dessert occasion.

Here are just a couple of ideas.

Lemon semifreddo -  freeze the leftover lemon cream in silicone flexi-molds or a plastic wrap lined loaf pan.  At serving time either pop them out of the flexis or turn out of the loaf pan and slice - great with fresh fruit, perhaps a little berry coulis and some lovely shortbread.

Caramel nut truffle tart - blind baked pâte d'amandes, layer of caramel nut filling with chocolate ganache poured over.  A definite keeper!

Above: the components

Above: pouring the ganache over the caramel nut filling

Above: ready to chill with some nuts peeking through

And finally, a summer reminder - the classic fresh fruit tart with crème pâtissière filling.  Ahhhhhh.

Ciao for now!

Chausson Napolitain

The third recipe in Philippe Conticini’s La Pâtisserie des Reves is an interesting mix of several classic pastry bases.

While I had been aware of this particular pastry, I had never researched it and had certainly never made it. In a nutshell it’s a pâte feuilletée (puff pastry) turnover filled with a combo of crème pâtissière and pâte à choux. Interesting, eh?

The recipe also calls for rum soaked raisins (a favorite of the French), but I opted for an hazelnut/cherry version instead. I developed my plan and struck out on a new adventure.

Most of the components can be prepared the day before, each one requiring minimal time, leaving you with the pâte à choux prep, final assembly and baking for the day of. It's all about timing and planning. Three cheers for mise en place!

I should point out that there are a couple of serious errors in this recipe, requiring you to pay close attention and adjust accordingly. The 200 gm of puff pastry called for is woefully inadequate, and should be about 600 gm. It was clear that 200 gm was not enough to create a 30x60 cm piece with a 1.5-2 mm thickness.

And when slicing the rouleau, the slices should be 1.0 -1.5 cm thick NOT 1/2 cm as the printed recipe states.  Philippe, where are your recipe testers and copy editors??

As I alluded to above, I admit that I’m not a big fan of rum or raisins. During the pastry program at Le Cordon Bleu, as well as my during my stage at Pâtisserie Pascal Pinaud on rue Monge in the 5th, I was amazed at how often rum (and a lot of it) was used by the Parisians.

When a recipe calls for alcohol, I tend to replace rum with either an almond or hazelnut liqueur, or I leave it out altogether and stick with good old vanilla extract.  It's so much easier on the budget, and I don't find the liqueur to be that much of a flavor enhancer.

For this particular project I replaced any rum in the recipe with Fratello, a delicious hazelnut liqueur that Steve discovered recently, used tart dried cherries instead of raisins and replaced macadamias with hazelnuts.

So let's get going!

I soaked 50 gm of cherries in Fratello/brown sugar and my softened butter/brown sugar mixture is ready to go. I weighed out 50 gm of blanched hazelnuts and coarsely chopped them before final assembly.

I have a batch of crème pâtissière chilled in the fridge.

I roll my puff out to about a 2 mm thickness and a length of 60 cm. (Note: I typically have puff pastry in my freezer so I let it thaw overnight in the fridge before rolling it out.)

I spread on the softened butter/brown sugar mixture and rolled it up snugly (the rouleau). Note: images below

The rouleau can be wrapped and refrigerated until you are ready to assemble the chausson.  Alternatively you can form the rouleau the same day, freeze it for 40 minutes or so, and it will be ready to slice.

Wrap and chill the rouleau and on the day you plan to assemble and bake your chausson make your pâte à choux. 

Once the choux is ready, blend in the crème pâtissière, add the zests of one lemon and one orange, a splash of vanilla extract, the marinated cherries and the chopped hazelnuts.  Your filling is ready to go! 

Remove your puff roll from the fridge (or freezer) and cut cleanly into 1.0-1.5 cm thick slices.

Cool layers, don't ya think?

Now comes a bit of fussiness.

The slices are rolled out into a flat, ~2 mm thick oval, and it is very helpful if you keep the slices cool. Work with 3 or 4 at a time while keeping the others handy in the fridge.  Work quickly on a nicely floured surface to minimize the potential sticking of the butter layer. I keep a bench scraper close by to lift up the dough and re-flour the surface as I go.

Scoop a grosse noix of filling just low of center on your oval and fold it over.  Don't worry about sealing the edges - just gently place them together, since you want the chausson to be open.

Yessirree!

Now give them a coat of egg wash and chill. Philippe recommends a one hour refrigeration before baking.  I put mine in the freezer for about 30 minutes.  My practice with all things puff pastry is to freeze before baking, whether it's chausson aux pomme, palmier or simply blind baking a puff crust for a quiche or flan.  The freezing firms up the dough and re-stabilizes the butter layers before it goes into the hot oven.

Bake at ~350ºF convection for about 30-40 minutes.

Remember: every oven is different, and it is sooooo key to pay attention to what's going on in there!  Even convection ovens don't always bake uniformly, so rotate and change shelf positions of your sheet pans half way through. It works!

Et voila - c'est fini! These babies were tasty indeed. Who would’a thunk it to put puff pastry, pastry cream, choux paste all together in one pastry. Oh boy, oh boy!

Pain gourmand au chocolat

This was my first attempt at making pains gourmands au chocolat, the second recipe in La Patisserie des Reves by Philippe Conticini, and what a pleasant surprise!

Here I'll share a bit about the process and offer some ingredient suggestions. The recipe is straight forward, the dough easy to prepare and handle, and the final product a lovely roll with a small crumb, nice texture and smooth chocolate flavor.  What a great addition to a special breakfast, weekend brunch or afternoon tea.

Here's a brief synopsis of the process:  melt the chocolate and butter over a bain marie and let cool until tepid.

Mix the rest of the ingredients (except for the chocolate chips) and knead on low for 5 minutes and then on medium for 5 minutes.  Turn back to low speed and add the tepid chocolate-butter mixture in three additions, blending after each addition until incorporated.

As you can see my 6 qt KitchenAid can handle this amount of dough very easily.  See how the dough has cleaned the sides of the bowl.  Now add the chocolate chips on low speed.

And here's the dough, all chocolate chipped, ready to be divided and shaped into boules.

Above: boules ready for a 3 hour room temp rise.

Below: after the rise, egg washed and sprinkled with raw sugar

Just out of the oven . . . . .

and time for a taste!

Steve and I sliced into one for a first taste sans garniture, then followed that with a dollop of raspberry jam, which was delightful.

The wheels are already turning with other possibilities - how about sandwiched with layers of chocolate ganache and caramel mascarpone cream?  Or a chocolate version of Bostock with chocolate almond (or hazelnut!) cream and lightly spiced poached pear?  Or a delicious bread pudding with tart cherries, pecans and chocolate chunks?  Just imagine!

Now for a few ingredient notes: when the recipe calls for chocolat noir, sucre roux, fleur de sel, cacao en poudre, I use the following:  Valrhona Manjari 64%, coarse raw sugar, Beanilla's vanilla fleur de sel (one of my favorite things!), and Penzey's Dutch process cocoa powder. 

It is not uncommon for French recipes to call for water and powdered milk in some viennoiserie doughs. When I see those two ingredients, I replace them with whole milk, e.g. 200 ml of water and 12 gm of poudre de lait = 212 gm of whole milk in my book.

This recipe calls for farine type 55 which is a French flour often used for both bread and general baking. Based on online research, as well as some experimentation of my own while in Paris, when type 55 is the recommended flour, here in the USA I use all purpose flour, but replace a percentage (15-20% by weight) with bread flour to yield a decent equivalent of French type 55. Oh, and I use King Arthur!

A note about yeast: many French recipes call for levure boulanger or fresh yeast. I use instant dry yeast and convert by taking 30% by weight of the amount of fresh yeast called for in the recipe.  e.g.  25 gm fresh yeast = ~7 gm instant. The beauty of instant yeast is longer shelf life (fresh has only 2 weeks at most) and no need to hydrate or "proof" it before adding it into your dough.

I followed the recipe instructions to divide the final dough into six approximately 150 gm boules, but since I generally prefer smaller portions, next time I'd consider 60-80 gm pieces, shaping them into rolls or loaves, depending on what I plan to do with them.

Next up - Chausson Napolitain!

Boston Teatime

Boston Teatime

On a recent crisp, clear autumn afternoon I hopped on the MBTA purple line in Providence and soon arrived at South Station in Boston.  Since I had some time to kill before meeting sister-in-law Dorothy and her friend Grace for afternoon tea at the Boston Harbor Hotel, I took the prerequisite stroll down the Greenway and over to Quincy Market.   Tourists were out in force and a couple of buskers were performing for the crowds.

The Rose Kennedy Greenway


I meandered down city streets, passed the occasional historic building, walked through Post Office Square, and made my way back to the Boston Harbor Hotel for our 2:30 pm rendezvous.

Old South Meeting House

Post Office Square


From the foyer looking into the Sea Grille restaurant
Dorothy and Grace soon arrived after a somewhat slow T ride from Riverside, and we were seated at our rose petal strewn table in the dining room of the Rowe Wharf Sea Grille restaurant.  We had a lovely view looking out over Boston Harbor.

Our only task was to decide on the flavor of tea we wanted, since the tea menu is otherwise all-inclusive.  Dor went with Earl Grey (her fave), Grace with passion fruit, and I with Formosa oolong.  There are “tea-tails” offered as well, for those who wish to have an alcohol laced addition to the tea experience.

Our perfectly steeped pots of tea arrived and were soon followed by a three-tiered assortment of treats.   Everything was described by our server and looked very tempting, although I thought the presentation would have been more pleasing had the top and bottom plates been switched in position, thus improving upon the “top heavy” look.

We thoroughly enjoyed our afternoon repast.  Once we had finished everything, save for two rather large pieces of the coconut chocolate chip shortbread bar, we voted for our favorites.  Of the sandwiches Dor and Grace gave the smoked salmon top prize, and I chose the Vermont cheddar and ham.  The grapefruit segment with the lobster salad was a nice touch, but the egg salad mousse was rather flavorless.

The menu described “warm lemon poppyseed and dried cherry scones, various pastry breads and Devonshire cream”.  In reality the scones were not warm, there were a scant few dried cherries involved (mine had none), and there were no “pastry breads” (unless the coconut chocolate chip shortbread bar is considered by those who made it "bread").  The Devonshire cream and fresh strawberries were tasty and did give a certain lift to the scones.

The sweets portion of the tier included raspberry mousse on a shortbread crust, passion tartlet topped with fresh blueberries, chocolate dipped strawberry and candied peanut topped PB cremeux in a chocolate cup.  The raspberry mousse was the winner, although Grace was surprised by the nice flavor and texture of the peanut butter offering, particularly since PB is usually not her first choice!

Once our tea pots were empty we bid each other adieu.  I headed for South Station and the train back to Providence, and Dorothy and Grace took a walk along the water before heading back to Douglas.

All in all an enjoyable afternoon with great company, tasty treats and a lovely autumn day!
The tea musketeers!

Kouign-aman

As I was pursuing my pastry studies in Florence and Paris in 2006, I never imagined all of the adventures I would have, from being a stagiaire in a Parisian pâtisserie, to baking in a Maine café, to creating desserts in a Providence fine dining restaurant and, finally, to starting up and running my own petite pastry studio at Hope Artiste Village in Pawtucket, RI.

Inspired by the many pâtisseries in Paris and the innumerable pastry books on the market, I’m always eager to learn more, try new recipes or even tweak some tried and true favorites. One never knows what great little tip or new technique you might come across as you explore the world of baking and pastry.

This is my way of sharing some of the things I’ve learned (and continue to learn!) along the way.  Happy baking!

Kouign-aman

Inspired by Philippe Conticini’s pastry shop and book La Pâtisserie des Rêves, I hope to bake my way through his wonderful collection of recipes. I use the French edition, but it’s also available in English through Amazon.

First up is Kouign-amann léger. Ever since Chef Xavier Cotte at Le Cordon Bleu in Paris demonstrated his version of Kouign-amann to our pastry class, I’ve wanted to recreate this delectable caramelized, buttery treat. Over the past couple of years I’ve compared and tested recipes for this traditional Breton specialty from the likes of Alain Ducasse, Philippe Conticini and Pierre Hermé (just to name a few).

Below is my recipe copy with my notes and musings - seems to be a lot going on.

As Kouign-amann (hereafter referred to as K-a) becomes increasingly well-known and available in the United States, many recipes can be found on line and in print. You can find all sorts of variables in proportions of ingredients, kneading times, resting and rising times and even oven temps and baking times. My intent is not to present the recipe per se, but to highlight a few tips for success in making this laminated dough.  It’s all about planning and timing!

If you’re not familiar with the techniques for laminated dough, there are many publications and online sources that will take you through the steps.

OK, so the first step is to make the dough: the key here is to mix the ingredients (flour, salt, yeast, water, a bit of soft butter and usually a bit of sugar) just until they come together, followed by 30-60 seconds of low speed kneading. Avoid prolonged kneading at this stage, since you don’t want to develop a lot of gluten and have your dough become tough.

Let the dough rest for 30-60 minutes, covered with plastic film at room temp, followed by 1-2 hours wrapped in plastic in the fridge. That gives it enough time to relax and cool before incorporating the butter.

Next comes the butter. Some chefs recommend using European style butter, which is higher in butter fat and lower in water content than our American butter (which is why the French refer to it as “dry butter”). I’ve been using Cabot’s standard unsalted butter for years with excellent results. Working with butter at about 65-68ºF is ideal for me. It still has a cool feel to it, and it’s malleable and able to be shaped easily. As long as your work environment is cool and you work efficiently, once your butter block is shaped you can even go right to the beurrage step (encasing the butter in the dough) without having to re-chill the butter. Just remember that if the butter becomes soft, warm and squishy, it’s time to chill it before you continue!

Once you’ve completed the beurrage, give your dough-butter package a 20-30 minute chill before starting the turns. Even after that short chill the butter can tend to crack a bit as you begin to roll, so I tap the dough with my rolling pin to make sure everything is malleable again before starting the turns.

On a lightly floured surface roll the dough out to a rectangle about 3 times longer than it is wide. Do one three fold (also known as a business letter fold), turn the dough 90º and repeat. Wrap the dough in plastic and rest for 30 minutes in the fridge. Do 2 more three folds, turning the dough 90º after each, this time rolling in sugar rather than flour. As you roll, continue to sprinkle sugar on your dough and keep rolling it in – and don’t skimp on the sugar!

Important tip: Chef Franck Geuffroy at Alain Ducasse’s école de cuisine in Paris was kind enough to share his K-a recipe with me, and this tip has made a huge difference:  after the two turns with sugar let the dough rest at cool room temp for 30 minutes, NOT in the fridge (I wrap it lightly in parchment).

If the dough sits in the fridge at this stage, even for 30 minutes, the sugar starts to melt; the first time I made K-a I was faced with a soupy, sugary mess when rolling the dough out for the final shaping. You still have to work efficiently after a room temp rest, but there is much less of a syrupy mess to deal with.

Now, once the dough has rested, you’ll want to roll it into a rectangle for cutting. As you roll be sure to give it a break every now and then, so it’s relaxed before you actually cut it. Your squares will hold their shape better.  Dredge both sides of your square with more sugar, fold up the corners and place them in your buttered rings or pans.

Rising times vary from recipe to recipe, anywhere from 30-90 minutes. I've found that a good 60 minute rise at warmish room temp (75ºF or so) is adequate. As is true of laminated doughs in general, if you let them rise at too warm a temp (over about 82-85º) the butter will start to melt out, pool on the baking sheet, and you'll lose some of the buttery layering you've worked so hard to achieve.

I’ve baked K-a in both open tart rings and traditional muffin tins, and I prefer the end result with the muffin tins. While the open tart ring version is still delicious, the sugar on the bottom of the K-a can over caramelize and burn if you’re not paying attention.

Which brings me to baking times and temps.  Learn your oven and understand that recipes are guidelines. It is SO important to use all of your senses to help you determine when something is done:  ahhh the aroma; ooohhh what a lovely golden crust; wow, that feels done!  And, of course, taste is the piéce de resistance!

So choose a recipe and GO! Bon chance tout le monde!!