Danish almond braids

1977E852-2388-46B1-BCCB-834C943537D7.jpg
637069C3-6987-4CE8-8AD2-538066C5AE95.jpg

It’s time for more Danish dough fun!

After I posted on Danish Kringle last spring, I knew I would return to this laminated dough and the wonderful things that can be made with it. I’ve been spending more time with Beatrice Ojakangas’ book “The Great Scandinavian Baking Book” (let’s call it TGSBB) and continue to be amazed at the array of dough and almond filling recipes she presents. Whoa.

I made two versions for this project so as to compare recipes from Ojakangas (BO) and one from Melissa Weller’s (MW) recently published book “A Good Bake”. She refers to it as her “laminated babka dough”. Their recipes are similar to mine although with variations in the amounts of sugar, egg and butter as well as how much butter is used in both the dough and the butter block. So many options in the baking world!

Here’s one of my favorite ways to compare recipes - hand written columns to show you just a few of the differences one might discover when researching different Danish (or any!) recipes. You see my recipe vs. the other two as well as the adjustments I made to those two noted in (parentheses). You can use the same mixing/kneading approach for all three - just look here. Each recipe is enough for two braids.

1433E2FC-9297-4D97-A7C1-1E21B8F690DC.jpg
Almond braid No. 1 (BO)

Almond braid No. 1 (BO)

Almond braid No. 2 (MW)

Almond braid No. 2 (MW)

Before we delve into the braid steps let’s talk briefly about almond paste. In my recent post on Bakewell tart, I mentioned frangipane and almond cream as commonly used fillings for baked fruit/jam/almond tarts. But almond paste is a biggie when it comes to making fillings for many pastries, particularly in Scandinavia and The Netherlands.

You may see the terms almond paste and marzipan mentioned in various recipes, some of which use the terms interchangeably. Technically they aren’t the same. Typically paste is at least equal parts ground almonds and sugar, with higher quality pastes (my preference) having an even higher percentage of almonds (e.g 66% almonds to 34% sugar). Marzipan is more often used for modeling and molding, available in an array of colors (or create your own), and is generally higher in sugar (e.g. 33% almonds to 67% sugar).

BB30E044-98A9-42A6-9710-D57D9BC6DE10.jpg

I’ve been using Mandelin premium almond paste for a while now (they have several “levels” of paste which are well described on their site). I’ve also been buying my blanched almond flour and sliced almonds from them too. Great stuff.

For the almond filling (enough for two braids) cream 56 g soft unsalted butter with 100 g confectioners sugar; blend in 1 teaspoon almond extract (I reduce that to 1/4 teaspoon since my premium almond paste has some bitter almond extract in it already), 100 g almond flour (or finely ground almonds), 85 g almond paste and 1 large egg white until smooth.

The process of forming this braid (not a real braid, truth be told) is what I find so pleasing - it speaks to my simple artistic bent and is so satisfying once completed. The braid in the following images is with MW’s dough.

Start with about 600 g of your finished laminated Danish dough and roll it out to a rectangle of about 9”x 15”. Have your filling ready to go.

D7296593-FACB-43D7-A6A1-CAE6DFCC2AF4.jpg

As seen in the image above, make light marks (don’t cut!) along the length to create three sections then cut the two outer sections at 45º angles about every inch or so. I find using 2 bench scrapers works well so you can match the cuts up as you work your way down. Cool!

The almond filling goes right down the center. Remember you’re using a half recipe per braid. Here’s a tip - place the filling in a rough log shape in plastic wrap, use a rolling pin to lightly compress and shape it to the size of the dough center, keeping it in the plastic. Then gently turn it out of the wrap right onto the dough center. That way you don’t have to spread the filling directly on the dough and risk some smooshing of the laminated layers beneath. Call me crazy!

F2230CBE-E750-4489-A176-D2666EC11B13.jpg

Now start folding the strips across the center, alternating sides, to create a faux braid until you reach the bottom. Tuck the ends under.

Almost there!

Almost there!

Got it!

Got it!

Place the shaped pastry on a parchment lined sheet pan. Cover lightly with plastic wrap and let proof about 60 minutes until puffy. It won’t double but you should appreciate more prominence of the layers.

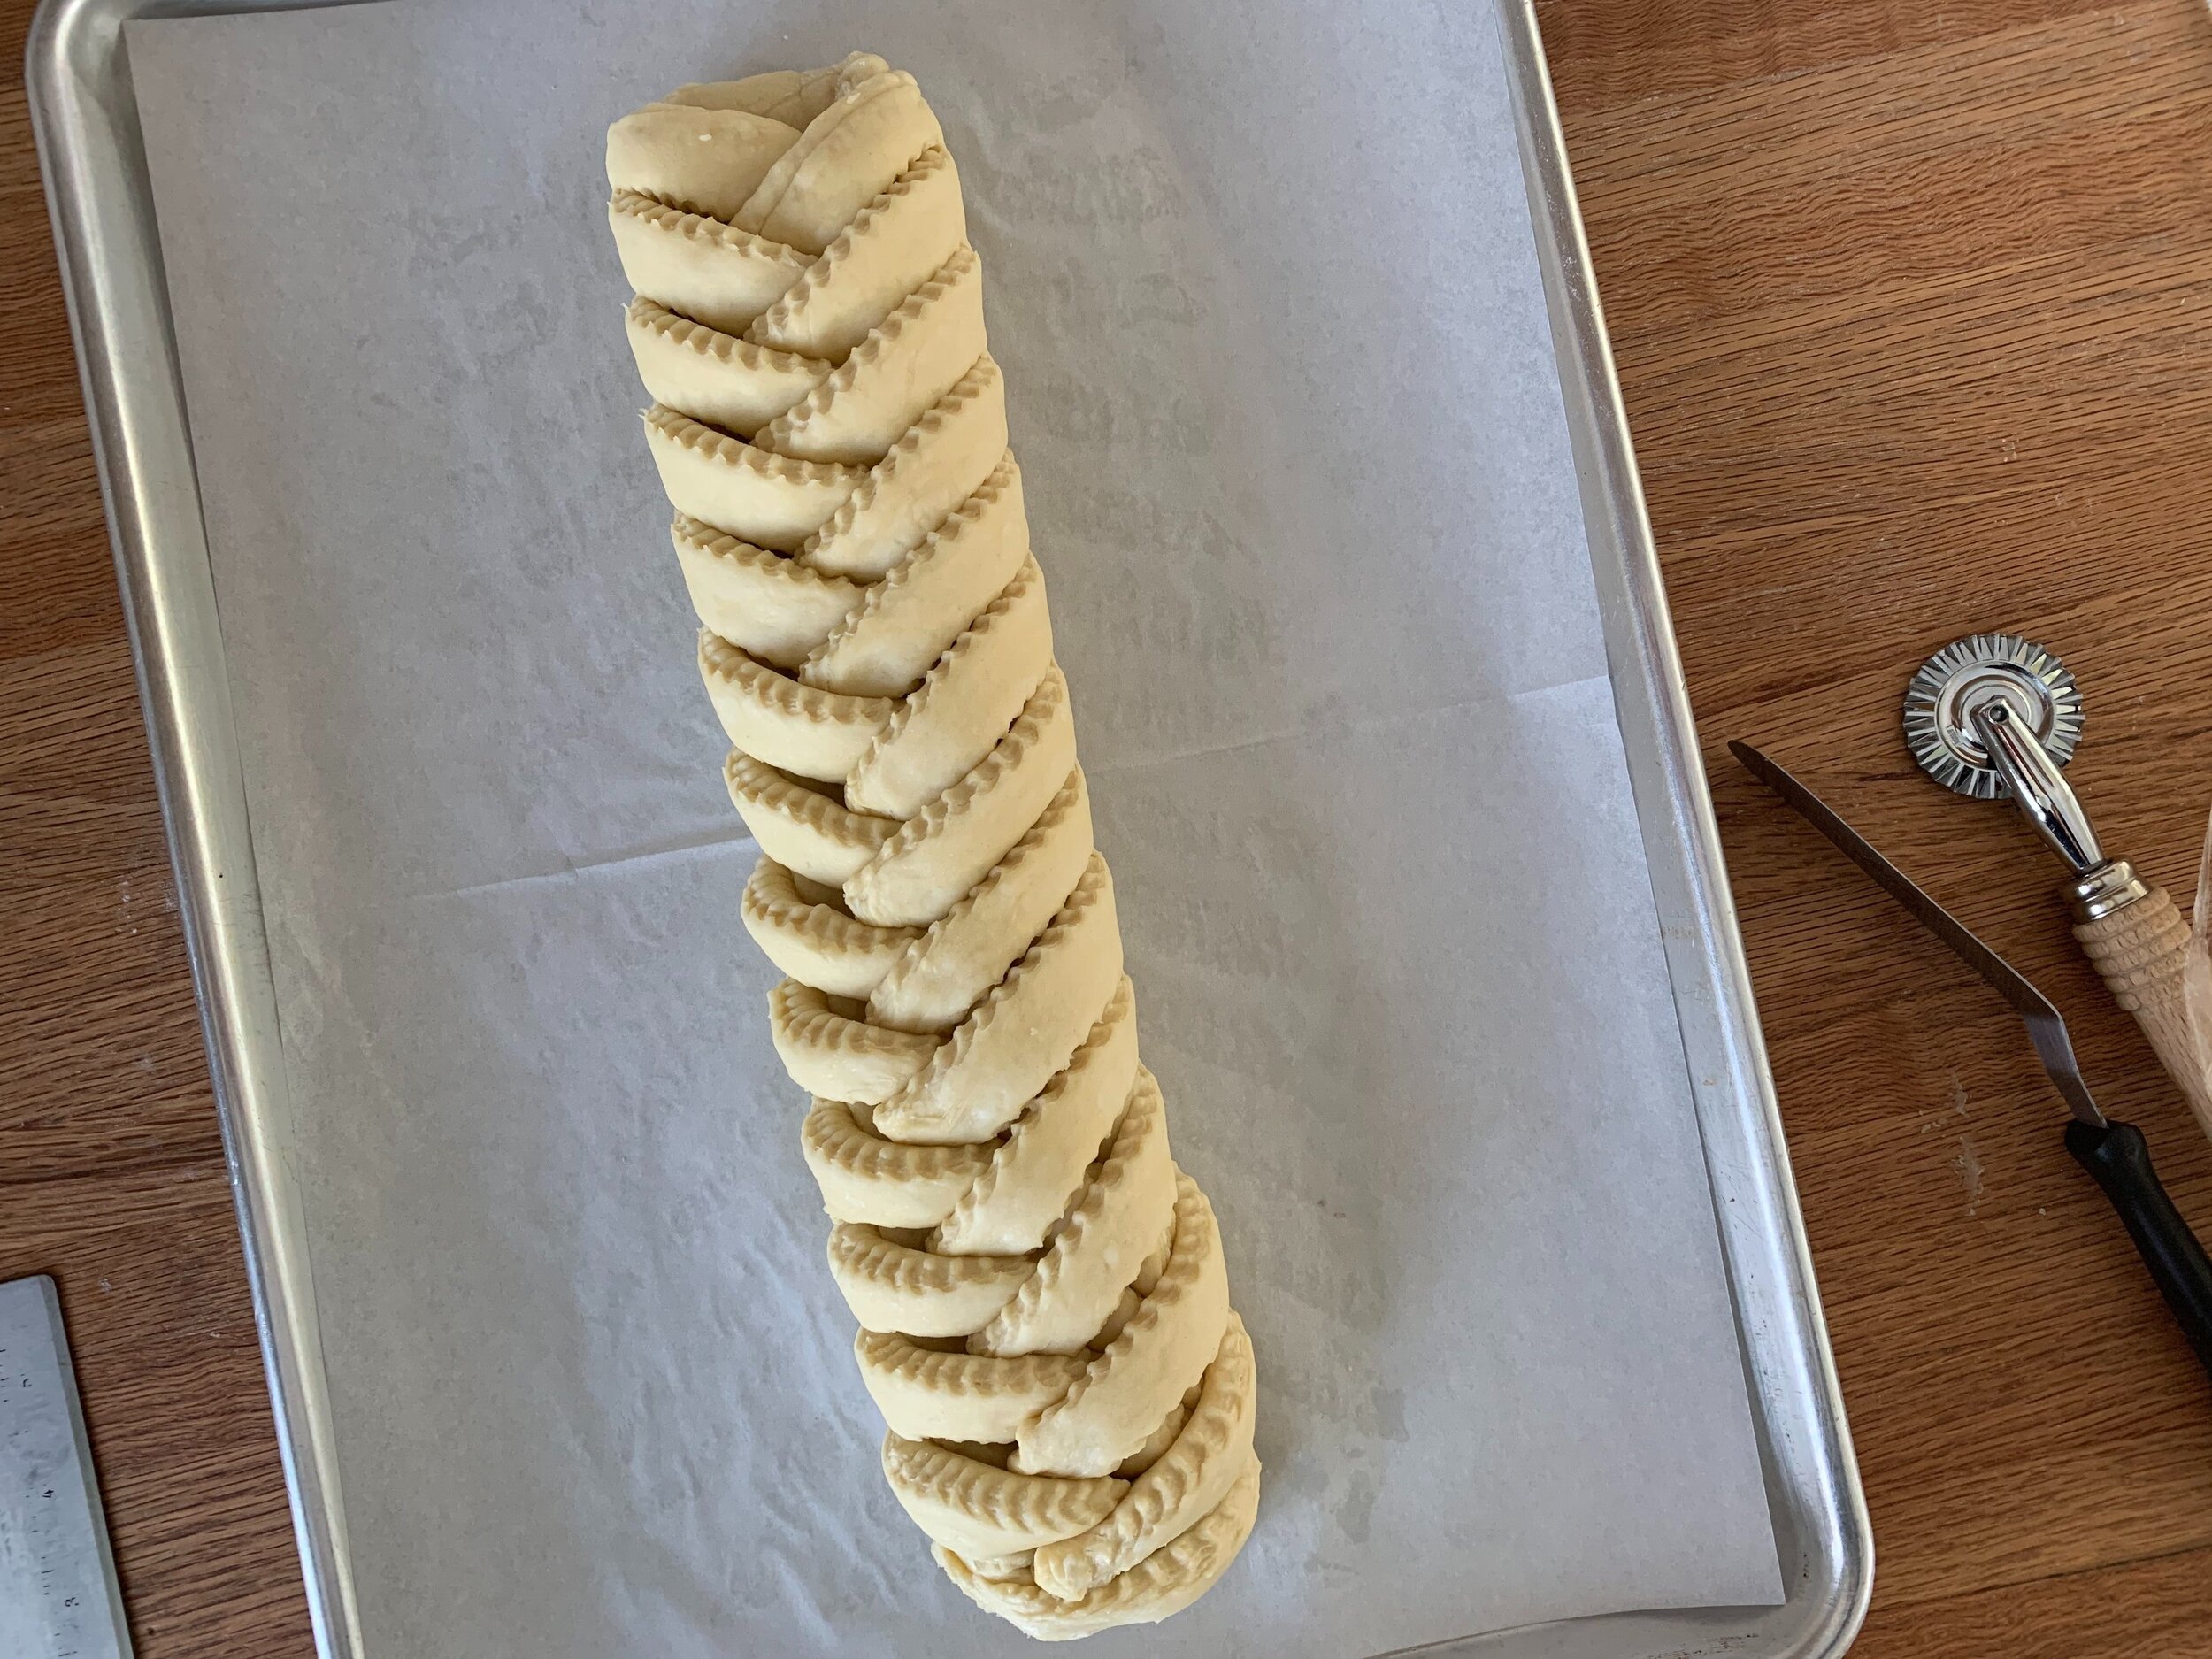
Just for comparison here’s an image of my first go at this with my version of BO’s recipe. I used a fluted pastry wheel to cut the sides to give it that certain je ne sais quoi, but my fold over pieces weren’t all quite long enough as I reached the end. That experience helped me pay closer attention to my cuts/strip lengths for the MW version.

CFA98446-E585-4D22-8BAE-7434B2CA31E7.jpg

While proofing, heat the oven to 350ºF (Weller’s version). I generally leave my baking stone on the bottom rack of my oven. Even if I’m not baking directly on it, I feel it helps keep the oven temp more even.

Egg wash, sprinkle sliced almonds and raw sugar or crushed raw sugar cubes on top, place on a second sheet pan (helps to protect the bottom from burning) then onto the center rack and bake about 30-40 minutes until nicely browned.

1E56797E-EB12-406F-8AD5-1B8BF089CC4C.jpg
657E865F-C24A-4DAD-BEC2-C0DDBA508643.jpg

For BO’s version heat the oven to 400ºF and bake about 15-20 minutes. Below is the baked version of BO’s - you can see how the fold over pieces pulled away, particularly at one end, exposing the filling. Still tasted good!

6C3D1B0E-4DD6-407C-A418-48201CB0FED9.jpg

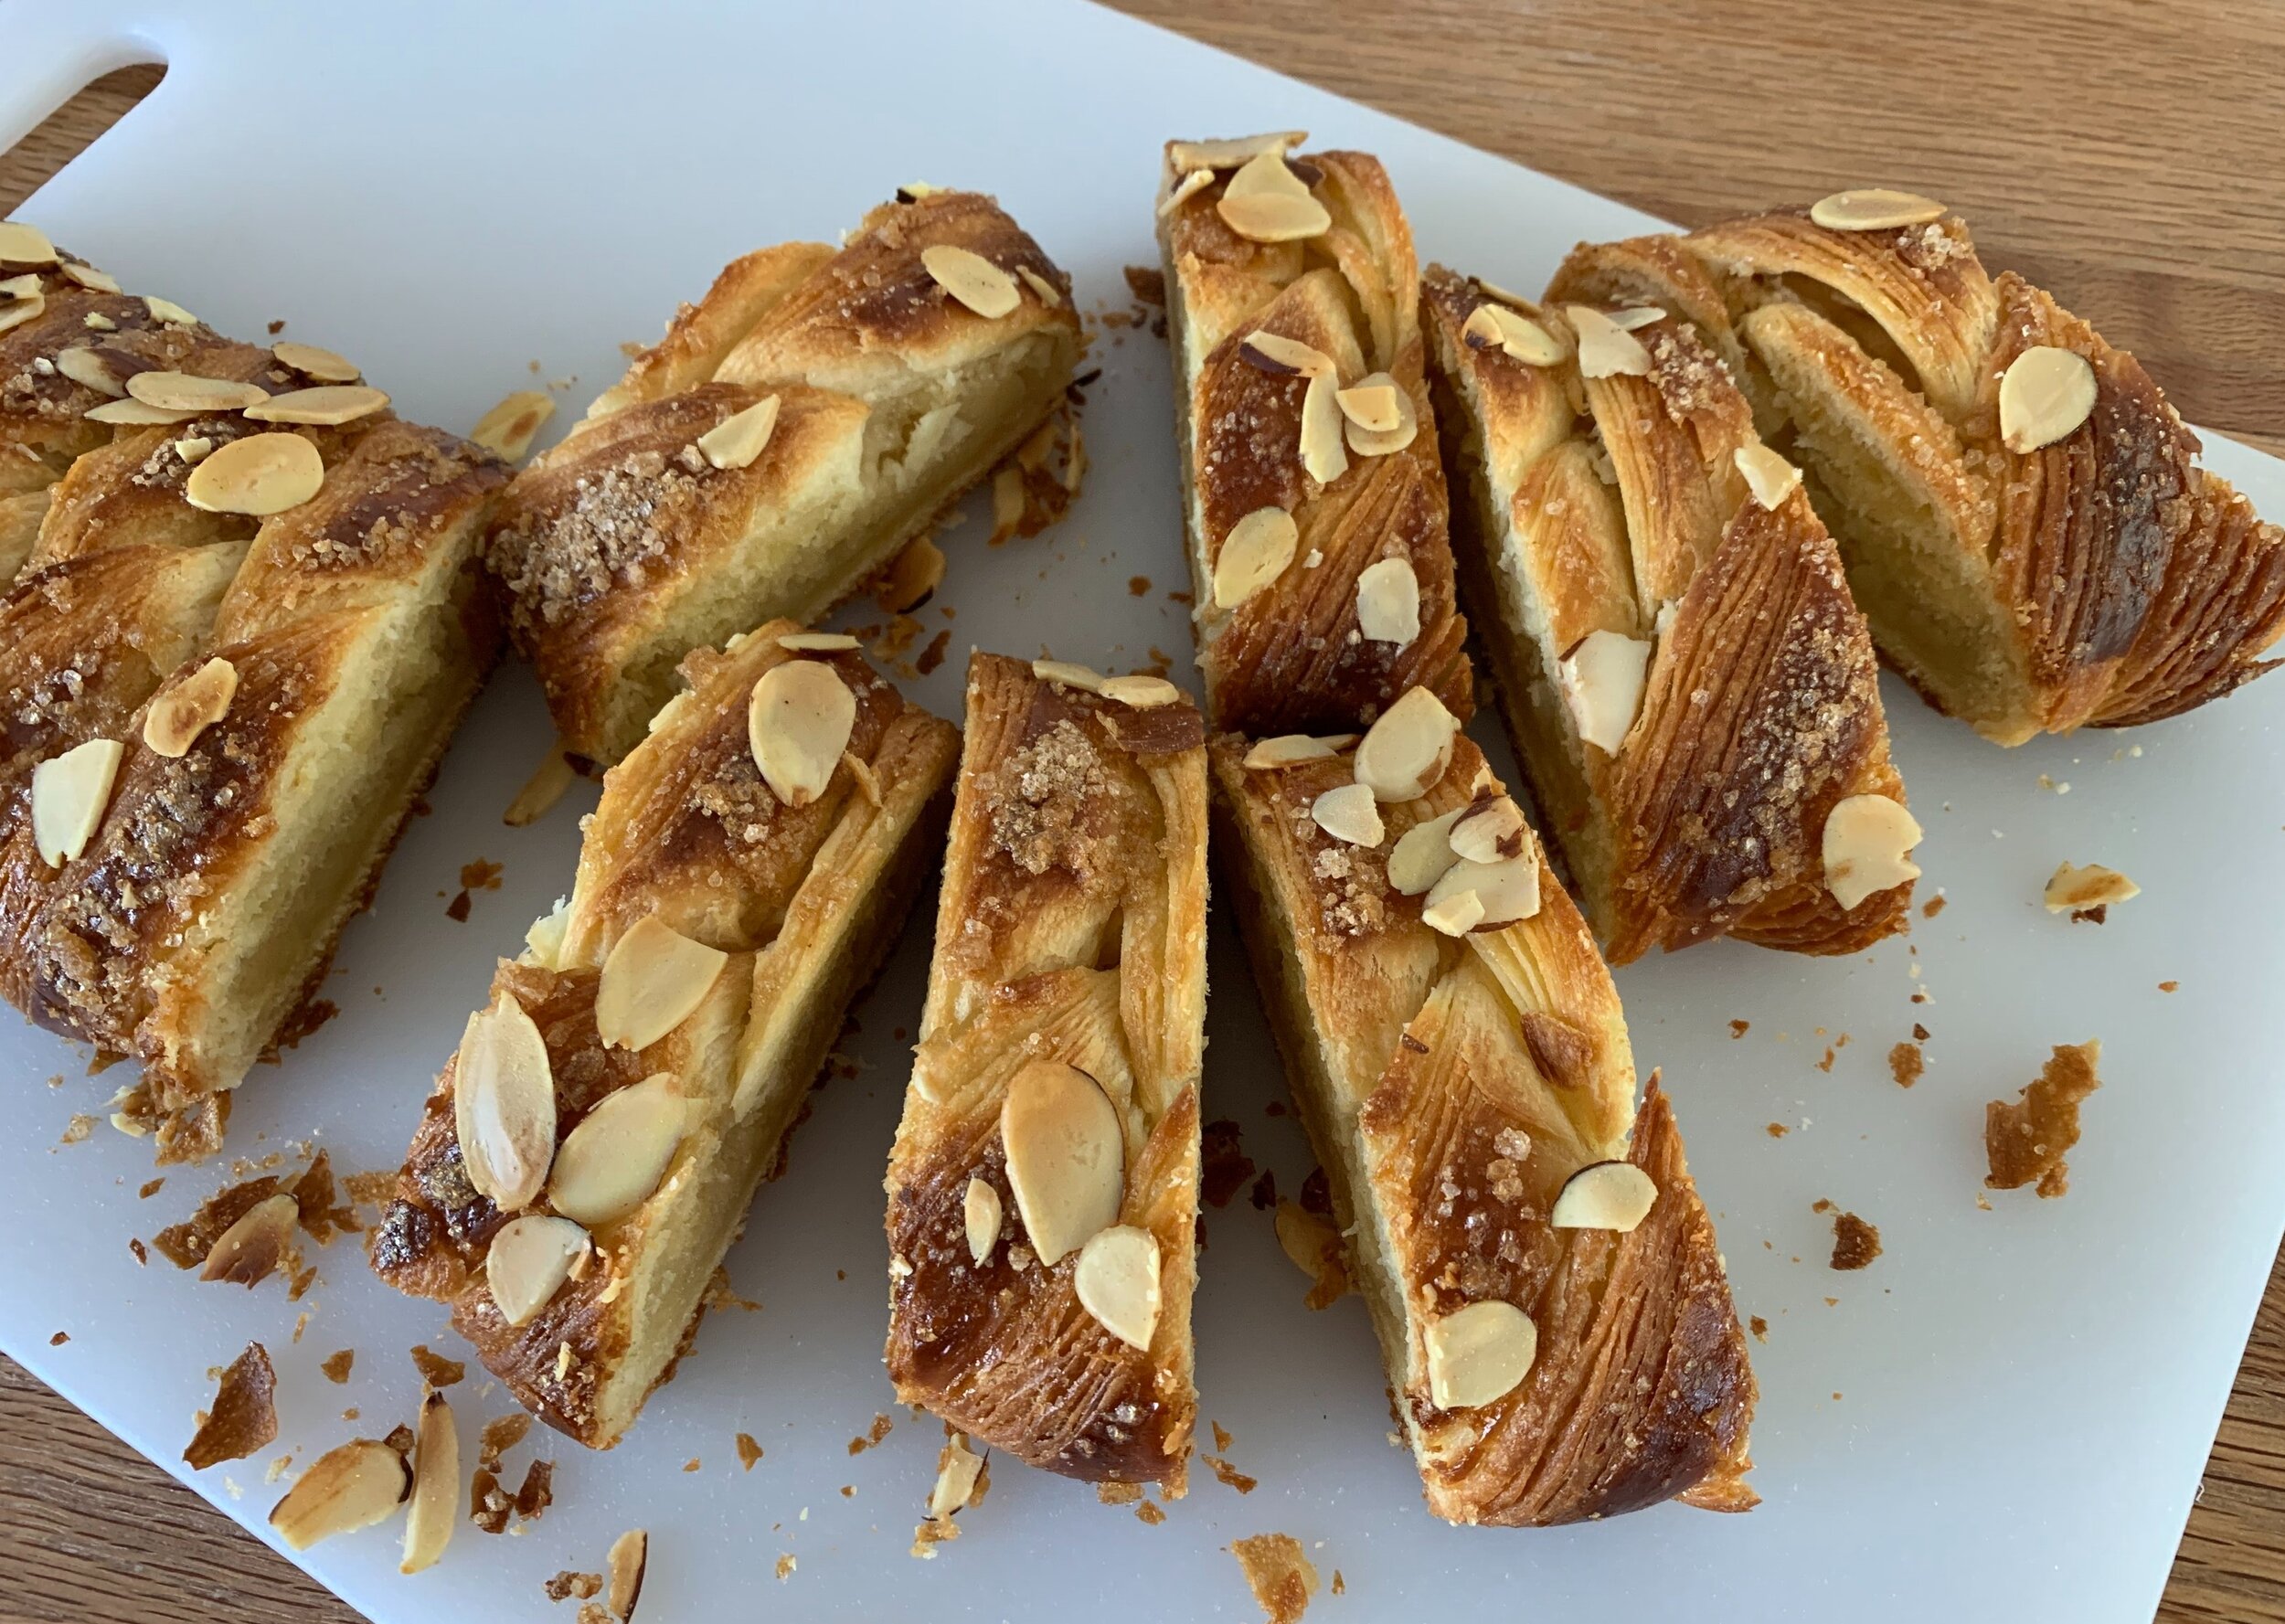
Let’s taste! Slicing into BO’s version, there’s a hint of doughiness to the bottom layers. The almond filling is deelish, although, in spite of the lovely flaky, golden and crisp exterior, Steve and I thought the pastry seemed a bit on the dry side and needed a touch more salt to punch up the flavor. The laminated layers are clearly seen (this one went through two 4-folds).

BO version

BO version

For MW’s version there was no doughiness at all to the bottom, and the top laminated layers look pretty good (this one went through only two 3-folds). The flavor of the pastry married with the almond-y filling is wonderful!! A big thumbs up.

MW version

MW version

Based on this project, I’ll tweak my recipe a bit: hike up the sugar to 90 g, increase the butter in the dough to 113 g and make my butter block 227 g for a total butter of 340 g all told. I’ll stick with two 4-folds for my laminating for now but will most likely play with that too from batch to batch. The almond filling is a keeper for sure!

In the meantime stay healthy, remain prudent and enjoy spring! Aaahh, so beautiful.

EA093B08-6F52-4531-BC98-08910A35B795.jpg


Swedish (cardamom) buns

IMG_0927.jpg

Time for more Swedish fun! Once again inspired by Brontë Aurell’s “Brontë at Home” as well as Beatrice Ojakangas’ “The Great Scandinavian Baking Book” (a recent acquisition as a result of a birthday gift card!) and a NYT article on cardamom buns, I’ve plunged into the depths of bun recipes and options. Whoa - so much out there!

As I’ve come to learn, the Swedes (and let’s be honest, Scandinavians in general) are HUGE bun lovers - cardamom, cinnamon, blueberry just to name a few. The dough is a pretty basic enriched dough made with milk, usually (but not always) some egg, butter, sugar, salt, yeast, cardamom and flour of course. Once the dough is made and rested/risen, you roll it out and spread it with a filling of butter and sugar (white or brown, either way), fold it in thirds, roll out again, cut it into strips, twist, wind and tuck and voilà, there’s your classic Swedish cardamom bun.

The process as just mentioned is the less buttery bare beginnings of a fully laminated dough, and you can take it in other directions with different shapes and fillings. Think jam, chocolate hazelnut spread, citrus zest, chopped toasted nuts, fresh or dried fruit, almond paste . . . the list goes on.

My first attempt sprang from the NYT article on classic Swedish cardamom buns, and, being intrigued by the shaping technique, I was ready to give them a try. One sees a hint of the shaping in the article images although the shaping instructions in the recipe didn’t give my brain a good image to work with. I played around with it, finally resorting to an online video or two which helped a lot. Just remember - there’s more than one way to shape a bun!

If you’re interested in checking out the NYT article, a quick note on the filling - I found it to be too much butter. There was a LOT of butter leaching out during baking so I’ve reduced the filling amount for this post and for my future bun projects.

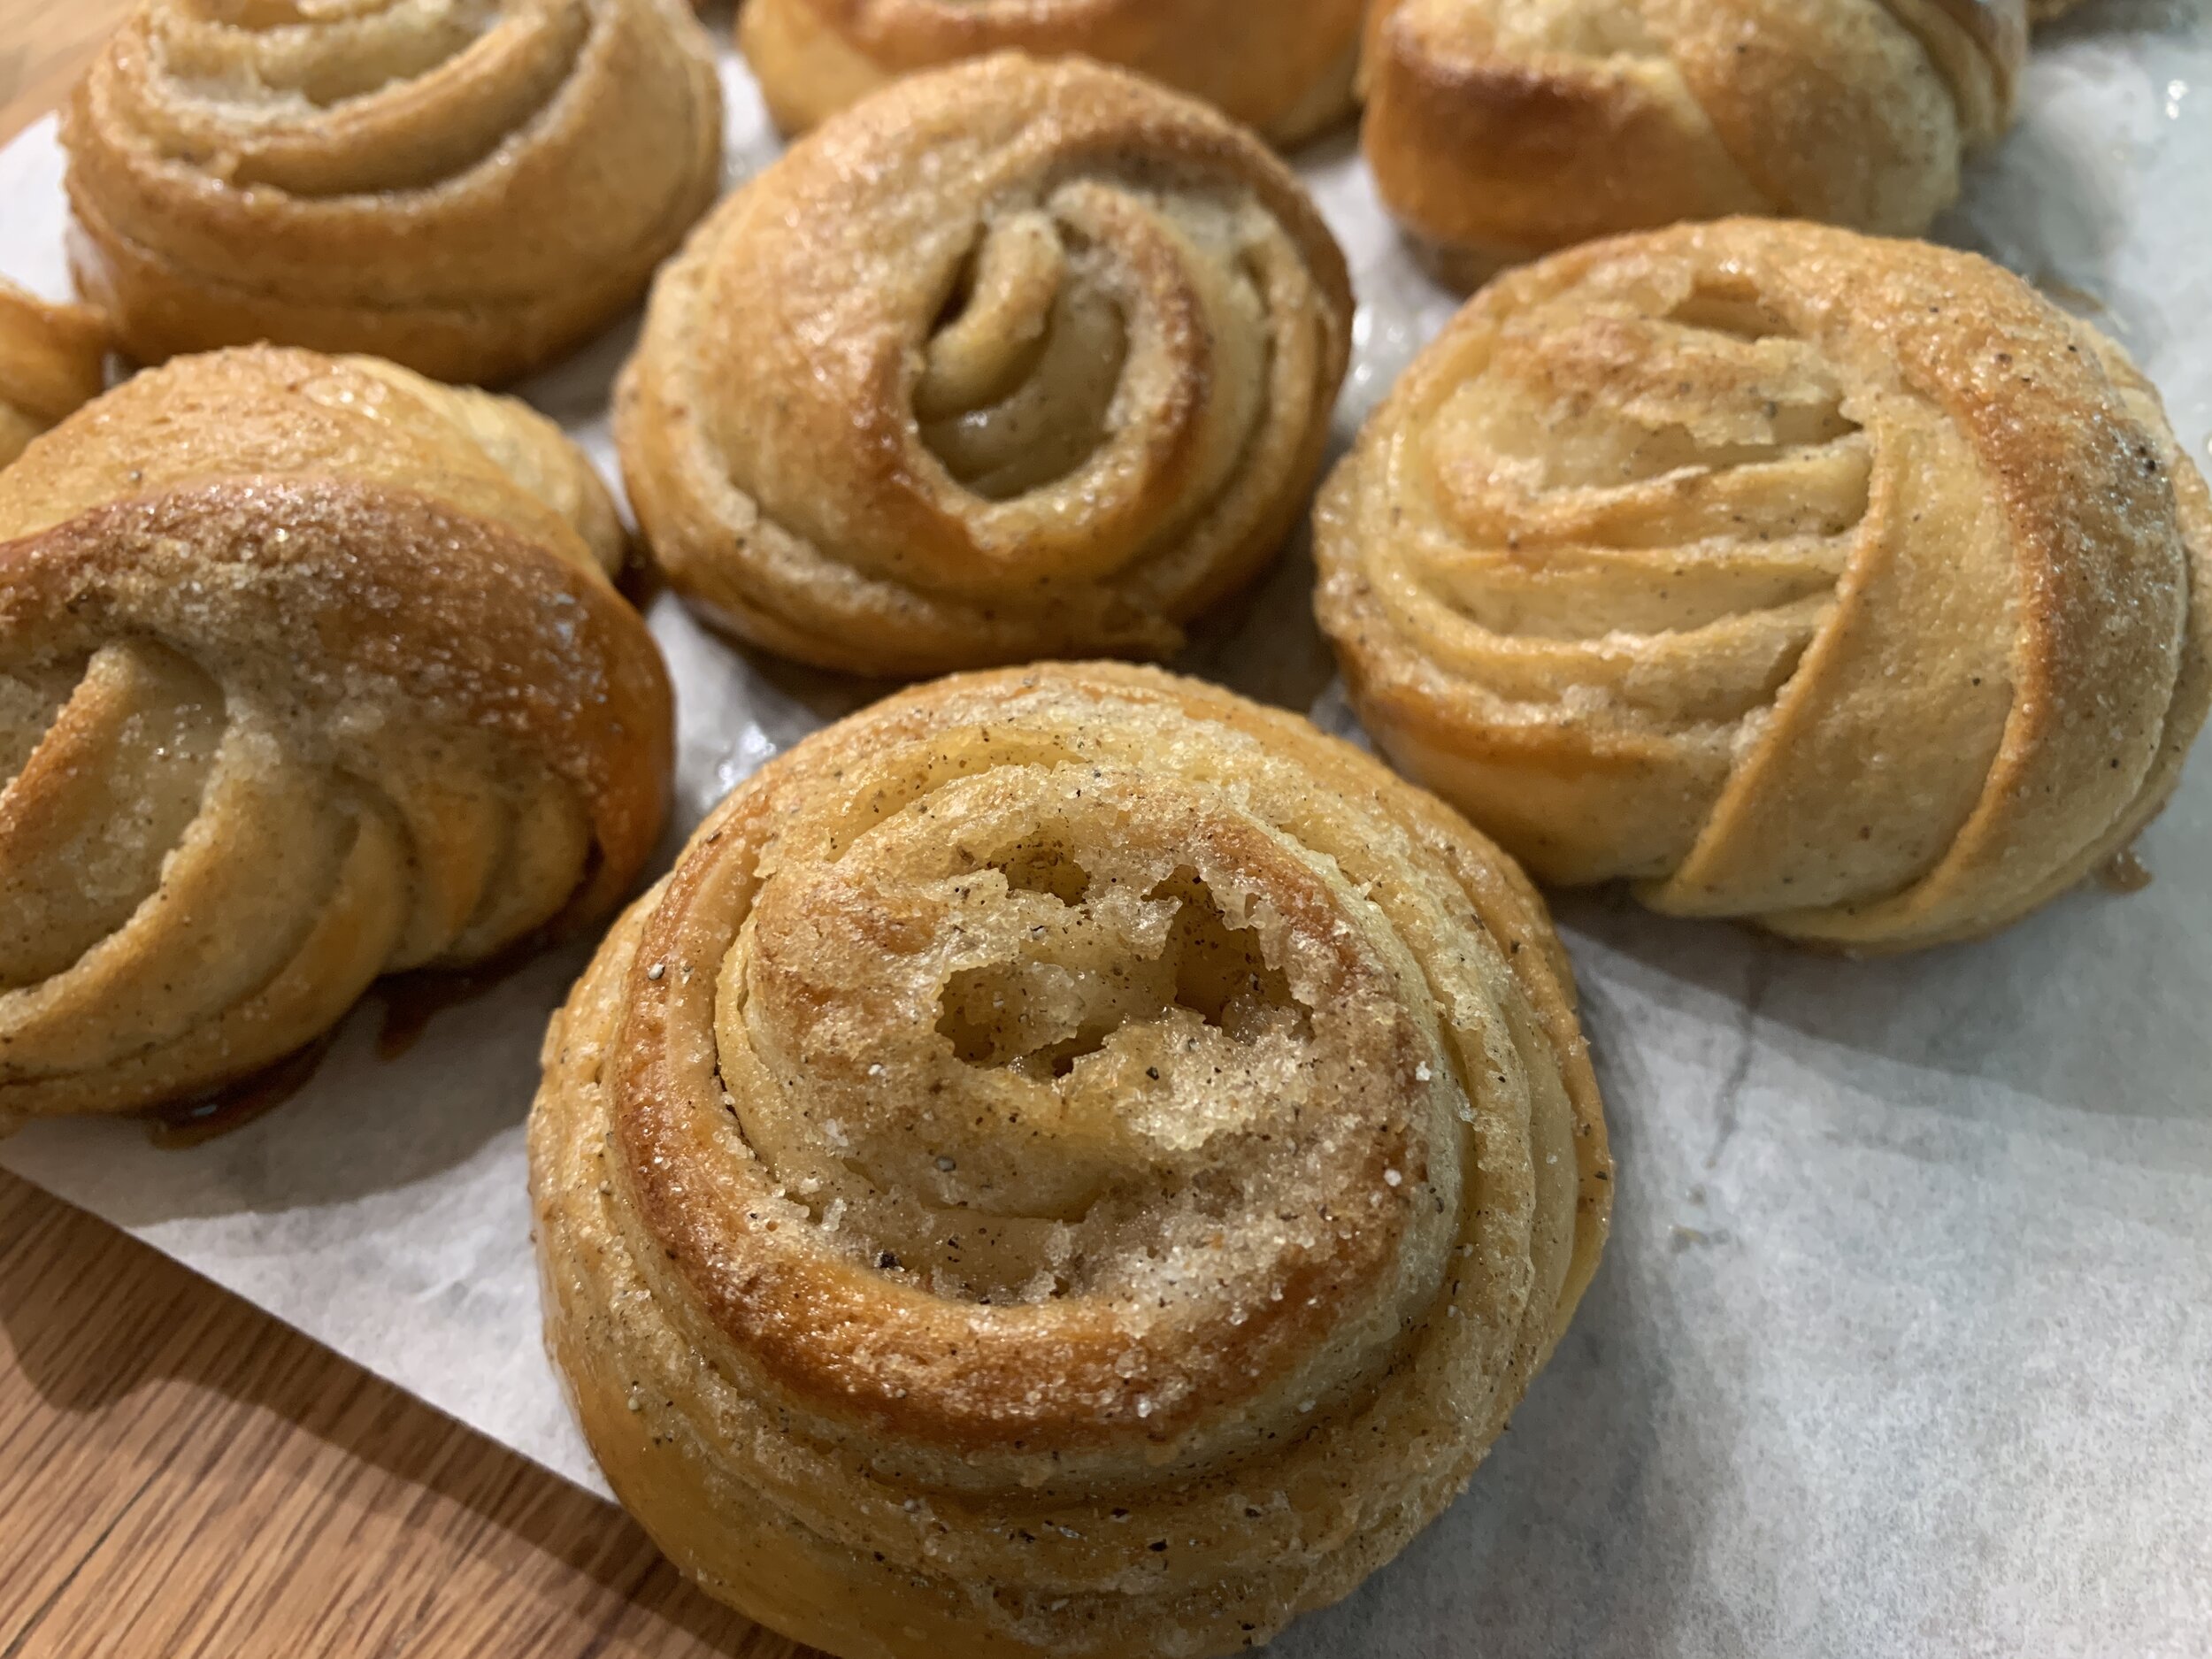
As you see below I ended up with a number of different looks to my buns as I twisted, coiled and tucked. Interesting indeed. The one on the bottom left looks like a conch shell, don’t you think?

IMG_0920.jpg
IMG_0926.JPG

After reviewing WAY more recipes than I should have, the more I compared them, the more I realized that I can simply take my base croissant détrempe, the dough BEFORE any added butter block/laminations occur, sub in some egg for part of the milk, bump the butter and sugar up a touch, throw in some vanilla extract and add cardamom or cinnamon or a spice mix of choice and you have your basic bun dough. Here’s the recipe I came up with.

In addition to being able to create a variety of buns from that base dough, you can also take that dough even further by adding a butter block and fully laminating it too! It then becomes Danish pastry dough (wienerbrød) like that in the Danish Kringle I wrote about here. Lots more buttery layers to be had.

Let’s take a look at the steps for the Swedish cardamom buns (let’s call it my first trial and error go at it).

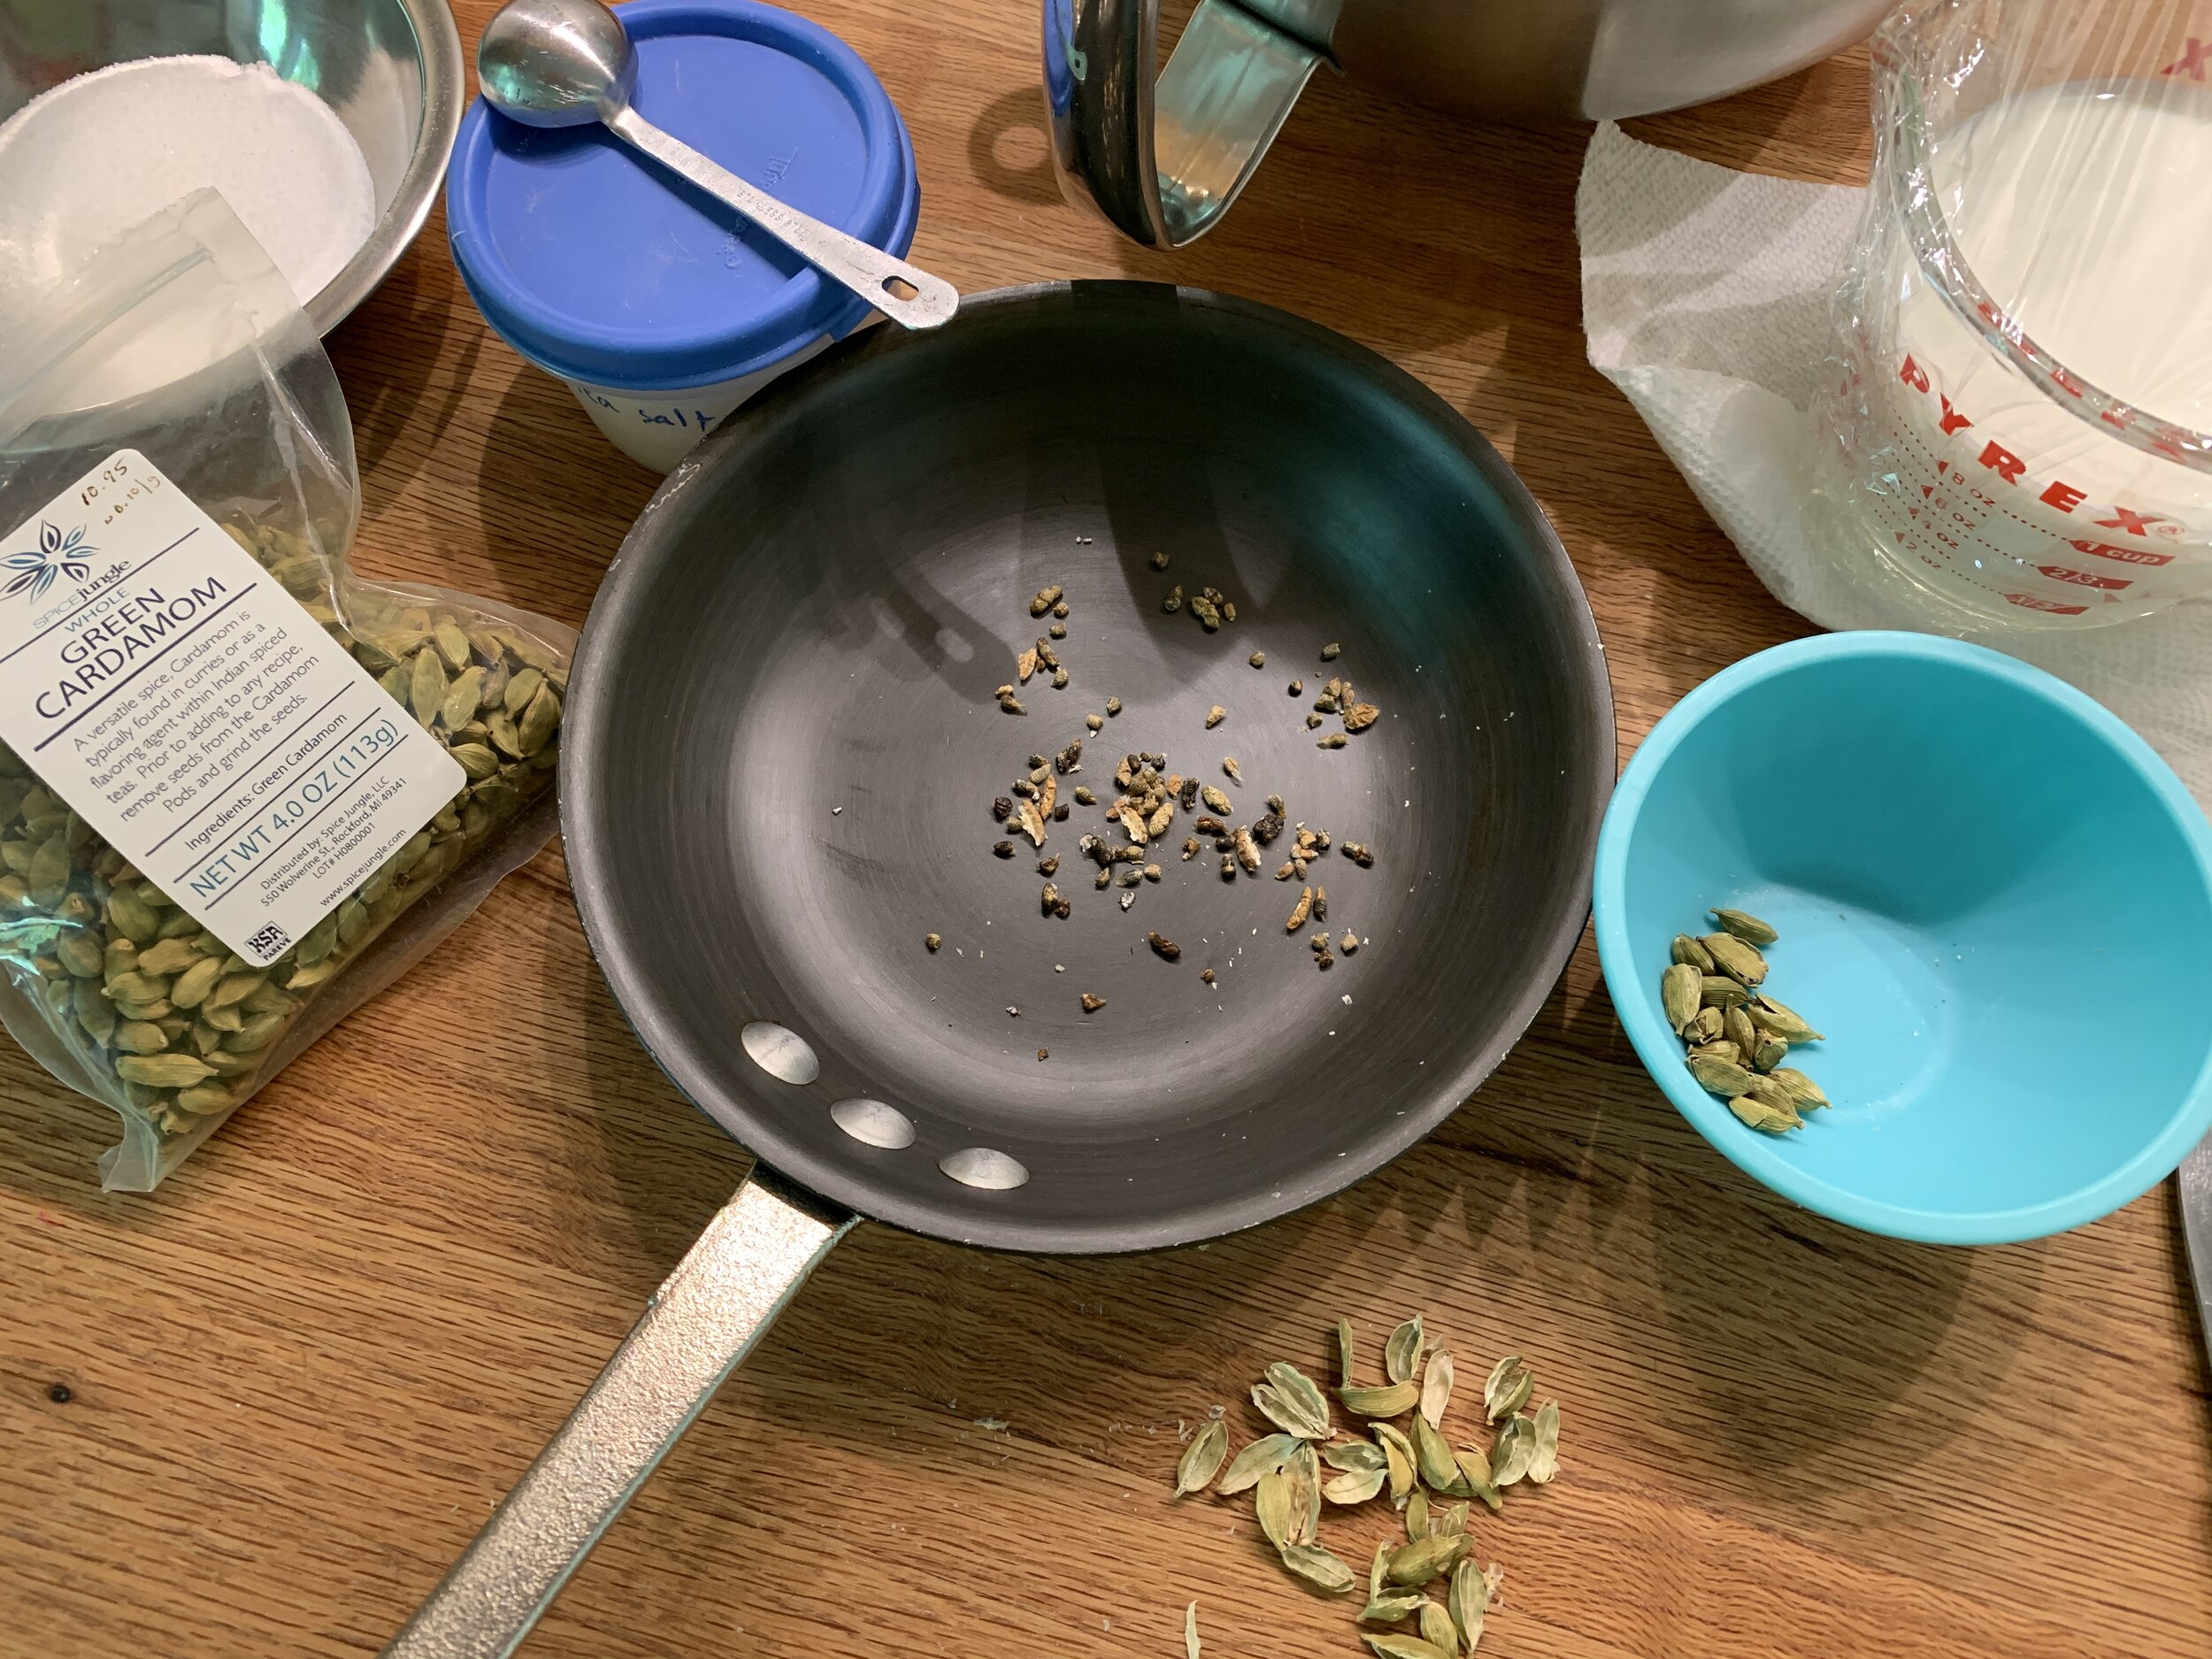
I’ve had some green cardamom pods on hand for a while now - time to use these babies. Open the cardamom pods, remove the seeds, toast them over medium heat then crush and grind them with a mortar and pestle. Generally around 6-7 pods will yield seeds to give you about a teaspoon of ground cardamom. You’ll need 1-2 teaspoons for the dough (to your taste), another teaspoon (optional) for the filling and an additional teaspoon to make cardamom sugar for sprinkling. Remember - feel free to sub in other spices!

IMG_0894.JPG
IMG_0914.JPG

Make the dough as directed in the recipe. It will be a bit sticky. Lightly ball it up, place in a greased bowl, cover with plastic wrap and let rest/rise about an hour at room temperature. Give it a good stretch and fold then ball it up nicely. Wrap tightly with plastic wrap and refrigerate at least 4 hours or up to overnight. I usually make my dough in the late afternoon/early evening for use the following morning. It’s all about planning ahead.

IMG_0896.jpg

On baking day prepare the filling by blending 80 g soft unsalted butter with 80 g sugar (white or brown as you wish), one tablespoon flour, a teaspoon vanilla plus a teaspoon ground cardamom if desired.

Note: You can ramp the filling up by grating 80 g good quality almond paste then blending it into the butter/sugar mixture.

Remove the dough from the fridge about 20 minutes before rolling, filling and shaping. On a lightly floured surface roll it out to a ~ 13”x18” rectangle, the short edge parallel to the work surface.

IMG_0902.jpg

Spread the filling in an even layer then fold the dough in thirds, the top down toward you . . . . .

IMG_0903.jpg

and the bottom up over that.

IMG_0904.jpg

Roll the dough out a bit more to ~9”x14” and trim any uneven edges. By the way - don’t get hung up on precise measurements, just go with the flow.

IMG_0905.jpg

Cut 2 cm strips. I also created a couple of scrap buns by braiding some of the edge pieces and coiling them up. Why not?!

IMG_0906.jpg

Pick up and gently stretch each strip, wrap it around three fingers a couple of times then bring it across and tuck it under. NOTE: in the future I’ll twist the strip as I wrap it for an even greater twisty look.

This is where I was a bit confused and my first attempts were clunky. but once I figured out the moves it worked out OK. Even so - variety is the spice of life so do whatever makes you happy.

Hmmmm . . . . going from the top down? Probably not.

Hmmmm . . . . going from the top down? Probably not.

Hmmmm . . . . not really it, but I do like a basic coil

Hmmmm . . . . not really it, but I do like a basic coil

Still a mish mash but, once I watched a video I finally got the cross-over-the-top thing to happen!

Still a mish mash but, once I watched a video I finally got the cross-over-the-top thing to happen!

At any rate, once you’ve shaped your little heart out, place the buns on parchment lined pans, cover lightly with plastic wrap and let rise 30-45 minutes.

Meanwhile heat the oven to 350ºF. Once risen, brush the buns lightly with egg wash and sprinkle cardamom sugar (1/2 cup mixed with a teaspoon ground cardamom) on top.

You can also wait on the cardamom sugar until after baking in which case, once out of the oven, brush your buns with simple syrup and sprinkle with the sugar.

IMG_0917.JPG

Bake around 10-15 minutes or until nicely golden brown. Remember all ovens are different so watch what’s going on in there!

IMG_0926.JPG
IMG_0927.JPG

I haven’t fully decided how I feel about the flavor of cardamom on its own. It can be a bit overwhelming but mixed in with other spices like cinnamon, coriander, ginger and nutmeg, I find it’s a very pleasing combo. Steve and I gave the overall bun texture and crumb a thumbs up. Even a couple of our neighbors who weren’t familiar with cardamom thought they were pretty darn good. Yay!

I did one more batch (doubled) along the cinnamon lines, this time with some variants on the twisty coils. Of course I’ll keep playing around with it.

IMG_1172.JPG

Now get into your kitchen and create your own shapes and fillings - and just have fun!

On a final nature note, here are a few images from my August walks. Summer marches on.

Keep a steady course, stay safe and find comfort in the trees, skies, flowers and plants. It helps.

Hydrangea

Hydrangea

Black-eyed Susan

Black-eyed Susan

Summer annuals going strong

Summer annuals going strong