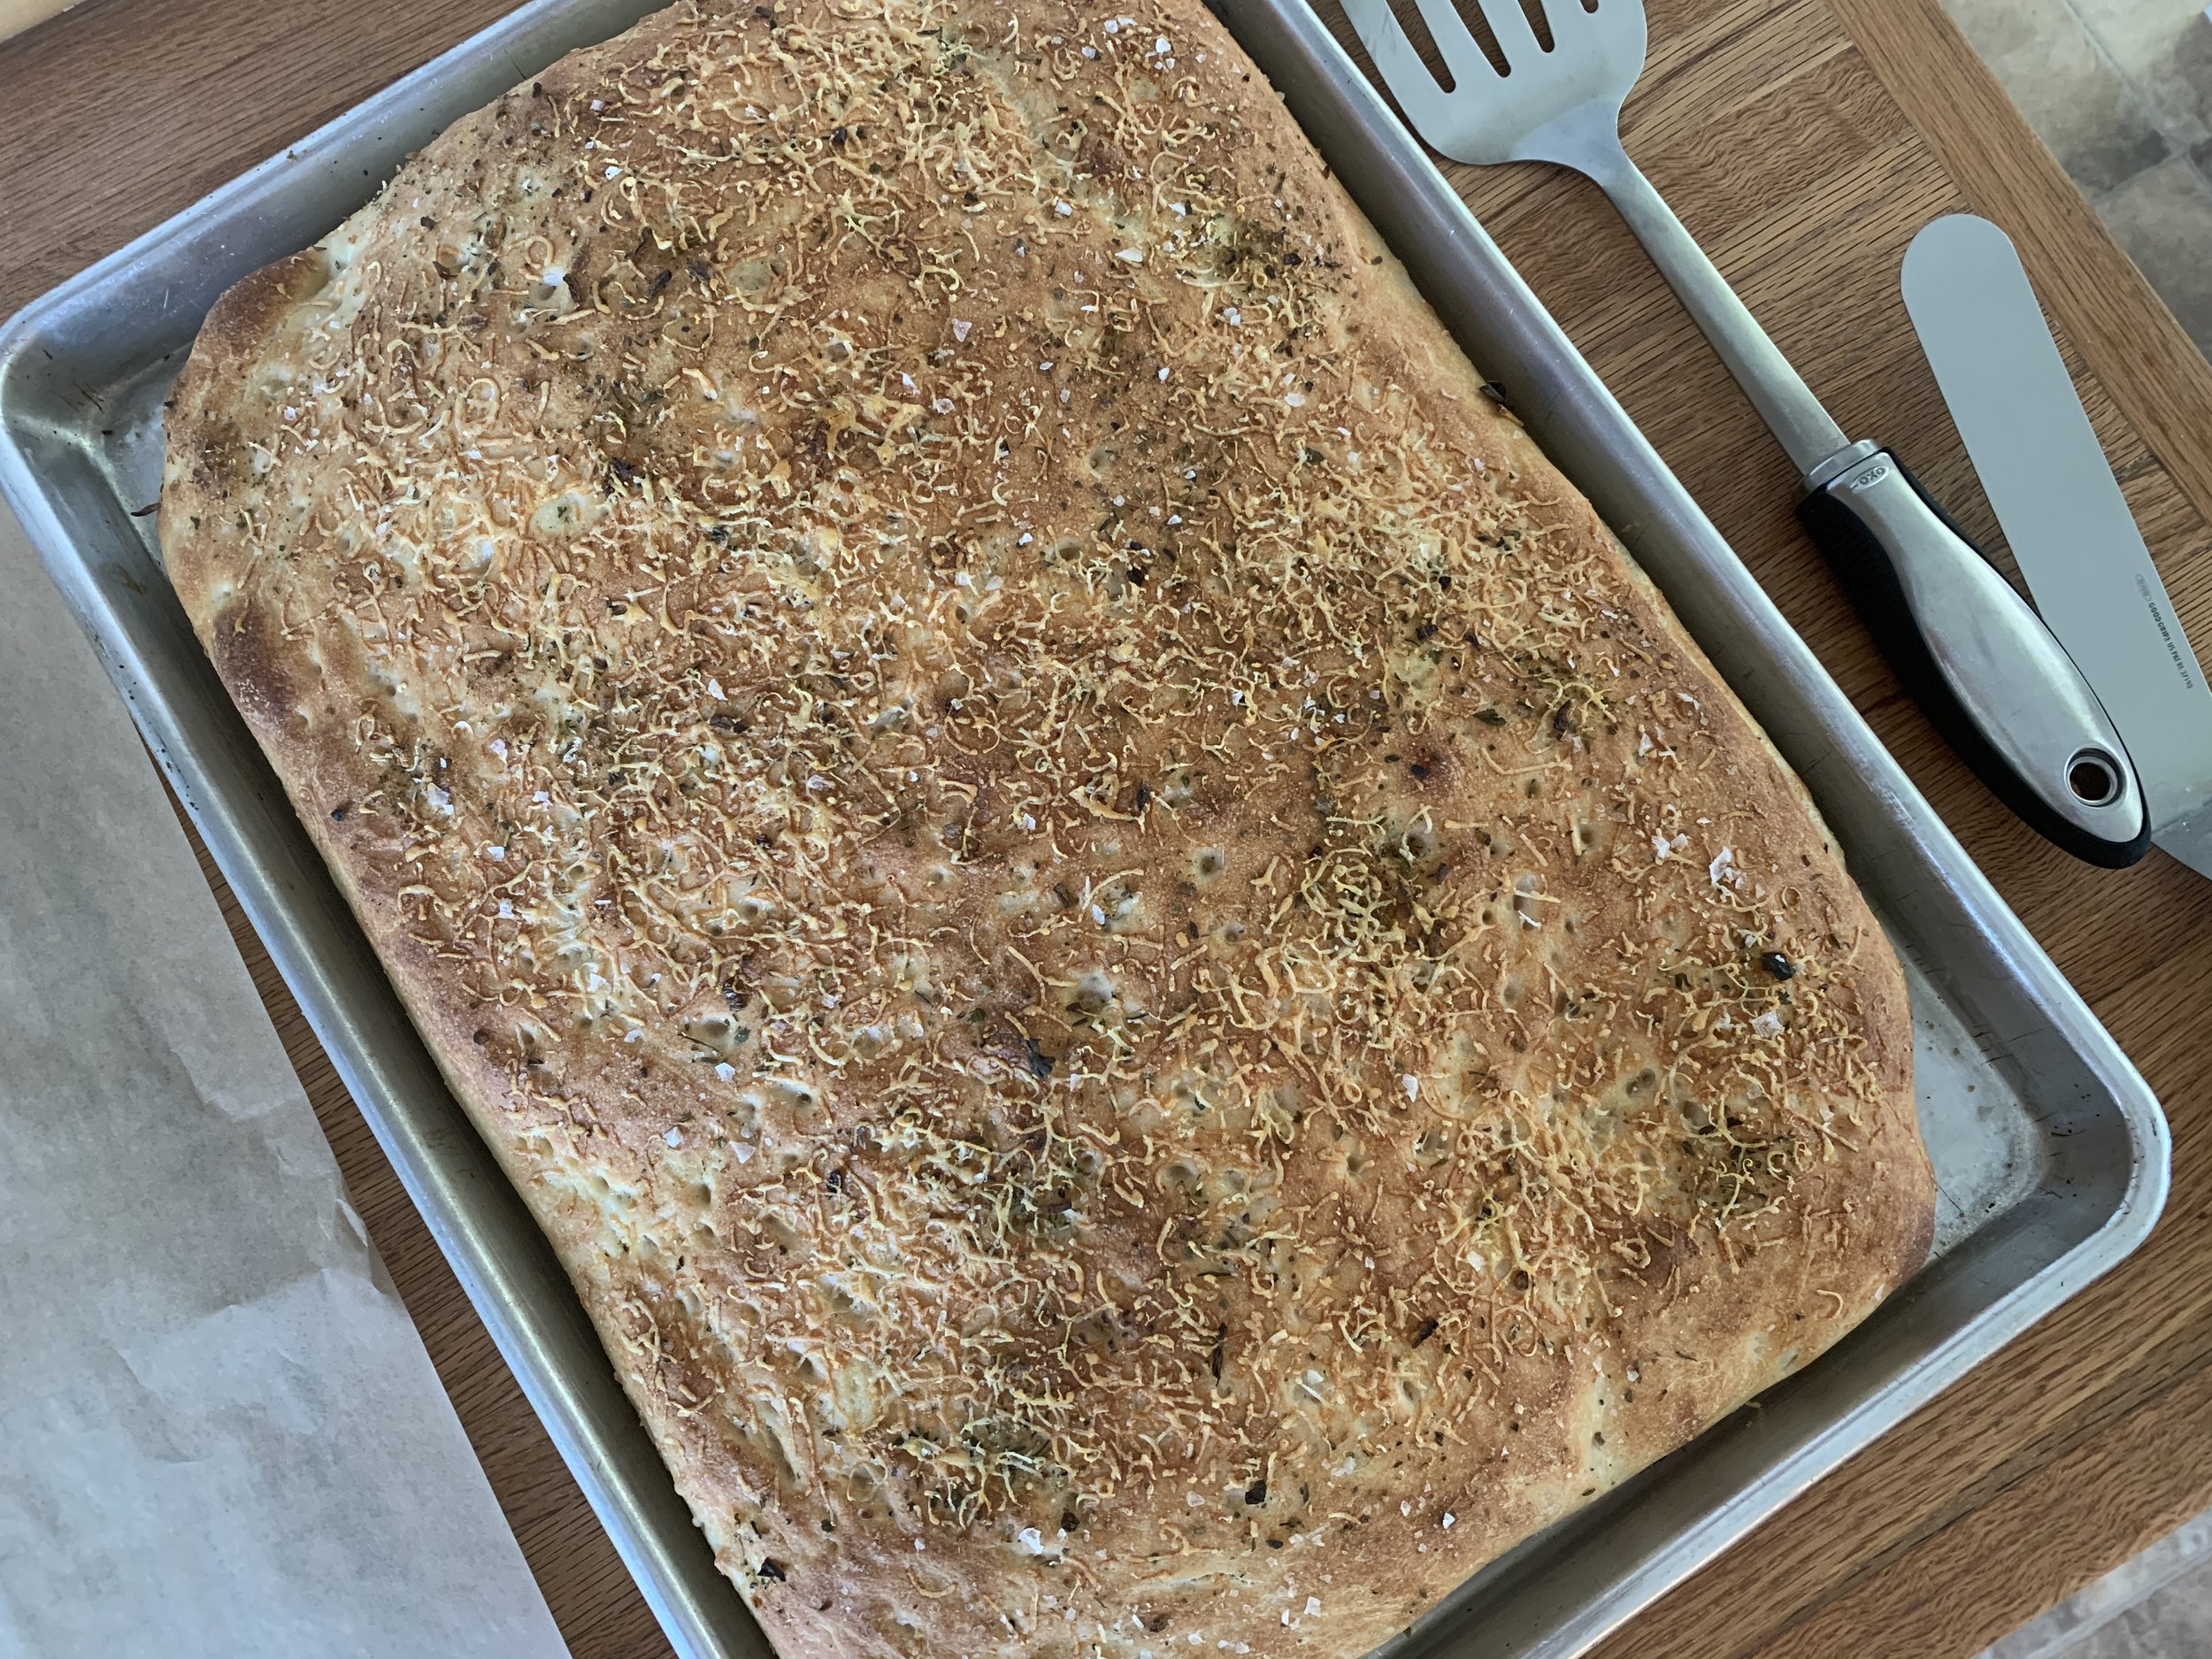
Focaccia

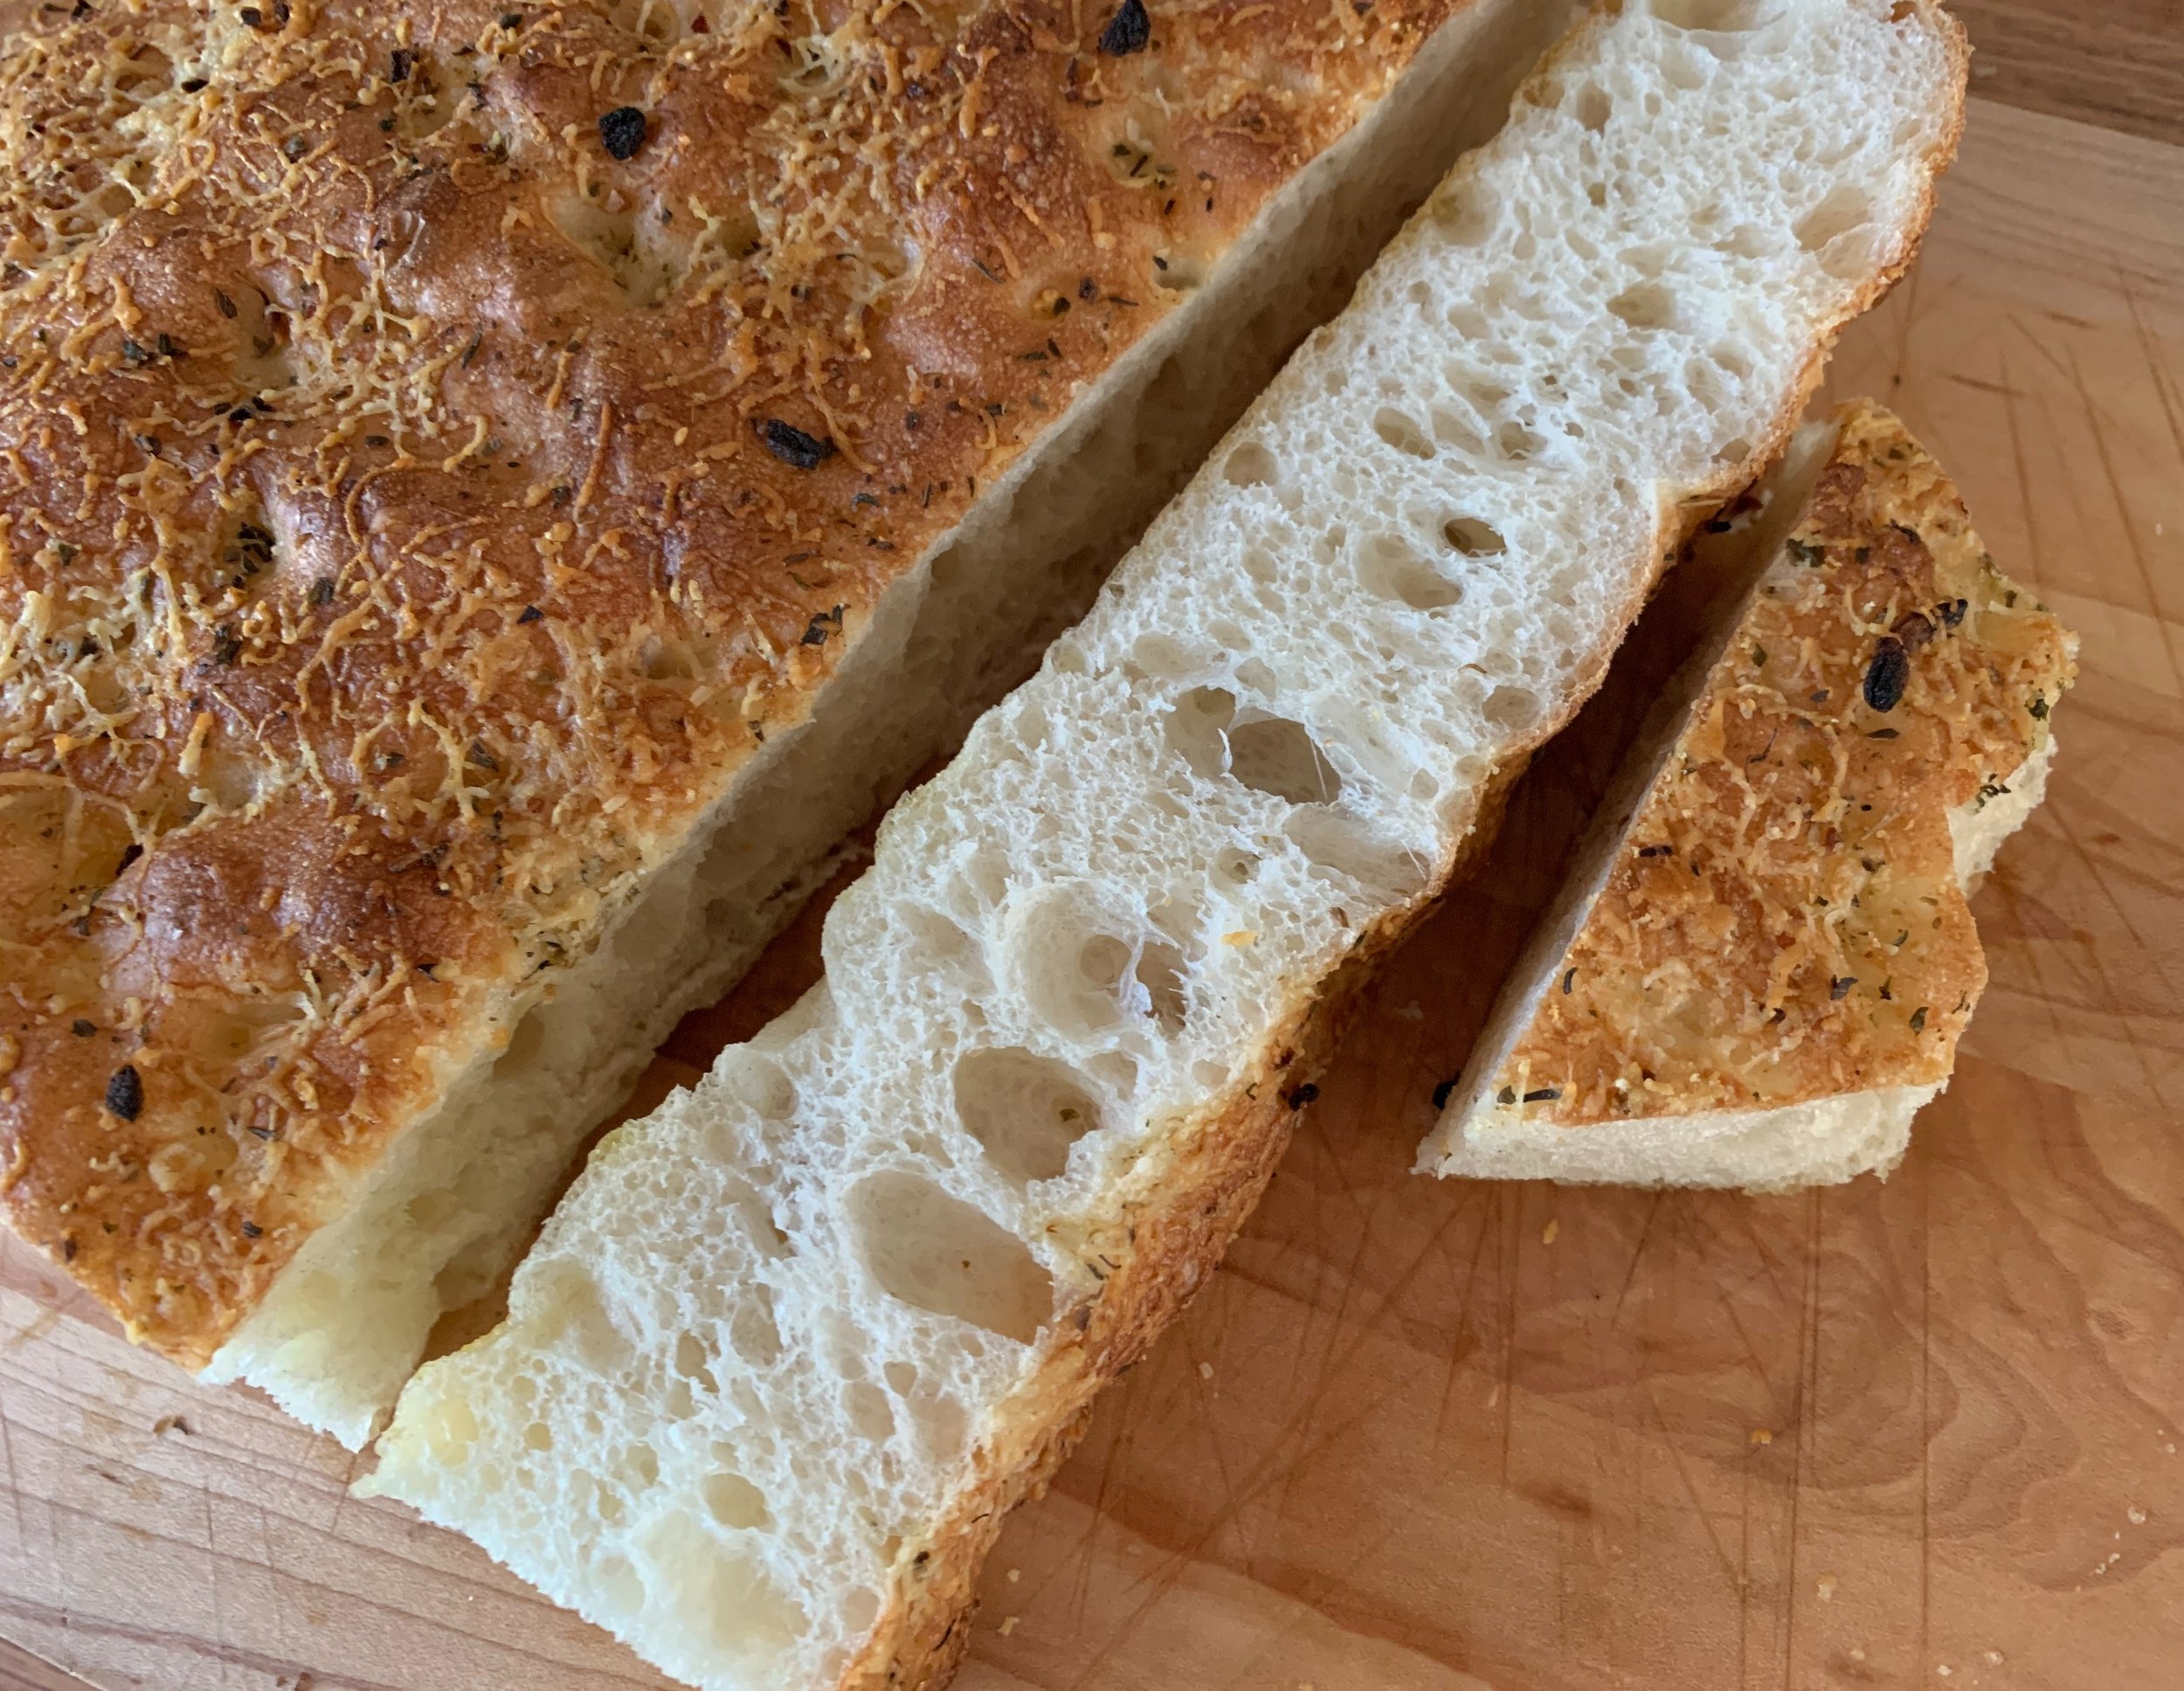
This one is a dandy folks! What a wonderful, luscious and tasty bread.

Let me go back a number of years and tell you about my discovery of Claudia Fleming’s book “The Last Course”, a wonderful and delicious ode to pastry and desserts. Back in 2007 to early 2010 I was the pastry chef at Gracie’s in Providence RI. Being a newbie in the pastry/restaurant world, I was always looking for inspiration for desserts. As it turns out, the Providence Public Library was just a couple of blocks away from Gracie’s, and I would occasionally wander over there after my day’s work to peruse the baking book stacks. Thrilled by the discovery of this particular book, I would often turn to Claudia’s recipes and glean ideas from her creations.

Imagine my delight when learning of Claudia’s second book “Delectable” published in 2022 and dedicated to her late husband Gerry Hayden who, as I understand it, was a very talented chef. For many years the two of them operated the North Fork Table and Inn on Long Island (now under new ownership), and Claudia baked focaccia for the restaurant every day. That kind of experience and expertise is invaluable.

One of the things I love about acquiring new baking books is reading the introduction and gaining an understanding of the author’s philosophy and approach - and, let’s not forget, the recipes aren’t bad either!

I’ve made this recipe a couple of times so far and you can be certain that it will remain a staple in my bread baking repertoire from here on out. I topped mine with a pizza seasoning herb mix we keep on hand along with grated parmesan cheese, but you can create your own version.

I’ve adapted the recipe with some tweaks in ingredient portions based on %hydration (76% here) and the weight of a cup of bread flour that I use. If you’re a recipe reader/comparer as I am, you soon realize the variables that can appear in measures vs. weights, particularly for flour. Some may indicate a cup of flour is 5 oz (140 g), some 4.5 oz (128 g) and some 4.25 oz (121 g). I’ve tested out what a cup of flour weighs for me - typically 127 to 130 g - so that’s my benchmark. I take weights over measures any day.

You need only the very basic ingredients for the dough (bread flour, water, dry yeast and salt), plus olive oil for the pan. Dissolve ~6 g / 2 teaspoons active dry yeast in 483 g / 2 cups room temperature water in the bowl of a stand mixer and let sit about 10 minutes until creamy. This step activates the yeast, however you can skip it if using instant yeast which can be mixed directly with the flour, water and salt.

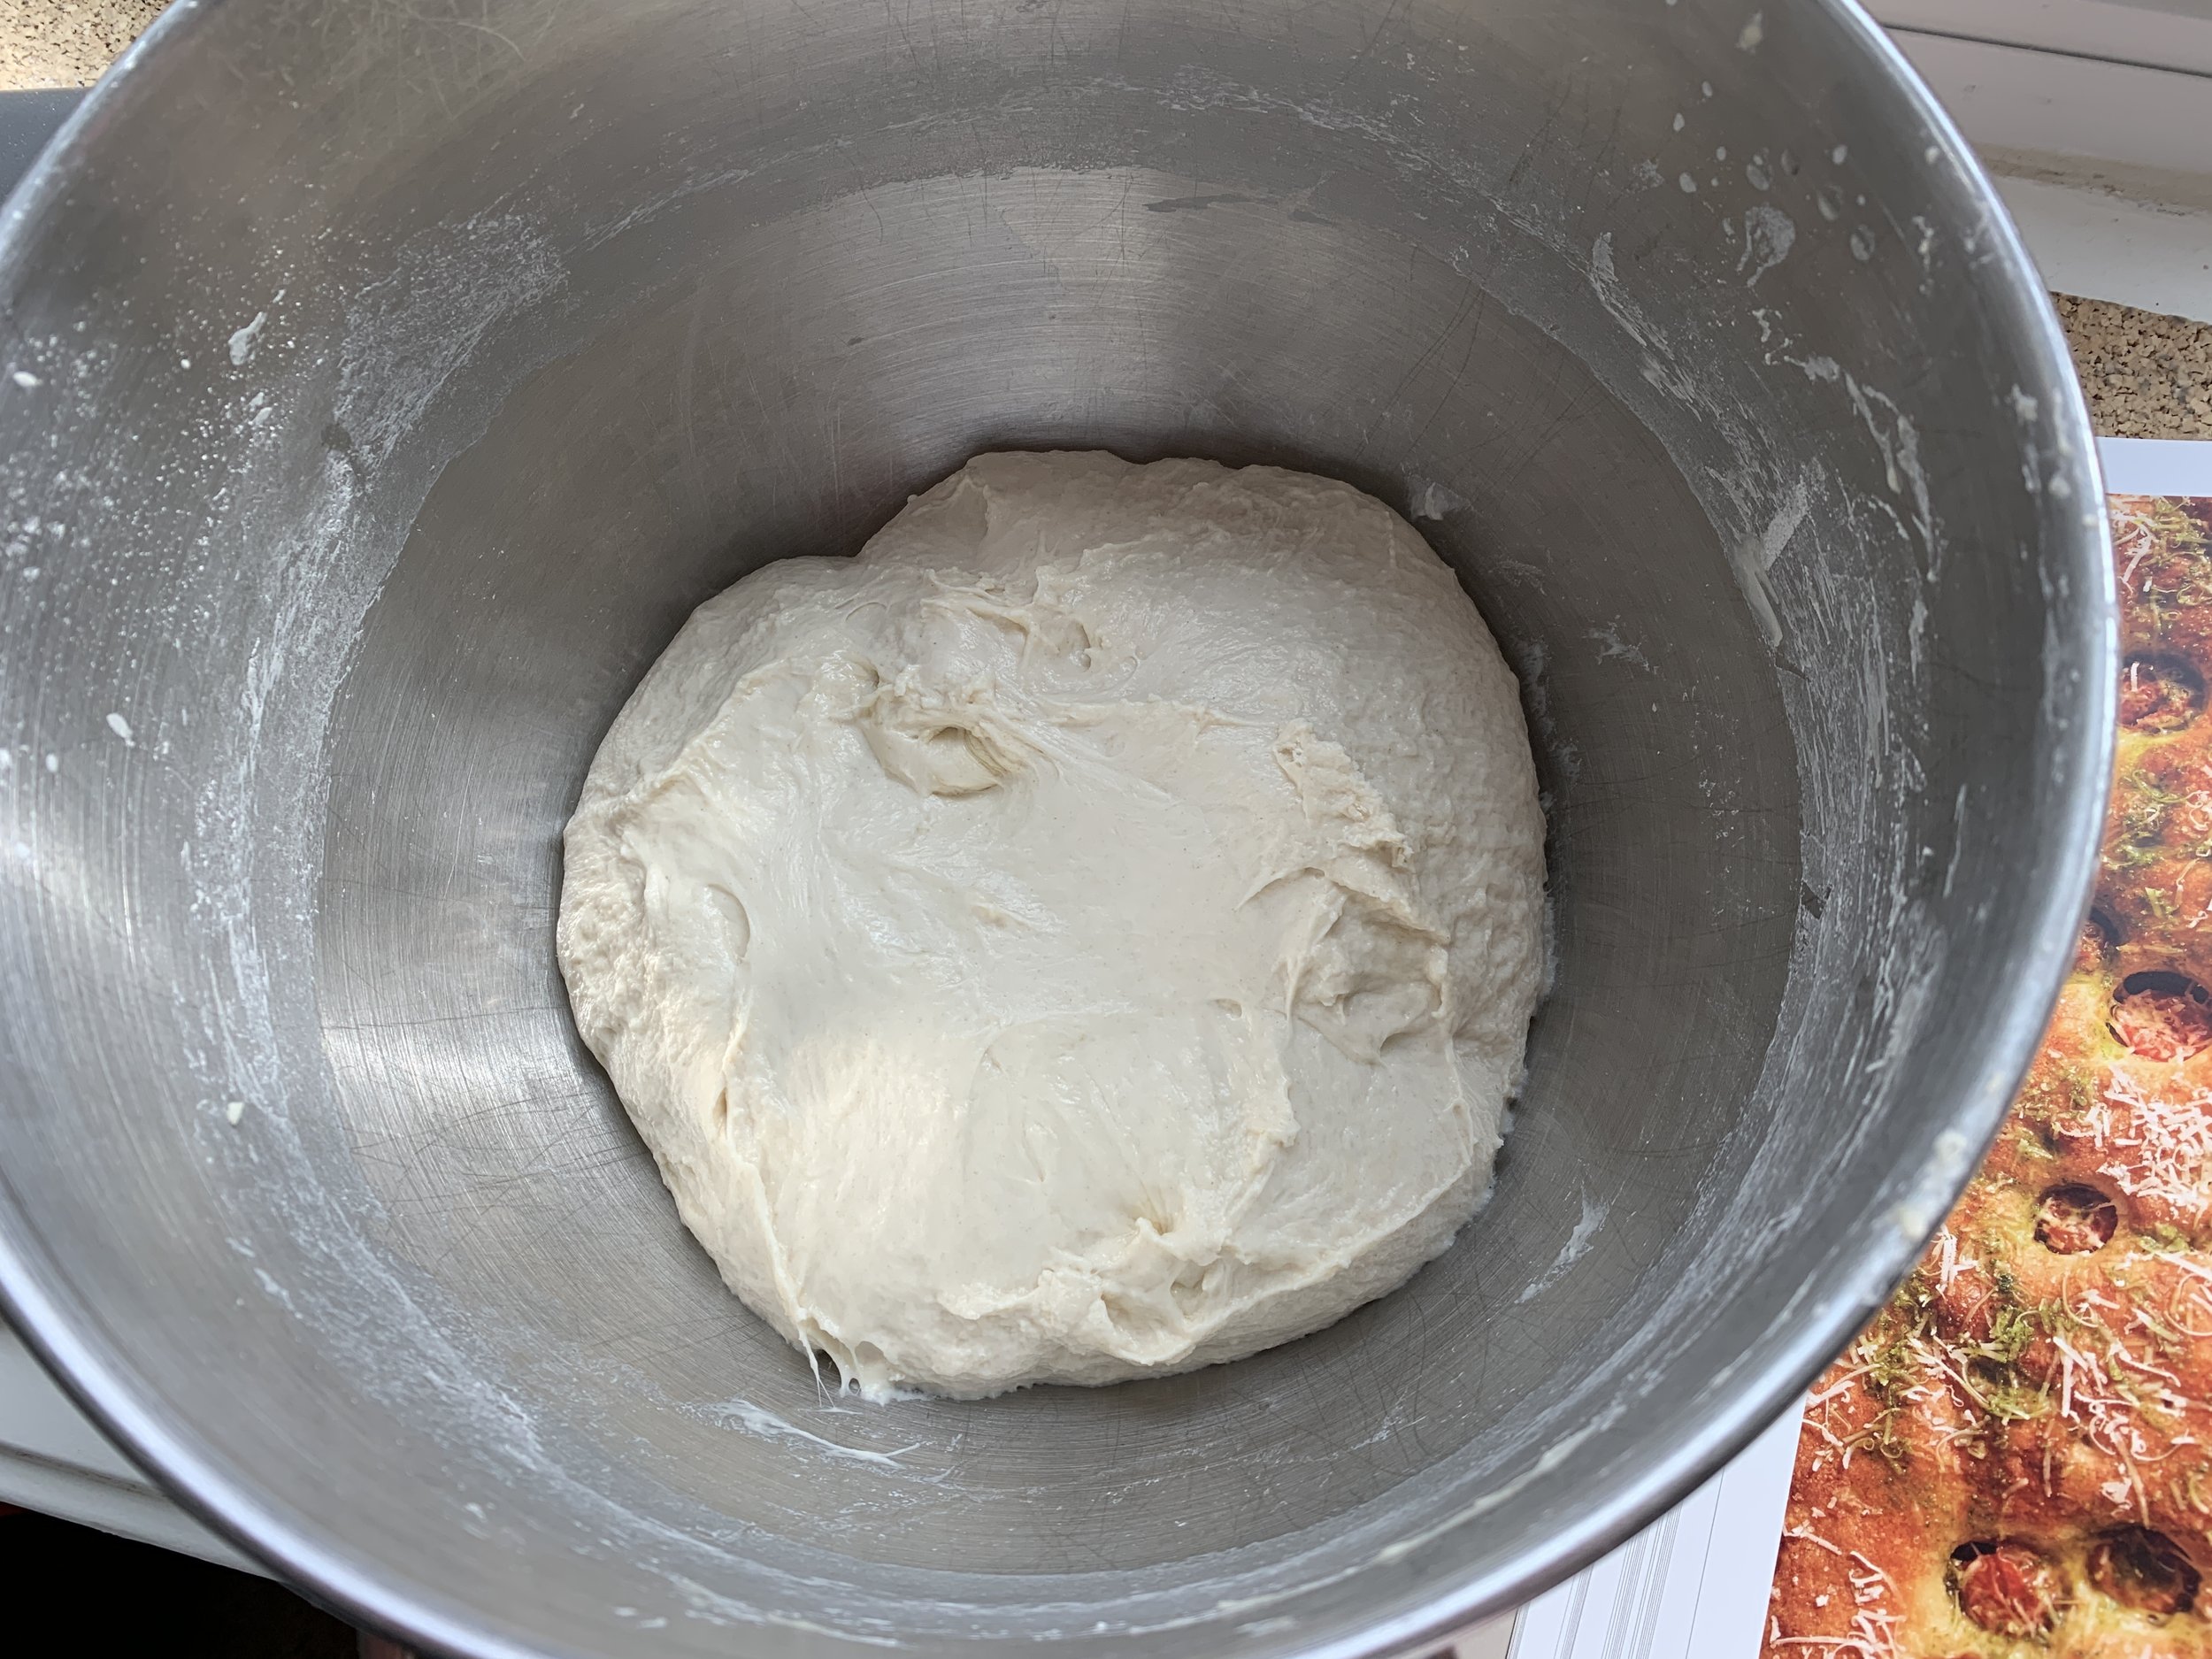
Add 635 g / 5 cups bread flour and 10 g kosher salt to the yeast/water mixture and mix first with the paddle until combined. Rest the dough for 30 minutes to hydrate. Here’s my dough after that rest.

After initial hydration

Now switch to the dough hook and knead on med-high speed for 20 minutes until smooth. My 8 quart Kitchenaid commercial mixer (with which I can also use my 6 qt bowl!) does a great job with it’s workhorse of a dough hook and powerful motor. It’s a beautiful thing.

8 qt mixer with attachments/6 qt bowl

After the 20 minute knead

Place the dough in a lightly olive-oiled bowl and do a folding of the dough to develop the structure by stretching and pulling up one edge of dough into the middle, then the opposite edge, then the other two edges one at a time. This forms a tighter ball of dough. Flip the dough over to coat with oil, cover with plastic wrap and let rise at warm room temperature for 1 to 2 hours until doubled. You can also do an overnight fridge rise if it better suits your schedule.

The first time I made this, I did a 4 hour fridge rise (must have had something unexpected come up?) which I followed by an additional hour at room temperature. It worked. For my second batch I followed the room temperature approach, completing the project over the course of several hours.

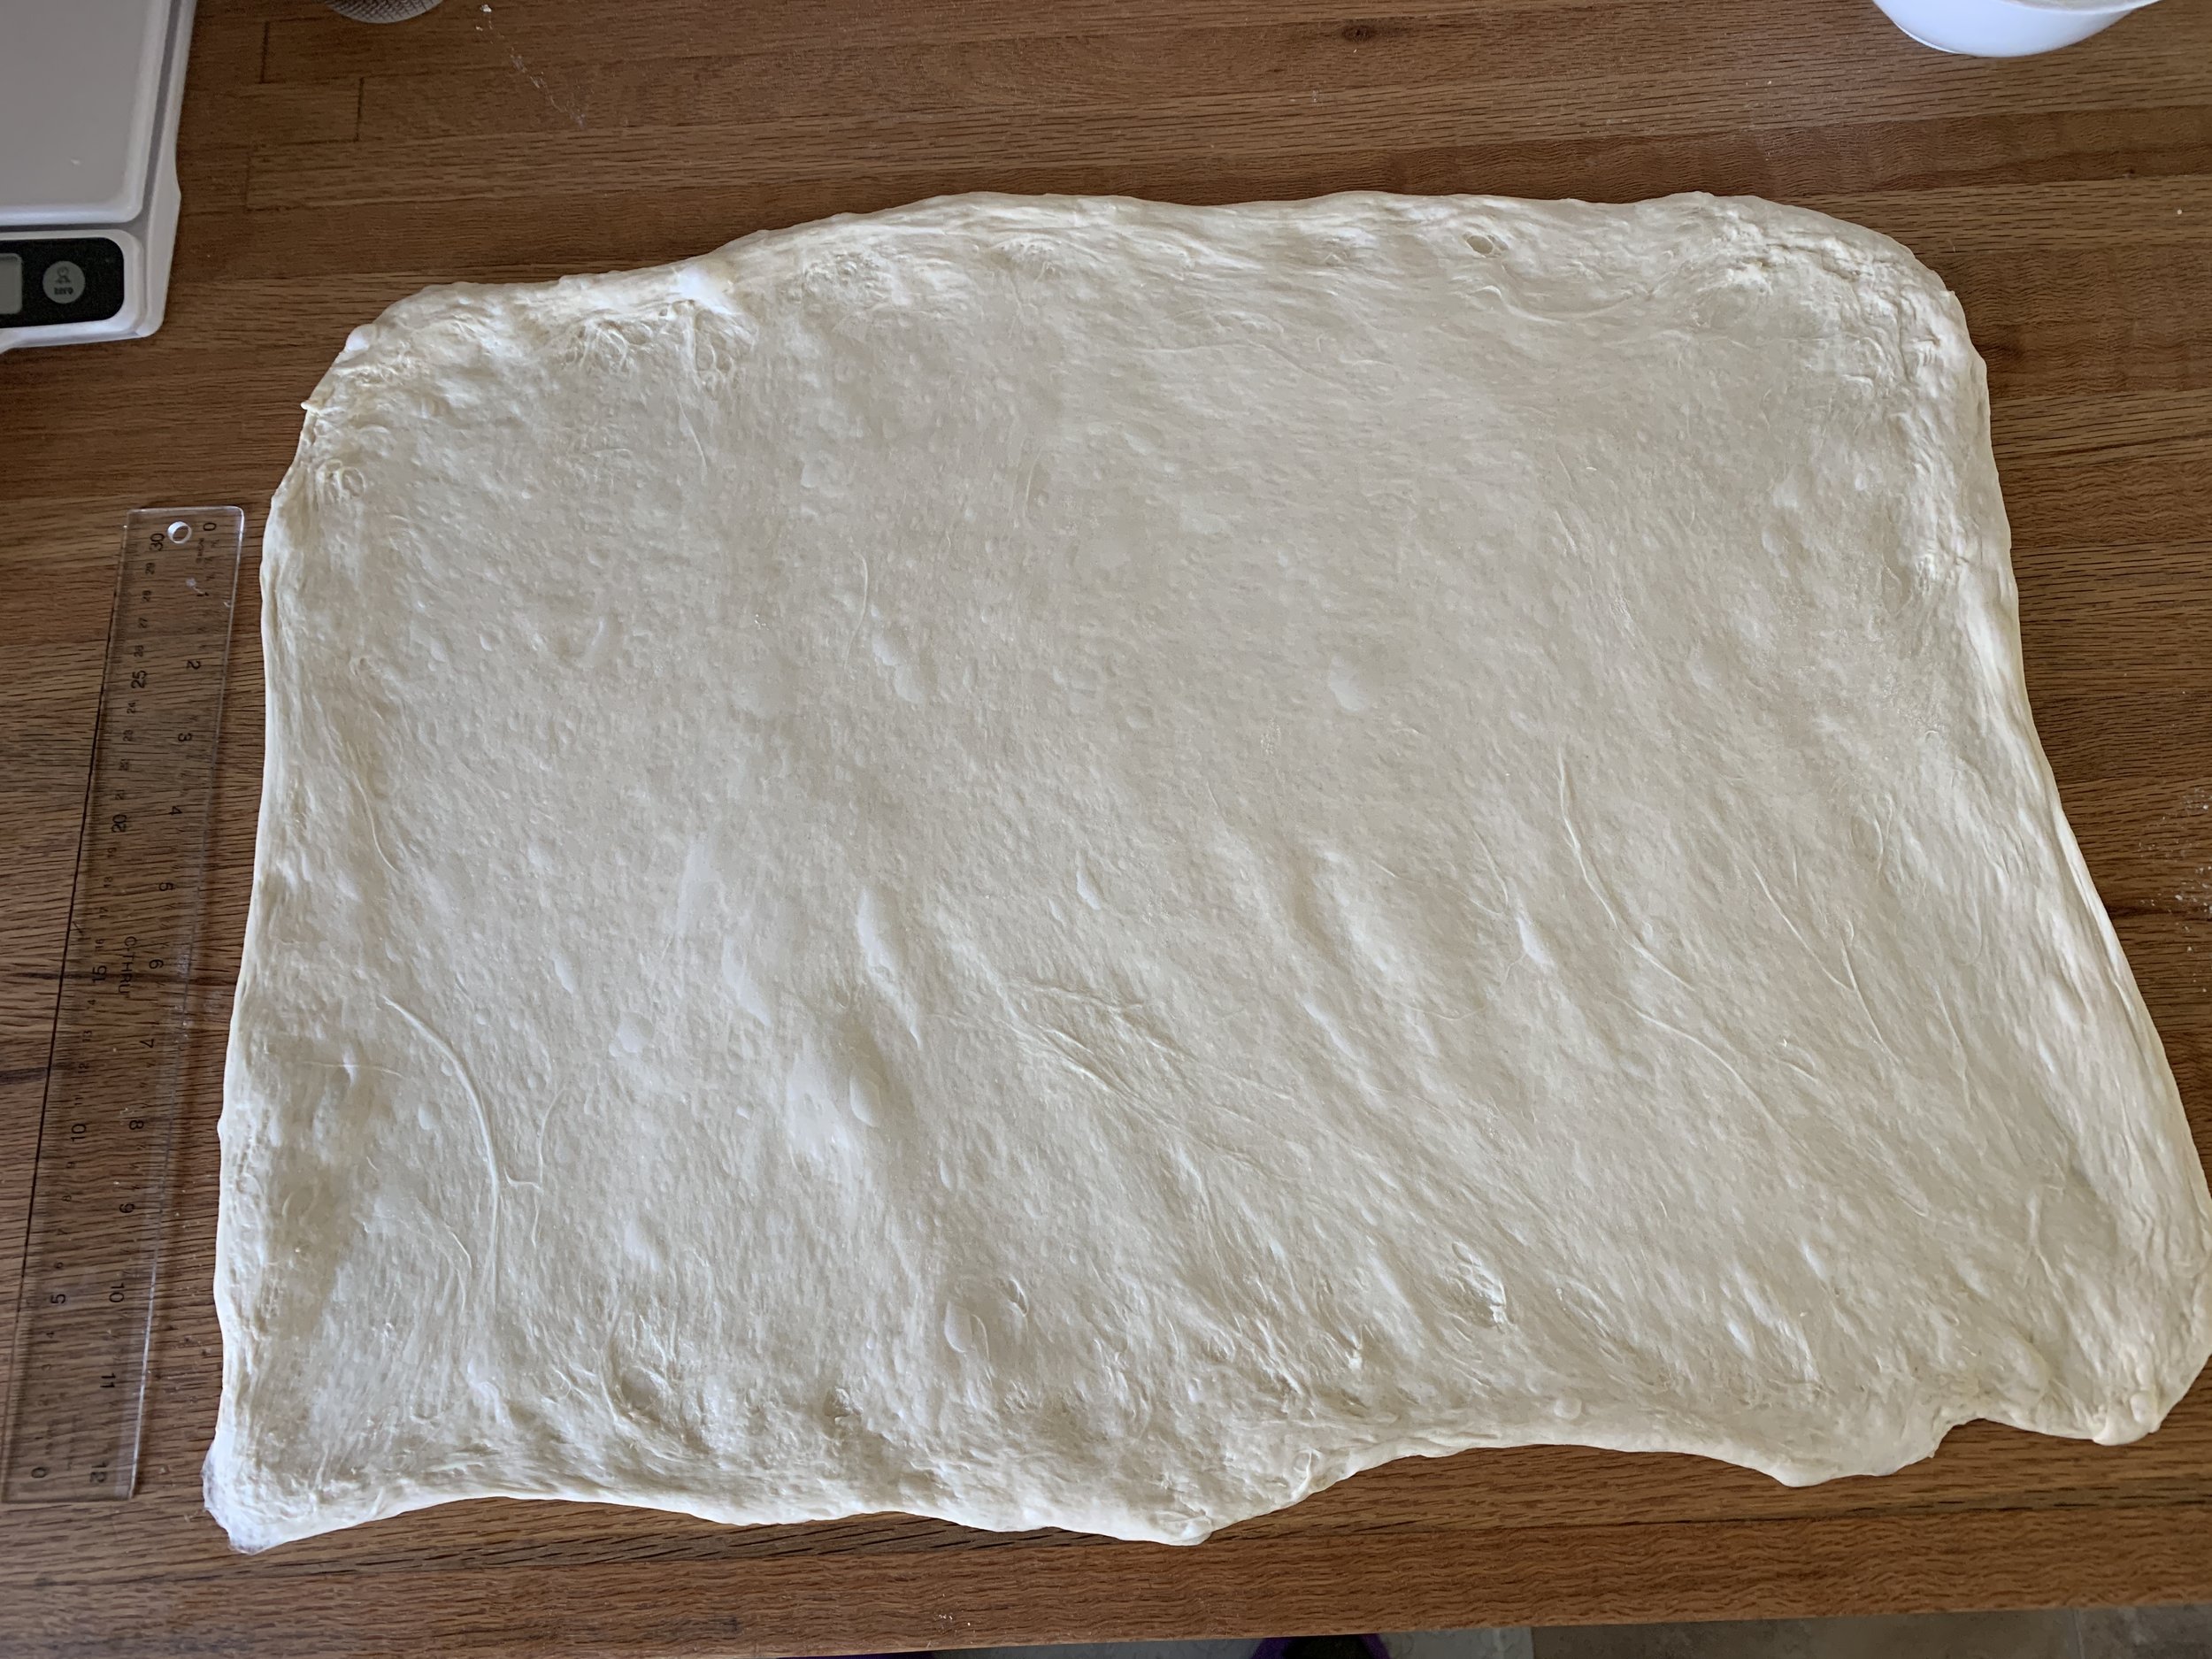
Turn the dough onto a lightly floured work surface, pat it into a square of sorts and stretch it out to about 16”x20”(ish).

Now fold it in thirds length wise (à la the letter or 3-fold we use for laminated dough).

Now fold in the short sides in thirds (another letter fold). Press out air pockets.

Dough package before panning

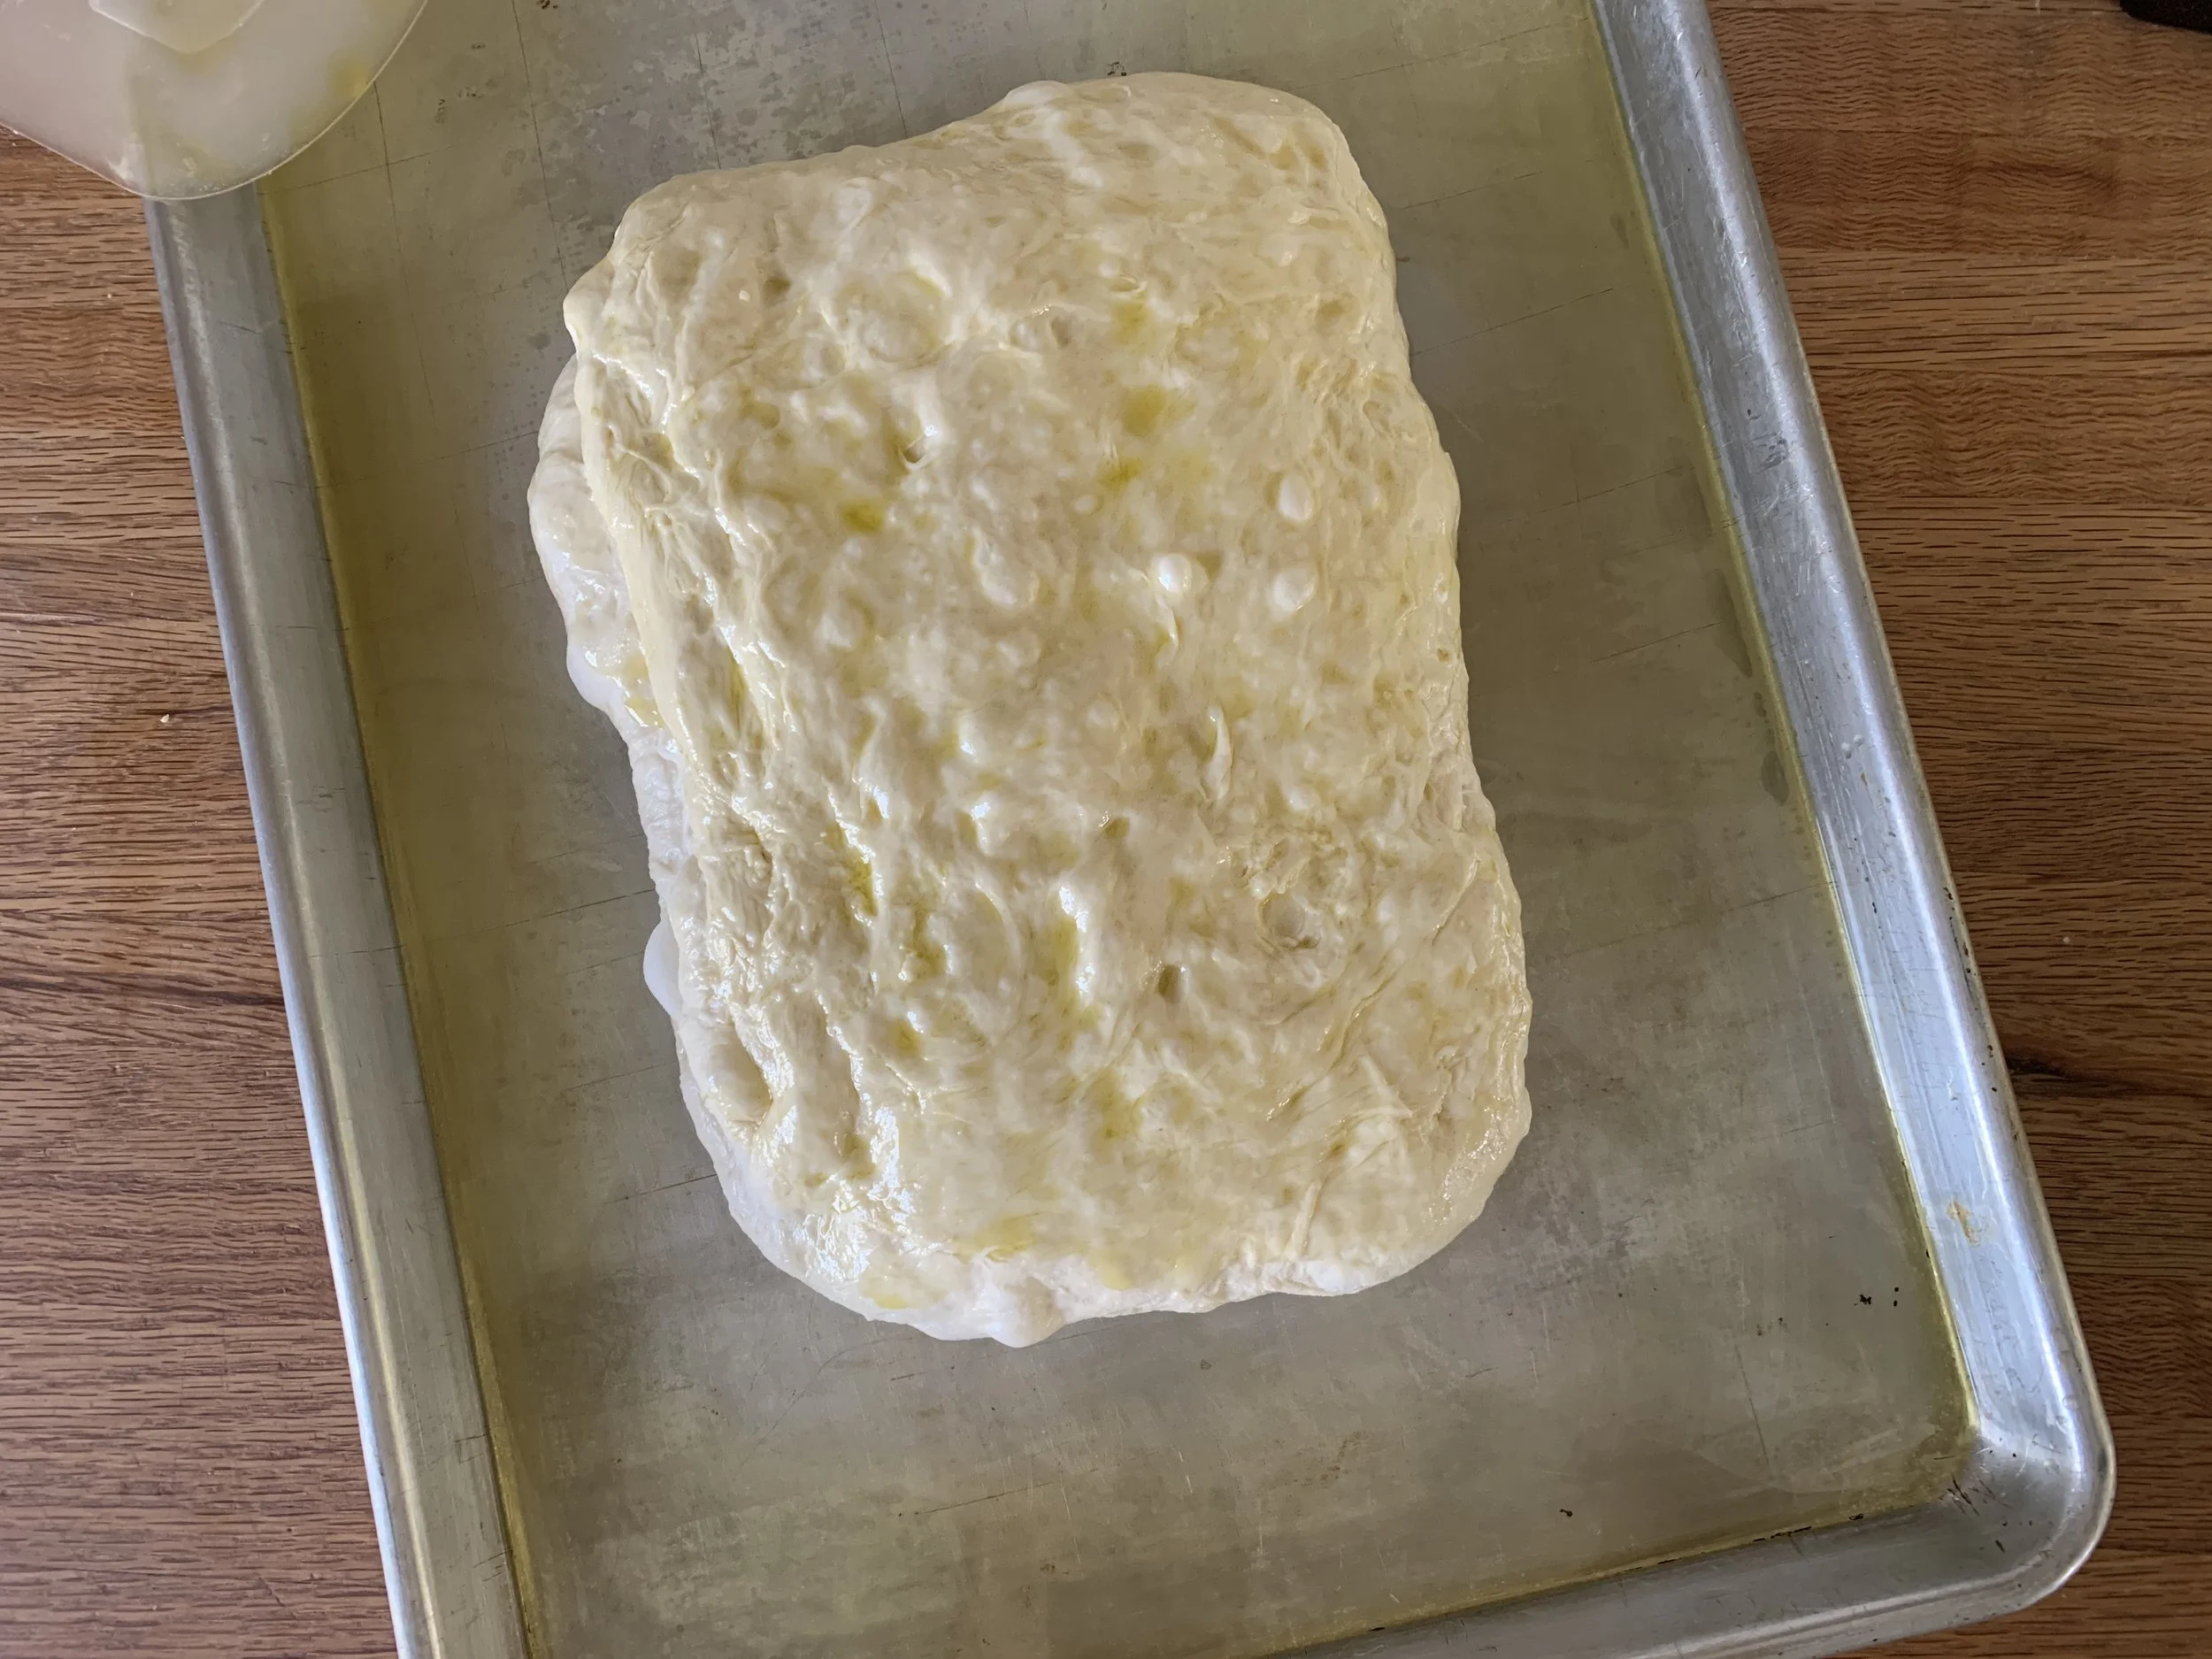
Pour 6 tablespoons extra virgin olive oil onto a half sheet pan, put the dough on the pan and turn to coat with oil. Let rest 10 minutes.

Stretch the dough to fit the pan as best you can. I did this in two steps, letting the dough rest 10-15 minutes in between. Dimple it all over, cover with plastic wrap and let it rise about 30-40 minutes. It will become more puffy.

Before the rise

Heat the oven to 500F. When ready, top with herbs and grated cheese (or your chosen topping(s).

Bake 8 minutes, rotate the pan and bake an additional 7 minutes until beautifully browned.

Mmmm, mmmm!

I slid the whole thing onto a cooling grid and gave it just a few minutes before Steve’s and my tastebuds just had to be put to work. Oh boy. Just the right chew and lightness of texture.

After our initial pre-dinner taste test, we enjoyed more with our evening pasta dish and then divided the remainder to wrap and freeze. It thaws and warms up beautifully in the oven and is great to split for sandwiches or open-faced baked with grated fontina and tomatoes on top or whatever your little heart may desire.

AbsoLUTEly delightful! Thanks Claudia.

Milk chocolate malted ice cream profiteroles

IMG_0677.jpg

After that extensive Danish Kringle post (whew!) I knew it was time for a break with a quick note on a fun and delicious dessert experience.

This past weekend we celebrated Steve’s birthday in isolation, enjoying a tipple of champagne followed by his famous marinated flank steak on the grill, roasted little potatoes and a veggie mix of edamame and last summer’s freezer stashed sweet corn. Mmmm mmmm good.

As luck (or the fates) would have it, I had choux puffs in my freezer that were originally intended for an event that was canceled due to the pandemic, and I’d been scheming about how I might use them. Since anything made with choux paste is on Steve’s favorites list, I knew they would have to be part of his birthday dessert.

I recently posted on making chocolate chunk bars as a way of using up some of the chocolates I had in my cupboard. I still had some Valrhona milk chocolate on hand, as well as Carnation malted milk powder which I originally purchased some months ago to make brown butter shortbread cookies. Inspired once again by Claudia Fleming’s “The Last Course”, milk chocolate malted ice cream was officially on the menu. Profiteroles here we come!

IMG_0686.jpg

What a great plan ahead dessert. Make your choux puffs using your favorite recipe and stash ‘em in the freezer where they’ll be fine for some weeks. Make or buy any flavor ice cream you choose a few days, or even a week or two ahead and you’ll be ready to assemble on the big day.

I made my usual ice cream base and, once cooked and off the heat, blended in 113 g / four ounces chopped milk chocolate, 28 g / one ounce 64% Guittard chocolate discs and a scant cup of Carnation malted milk powder (sift before whisking it in). Then strain and chill.

I usually keep my ice cream bases refrigerated for a day or two before processing. Once the ice cream is churned it needs a good 3-4 hours in the freezer to firm up. But you can make it ahead and it should be fine in the freezer for a week or two.

On the day you plan to serve the profiteroles, take out as many as you want, put ‘em on a parchment lined sheet pan and warm them in a 300ºF oven for 10 minutes or so to thaw them and crisp them up a bit. Cool before slicing the tops open and filling with lovely scoops of frozen goodness. Then simply put them back in the freezer to hold until serving.

IMG_0667.JPG

A quick note about ice cream - this malted milk version was easy to scoop right out of the freezer (maybe due to the malted milk powder??), but some flavors of ice cream will freeze harder than others. Give yours a feel and if it’s rock hard, take it out 10-15 minutes ahead of scooping for greater ease of assembly.

IMG_0668.jpg

For a lovely ending to Steve’s birthday meal I just popped a few in each of our bowls, topped them with chocolate sauce, caramel drizzle and chocolate shortbread cookie crumbs et voilà - un dessert três délicieux!

The next day I had empty puffs on hand and more ice cream so I filled them all and froze them for enjoyment later. I found that once they had firmed up over the next hour or two, I could turn ‘em upside down while gently holding the tops on and dip them in a chocolate glaze made by melting 113 g / 4 ounces dark chocolate with 42 g / 3 tablespoons unsalted butter, then back into the freezer they went.

In case you’re wondering, I had a few crunchy topped puffs in the mix which I left unglazed.

IMG_0674.jpg

Even though we work at keeping our meals pretty darn healthy, during these days of ongoing isolation it’s nice to be able to anticipate a little sweet treat every now and again don’t you think?

Stay home, stay safe and keep on baking!

IMG_0677.JPG

Saint Angel tart

IMG_0201.jpg

Along the lines of the tarte au fromage blanc that I made during the summer of 2018 as part of my baking with cheese series, this Claudia Fleming inspired tart is reminiscent of a soufflé, using a pastry cream base to which is added triple crème cheese and a lightly whipped meringue. Yum!

In preparation for this project I returned to our favorite cheese shop, The Cheese Lady, here in Grand Rapids. Steve and I never turn down an opportunity to drop by to chat, taste and buy (and they sell some great wines to boot). Love it!

After tasting a few triple crème options I went for Saint Angel, a creamy cow’s milk cheese from the D’Affinois group. It has a lovely, slightly nutty taste with just a hint of salt - perfect for a tart just like this one.

IMG_0181.JPG

I used my favorite pâte sucrée d’amandes with the addition of ~ 60 g of toasted and coarsely chopped hazelnuts (following Claudia’s lead) for the crust. Below is the lined tart ring before blind baking.

By the way, the base dough recipe makes enough for two 9-inch tarts so I simply wrapped and froze the portion I didn’t use. Nothing wrong with that!

IMG_0182.jpg

The tart shell can be blind baked at 325ºF and set aside for several hours before filling or even frozen a few days ahead to give your project a jump start before the day you wish to serve it.

With your blind baked shell at the ready, heat your oven to 350ºF.

For the filling I prepared a HALF recipe of my basic crème pâtissière using 3 large eggs, divided - yolks for the crème and whites placed into the bowl of a stand mixer and set aside. Once the crème has cooked and thickened, blend in 283 g/10 ounces Saint Angel cheese (rind removed and cut into pieces), then strain into a large bowl and set aside.

IMG_0193.jpg

Using the whisk attachment, whip the 3 egg whites on medium-low speed until foamy then slowly shower in 150 g/3/4 cup granulated cane sugar. Once all of the sugar is added, whip on high speed until medium stiff peaks form.

Gently fold a third of the beaten whites into the triple crème mixture, then fold that mixture back into the remaining meringue in two additions.

IMG_0195.jpg

Transfer the filling into the baked tart shell . . . .

IMG_0196.jpg

and bake for 20-25 minutes until puffed and golden.

IMG_0200.JPG

You can certainly plan to serve this soon after baking, yet knowing full well that it would collapse, I opted for letting it do just that, cool down and then give it a try.

Delicious, light, creamy, a hint of salt and a sublime taste treat indeed.

IMG_0203.jpg

Thinking about accompaniments to a good triple crème cheese, I tried a dollop of cherry jam on top - not bad although Steve wasn’t a big fan. Otherwise toasted nuts, a drizzle of honey, roasted fruits/fruit compotes, berry sauces or coulis would be deelish too! Give it your own spin.

Good news! The tart held up well in the fridge (covered) for the next couple of days. Hurray!

Here’s to everyones health, safety and getting through the uncertainties in today’s world. Take care all of you.

Lemon ricotta blueberry tarts

IMG_4129.JPG

It’s definitely blueberry season here in West Michigan - love it! We’ve been deep into it for the past few weeks and they’re still coming. Of course I simply had to create something with these luscious orbs so I turned to some of my favorite base recipes.

IMG_4139.JPG

I love choosing my components and flavor profiles while giving myself plenty of time to make each part, assembling the final result when I’m ready to serve and enjoy. The freezer plays an important roll here folks and is one of the most useful tools in the baking and pastry armamentarium. Hip hip hooray for freezers!

I recently purchased a set of 80 mm square perforated tartlet forms that came with a 6-well silicone mold to create fillings that fit oh so nicely in or atop the tart shell. They’re made by my favorite Italian silicone flexi-mold maker Silikomart. What a cool way to create a composed tart - right up my alley. And let’s not forget - soooo many possibilities.

Of course I’ve been itching to try them out and what better way than creating a blueberry lemon flavor combo to help celebrate our summer’s berry bounty.

IMG_4118.jpg

Perforated tart forms have been available for some years now, the idea being that the tart crust will brown ever so golden-ly since the dough is exposed to more oven heat via the numerous little holes.

For this project I started with a version of pâte sucrée based on a Claudia Fleming recipe from her book “The Last Course”. It’s very reminiscent of a honey graham cracker: cream 227 g (2 sticks/8 ounces) unsalted softened butter with 50 g granulated sugar and 50 g dark brown sugar until smooth; add 84 g (1/4 cup) honey and beat until well blended; in a separate bowl mix together 195 g (1.5 cups) all purpose flour, 125 g (1 cup) whole wheat pastry flour, 1 teaspoon salt, a pinch of cinnamon and some freshly grated nutmeg; add the dry ingredients to the butter/sugar/honey mixture in two additions and blend just until the dough comes together. Wrap in plastic wrap and chill at least an hour before rolling out.

NOTE: this makes more than needed for the six square tarts; the extra dough will be OK wrapped in the fridge for a couple of days (if you have another use for it soon) or in the freezer for several months. If frozen, thaw overnight in the fridge before using.

I lined my square tart forms, blind baked them and filled them with my favorite lemon tart filling á la Jacques Genin, pouring the still warm mixture into the baked shells (note: the baked shells don’t have to cool all the way before adding the lemon filling). Bake at 300ºF for about 10-15 minutes until the filling is set (look for just a hint of jiggle in the center). Let cool and store covered in the fridge for a day if you’re planning on serving them soon or freeze for several days or up to 1-2 weeks. If frozen, you can top with the ricotta custards right out of the freezer (more on that coming up!).

IMG_4121.jpg

It’s all about the components - work on them step-by-step then put it all together for the pièce de resistance!

Now for the lemon ricotta filling (makes plenty for six 80 mm square tarts plus a number of additional flexi-mold shapes of your choice - I did a bunch of ingots which are just waiting in my freezer for the next creation!).

IMG_4122.jpg

Blend 2 cups whole milk ricotta with 150 g (3/4 cup) granulated sugar, 1 tablespoon cornstarch, 1 teaspoon lemon zest (or lemon/lime zest combo), 1 teaspoon vanilla and 3 large eggs. In this case I also blended in 1/4 cup of leftover lemon tart filling to add a bit more tang.

Heat the oven to 325ºF. Fill your chosen flexi-molds and place the mold(s) on a sheet pan. Carefully pour hot water around the base of the molds so as to create a shallow water bath around the molds. Bake about 20 minutes until set.

Remove from the oven, gently lift the flexi-mold(s) and place on a wire grid to cool. Once cool, place the molds in the freezer to firm up, at least 4 hours or overnight.

When ready to assemble, pop the frozen ricotta custards out of the molds and place on top of the lemon filled tarts.

IMG_4123.jpg
IMG_4124.jpg

Once this step is complete, place the assembled tarts in the fridge for several hours to allow the ricotta custards to thaw. The custards will hold their shape in the fridge and be ready for the blueberry topping for serving. Yes!

IMG_4128.jpg

For the blueberry topping: place 2 cups fresh blueberries, 50 g sugar, 2 tablespoons water and the zest of a lemon in a saucepan over medium heat until the berries pop (4-5 minutes). Cook another few minutes to jam-ify a bit, transfer to a clean bowl, stir in a splash of lemon juice and chill. When ready to garnish your tarts, stir in an additional 1 cup fresh blueberries and spoon the topping over the chilled lemon tarts. You’ll have plenty - the leftovers will keep in the fridge in a covered container for 2-3 days (hmmm . . how about on top of your favorite vanilla or berry or peach ice cream?). Sounds deelish.

Et voilà! You are ready to enjoy a delicious summer treat. The combo of the honeyed whole wheat crust, tart and tangy citrus filling, smooth ricotta custard and luscious berries is absolutely stunning!

And yes - Steve gave it a thumbs up!

IMG_4130.JPG

Ooooo - next time how about chocolate pâte sucrée, dark chocolate ganache filling, topped with an orange hazelnut custard and garnished with crunchy hazelnut praline? Sounds like a great autumn/winter project to me!