Chocolate babka buns

3B564E9B-75EC-46B6-BE88-1E49DA77C0B2_1_201_a.jpeg

These are NOT the prettiest pastry in the case BUT! They are dee-licious. Mmmmmm!!

I was on a mental chocolate bun kick, trying to decide what chocolate-y goodness I might create for “Pastry Friday” at a nearby assisted/independent living facility. Thinking of something twisty or swirled, babka came to mind as the basic idea but this time in individual bun form.

I wrote a series of babka posts during the spring of 2017 but haven’t returned to that particular pastry for awhile now. It’s time.

I had a chocolate babka recipe in my files from Sur La Table teaching days - it was one we never ended up making in class, but I saved it nonetheless. The filling looked very intriguing but different from other filling iterations I’ve seen. The ingredient portions had me wondering so I went to the “trusty” internet to google “best chocolate babka filling”. And what to my wondering eyes did appear? A NYT article/recipe on chocolate babka by Melissa Clark that was EXACTLY the same as this particular SLT version. My oh my, how intriguing is that?

At any rate, I decided to go for it and go for it I did.

The dough is a brioche like number that gets a first rise and then an overnight in the fridge - gotta develop that flavor! Compared to my usual brioche recipe in which I keep ingredients cold, Melissa’s is less enriched with half the milk (slightly warmed), one less egg and about half the butter (egg and butter at room temperature.) Vanilla and nutmeg add some wonderful flavor too.

Here’s the dough after initial mixing;

A513BC37-F037-4D25-9B93-C37CF3F182F5_1_201_a.jpeg

and after a 2 hour rise.

43BEF7DB-6207-48A4-A33C-DBCC08485C79_1_201_a.jpeg

Gently deflate, form a ball then wrap and refrigerate overnight.

3F21B2CB-C431-4C9C-9ABE-16A2E407B833_1_201_a.jpeg

There are three more things that have to be prepared for assembly and final garnishing. They can all be prepared the day before and refrigerated, but I found it easiest to do it the day of baking.

The filling is fudge-y and oh so tasty. Make it 30 or 40 minutes ahead of taking the dough out of the fridge, since it has to set up a bit to make it perfectly spreadable. I reduced the sugar in Melissa’s recipe from 100 g to 50 g. Here’s how it goes: medium saucepan; 50 g sugar, 180 ml heavy cream, pinch kosher salt; simmer, stirring on and off for 5 minutes to dissolve sugar; scrape into a bowl and blend in 170 g chopped dark chocolate (66% is nice), 113 g unsalted butter (cubed and at room temp) and 2 teaspoons vanilla extract until smooth; cool to room temp.

The chocolate streusel is for final garnishing just before the bake so you can put that together easily during the proof. Here’s how it goes: stir 60 g all purpose flour (or whole wheat pastry if you have some), 45 g granulated sugar, 11 g cocoa powder (Dutch processed is my go to) and 1/2 teaspoon kosher salt together in a bowl; stir in 64 g melted butter with a fork to form large moist clumps. Melissa adds 50 g mini chocolate chips too but I left those out. Set aside.

Next is a simple syrup that will be brushed on after the bake. Here’s how it goes: combine 2/3 cup granulated sugar with 2/3 cup water in a small saucepan; bring to a simmer and simmer a few minutes to dissolve the sugar. Set aside.

When ready to proceed with roll out and assembly, remove the dough from the fridge and divide it in half (it won’t have risen much). Going for a yield of 18 portions, I had my 3” Fat Daddio cake pans buttered and coated with raw sugar standing by. P.S. I have only 12 Fat Daddio pans and used 6 ramekins in addition.

4EAB6249-6954-4053-AA40-E50A18694B61.jpeg

The next few steps are the same as if you were making classic babka in loaf pans. Work with one half at a time, keeping the other half in the fridge until ready.

Roll each half into a 9”x18” rectangle.

2D5509E8-3C5A-41A2-BF50-7B12EEA493C3_1_201_a.jpeg

Spread half the chocolate fudge mixture on each. Heaven.

15A3A31A-1E42-4C95-9CF4-E241AECC8A94_1_201_a.jpeg

Roll into a tight coil then place on parchment and into the freezer for 15 minutes or so.

Rolling, rolling, rolling . . .

Rolling, rolling, rolling . . .

Place the chilled log on your work surface, seam side down, and slit it right down the middle, turning the pieces outward to expose the filling. I used my trusty bench scraper.

6C393F37-46FB-4700-A98C-01C3211816D2_1_201_a.jpeg

Now twist the 2 pieces around each other, keeping the filling facing up.

I gave the twist a good final snugging up before dividing.

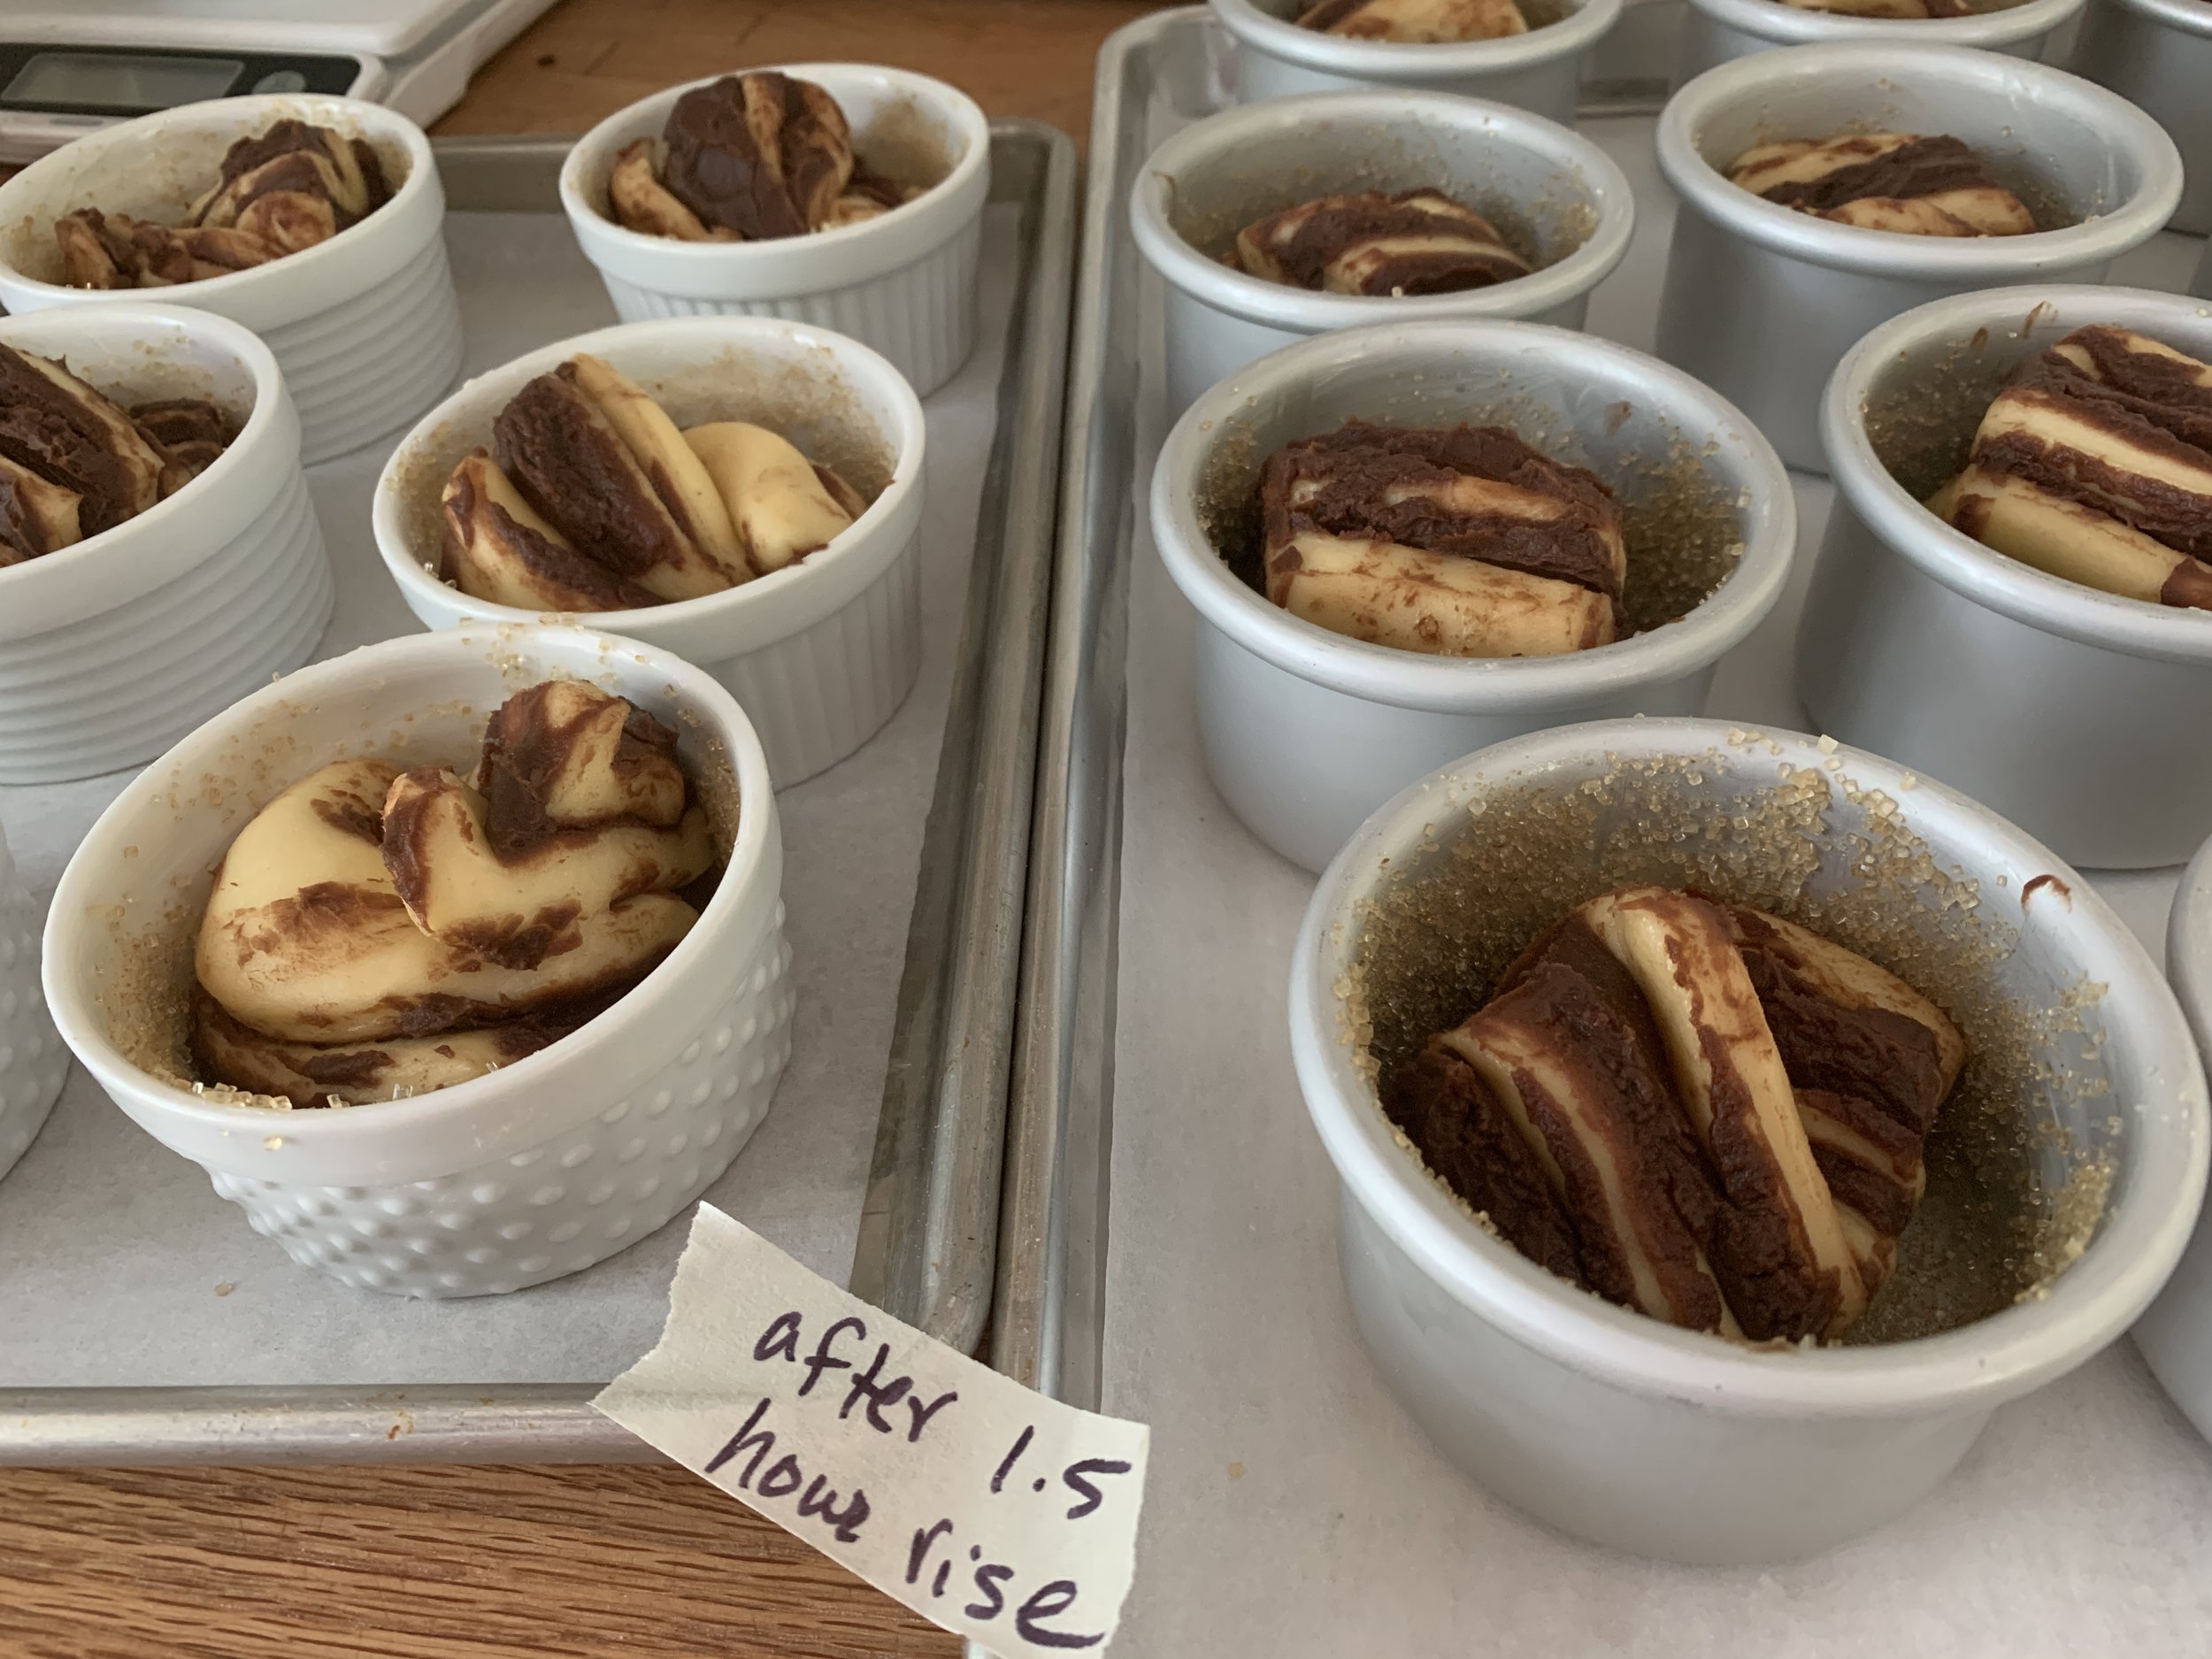
Here’s where I veer away from the classic loaf babka. I cut each twist into nine 2” lengths for a total yield of 18 portions. Tuck each piece into the prepared pans.

Cover with lightly buttered film wrap and let rise for 1 to 1.5 hours. At about an hour in, heat the oven to 350ºF.

They won’t achieve a significant doming and filling the pan type of rise but you should appreciate puffiness.

Just before going into the oven, divide the streusel over the tops of the buns using a fork and your fingers to separate clumps a bit.

Bake about 20-25 minutes, rotating the trays half way through. NOTE: if you’re making two full size loaf babkas, baking time is 40-50 minutes.

I look for browning of the dough edges and a tester coming out clean. It’s a bit messy with the chocolate and streusel so aim the tester into dough (rather than chocolate goo) as much as possible.

Just out of the oven, brush with simple syrup as best you can. The streusel and chocolate on top makes it a bit tricky, but I tried to focus the syrup on the obvious browned dough edges.

Let sit about 10 minutes then ease out of the pans/ramekins with a small offset spatula, running it around the edges to loosen the crunchy bits.

At first I was afraid these would fall apart like a pull-apart roll but as I gently released them and placed them on a cooling grid, they held their shape just fine.

Once fully cooled they maintained their integrity very nicely. Whew!

Taste test time!!

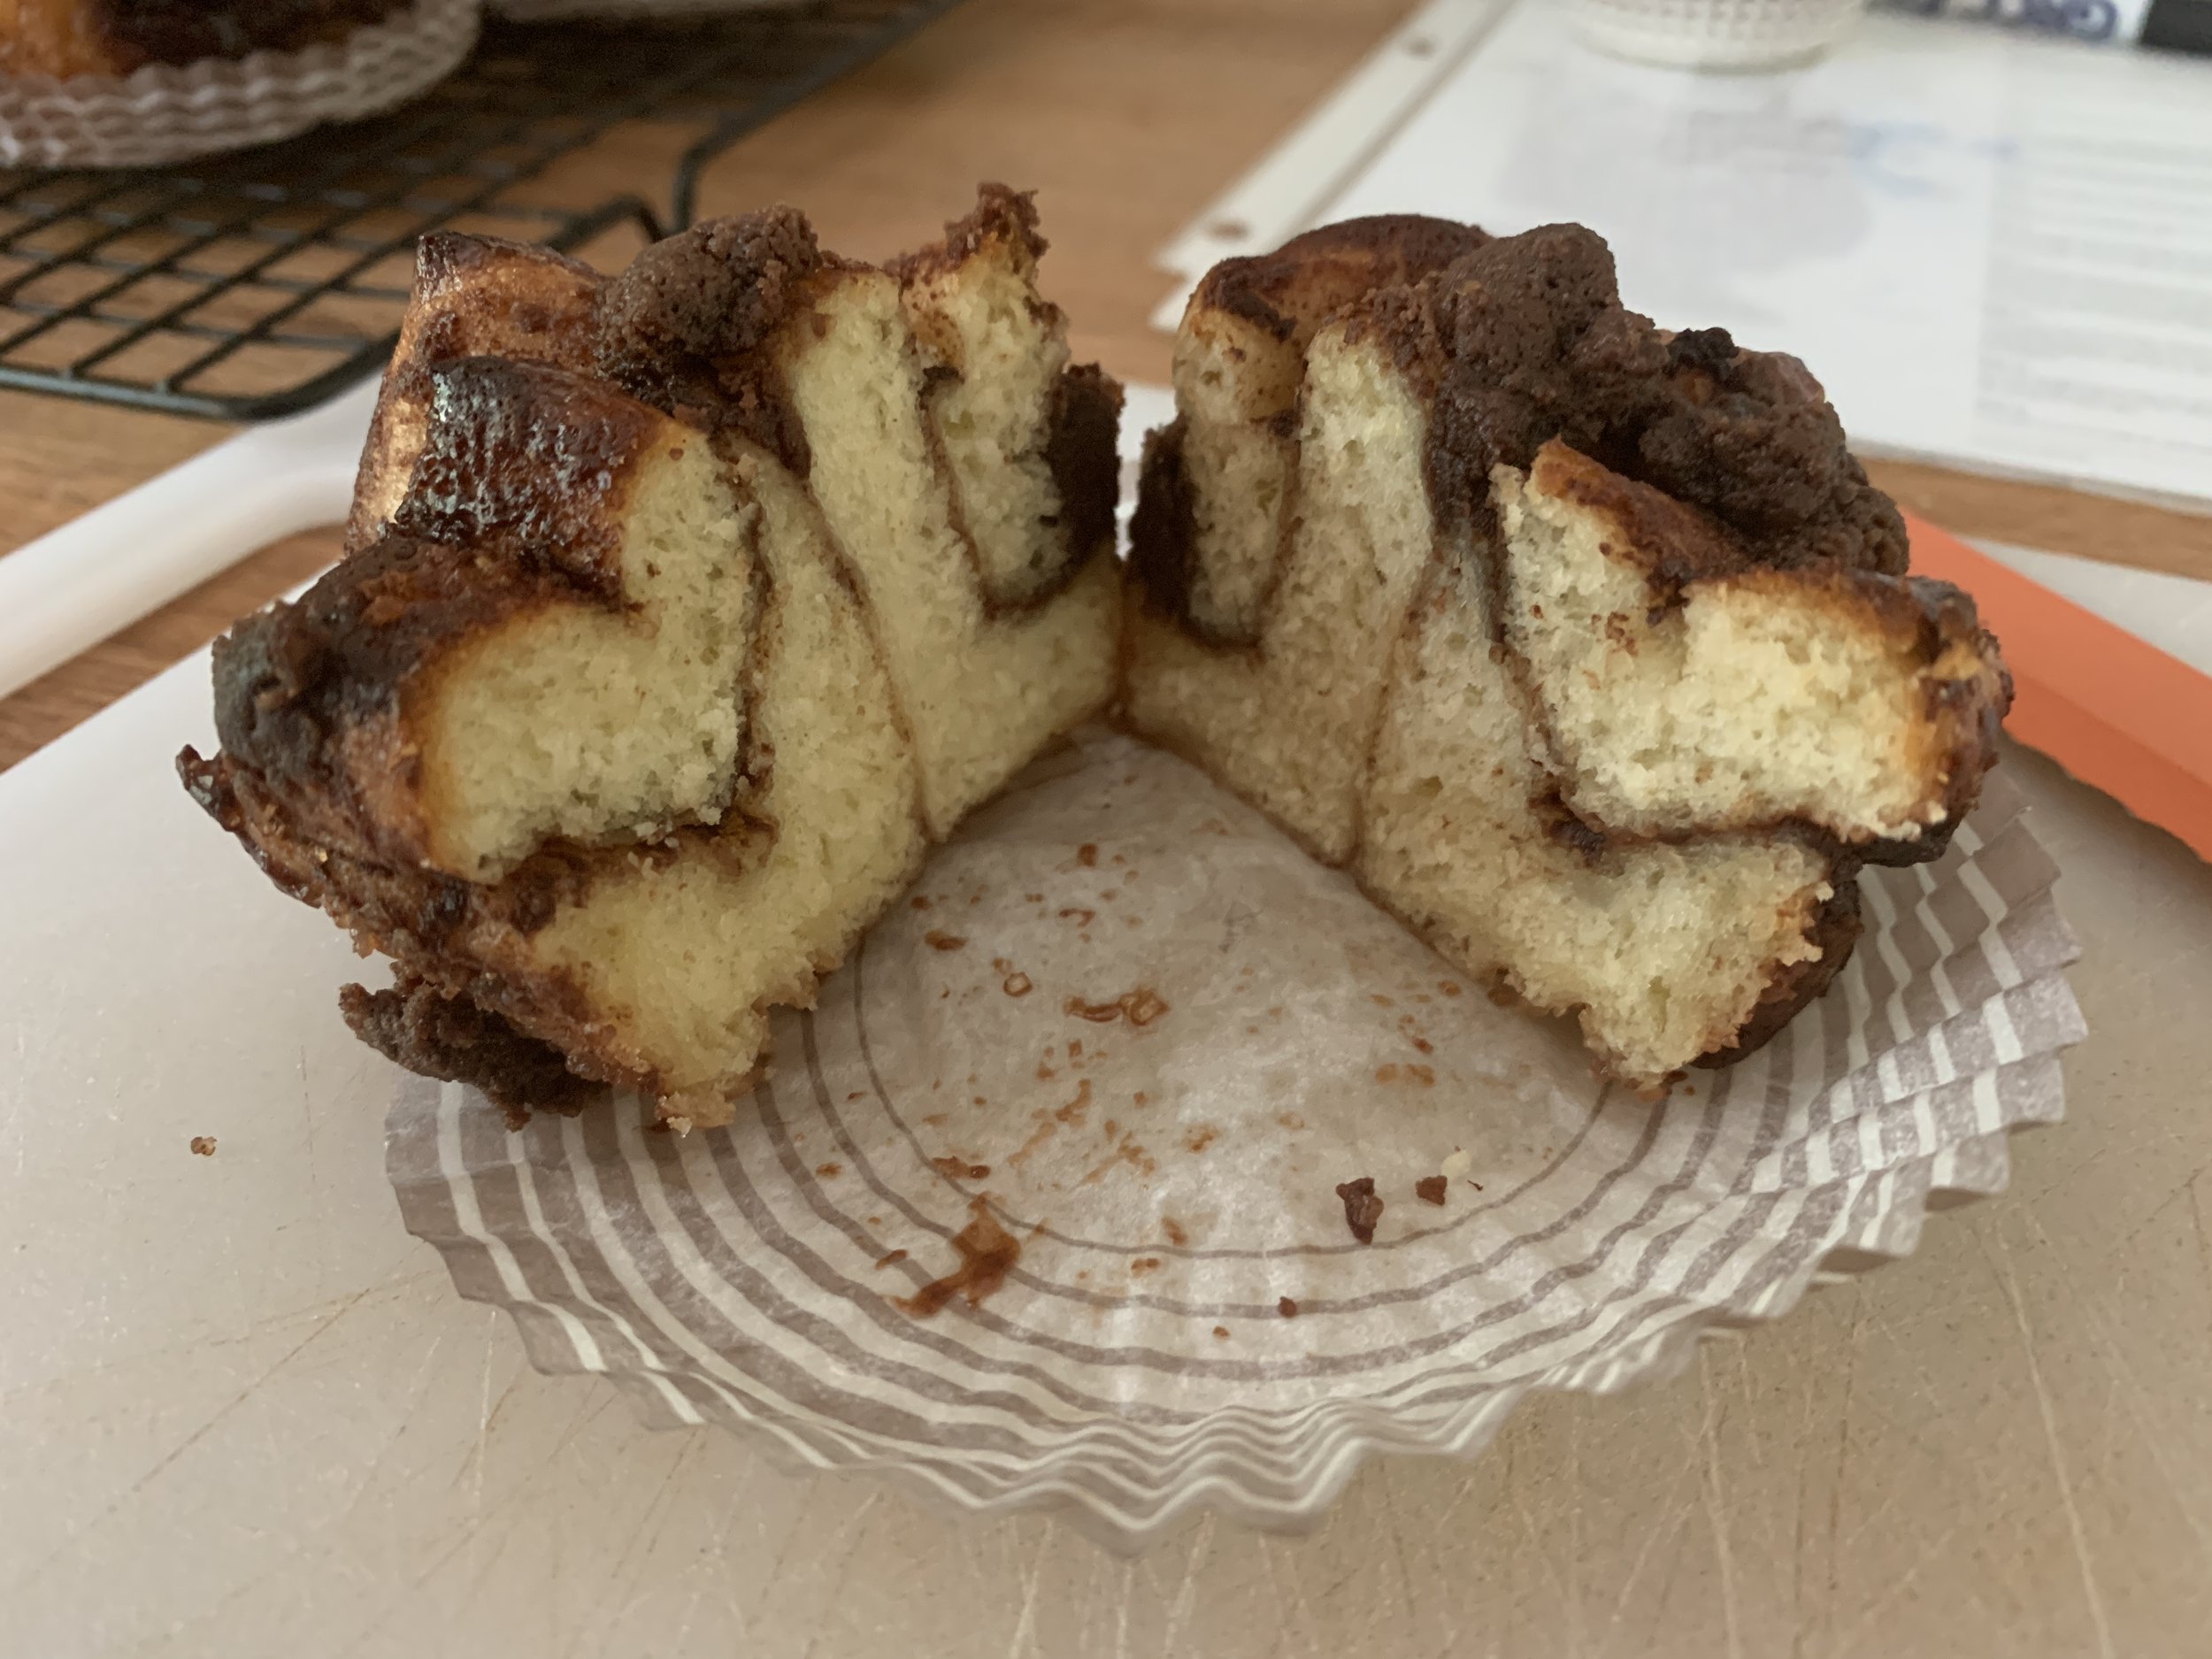
Based on the exterior appearance, I thought I’d find more chocolate inside. Not so, but the subtle swirls in the oh so tenderly textured dough, the hint of saltiness in the streusel and the all around delicious flavor of the whole are a winner in my book - and Steve agrees!!

You can use the same approach with your own favorite brioche or cinnamon roll type dough. Just go for it!

Meanwhile, autumn colors are finally appearing much later than usual. Here are a few images from some of the colorful inside displays at nearby Meijer Gardens.

Enjoy and I’ll “see” you next time around.

Coriander buttermilk "bouchon"

4EB2E90F-732A-47F2-9372-9D24BF4EDB79.jpeg

If you’re dreaming of the perfect buttermilk pancake and donut hole rolled into one, this is it! Moist with hints of nutmeg, coriander and ginger, these small bites go down so smoothly that you’ll clamor for more. I first made these in 2012 in my small shop inside Hope Artiste Village in Pawtucket RI. When Steve and I saw them, we immediately knew what they should be called.

Bouchon is the French word for cork, and the champagne cork shape develops as they bake in small round flexi-molds. The key is to fill the wells enough so that the top poofs out over the edges as the cakes rise, giving that signature look.

C96BA31E-C45A-4E25-A209-745282A6BE15.jpeg

The process is your basic creaming method of cake prep. In a nutshell: cream butter and sugar, add eggs and vanilla, blend in dry ingredients alternating with wet (1/3 dry, 1/2 wet, 1/3 dry, 1/2 wet and end with 1/3 dry), scraping down after each addition.

In the plan ahead phase, bring 170 g / 6 ounces unsalted butter, one cup buttermilk and 2 large eggs to room temperature. While not a complete deal breaker, this will cut down on any curdling that can occur during mixing when things are too cold.

Heat the oven to 425ºF.

In a medium bowl whisk 200 g all purpose flour, 146 g whole wheat pastry flour, 3/4 teaspoon salt, 1.5 teaspoons baking powder, 1/4 teaspoon baking soda, 1 teaspoon ground coriander, 1 teaspoon freshly grated nutmeg (I eyeball it and probably end up using less) and 1/4 teaspoon ground ginger.

Place the 170 g room temp butter with 75 granulated sugar and 67 g dark brown sugar in the bowl of a stand mixer fitted with the paddle. Cream for 2-3 minutes and scrape down the bowl.

F6A292E1-B87B-4ADD-BCA7-89C3082631D9_1_201_a.jpeg

Add the eggs, one by one, as well as a teaspoon of vanilla extract. Do the dry/wet additions as mentioned above.

In the image above you can see the Demarle Flexipan mold 2266 I use for this - at purchase it is a 48 well mold, but I cut it in half to fit on a half sheet pan. I probably haven’t mentioned this for some time now, but I always set silicone flexi-molds on a wire grid on the sheet pan. This allows for better oven heat circulation and more even baking.

This cake batter is quite thick so I use a wide round tip (20 mm / 3/4” diameter) to pipe and hold my offset spatula in the other hand to cleanly “cut” the batter away from the tip as I go. Works like a charm.

1C7EFC8F-AE31-46CC-AB97-ECDAC5D20ACF.jpeg

Pipe the batter to nearly the top of each mold with a nice dome at the finish. Not having made these for some time, I had to fine tune my piping as I went. The yield varies but I typically get 32-34 cakes from a recipe. I ended up with 42 this time which tells me I need to be more generous with my piping for the next go. Gotta get those cork tops!

10882B23-27EA-4C10-AE5F-A41B616508ED.jpeg

Bake about 15 minutes until golden. The cakes should feel firm when gently pressed on top.

While the cakes bake, melt 4 tablespoons butter in a small bowl; in another small bowl mix 1/2 cup sugar with 1 teaspoon ground coriander, 1/4 teaspoon ground ginger and a few grates of fresh nutmeg.

Once out of the oven, let cool about 5 minutes then pop the cakes out onto the wire racks.

4C546743-233F-4898-AFA3-70A5F8E9D097.jpeg

Working in small batches, dip the tops in the melted butter, give them a couple of minutes for the butter to absorb and then dip/roll them in the coriander sugar mixture.

CD2DC2B3-368E-4767-BEA3-7DCE944F77C1.jpeg
4401CEBC-E22A-49F8-AF99-DC81818DC89E.jpeg

I didn’t dip and roll the whole batch since I wanted to freeze some au naturel to have on hand for later. You never know when a bouchon occasion might arise.

These babies are dense yet light, not too sweet and with just the right warmth from the spices.

B27D230E-B550-4F2A-97EC-F7F9E5FDBEDD.jpeg

My inspiration for making these after a number of years was two-fold: I was dreaming about them and just happened to have some buttermilk in the fridge, plus a weekend visit from sister Joyce for whom I had to have a little treat or two on hand. Thanks for your visit Joybell!

Oh - and let’s not forget that Steve loves them!!

47285A62-0BCD-4763-B726-E79C630FC89A_1_201_a.jpeg

Happy bouchon making everyone and here’s to more autumn baking adventures.

Ciao for now.

Not your mother's (or grandmother's) cherry pie: free form cherry puff pastry tart

6B3CBB64-6FEB-4983-A3D7-B1EAF59FB71B.jpg

Yum yum yum. On the heels of the mille-feuille that I recently posted on, I came up with a free form cherry tart for cousin Melissa’s husband Jeff’s 60th birthday. I had rough puff and my last bag of Michigan sour cherries from summer 2020 in the freezer. What better way to use them than to create a spur-of-the-moment dessert!

DD3DF47B-861A-4C0A-9E9E-2A2FCA615452.jpeg

I let my generous 2 cups of cherries (~350 g) thaw at room temperature for an hour or two then put them in a medium saucepan along with 100 g / 1/2 cup cane sugar and a pinch of salt. I opted for a few grates of fresh nutmeg, 1/2 teaspoon ground coriander too. Heat on low, with occasional stirring, until the cherries release some juice and the sugar dissolves. Blend a tablespoon lemon juice with 2 tablespoons cornstarch and stir it into the cherry/sugar mix. Bring to a boil then cook for several minutes until thickened. Add a splash of vanilla or almond extract if you like and let it cool. You can prep the cherry filling a day or 2 ahead and hold it in the fridge until baking time. Just look at these jewels!

1DE3C61D-E679-4FD4-9798-AA0F452092A9.jpg

The beauty of a free form tart is being able to make any size or shape your little heart desires. For this one I used about 300 g of puff, rolled it out to a 6-ish by 13-ish rectangle and put it on a parchment lined sheet pan. I then cut ~1/2” wide strips from each border and “glued” them around the edges with a brush of egg white. I had some scraps from which I cut small diamonds and spaced those along the edges too. Those touches give a bit of a border for the end result.

You can go even more decoratively as I did for this small savory tart some years back. Make it your own!

freeformpufftart.jpg

Brush the puff with egg white or wash, add a sprinkle of vanilla sugar over the dough and freeze the puff while heating your oven (helps keep down shrinkage), then bake fully at 400ºF for about 20-25 minutes until golden toasty brown (reduce oven heat as needed). I overturn a wire grid across the sheet pan to keep the rise even.

Reduce the oven temp to 325ºF. Let the pastry cool 5-10 minutes (so you don’t burn your fingers), gently push down the puffed center and layer the already cooked filling over the dough. I had just enough cherries for a single layer. Return to the oven for about 20-25 minutes to warm and set the filling a bit more.

7103DB85-40AA-481E-B885-9E3668DFBDF7.jpg

I had frozen a bunch of leftover baked puff scraps from the mille-feuille project so I crushed/cut a bunch of those up to use as a rustic topping.

1DE3C61D-E679-4FD4-9798-AA0F452092A9.jpg
2B8D7701-73E1-4F60-BB09-6E01F7C8D341.jpg
A49EF8C4-C587-4C4B-A458-1B2BC8B62A78.jpeg

A drizzle of caramel to top it off plus a dusting of powdered sugar before serving. Ohhh . . . . the tartness of the cherries with just the right hint of sweetness and spice. Love it!

It’s great au naturel but a scoop of vanilla ice cream wouldn’t hurt a thing. Your choice.

6B3CBB64-6FEB-4983-A3D7-B1EAF59FB71B.jpg

I saved some of the cherry syrup from the filling and used it to make a batch of cherry Swiss meringue buttercream which is currently residing in my freezer. Hmmm . . . I wonder what I’ll create with that! Time will tell.

Keep moving, stay safe, everything in moderation and enjoy spring wherever you are.