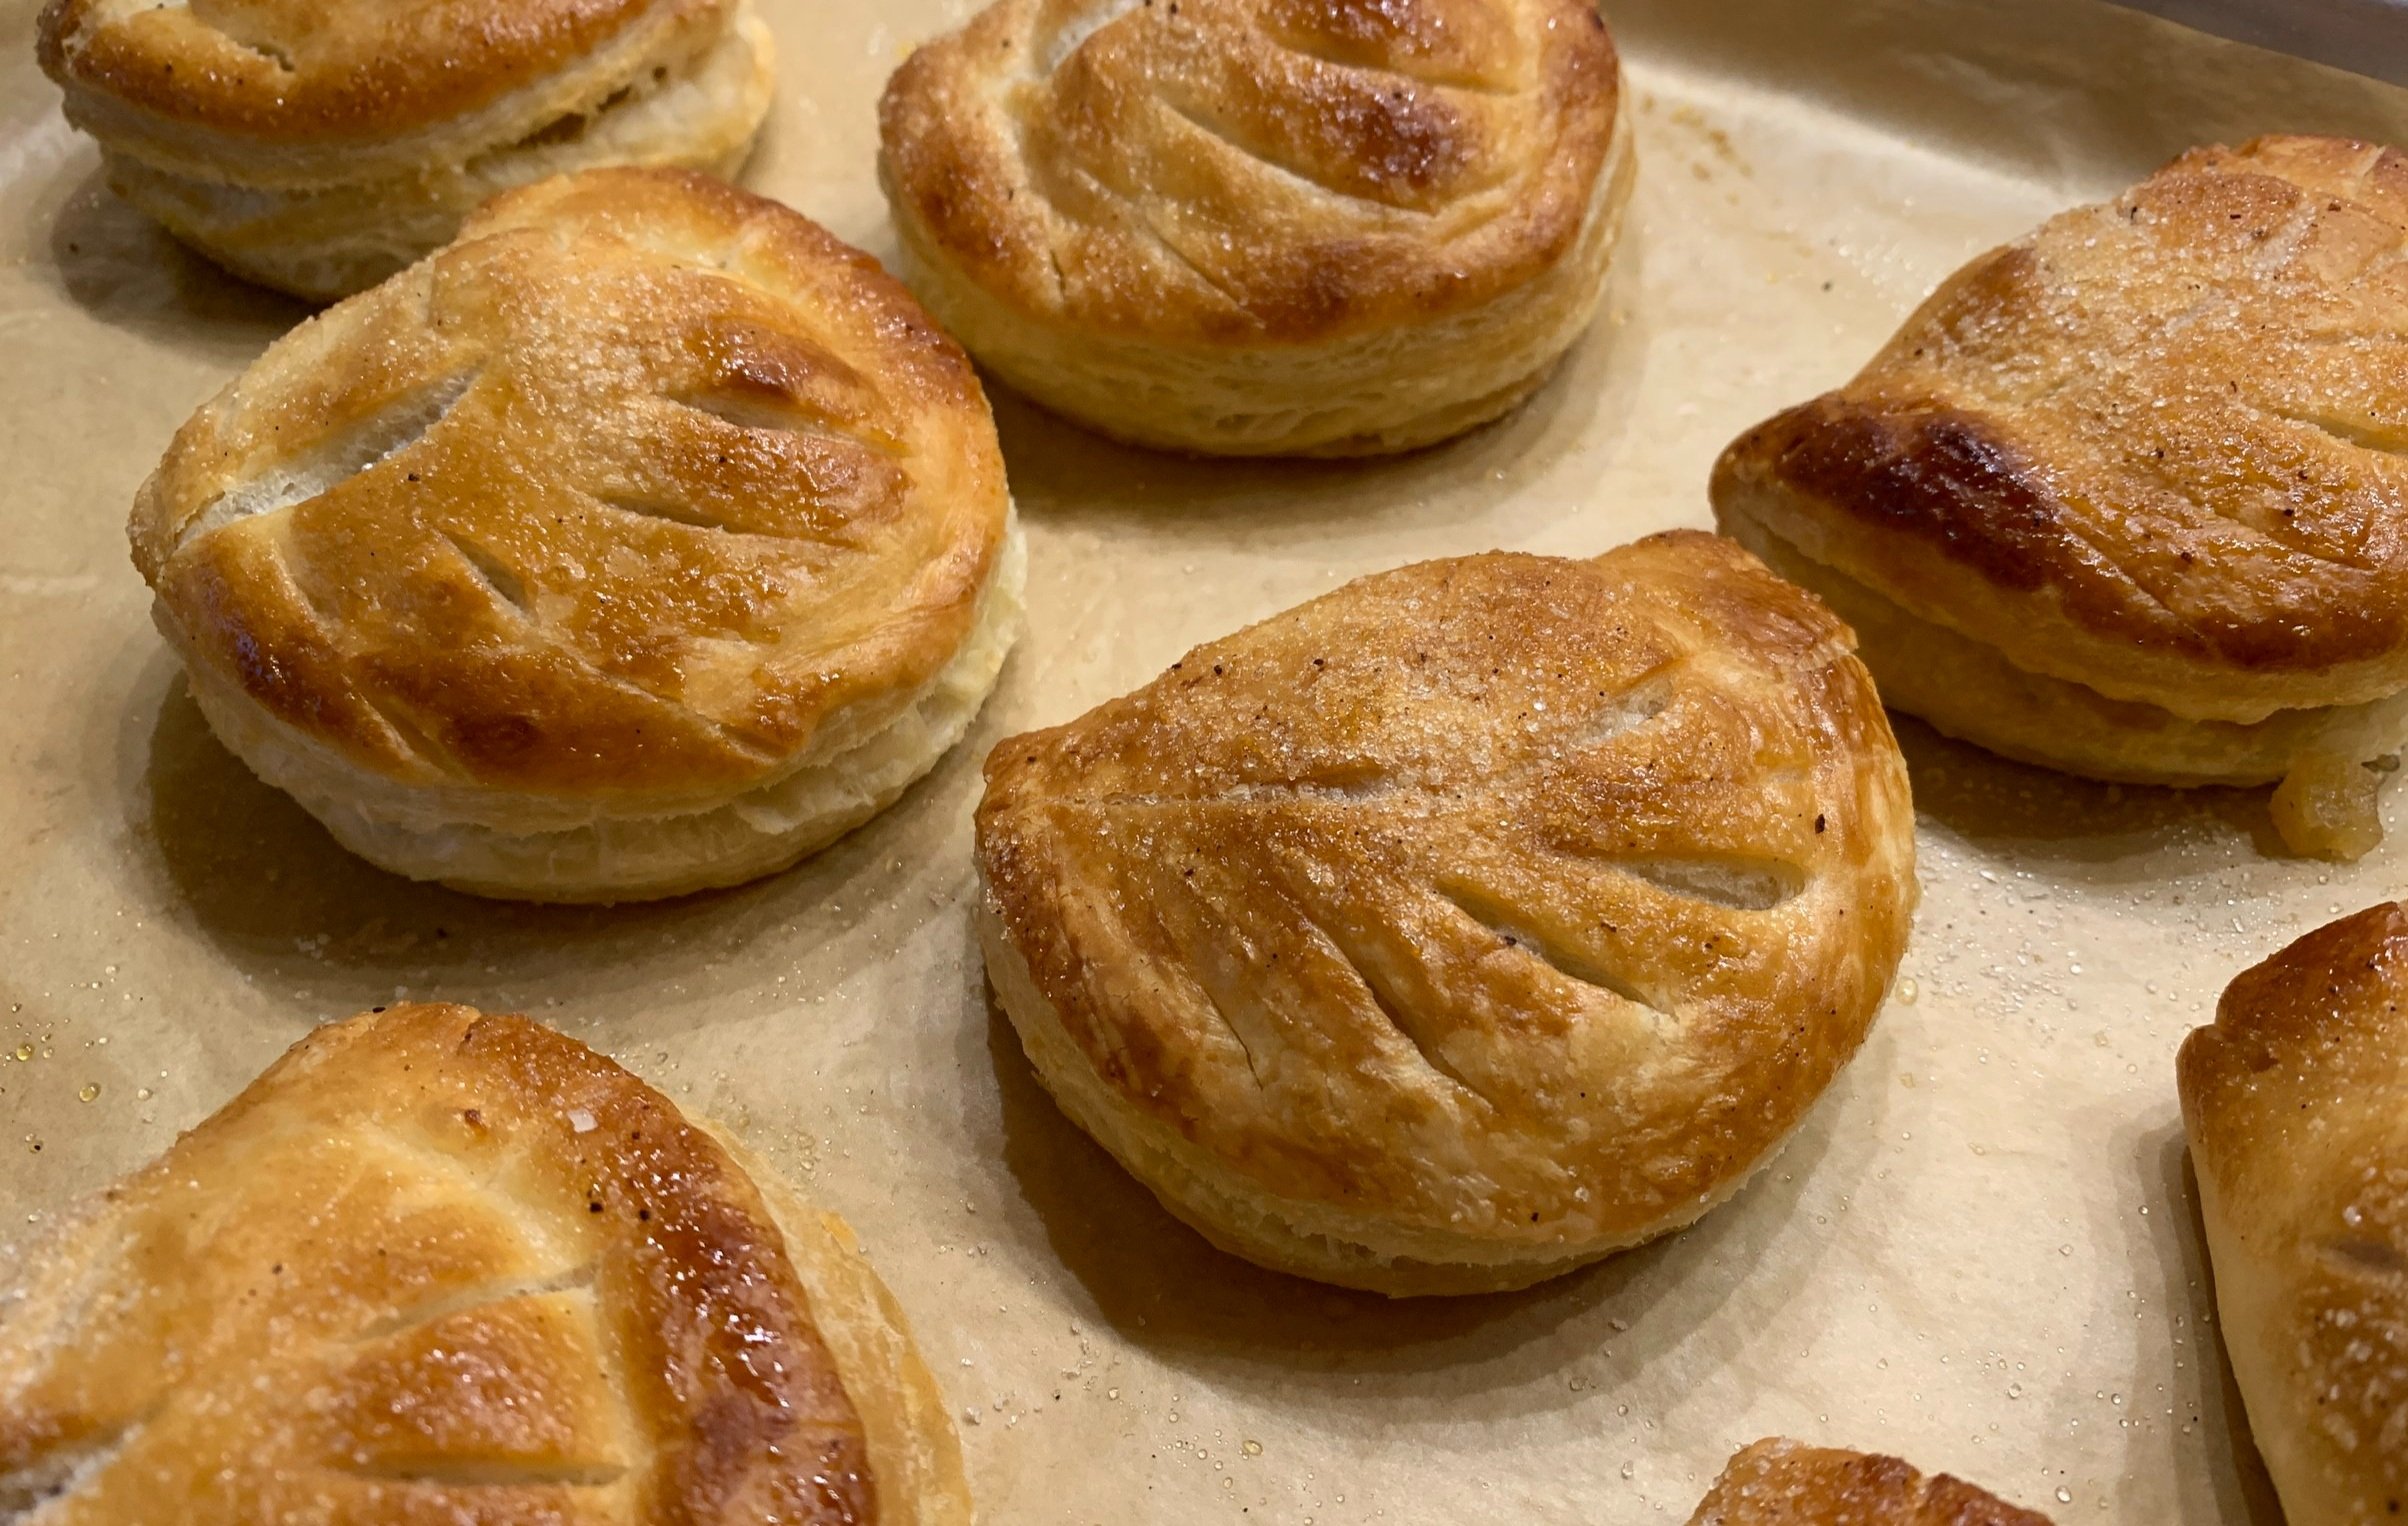
Chausson aux pommes - a classic
/You know when you’ve made something so many times using the method you were taught because, well duh, that’s how we did it? That’s what chaussons aux pommes have been for me. Ever since my Paris pastry schooling and internships in 2006-2007 I’ve done the preparation/assembly the same way, the process unchanged throughout the years. Roll out the dough, cut circles of your desired size, let them rest a few minutes then roll out a bit more to an oval. Egg wash the lower edge, scoop prepped apples on the bottom half, fold the top over and seal the edges. ONE. BY. ONE.
Well low and behold, as I was planning to teach a recent puff pastry class here in Grand Rapids and reviewing one of my favorite books “Pastry, Savory and Sweet” by Michel Roux, I realized that through all these years I had NEVER noticed his method of creating chausson. Eureka!
Hint- think ravioli.
Let’s start at the beginning and work through the steps. I’ll assume you have your puff pastry already made or purchased. The next thing is to prep the apples. I love Granny Smith for this since the caramel-y tart apples go so well with the buttery, flaky puff. Yum.
If you’re wondering how many apples to prep, I find that a good sized Granny Smith will yield me three to four chaussons of medium-ish size (I tend to lean smaller in my pastries - just sayin’). I peel, core and small dice the apples and sauté them in butter and sugar until softened. My “rule” is to use about 10 g sugar and 10 g butter per medium apple soooooo . . . . . if I’m prepping 5 apples, I use 50 g (about 1/4 cup) sugar and 50 g (about 1/2 stick) unsalted butter. You can play around with the proportions to suit your taste.
Have some water on the side so when the apples start browning and sticking a bit and their liquid evaporates, you can splash a bit more water in to deglaze. Toward the end of sautéing I also add a big splash of boiled apple cider and a couple of big squirts of my home made caramel sauce, always at the ready in my fridge.
The apples should become golden brown and caramel-y and start sticking to the pan. Once they’re fork prick tender (but NOT mushy), I scrape them onto a paper towel lined sheet pan to cool and soak up any remaining moisture.
A side note: when sautéing the apples, I figure I might as well go for the “more is better” approach since they keep well in the fridge for several days. Plus you can assemble a bunch of chaussons and freeze them unbaked until you’re ready. Have some house guests coming soon? Pop a few onto a sheet pan and into the oven (no thawing needed) for some freshly baked morning treats.
Ready for assembly? Let’s go!
I usually get about 12 chaussons from a half batch (~600 g) of my puff. Save the scraps to roll out for palmiers or as the lining crust for quiche or flan Parisien or for blind baked mini tart shells that you can fill with lemon curd or ganache or coconut cream or . . . . . you decide.
On a lightly floured surface roll the dough out to a 16” across and 18” top to bottom rectangle, about 1/8” thick. Divide the dough into three strips of 6” by 16”. A pizza cutter works great here! You’ll create 4 chaussons from each strip.
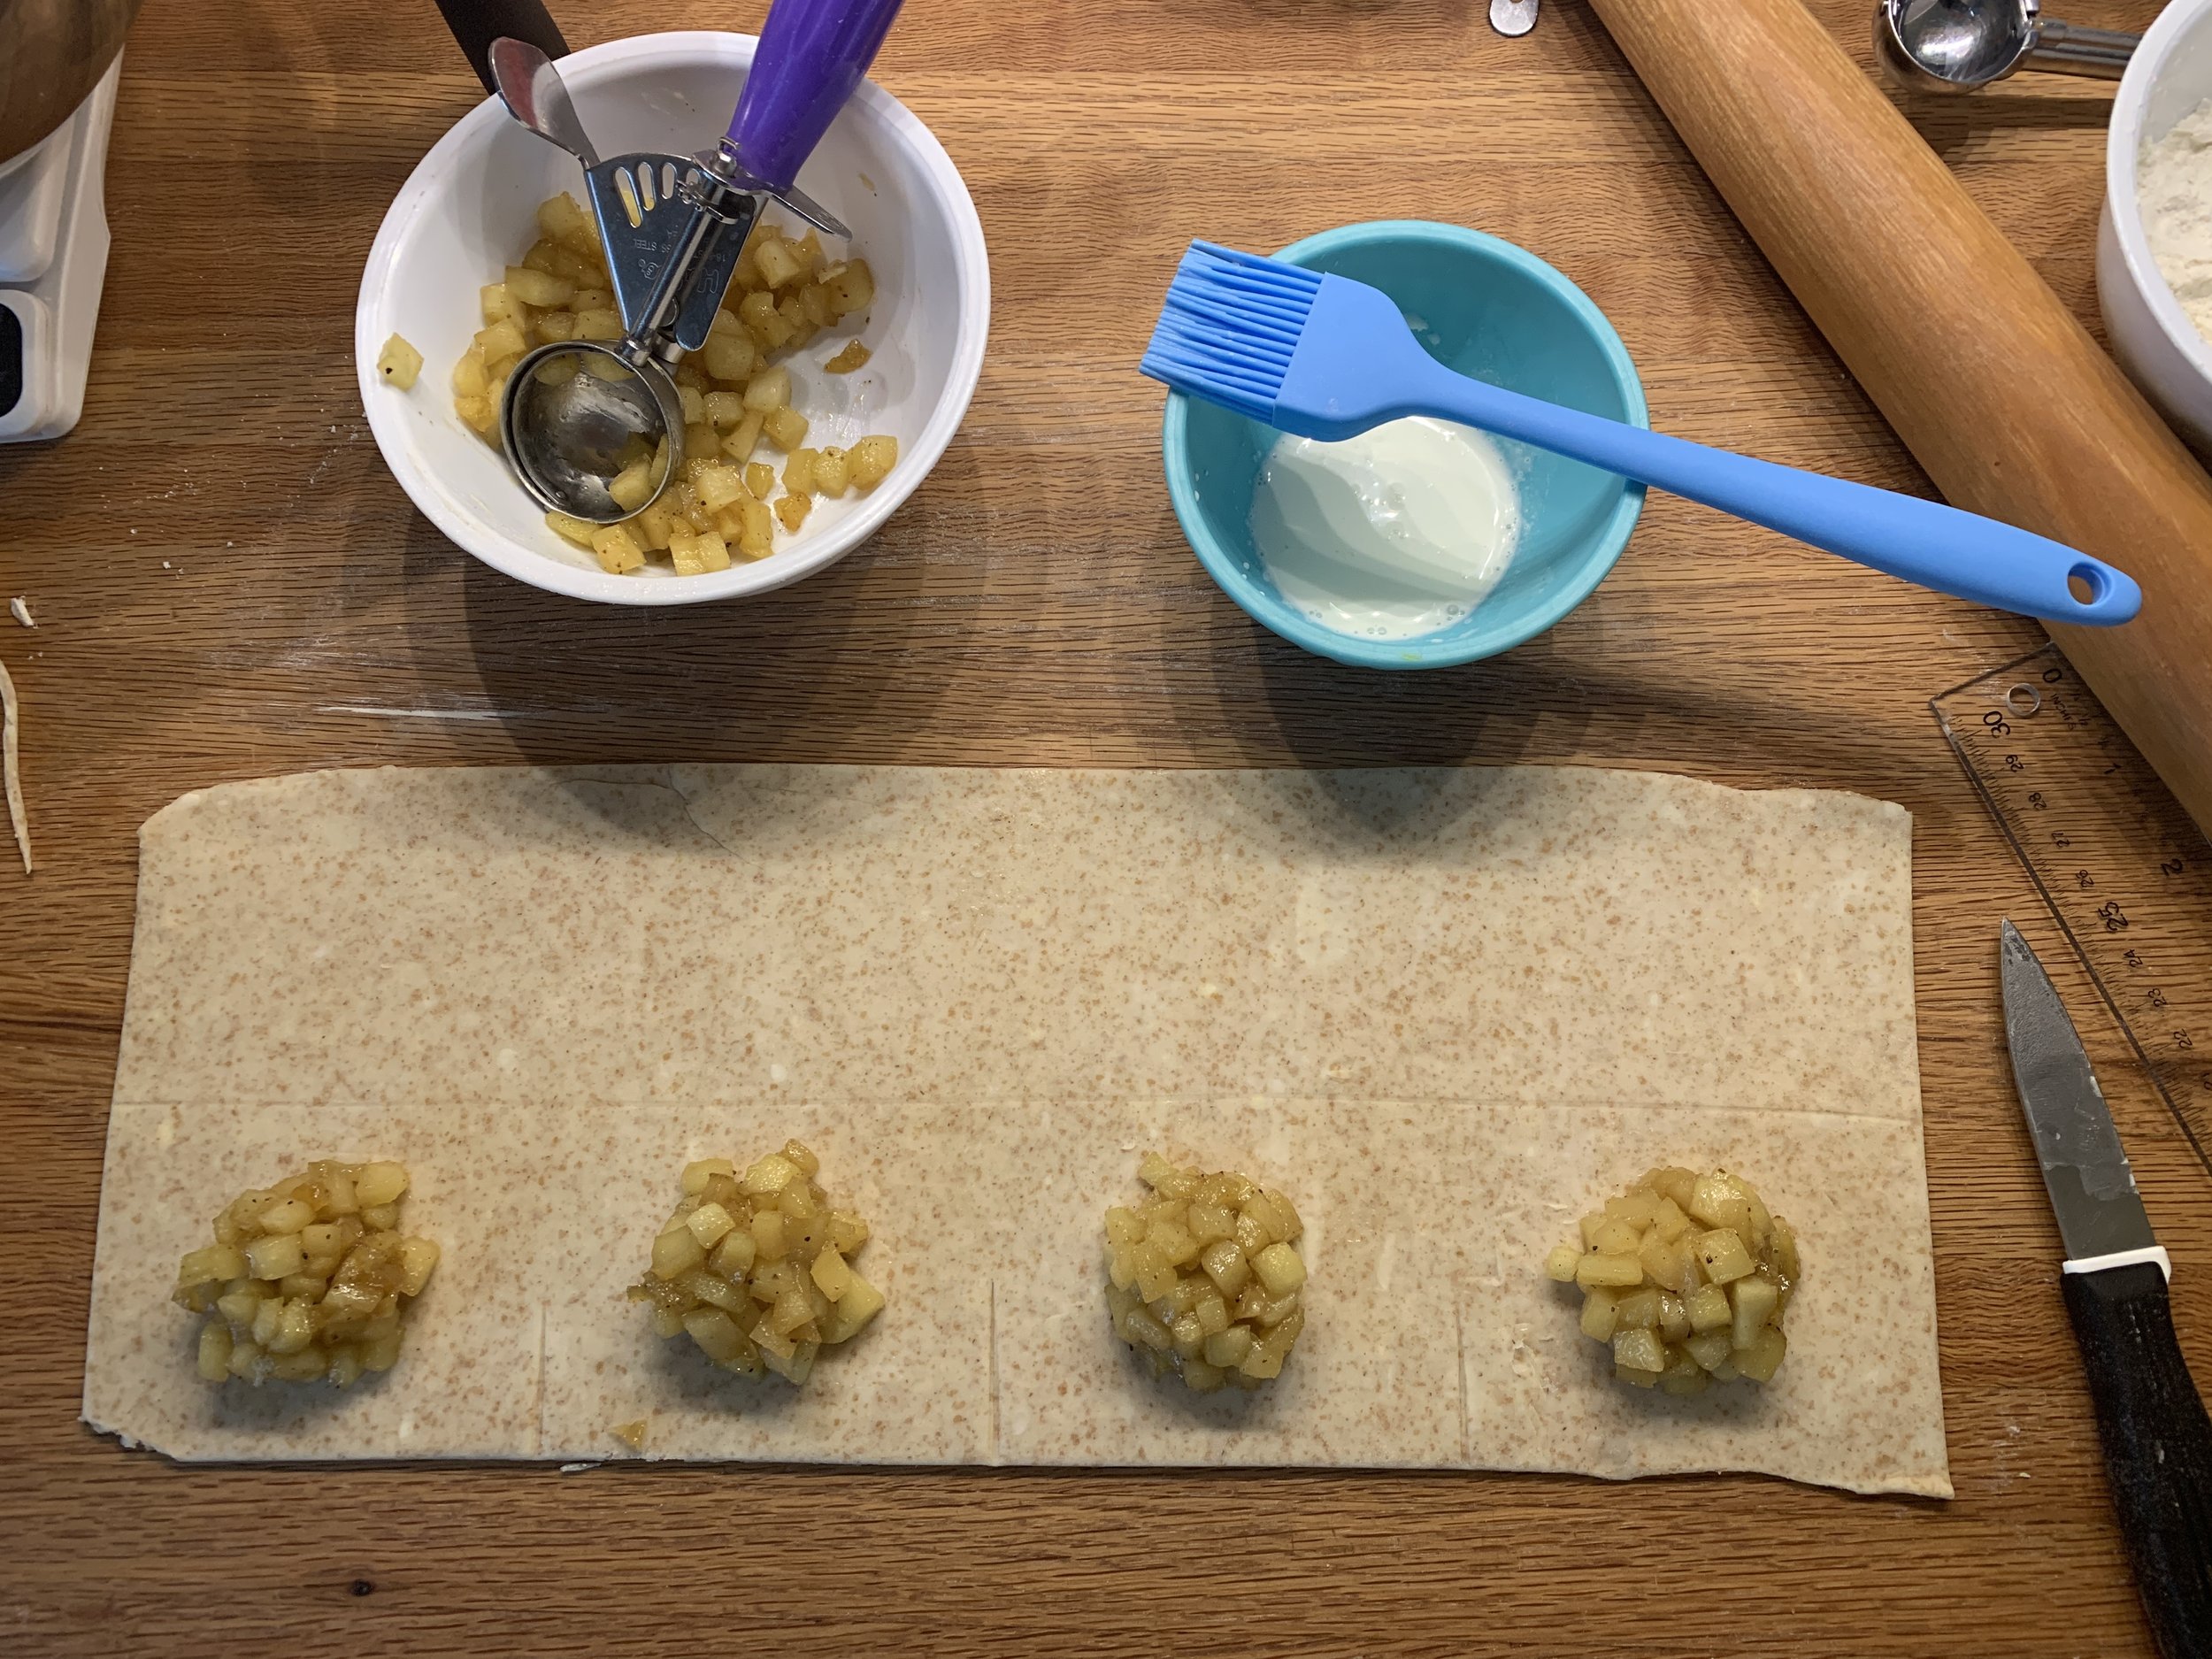
In the image below I did a practice run using my spelt rough puff (had some in the freezer, don’t ya know). Without cutting the dough, mark it into four 4” sections.
Also mark (don’t cut!) the midline across the length of the piece. Now put a nice scoop of apples on each of the sections.
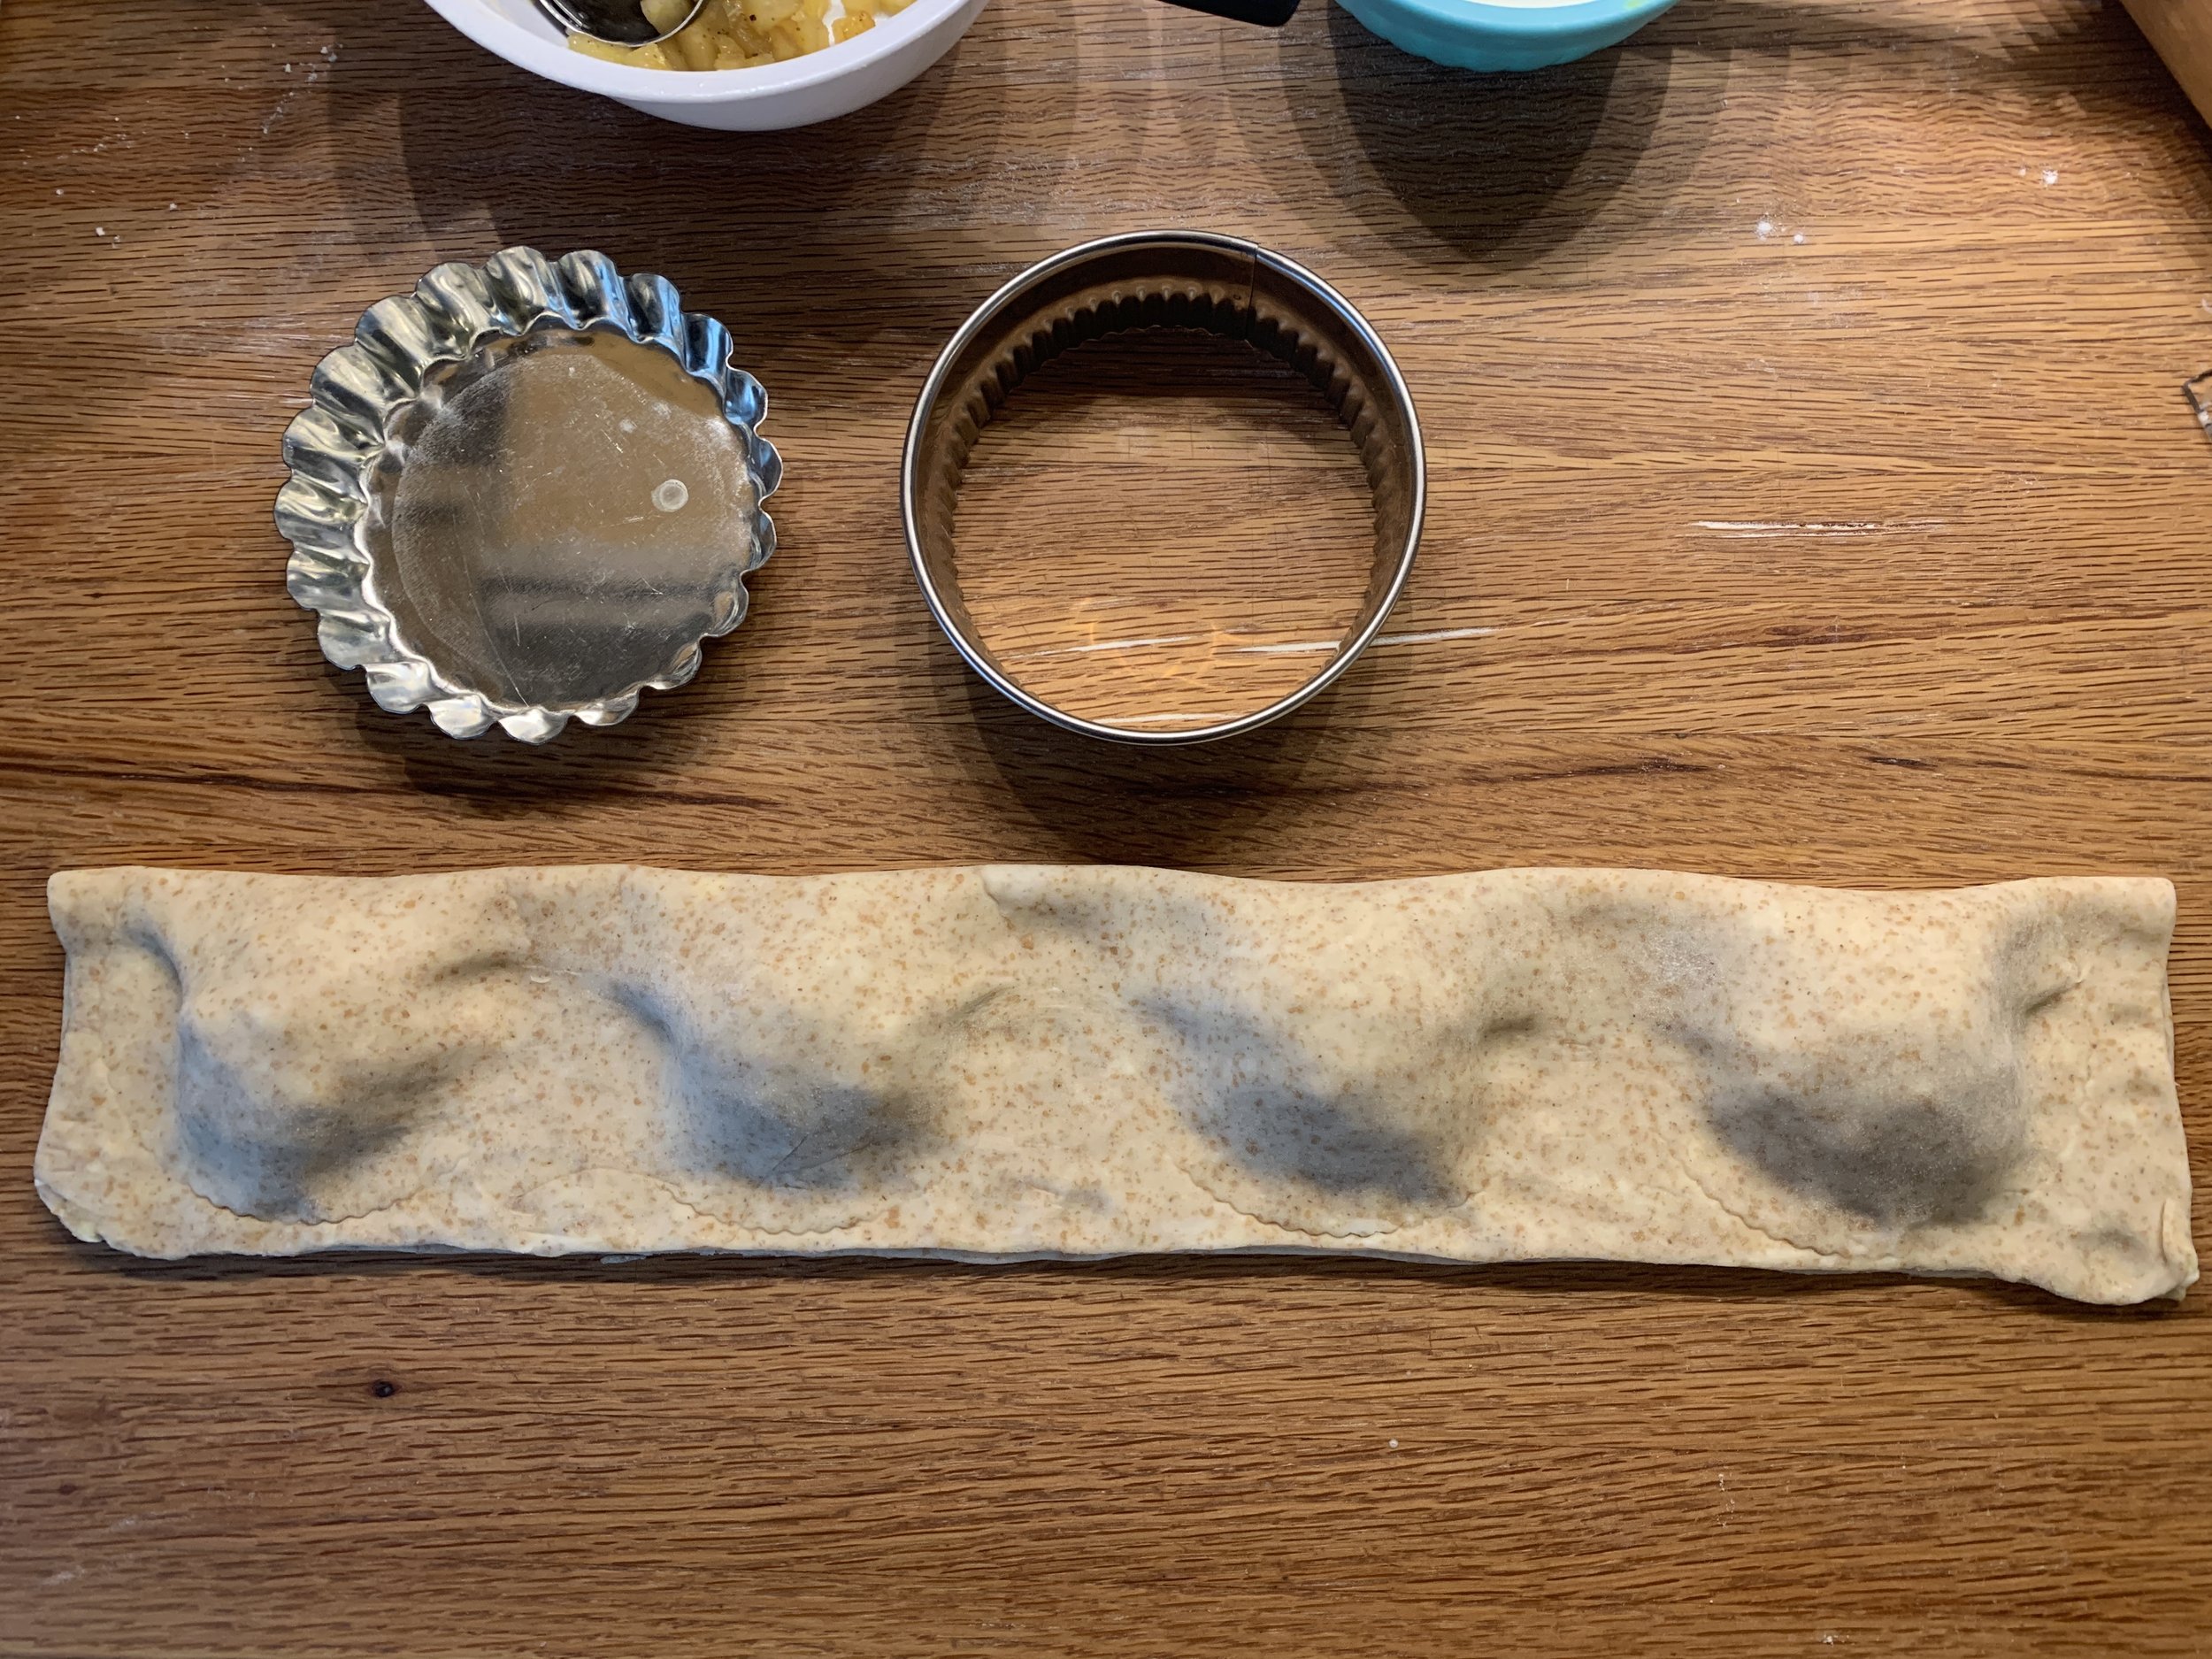
You can use water or milk or egg white or egg wash - just something wet to brush around the apples. Now fold the dough from top down, covering the apples, pushing out any air pockets and pressing down around the mounds to seal.
I tried two different forms to cut the dough - a 3.5” fluted tart pan and a 3.25” fluted cutter. The tart pan didn’t cut sharply enough but the fluted cutter did the trick.
Shoot! I didn’t get a pic of the cutter placement - set it so that a little over half of the cutter is over the dough and a little less than half is over the counter, straddling the folded edge.
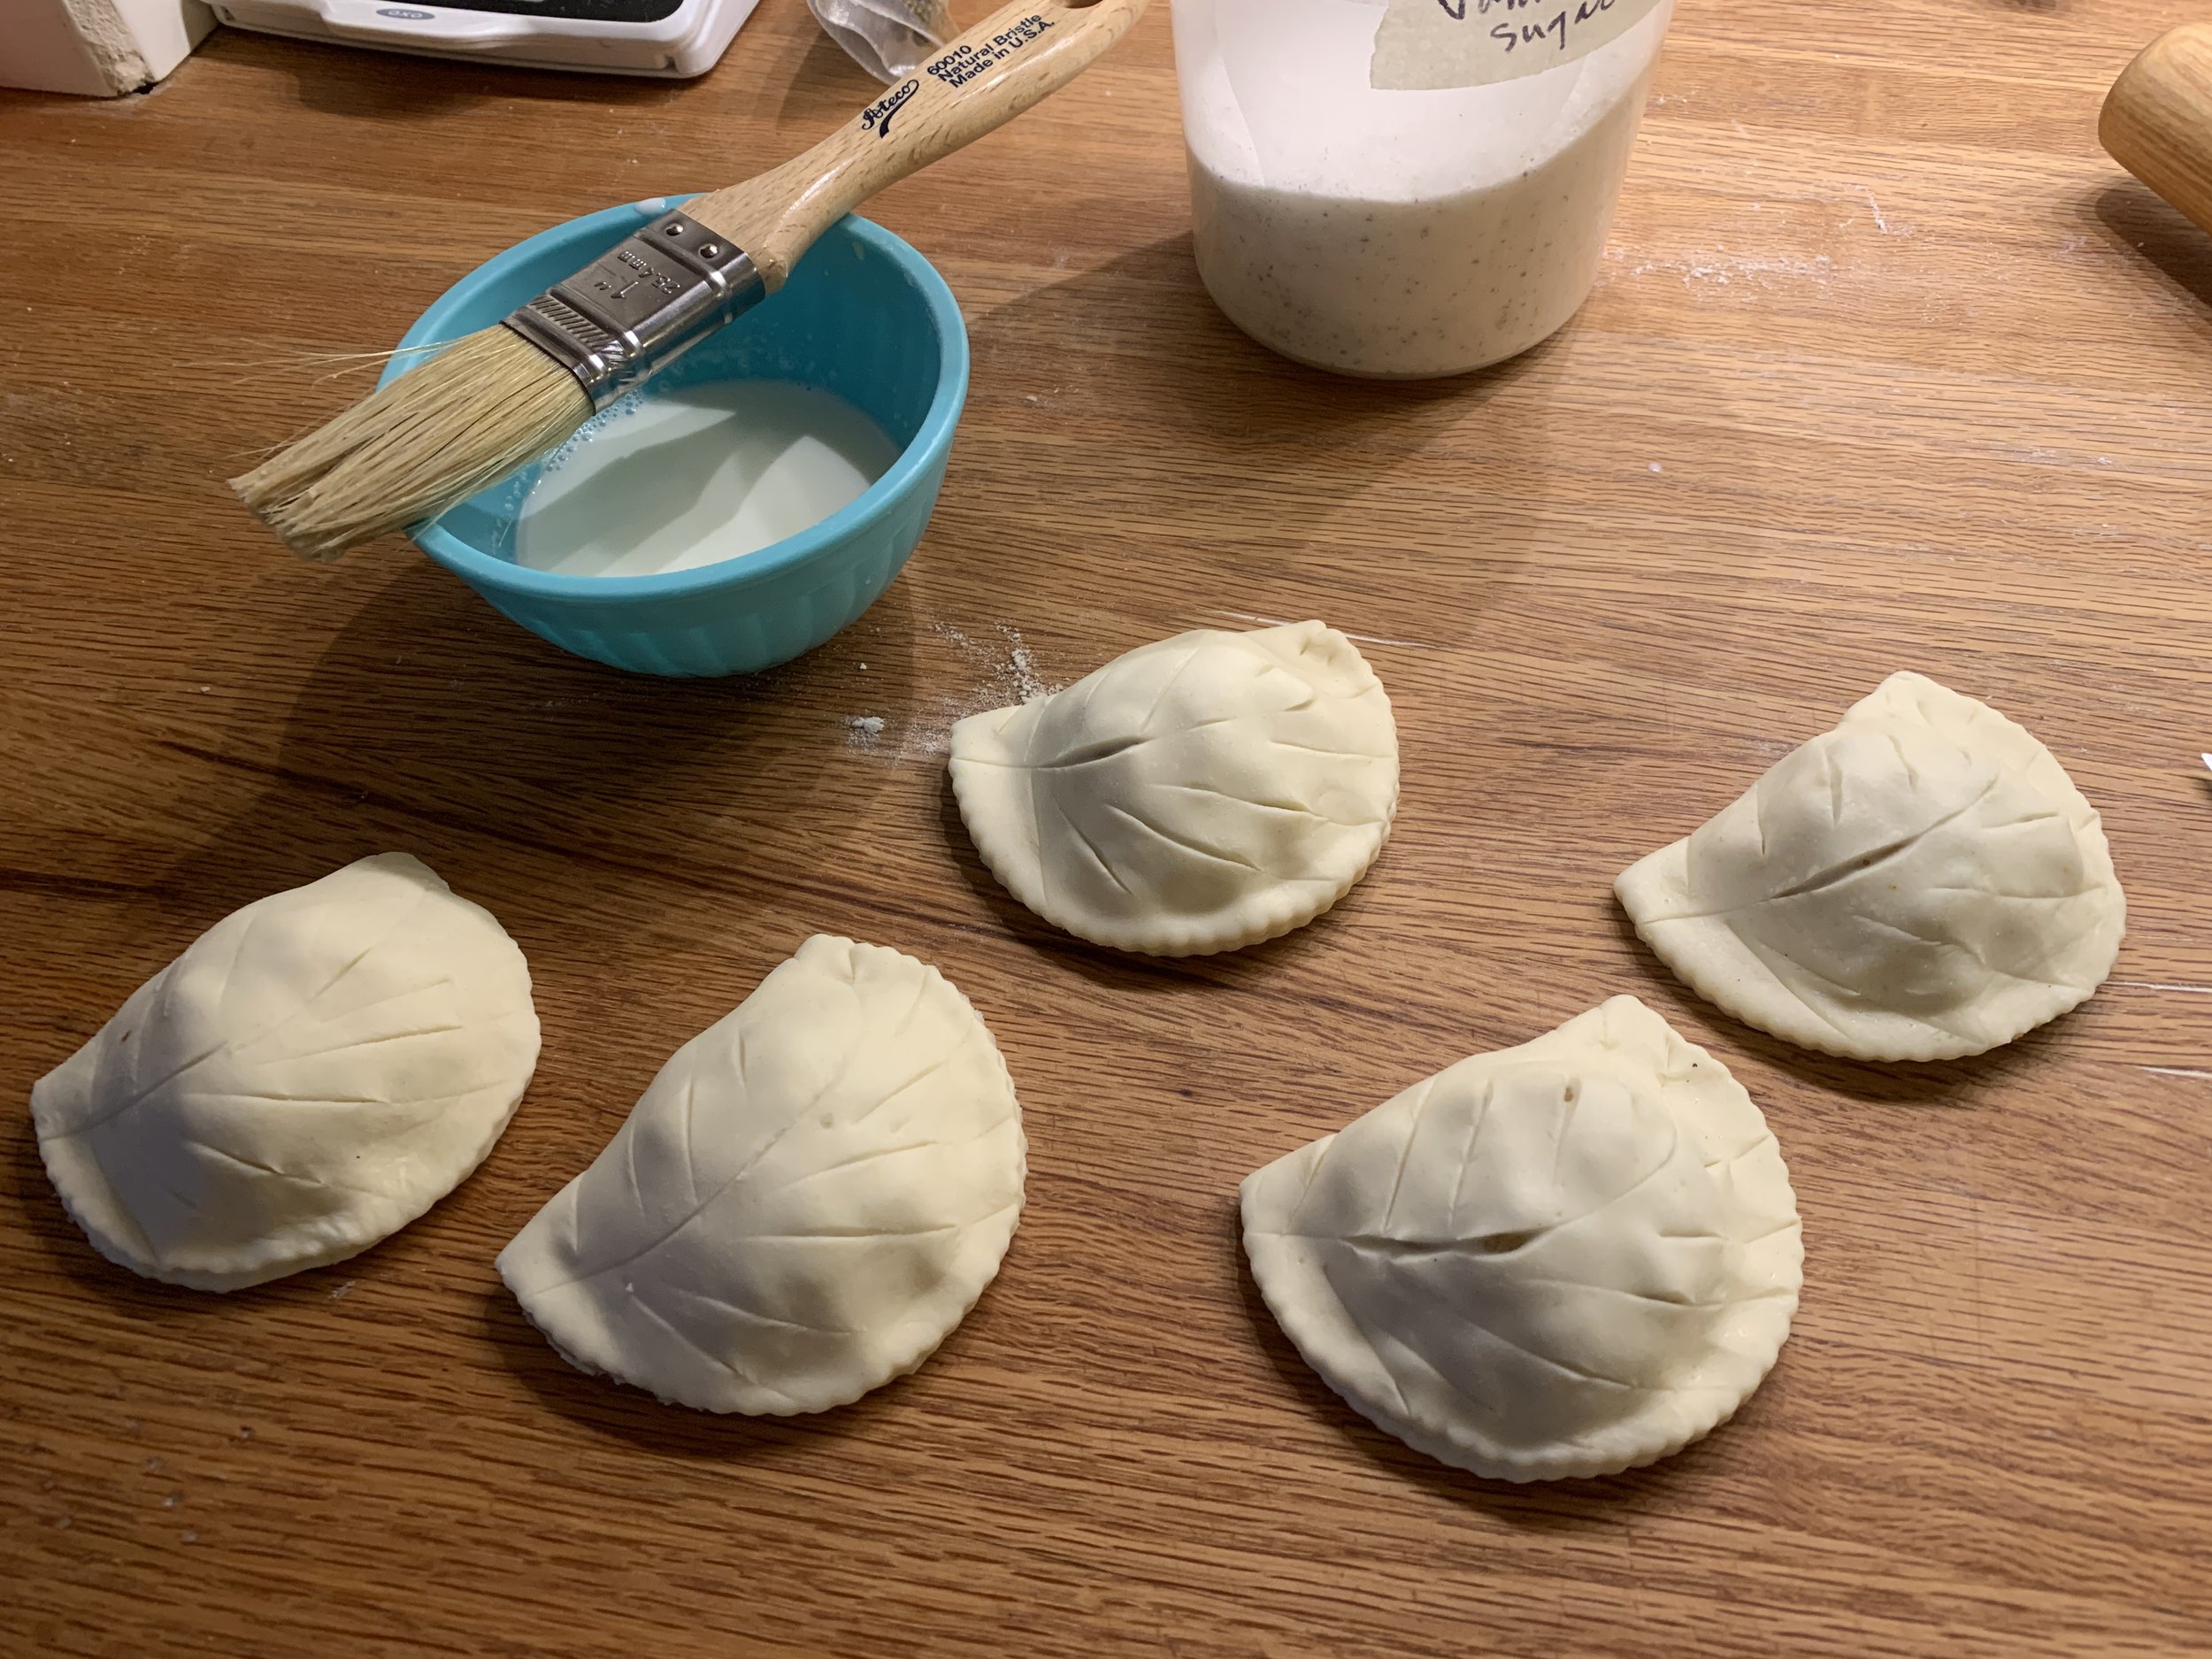
Make slashes to create a leaf like pattern. Pssst . . . I’m using some regular puff below, having done my assembly in a couple of different sessions.
Brush them with egg wash or milk, sprinkle with vanilla sugar or coarse raw sugar and place them on a parchment lined sheet pan. Pop ‘em into the freezer to firm things up and stabilize the butter while you heat the oven to 425ºF.
Bake 10 minutes, rotate your pan and check on the browning. If browning too quickly, reduce temp to 400ºF and bake an additional 10-15 minutes until golden brown.
Mmmmmm . . . . these are tasty indeed!
Not only that, but spring is finally springing. Enjoy!

