Citrus olive oil almond flour yogurt cake

Wow! That title is one heck of a mouthful. Here’s another cake quickie with more citrus coming at ya! I’ve shared a couple of other citrus cake beauties with you in recent months - orange and lemon - and this one sort of rounds those out as summer wanes. Soon I’ll be gearing up for autumn with buttery pâte brisée, croissant and puff laminated doughs, nutty/caramel-y tartes and so much more.

While citrus is typically heralded during winter and early spring, the flavors marry so beautifully with summer fruits - lime with strawberry or cherry; lemon with raspberry or blueberry; orange with blackberry come immediately to mind. You’ll find many recipes for things like fruit crisps, jams, fruit sauces or purées that call for a squeeze of lemon juice to brighten flavors. I’m on board.

One lazy warm summer afternoon as I was reviewing recipes from various sources, this one caught my eye. It’s from Aleksandra Crapanzano’s book “Gâteau” which offers a wonderful array of simple classic French cakes. There’s a section specifically focused on yogurt cakes in which she offers some interesting versions and flavor choices. This is one of them. And besides - I had yogurt and some almond flour to use up! It’s a straight forward prep that doesn’t even require a mixer. Nice!

I first wrote about the French approach to a simple yogurt cake here. And you’ll find an orange olive oil cake here - I made this one during the early weeks of the pandemic when I was abuzz with free time and the need to bake.

As is often my wont when making a loaf cake, I use my mom’s longer, narrower Mirro loaf pan which gives a slimmer, less bulky looking end result. I like that. Butter, line with parchment, then butter and raw sugar coat it for that hint of a sugar crunchy edged result.

Here’s the recipe PDF. My mise is below where you can see I decided on a mix of lemon, orange and lime zests which I rubbed into the sugar to release the oils. I’m sure many of you know that trick. Eggs should be at room temp. I use Chobani whole milk plain yogurt and a fruity Italian extra virgin olive oil (EVOO). I’ve been using Mandelin blanched almond flour for several years now - I used to order the 5 lb bag from the company but you can now find it on Amazon. Costco sells 3 pound bags of their Kirkland brand at a decent price too.

All mised up

In a large mixing bowl whisk the eggs, yogurt, sugar/zests, EVOO, vanilla and almond extracts. Blend in almond flour, baking powder, baking soda and salt then sift in the all purpose flour and blend. Remember - the recipe is here just for you!

Flour is the final addition

I thought I’d try a suggested variation of sprinkling sliced almonds on top before baking, but once I had done that I said to myself “Susan - these babies are going to sink - I should have added them after the cake had started to set”. Guess what - I was right. Down they went! Sometimes our brains tell us something for good reason.

Almonds soon to disappear!

The cake bakes at 350ºF about 40-45 minutes until a tester comes out clean. Even though the almonds sunk, the result was a lovely golden brown with a pleasing aroma of citrus.

Next time I’ll wait about half way through the bake before sprinkling almonds on top. Or, even better, forget the added almonds and check out some serving suggestions below.

No almonds to be seen

Let cool about 10-15 minutes. Rather than lifting it out of the pan, I opted to turn it out so the bottom side ended up top. Looks pretty good to me. I think I see a fleck or two of sunken almonds.

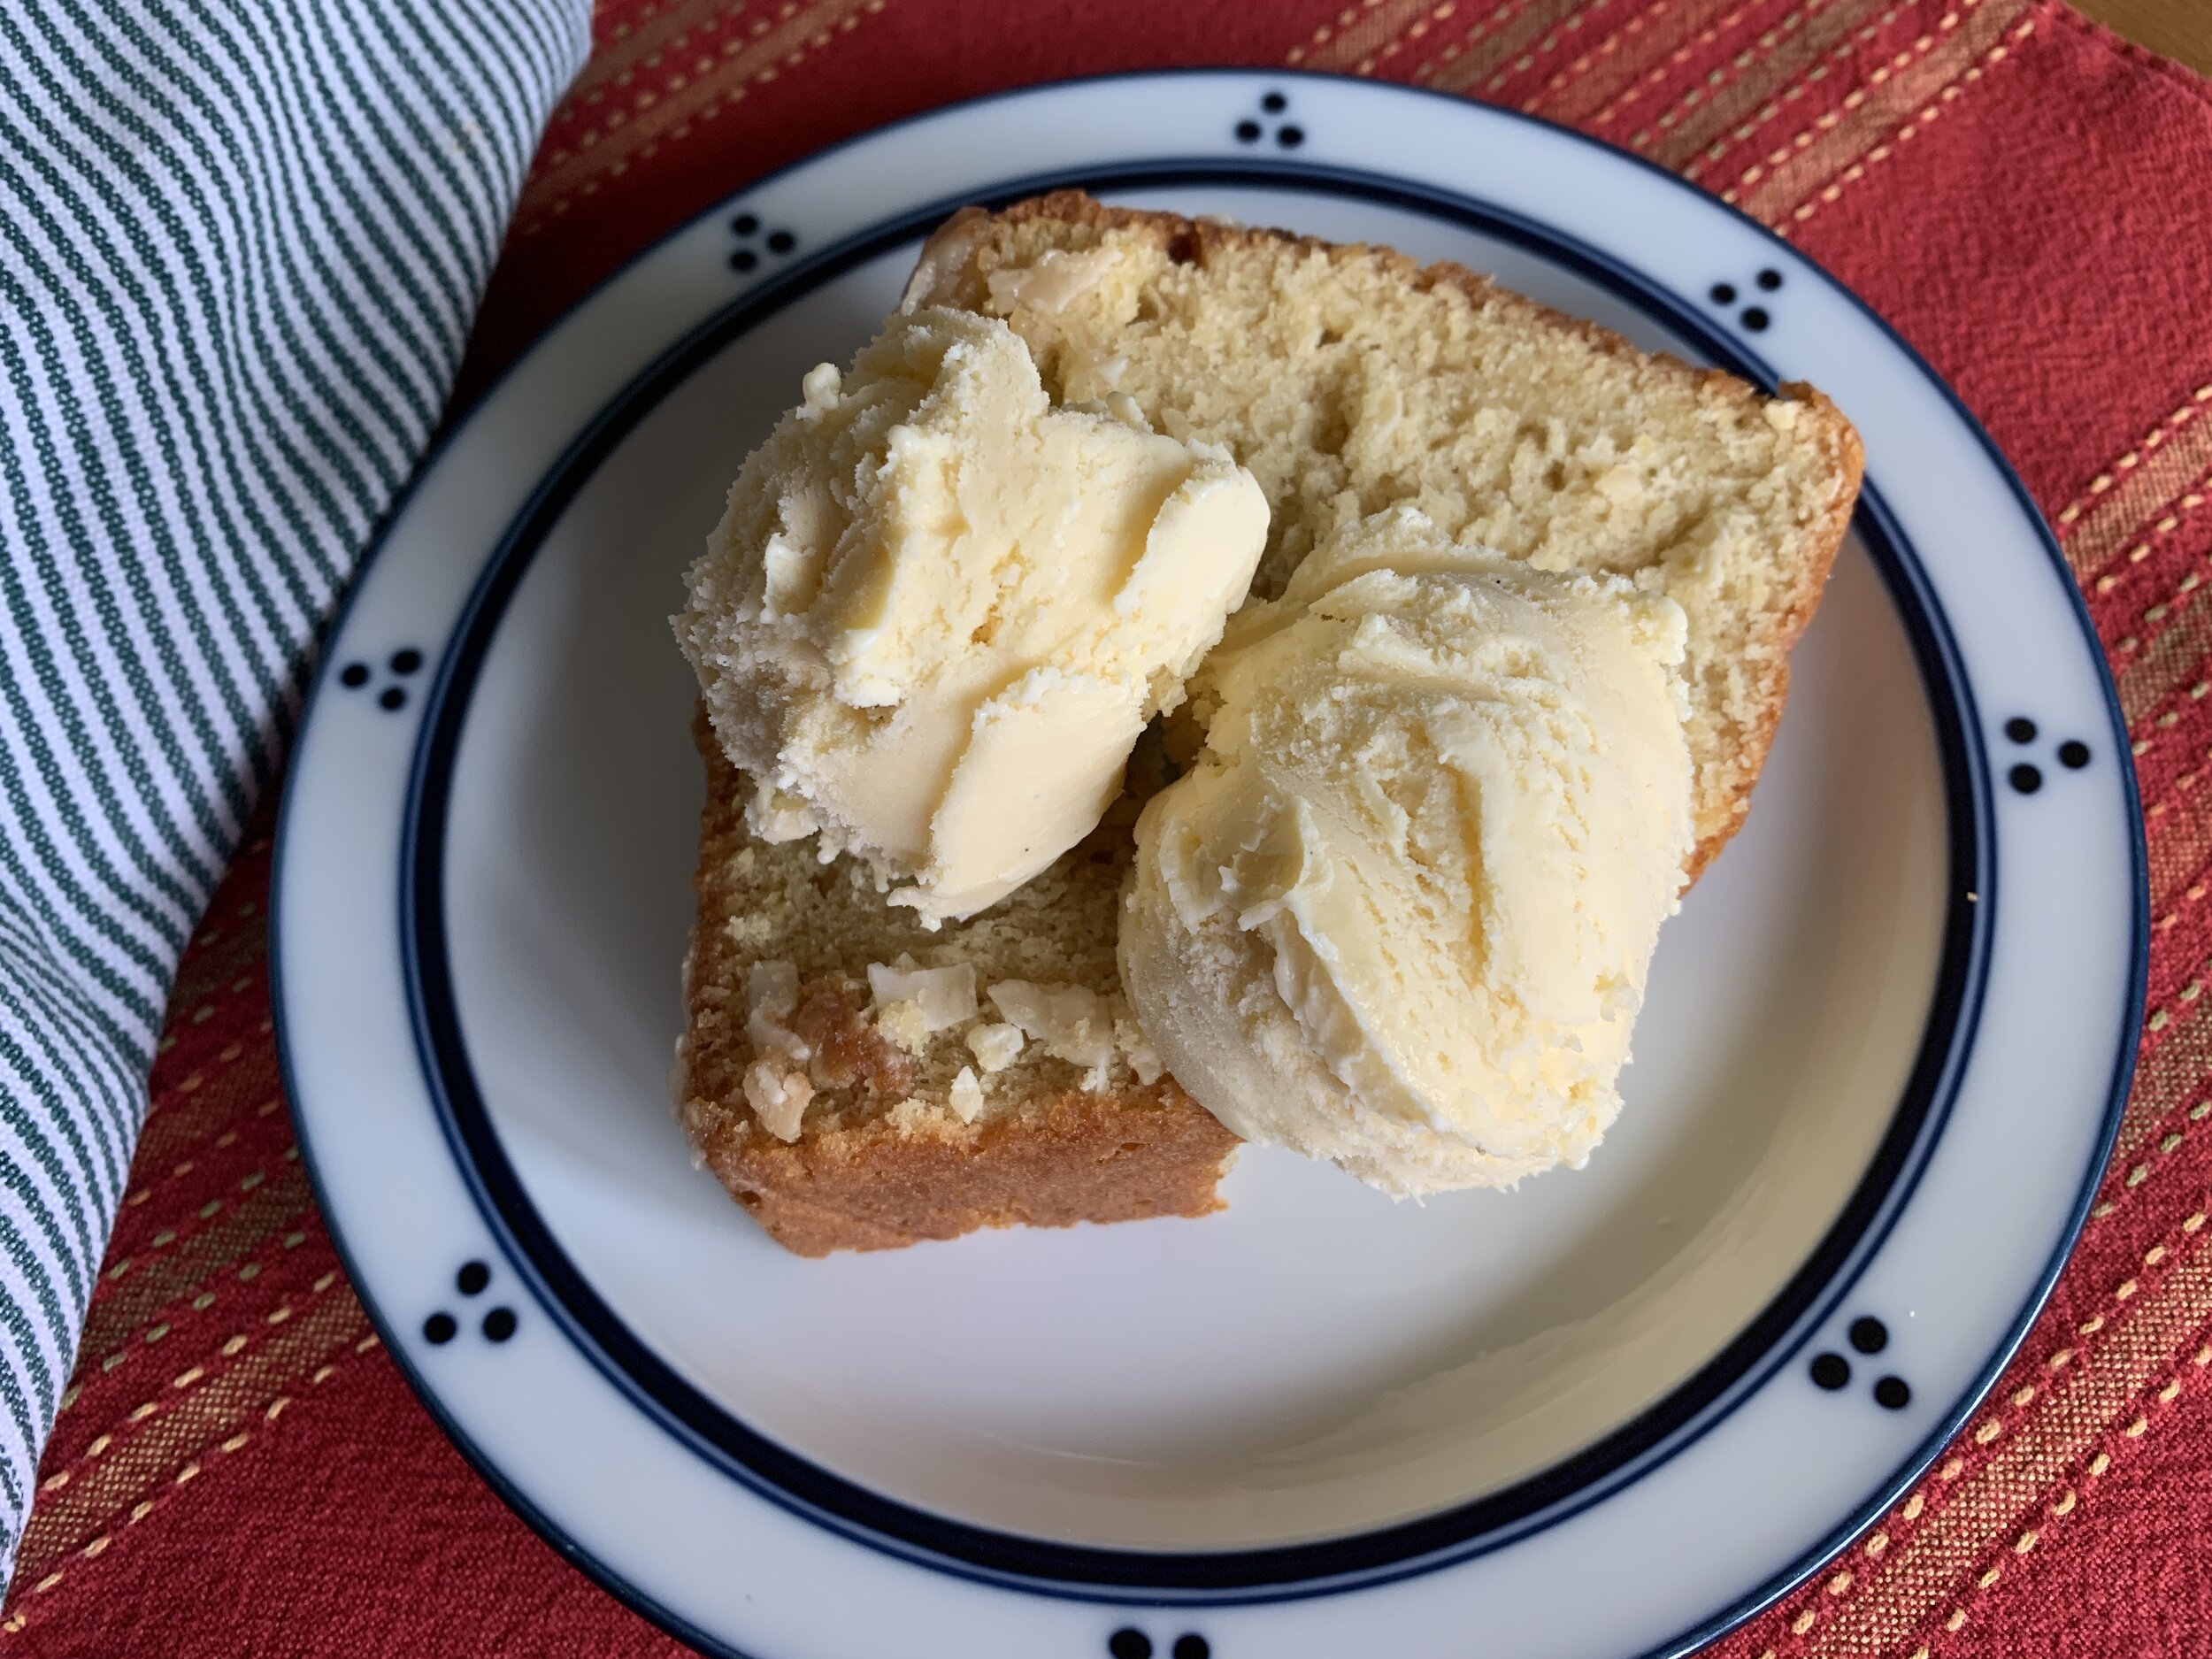
Moist, tender and citrus scented, serve a simple slice with an afternoon cup of tea or coffee. For a light dessert, serve with Chantilly, a sprinkle of fresh berries and toasted or candied sliced almonds. Or amp it up a notch and top with a scoop of vanilla ice cream, warm berry sauce and a crunchy crumble. I think you’ll like it.

I see some almonds!!

Autumn is coming! Yay!

Favorite garnishes part 2: candied citrus

Citrus teacakes

On to part 2 of my favorite garnishes - candied citrus. It takes a bit of time but is a perfect project for a snowy winter day. Put on some music, feel a calm come over you and have fun!

Lemon, lime, grapefruit, orange, tangelo - all are fair game. Check out this post on just one way to use them.

Orange craquelin

To candy citrus peels you’ll need a couple of small to medium sized sauce pans and a medium strainer.

In one pan make a simple syrup using equal parts granulated cane sugar and water (1/2 to 3/4 cup each should be plenty), and in the other one place enough cold water in which to immerse your citrus peels.

Prep the peels by cutting the rind off the fruit, white pith and all, then trimming the pith off (there will invariably be some left) to leave the colored outer skin (the oils and flavor are here!) Cut the peel into matchsticks and place them in the pan with the cold water.

Bring to a boil, strain and rinse, refill the pan with fresh cold water then repeat the process two more times. This helps reduce the bitterness.

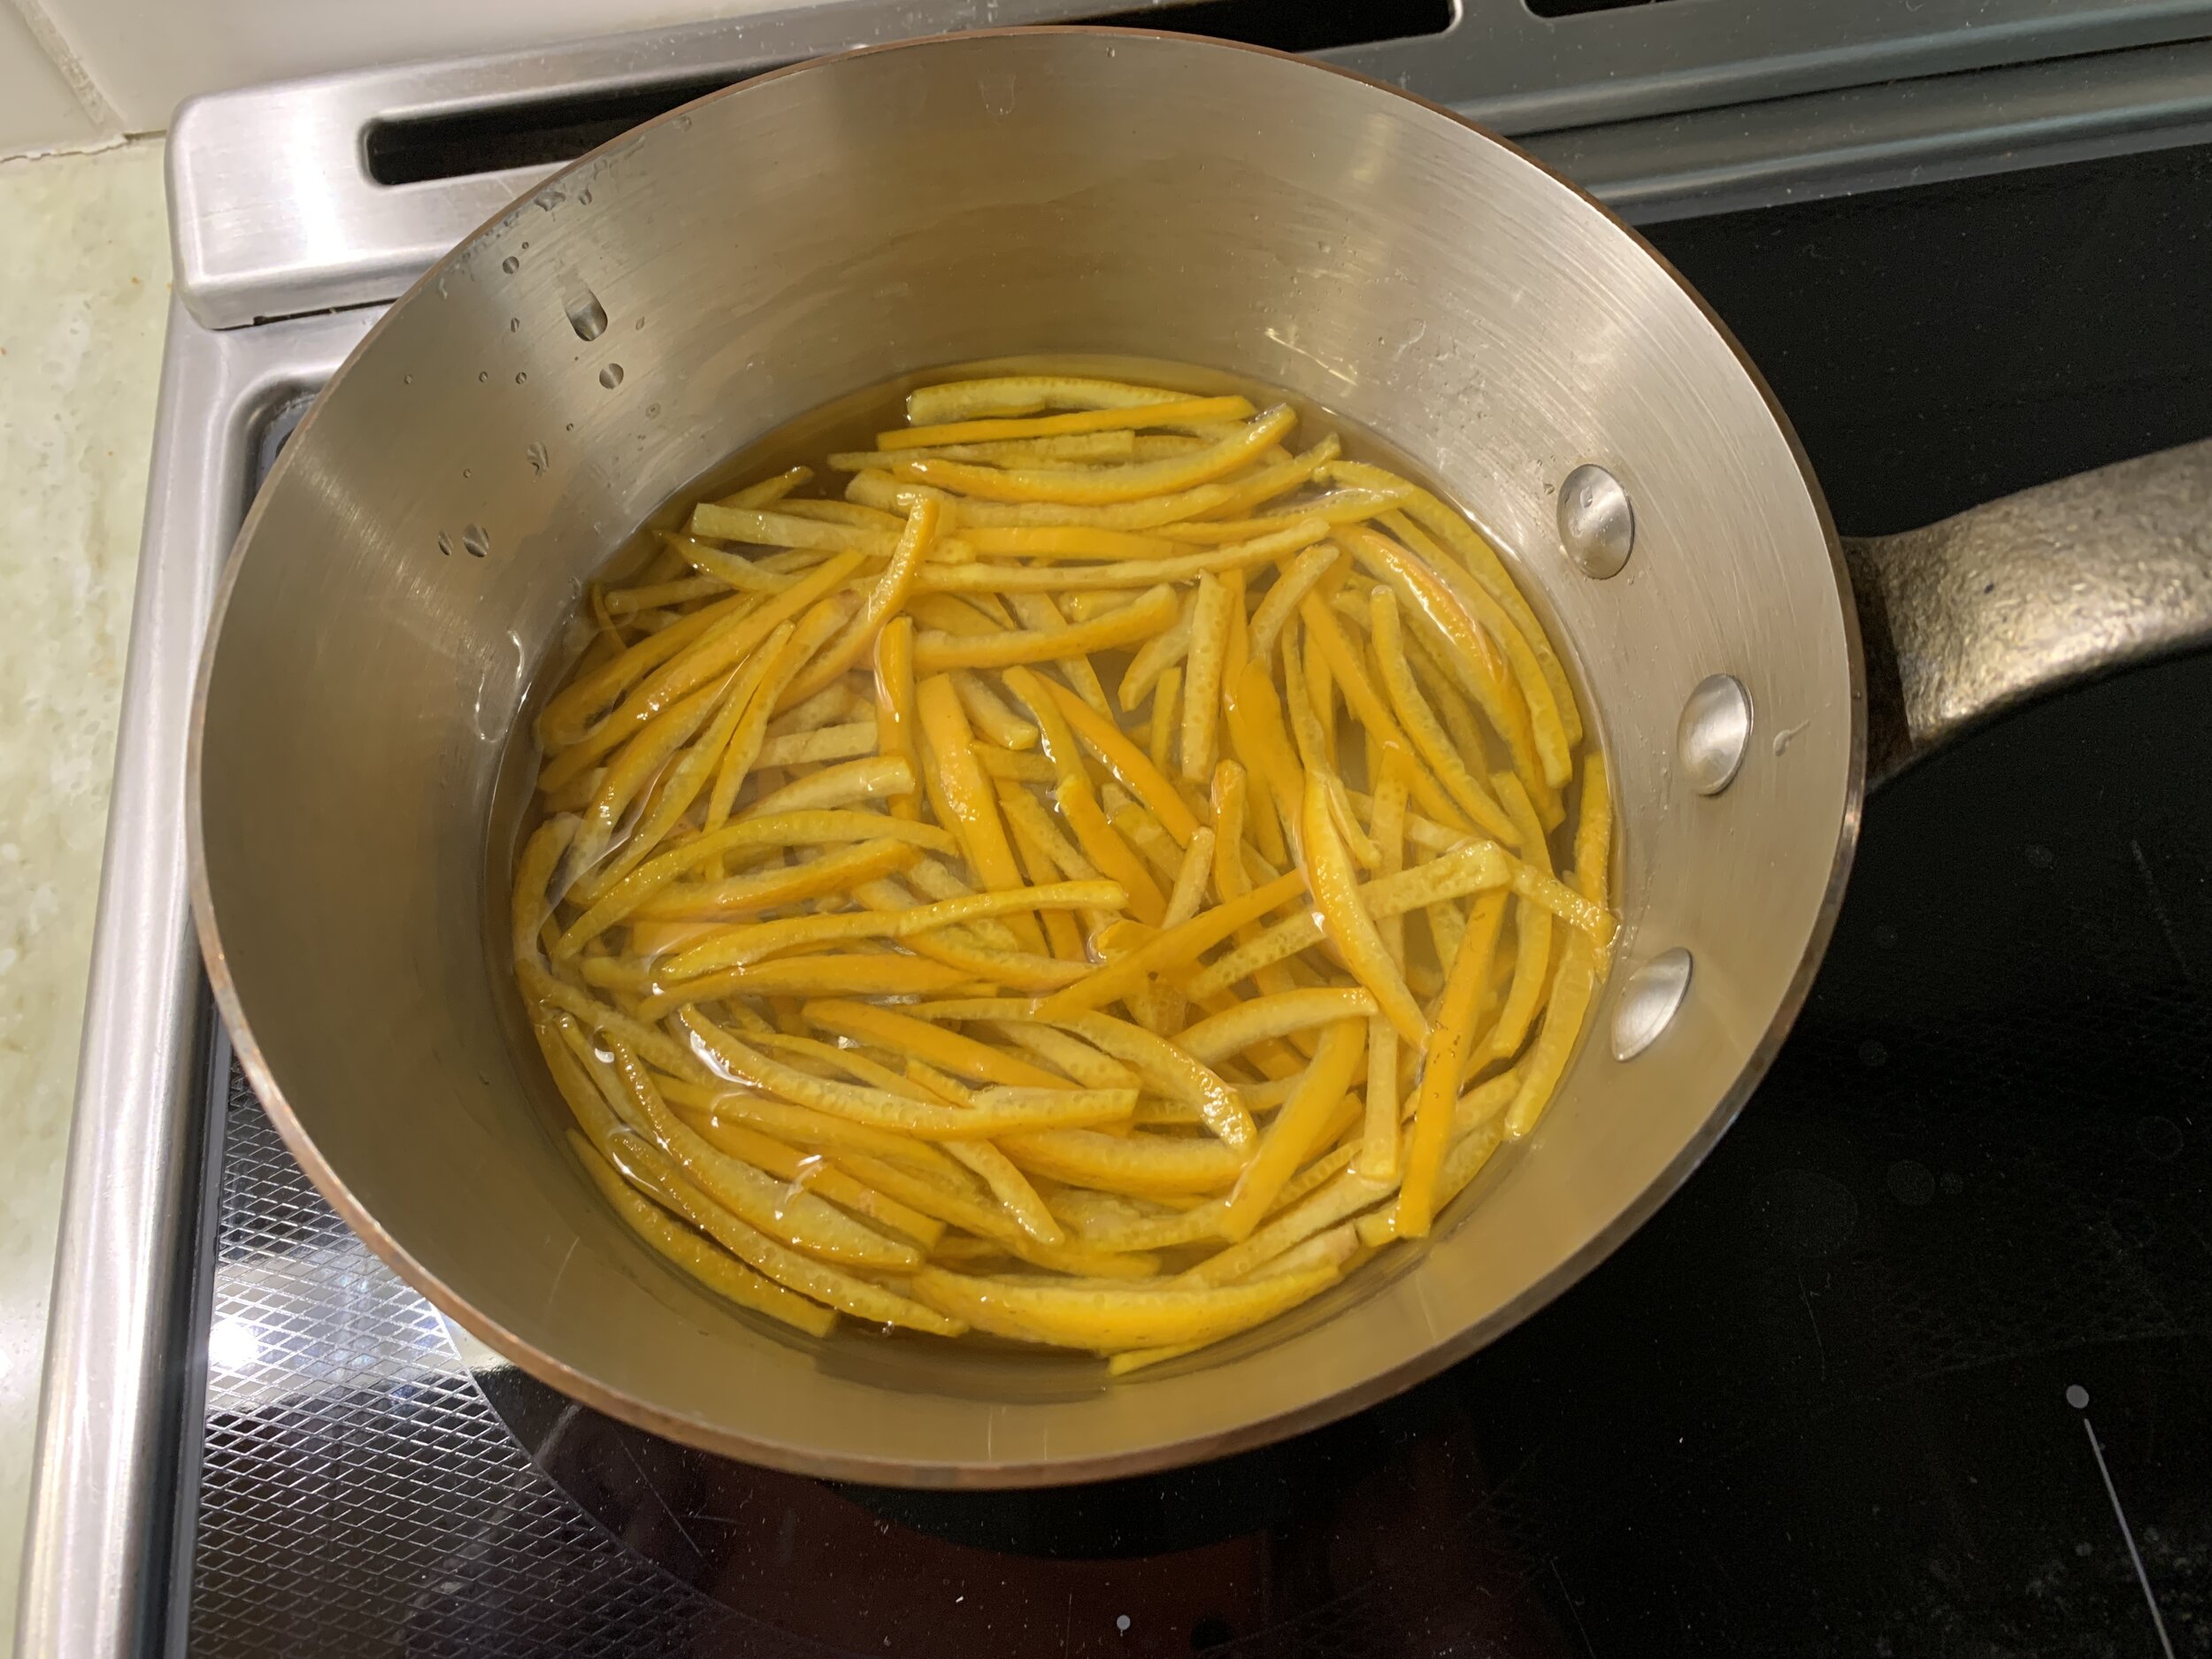
Now put the peels into the simple syrup and simmer until softened and translucent. This can take 30 minutes or so. Go ahead and busy yourself with cookie dough or pastry cream or cake batter. You’ve got time.

Starting the process

All softened up - see the difference?

Remove from the heat and let cool. At this point you can store them in the syrup in the fridge for several weeks, using as desired.

You can also separate some out, strain off the syrup and toss them in sugar.

Separate and place them on a wire grid to dry then store in a covered container at room temperature for a couple of weeks.

Either the sugared and dried rinds or the soft and refrigerated-in-syrup rinds are great for a garnish on a tartelette or teacake. Or chop them up finely and add to your cake batter, cookie or brioche dough or Swiss meringue buttercream. You be the judge.

Hint: the sugared/dried pieces are lovely with a small piece of chocolate and a few candied nuts for a satisfying after meal treat when you’re looking for just a little something.

Meanwhile, feel the calm and peace of the holiday season. We all deserve it.

My handmade angel shoes

Tarte aux fraises fraîches et à la crème

930BCED4-2B0F-405C-A6C9-75B3166CC6C8.jpeg

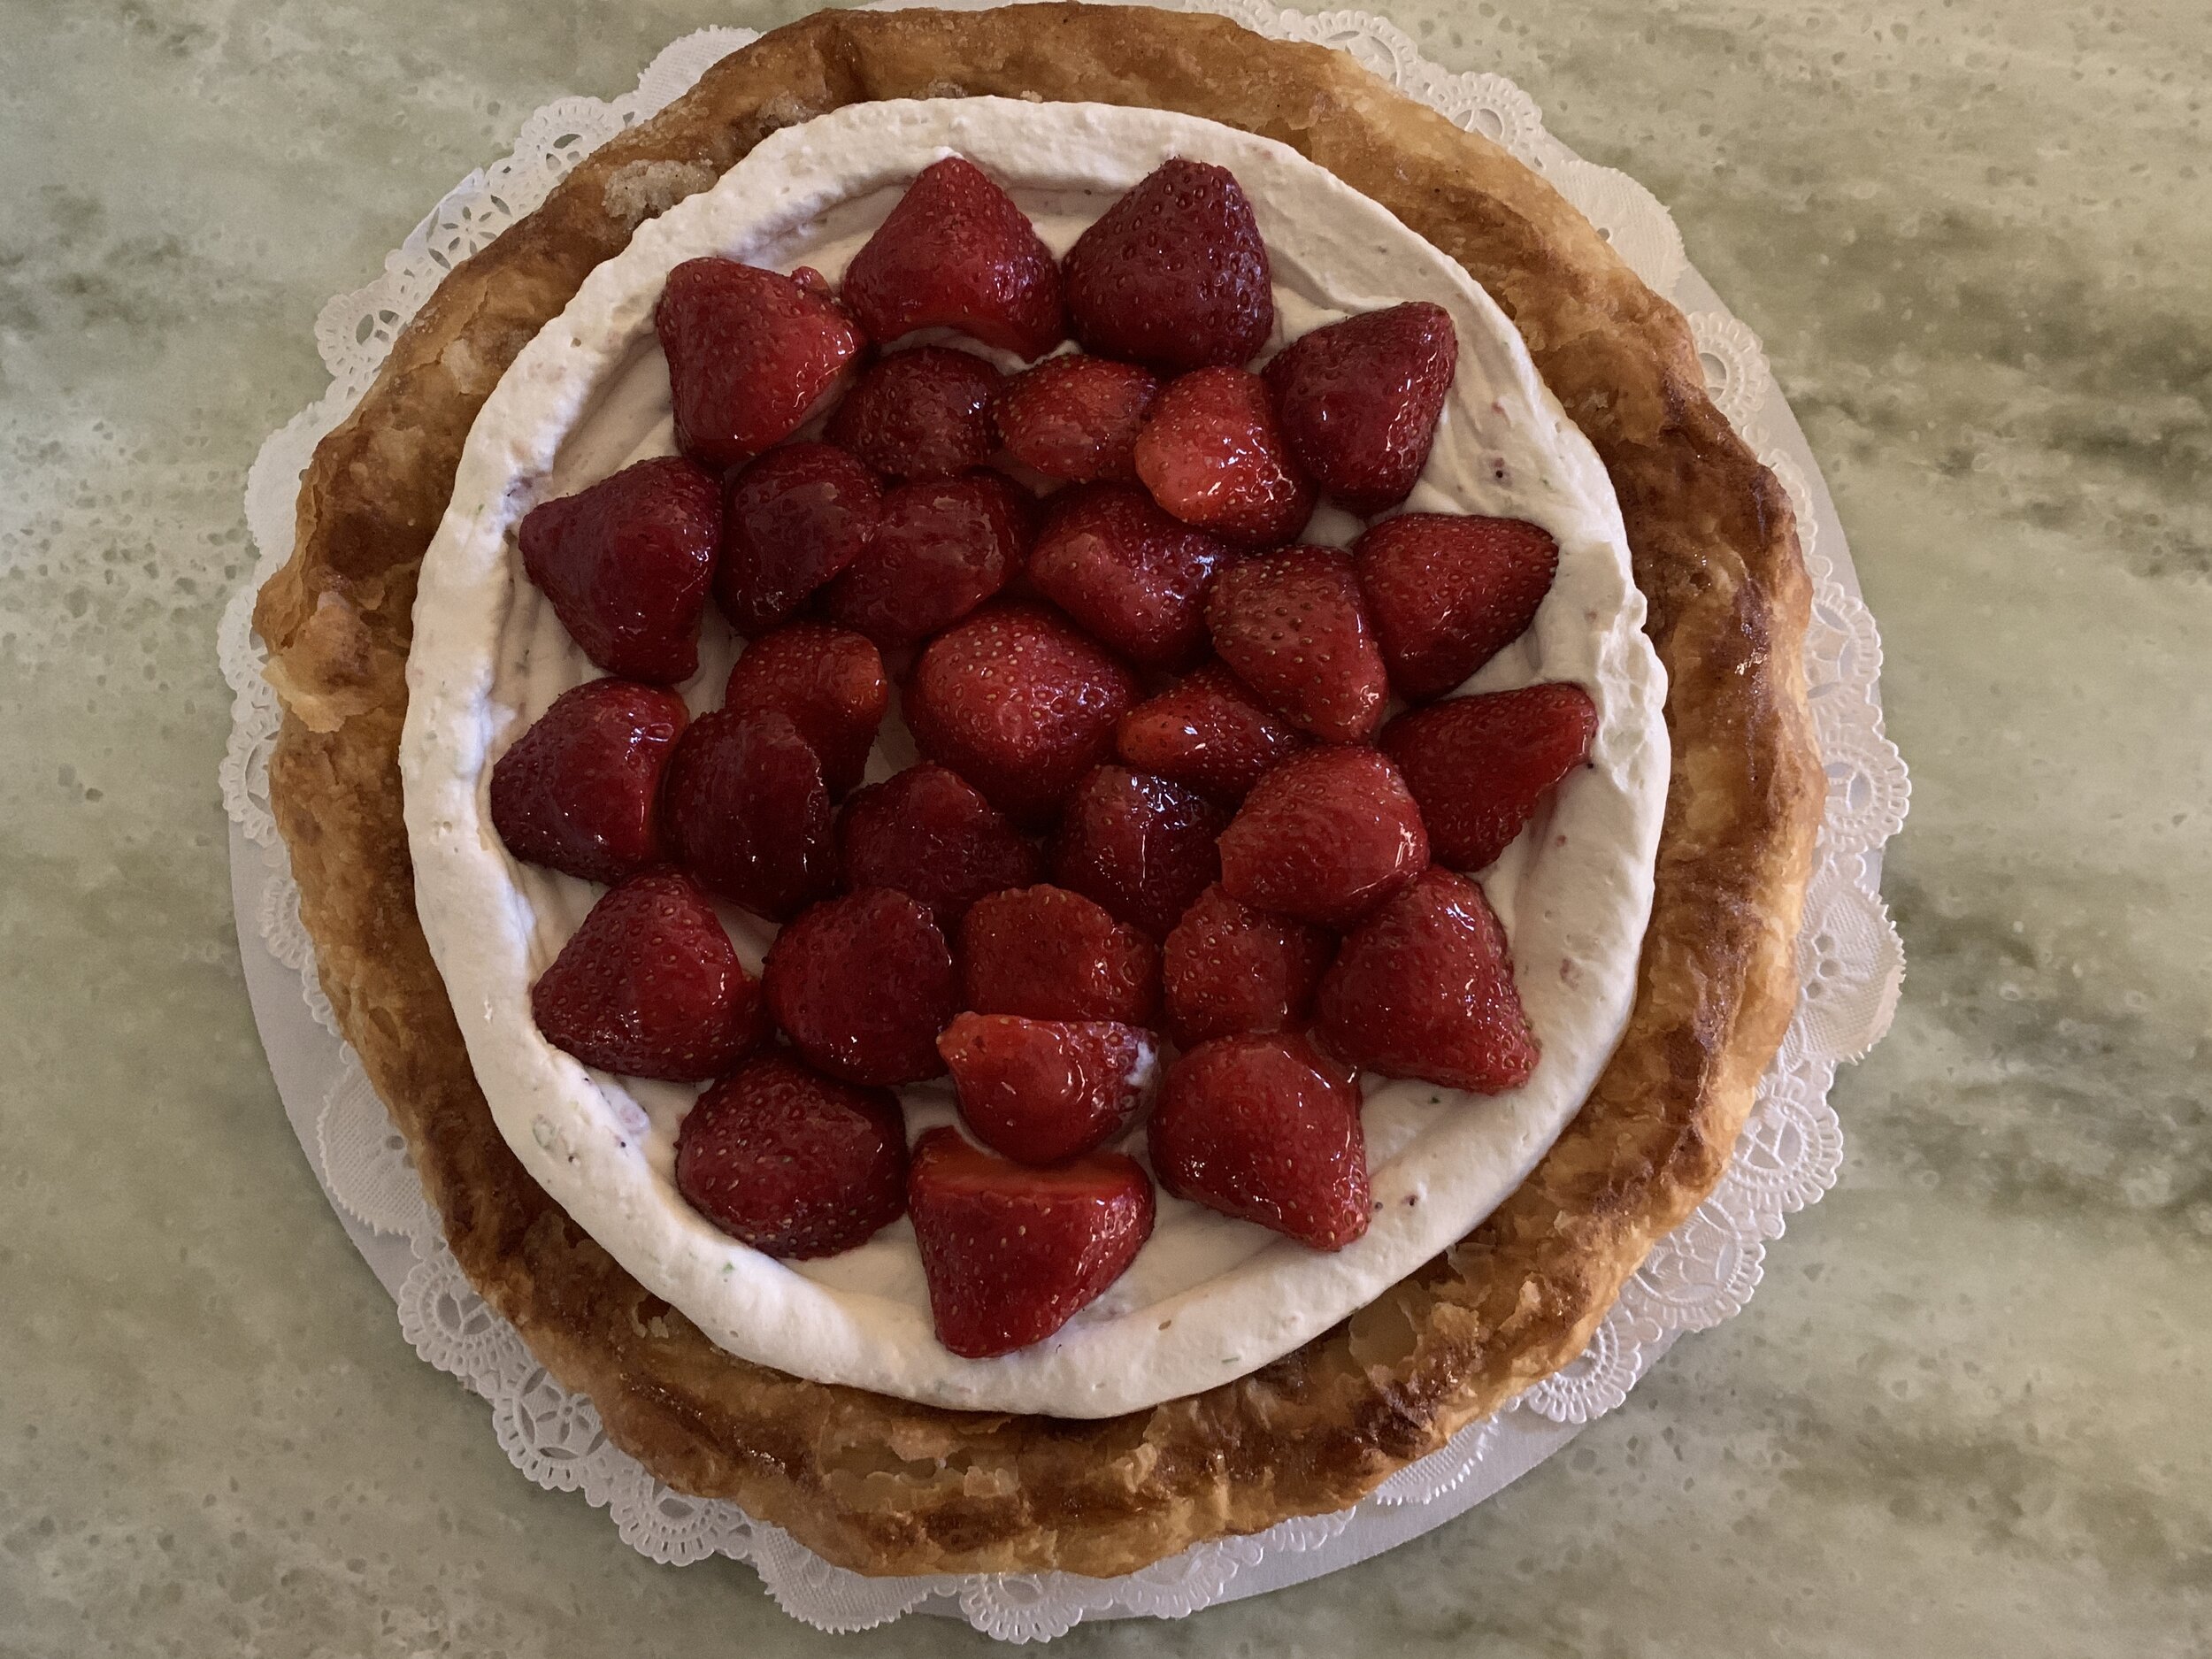
It’s fresh strawberry season here in west Michigan! It doesn’t last long so we have to enjoy it while we can and what better way than nesting these succulent gems atop a whipped lime mascarpone cream in a flaky, buttery puff pastry base. Now that’s summer!

DAC727EA-C736-4E3B-B19E-130F0CEF2F16.jpeg

This is yet another great example of putting together a couple of favorite base recipes to create a delectable dessert. In this case I made a batch of rough puff pastry using 1/2 spelt and 1/2 ap flour. You can make the dough ahead and keep it frozen, well wrapped, for at least a couple of months. Thaw it in the fridge overnight the day before you want to use it.

It’s best to work with the dough cool so if your kitchen is pretty warm as can happen during these summery days, don’t be shy about popping it back into the fridge or freezer for a few minutes to keep it chill during any rolling session.

Using about 275 g of finished dough, roll it out to an approximately 11” inch square or as close to a circle as you can. Using a 9” tart form as a guide, trim the dough to a 10” circle; fold the edges under about an inch to form a lip, flute them if you’d like, brush it all with cream and sprinkle with vanilla sugar. Give it a good fork pricking, then into the freezer it goes for a least 30 minutes (while your oven is heating). Cold dough into a hot oven makes for good puffing. You can also roll and shape the dough ahead and hold it frozen for a day or two before baking (bake right out of the freezer - no thawing needed).

Remember when rolling out the dough, give it a rest for a few minutes a couple of times along the way before you finish to your desired size. It gives the dough a chance to relax (something we all need now and then) and will hold its shape better during baking. Give it a final rest before cutting - if you’re in a hurry, your dough may shrink back and loose it’s lovely shape.

799756C9-829E-41CF-A1E5-DABA6E0BB8FC_1_201_a.jpeg

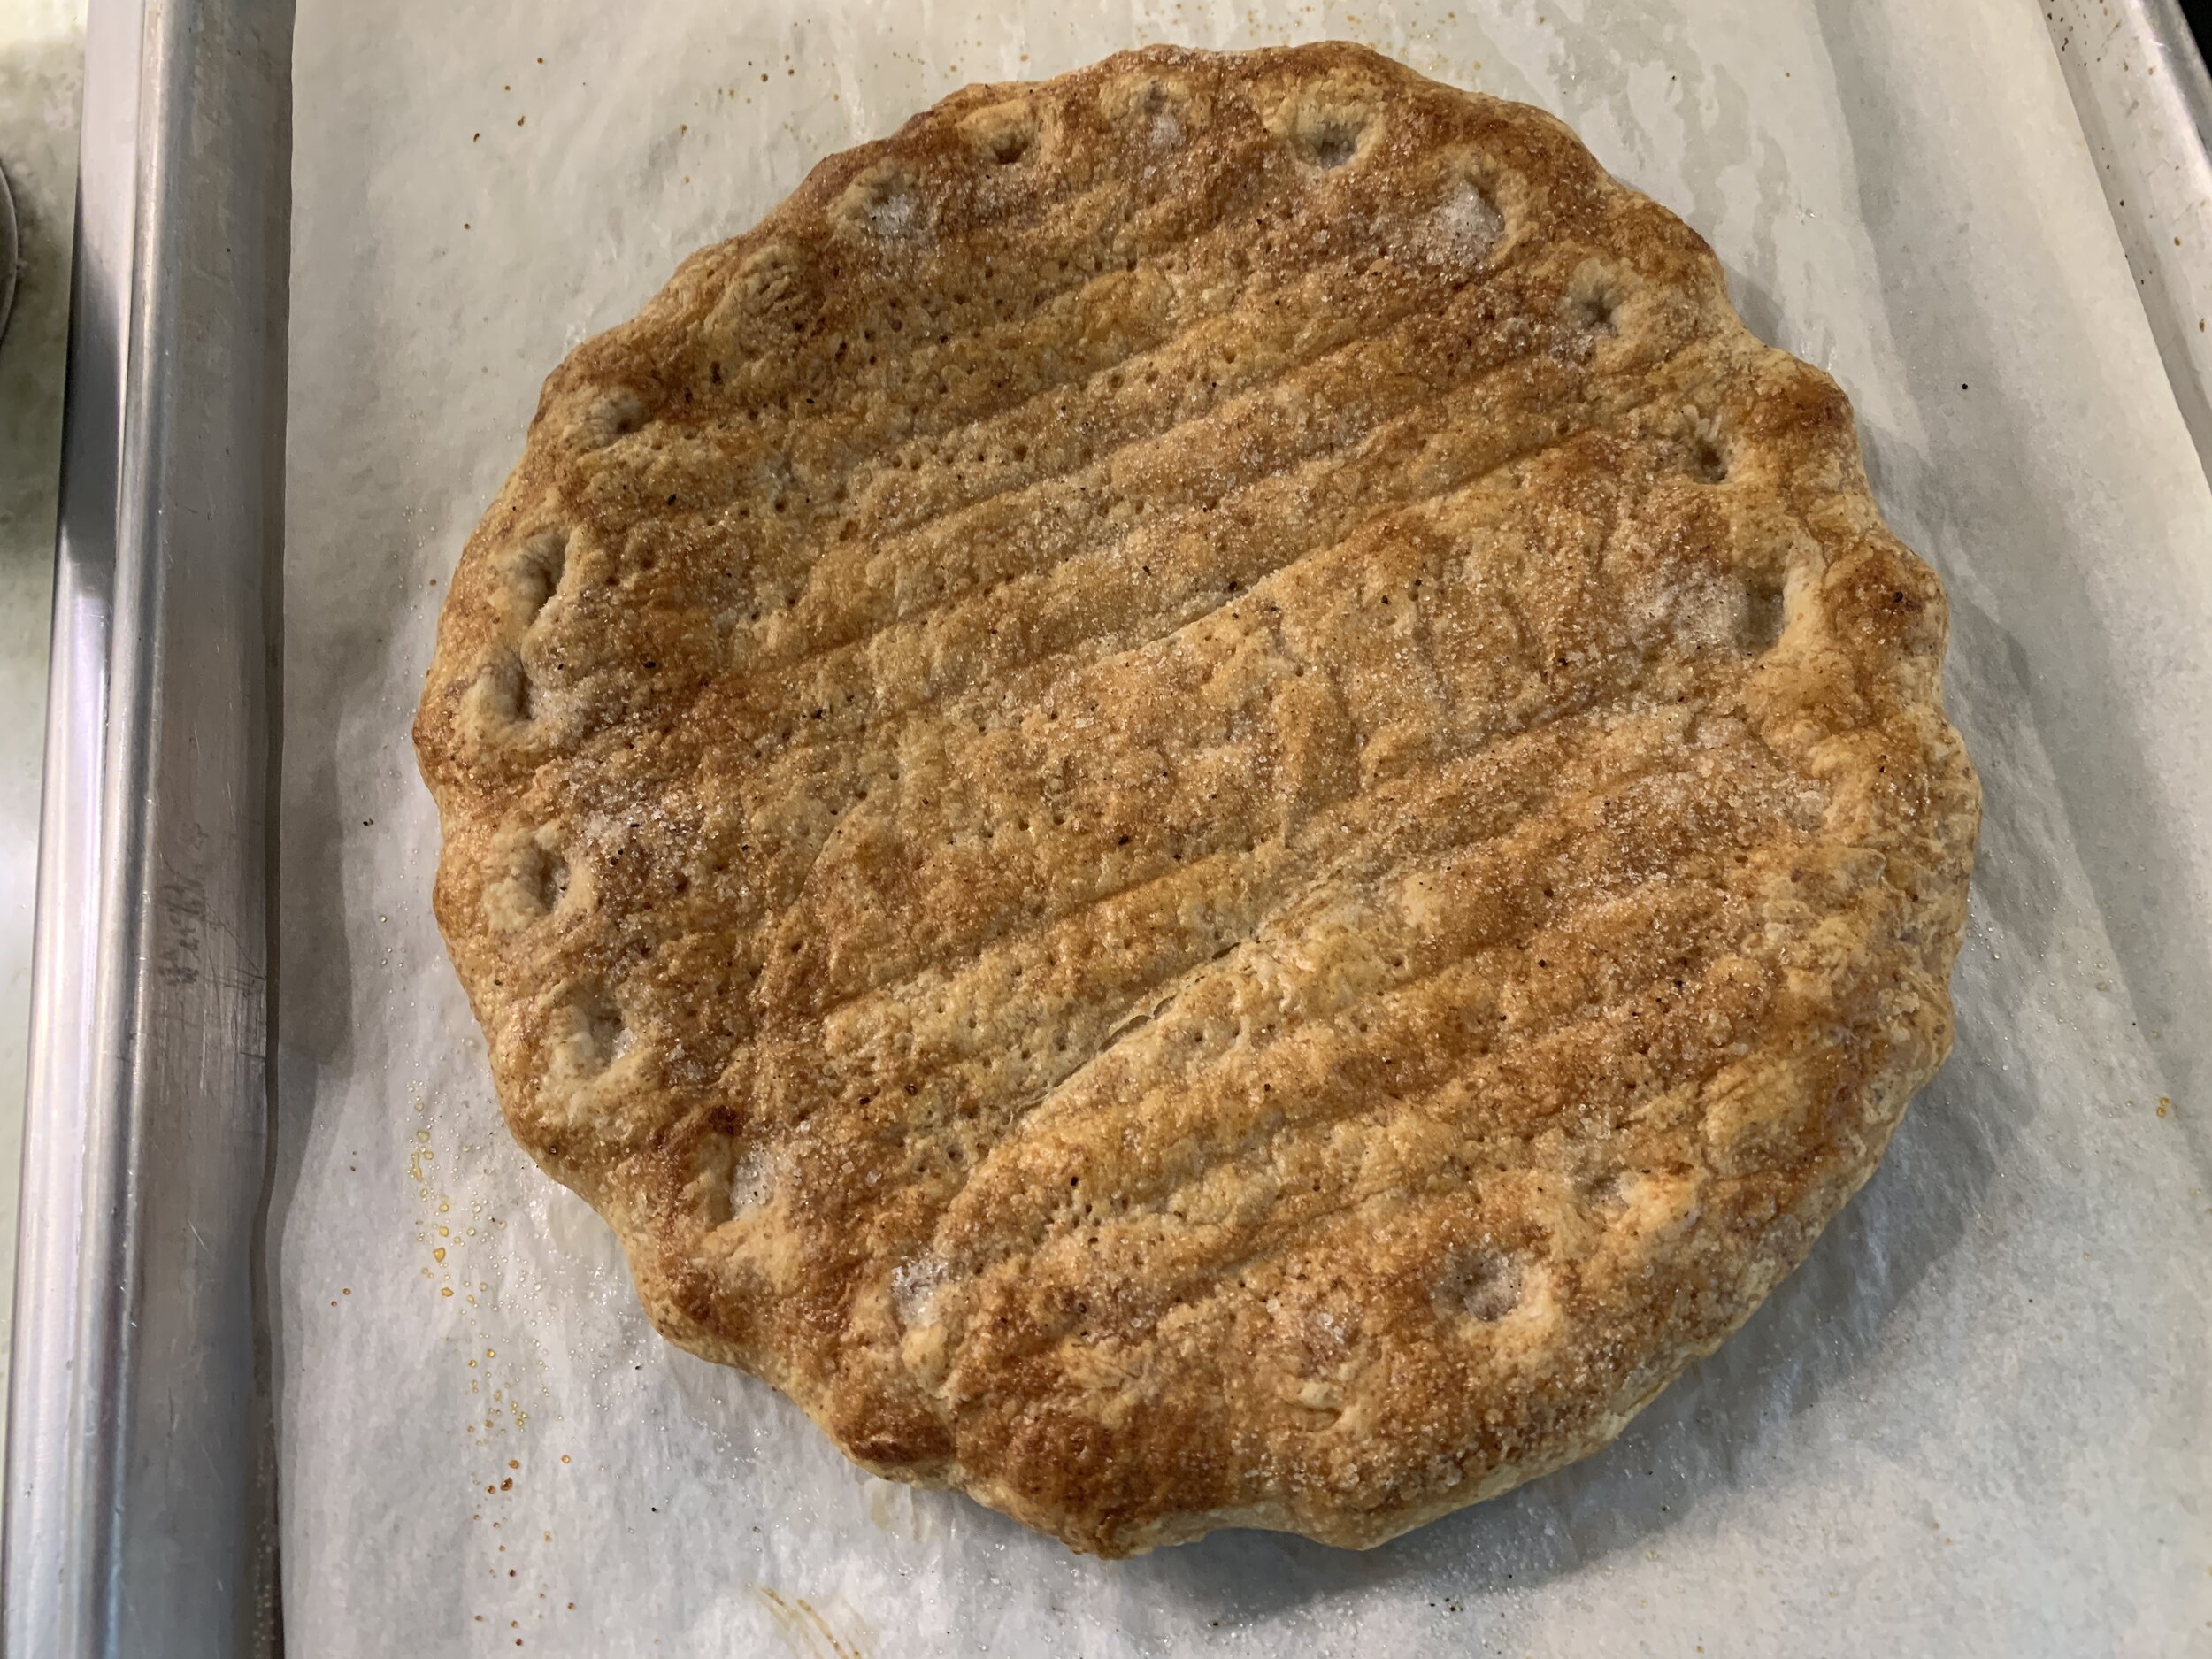
For this tarte the crust is fully baked before adding the mascarpone cream and strawberries. I heat the oven to 425ºF to give my freezer stashed puff a nice hit of heat to start the puffing process. I place overturned wire grids across the sheet pan to give the puff an even rise and bake for 10 minutes before turning down the temp to 400ºF.

37C49C85-6778-4357-8C51-4D08D8FBD760.jpeg

After another 5-8 minutes I remove the wire grids, decrease the temp to 375ºF and continue baking until nicely golden brown, another 5 minutes or so. Don’t be afraid to tweak your oven temps as you watch what’s happening in there. You be the judge.

All baked up

All baked up

Once cooled, I take a sharp knife and develop a border to delineate where my filling will go, gently pushing the puff down in the center (not too much!).

3BA7813E-F54E-468B-AA30-34690F9592CA.jpeg

Make the mascarpone filling and either pipe it or spread it over the crust, leaving the border free. For this size tarte a half recipe is just right. I used caramel as my sweetener, added the zest of a lime and a dollop of roasted strawberry purée to give it that special something.

A7D7EF68-9BA1-43B6-8B95-14C6677F9239_1_201_a.jpeg

The big challenge is how to arrange the fresh strawberries. While my heart tells me to be devil-may-care about it, my orderly personality makes me reluctant to throw caution to the wind. I made several of these for Father’s Day gatherings and created three different versions just because.

The first one, at least around the edges, reminds me of the humps along a cartoon dinosaur’s back . . . . . or a multi-pointed star.

One

One

The second is the most jumbled of the three - I sliced whole strawberries and while keeping the slices together tucked the berries rather higgle-dy/piggle-dy over the cream. Hmmmm . . . not sure about this one but there’s no going back now. Let’s remember it still tastes delicious!

Two

Two

The third is simple yet classy (Steve’s favorite).

Three

Three

I used some strawberry jam diluted with a bit of water and strained to give a light brushing over the berries for a bit of shine. It makes all the difference.

I had also assembled a small test tarte for us to sample, refrigerating it all day before tasting so as to assess how the puff would hold up. We finished it off the next morning after continued refrigeration over night, and I’m here to tell you that it handled it very well. Yay! I’m a stickler for serving things as freshly made as possible, but it’s always good to know when there’s some staying power to provide a bit of timing leeway.

At any rate, summer is officially here and I wish all of you a fantastic reopening full of good times ahead.

Smile!

67DC8FF0-B602-467F-B51E-9BE865996D5E.jpeg

Toasted coconut pound cake

IMG_0404.jpg

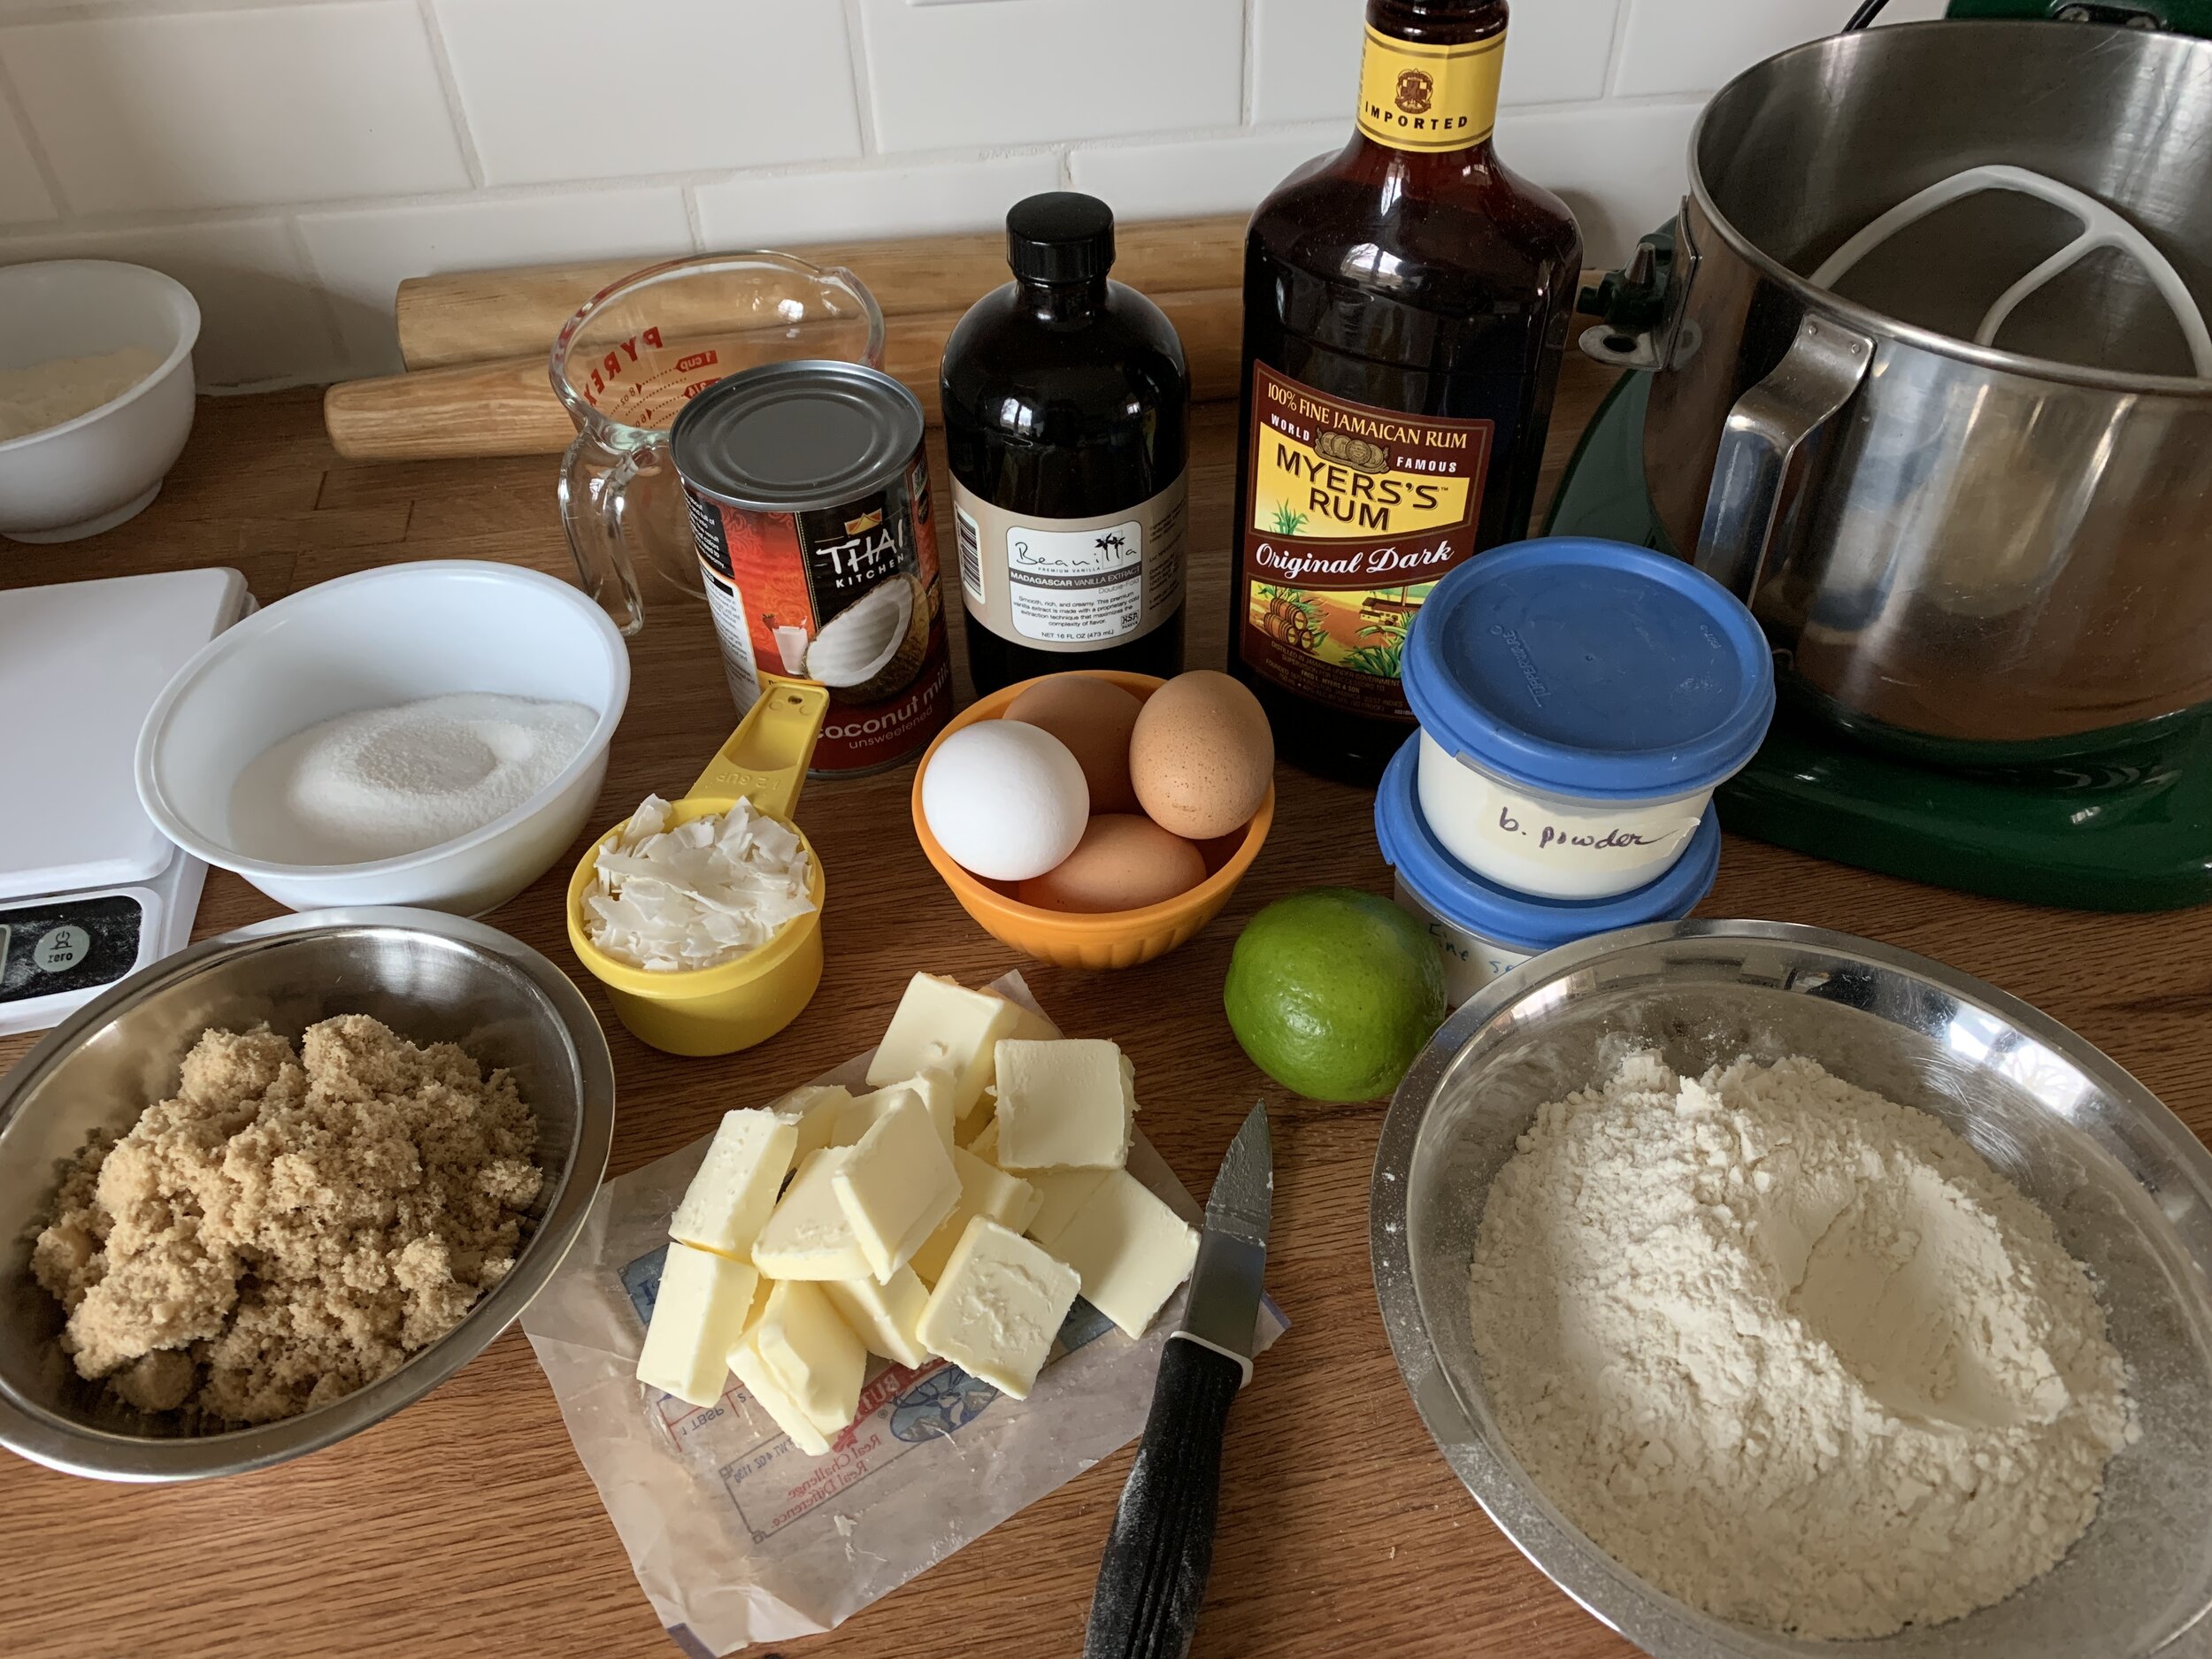
A can of coconut milk, some unsweetened coconut chips, a lone lime in the fridge, a bottle of rum - how about toasted coconut milk pound cake and some toasted coconut ice cream to go with it? Right-o.

IMG_0584.JPG

Some months ago I had purchased a bag of Trader Joe’s unsweetened coconut chips and felt it was high time to adios that bag from my pantry cupboard. Same for a can of Thai Kitchen’s full fat coconut milk that had been destined for . . . . . hmmm, now what was I going to do with that again?

I searched my recipe files for some basic pound cakes and came up with a recipe that felt just right. I made a few of my own substitutions/additions and was ready to go.

IMG_0384.JPG

Here’s what I came up with. There’s coconut milk in both the cake and the glaze, plus I used the rest of the 13.66 fl. oz. can in my ice cream base. Good show - no leftovers!

Ingredients:
Cake
170 g / 3/4 cup unsalted butter, softened
140 g /scant 3/4 cup packed light or dark brown sugar
185 g /scant 1 cup granulated cane sugar
zest of one lime (or two if you have ‘em!)
3/4 cup full fat unsweetened coconut milk (it separates so open the can and mix it up thoroughly before measuring)
260 g / 2 cups flour (I used 60 g whole wheat pastry flour and 200 g all purpose but you can use just all purpose if you like)
3/4 teaspoon baking powder
1/4 teaspoon salt
1/2 cup shredded unsweetened coconut, toasted and cooled (I used coconut chips and simply crushed them up after toasting and cooling)
4 large eggs at room temperature
1 tablespoon vanilla extract + 1/2 tablespoon rum + 1 teaspoon lime juice

Glaze (optional)
42 g / 3 tablespoons unsalted butter
50 g / 1/4 cup brown sugar (light or dark - you decide)
1/2 teaspoon vanilla extract (plus an optional splash of rum)
1/2 cup unsweetened toasted shredded coconut
2 tablespoons coconut milk

For the cake:
Heat oven to 325ºF. Butter and flour a standard loaf pan (9'“x5”). I used my mom’s longer, narrower Mirro “teacake” pan.
Cream butter, sugars, lime zest on medium high for 2-3 minutes until light and fluffy.
Meanwhile blend flour, baking powder, salt and cooled coconut in a separate bowl.
Add eggs to butter/sugar mixture one at a time, scraping down after each addition.
Add vanilla, rum, lime juice and blend.
Add flour mixture alternating with coconut milk, beginning and ending with flour mixture. Blend just until combined.
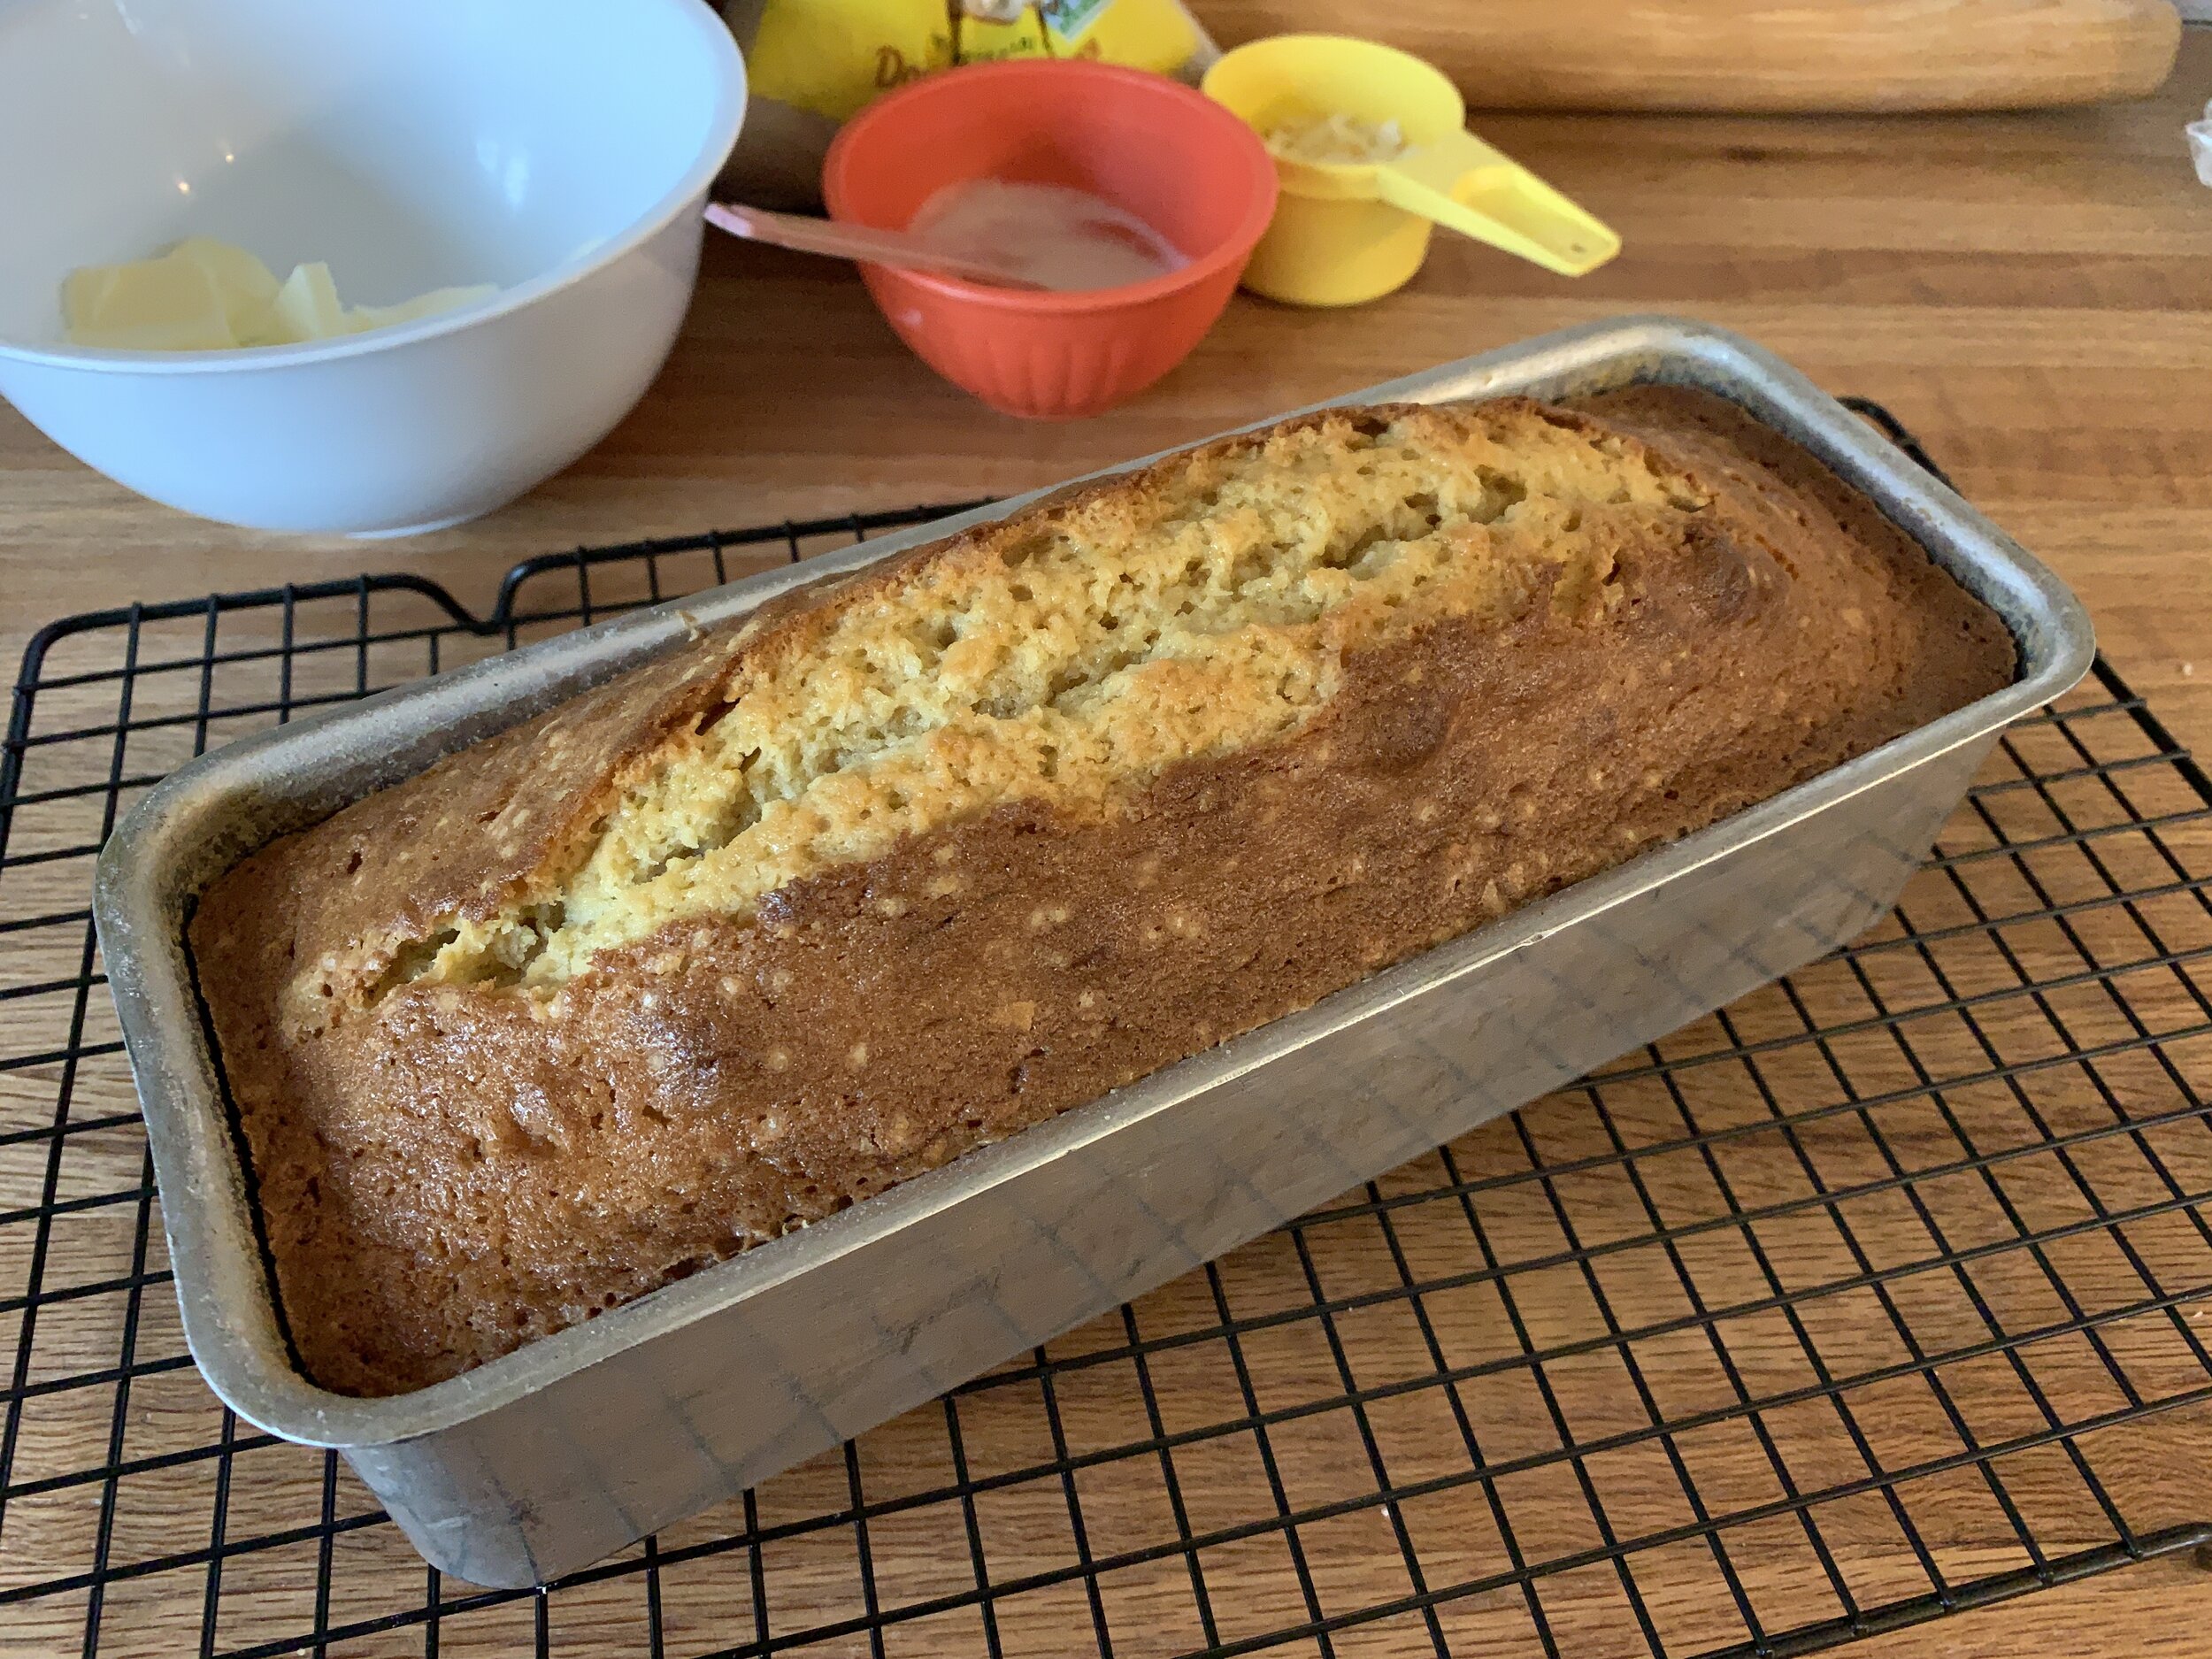
Transfer into prepared loaf pan. Bake 1 to 1 1/4 hours until nicely browned and a tester inserted in the center comes out clean.
Cool in the pan for 10-15 minutes then turn out onto a wire rack set over a sheet pan. Top with glaze (if using) and cool completely.

IMG_0389.JPG
IMG_0401.JPG

If making the glaze, place the butter and brown sugar in a saucepan over medium heat until the butter has melted and brown sugar dissolved. Stir in toasted coconut, vanilla and coconut milk, let cool slightly then pour/brush over the still warm cake.

IMG_0402.JPG

Once cooled, slice and enjoy.

IMG_0405.JPG

Our first taste was for an afternoon snack accompanying our coffee time. So good.

My baking goals typically focus on a balance of flavors - subtle yet playing well together. “Some” (hint, hint - Steve) say I’m often too timid with flavor additions but in this case - bam! The moisture, the toasted coconut, the caramel-y-ness from the brown sugar and rum (without being overly rummy) are deelish.

I will admit that not much, if any, lime comes through, but at least I used up the one lonely lime that was crying out to me from the fridge. Next time I won’t even bother since the other ingredients do the trick .

As mentioned I used the remainder of my can of coconut milk to make toasted coconut ice cream, replacing the whole milk in the recipe with coconut milk and infusing the dairy with toasted coconut before making the base. Check out this link for more on that, as well as additional ice cream making fun! Summer here we come.

We had a very quiet Easter Sunday at home with a simple evening meal of grilled chicken salad over greens, a side of Bush’s baked beans and some oven fried potato wedges. And for dessert? Toasted coconut pound cake with luscious, creamy coconut ice cream of course!

Once again - stay home, stay safe and happy baking!

IMG_0585.JPG


Petits gâteaux part 2 - toasted coconut lime

IMG_2642.JPG

Welcome to part 2 of petits gâteaux!

This toasted coconut cake is based on a pound cake recipe I've had for many years, even before pastry school days. I tweaked it in a few places to create a delightful, dense and flavorful cake made with ricotta, lime zest, diced dried pineapple, toasted coconut, a bit of whole wheat pastry flour plus the usual butter, eggs, sugar etc.

I baked these babies in another of my favorite flexi-molds from Silikomart - a rectangular ingot shape that just speaks to me.

Ready for the oven

Ready for the oven

All baked up and glazed

All baked up and glazed

Just out of the oven I brushed on a lime glaze then popped them back in for a few minutes to set the glaze.

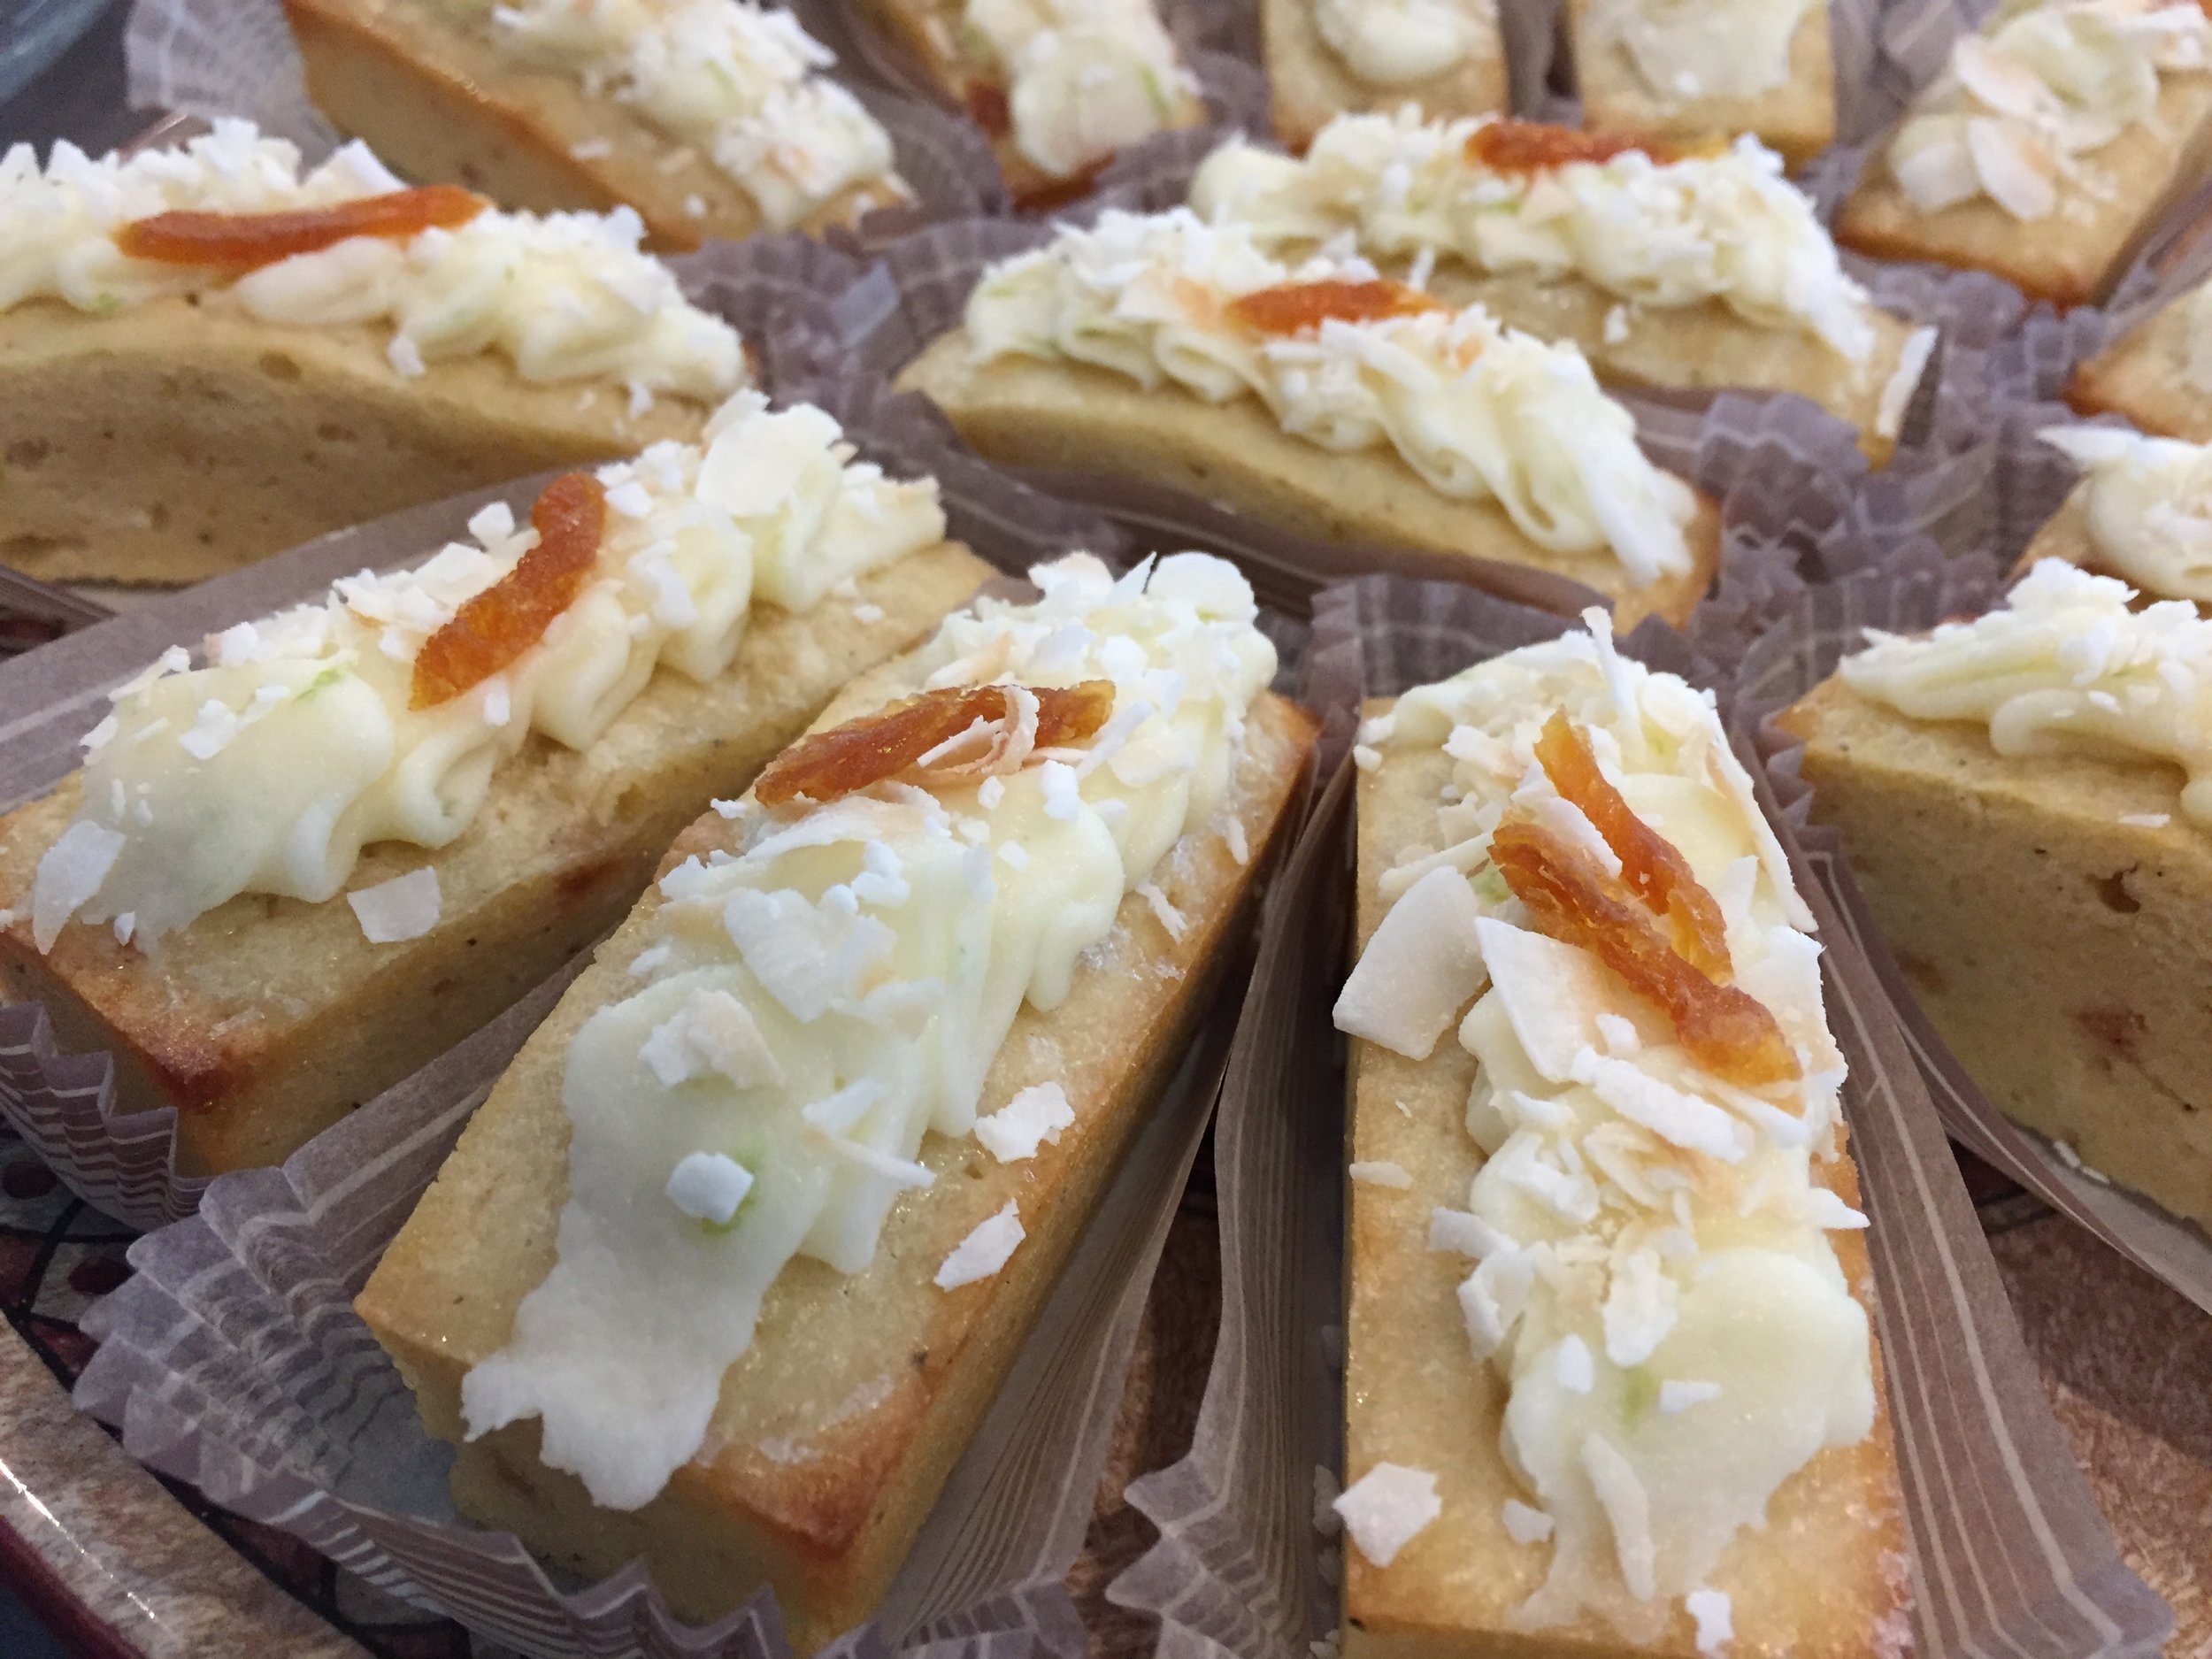
Once cooled, I garnished the cakes with a basic cream cheese frosting, zinged with some lime zest, plus a sprinkle of toasted coconut and a julienned piece of dried pineapple.

IMG_2639.JPG

Time for the recipes!

TOASTED COCONUT LIME CAKE: makes one standard Bundt cake OR two medium loaf pans or multiple small cakes. I made a half recipe which yielded 19 "ingots". Components include cake, glaze and frosting plus garnishes.

  1. Get a few things ready: toast 70 g (plus a bit more for garnish) unsweetened shredded coconut and set aside. Zest three limes, reserving the zest of two for the cake and one for the frosting, then juice the limes to yield 45 ml juice (you can do a combo of pineapple and lime juices if you'd like) for the cake plus 30 ml juice for a glaze at the end. Finely chop about 1/4 cup dried sweet pineapple (I found mine at Trader Joe's) and cut a bit more in strips to use as top garnish.
  2. Heat the oven to 325 ºF. If using a Bundt pan or loaf pans, do the butter and flour thing. No need for that with silicone molds.
  3. In a medium bowl whisk together 272 g all purpose flour, 88 g whole wheat pastry flour and 1/4 teaspoon salt.
  4. In the bowl of a stand mixer fitted with the paddle attachment, cream 227 g unsalted butter with 170 g whole milk ricotta until smooth; add in 480 g granulated sugar and the two lime zests, then cream until light and fluffy. NOTE: I like to rub the lime zest into the sugar as I do my mise en place then just add the zested sugar when ready.
  5. Add 5 large eggs, one at a time, beating well and scraping the bowl after each addition.
  6. Blend in 1 teaspoon vanilla extract.
  7. Add lime juice alternating with the dry ingredients just until blended.
  8. Blend in the toasted coconut and diced dried pineapple.
  9. Fill prepared pan(s) or molds and bake. Bundt will take up to 1.25 hours, loaves more like 50-60 minutes and small cakes perhaps 20-25 minutes. Watch what's going on in there! A skewer inserted in the center should come out clean. Remove from the oven.
  10. While your cakes are baking, make a GLAZE by whisking together 3/4 cup powdered sugar and 2 tablespoons lime (or pineapple) juice. You want it thin for just that oh-so right light coating. Once the cakes are out of the oven, brush the glaze on the surface and pop them back in for a few minutes to set the glaze.
  11. Let cool in the pan or molds, then remove.

LIME CREAM CHEESE FROSTING: makes about 2 cups, plenty for your needs (I made a half recipe for my half cake recipe).

  1. Soften 227 g cream cheese and 113 g unsalted butter on low in the microwave. I you prefer not to use a microwave, place the cream cheese and butter in a bowl and place that in a second larger bowl with warm water - you want them soft, not melted.
  2. Add 170 g powdered sugar, 1/2 teaspoon vanilla, a splash of lime juice and the zest of 1 lime.
  3. Blend all until smooth. Spread or pipe as you desire on the top(s) of the cake(s).

For the pièce de résistance, sprinkle some toasted coconut on top along with a piece of slivered dried pineapple. Et voilà. You've done it!!

IMG_2642.JPG