Strawberry pistachio feuilletés


Forever scheming about ways to use ingredients I have on hand, whether in the freezer or cupboard, I hit upon feuilletés, puff pastry cases filled with whatever your little heart desires.

Our local grocery store, Meijer, has recently started carrying local Michigan, greenhouse-grown strawberries, which look world's better than the usual year round California giant, and often anemic looking, berries.

not bad for "out of season" fruit

I also had some pistachio paste on hand and decided on a pistachio pastry cream filling topped with fresh strawberries and pistachio crumble for this particular adventure.

I rolled out my puff, cut squares and fashioned the turned-corner feuilletés as seen in the photo below.  I popped them into the freezer while heating the oven to 425ºF.


Once the oven came up to temp, I brushed them with a little milk, sprinkled on some vanilla sugar and baked them with an overturned cooling grid across the top of the sheet pans - this technique keeps the puff even as it rises.

After about 10-15 minutes I removed the cooling grids and continued baking until nicely puffed and golden brown (another 10 minutes or so).

just out of the oven

love those layers!

I had made a classic crème pâtissiere au pistache earlier that day.  I added a bit of whipped cream to lighten the chilled pistachio cream.

Once the feuilletés were cooled, I simply pushed down their centers to make room for the filling, piped in some pistachio pastry cream and topped them with slices of strawberry.  Pistachio crumble finished them off, along with a dusting of powdered sugar.


Et voila!


These made for a delicious flaky, buttery, creamy, fruity, crunchy treat after a traditional Easter dinner of ham, cheesy potatoes, asparagus, strawberry spinach salad, carrot souffle and more.

Tasty.  Now just get into YOUR kitchen and create your own version of feuilletés!

Yes indeed.

Hot cross buns


Last week, as the days ticked by before Easter, I kept thinking about the hot cross buns my mom used to buy at the Fremont bakery when we were kids.  They were always a treat back then, and, since I hadn't eaten one in years and had never made them myself, I thought it was high time.

There are a variety of stories about the history of these buns, a topic I'll let you research for yourself.

Popular in many countries, particularly with the Brits, these lightly spiced, yeasted, fruit-studded sweet buns are traditionally served during the Lenten period leading up to Easter, particularly on Good Friday.

They are usually baked with raisins or currants mixed into the dough, although some recipes suggest other dried fruits or candied citron.  I considered dried tart cherries and apricots for a somewhat more modern switch, but ultimately went with currants, orange zest and spices.

As usual, I did a bit of recipe research, including checking out Joy of Cooking (which has been sitting on my cookbook shelf for years).  Joy's recipe is basically a Parker House roll with a few tweaks.  I found a few other sources and compared amounts of sugar and egg, opting for less of those two ingredients in creating my own version.


Let's go!

les ingredients

Here I'm working in my mom's kitchen since ours is currently under renovation.  Just a couple more weeks, and I'm back into the baking swing at home.  Can't wait!

This dough is a straight forward direct dough, meaning there is no starter, pre-ferment, poolish or sponge (for all you bread bakers out there).  It comes together easily, is on the moist side once mixed, and kneads up into a luscious, soft, silky dough.

First I briefly microwaved 3/4 cup currants in 1/4 orange juice to plump them up, then let them cool.

Add 10 grams instant yeast to 240 ml (1 cup) tepid whole milk, along with a pinch of brown sugar and let sit for 10 minutes or so until foamy.  Whisk in 75 grams melted (but not hot!) unsalted butter, 1 egg yolk and 1.5 teaspoons vanilla extract.

In a separate large mixing bowl whisk together 390 grams (3 cups) all purpose flour, 50 grams (1/4 cup) brown sugar, zest of two oranges, 3/4 tsp kosher salt, 1/2 tsp coriander, 1/4 tsp allspice, 1/4 tsp powdered ginger and a few fresh grates of nutmeg (or more according to your taste).

Make a well in the center of the dry ingredients and pour the liquid in.


yup - wet and dry

Mix with a wooden spoon or spatula until moistened and the dough comes together in shaggy ball.


Drain the currants and briefly knead them in.


Turn the dough out onto a floured surface and knead by hand for about 8 minutes until the dough becomes soft and elastic.

 
I love kneading by hand and getting a real feel for the dough, but you can also knead in a stand mixer with the dough hook for about 4-5 minutes.

finished kneading

Place the dough in a lightly buttered bowl . . . .


cover and let rise in a warm environment for about 1 to 1 1/2 hours until about doubled.  I planned it so I could go out for my daily walk during the rise.  Not a bad deal, eh?

after the first rise

Now divide the dough into 15 pieces of sixty grams each (about 2 ounces) and form into balls.


Place them in a buttered 9x13 pan . . . .


cover with buttered plastic wrap and let rise about 45-60 minutes until puffed and touching.

after the second rise

Heat the oven to 375ºF.

Brush the rolls with egg wash or milk and bake about 25 minutes until nicely browned.

right out of the oven - smells great!

Once cooled a bit, gently pull the rolls apart and finish cooling them on a wire rack.


looks just like a good roll should

To make the icing I mixed 1 cup confectioner's sugar with 1 tablespoon milk and a teaspoon of vanilla extract, yielding a consistency just right for piping.


Steve, Mom and I couldn't wait too long for the first taste test - it just HAD to be done!

Soft, lightly sweetened, citrus scented, spiced pillows of goodness indeed.

Not bad for my first hot cross buns.


Afternoon tea at the Townsend Hotel


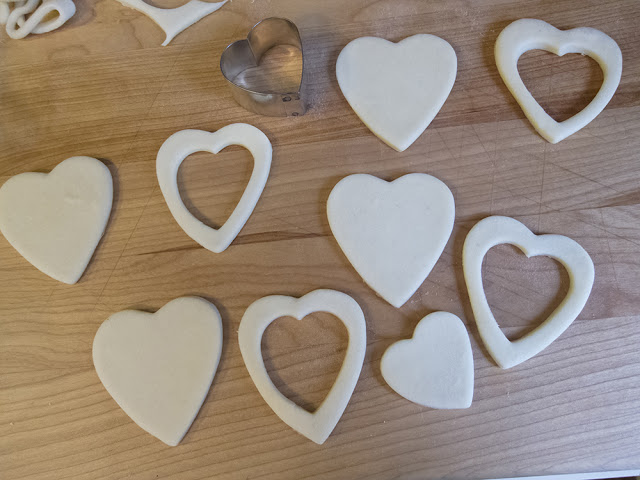
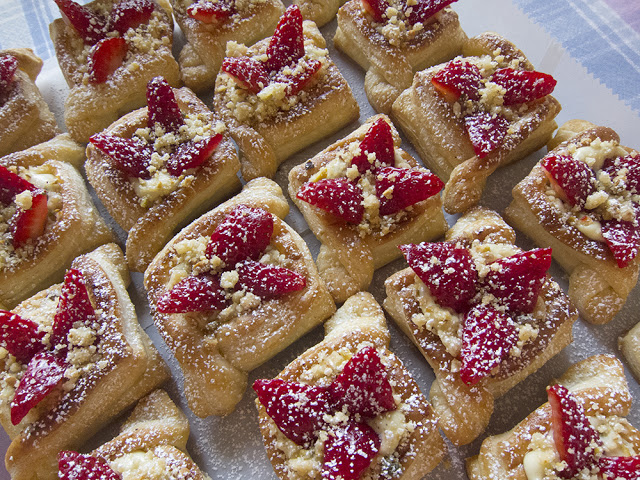
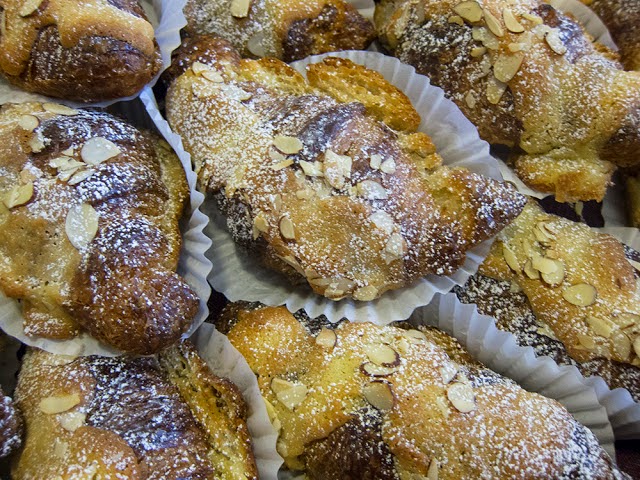
a medley of petite treats

After a lovely week of warmer weather and sunshine, spring is doing its best to hold sway, even though this week looks to be cooler and intermittently rainy.  But you know what they say . . . . showers bring spring flowers and all that.

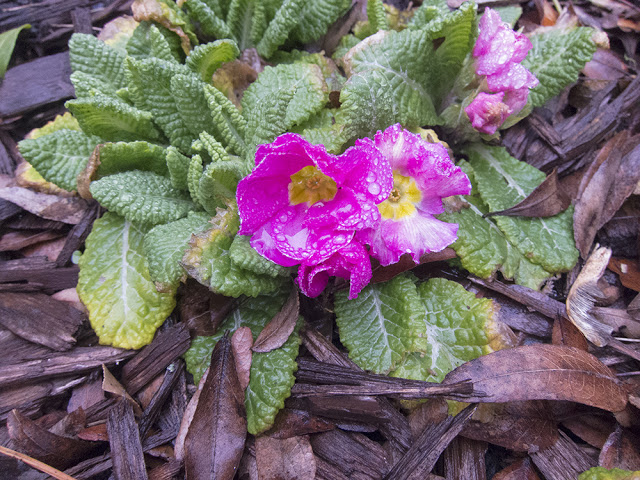
early primroses blooming in our little courtyard

This past Sunday Steve and I took a drive over to the other side of the state to pay a visit to the Townsend Hotel in Birmingham, Michigan for their afternoon tea.  As I consider how I might go about offering such an enjoyment to small groups here in Grand Rapids, I'm always up for seeing how different places manage that particular delight.

Birmingham is a northern suburb of Detroit.  Due to the pouring rain, we weren't able to stroll around the ville, but as we drove through the main business district, we sensed an upscale community with an array of interesting shops and eateries.

Upon our arrival at the hotel, the hostess introduced us to Laura Klein, the tea director.  Laura and I had communicated by email in past weeks, and it was good to finally meet her in person.

We were ushered into the tea room, a lovely muraled space with a fireplace, fireside sofas and several traditional tables which were all set for tea.  Steve and I chose a cozy spot along the wall with a nice view of the fireplace across the room.


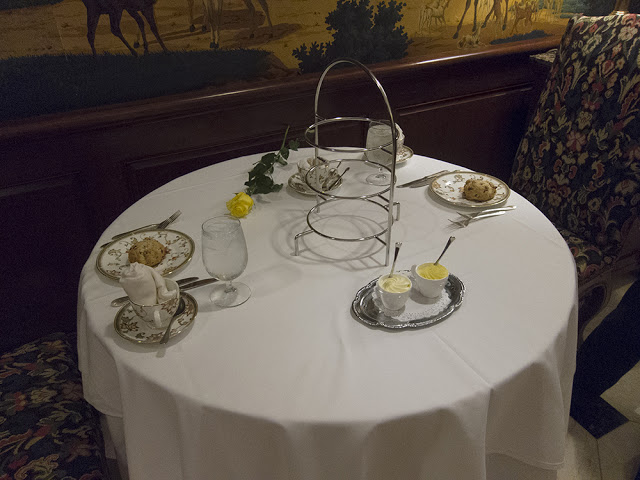
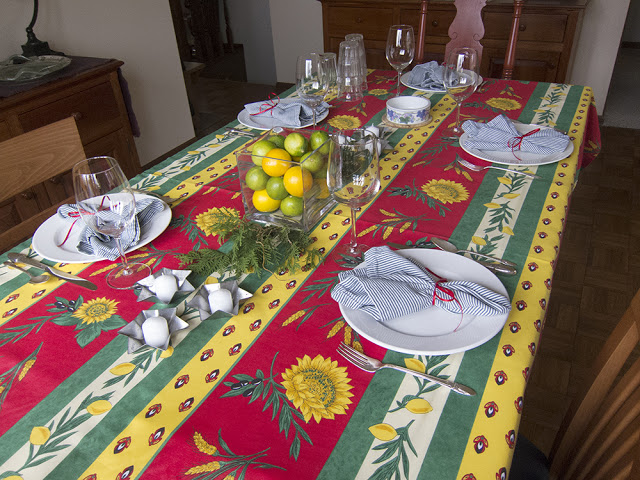
ready and waiting for guests

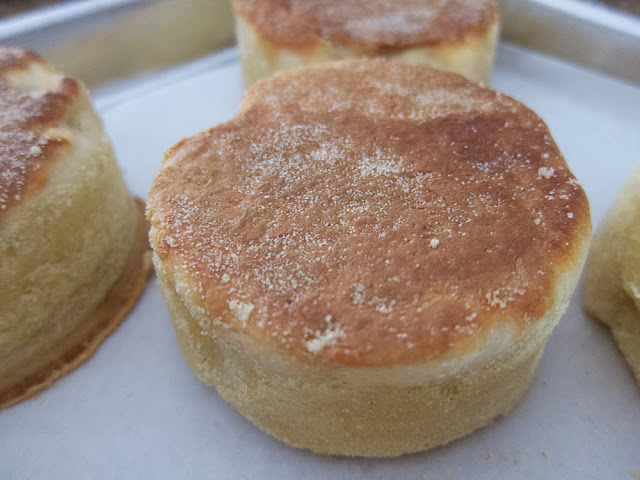
There were orange cranberry scones already in place on Wedgwood's Oberon pattern china - soft autumnal colors which blended very nicely with the overall decor of the room.


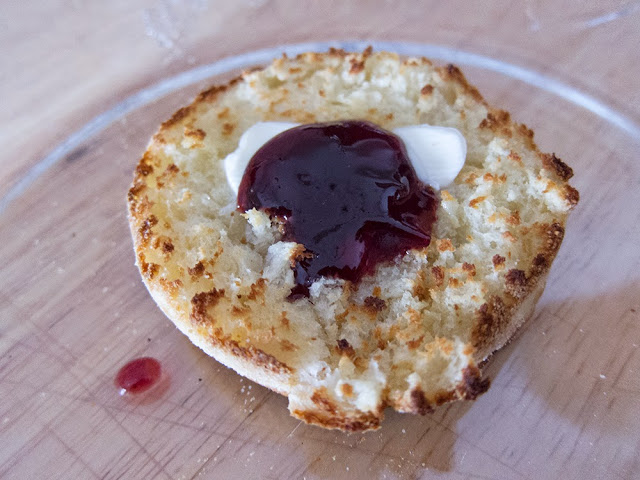
Mascarpone cream and house made lemon curd were in place as accompagnements for the scones . . .


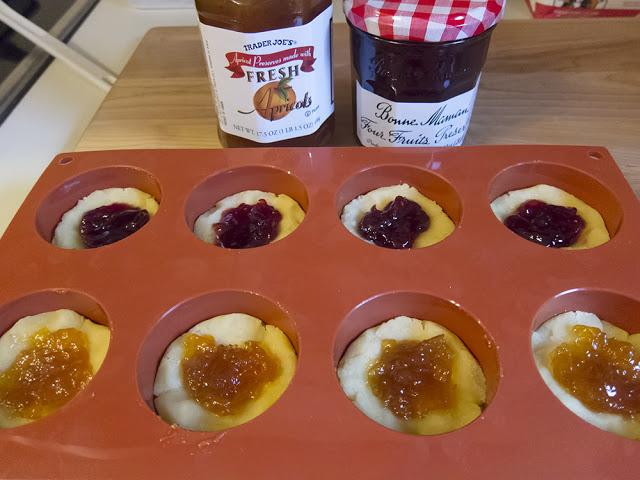
in addition to small jam jars of Dickinson and Bonne Mamam (our favorite "store bought").


The Townsend offers Harney and Sons teas, and the Earl Grey won out over the raspberry herbal for us.  Ginger, our server, was immediately at hand to pour, and she kept our cups topped off throughout our stay.

Laura stopped at our table often and was very willing to share her tea expertise, answering my questions and giving me advice and tips on how one might proceed in developing an afternoon tea concept.  Her best advice - as you start out "keep it simple"!

Once our tea had been served we started in on the scones - crisp exterior, moist interior and a noticeable orange essence, although I felt the baking powder taste was a bit too forward.  The mascarpone and lemon curd pleasantly complimented the orange-cranberry.

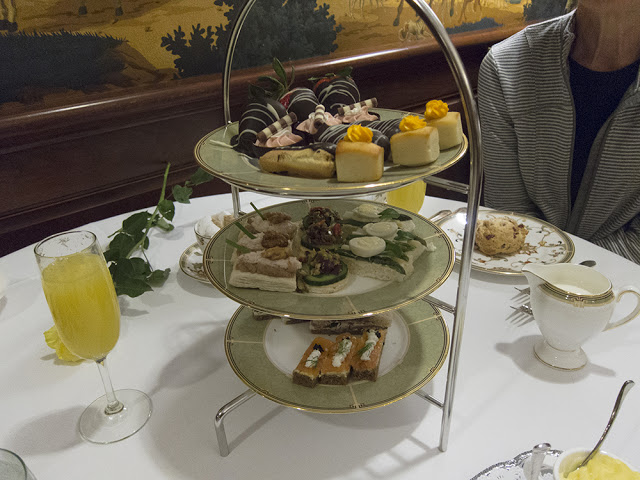
Soon the tea sandwiches and sweets were delivered . . . .


offering a generous and traditional assortment (with some Townsend twists) of finger sandwiches and petite sweets.

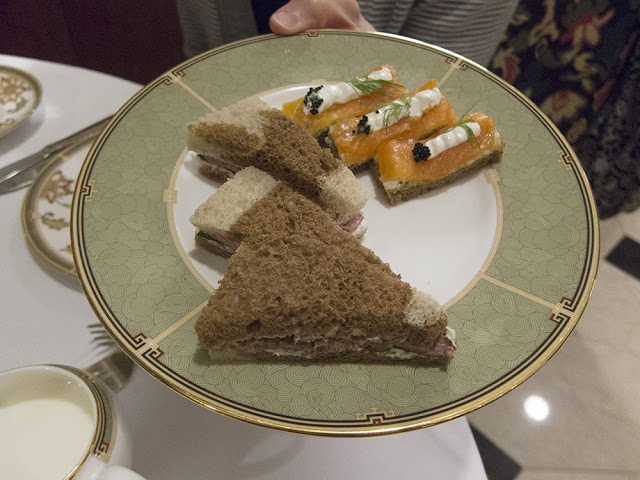
Below are salmon/egg salad/crème fraiche/caviar on wheat and beef tenderloin/citrus horseradish cream/watercress on rye . . . .


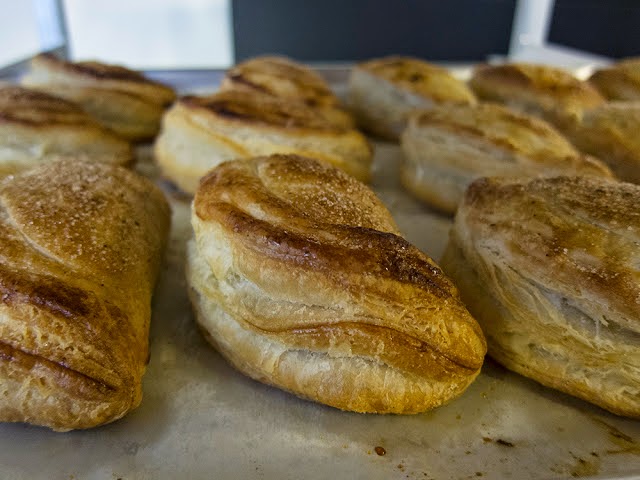
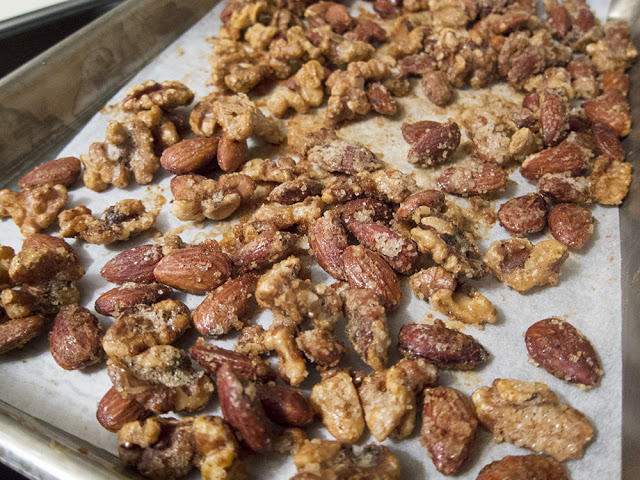
followed by chicken salad/maple walnut butter on puff pastry, hummus/cucumber/tapenade on pita and asparagus/boursin topped with quail egg on white.


My favorites were the asparagus/quail egg and the chicken salad, although the beef/citrus horseradish was pretty tasty as well.

I found the hummus/cucumber/tapenade too briny, but I must admit I'm not a huge olive/pimento fan.

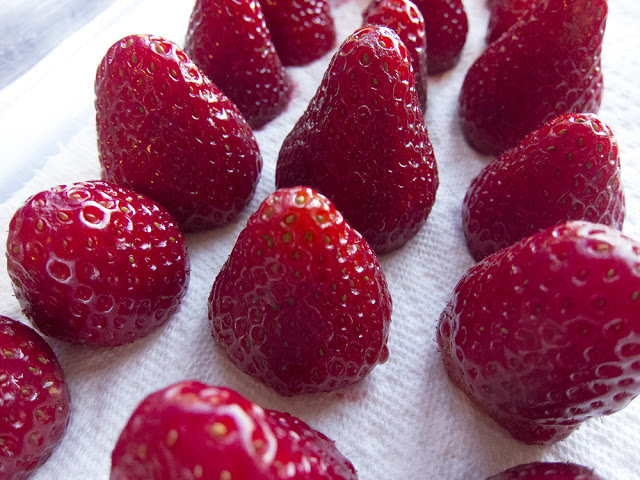
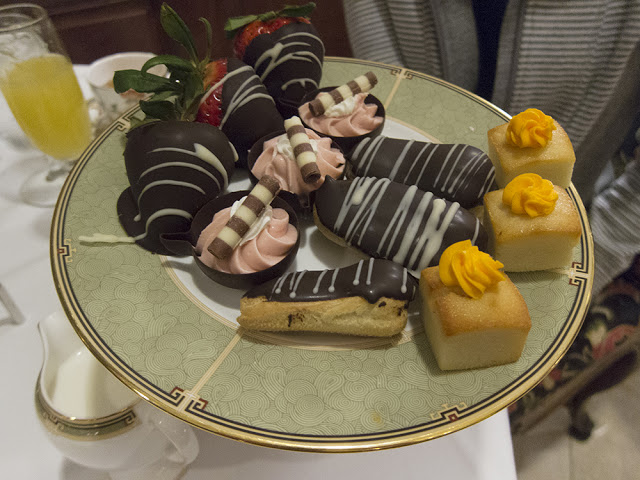
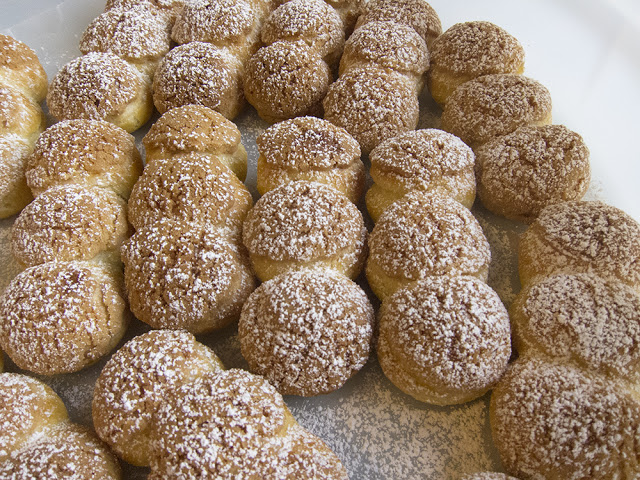
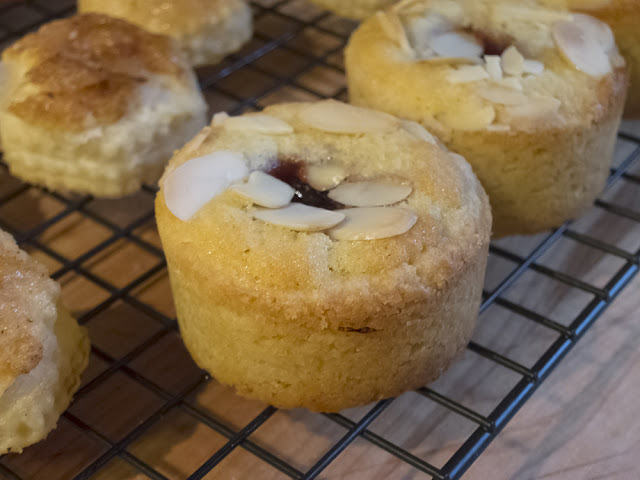
The sweets medley consisted of chocolate covered strawberry, white chocolate raspberry teacup, chocolate glazed éclair and orange flavored teacake, providing a pleasant spectrum of textures and flavors.


Steve had decided ahead of time that he wouldn't partake of the traditional tea, and so he ordered an omelette with potatoes and English muffin - pretty basic Sunday noon fare and plenty to eat.


We continued chatting with Laura as we sipped our tea and took some breaks between taste testing.
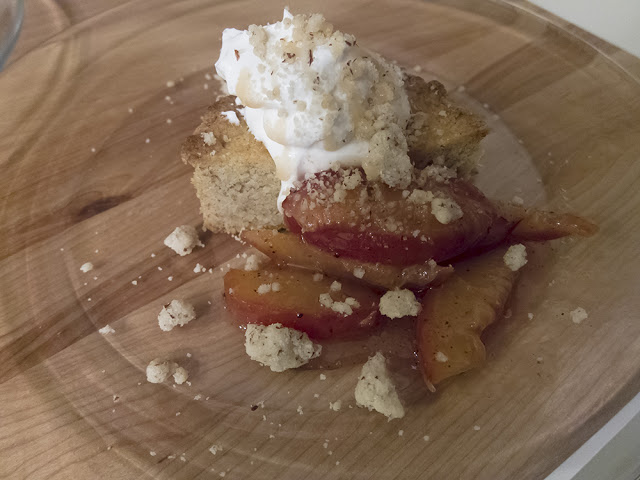
For the 
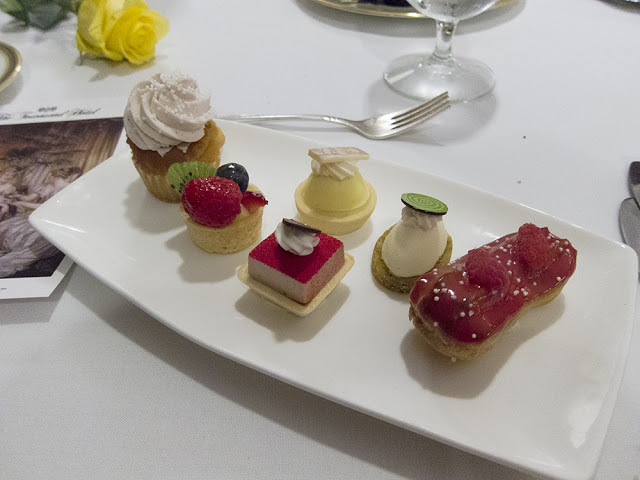
pièce de resistance we were surprised by beautifully presented trays of petite sweets, prepared expressly for us by the hotel's pastry chef.

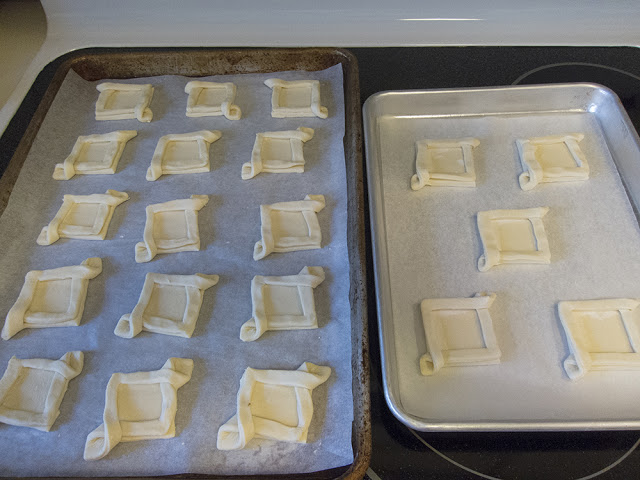
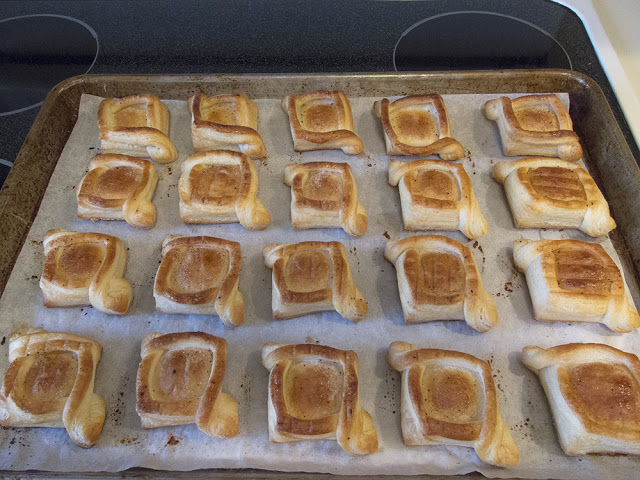
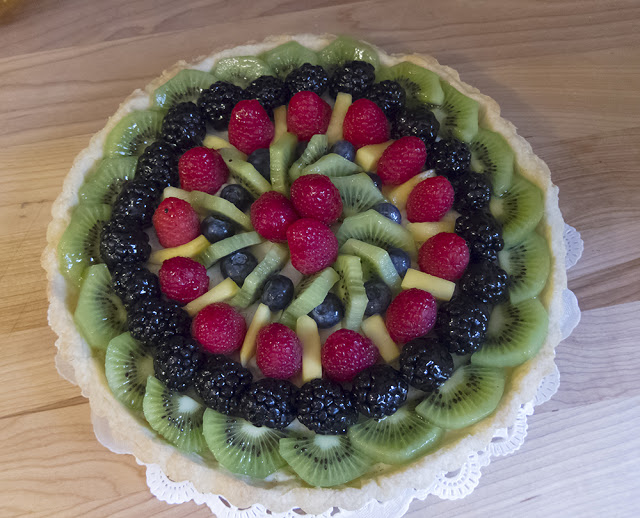
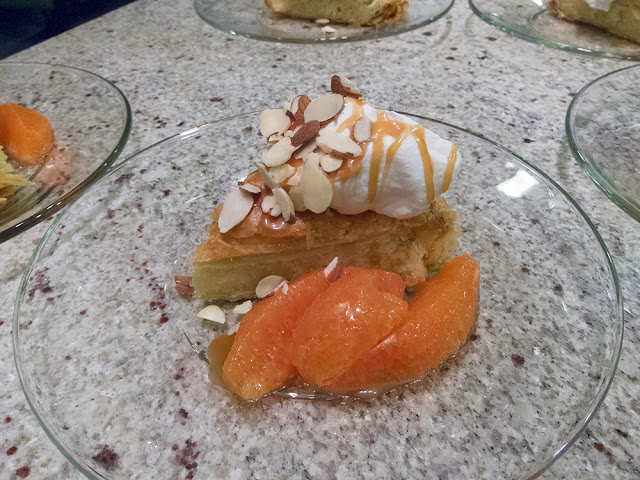
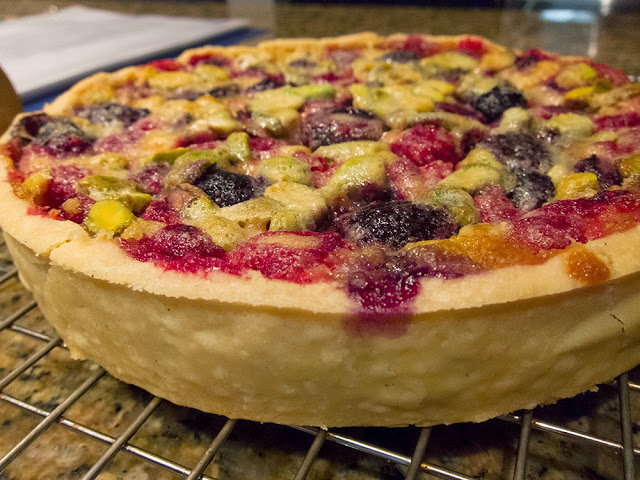
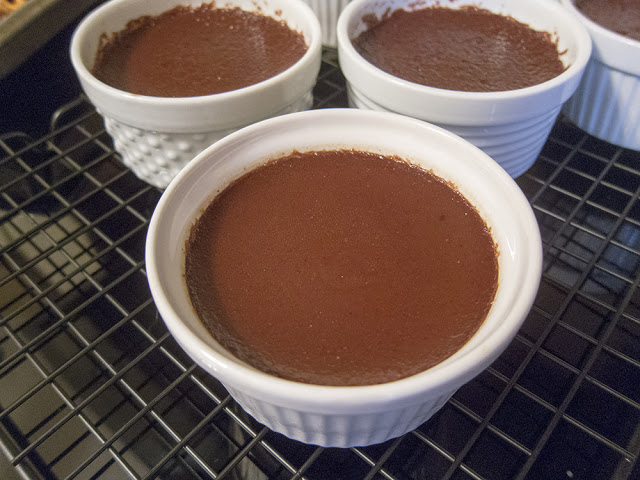
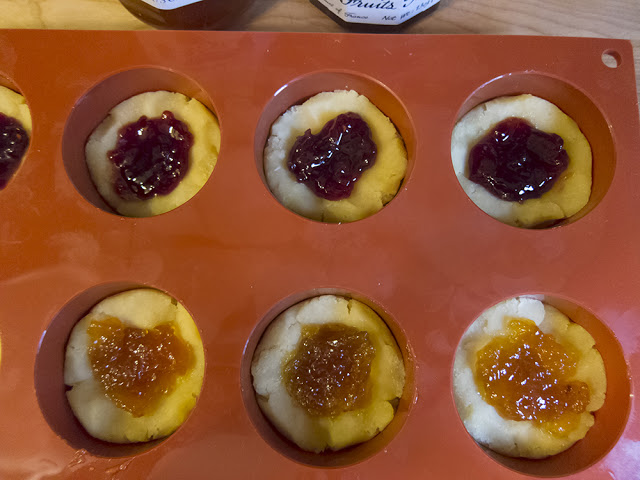
Lavender cupcake, fresh fruit tartlet, strawberry and mango gelées in pastry shells, green tea mousse and raspberry cream éclair  - quite a selection!

While the assortment was pleasing to the eye, when it came time to taste, I found the gelées a tad too gelatinous and the strawberry and mango flavors not as fresh and natural as I had hoped.

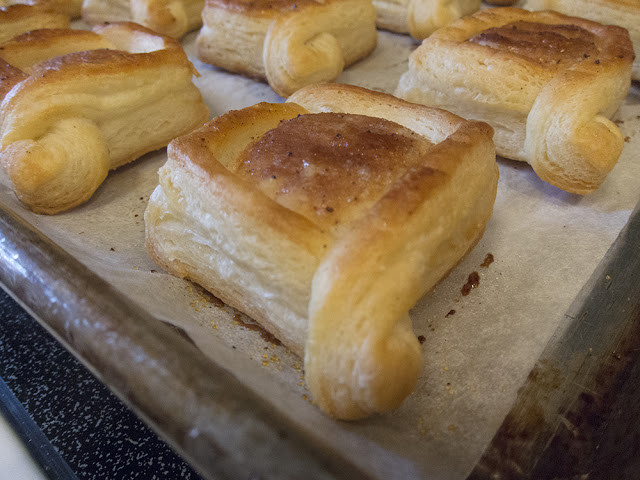
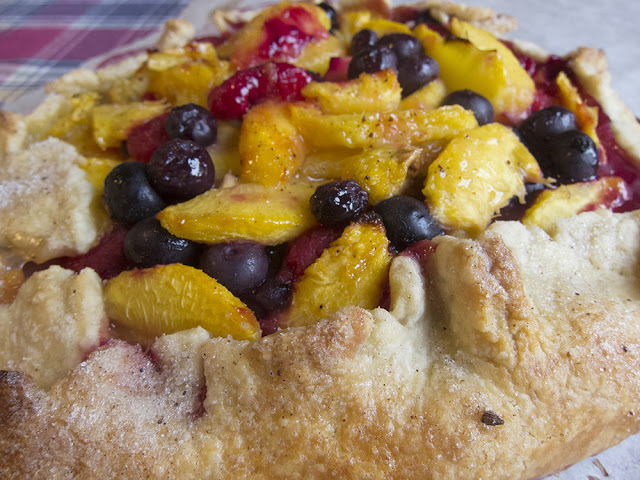
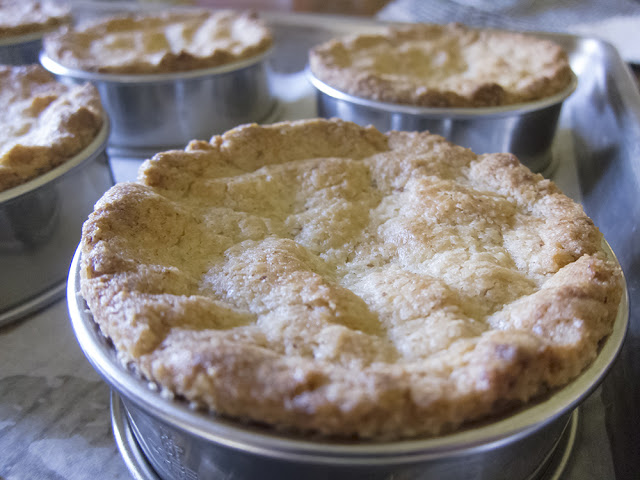
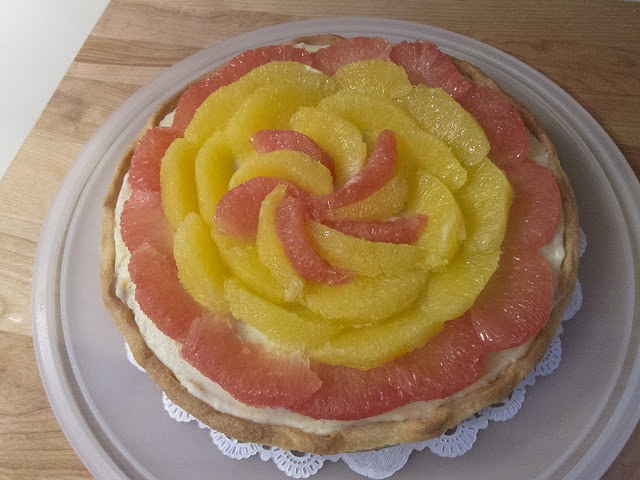
The fresh fruit tart was delicious and the pastry shells were not at all bad for commercially stamped out products.

It's all about learning, all the time!


Laura was kind enough to send some samples of their loose and bagged teas home with us as well as "doggie boxes" of left over treats.

Our visit was a positive and enjoyable experience.  The ambience of the tea room is just right, the staff are knowledgeable and attentive, eager to please and very willing to talk about their trade with the likes of us.  The menu is well thought out and offers an array of tastes and textures.

Try it sometime and see for yourself.

Not bad for a Sunday drive, wouldn't you say?!


Orange clove bread

Another Samantha Seneviratne recipe here we come!

This one is fun and the recipe lends itself to your own flavor variations.  Go for it.


While generally not a huge fan of cloves, I figured what the heck, I'll give this one a try.  The "pull apart" nature of the finished product pulled (pun intended) me in.

This is a yeasted bread so put that into your planning agenda.

It's an easy dough to prepare and potentially requires a few hours (total) of rising time, depending on how warm your kitchen is.

Let's go.

les ingredients

Have a large buttered bowl ready.

Bring 120 ml (1/2 cup) whole milk to a boil (I did it in the microwave), remove from the heat and add 56 grams (1/2 stick) unsalted butter to melt it.  Let it cool to about 105ºF.

Blend 1 large egg, lightly beaten and 1 tablespoon vanilla extract into the milk-butter mixture.


the liquid and dry ingredients

In the bowl of a stand mixer (or a large bowl) whisk together 130 grams (1 cup) all purpose flour, 130 grams (1 cup) bread flour, 56 grams (1/4 cup) sugar, 1 1/2 teaspoons active dry yeast, 1/2 teaspoon kosher salt and 1/8 teaspoon ground cloves.

Add the milk mixture and mix with the paddle attachment ( or with a wooden spoon) until just combined.

Switch to the dough hook and knead on low speed about 6 minutes until smooth and elastic (or knead on a work surface by hand for about 12 minutes).


after the mixer knead 

 I turned the dough out onto my pastry board and gave it a few quick hand kneads, formed a ball and placed it in my buttered container for the first rise.


ready to rise

My rise took about 1 1/2 hours.

During that time you can prepare the filling.  Mix 75 grams (1/3 cup) granulated sugar with the grated zest of 2 oranges and 1/4 teaspoon kosher salt.  Have 42 grams (3 tablespoons) unsalted butter at room temperature.


Blend the butter into the zest-sugar mixture, cover and set aside until ready to use.


filling's ready!

Prepare a medium loaf pan - butter it, line it with parchment and butter the parchment.

Once the dough has doubled, turn it onto a lightly floured work surface, give it a knead or two and roll it into a 9" square.


Spread the filling over the dough . . . .


then cut into 4 strips . . . .


and stack the strips on each other, filling side up (isn't this fun?!).


Then cut the stack into 4 piles . . . .


and line them up on their sides in the prepared loaf pan.


Love it!

Now it's time for the second rise so cover the pan lightly with plastic wrap, put it in a warm spot and let it rise until it reaches to just under the lip of the loaf pan.  About an hour.

Heat the oven to 375ºF.

I forgot to take a picture before I popped it in the oven so I quickly snapped a shot at the start of the bake.


Bake until nicely browned and puffed, about 30-35 minutes.  If the center sections seem soft, bake a few minutes more.

et voila!  C'est fini!

I must say the aroma during baking was delightful, clove or not.  I couldn't wait to give it a try.

First let it cool about 15 minutes, then lift it out by the overhanging parchment and finish cooling on a rack.


The sections pulled apart easily.  The interior had a soft, tender, sort of sweet-roll-like characteristic and the orange-sugar filling added just the right citrus note.  And the clove wasn't bad either!

Steve liked the texture but didn't care much for the clove.  Oh well.

I like the dough for sure - easy to mix and handle and nice texture.

Next time I'm thinking of replacing the orange zest with lemon zest and the clove with perhaps a bit of coriander and ginger.  And maybe buttermilk instead of milk.  One could throw in some chopped dried cherries, raisins or apricots too, depending on your flavor profile.  Or some finely chopped nuts.

You make up your own and have some fun!  You can do it.


Chocolate, cherry, black pepper bread


As I move on through some of the recipes in the new sugar and spice by Samantha Seneviratne, I continue to find many of her ingredient combinations enticing (and intriguing).  This one contains chopped dark chocolate, dried tart cherries and freshly ground black pepper, an idea that came to her after a glass of dark red wine that left her with those particular nuances of flavor.


 Although the title calls this a bread, Samantha then proceeds to call it a cake in her short intro to the recipe.  Call it what you will, the process is still the same.  Essentially a quick bread, the preparation is straight forward.

When doing the mise en place, pay attention to the room temperature ingredients (butter, eggs, sour cream, whole milk) since the mixing of the batter proceeds more smoothly when these things are indeed at room temp.  So plan accordingly.

Chop the chocolate and dried cherries and grind the black pepper ahead too.  

Always read the recipe through before starting, right folks?!

So get everything ready and mix away.

les ingredients

Heat the oven to 350ºF.  Butter and flour a medium (4 1/2 by 8 1/2 inch) loaf pan.

In a medium bowl whisk together 260 grams (2 cups) all purpose flour, 1 1/2 teaspoons freshly ground pepper, 1 1/2 teaspoons baking powder, 1/2 teaspoon baking soda and 3/4 teaspoon kosher salt.

In a large bowl with an electric mixer, cream 113 grams (1 stick) room temperature, unsalted butter with 170 grams (3/4 cup) granulated sugar; beat this for about 3-4 minutes until pale and fluffy.

Add 2 room temperature eggs, one at a time, plus 1 teaspoon vanilla extract.

Add half of the flour mixture and combine on low speed, then add 1/2 cup room temperature sour cream and 1/4 cup room temperature whole milk and blend.

Add the remaining half of the flour mixture and blend until just combined.

Fold in 65 grams (about 1/2 cup) chopped dark chocolate (choose what you like in the 50-64% cacao range) and 113 grams (about 3/4 cup) chopped dried tart cherries.

Place the batter in the prepared loaf pan and sprinkle the top with raw sugar.


ready for the oven

love that sparkly crunch!

Bake this until golden brown and a cake tester poked into the center comes out with moist crumbs, about 50-60 minutes.

After a 15 minute cool down in the pan . . . .


turn it out onto a rack to finish cooling.


Mmmmm!

Of course Steve and I just had to do a taste test while it was still a bit warm, so I sliced into this chocolate and cherry studded beauty.


The crust was crisp and crunchy from the raw sugar, the interior moist with a dense crumb and the flavor divine with a delicious combo of chocolate and cherry.  The black pepper hit me on the finish -  a nice tingle on the tongue.

I must admit I was a bit shy about using the full 1/1/2 teaspoons of pepper in the recipe, but Steve encouraged me to go for it, being the savory chef in our home kitchen (and a prolific pepperer to boot).  He even suggested I add more.  Imagine that!

At any rate, for the first go-around with this recipe I found the peppery-ness to be subtly just right, but next time I won't be so shy.

Good stuff indeed.

Now just imagine it served warm with a scoop of creamy vanilla or chocolate ice cream and some chocolate crumble.  Oh yes.


Now here's an interesting one - roasted banana ice cream

When I first read this recipe in the book the new sugar and spice, I thought - wow!  What a great way to use up ripe bananas.

It sounded intriguing so I went for it.

We had a bunch of bananas sitting around, not getting any younger, so I peeled them, broke them up and froze them in a ziploc bag until I was ready.


The ice cream base is pretty standard, using cream, sugar and egg yolks, although the sugar comes in at the banana roasting stage rather than during the making of the crème anglaise.

Whereas the recipe calls for 3 cups of heavy cream for the dairy, I used whole milk for one of the cups.  I decided to follow the standard formula in a David Lebovitz recipe that I've been using for years and has always turned out well.

The first step is to heat 2 cups of the dairy with 2 scraped vanilla beans (seeds and pods) and let it steep for an hour or so.


Then in an ovenproof skillet, melt 1 tablespoon unsalted butter, add 100 grams dark brown sugar and 3 tablespoons water. My bananas had been frozen, so during the thaw some juice was created which I used in place of some of the water (Samantha's tip!).

getting ready
Add the bananas and toss them to coat . . . .


then put the skillet in a preheated 450º oven.

Bake the bananas until bubbling and the bananas have broken down.

after the oven
Then purée the roasted bananas (I used a blender) and put them in a medium bowl to cool.  Place a strainer over the banana bowl.

Now this is where I became a tad concerned.  The puréed mixture looked absolutely awful and totally unappealing.

oh my!

But not to be swayed I was determined to see this through.  My hope was that once the purée was mixed into the ice cream base and processed, it would lighten up and not have such a dirty, ugly brown color!

Turning back to the ice cream base, I put 6 large egg yolks in a bowl along with 1/2 teaspoon of salt, poured a portion of the warm vanilla bean infused dairy over the yolks, whisking away.  The mixture is then returned to the heat and cooked while stirring until just thick enough to coat the back of a spoon.  I took it to about 82ºC.

Strain the mixture into the bowl containing the banana puree and whisk in 1 teaspoon of vanilla extract and the third cup of dairy.

Cool this over on ice bath, whisking periodically.

phew! looks better already
Chill the base in the fridge over night.

When you're ready to process the base, have 142 grams/5 oz bittersweet chocolate chopped and ready to go.


ready to start churning
At the end of processing add in the chopped chocolate to blend.

looking pretty good
Put the ice cream in a container and freeze until firm (I usually do this a day or two ahead of when I plan to serve it).  Place plastic wrap directly on the surface of the ice cream to prevent crystallization during freezer storage.

The final product looked just fine and tasted good too.  My only complaint was it seemed a bit icy and not as creamy as I would have liked.

Perhaps the fact that I replaced one cup of cream in the recipe with whole milk, in addition to the moisture in the banana puree, was enough to create the icier texture.

Steve had NO problem with it, but then he's a sucker for ice cream in any way, shape or form!


Pistachio and chocolate butter cake from Samantha Seneviratne

A post holiday gift to myself was the book the new sugar and spice - A RECIPE FOR BOLDER BAKING by Samantha Seneviratne.

Many of the recipes have caught my eye.  My first trial from the book, coffee cardamom shortbread, was a definite success.

Next up is the cover recipe for pistachio and chocolate butter cake, highlighting the use of pistachio paste, cardamom and chocolate chunks (and butter, of course).


The butter, eggs and milk should be at room temperature.

Butter a 9" springform pan and heat the oven to 350º.

Do your ingredient mise en place . . . .

les ingredients
and let's go!

Whisk 223 grams flour, 7 grams baking powder, one teaspoon freshly ground cardamom (hard to see, but it's there on the left side in with the flour) and 1/2 teaspoon salt in a medium bowl.

Cream 113 grams/1 stick room temperature, unsalted butter with 75 grams granulated sugar with an electric mixer on medium speed until light and fluffy.

Add two eggs, one at a time, then blend in 198 grams pistachio paste.

Add the flour mixture alternately with 120 ml milk in three additions, beginning and ending with the flour.

Fold in 85 grams chopped dark chocolate (I used a mixture of 56% and 72%).

Put the batter into the springform pan and smooth.  Sprinkle 35 grams coarsely chopped pistachos over the top.

A very straight forward cake batter preparation.

ready for the oven

Bake for about 30-40 minutes.

just out of the oven

How did this work out?  Well, this is one case where it's important to pay attention to what's going on in your oven.

I baked this for a good 50-55 minutes since the center was still loose after the first 30-40 minutes.

At that point all the signs of doneness were there - a tester inserted in the center came out with moist crumbs, the top was nicely browned, there was no central jiggling when I lightly shook the pan, and it felt firm in the center.  Plus the aroma was enticing!

BUT!  Once this cake cooled it sank significantly in the middle and was still not thoroughly baked through in the center.  Disappointing.  You pay attention, you think it's done, but then . . . .

Perhaps the fact that my springform pan was sitting on an insulated cookie sheet kept the oven heat from getting properly into the center - who knows!

However, all was not lost.  I simply cut out the center goo, sliced the cake and served it with Samantha's roasted banana ice cream (see my next post!).  Pretty tasty indeed.

The cake is dense and buttery with a lovely cardamom-pistachio-chocolate thing going on.

If I were to do this recipe again, I would bake the cake in small flexi-molds or individual cake pans.  The baking time would be less, and the smaller portions would bake through more evenly.

Live and learn.  That's what it's all about.


Lemon-lime tart

As I mentioned in a recent post on fresh fruit tarts, I had a blind-baked pâte brisée shell in my freezer just waiting to be filled. I was thinking lemon.

Before the Christmas holidays I had purchased a bunch of Meyer lemons, regular lemons and limes to use as table decor as well as to have on hand for baking. Since I had way more fruit on hand than I would use up efficiently, I proceeded to zest it, freeze the zest, juice the whole lot and freeze the juice too. Always on the prowl for the perfect lemon tart, I tried to track down the recipe for Jacques Genin's famous tarte au citron. I found a couple of recipe versions online as well as a video of Jacques himself preparing said tarte.  Unfortunately the video did NOT include the specific ingredient portions.  Oh well.

Update! I subsequently got my hands on his book on lemon tarts compliments of a student who was in one of my classes at Sur La Table. It’s small, in French and includes many versions of citrus tart. It’s great! But alas very difficult to get one’s hands on in the USA.

While his tart is made with limes, I opted for a lemon-lime combo. I already had my blind-baked crust. NOTE: here’s a link to two of my favorite tartes au citron, including Genin’s version.

The lemon-lime filling is made with 3 large eggs, 170 grams sugar, 180 ml juice (half lemon, half lime for me), zest of 6 fruits (Meyer lemon, lemon and lime combo for me) and 200 grams butter.

Whisk the eggs and sugar in a saucepan, add the zest and juice and cook over medium heat, whisking constantly until the mixture starts to thicken and is just short of boiling (I took it to ~83º C).  You should start seeing fine little bubbles forming around the edges and steam starting to rise up.

Remove it from the heat and blend the butter in with an immersion blender until smooth and creamy.

Since my crust had been in the freezer, I took it out about 30 minutes ahead and warmed it in a 325ºF oven for about 5 minutes.

One approach to a lemon tart is to make the curd, chill it and then fill the blind baked shell with the already chilled curd. Then it goes back into the fridge for additional chilling. Another is to fill the shell with the warm curd, cover the surface with plastic wrap and put the whole thing in the fridge to chill. Even another is to fill the warm shell with the warm curd and put it in the oven at 300-325ºF for about 10 minutes to further "set " the filling.

That's what I did with this one.

before the oven

after the oven

Believe me - the number of ways to approach a lemon tart is as many as the number of lemon tart recipes you'll find out there.  Yes, it's true.  I've tried 'em all (almost).

Once the tart cooled to room temp, I popped it (covered) in the fridge overnight.

We taste tested it the following day as our luncheon dessert at cousin Jen Galloway's house in the woods.  Oh how creamy, tart and lemony it was.  And the pâte brisée crust was PERFECT with it.

Another winner!

Happy Valentine's Day and some puff pastry hearts


 Happy Valentines Day to one and all!


I recently gave a puff pastry presentation at OLLI (Osher Lifelong Learning Institute) at Aquinas College here in Grand Rapids MI.

talking the puff talk

As a prelude to Valentine's Day I simply had to include some puff pastry heart treats for the attendees.

I cut out some heart shaped vol au vent . . . 


and baked them up after egg washing and sprinkling them with vanilla sugar.


I filled them with swirls of whipped chocolate ganache . . . .


Et voila! A tasty treat!

Fresh fruit tarts in January

There's something so attractive about fresh fruits arranged on a layer of vanilla pastry cream, nestled in a lovely tart crust.  A feast for the eyes as well as the mouth.


Recently I received an order for a fresh fruit tart with a request for kiwi and berries.  Typically I use a 1-2-3  cookie-type dough (similar to shortbread dough in the ratio of sugar, butter and flour with some egg and vanilla added in).

But . . . . I had some pâte brisée dough in my freezer and decided to do a comparison between that and the usual 1-2-3.

I don't normally blind bake pâte brisée, but this time I lined 9" tart rings and smaller rings with each of the two doughs, primarily so I'd have something I could sample and compare.

Notice in the photo below how the pâte brisée edge is not as sharp and pristine.  It's an ongoing battle with that dough - trying to keep its shape, avoid shrinkage and have a nice looking end result.

Two things that help when working with pâte brisée are making sure the dough is nice and relaxed before lining the tart form and then freezing the dough in the form before baking.

Keep trying, right?


blind baked pâte brisée

small version of blind baked 1-2-3 dough

larger 1-2-3 version for the ordered tart

I filled the above shell with vanilla bean pastry cream lightened with a bit of whipped cream and topped with fruit.  As seen below on the left, I typically do a little fruit "practice" before placing it on the finished tart.

I added in some mango slivers to give a bit of contrasting color to the kiwi and berries.


getting ready for final assembly

et voila!

As for the smaller versions with the two different doughs, I just randomly topped the pastry cream with some of the fruit leftover from the order, not being concerned about the artistry.  I wanted to know how the two crusts compared taste wise.


the taste tester tarts

The left side is the 1-2-3 and the right the pâte brisée.

Somehow they were switched around for the "cut" pictures.


pâte brisée on left and 1-2-3 on right

While you can't really see a difference in the two doughs photographically, the taste experience was definitely one for comparison.  And to top it off, I stored these babies in the fridge for a day before we ate them.

Both were delicious, although Steve and I agreed that the pâte brisée taste and texture (crispy yet tender and oh so good) outshone the 1-2-3.  They both held up well after their refrigerator day - good to know when planning dessert.

Pâte brisée is now on my hit list of doughs to use for blind baked shells.  The 9 inch-er that I baked for this test went into the freezer for a couple of days after which I used it for a delicious lemon tart.

More on that later.

All in all an enjoyable comparison!


Kouign-amann pudding

Now here's a good one - essentially a bread pudding made with leftover Kouign-amann.  What?!


Of course some might argue that once Kouign-amann are made they'll be gobbled up and there won't BE any leftovers.

Not so in my case.  A couple of months ago I decided to make a batch of K-a, but, instead of baking them in open tart rings, I baked them in flexi-molds.  I thought it would lend itself to much easier release of the final baked goods from their sticky, caramelized holders.

Nuh-uh.  Because the dough was essentially "shielded" by the silicone molds, the K-a exteriors did not caramelize, the dough layers did not bake through and were pale and floppy.  It was a gooey mess.

Note to self: certain things bake and brown much better surrounded by metal.  Yup.

Some of the edges were actually OK and the flavor was there, so something wouldn't allow me to throw them all away and into the freezer they went.

After the holidays I was visiting Schuler Books here in Grand Rapids, looking of course at baking books, and was excited to find a recipe from Rose Levy Beranbaum's The Baking Bible (with Kouign-amann on the front cover no less) for "souffled French toast".

It uses day-old K-a baked in an egg, milk, cream, vanilla custard.  What's not to like.

I removed 480 grams of K-a from the freezer some hours ahead and let them thaw at room temperature.  Notice the misshapen K-a lumps in the photo below.


notice the doughy interior layers


Cut the K-a into cubes and place them in an 8"x8" glass baking dish.

Mix 6 large eggs, 160 ml heavy cream, 60 ml whole milk and 1 teaspoon vanilla extract.


Pour the custard over the K-a, cover and soak the mélange in the fridge over night.


ready for an overnight soak

Heat the oven to 350º F.  Bake covered with foil for 10 minutes, then remove foil and bake an additional 10 minutes or until the pudding is puffed, set and nicely browned.


We ate this for dessert au naturale, still slightly warm (when it's at its best, by the way).

I can just imagine it topped with a little chantilly cream, a drizzle of maple syrup and some fresh berries, either for dessert or for breakfast or brunch.  YUM.

So now you know what you can do with those leftover or not-so-perfect Kouign-amanns that you just might have lying around.

Thanks Rose.


Coffee cardamom shortbread

A new shortbread recipe.  Yay!


Cardamom is a spice I haven't used very often.  This tasty version of my favorite type of cookie is from Samantha Seneviratne's book the new sugar and spice - a recipe for bolder baking.  She provides great descriptions of the origins, uses and storage of various spices.

Samantha tells us that "Native to India, green cardamom, Elettaria cardamomum, is the fruit of an herbaceous perennial bush of the ginger family".  The pods are harvested and dried, and the dark brown seeds found inside are ground for culinary use, either savory cooking or baking.

It is generally recommended that one buy whole cardamom pods which have a much longer shelf life than ground cardamom.  Remove the seeds from the pods and grind only what you'll need for a particular recipe, since once the cardamom is ground it will lose some of its fresh flavor and pungency.

I remember one of the chefs I used to work with at Gracie's restaurant in Providence RI always toasted the cardamom pods first to bring out the flavor even more.

Samantha recommends using a light or medium roast coffee, so I chose Starbucks Veranda blend.  I ordered my green cardamom from Spice Jungle, the same folks who run Beanilla, my favorite source for vanilla beans, extract and vanilla fleur de sel.


One thing I noticed right away as I read through the recipe was the higher ratio of butter to flour than most typical shortbreads.  I was intrigued.

Let's go!

First I toasted the 20 pods which, according to the recipe, were to yield about a teaspoon of seeds or 2 teaspoons freshly ground cardamom.


Then I removed the seeds from the pods . . . .


and ground them in my spice grinder with 2 teaspoons of the Verona blend coffee.

The process is a bit fussy but not a problem if the result is a freshly ground spice with maximum flavor!


les ingredients

In a medium-large bowl whisk together the ground coffee/cardamom mixture (seen in the forefront on the left in the above photo), 33 grams/1/3 cup confectioners sugar, 50 grams/1/4 cup dark brown sugar, 1/2 teaspoon kosher salt and 162 grams/1.25 cups all purpose flour (seen on the right above).

Samantha adds the 169 grams/3/4 cup unsalted butter and 1 teaspoon vanilla extract and beats with an electric mixer on medium speed until the butter is blended in.

I chose to sand the butter in by hand and realized just how buttery this dough is.  Oh boy.

Press the dough into the pan (9" fluted tart or springform pan in the book - I chose my rectangular straight sided tart mold simply because I like it).

Freeze for about 15 minutes.  It firms up and stabilizes the butter.

Heat the oven to 325º F.


pressed into the tart mold and chilled for baking

Bake for about 40-45 minutes.  The dough should look dry and be nicely browned.

Oh the aroma!


just out of the oven

While the shortbread is still warm cut it into shapes of choice.  I like the baton size so I cut down the middle long ways and then cut narrow strips.


lettin' em cool

The flavor is unique yet scrumptious, offering notes of citrus and spice, and I can appreciate a certain gingery warmth.  The texture is crisp yet tender with a buttery crumb.  A keeper.

Steve even liked them.

Yes indeed.  Thanks Samantha.

Vanilla wafers for Liam

Happy winter everyone!

Recently we hosted my niece Christina and her family during their short visit to Grand Rapids on route from Hawaii to Lille, France where they will be living for the next couple of years.  Yay! Trip opportunity for us!!

Prior to their arrival I asked Christina if there were certain things she'd like to have in the house for the children to eat.  Kiera, age 9 - string cheese; Liam, age 4 - vanilla wafers.

In a recent post I wrote about making my own graham crackers, and the fact that Liam loves vanilla wafers inspired me to give them a try.  I prefer avoiding much of the mass produced stuff in the grocery store, particularly if high fructose corn syrup is involved (it's in the "Nilla Wafer" ingredient list).

I searched online and found an Alton Brown recipe that looked pretty straight forward (and tasty).  You can easily find it by googling "Alton Brown's vanilla wafers" - yes sirree!

The dough was easy to mix - cream butter and vanilla sugar; add egg and blend; blend in vanilla extract and a little milk; blend in flour, baking powder, salt to incorporate.  Then chill the dough for 10 minutes (or longer if your schedule demands it).

Scoop teaspoon balls of dough onto parchment lined sheet pans . . . .


then flatten the balls a bit with the palm of your hand . . . .


ready for the oven

and bake at 350º for about 18 minutes until golden brown.

Side note:  in the photo above you can see a log of dough adjacent to the sheet pan.  I decided to shape that and freeze it for later.  It will be interesting to see how the thinly sliced log cookies bake up.


c'est fini!

While these may not have the smooth surface and well defined edges of the store bought variety, they are tasty indeed.  I describe them as subtly pleasant with vanilla and a hint of salt on the tongue.  The texture reminds me of animal crackers.

I offered one to Liam as a taste test - he took one a bit hesitantly, took a bite and pronounced it good.  Off he went, but a couple of minutes later back he came with "may I have another cookie?".  Yup - they were a hit!!

From now on these will be known as Liam's vanilla "wayers" as he calls them - what a cutie!

Homemade is pretty much always best.

Oh - I made some pear financier that day too - one of Steve's faves.


always a treat

Now it's time to ramp up with some new recipes over the next several weeks.  Can't wait!

Ciao for now and happy baking.

Beet sugar vs cane sugar - live and learn!

Here's a quick tip - pay attention to what the granulated sugar package in your grocery store aisle tells you!  If it doesn't specify CANE sugar it's most likely BEET and, it turns out, the two can behave very differently.

I thought I was quite attentive to that little detail when buying sugar at my local MEIJER store, but, just the other day I realized that their largest line of granulated sugar is actually beet sugar.  Heretofore I don't recall that was actually printed on the bag - but now it is.  Turns out the purple and white Meijer brand bags of granulated sugar are actually beet sugar, while the green and white bags clearly state CANE sugar.

Why am I bringing this up, you might ask?

Since we've been living in Grand Rapids MI I've made a couple of batches of my favorite caramel sauce, a staple I always like to have on hand in my fridge and a recipe I've made many, many times. While it appeared that the sugar cooking process proceeded normally to the medium-dark amber stage, once I added my cream, a little butter and a good pinch of vanilla fleur de sel and chilled the caramel in the fridge, weird things started happening.

The caramel turned a paler tan color and had chunks (and I mean CHUNKS) of crystallized sugar in it - not a pretty picture!  I had to warm it up to try and dissolve the chunks or strain them out, but the stuff still was not the same as my usual deep brown, rich, tasty caramel sauce.

So I finally went on line and found my answer - beet sugar caramelizes differently.  I won't go into the various scientific explanations, but, suffice it to say, I learned my lesson.  I'll be sure to pay very close attention to the sugar package labeling from now on.


what a difference!

I should note that you shouldn't be too concerned about beet vs. cane when doing every day baking like many cookies, brownies, quick breads and more, for many folks won't notice any difference in flavor.  In fact, I made a batch of Steve's favorite brownies just the other day, using the (at the time unrecognized) beet sugar, and they came out just fine and dandy!

FYI - two cane sugar brands available here in GR are Domino and C&H.

So here's to paying attention to the little things!


A pastry year in review and looking ahead

Wow!  It's already January 4 (one of Steve's favorite lines after the new year is "this year is flying by!), and I'm excited about a couple of recently purchased pastry books, compliments of a Schuler's gift certificate from my book lover husband.

Here's a little new-book-preview before I look back at some of the favorite things that I baked in 2015.

Dominique Ansel's The Secret Recipes caught my eye, not because of his cronut fame, but because he shares the history of his pastry profession as well as some of his innovative recipes.  I've just started working my way through the book, and I'm already inspired.

Samantha Seneviratne's the new sugar & spice spoke to me since I'm always trying to think a bit outside the box when it comes to spices and flavor combos.  And her stories of family life in Sri Lanka only serve to enhance the collection of recipes that focus on specific spices such as cardamom, nutmeg, cinnamon, vanilla, pepper and more.


And so I look forward to plunging into some new baking adventures.

The cover recipe of Samantha's book is first on my list - pistachio and chocolate butter cake.  Of course I must get some cardamom in the house!


Dominique's "magic soufflé" looks really interesting (and challenging) - brioche dough wrapped around a chocolate ganache filling - man oh man, that should be fun.  I love doing new things with brioche dough, so stay tuned folks!


Now here's a brief pictorial of some of the favorites from this past year.

Galette des rois . . . .


served with chantilly, toasted almonds, fresh citrus and caramel drizzle.


My first English muffins . . . .


served toasted with butter and jam.


Brioche craquelins . . . .


oh so citrusy and crunchy with a crumb to die for.


 Chocolate génoise entremet . . . .


Golden raisin toast apple tart . . . .


Millefeuille chocolat . . . .


 Tarte aux fruits rouge pistache. . . . 


Cannelés bordelais . . . .


Crunchy topped choux  . . . .


Rustic summer crostata . . . .


Gateau Breton . . . .

au naturale
and . . . .

avec crème d'amandes et confiture
Tea flavored shortbread . . . .


Thanksgiving citrus cream tart . . . .


And last but not least a Christmas coconut cream tart . . . .


But I simply can't sign off without a reminder of the perennial favorites . . . .

croissant et pain au chocolat


chausson aux pommes

croissant aux amandes

kouign-amann

Here's to a fantastic year of baking and pastry for 2016!!

Homemade graham crackers and a coconut cream tart for Christmas

It's hard to believe that Christmas Day has come and gone.  Especially with the no-snow-on-the-ground, warm weather we've been having here in west Michigan.  The weeks leading up to Christmas always seem to fill up with various projects, activities and baking (of course!).  And then it's over and time for a new year.


our holiday table

chocolate pot de crème for Christmas Eve supper

spiced, candied nuts as an accompaniment

The other day when Steve and I were checking out Kingma's butcher counter looking for flank steak, we were also perusing the many aisles of food products.  There before my eyes was one of the largest selections of Bob's Red Mill flours that I have ever seen.  The one that caught my eye was graham flour and got me in the mood to make my own graham crackers in preparation for a graham cracker crusted coconut cream tart for Christmas Day.

This graham flour is ground from "hearty dark northern, hard red spring wheat" and "contains all of the wheat berry's healthy and natural elements - the germ, endosperm and bran".  It's good for you!

I first made my own graham crackers some years ago after paying closer attention to the ingredients on the boxes of "store bought" grahams.  I like to keep my baked goods as preservative free as possible and making these crackers at home is really an easy proposition.  So why not go for it?!

I think this recipe may have come from Elizabeth Falkner when she visited Johnson and Wales University in Providence a few years ago as a distinguished visiting chef.  It's a keeper.  I often write up recipes with gram weights and note things I might do differently the next time.  I keep them in plastic page sleeves that I then stash in my many recipe notebooks.


les ingredients

Heat the oven to 350º F.  Line two 1/2 sheet pans with parchment paper.

In a separate bowl whisk 180 grams graham flour with 98 grams all purpose flour and 3/4 teaspoon salt.

In a mixing bowl cream 56 g (2 oz) soft butter with 85 g sugar; add 1 large egg and mix until blended.

Stir in 4 tablespoons honey, followed by 1/2 teaspoon baking soda that's been dissolved in 2 teaspoons of water.

Blend in the dry ingredients.

The dough should hold together and be manageable.  If it's too sticky, add a bit more graham flour.


the finished dough

On a graham flour dusted surface roll the dough out to a thickness of about 2 mm. I work with about half the dough at a time.  It is a tad sticky, but just keep lightly dusting and lifting the dough with a bench scraper to keep it from sticking.


Since my plan for these grahams was to crush them for a graham cracker crust, I wasn't too fussy about how I cut and baked them.  You can certainly cut nice looking squares and even score them with a fork to give the quintessential graham cracker look if you're serving them as a traditional cracker.


ready for the oven

Bake for about 15 minutes and always remember to watch what's going on in your oven!

crisp and golden brown

My graham cracker crust calls for 140 grams (5 oz) of graham crackers so I weighed out what I needed and coarsely broke up the remaining crackers to put in my freezer for the next time.

I crushed the crackers for the crust with the old zip-top bag/rolling pin technique which eliminates having to get out the food processor (or cleaning it afterwards).  Love it!

This coconut cream tart recipe comes from the Baking Illustrated book by the editors of Cooks Illustrated magazine and calls for toasting unsweetened, shredded coconut for both the crust, the filling and the top garnish.  I did that a bit ahead.


crust ingredients

The above ingredients include the 140 grams crushed graham crackers, 2 tablespoons sugar, 70 grams (5 tablespoons) melted unsalted butter and 4 tablespoons of toasted coconut.  Simply mix it all with a fork and press it firmly into a tart pan.

Bake the crust at 325º F for about 20 minutes until fragrant and browned.


waiting for the filling

While the crust cools go ahead and make the coconut cream filling.


filling ingredients

The filling is prepared using a basic pastry cream method.  Place the contents of one 14 oz can of coconut milk in a sauce pan, along with 240 ml (one cup) of whole milk, 35 grams of toasted coconut, 75 grams sugar and 1/4 teaspoon salt.  Heat this to a simmer, stirring occasionally.  Meanwhile place 5 egg yolks in a separate bowl, whisk in 75 grams sugar and 28 grams cornstarch.

Gradually pour half of the hot milk mixture over the yolk mixture, whisking constantly, then return all to the sauce pan and cook, still whisking constantly until the mixture thickens and bubbles.

Take it off the heat and whisk in 1/2 teaspoon vanilla extract and 28 grams (2 tablespoons) unsalted butter.

Pour the cream directly into the baked crust, cover the surface with plastic wrap and refrigerate at least 3 hours until chilled.


chilled tart ready for garnish

Whip up a cup of heavy cream with a splash of vanilla extract and a tablespoon or two of powdered sugar and spread it over the coconut cream filling.  I love to use my offset spatula to create a simple design.


nothing too fancy here folks!

Then sprinkle some toasted coconut on the top . . . .


and voila, you're ready to go!

Now it's time to take a breath, relax a bit and look ahead to a new year.

A Thanksgiving tart and moving into citrus season

Thanksgiving is now behind us, and we look ahead to the upcoming weeks of December holidays and festivities.

This time of year I start thinking about citrus - all the lovely oranges and grapefruit that come to us from warmer climes.  There's the Cara Cara orange (a lovely pink fleshed navel), the blood orange and the standard navel orange.  And let's not forget tangelos, tangerines and clementines.  Nothing like a bunch of Vitamin C, right?!

As Thanksgiving approached I debated what I wanted to make for dessert to follow the classic American turkey-and-all-the-fixins meal.  Would it be a caramel nut tart or perhaps apple-cranberry or pumpkin ginger?  No - this year I opted for something citrus!


citrus browned butter cream tart

This tart is based on a recipe from Fine Cooking magazine some years ago.  Basically a blind baked pâte sucrée crust filled with browned butter pastry cream and topped with fresh citrus.  What's not to like?

I used my favorite pâte d'amande dough for the crust (I happened to have some in the freezer which made it an all the more attractive option).


lining the tart ring

all lined and ready for blind baking

baked and cooling - just waiting for the pastry cream

The filling is a pretty standard pastry cream made with milk, sugar, egg, cornstarch and, in my case, some added orange zest and vanilla bean seeds.  Yes!  Oh - and some browned butter added at the end of cooking.


les ingredients

In general I like to lighten pastry cream with a little whipped cream, so once my pastry cream was made, I chilled it in the fridge before whipping up a little cream and folding it in.


ready to fold and fill

all filled up

I segmented navel oranges and red grapefruit . . . .


and after drying the segments on paper towel, I did a practice layout . . . .


before the final assembly.

Et voila!


all assembled and ready to transport

We had a delicious Thanksgiving feast at cousin Garrett and his wife Laurie's home in nearby Rockford MI.  We took a break after dinner for some games and chit-chat, and, when it came time for dessert, enjoyed Laurie's pecan and pumpkin pies along with the bright taste of citrus and the smooth creaminess of the vanilla-orange crème pâtissière.

All in all a great day!

The first Michigan snowfall this season, plus some tea shortbread cookies

It's gently snowing at the moment and quite lovely.  We had our first real snowfall over the weekend, about 3 inches or so - really not much, but seeing that first snowy ground cover is always kind of exciting.  What might this winter bring, we ask?

still a few leaves on the burning bushes

looking north

For some time now I've been using a tea shortbread recipe that I received some years ago at a Women Chefs and Restauranteurs conference in Washington DC.  The presenter of one of the seminars on uses of tea in baking and cooking was Chef Laurie Bell of Great Falls Tea Garden.  She had cookie samples to share with us, having chosen a fennel chai tea as that day's particular flavor. So yummy.

I just checked out their website and the business is still going strong. Great stuff for you tea lovers.

http://greatfallsteagarden.com/

Here in GR one can find many varieties and flavors of tea at Schuil Coffee Company. I paid them a visit to pick up some Earl Grey jasmine tea and, in the process, found a Mayan chocolate tea (the staff described it as “peppery”) that sounded like just the ticket for a delicious shortbread cookie.

As you can see above in my much used copy, the recipe includes ground almonds and finely ground tea of choice. Feel free to change up the nut choice to marry with whatever tea you’ve decided to include - lots of options here!

les ingredients

In the bowl above I have 57 gm almond flour (you can grind your own toasted, sliced or slivered almonds easily enough), 130 gm all purpose flour, 1/2 tsp baking powder, 1/4 teaspoon salt and 75 gm sugar. In the forefront is my 10 gm of ground Earl Grey jasmine tea which will go in with the dry ingredients.  Then I simply dice my butter, sand it into the dry mix until it comes together.  Wrap and chill.

For the Mayan tea I opted to make two batches - one using the above recipe, obviously replacing the Earl Grey with the Mayan chocolate tea, and one substituting pistachios for almonds and adding cocoa powder to the mix. After all, when I hear "Mayan chocolate", I see a chocolate cookie in my mind's eye. Among other things, the Mayan tea contains cardamom pods, cocoa and ginger pieces and black pepper - all good with chocolate if you ask me.

Oh! FYI - for the pistachio chocolate version I cut the flour back to 110 gm and added 24 gm of cocoa powder to the dry ingredients.

Once the doughs were completed, wrapped and chilled, I prepared for baking.

I love the many different cutter shapes available, and I chose three different ones to help me keep track of which cookie was which.

ready for the oven

These bake at 325 convection for about 20-25 minutes - remember to pay attention to what's going on in that oven of yours!

just out of the oven

Et voila!

getting into the holiday spirit

Bien sûr Steve and I had to do a little taste testing. The Earl Grey jasmine was delightful with a subtle floral hint compared to the more classic Earl Grey with bergamot with which most of us are familiar. And I'm normally not much of a floral flavor fan (how's that for alliteration?)

While the straight Mayan chocolate tea version was smooth and tasty with a nice peppery aftertaste, the pistachio cocoa version was a tad dry, most likely due to the added cocoa powder (but delicious nonetheless).  Next go around I'll back down the cocoa powder a bit to 15 gm and up the flour to 120 gm.  And I'm considering a skosh more butter for that version as well.  The choice of pistachios is great for this flavor profile.

As I anticipate the upcoming December holidays and preparing gift boxes of shortbread,  I'm working on a special tea assortment.  I have a couple more flavor ideas bopping around in my head and hope to have the final assortment chosen soon.  Can't wait!

And Happy Thanksgiving to all from snowy Michigan.

Italian cookie trials and more

It's already November and the holidays are creeping up on us - watch out!!

Lately I've been busy in the kitchen testing out some Italian cookie recipes for holiday gift boxes for a local café. Brutti ma buoni (ugly but good), a ground nut (hazelnut version here) meringue cookie . . . .

Ricciarelli - a classic Senese almond cookie . . . . .

Biscotti doppio cioccolato - double chocolate biscotti . . . .

of course I had to dip some in chocolate!

and semolina shortbread (sorry - no pic!). They all turned out pretty darn tasty!

In the meantime I'm cranking out my own petite shortbread for some sample give away boxes.  I love to hand out goodies for folks to try.

Eight flavors of goodness

Recently I made a batch of reverse puff pastry to have on hand for whatever might come along.  And, being apple season, there's nothing like the combo of buttery puff and lightly sautéed, caramelized apples.  Yum, yum.  Here are some chausson aux pommes I made a couple of weeks ago.

Last week I visited Aquinas College's Browne Center to speak to the ladies there about getting on their "lifelong learning" adult education schedule to teach some pastry classes.  Yeah!

I never like to arrive empty handed so an assortment of treats was in order. In a slightly different take on a chausson I rolled out some puff, cut hexagons, brushed with milk and sprinkled with sugar . . .

and baked them.

puffed and sparkly

I make an indentation in the top of the baked puff, top them with a scoop of the above mentioned apples, drizzle some caramel on and bake them again just to warm the apples through.  So delicious.

I included these apple feuilletée along with matcha-berry financier and some gateau Breton aux amandes et confiture in the goodie box for the Browne center crew.

A brief postscript to the above:  I wrote about gateau Breton in my last post, but this time I topped the dough with either apricot or four fruits jam, a ring of almond cream and some sliced almonds before baking.  What buttery, nutty goodness.

all baked and ready to eat

Lots of fun and much more to do before New Year's Day hits!

Stay tuned.

Gateau Breton

Perhaps I've mentioned this wonderful goodie in previous posts, if only to speak of its ease of preparation and its delightful taste and texture.  In the wake of making a walnut version recently, I thought it time to focus on Breton dough a bit more.  

Absolument!

Gateau Breton au noix

In Brittany a simple gateau Breton is a common offering for petit déjeuner.  It's hard to describe its texture - kind of a cross between cake and shortbread.  When you first take a bite, there is a crispiness to the exterior, but then you reach a dense, almost cake-like interior full of buttery goodness. So deelish.

Breton dough is in the sablé category of dough, but differs from some pâte sablés by changing up the sugar, butter and flour ratios, adding more egg yolks plus baking powder, not a typical ingredient in shortbread and tart doughs.

There are many Breton dough recipes out there.  Most of them utilize equal weights (or close) of sugar and butter in addition to a number of egg yolks, and an amount of flour that is usually about 2 times by weight of that of the sugar or butter.  You can replace some of the flour with a ground nut flour of choice, e.g. almond, pistachio or walnut. Tons of variations exist!

The beauty of Breton dough is its ease of mixing and shaping.  Plus, depending on how thick you bake it, you'll end up with a crispy shortbread (baked thin) or a classic gateau Breton (baked thick).  How can you go wrong with those choices?!

For my walnut version I used Christophe Felder's sablé Breton recipe from his book Les Folles Tartes, replacing the almond flour with toasted, then ground walnuts (toasting nuts before using brings out their flavor!).

I'm a pastry chef who takes lots of notes.  In Felder's book the dough is described thus:  "sablé aéré et léger", and my notation of 2/11/11 was "c'est vrai!" On that date I baked this Breton dough in 60 mm rings and served it with ricotta custard, almond nougatine and a blackberry/raspberry sorbet.  Wow! 

How can something be dense yet airy and light at the same time?  You just have to taste it to understand.

I've since created versions of Breton tarts by topping the dough with almond or pistachio cream and berries or cherries before baking.  You can also add a layer of raspberry or apricot jam (or any flavor you want!) between two layers of dough before baking.  Or bake it plain and top with citrus curd and fresh fruit or coconut cream, candied lime zest and chopped crystallized ginger.  Just use your imagination!

On to the recipe.

les ingredients

There are different methods of mixing the dough - I use the one I learned at LCB in Paris in which one puts all the ingredients except the yolks in the mixing bowl, brings it to the crumbly stage, then adds the yolks and mixes just until the dough comes together.  So easy.

Here goes.  Place 140 g sugar, 150 g diced/cool butter, 200 g all purpose flour, 70 g ground toasted walnuts (almonds if you're following Felder's recipe), 1 teaspoon baking powder and 1/2 teaspoon salt in the mixing bowl.

NOTE:  Felder calls for 20 g baking powder which is about 2 tablespoons.  I opted to cut it back so as to avoid too heavy of a baking powder taste.

Mix with the paddle on low until coarse crumbs.  Have 3 egg yolks standing by.

ready to start mixing

coarse crumbs

Now add the 3 yolks and blend just until the dough comes together.

c'est fini!

I baked my gateaux Bretons in 80 mm (~3") wide, 2.5 cm (1") tall open rings.  Butter them first and place them on a parchment lined sheet pan.  Heat the oven to 325ºF (I use convection).

Here's the beauty of Breton dough.  When baking it this way, you don't have to chill it or let it rest first.  You can simply press it into place.  I divided the dough up among 6 rings ( ~105 g per ring) and pressed it down evenly.

all divided up

all pressed down evenly

On a side note, if you're baking this dough as a thin cookie, you should wrap and chill it for a couple of hours first.  Then you can roll it out on a lightly floured surface and cut shapes of choice.

Bake these gateaux for about 20-25 minutes and REMEMBER - always watch what's going on in your oven. You're looking for golden brown deliciousness, and the dough should have risen up along the edges of the rings.

golden brown

looks yummy

Let cool for about 10-15 minutes before gently removing from the rings.

I served the gateaux with warm, sautéed plums prepared as follows.

Thinly slice 4 plums, toss them with a bit of lemon zest,  about 1/4 cup of vanilla sugar and  a couple of teaspoons of cornstarch . . . .

all mixed up

then sauté them over med-low heat until the juices are released and start to thicken, 5-10 minutes.

thickened up and ready to go

And the piéce de resistance . . . .

Gateau Breton with sautéed plums, chantilly cream and nut crumble

Très, très délicieux!

Happy autumn tout le monde!!