Flan Parisien


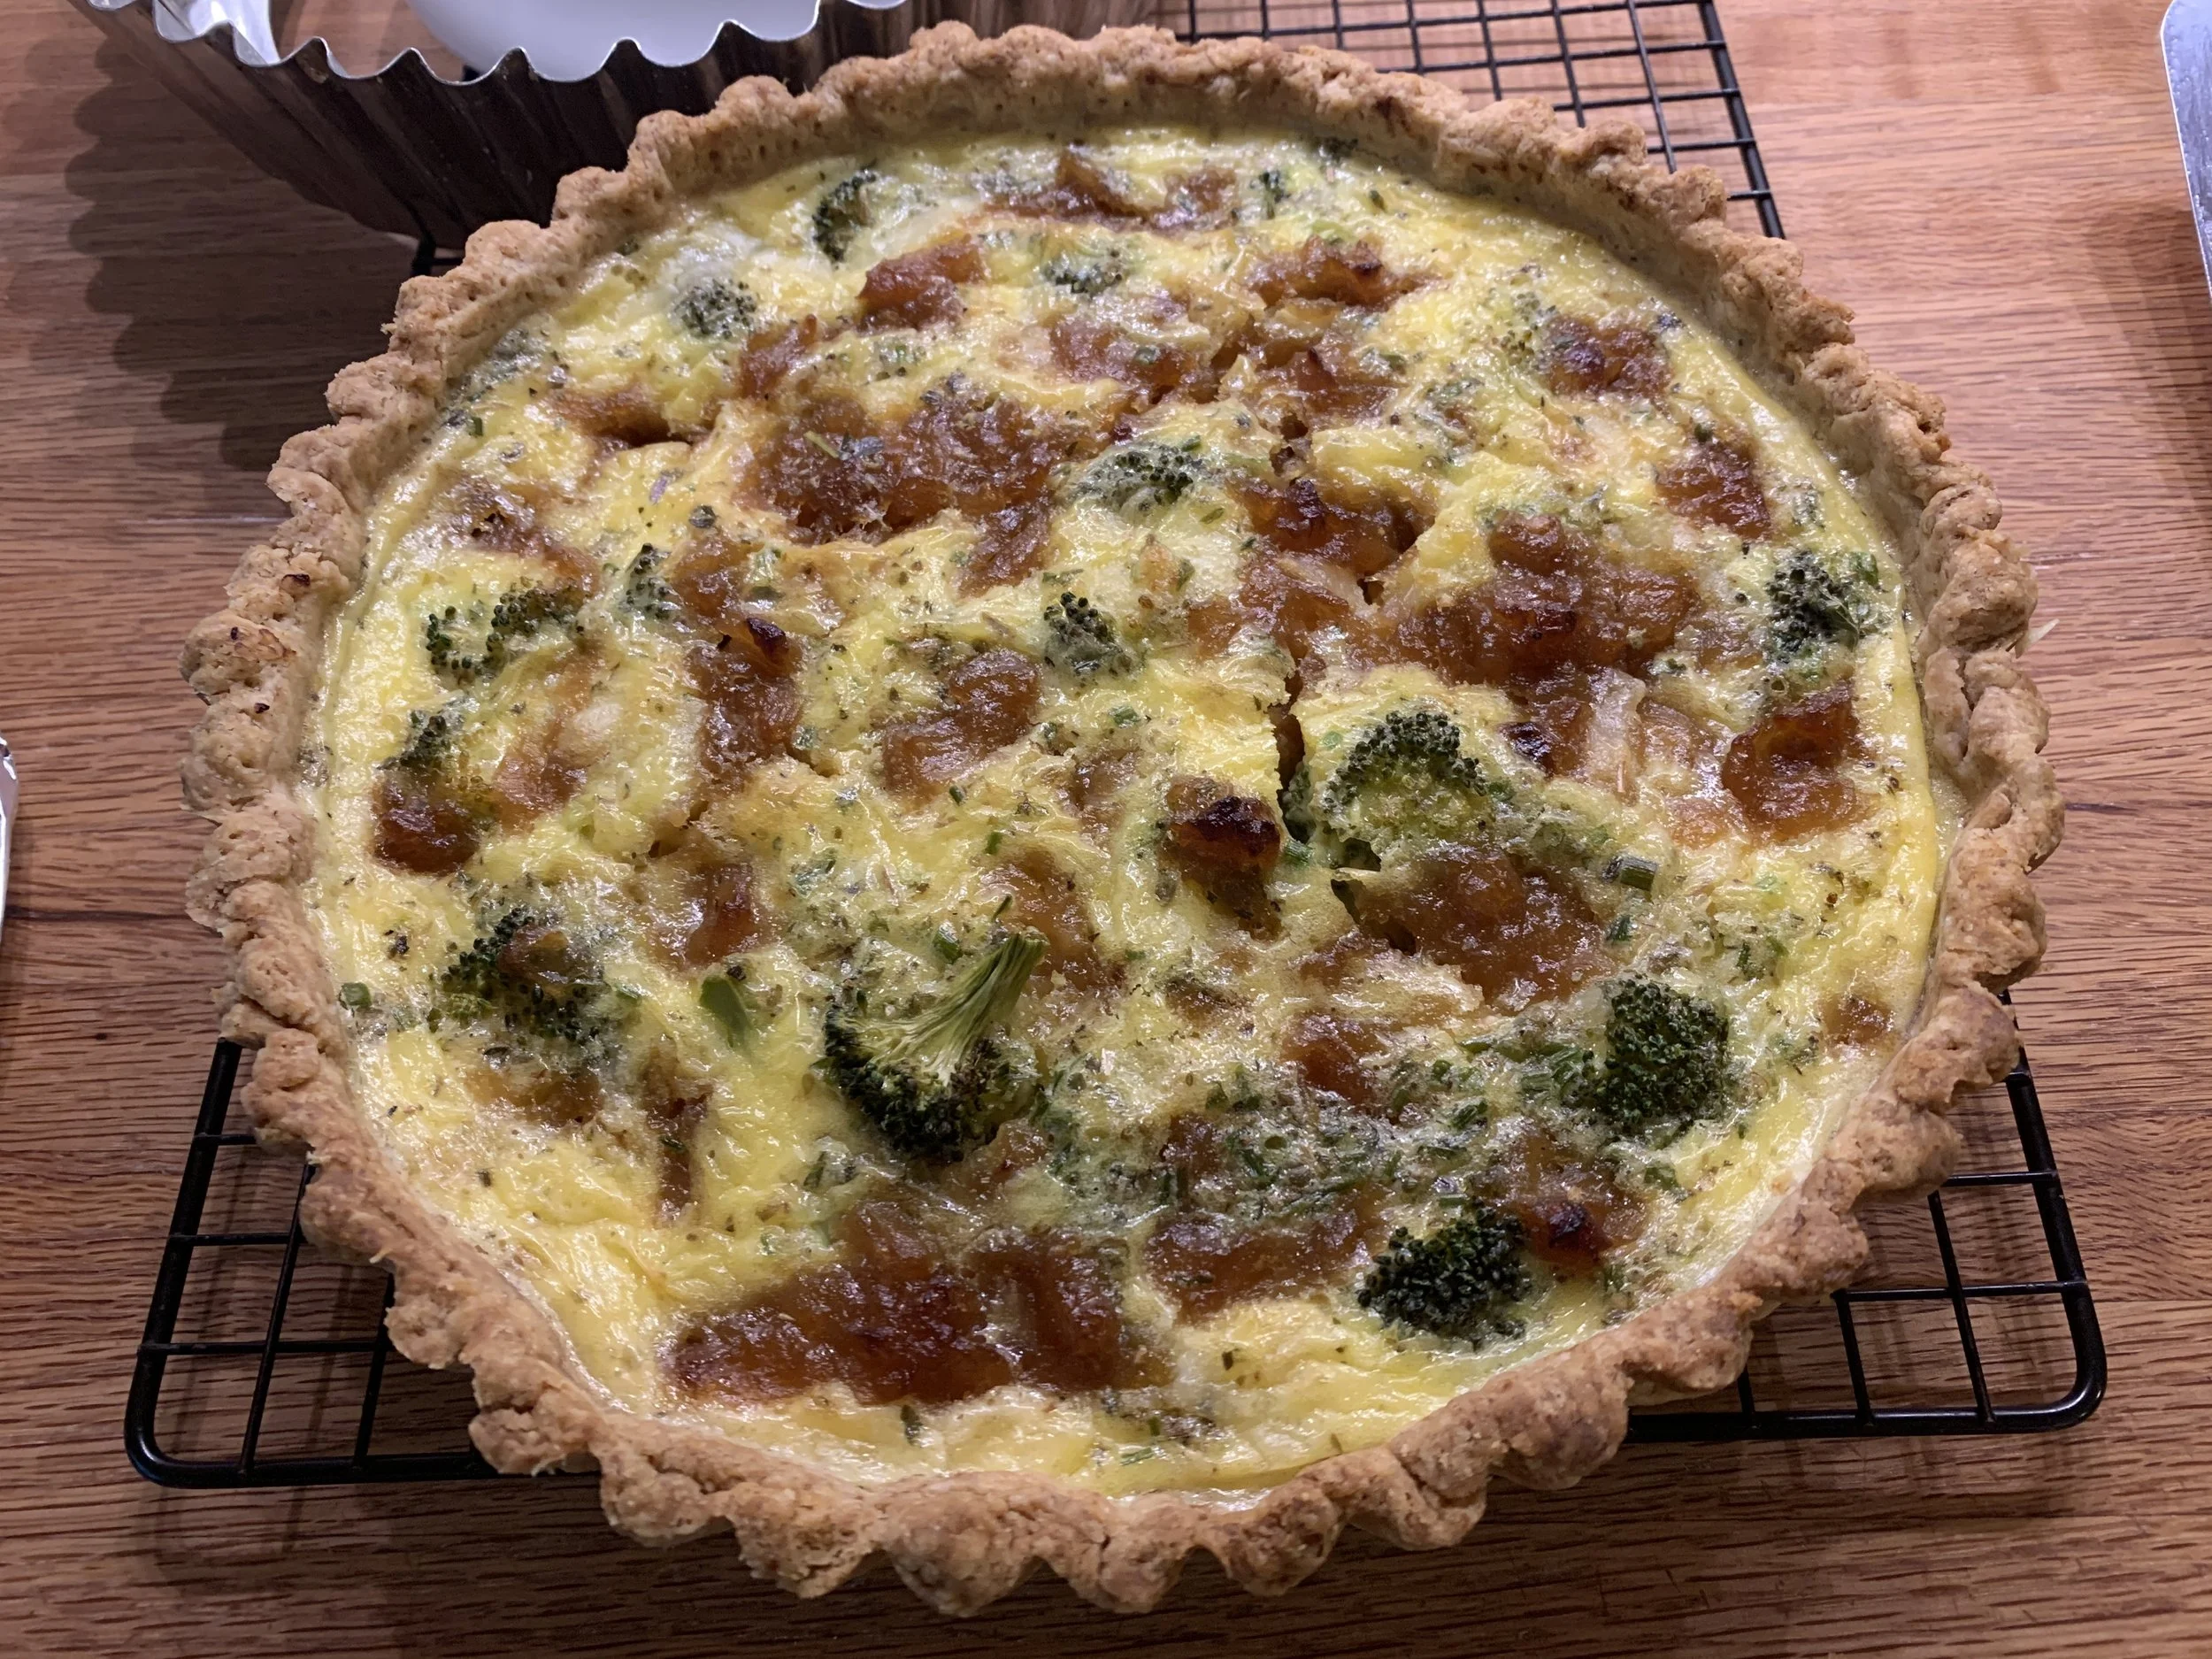
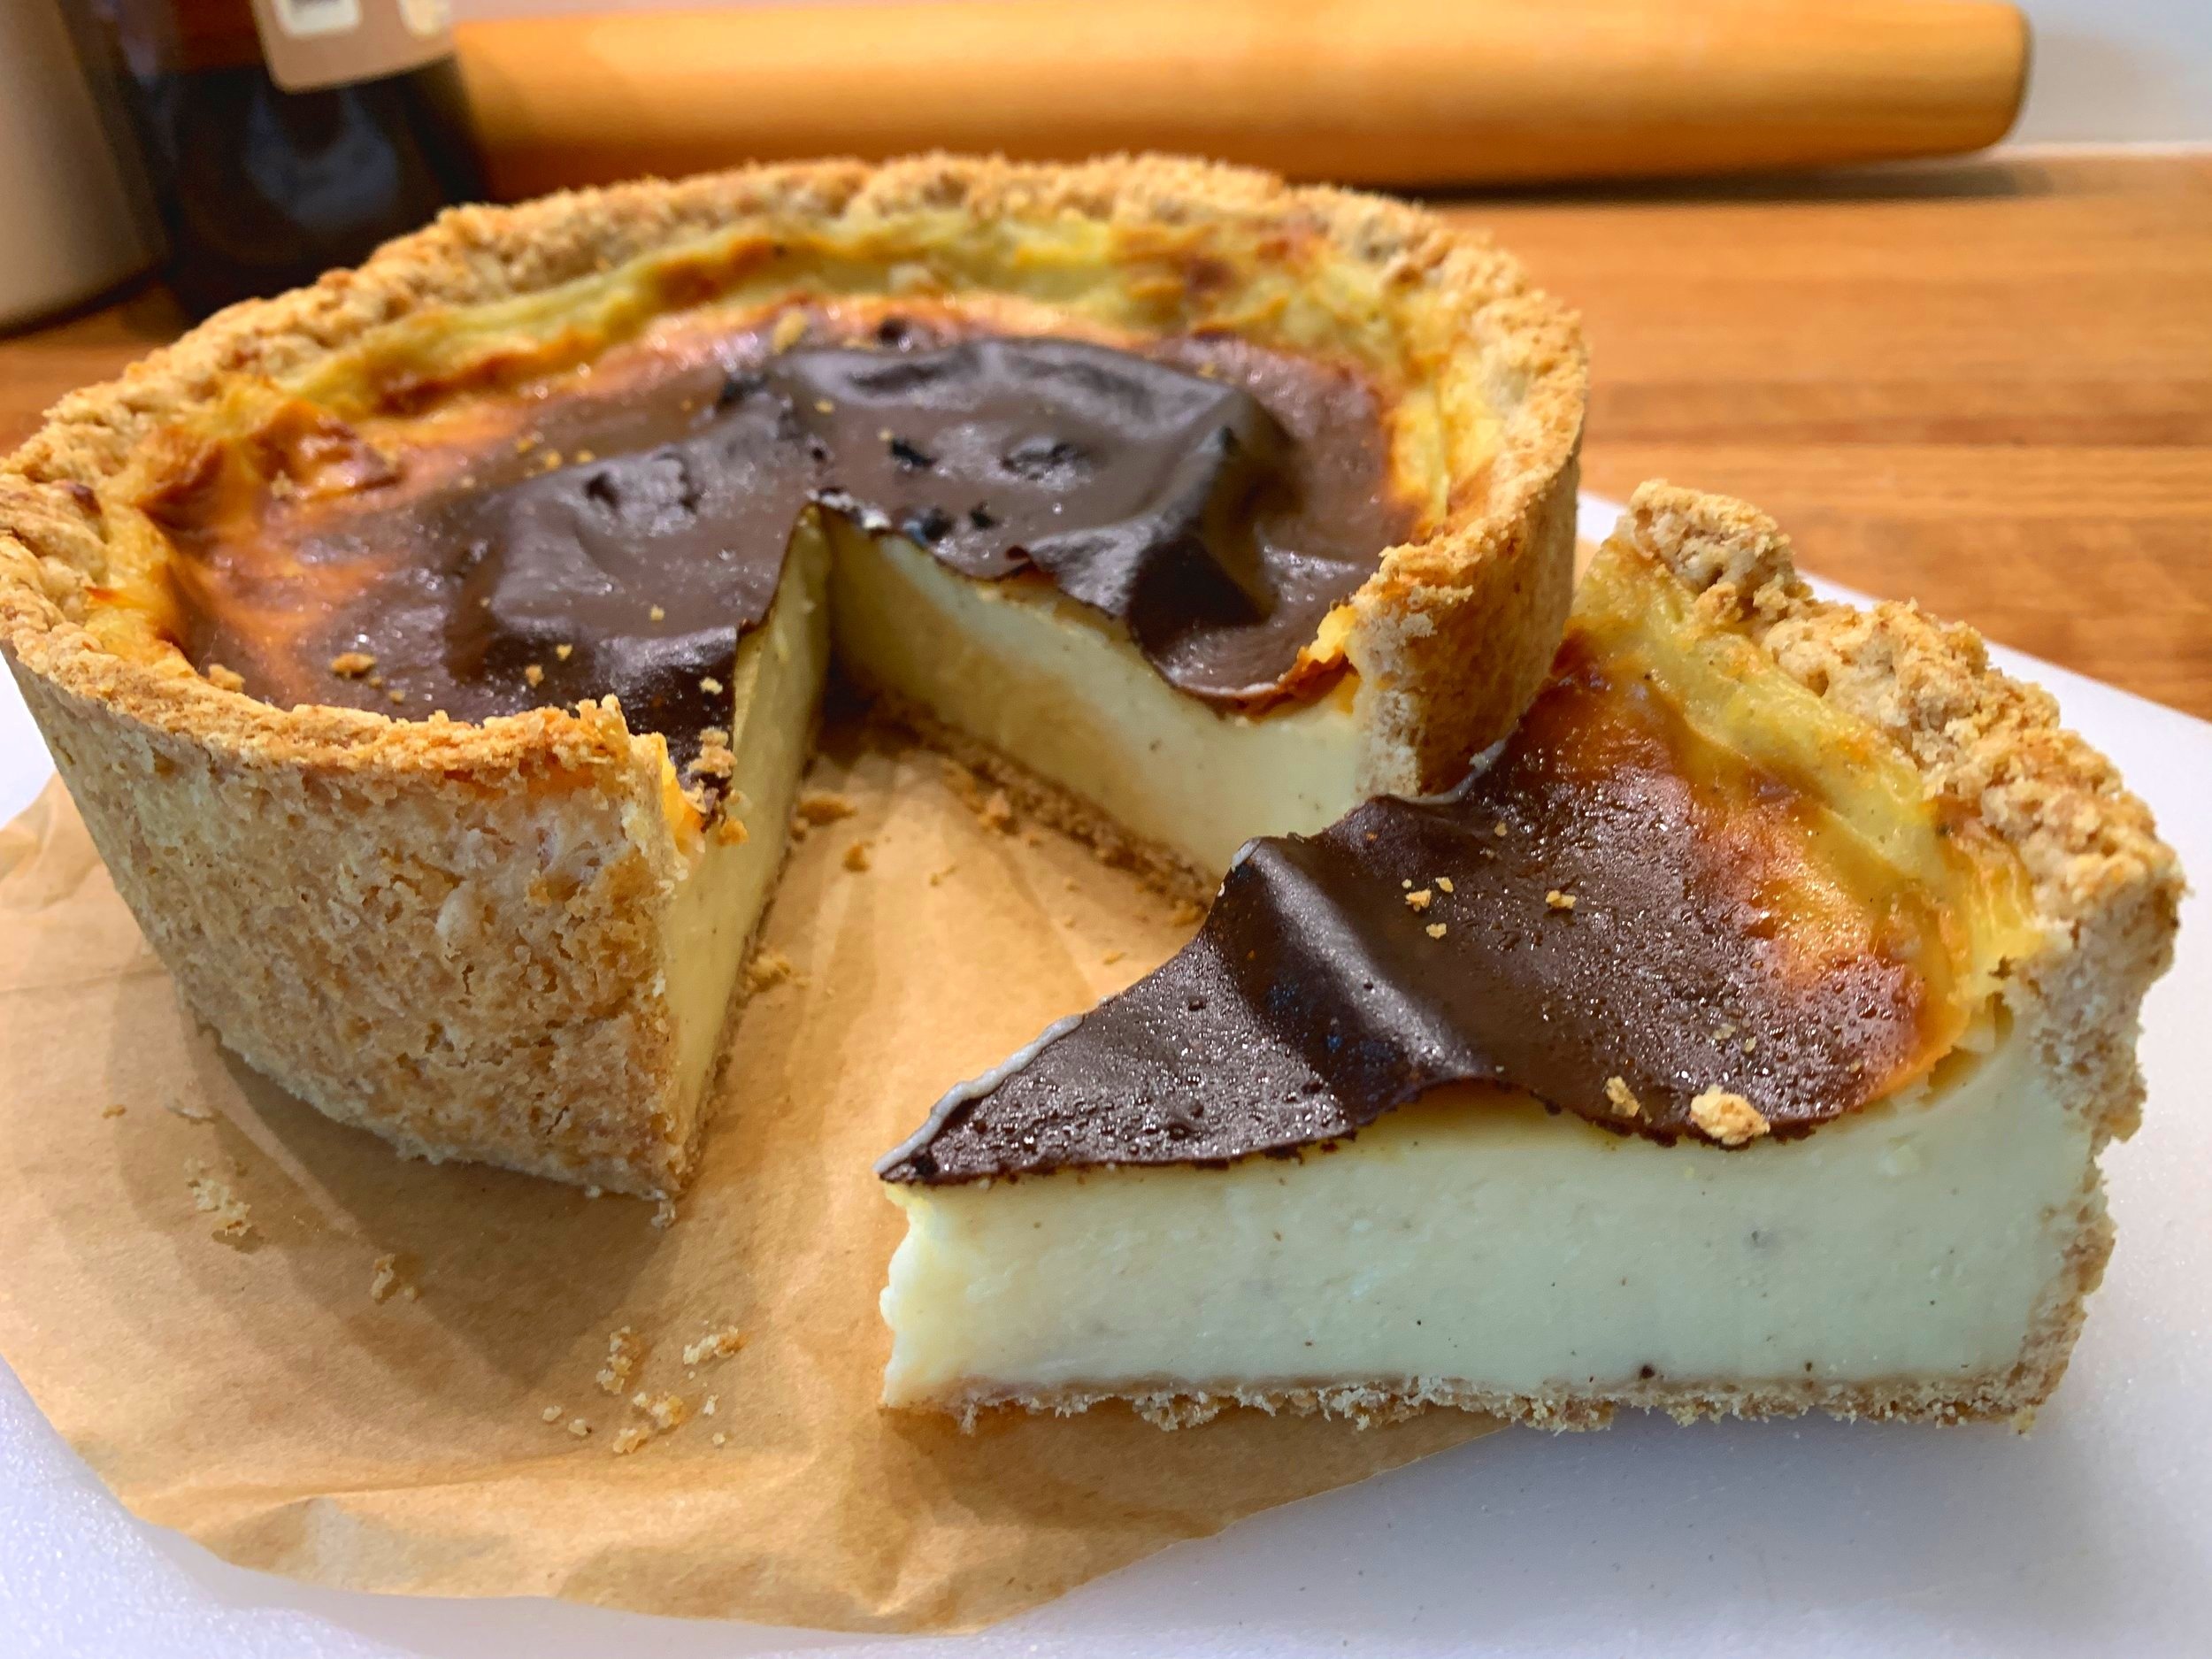
OK! It’s time to get down to brass tacks. October is flying by, and I want to share one of my favorite baked goods ever. Being a huge lover of all things custard (think cooked vanilla pudding with melty chocolate chips as a child), my focus here is on le flan Parisien, essentially a custard baked in a crust. Yum.

Ever popular, flan has made its mark as a favorite le gouter after school snack for many French kiddos and is a staple in many pâtisseries across the country. There are many versions of flan across the globe - Mexico and Spain to name just two.

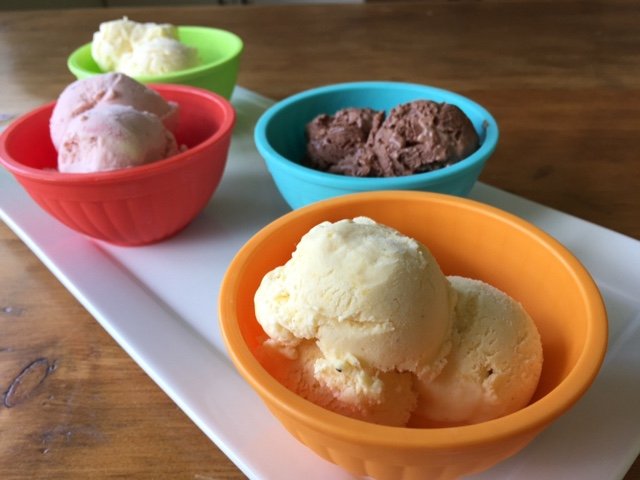
And let’s not forget the many classic custard based desserts that you’ll find world wide. Some of my favorites are crème brulée, pot de crème and my favorite ice cream base, crème anglaise, which I (and many!) consider the mother of custard sauces.

LIme coconut, raspberry/strawberry, chocolate almond, peach ice creams

I do digress. Sorry ice cream! I have to get back on track, but I couldn’t resist bringing you into the picture.

A custard is essentially a blend of dairy, egg and sugar with the occasional added thickener like cornstarch and/or flour, as is the case with crème pâtissière. You’ll see MANY variations in custard recipes using only milk, only cream, a blend of milk and cream, some yolks, some whole eggs - you get the idea. It would take me an entire post to try and explain the differences. Suffice it to say - all or mostly cream and all yolks in a custard make for a more unctuous mouth feel and richer taste. Switch in some whole milk for some of the cream and some whole eggs for yolks and you’ll experience a lighter, airier custard.

During my stage at Pâtisserie Pascal Pinaud in Paris’ 5th arrondisement, the house flan was made with puff pastry scraps for the crust and a simple crème pâtissière filling using whole eggs rather than yolks. Chef Pascal would line a 10-11 inch (25-28 cm) open ring with puff, hold it in the freezer and then I (oui moi!) would make the crème pâtissière that would be poured directly from the hot saucepan into the unbaked frozen shell. Into the oven it went. Always a hit.

At The French Tarte, my small shop in Pawtucket RI (2012-2014) , I occasionally made a version from Phillipe Conticini’s Pâtisserie des Rêves. His offered a unique approach whereby the custard filling was cooked, cooled then placed into unbaked puff lined rings and into the freezer for a couple of hours before baking. Right out of the freezer, directly into the oven! I looked back at my notes from July 25, 2013, having done a comparison between frozen and not - frozen won out for its creamier texture. Who knew.

I had already created my own flan custard base a few years back after doing a comparison of several recipes I had tried over the years. It incorporates whole milk, cream, eggs, yolks, sugar, cornstarch, vanilla bean. It was tasty back then so I went with it for this project. Plus, I hadn’t made a flan in forever!!
My goal here was not so much to revisit the custard portion BUT to compare using puff pastry scraps and my favorite pâte brisée for the shells. Blind baked or not and filling them with hot/cooled/frozen in the shell versions of the custard filling. While not a very scientific or well controlled experiment, it gave me the answers I sought.

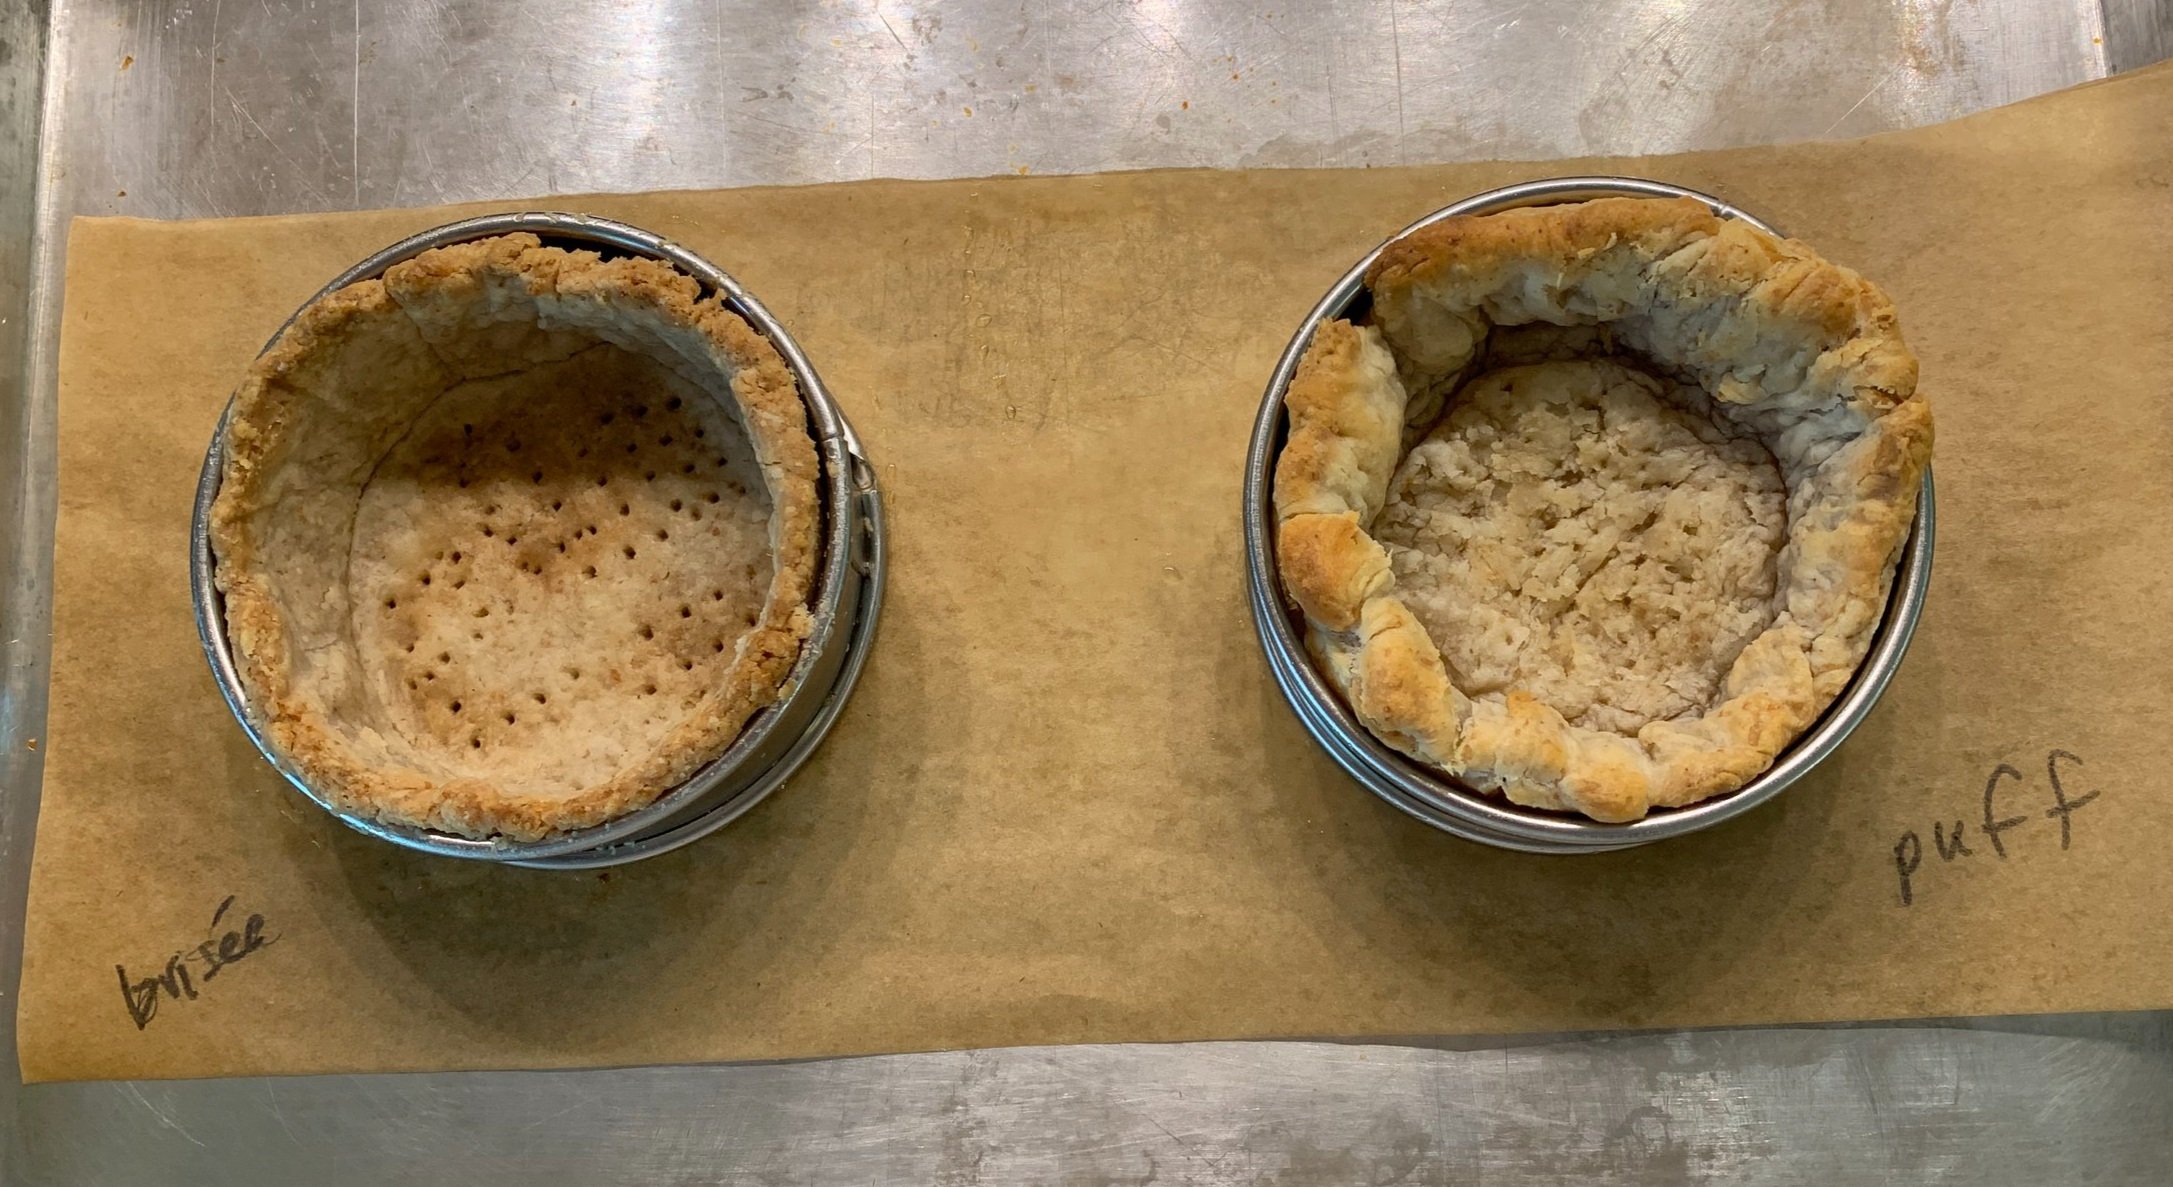
I used my 80 mm (3”) diameter, 2.5 cm (1”) high open tart rings, lining three with puff pastry scraps and three with pâte brisêe. I blind baked one each of brisée and puff and left the rest unbaked.

Ready for Baking

As I suspected it would, the puff puffed up in spite of the weights, resulting in a pudgy crust.


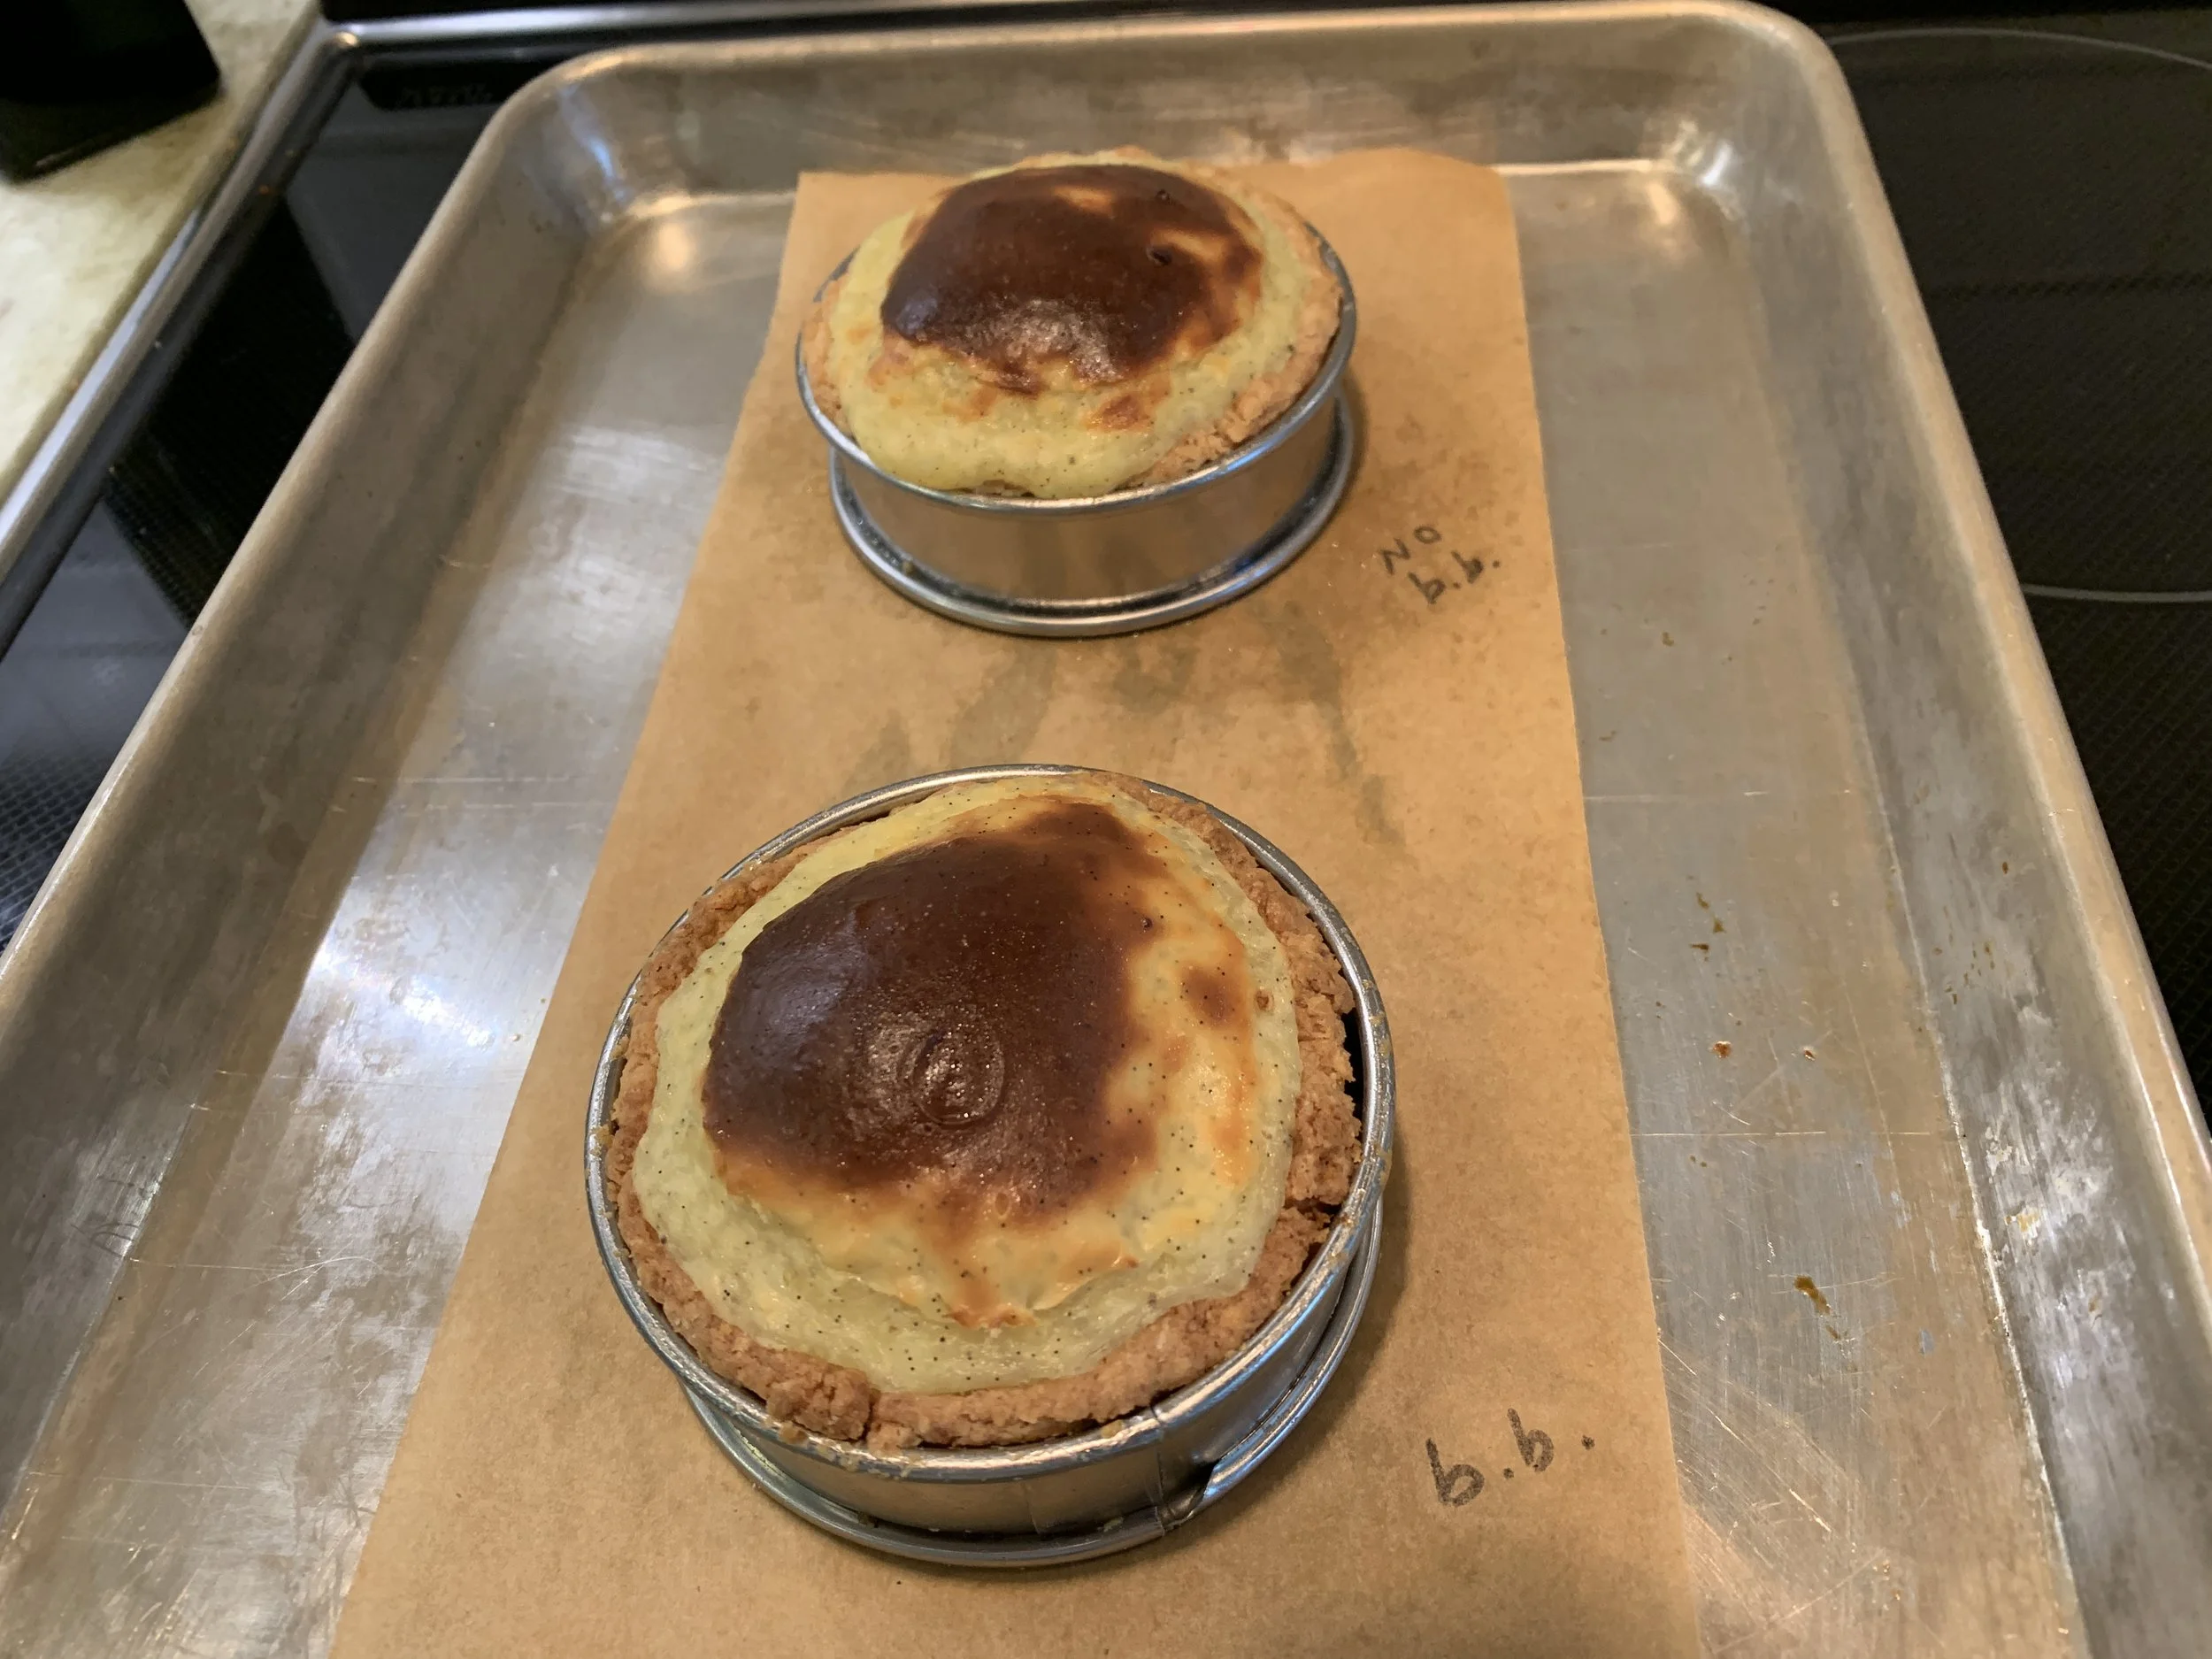
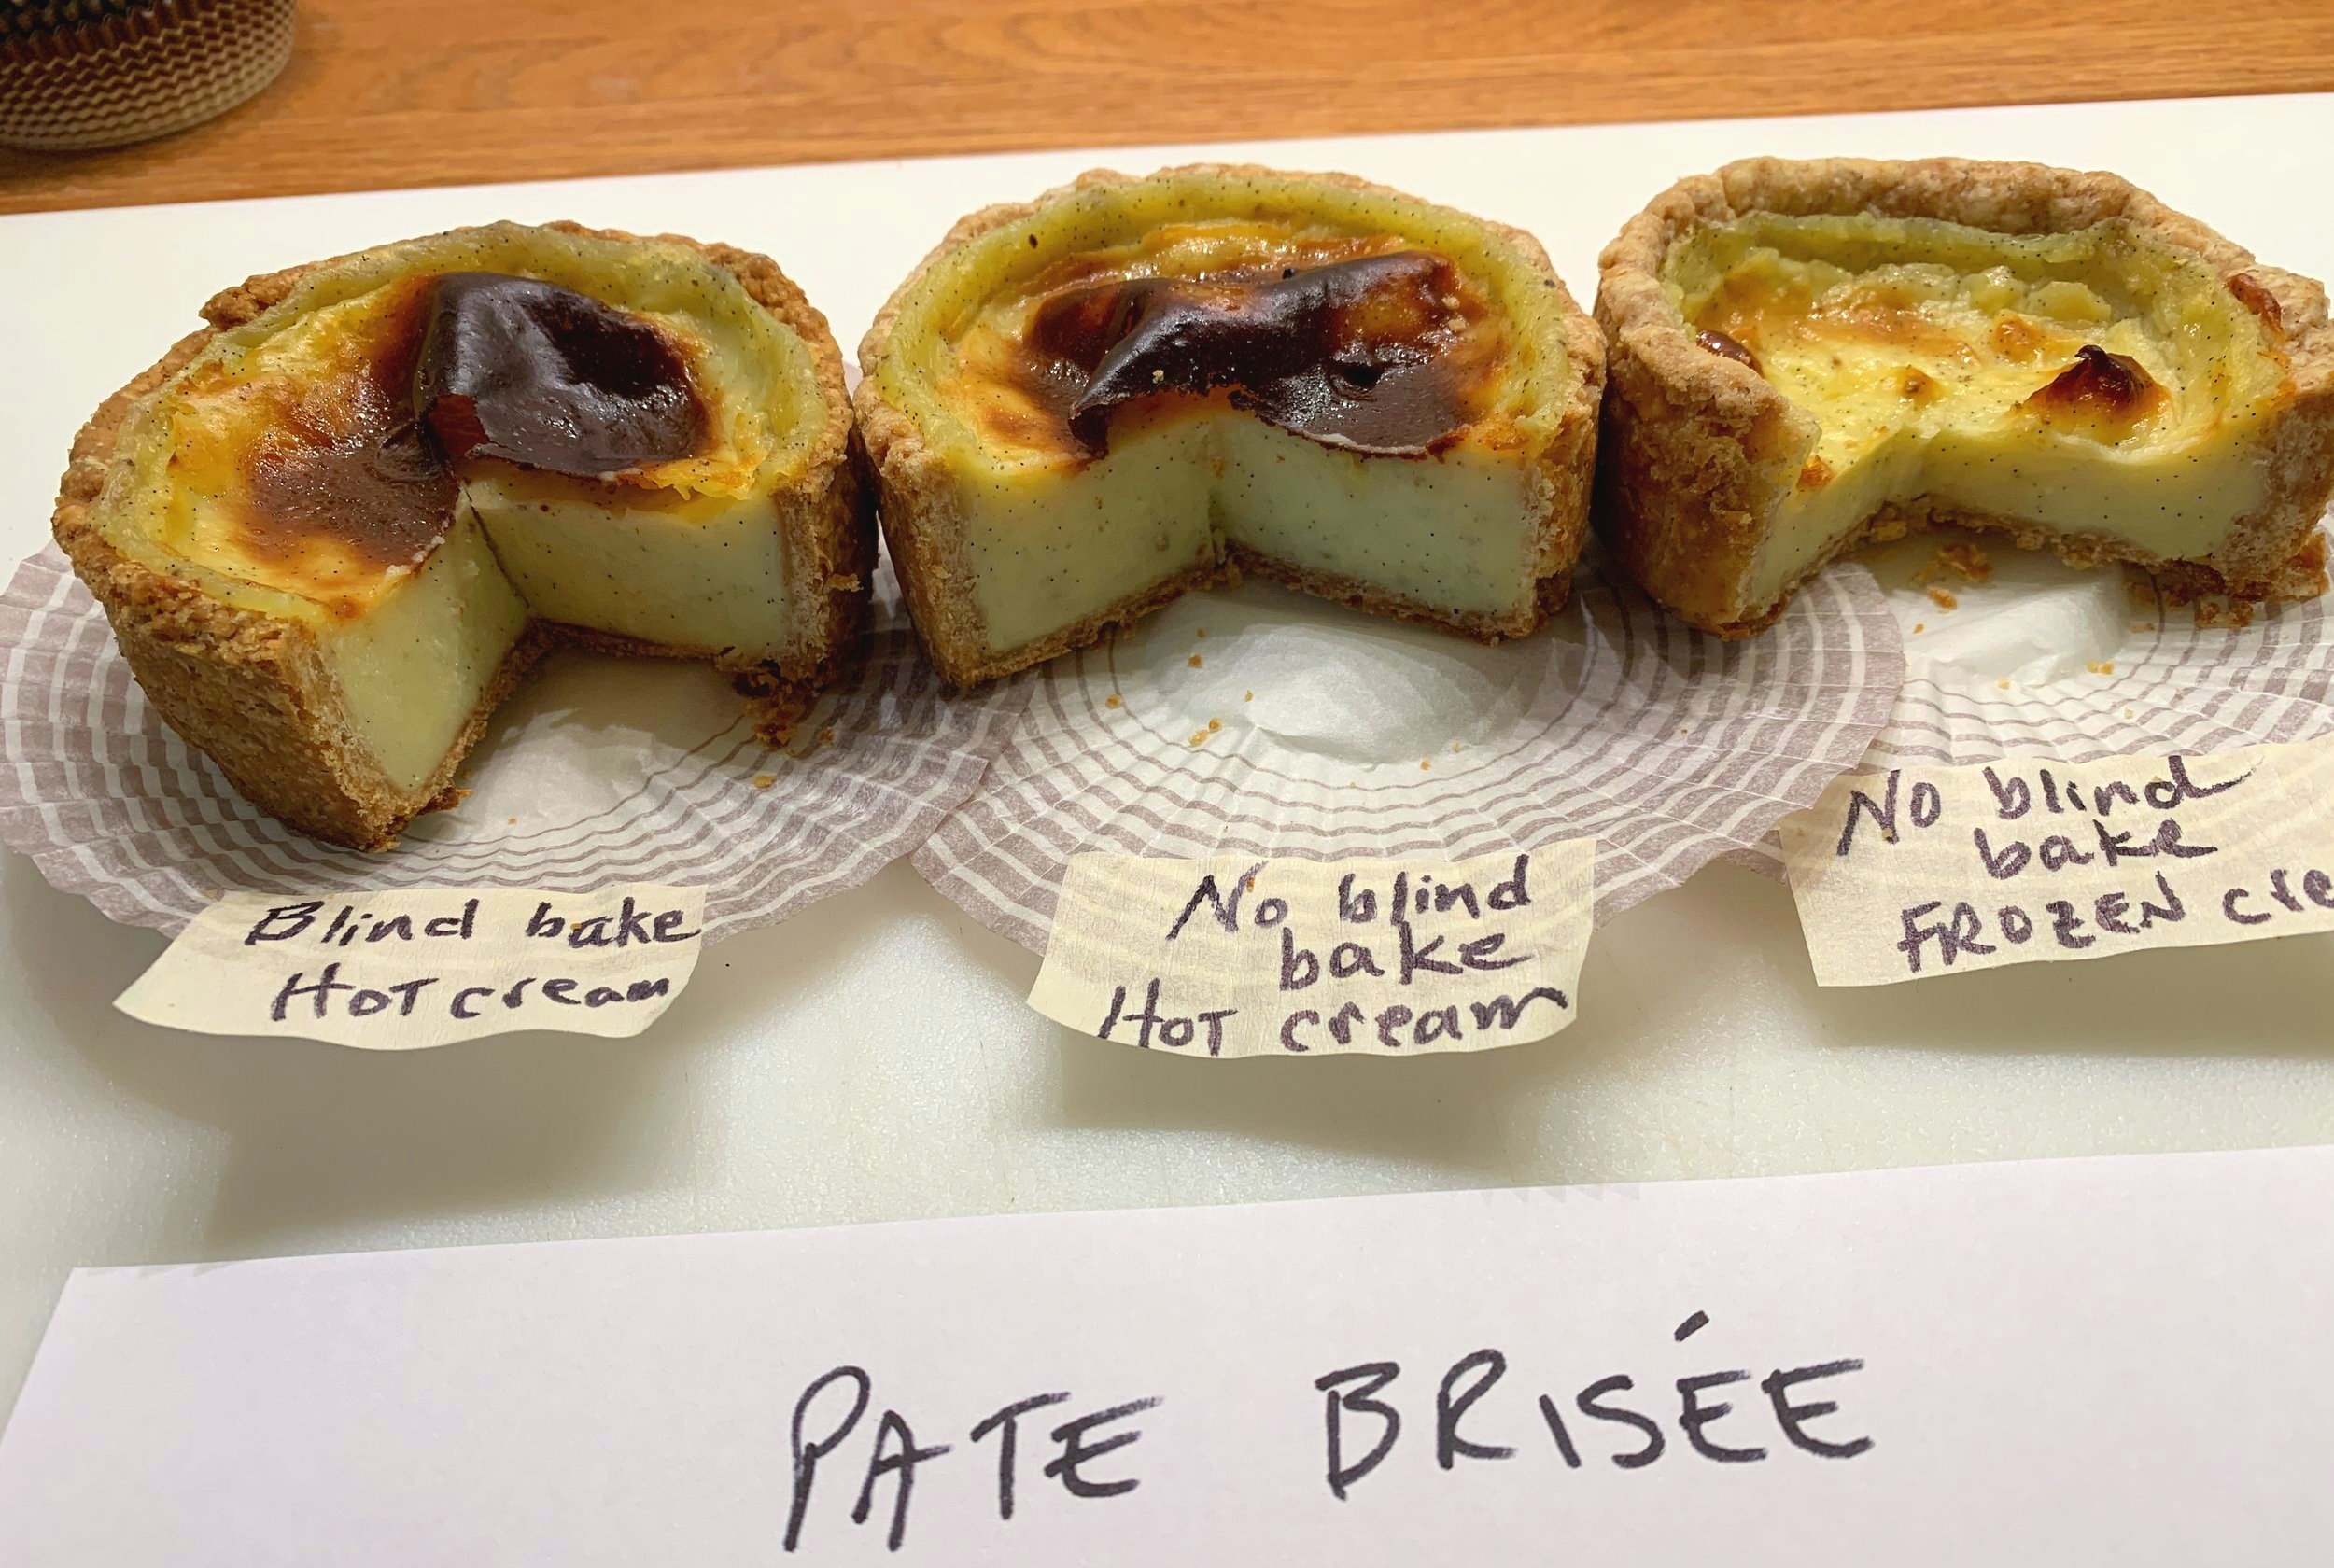
I then proceeded to make a batch of my flan custard, filling both a blind baked and an unbaked pâte brisée shell with HOT cream and then right into the oven.

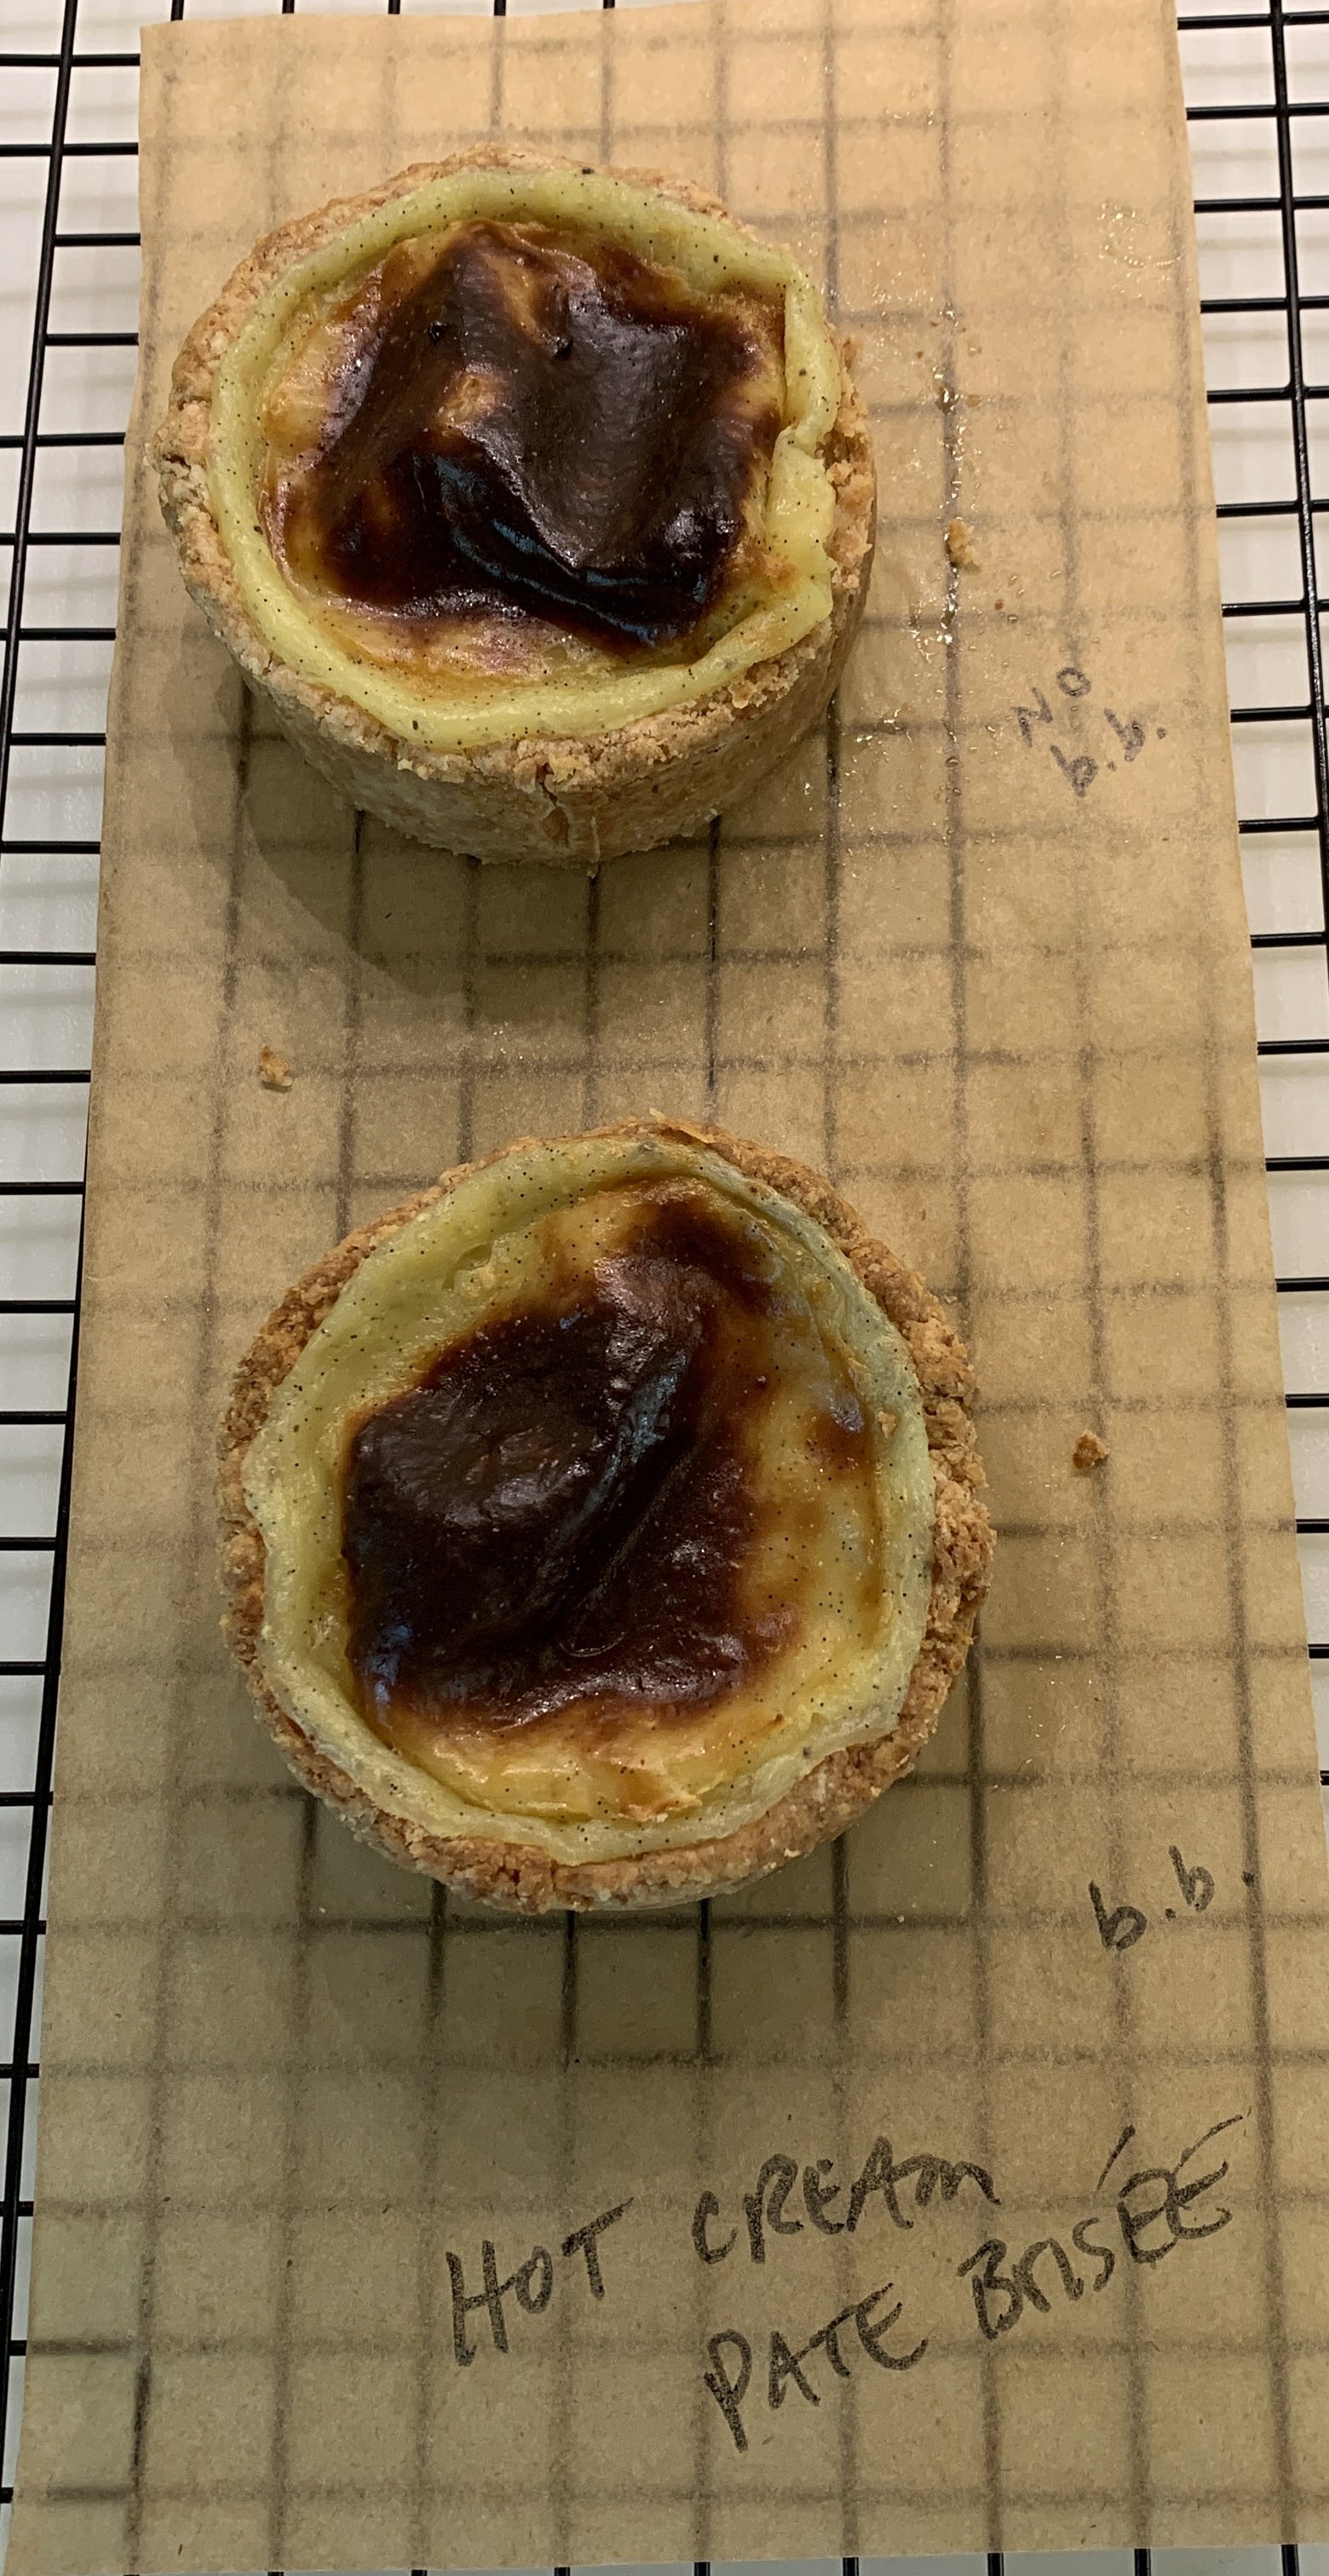
Look for the nicely browned (in some cases almost black) top and just a hint of jiggle in the otherwise set custard. Both crusts baked up brown and crisp, blind baked or not. Good to know.

pâte brisée/hot cream just out of the oven

The flans do deflate while cooling as seen below.

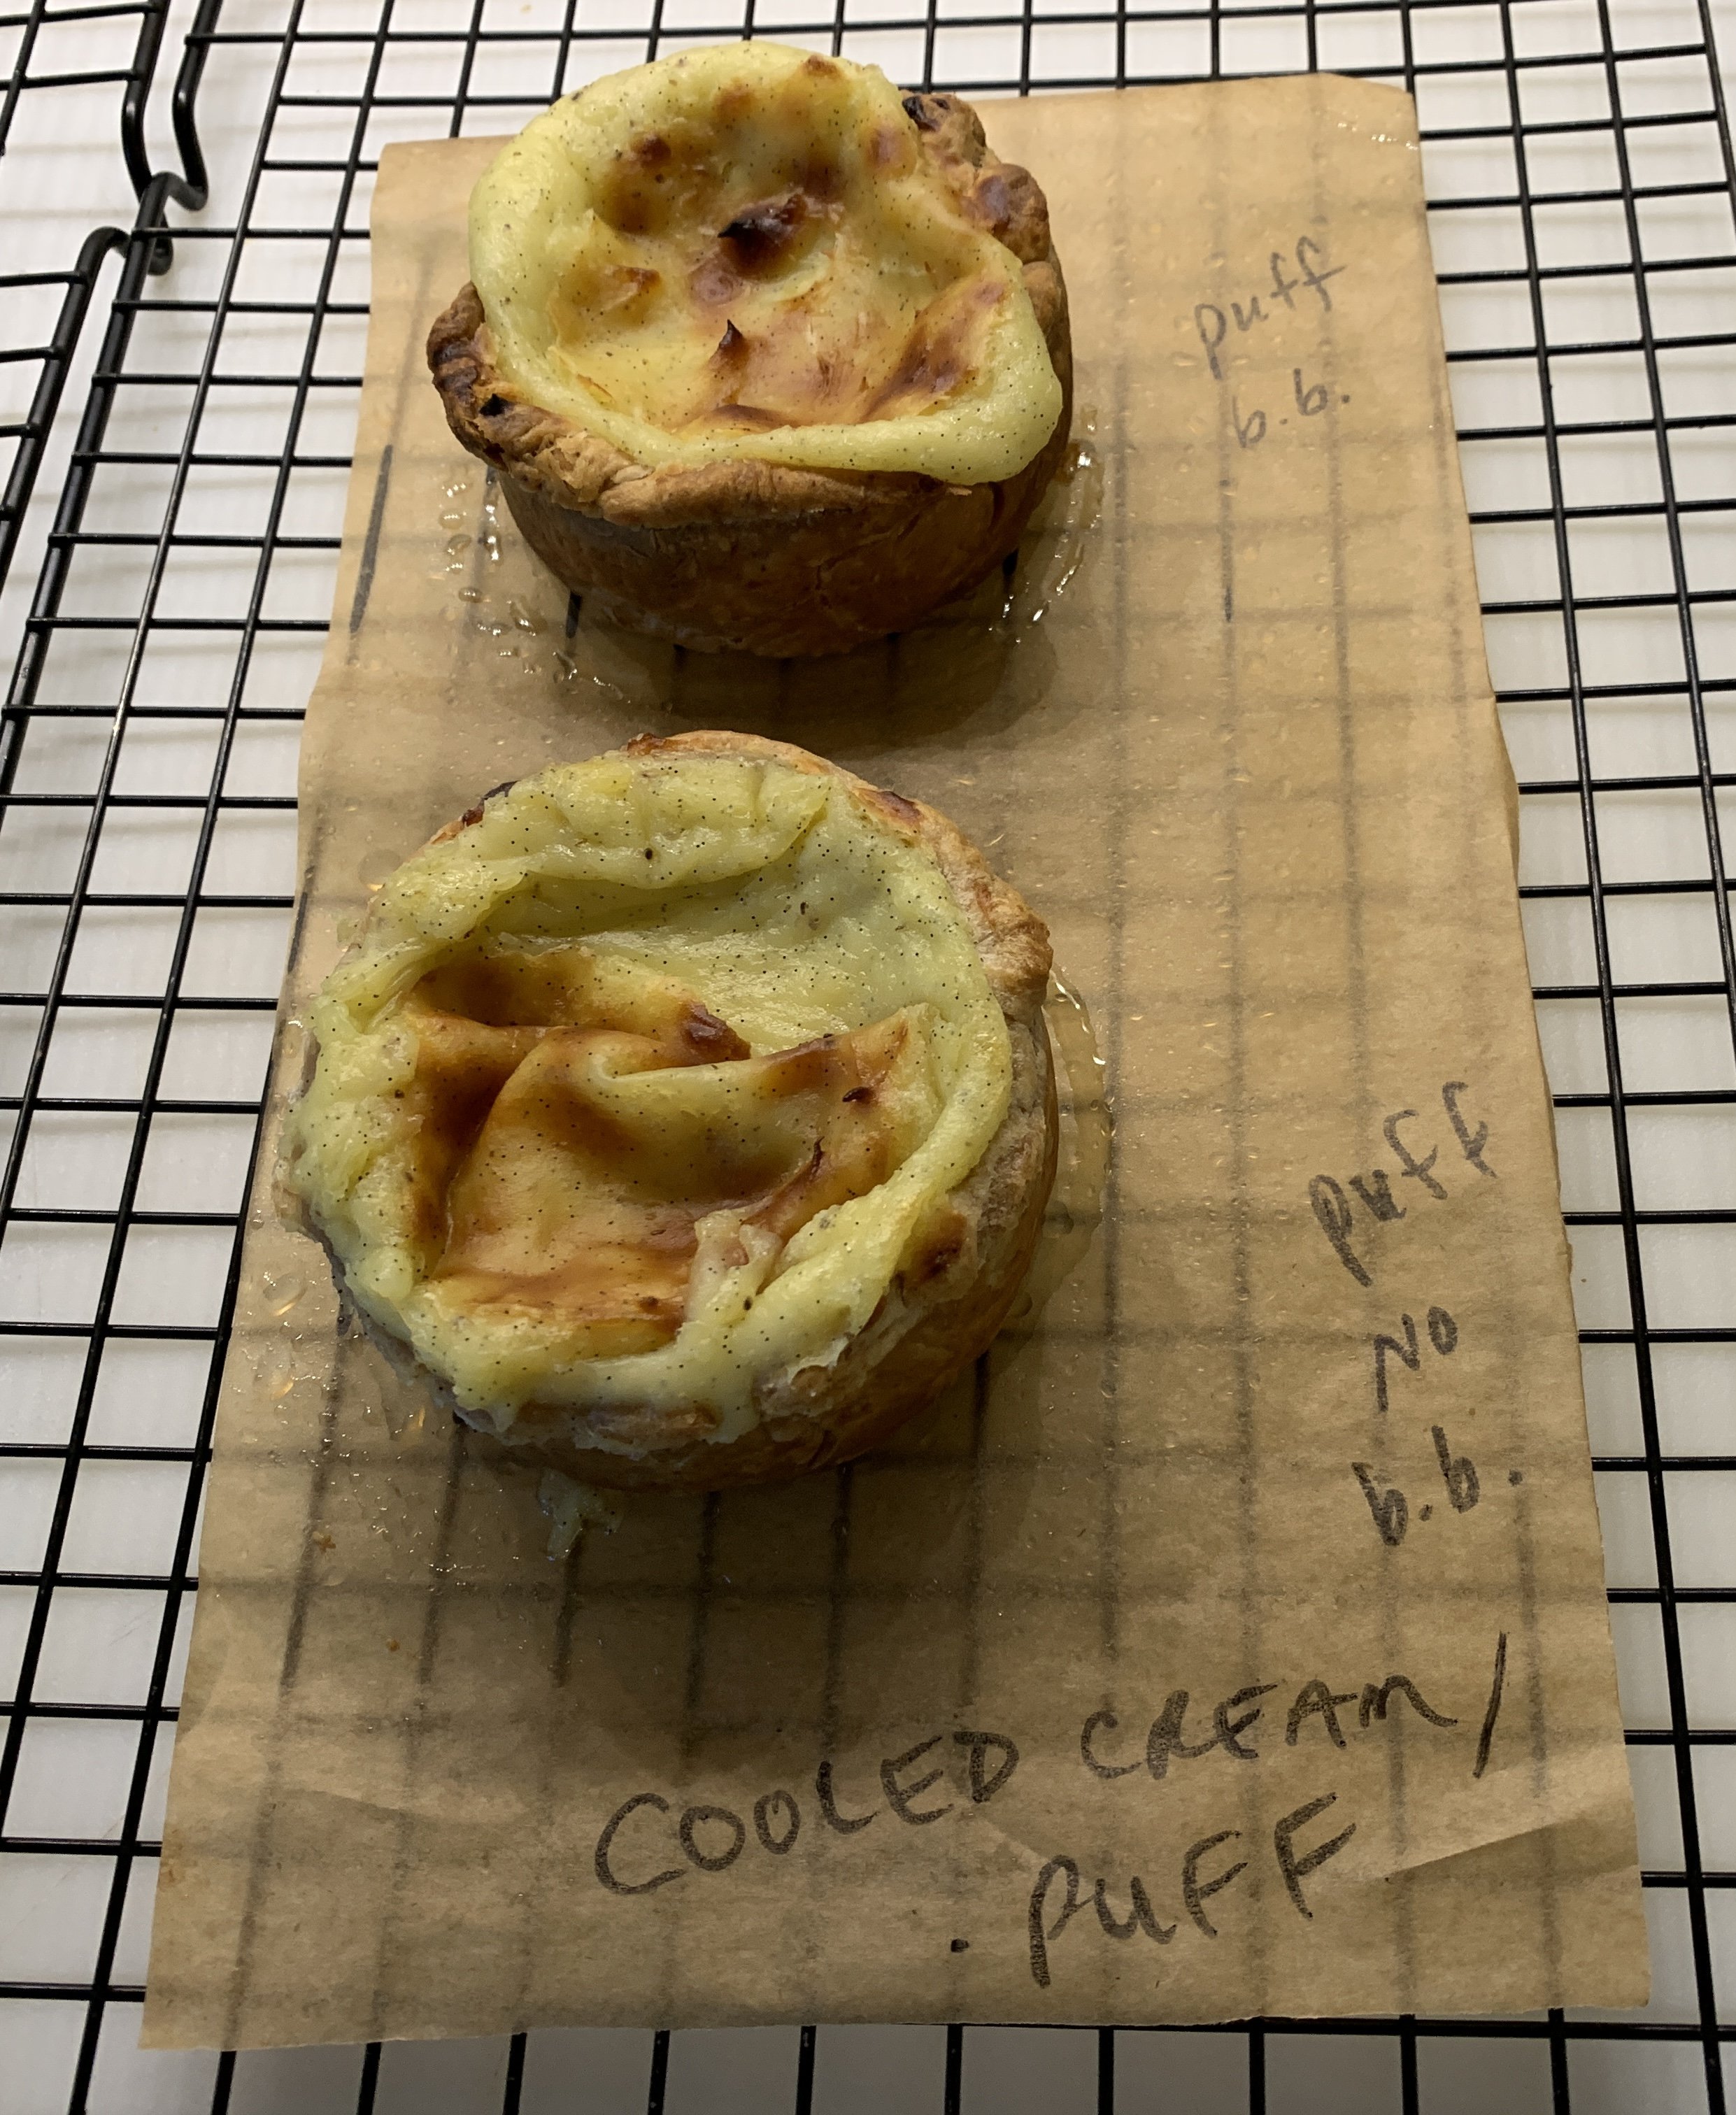
I allowed the remaining flan cream to cool about 30 minutes and filled a blind baked puff and an unbaked puff with the cooled cream.

Ready for the oven

Not a pretty picture since the unbaked puff puffed, essentially pushed the filling out and over the edges. Yikes! The blind baked one didn’t fare too well either. Too much filling on my part, although it did settle down once cooled.

rather a mess

Last but not least I filled my remaining two unbaked shells (one brisée and one puff) with cooled custard and froze them for a couple of hours before baking. I was a bit short on filling, but they were still good for the testing phase.


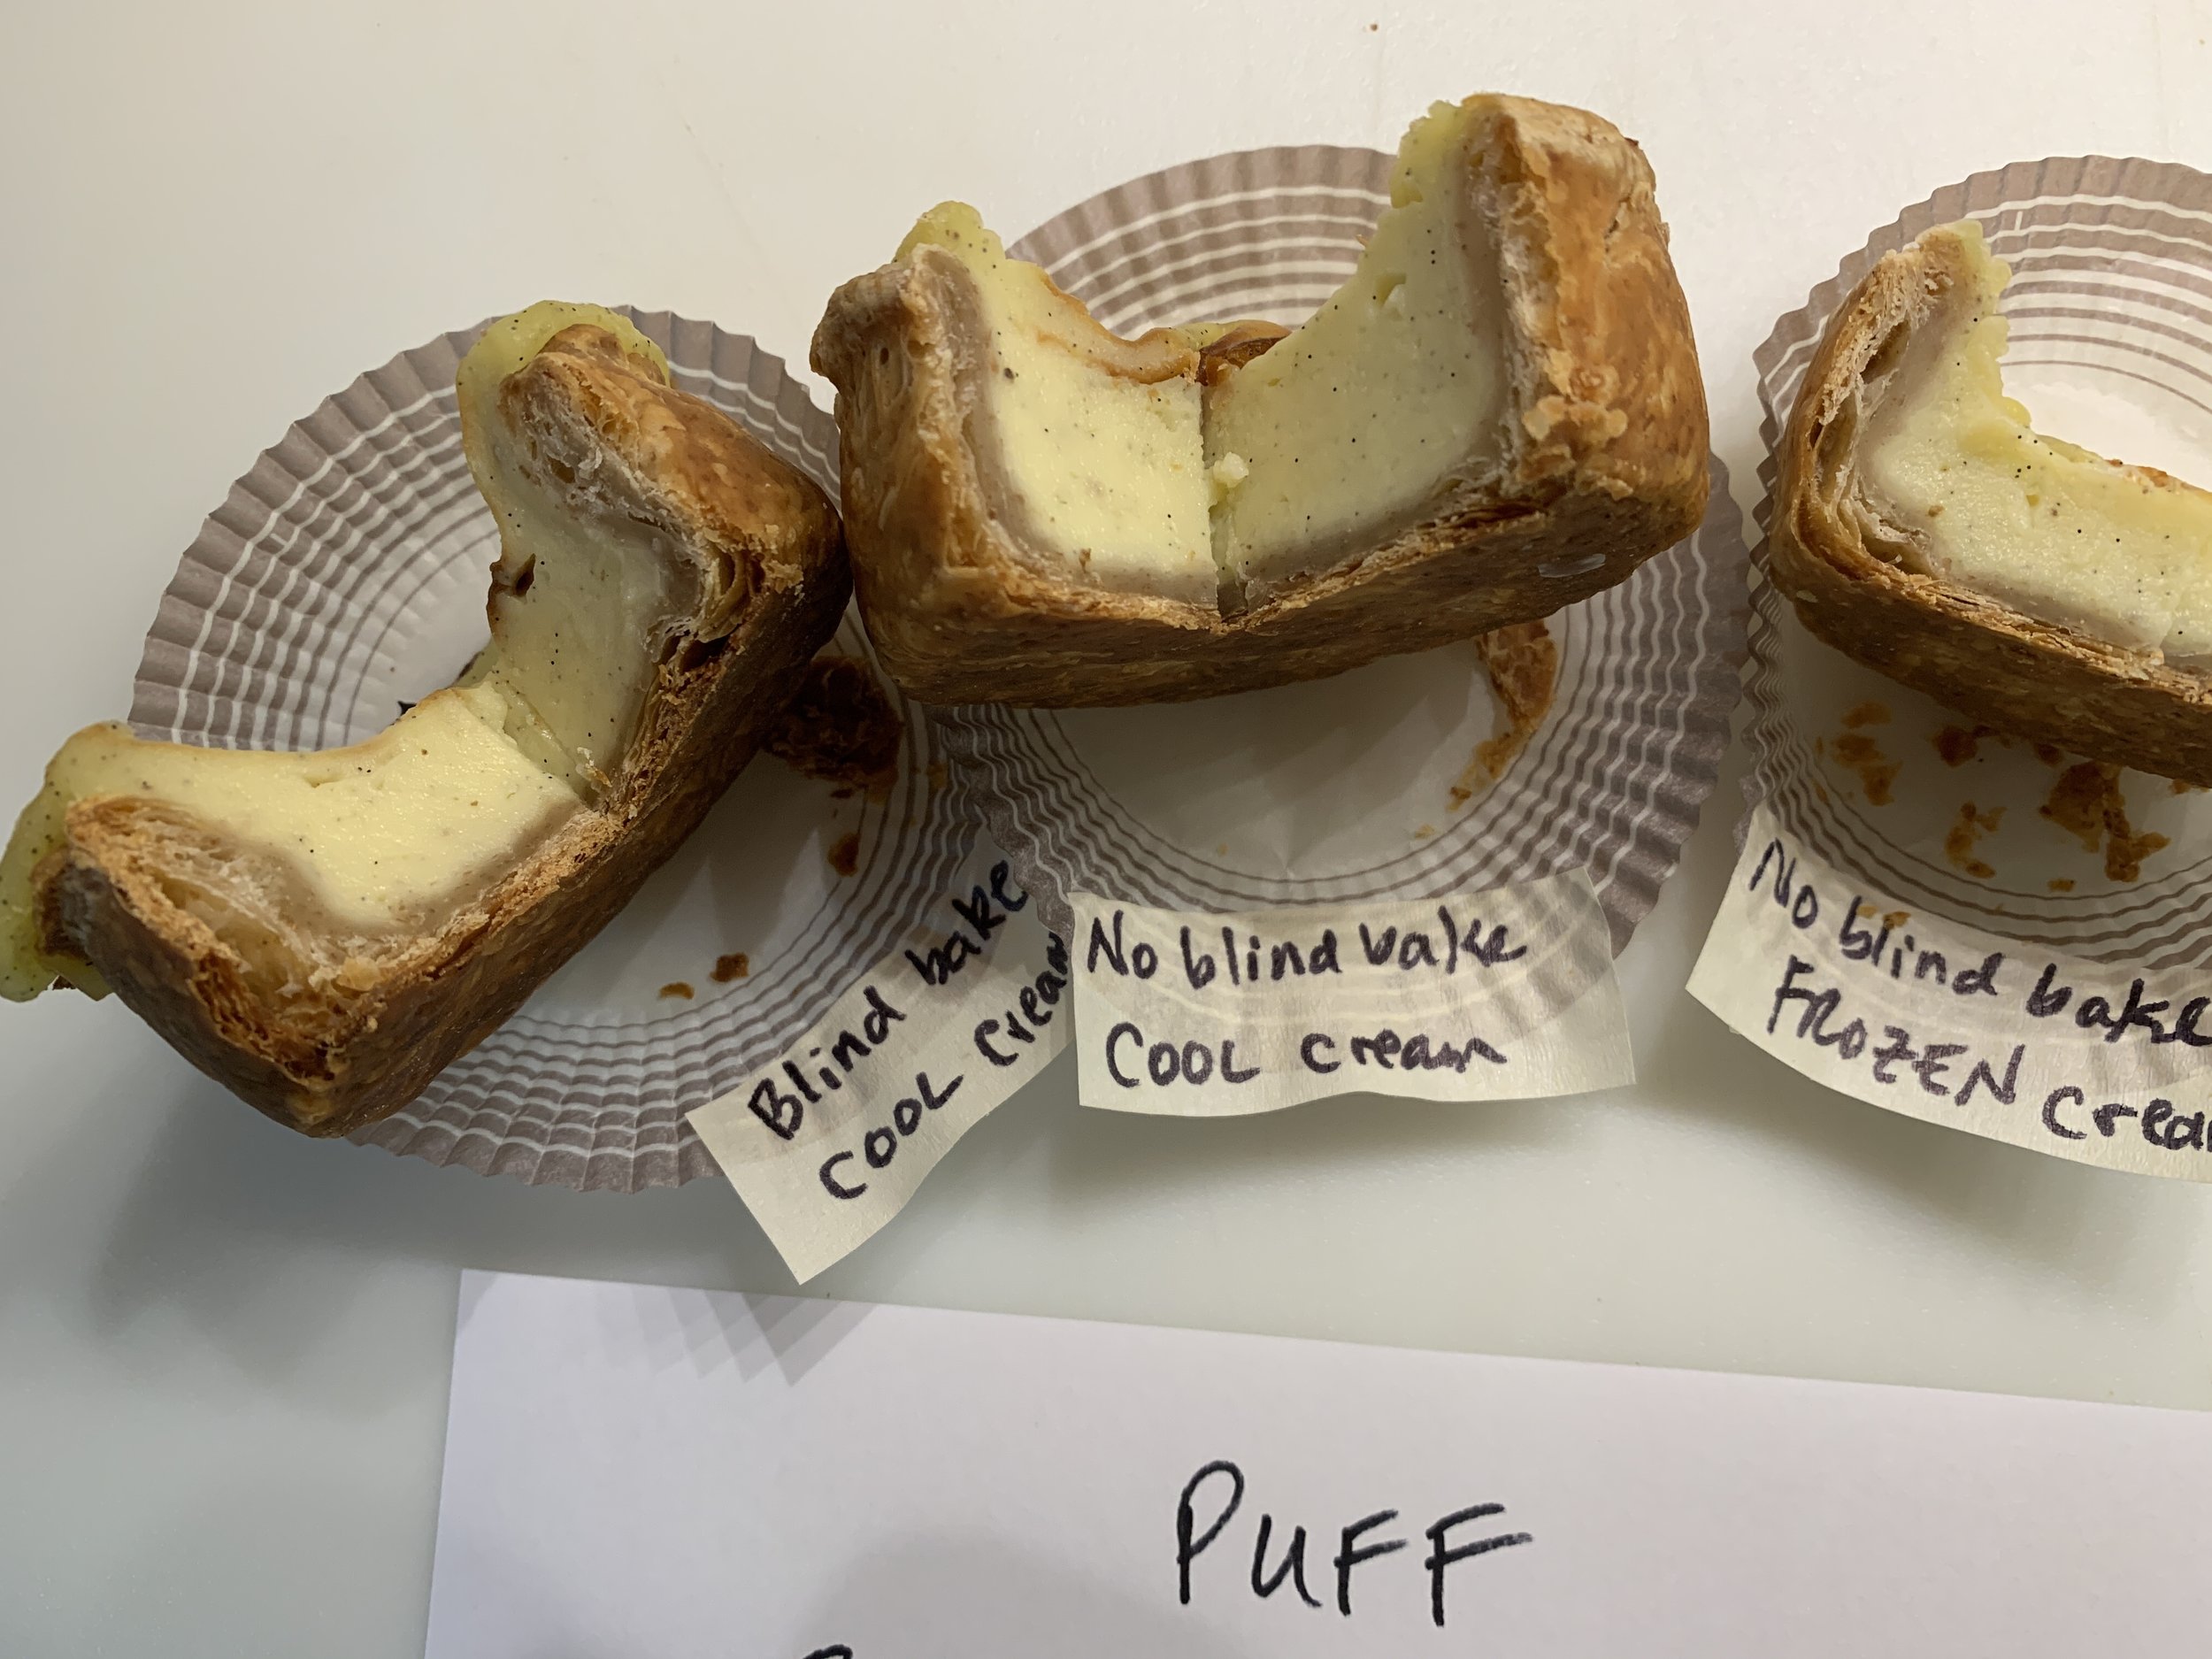
Taste test time! The first image is of the three puff crusted flans. You can see the inner layer of puff isn’t fully baked, even in the blind baked one. The custard was a winner in all versions, whether hot, cooled or frozen.

Here’s a closer view of the puff versions. Can’t have that doughy layer, no sirree!

The brisée versions all baked up beautifully. The crust so nice and crisp, browned and buttery and the custard silky smooth with a lightness that seemed just right.


Here’s a closer look at the brisée crusts.


The final analysis? Pâte brisée, hot custard and no need to blind bake. Straight forward indeed.

I simply had to do one final version using a 16 cm open ring. As seen below, I did the let-the-raw dough-hang-over-the-edge-of-the-ring approach, something I’ve seen in a couple of different pastry books. Once the whole thing is baked and cooled, you carefully cut away the excess dough to create a clean edge. It worked OK but I wouldn’t bother with it in the future.

Over hanging dough approach

Place lined ring/sheet pan in the freezer while preparing the custard. Fill shell with hot cream and bake.

Ready for the oven

All Baked up

Crust trimmed

Once cooled, trim off the excess crust (snack on it!), lift off the ring and cool the flan in the fridge overnight. This holds well refrigerated over 3-4 days, and I’ll admit that Steve and I each enjoyed a daily slice during that time. A keeper.


Have fun making your own flan Parisien!

Before I go, let me share this photo of a beautiful double rainbow seen out of our west windows this morning. The rising sun in the east was hitting the trees/oncoming rain clouds to the west to give us a vision of nature’s finest. Until next time - happy baking!

Lemon lime toasted coconut tartelettes

Spring’s celebrations always bring out a wave of lemon, lime and coconut themed recipes, and I’m certainly one who hops on the band wagon tout de suite. I made these for Easter as well as for a spring pastry event right down the road - a big hit.

After our return from a late spring trip to New England and Nova Scotia, I was determined to write at least a bit about these, since, even with summer upon us, there’s always room for citrus.

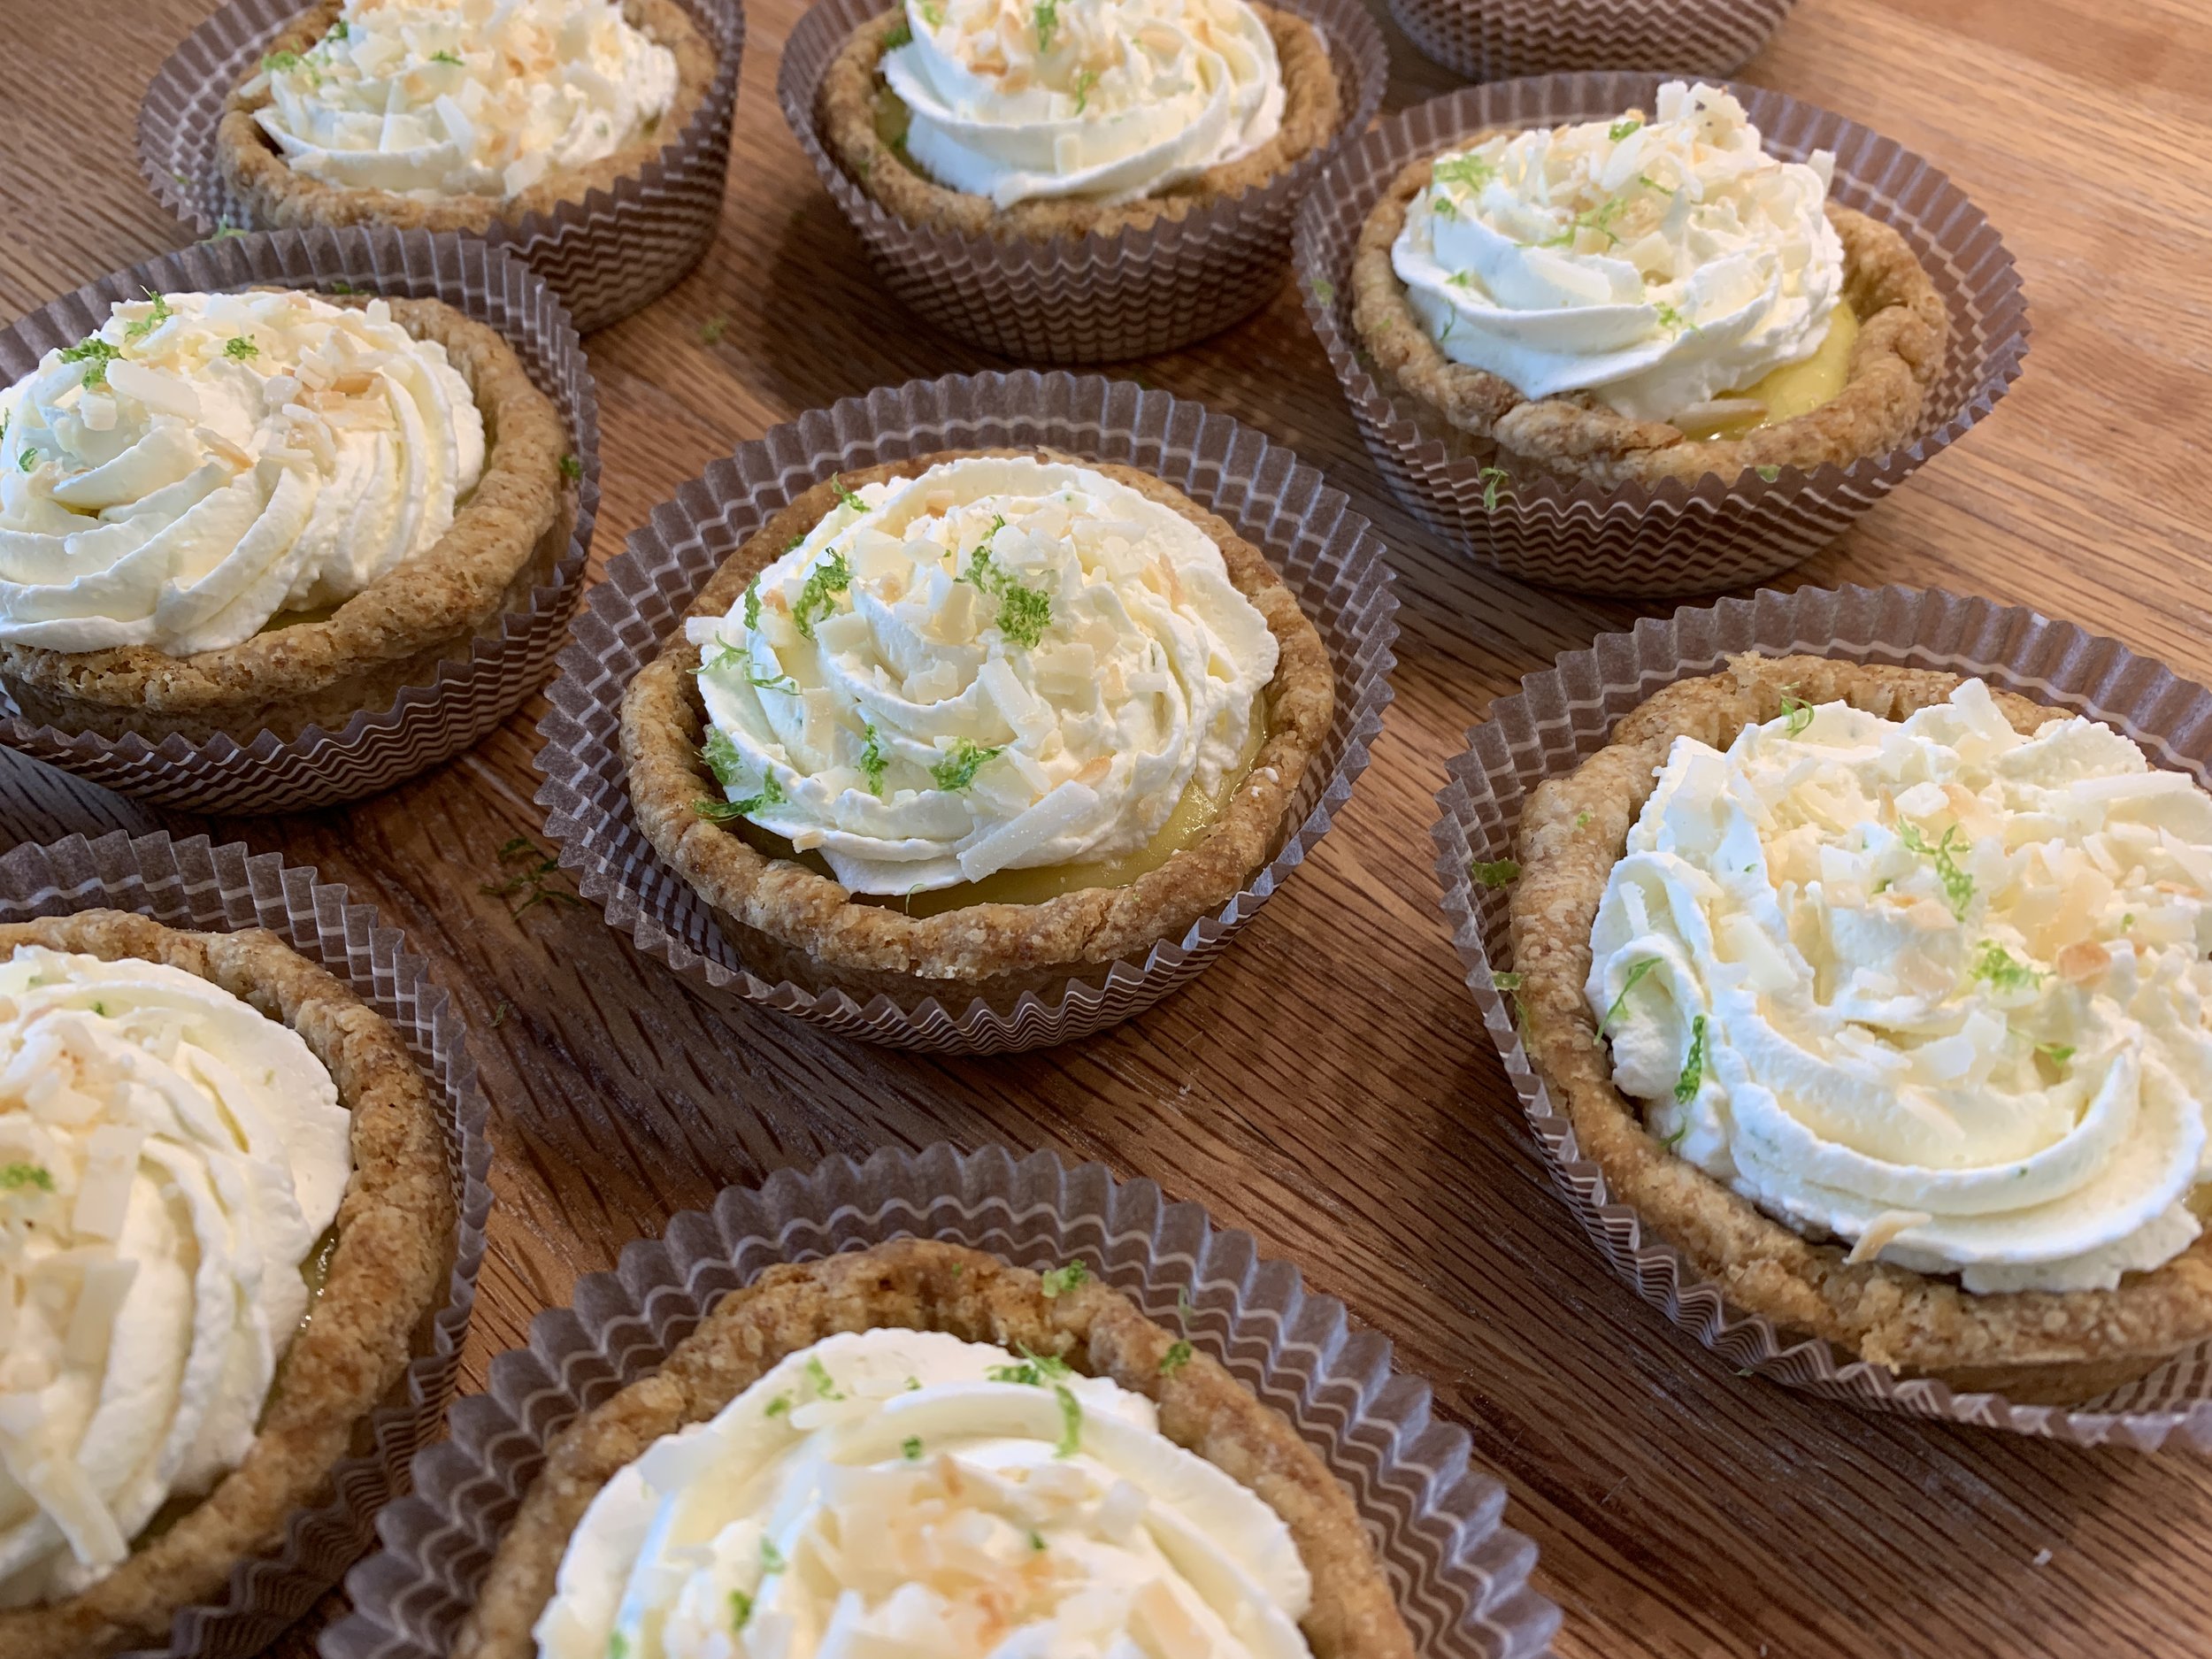
So delicious!! Plan ahead friendly! Tart lemon lime filling baked in an already blind baked pâte brisée shell then garnished with whipped lemon mascarpone cream and toasted coconut. Yum. Yum. Yum.

I know I go on (and on and on) about the classic bases of pastry and these babies fit the bill big time. Using three of the top components on my A list, the result is a match made in heaven. I like to think of tart preparation as a build-your-own process in which you can change up your chosen dough, filling and garnishes to suit your tastes and occasion.

If you already have pâte brisée in your freezer, you’re one step ahead. If not, make the dough and chill it a few hours or overnight before rolling it out, lining your chosen rings/molds then blind baking the shells. TIP: wrap and freeze the dough up to a couple of months for even more plan ahead fun.

Check out this post for so much more on pâte brisée.

example of rings lined for blind baking

The lemon-lime curd is a favorite based on Yotam Ottolenghi’s recipe in “Sweet”, a book I highly recommend. It can be made several days ahead and holds well in the fridge - another win-win for planning. If I have leftover curd, I’ll add it to whipped mascarpone as I’ve done here. It’s also great added to Swiss meringue buttercream, ice cream base during processing or blended into crème pâtissiére to fill choux puffs.

If you prefer, you can make the filling while the shells are baking. I then typically fill the blind baked shells immediately with the warm curd then pop them into a 325ºF oven for about 10-15 minutes to set with a hint of a jiggle left. Cool at room temperature about 30 minutes then chill completely before adding your chosen garnish.

Some may wonder why I bake the filling since it’s already cooked. While not absolutely necessary, I find it makes for a more luscious, creamy mouth experience by taking that extra step.

Option - chill the curd separately then fill the baked/cooled shells, garnish and enjoy .

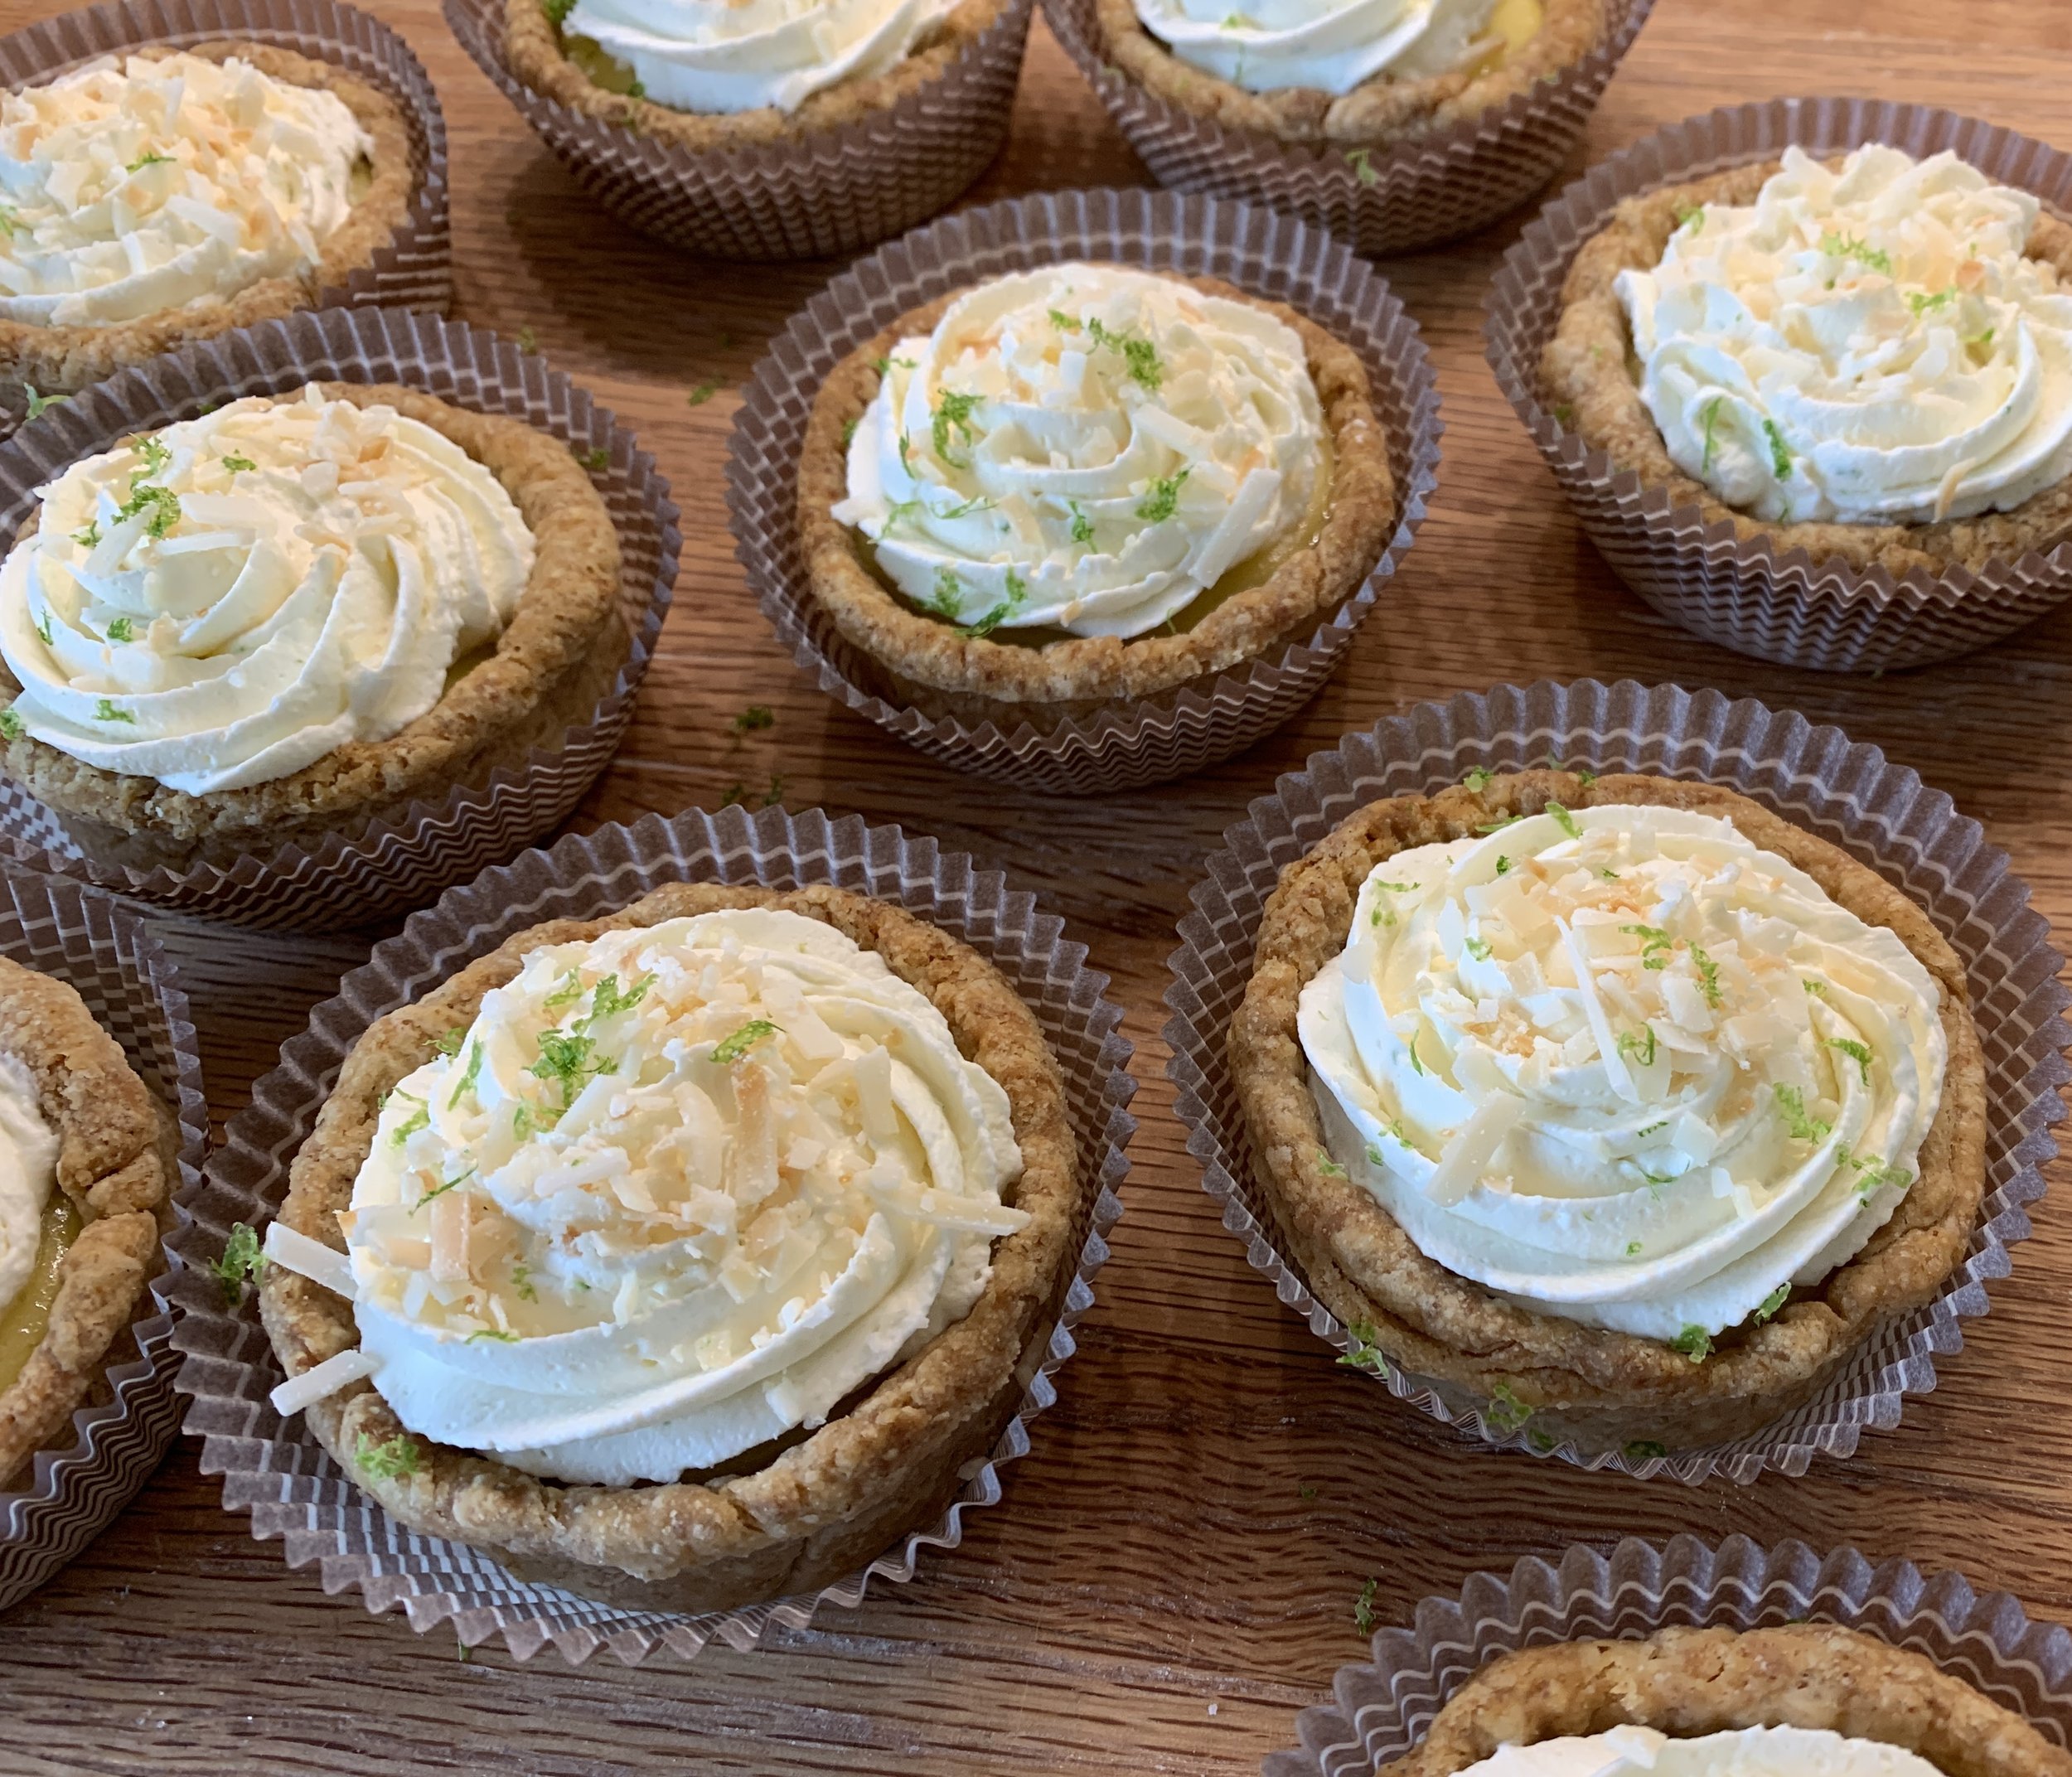
In the image below the two tartelettes at bottom left and right are examples of the option just mentioned. You can appreciate a looser texture than the others that have been baked which have a certain sheen and appear more set.

Before the final garnish

Whichever way you do it, the final task is the garnish - whipped mascarpone cream which I prep just ahead of use. In this case I used half of the base recipe, adding lime zest and 3-4 tablespoons (or to taste) of lemon-lime curd to the cream as I whipped.

Decorate the tarts with your favorite swirl pattern and top with a bit of lime zest and toasted coconut. You’ll be so happy.

One more thing - Steve and I can attest to the staying power of these lovelies in the fridge for 4-5 days. Whoopee!!

Enjoy and have fun with it!

Canadian butter tart trials

Please note: when this post first published, the text mistakenly read the “left half of the pan was eliminated”. That has been corrected to “the right half”. Apologies!

7E720EA9-E600-4B82-8506-5CFE869FBB1B_1_201_a.jpeg

It’s so cool when I come across something new (for me) in the baking and pastry world and not long thereafter I receive a request to make just that very thing. The ever popular Canadian butter tart is one of those. It’s kismet!

75D12CD5-87C8-4AB1-97B9-53891244E0A0_1_201_a.jpeg

It turns out that a local Grand Rapidian has a Canadian friend who adores butter tarts, and she wanted to gift some to said friend for her birthday, a lovely gesture indeed. Being confident that I could deliver, I took to reviewing a number of recipes including one from NYT (the one I remembered reading not too long ago.)

For my money I’d call it a sugar tart since the filling and taste experience are indeed quite sweet (true confession - a bit over the top for me!).

As I reviewed the dough portion of a number of recipes, I found most of them contained whole egg or yolk in addition to the typical crust components of flour, butter and ice cold water. Some used a combo of lard and butter and some went with my preferred method - all butter.

I decided to follow the recipe from the NYT article and compare the dough with my standard pâte brisée (no egg). For the filling I made two versions of NYT’s and found another filling that spoke to me from the site Little Sweet Baker - less sugar and more butter plus a splash of cream - it’s a BUTTER tart after all!

Mine is certainly not a scientific study but simply my way of sharing my inaugural (and limited) experience with the butter tart world. The results are frankly hard to fully explain in terms of why a certain filling baked the best in a particular dough. Hmmm.

BCA2FDCE-D7CC-47AE-B473-E7B4997E938C.jpeg

I blind baked the two doughs by lining a standard muffin tin (3 wells for each dough), freezing it to firm up the dough, then lining with papers and using sugar in place of dried beans as my weight, a tip learned from Stella Parks of “Brave Tart” fame. While the sugar doesn’t toast for very long this way, you can still save the sugar and use it in your shortbread or tart dough recipes to give them a hint of toasty-ness.

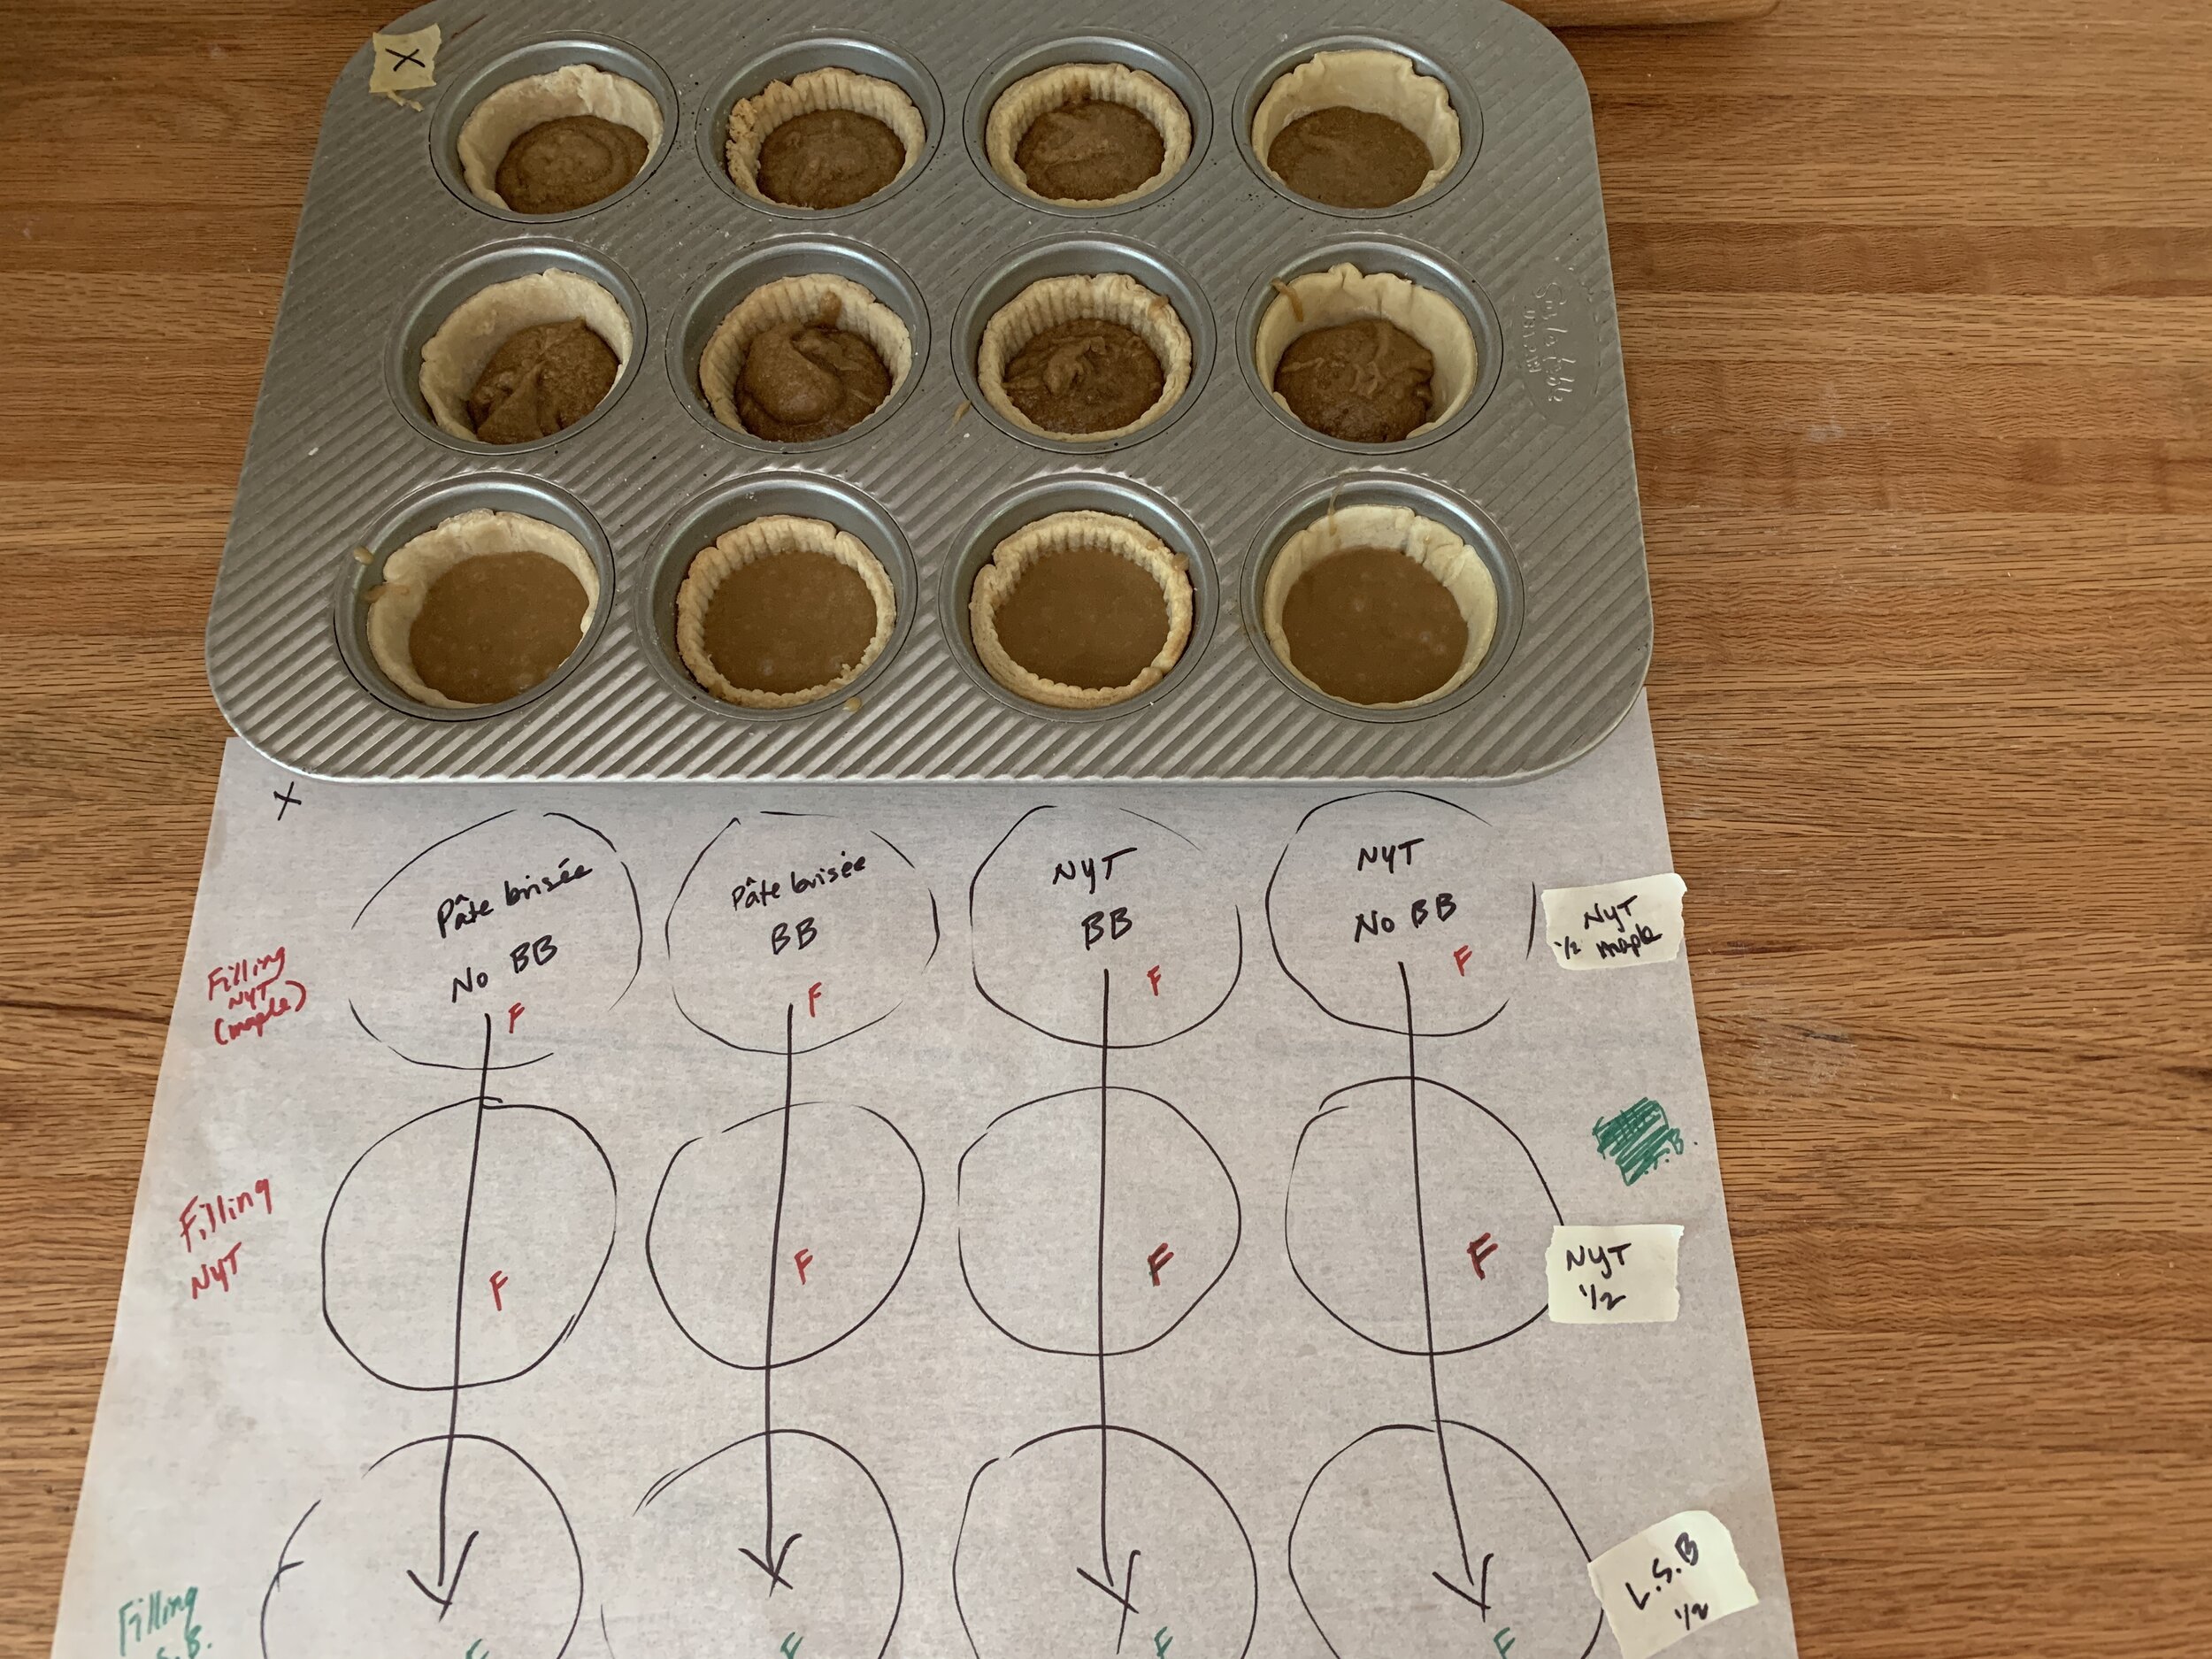
Once the blind baked shells were cool, I lined the remaining empty wells, 3 with each dough and proceeded with the fillings.

When making the filling, it is suggested that one use very soft or melted/cooled butter and blend the filling by hand so as to avoid incorporating air into the mix, resulting in a final, enhanced gooey-ness. I chose to keep it simple, not adding nuts or raisins as some iterations do.

The full NYT recipe blends 200 grams brown sugar ( I used dark) with 1/2 teaspoon salt; blend in 57 g soft, unsalted butter by hand until smooth, followed by 1 large egg and a teaspoon vanilla (pretty easy, eh?). The second NYT version I made replaces the 200 g brown sugar with 150 g brown sugar and 1/4 cup maple syrup with the remaining ingredients the same (meant to result in a runnier filling that some reportedly prefer).

Little Sweet Baker’s filling blends 150 g brown sugar with 75 g melted and cooled butter; add in 1 large egg, I teaspoon vanilla and 1 tablespoon heavy cream. Again, easy-peasy.

For my testing purposes I used half recipes (for the egg, whisk up one egg then weigh out 25 g which is about half a large egg.)

05F8FDD1-B805-48C9-8C25-1618A97E8A27_1_201_a.jpeg

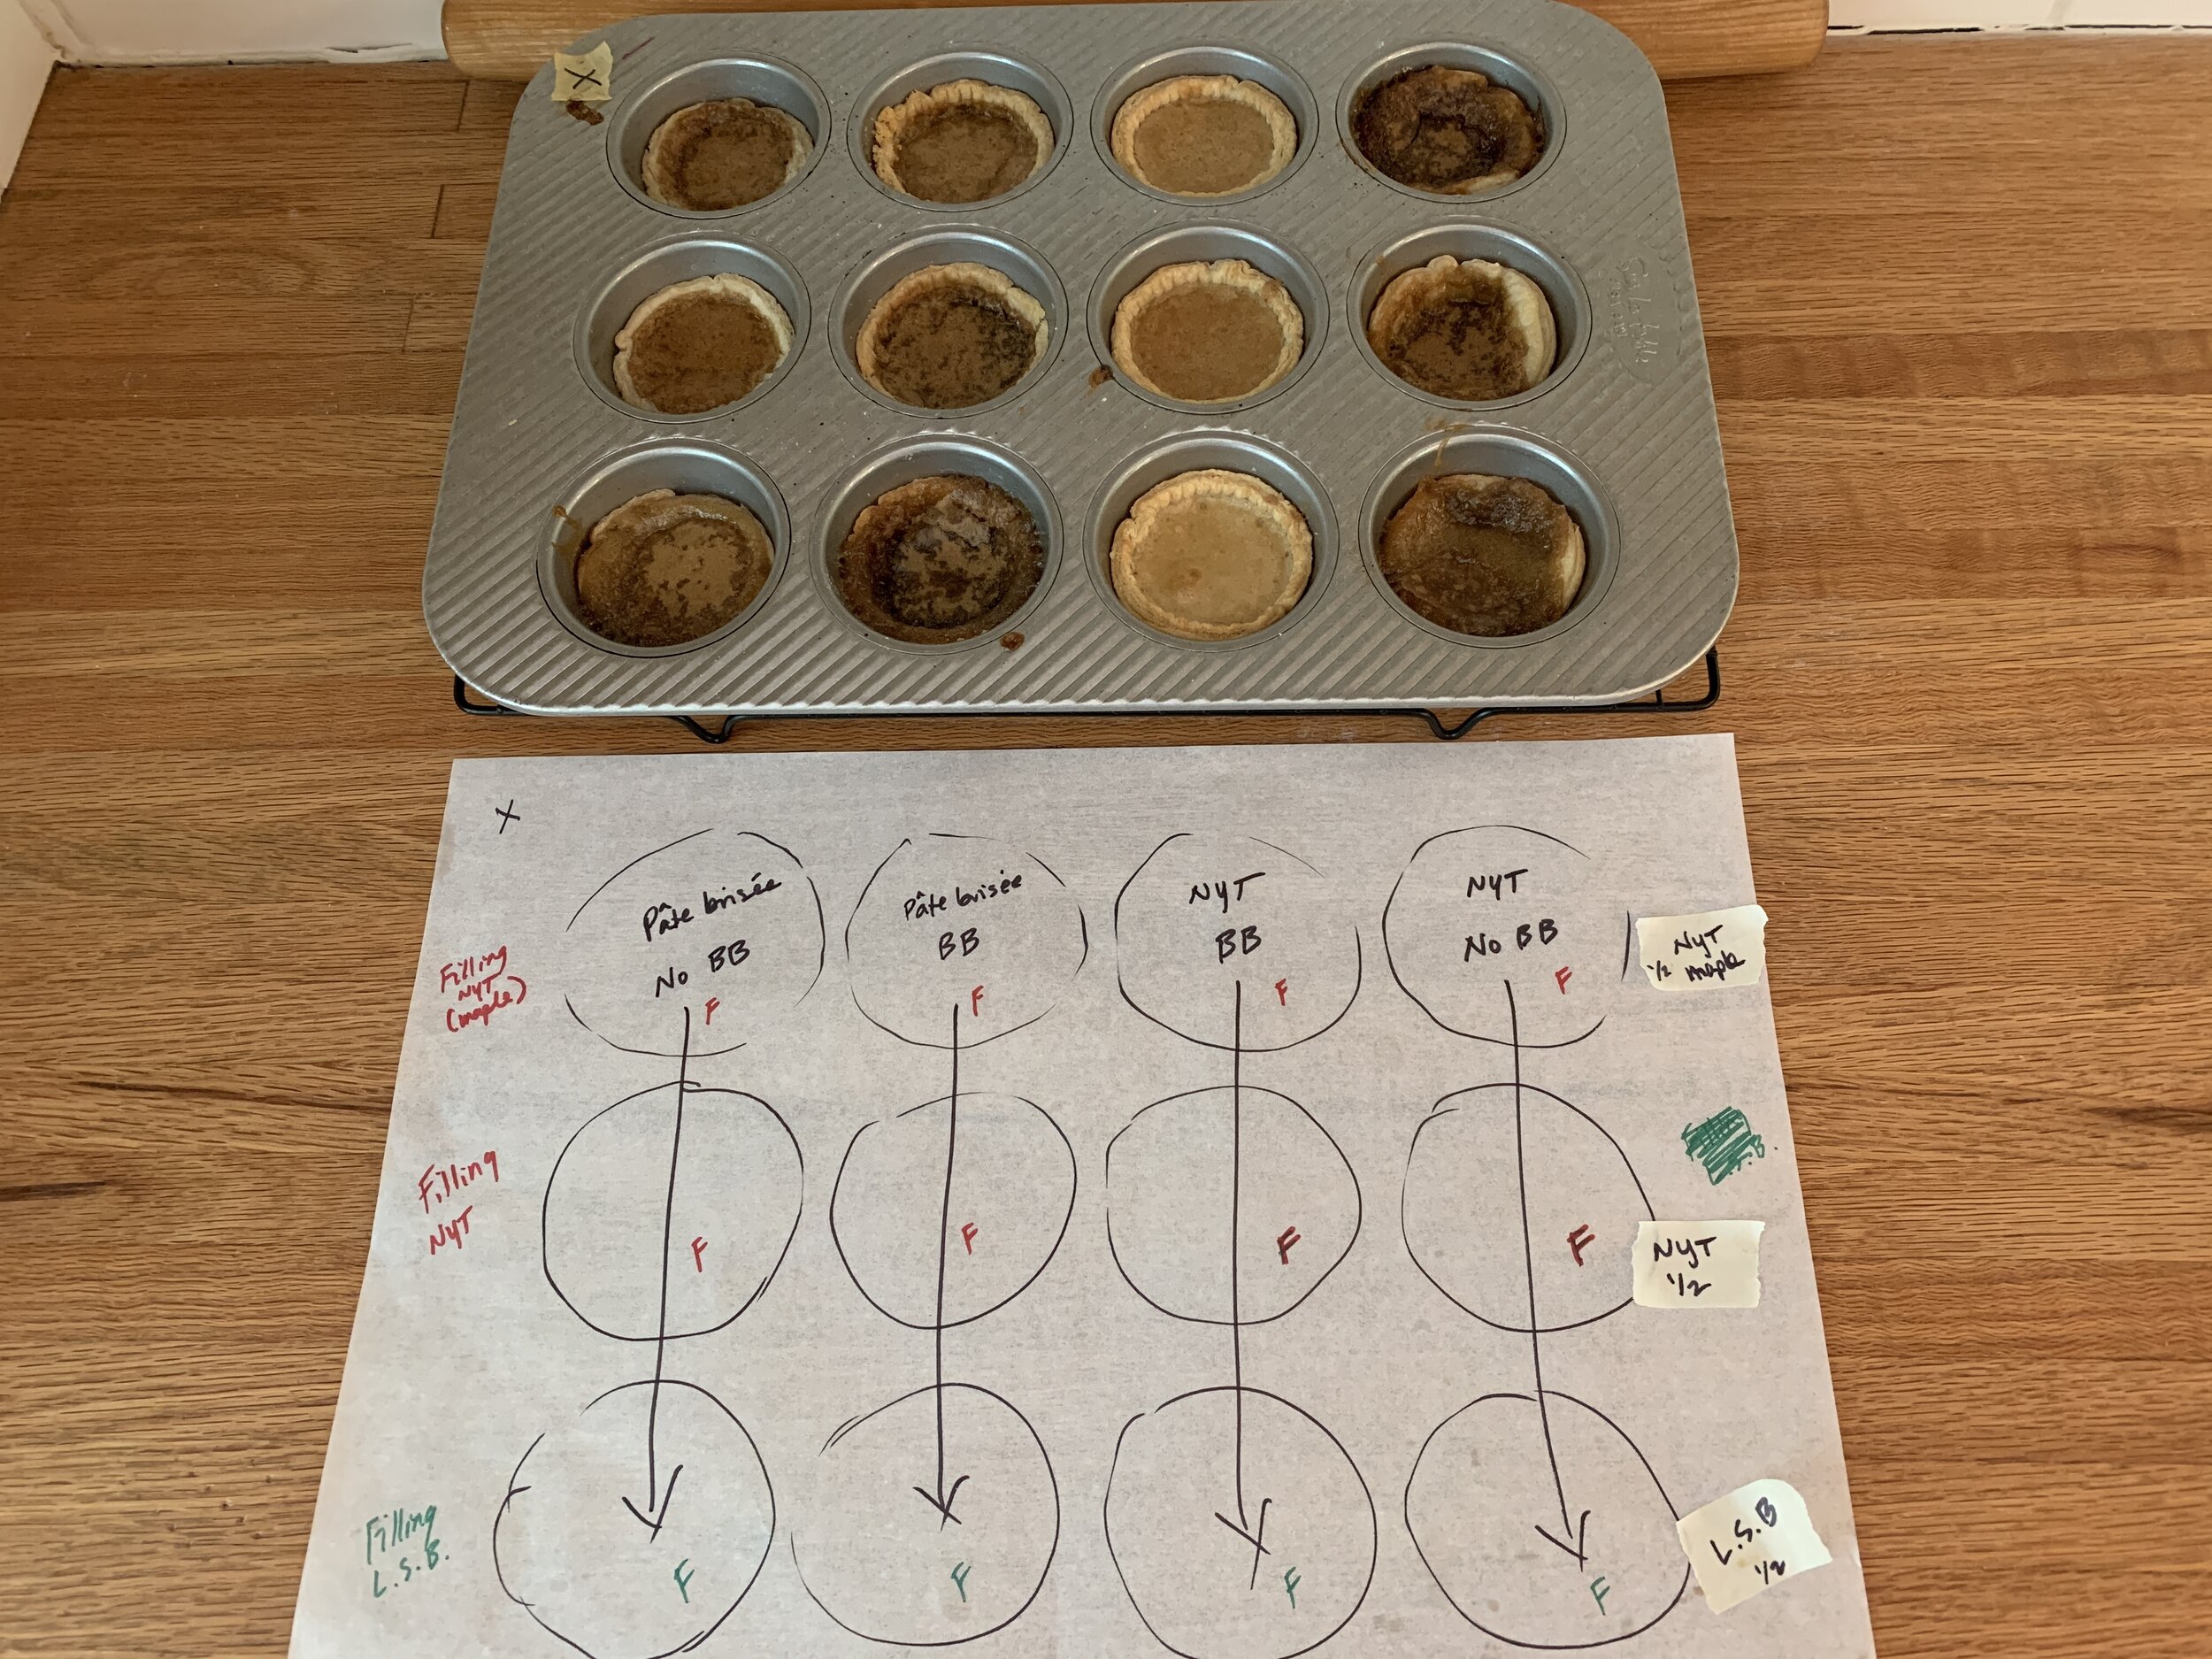
I guestimated about 28 g or so of filling for each tart and proceeded to dole the different fillings into the shells. Remember the central 6 wells are blind baked and the outer 6 are not.

B9F5ED14-AF96-49BA-AAE3-B23C5C2DEA8A.jpeg

Here they are, all filled up and ready to go.

129D2521-A69F-4682-8608-0983D39927B3_1_201_a.jpeg

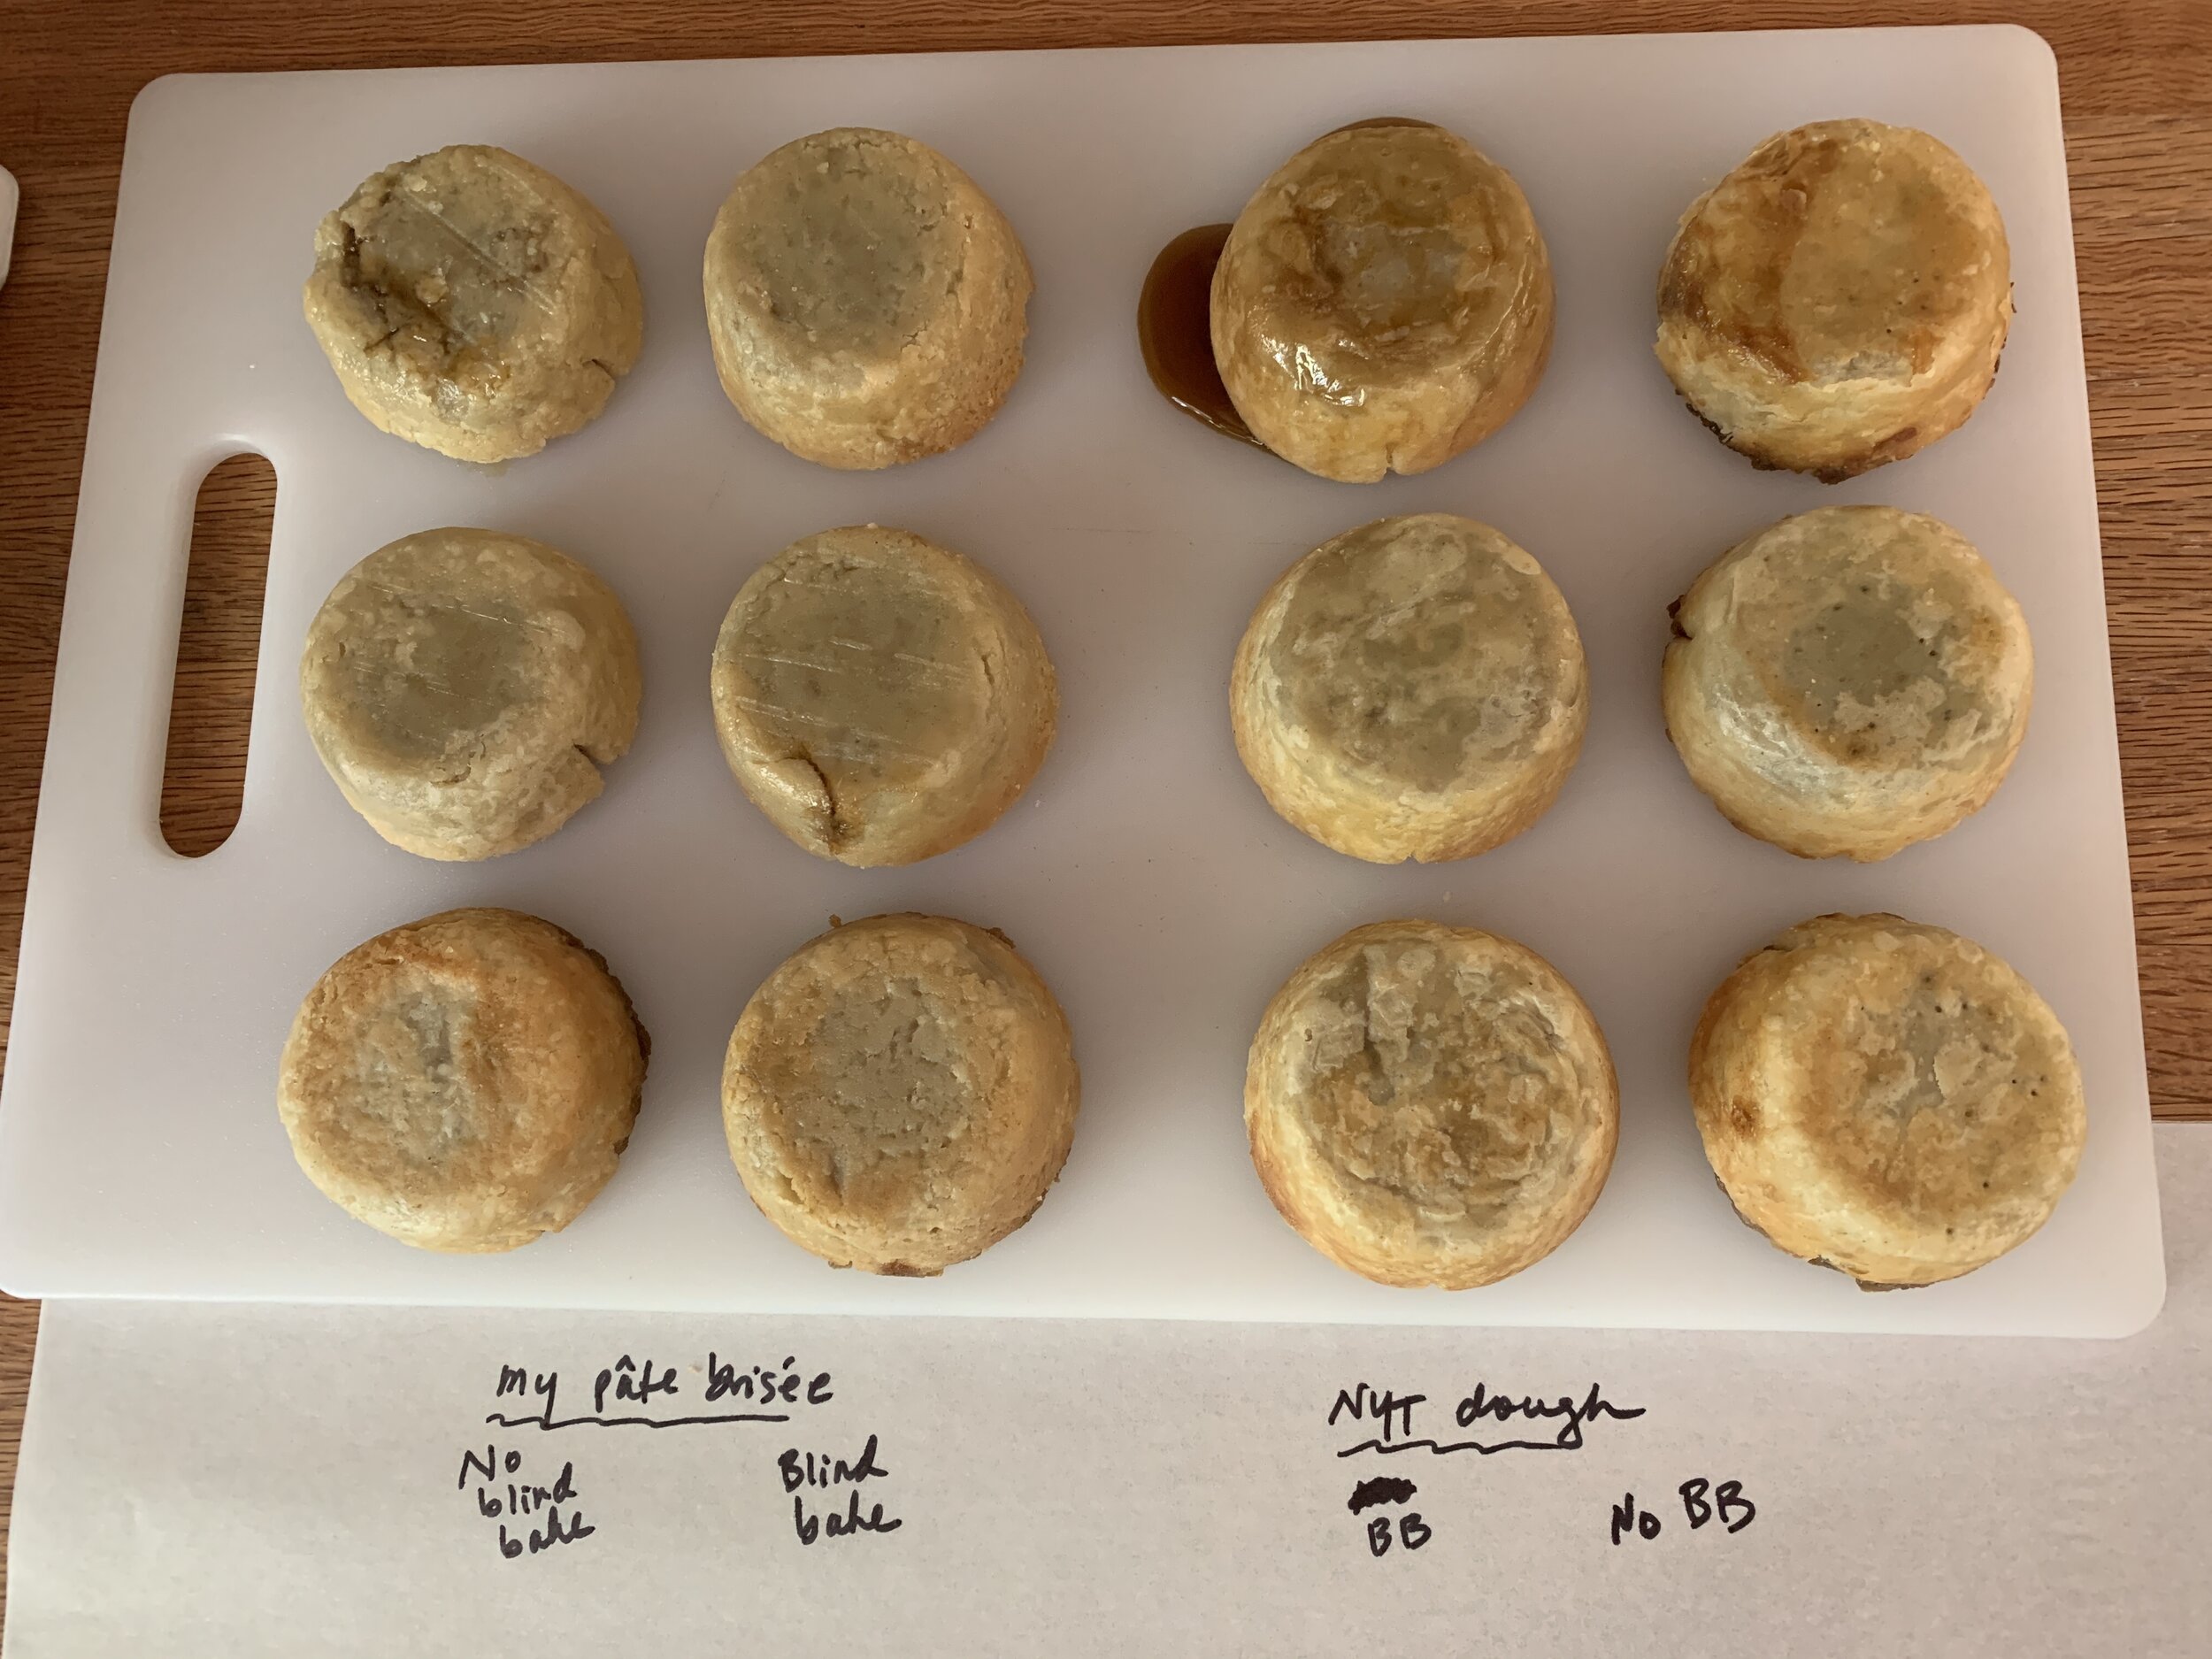
Bake at 400ºF for about 13-15 minutes for a gooier result or up it to 17-19 minutes for a firmer result. I went for the gooey time frame - you want the crust to be nicely browned and the filling looking set and deeper brown. What surprised me is the stark difference in the color of the third (from the left) column of tarts (the NYT blind baked ones) - much lighter golden vs the deep caramel-y brown of the others.

7E720EA9-E600-4B82-8506-5CFE869FBB1B_1_201_a.jpeg

Once baked, run a small offset spatula (my FAVE tool!) around the edges to loosen any sticky goo before it hardens. Then let them cool completely, lift them out of the tins and enjoy.

I turned them all out upside down (note the filling oozing out of the top, 3rd to the left tart) to assess the bottom crusts. I must say I’d be hard pressed to tell which were blind baked and which were not if I didn’t already know.

B84A839E-4F7F-4A4F-A429-E12A71FB5393_1_201_a.jpeg

Time to taste! Steve was a good sport for this one - we agreed that too many tastes became quite overwhelming with the sweetness of it all.

There was no rhyme nor reason to which fillings baked up runny and which gooey - you can see below that the NYT dough/blind baked threesome yielded a runny result for all three fillings. Go figure! Lucy I just can’t ‘splain it.

4082F727-347A-4D56-8C36-62E7E4175C95_1_201_a.jpeg

The NYT dough was unpleasant in the mouth - chewy and less flaky than good old pâte brisée - and the maple syrup filling was simply too runny. Due to those two things, the right half of the pan was eliminated.

Our final analysis: the pâte brisée plus Little Sweet Baker filling won the day, and it didn’t seem to matter at all whether the crust was blind baked first.

EA001655-E6C2-444E-8B93-8C5CA2AE515F_1_201_a.jpeg
257BA32C-31D0-41D7-99A5-4FB46E1C7D49_1_201_a.jpeg

For my final round of butter tart baking for the actual birthday order I used my classic pâte brisée, no blind baking needed. I upped the Little Sweet Baker filling recipe by 50% since I found the base recipe meant for 12 tarts to be meager. Of course, let’s remember I’d had no prior experience making these but it just felt right.

The final bake: 400ºF for 7 minutes; rotate the pan 180º and bake another 5 minutes; decrease to 375ºF and bake another 3 minutes. Since I had 12 of these for the order, I didn’t have an extra one to cut into but . . . . . imagine the end result looking like the close up above with a skosh more filling to enjoy. Sounds pretty darn good to me.

Et voilà! All boxed up and ready to go. And the feedback from the Canadian birthday girl: “a big hit”! Yippee!!

75D12CD5-87C8-4AB1-97B9-53891244E0A0_1_201_a.jpeg

Any tips or tricks of the trade from all of you butter tart aficionados are welcome!

Stay healthy everyone!!

Summer fruits galette/spelt pâte brisée

IMG_1249.JPG

This time of year when the farmer’s markets are teeming with fresh fruits and produce, a rustic galette is just the ticket for a delicious summer dessert. Think cherries, peaches, plums, berries (red, blue and black), and currants too! Steve and I love our local Fulton Farmers Market and make at least a weekly visit for our favorite seasonal goods.

IMG_1251.JPG
IMG_1253.jpg

Even though our socializing has been curtailed and we’ve been at home for the majority of our time in the last five months, every now and then we get out to Clear Lake to see cousin Jen and her family. What a beautiful spot to enjoy an outdoor meal and of course each other’s company. We provided grilled chicken, fresh green beans and corn while Jen had some deelish nibbles, crusty rolls, followed by vanilla ice cream to accompany the fruit galette. Yum indeed. Thanks Jen, Scott and Claire!

IMG_1238.jpg

In France a fruit galette (crostata in Italia) is a rustic tart - no tart pan or ring, just a rolled out round of dough topped with a mound of fresh fruit then baked to golden crust perfection. I’ve written about galettes before but it’s always fun to revisit an old friend.

Planning ahead, you can certainly make your dough days or even weeks before, wrap it well and freeze it until you need it. Think about that when, before you know it, the fall and winter holidays will be upon us. What better way to be prepared for the pies or tarts you hope to serve for Thanksgiving dinner or holiday suppers/gatherings than to have your dough already made. Yippee!

For this one I used my favorite pâte brisée recipe but substituted 60 g of spelt flour for 60 g of all purpose flour. What a buttery, flaky, edge-of-nuttiness and melt-in-your mouth dough this is!

I’m a big fan of Bob’s Red Mill specialty flours. While I use King Arthur flour for my all purpose, bread and general whole wheat needs, the wonderful array of BRM’s offerings available on my local grocery store shelves allows me easy access to some of my faves like whole wheat pastry flour (sadly hard to find during this pandemic!), spelt, and semolina, plus non-wheat options like rye, cornmeal, rice and oat flour, potato and tapioca starch just to name a few.

IMG_1256.jpg

For this galette I used about 300 g of dough for a finished size of about 9 inches. On a lightly floured surface roll the dough into a rough ~ 12-inch round about 1/8 inch thick. Check out the butter marbled throughout and the speckling of spelt in the photo below - I love that.

Remember to work with your dough cool - if it becomes warm and the butter squishy, it’s time to pop it into the fridge or freezer for 10-15 minutes to firm things up. You’ll be happy you did. Once your dough is rolled out to your satisfaction, place it on a parchment lined sheet pan and hold it in the fridge while prepping your fruit.

Heat the oven to 425ºF.

IMG_1231.JPG

I used a total of 5 cups of fruit including sliced peaches and yellow bubblegum plums, blue/red/blackberries tossed with about 1/3 cup sugar, 2 to 2.5 tablespoons flour, a squeeze of fresh lemon juice and a pinch of salt. I follow that ASAP with assembly so my fruit mixture doesn’t get too juicy.

To provide a bit of anti-soggy protection to the crust I blend a tablespoon or so each of either all purpose or almond flour and sugar. Sprinkle that over the crust, leaving about a 2-inch border. Have at the ready a couple tablespoons unsalted, diced butter to dot on top of the fruit and some milk or cream and raw sugar for the edges.

IMG_1232.jpg

Now mound that pile of fruit in the center, again leaving about a 2-inch border. Notice I’m doing my assembly ON the parchment lined sheet pan rather than my work counter so as to avoid having to lift the filled/shaped galette onto the sheet pan. Yup, it’s all in the details folks.

IMG_1233.jpg

Pleat the dough up over the fruit and, once you’ve made it all the way around, cup your hands around the edges and give everything a firm squeeze to set your dough in place. Dot with butter, brush milk on the dough edges and sprinkle with raw sugar.

Pop the whole pan into the freezer for 10-15 minutes to firm up the butter and set the dough even more.

IMG_1234.jpg

Bake on the bottom rack for 10 minutes, turn the oven down to 400ºF and give it another 10 minutes. Move the sheet pan up to the middle rack, decrease the oven temp to 375ºF and bake another 15 minutes, periodically checking for the degree of browning. You want to see the fruit bubbly and the edges golden brown. If needed, go another 5-10 minutes. All in all I usually plan on a total baking time of 40-45 minutes for this size galette. Remember - in your oven it may be a bit more or less.

IMG_1236.JPG

Have fun creating your own mixture of fresh fruity goodness for a delicious summer fruits galette - you can do it. Absolutely!


Provençal tomato tart

IMG_3180.JPG

Wow this was good! Steve and I enjoyed this freshly baked, slightly warm tomato tart along with grilled chicken and fresh green beans. A delicious late summer meal.

Since tomatoes are out in FORCE right now I decided to make this Provençal tart, ramping up the cheese to include both Swiss cave-aged gruyère and a crumbling type chevre from Pélussin France, located in the Loire department just south of Lyon. Once again, thanks to The Cheese Lady here in Grand Rapids MI for a great selection of cheeses.

IMG_3164.JPG

This tart is one of those things that you can play around with, changing up the herbs, the cheese, the amount of mustard, even the size and type of tomato. It’s a simple approach - a blind-baked pâte brisée crust, a schmear of Dijon mustard and a layer of grated cheese all topped with slices of garden fresh tomatoes seasoned with a little salt, pepper and your choice of herbs. I added some dabs of goat cheese on top just to give it that certain something. Then it all goes into the oven.

Let’s go through the steps OK?

First line the tart pan with tasty pâte brisée.

IMG_3165.JPG

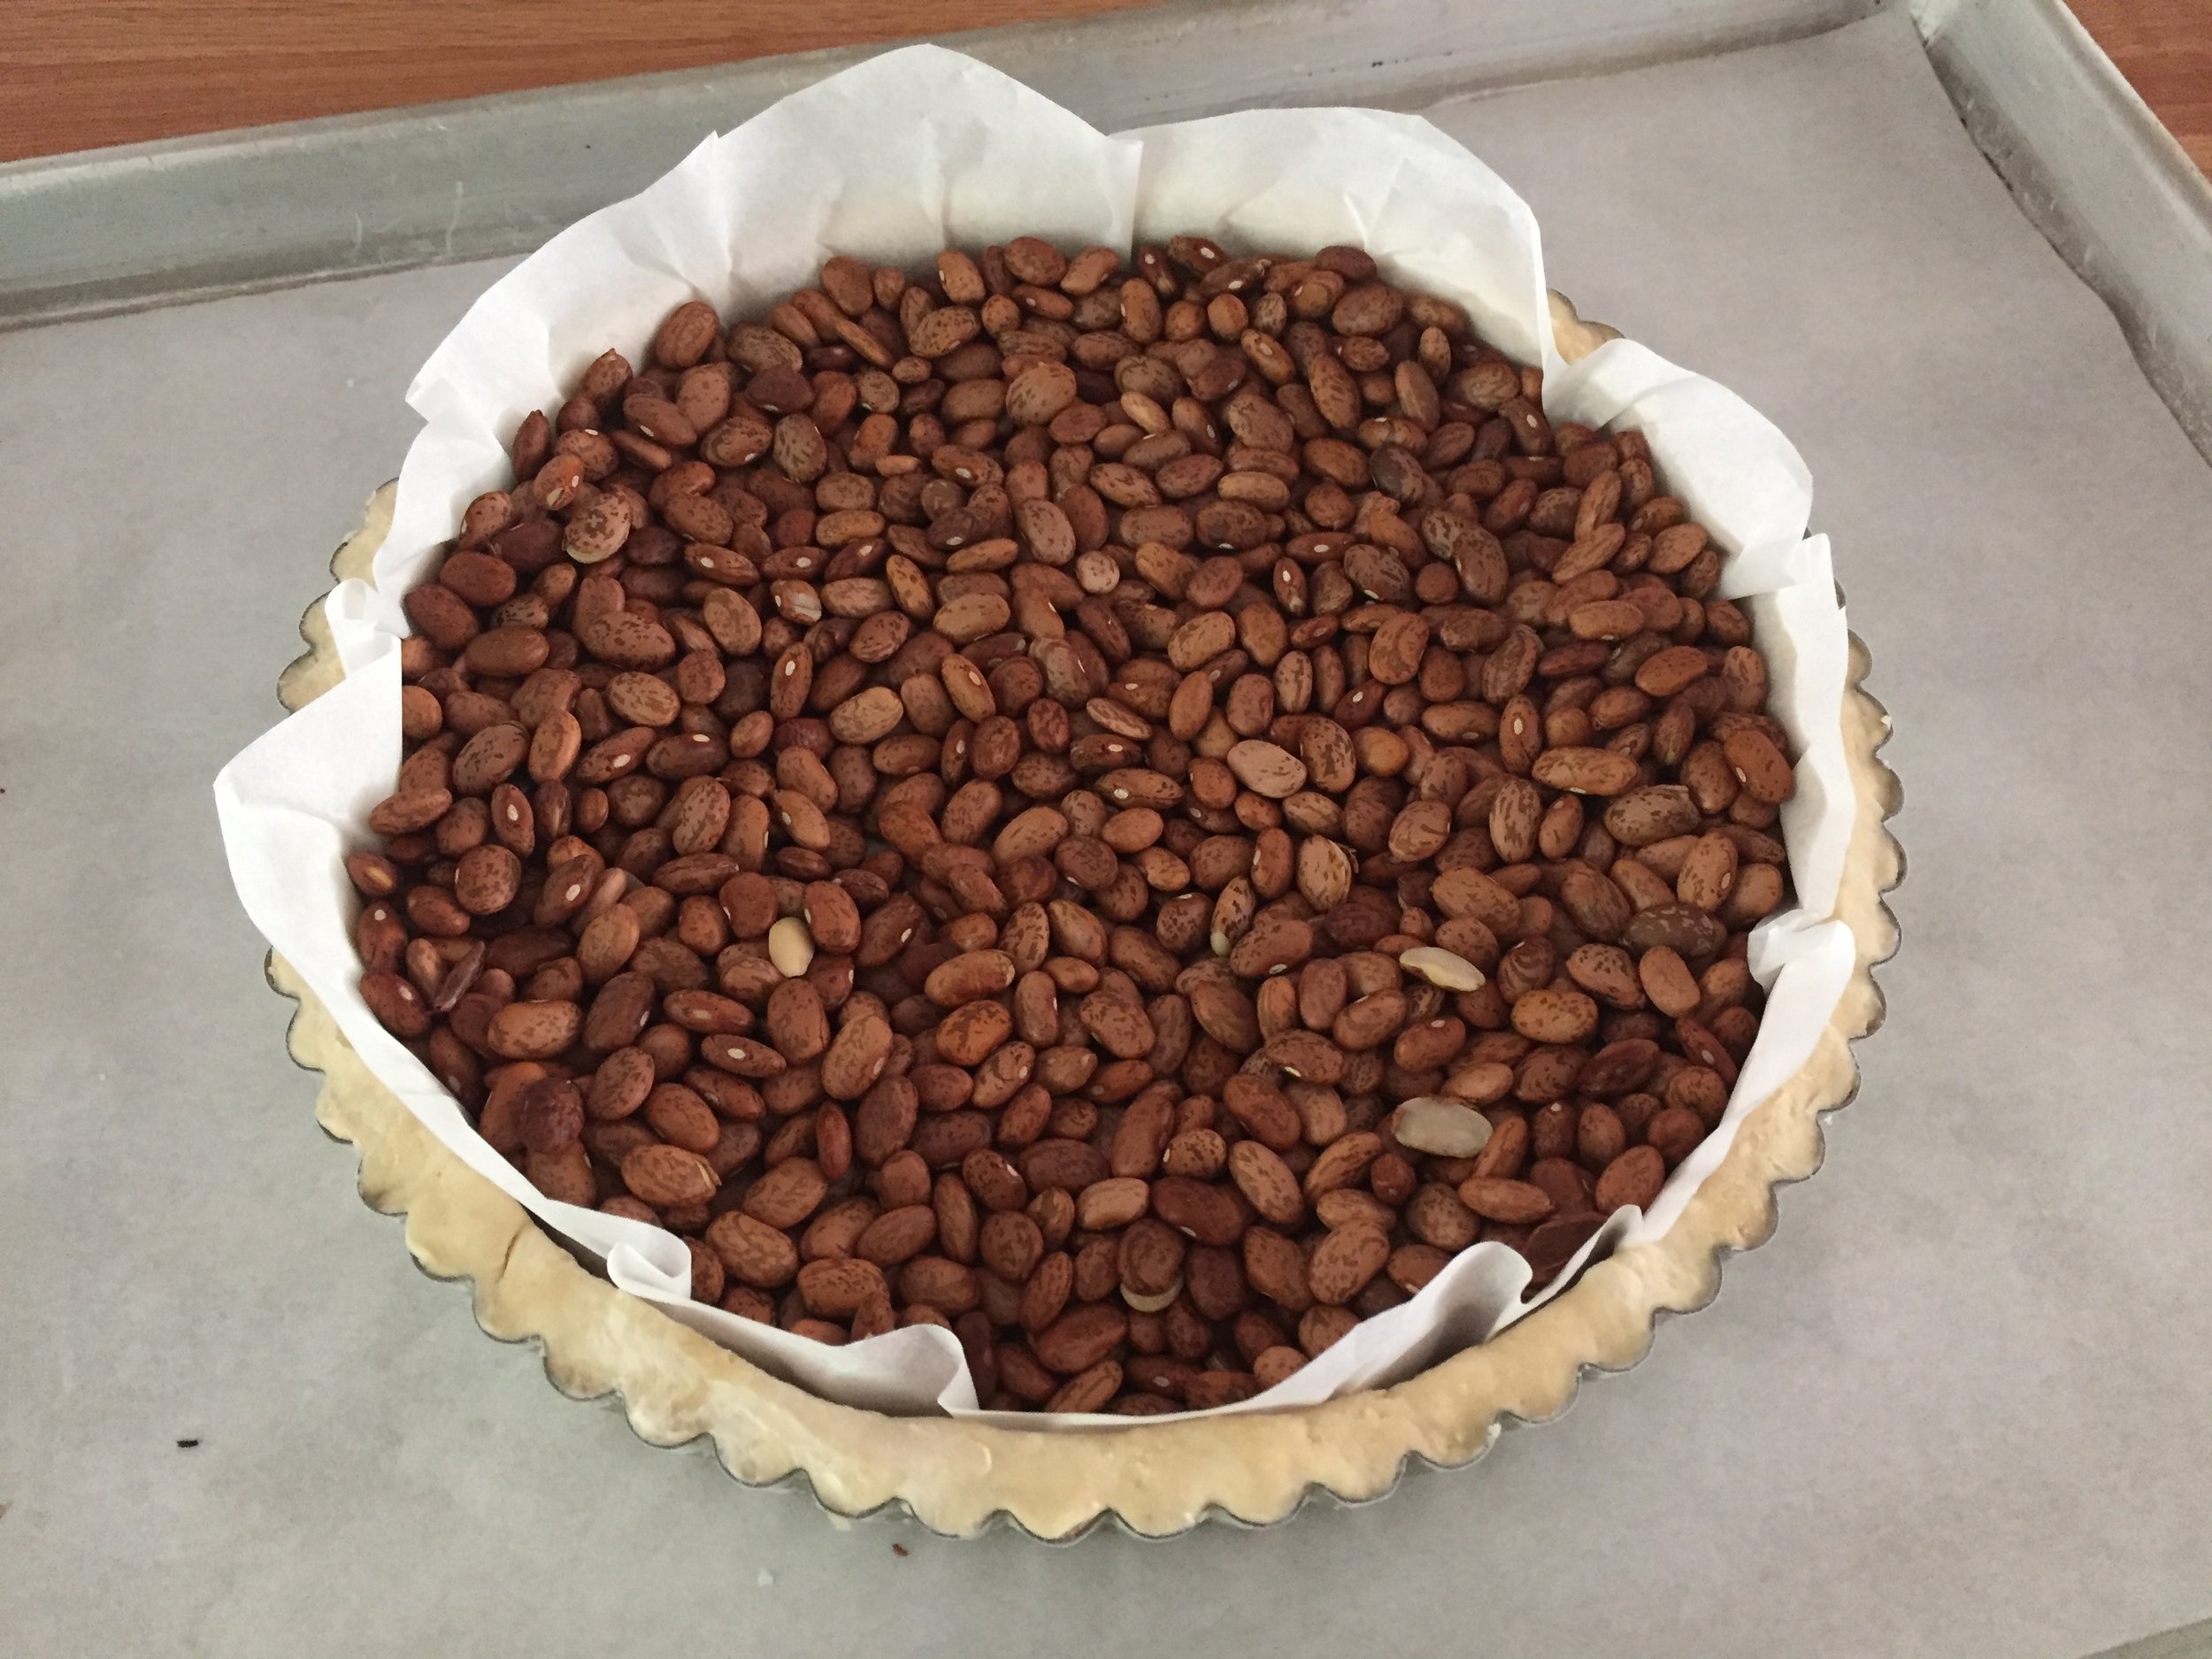
Once lined and pricked all over with my trusty fork, I place the tart pan on a parchment lined sheet pan and freeze it for 15-20 minutes while heating the oven to 425ºF. Once firm, it makes it much easier to line it with a round of parchment and fill it with dried beans for blind baking.

IMG_3168.JPG

Now bake it on the lower rack for 10 minutes, turn the heat down to 400º, move it up to the middle rack and give it another 5 minutes. Take it out of the oven and remove the weights. The crust should be starting to set although the bottom will be a bit moist and doughy and will need a bit more baking to finish it off.

Pop it back into the oven without the weights and give it another 5-10 minutes until golden brown. I often decrease my oven temp to 375 for this step and, as usual, keep on eye on what’s happening in there.

IMG_3172.JPG

Decrease the oven temp to 350º. While the crust cools, thinly slice 2-3 fresh, ripe medium tomatoes, grate up a cup (about 4 ounces) of gruyère and have some Dijon mustard at the ready. I like to blend some regular Dijon with a nice coarse grainy mustard, 2-3 tablespoons total. Maille is a great brand and, if you’re in Paris, you can visit their wonderful shop right near Place de la Madeleine.

Spread a thin layer of mustard over the bottom of the cooled crust. I used 2 tablespoons since I like a more subtle mustard flavor, but you can certainly use more if you wish!

IMG_3173.JPG

Sprinkle the grated gruyère over it.

IMG_3174.JPG

Arrange your tomatoes in concentric circles, overlapping each slice. I also tucked in some halved orange and dark red cherry tomatoes for some additional color.

IMG_3175.JPG

It’s pretty traditional to finish off these tarts with salt, pepper, fresh herbs and a drizzle of olive oil before baking, but I went for an addition of crumbled goat’s cheese dotted over the tomatoes. Then some freshly grated black pepper, a pinch of two of salt, a sprinkling of herbes de provence and it’s ready to go into the oven.

IMG_3177.JPG

Bake it for about 20-25 minutes until the goat cheese is starting to brown, the tomatoes are starting to shrivel and the aroma is hitting your nostrils just so.

IMG_3178.JPG

The combo of nutty gruyère, warm fresh tomatoes, the tangy, creamy goat’s cheese and the perfect hint of mustard and herbs was absolutely delicious. Not only that, it’s très, très facile. You can do it!

This one’s a keeper, right Steve?

IMG_3180.JPG

Tarte au fromage blanc

IMG_3027_1.jpg

Continuing on with my baking with cheese series, this tarte au fromage blanc is the latest adventure - and a delicious adventure it was. One of my favorite tart books is Les Folles Tartes by Christophe Felder, one I purchased back in early 2011 in Paris. I've been eyeing his recipe for this particular tarte for some time now, and what better way to pursue it than to include it in the cheese project. Love it.

Heather Zinn, the proprietor of our local GR Cheese Lady shop was kind enough to order a full fat version of this cheese for me from Bellweather Farms in Sonoma County CA. It's a European style fresh cow's milk cheese, not unlike a creamy goat cheese, with a bit of tang and salt and is also referred to as "fresh farmer's cheese".

IMG_2993.JPG

I wasn't sure what to expect but was pleasantly surprised at it's creaminess, spreadability and delicious dairy flavor straight out of the tub. Steve and I loved it on our favorite original Triscuit crackers, thinking it would only be enhanced by some herbs, a grind or two of black pepper and perhaps a little succulent fresh tomato. Yeah baby! 

I opted to use my standard pâte brisée which I blind baked first so as to avoid an under baked bottom crust once the filling was added and baked. This time I tried a new approach, one I gleaned from reading Thomas Keller's "Bouchon Bakery". It involves leaving an over hanging edge of dough around the tart ring, baking it as such and then eventually trimming off the excess dough after baking. The idea is to cut down on dough shrinkage during the bake. Pretty cool.

IMG_2997.JPG

Once the ring was lined, I popped it in the freezer on my parchment lined sheet pan for about 15-20 minutes while heating the oven. Then in goes a round of parchment and dried beans as weights and onto the bake. As you see below, I had a few cracks in the dough around the periphery but, when it came time to add the filling, I simply took some small pieces of raw dough and patched them. Okey-dokey.

IMG_2998.JPG

The filling is a straight forward blending of 400 g fromage blanc, 2 large egg yolks (2 whites comin' up!), a pinch of salt, 90 g cane sugar, 20 g flour, 100 g heavy cream, a teaspoon of vanilla extract, finished off by folding in the 2 whites that have been whisked until fluffy. I added my own zest of two lemons - it seemed so right with this cheese.

Have 50 g of cubed butter set aside to dot on the top of the filling before it all goes into the oven. (Notice my raw dough patches on the crust!)

IMG_3007.JPG

I decided to trim some of the dough over hang before the final bake - took my serrated knife and gently trimmed away.

IMG_3008.JPG

The cubed butter on top (seemed like a lot - I would reduce it next time!) . . . .

IMG_3010.JPG

a 45 minute bake at 375ºF . . . . et voilà!

IMG_3014.JPG

Pretty pouffy just out of the oven, but after a short time things calmed down and sunk, as a custard type filling is often wont to do. Kind of moonscape like, non?

Once fully cooled, I trimmed the flaky crust edges and eased this baby out of the tart ring. It can be served room temp, or in my case, it went into the fridge, covered, to chill and be served later.

IMG_3015.JPG

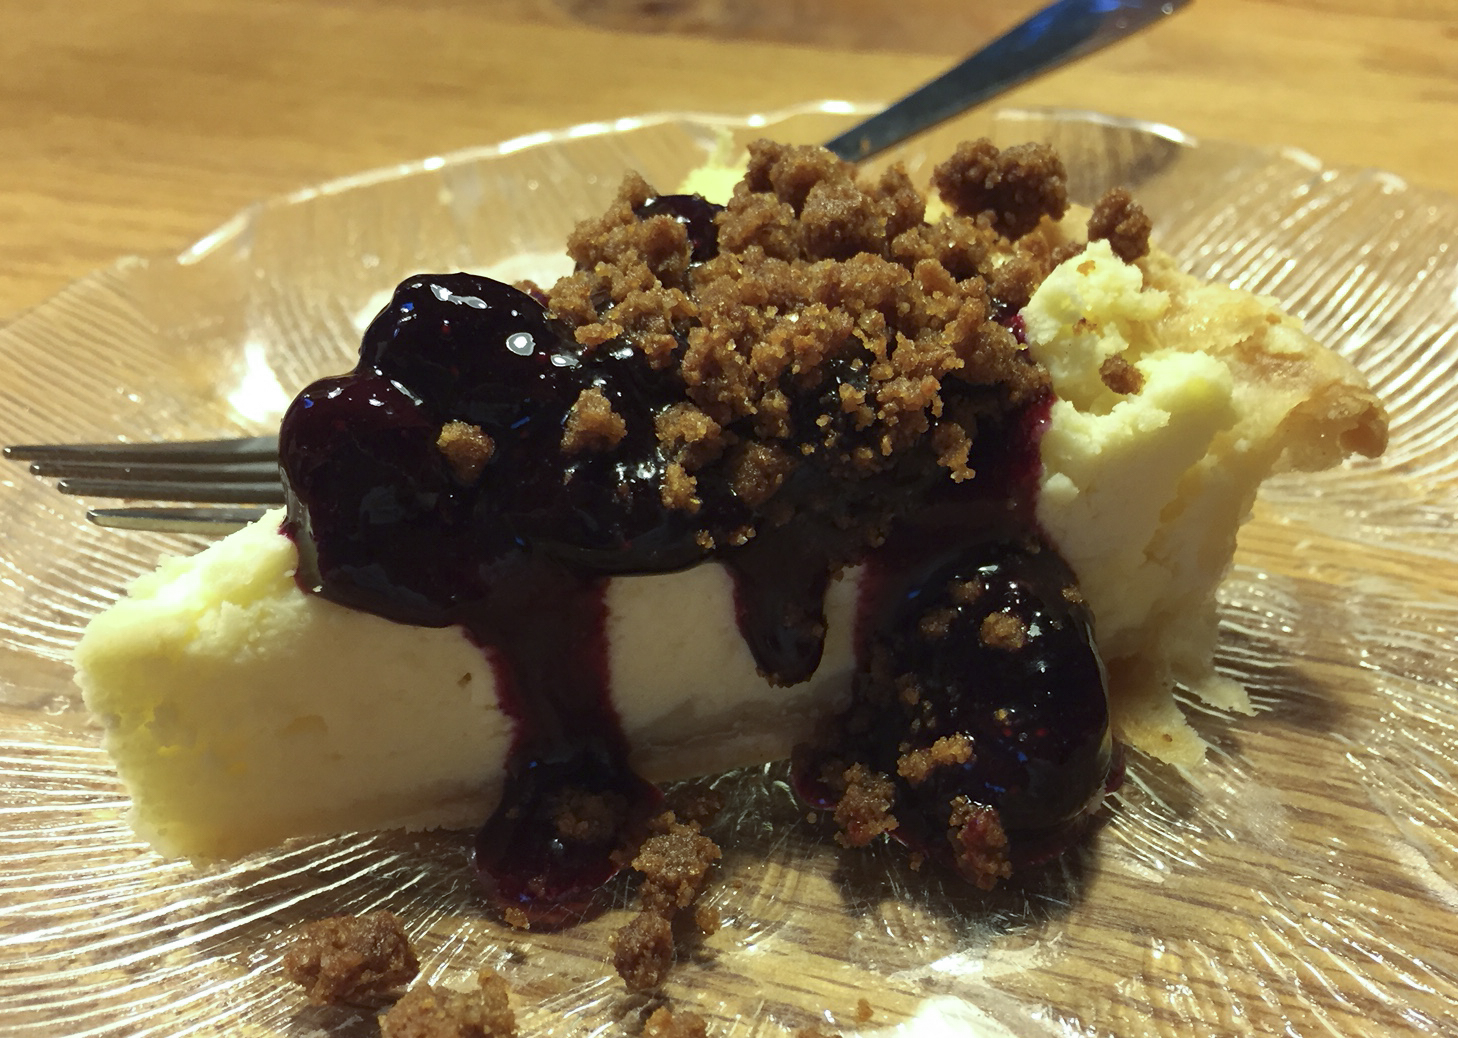
This was destined for dessert at cousin Jen and her husband Scott's lovely woodland home and, since we're deep into blueberry season, it only seemed right to whip up a quick blueberry sauce. A warm up in a saucepan of 2 cups blueberries, a couple of tablespoons of simple syrup, a teaspoon of cornstarch dissolved in a tablespoon of lemon juice and a pinch of salt. Once the juices release a bit, take half the blueberries, purée then strain and add the purée back into the remaining blueberries, cooking a few minutes to thicken. Easy and oh so good. Plus, I had some fresh raspberry purée in the fridge that was begging to be used.

IMG_3024_1.jpg

Some chose both the blueberry sauce and raspberry purée while others kept to a solo blueberry arrangement. All were topped with my homemade graham crumble for that just right added crunch.

IMG_3030_1.jpg
IMG_3027_1.jpg

Creamy, just right lemon-y, fruity, berry-y and graham crunchy in a flaky just right crust. OH. SO. GOOD.

Yes, I would make this again.

Back to basics - pâte brisée

now THAT's flaky

In the wake of a tart class that I taught a few months back, when my apple tarts baked with pâte brisée came out soggy and under baked, I was determined to revisit the techniques involved in making this classic dough. (SIDE NOTE: in my defense the apple filling prepped by an eager culinary student was way too soupy, and the oven I used was not familiar to me, but I still felt the need for a refresher!)

Known to pie and tart bakers as flaky pie dough, pâte brisée can cause the most confident baker to question why, why, why doesn't this dough come out perfectly EVERY time?! Some years ago I compared a number of recipes and methods for pâte brisée and came away with a version that was delicious and seemed to be just the thing. But since then, even though I've used the same recipe and technique every time, I've had my share of less than stellar results. Maybe it's just me, eh?

I proceeded to look at recipes from Christophe Felder (one of my favorite tart makers) and Thomas Keller of French Laundry/Bouchon Bakery fame. In addition I obtained the recipe that the bakers at Nonna Cafe in Ada use (I've had their quiche many times and the crust is always deeelish!). The last addition to my test quartet was the recipe I've been using for years.

Truth be told, many pâte brisée recipes are very similar, but what intrigued me about these four was the difference in ratios of butter to flour, how much water is added and how the ingredients are brought together.

Here we go!

Pâte brisée is simply flour, cold butter, salt and ice water (some recipes add a bit of sugar too). In the photo below I've provided the amounts of butter and flour for each of the four recipes. From left to right you see the following ratios plus baker’s percentages for the butter: Felder (CF): butter:flour at 1:2 (50%); Keller (TK) 1:1.35 (74%); me (SV): 1:1.44 (69%); Nonna (N): 1:1.18 (85%) (getting much closer to 1:1!).

In this test I'm using Challenge unsalted butter made in California with the claim that it is from cows not treated with growth hormone rbST. I've been using it for some months now and it's good.

I've discovered over the years, working with various tart and shortbread doughs, that the closer the weight of butter gets to the weight of flour in the dough (butter weight is typically about 2/3 flour weight), the more tender and delectable the end result.

At any rate, this promised to be interesting.

Below are the four finished doughs with all ingredient amounts listed. The Felder recipe makes a larger quantity than the other three, but you can still appreciate the ingredient ratios.

Just a note - the TK, SV and N recipes are typically double (enough for two 9" tarts or pies) what I note below.  I made smaller recipes for testing purposes.

So how are these all put together, you might ask? I've always followed the "flaking" method when making pâte brisée by hand.This involves working pieces of cold butter into the flour and salt, purposely leaving large "flakes" or flat pieces of butter in the mixture. Cold water is then added in increments and mixed lightly and quickly until the dough holds together. The dough is then wrapped and chilled before rolling it out for use.

Here are the differences in technique for the other three doughs.

Felder calls for soft butter to which is added the salt, sugar and flour. The mixture is sanded by hand to coarse crumbs, then 120 gm ice water is added and mixed gently until the dough comes together. The amount of water to flour is much higher in his recipe. He claims that this dough holds very well after baking, doesn't soften and is great for juicy fruit fillings.

Keller's method involves mixing half the flour with the salt, adding butter pieces on low speed in a mixer until NO butter is visible. Then on med-low speed the remaining flour is added, followed by the water. Mix until just combined, wrap and chill.

Nonna's dough is made with a food processor, although I chose to sand the butter in by hand. Place the flour and salt in the bowl, pulse in the cold, diced butter to achieve coarse crumbs, then add the ice water and pulse just until it comes together. Wrap and chill.

All just a little bit different!

Once the four doughs were chilled I rolled them out to make 80 mm filled and baked blueberry tarts and blind baked then filled lemon tarts.

Here are the rings lined for the blueberry tarts.

Here's what I observed when rolling these doughs.

The Felder dough, even after a good chill, felt weirdly spongy and soft (NOT in a good way). It was sticky and didn't hold its shape well when lining the ring.

The Keller dough was smooth, firm and tight, rolled beautifully and held very nicely when lining the ring.

My SV dough felt a bit rougher and drier than the others, although rolled well and held when lining the ring.

The Nonna dough felt soft (in a good way) - not too wet, not too dry - rolled nicely and held well when lining the ring.

I popped the lined rings into the freezer to firm up before baking.

First the blueberry tarts. I sprinkled some fine, dry bread crumbs in the bottom of the tart shells - this is meant to create a barrier between the filling and the crust to help reduce the chance for sogginess. Then I filled each with fresh blueberries that were tossed in a little lemon juice, sugar and flour ( for four 80 mm tarts I used a generous 3 cups of berries with 1-2 teaspoons lemon juice, 4 - 6 tablespoons sugar (or to taste) and 2 tablespoons of flour).

Heat the oven to 425 F. Here they are ready to go in.

I gave these 5 minutes then decreased the oven temp to 400 F. Continue baking another 20-25 minutes or so until the berries are bubbly and the crust is nicely browned.

I sprinkled vanilla sugar atop the blueberry tarts once out of the oven.

I also rolled out some scraps of each dough to bake all by themselves. I wanted to see how they puffed and tasted sans filling. A sprinkle of vanilla sugar gave them just the right something.


It's a bit difficult to see from the photo above, but all of the scrap pieces puffed up nicely, except the Felder dough. Here’s the Nonna dough, beautifully flaky.

Now for the blind baked tarts with oven temp at 400ºF.

Freeze the lined rings for 10-15 minutes then fill with parchment rounds and dry beans.

Bake with weights for 15 minutes, remove weights and bake an additional 5-8 minutes until nicely browned. Always pay attention to what's going on inside your oven!!

All four doughs held their shape pretty well during baking with the usual amount of shrinkage away from the rings.

After reducing the oven temp to 300ºF I filled them with my current favorite lemon filling and baked them until the filling was set, about 10-15 minutes. Check out my post from 2/16/16 on lemon-lime tart and here’s a link to two of my favorite tarte au citron recipes.

Now for the tasting. Steve was on hand for the event, my ever present tasting guru. First the blueberry.

I realize you can't appreciate the difference in the doughs visually, but the first thing I checked was how they all felt when portioning them with a serrated knife, followed by how easily they cut with a fork.

Felder's crust was tough, both when slicing with a knife and when cutting with a fork. It was chewy in the mouth, not flaky or tender and the flavor was dull. No thanks.

Keller's cut very easily with both knife and fork, was tender and crisp with a pleasant and agreeable flavor.

Mine was just a tad resistant to cutting compared to Keller's, slightly less tender but crisp in the mouth with good flavor.

Nonna's cut easily with great flavor and texture.

All of the above observations held when tasting the plain baked scraps of dough. Felder's was chewy and tough, broke apart with a bend rather than a crisp snap without any flakiness. The other three were flaky, crisply tender and delicious.

When cutting and tasting the lemon tarts, the same observations held true. (Love that lemon filling!)

Felder was the obvious loser. However the other three were all good, leaving me with the question - now what?!

As if you haven't already had enough, I decided to do just a bit more reading and research and came upon one more technique that sounded promising. I'll credit this one to Kristen Rosenau who writes the blog "Pastry Affair" (http://www.pastryaffair.com).

First I tweaked my recipe (it's coming at the end, I promise!) by increasing the butter to bring the butter:flour ratio to 1:1.25 (80%), in between TK and N.

In Kristen's by-hand method she takes half of the diced cold butter and sands it into the flour and salt. Then she adds the other half of the butter in larger diced pieces and "flakes" them, leaving flat pieces of butter visible. Add the ice water incrementally and once the dough holds together, turn it out onto a piece of parchment or plastic wrap. There may very well be some crumbly pieces at the edges. Don't worry.

Using the plastic wrap as an aid, fold the dough in three.

Flatten and turn it 90 degrees then fold in three again (basically a rustic version of puff pastry).

Flatten, wrap and chill for a good hour or more.

I then performed the same steps as with the quartet of doughs already described, making a filled and baked blueberry tart, a blind baked and filled lemon tart and baking a piece of the dough all by itself.

Ready for the oven above and all baked below.

Here’s the au naturel dough all baked up.

And the finished lemon tart.

Of course while the blueberry and lemon tarts were cooling, I just had to snitch a taste of the plain crust - YUM!  Tender, flaky and all around delicious.

Once they were cooled, Steve and I tasted the blueberry and lemon versions and found the crust to be wonderfully tender, flaky and buttery. And, to top it off, they were still delicious the next day!  I like that.

So here's my version that I intend to use from this day forward.

Pâte brisée (makes approximately 645 gms of dough, MORE than enough for two 9" tarts; just freeze what you don't need). Click here for a printable PDF version.

325 grams all purpose flour
3/4 teaspoon salt
OPT: one tablespoon granulated sugar
260 grams cold, unsalted butter (1/2 small-dice, 1/2 large-dice)
60 ml (4 tablespoons) ice cold water

Mix the flour, salt and sugar (if using) in a large bowl.
Sand in the small-dice butter with your finger tips to achieve coarse crumbs.
Flake in the large-dice butter leaving flat, largish pieces in the mixture.
Add 1/2 the water, toss with a fork then toss and gently squeeze with your hands. Add additional water by tablespoon until the dough holds together.
NOTE:  if the dough still seems dry and too crumbly to hold together (as it might on a cold, dry winter's day), continue to add additional tablespoons as needed but don't exceed 120 ml (8 tablespoons).
Place the dough onto a piece of parchment or plastic wrap; using the wrap as an aid, flatten the dough and fold into thirds. Turn 90 degrees, flatten and fold in thirds again. Flatten, wrap and chill for at least an hour or overnight.

If you don't intend to use the dough for a couple of days, freeze it well wrapped for up to 3 months. A day before you wish to use it remove it from the freezer and place in the fridge to thaw overnight.

While this may not have been the most scientific of studies, it was indeed illuminating. I love experimenting and learning, especially when I get to work with dough. Yeah.

Have lots of fun folks!!

Lemon-lime tart

As I mentioned in a recent post on fresh fruit tarts, I had a blind-baked pâte brisée shell in my freezer just waiting to be filled. I was thinking lemon.

Before the Christmas holidays I had purchased a bunch of Meyer lemons, regular lemons and limes to use as table decor as well as to have on hand for baking. Since I had way more fruit on hand than I would use up efficiently, I proceeded to zest it, freeze the zest, juice the whole lot and freeze the juice too. Always on the prowl for the perfect lemon tart, I tried to track down the recipe for Jacques Genin's famous tarte au citron. I found a couple of recipe versions online as well as a video of Jacques himself preparing said tarte.  Unfortunately the video did NOT include the specific ingredient portions.  Oh well.

Update! I subsequently got my hands on his book on lemon tarts compliments of a student who was in one of my classes at Sur La Table. It’s small, in French and includes many versions of citrus tart. It’s great! But alas very difficult to get one’s hands on in the USA.

While his tart is made with limes, I opted for a lemon-lime combo. I already had my blind-baked crust. NOTE: here’s a link to two of my favorite tartes au citron, including Genin’s version.

The lemon-lime filling is made with 3 large eggs, 170 grams sugar, 180 ml juice (half lemon, half lime for me), zest of 6 fruits (Meyer lemon, lemon and lime combo for me) and 200 grams butter.

Whisk the eggs and sugar in a saucepan, add the zest and juice and cook over medium heat, whisking constantly until the mixture starts to thicken and is just short of boiling (I took it to ~83º C).  You should start seeing fine little bubbles forming around the edges and steam starting to rise up.

Remove it from the heat and blend the butter in with an immersion blender until smooth and creamy.

Since my crust had been in the freezer, I took it out about 30 minutes ahead and warmed it in a 325ºF oven for about 5 minutes.

One approach to a lemon tart is to make the curd, chill it and then fill the blind baked shell with the already chilled curd. Then it goes back into the fridge for additional chilling. Another is to fill the shell with the warm curd, cover the surface with plastic wrap and put the whole thing in the fridge to chill. Even another is to fill the warm shell with the warm curd and put it in the oven at 300-325ºF for about 10 minutes to further "set " the filling.

That's what I did with this one.

before the oven

after the oven

Believe me - the number of ways to approach a lemon tart is as many as the number of lemon tart recipes you'll find out there.  Yes, it's true.  I've tried 'em all (almost).

Once the tart cooled to room temp, I popped it (covered) in the fridge overnight.

We taste tested it the following day as our luncheon dessert at cousin Jen Galloway's house in the woods.  Oh how creamy, tart and lemony it was.  And the pâte brisée crust was PERFECT with it.

Another winner!

Fresh fruit tarts in January

There's something so attractive about fresh fruits arranged on a layer of vanilla pastry cream, nestled in a lovely tart crust.  A feast for the eyes as well as the mouth.


Recently I received an order for a fresh fruit tart with a request for kiwi and berries.  Typically I use a 1-2-3  cookie-type dough (similar to shortbread dough in the ratio of sugar, butter and flour with some egg and vanilla added in).

But . . . . I had some pâte brisée dough in my freezer and decided to do a comparison between that and the usual 1-2-3.

I don't normally blind bake pâte brisée, but this time I lined 9" tart rings and smaller rings with each of the two doughs, primarily so I'd have something I could sample and compare.

Notice in the photo below how the pâte brisée edge is not as sharp and pristine.  It's an ongoing battle with that dough - trying to keep its shape, avoid shrinkage and have a nice looking end result.

Two things that help when working with pâte brisée are making sure the dough is nice and relaxed before lining the tart form and then freezing the dough in the form before baking.

Keep trying, right?


blind baked pâte brisée

small version of blind baked 1-2-3 dough

larger 1-2-3 version for the ordered tart

I filled the above shell with vanilla bean pastry cream lightened with a bit of whipped cream and topped with fruit.  As seen below on the left, I typically do a little fruit "practice" before placing it on the finished tart.

I added in some mango slivers to give a bit of contrasting color to the kiwi and berries.


getting ready for final assembly

et voila!

As for the smaller versions with the two different doughs, I just randomly topped the pastry cream with some of the fruit leftover from the order, not being concerned about the artistry.  I wanted to know how the two crusts compared taste wise.


the taste tester tarts

The left side is the 1-2-3 and the right the pâte brisée.

Somehow they were switched around for the "cut" pictures.


pâte brisée on left and 1-2-3 on right

While you can't really see a difference in the two doughs photographically, the taste experience was definitely one for comparison.  And to top it off, I stored these babies in the fridge for a day before we ate them.

Both were delicious, although Steve and I agreed that the pâte brisée taste and texture (crispy yet tender and oh so good) outshone the 1-2-3.  They both held up well after their refrigerator day - good to know when planning dessert.

Pâte brisée is now on my hit list of doughs to use for blind baked shells.  The 9 inch-er that I baked for this test went into the freezer for a couple of days after which I used it for a delicious lemon tart.

More on that later.

All in all an enjoyable comparison!