Quiche

Sometimes I’m amazed at the baking adventures that I HAVEN’T written about. You would think that with my penchant for French-y type bakes, quiche would be at the top of my list.

I’ve made quiche a number of times and have enjoyed some delicious versions in various eateries both locally and on our European travels over the years. Let’s do it!

Some months ago I was tasked with making two quiches for my friend Kim down the road. I decided on a classic Lorraine type version with bacon and Gruyère and a broccoli/cheddar/caramelized onion number. The latter is what I’m highlighting here.

You know how I’m always going on about planning ahead for your baking projects. Well this is one great plan ahead-er. Blind bake your crust and hold it in the freezer for a day or two until you’re ready to fill and bake; make the custard base a day ahead and hold in the fridge; prep filling additions too, like blanching veggies, grating cheese, caramelizing onions. It makes it all so much smoother.

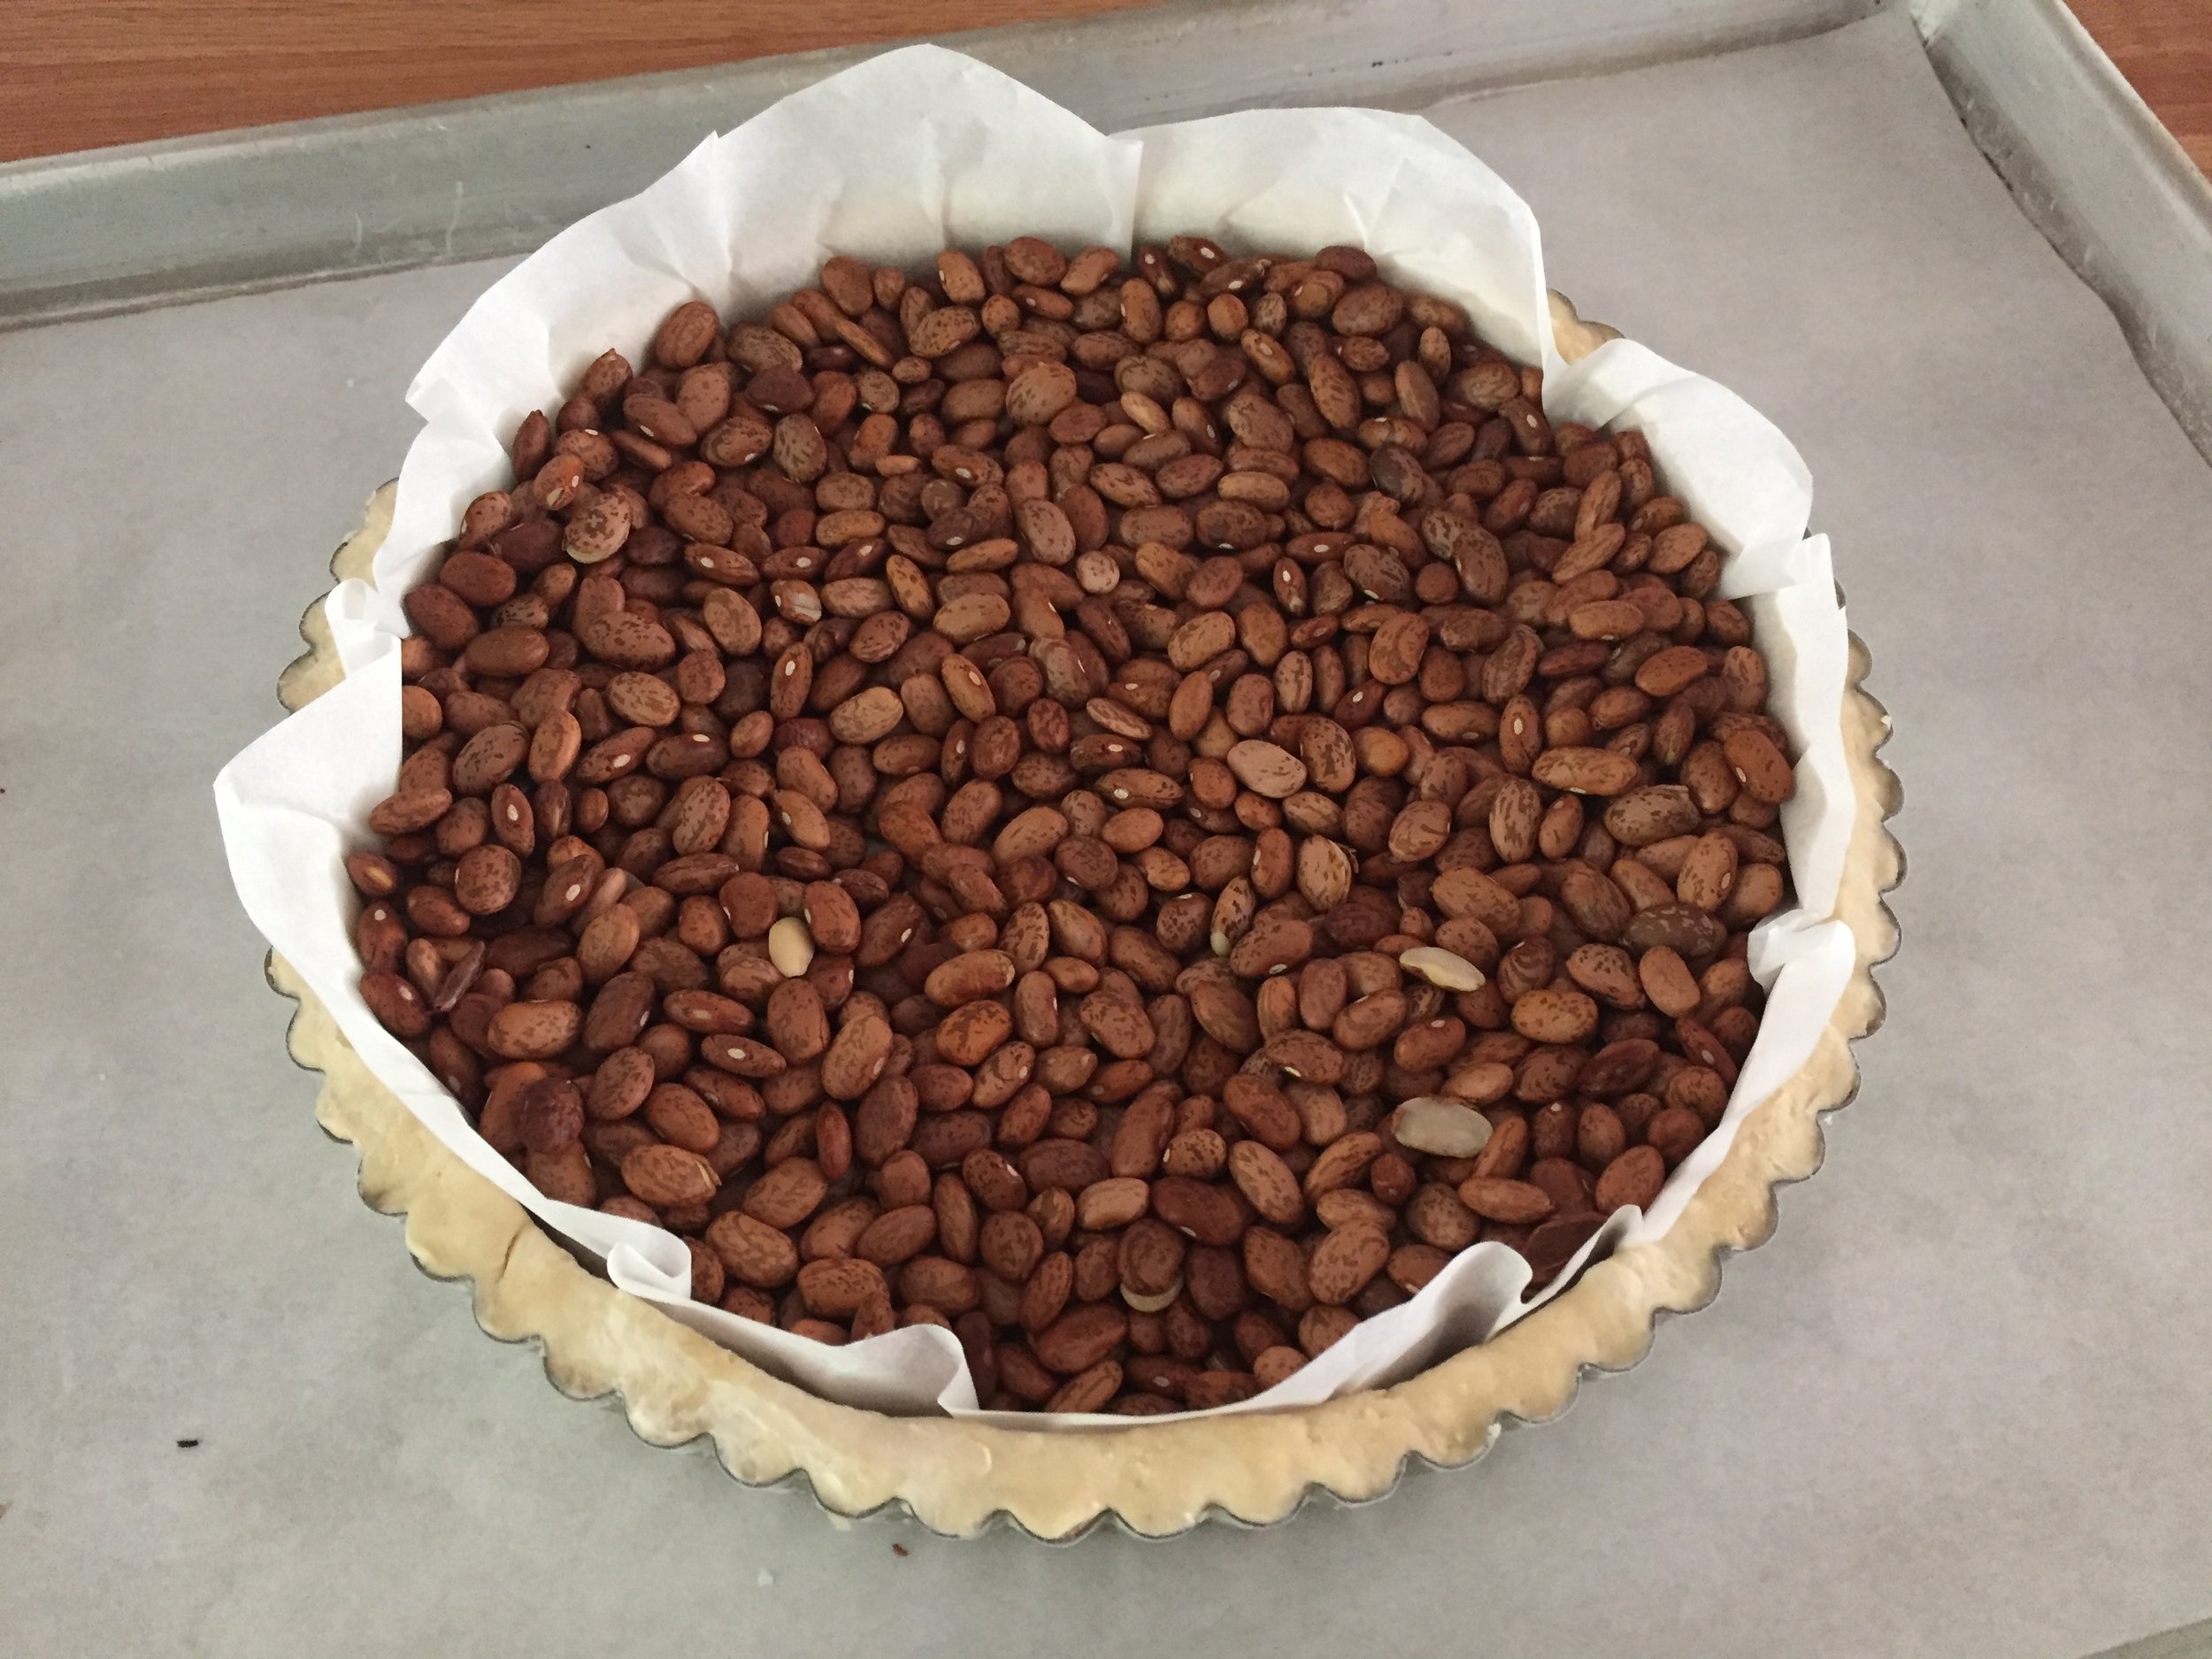
NOTE: I always blind bake the crust for quiche. Nothing is more disappointing than cutting into a piece of quiche and finding a soggy and nearly raw or barely baked bottom. Not cool!
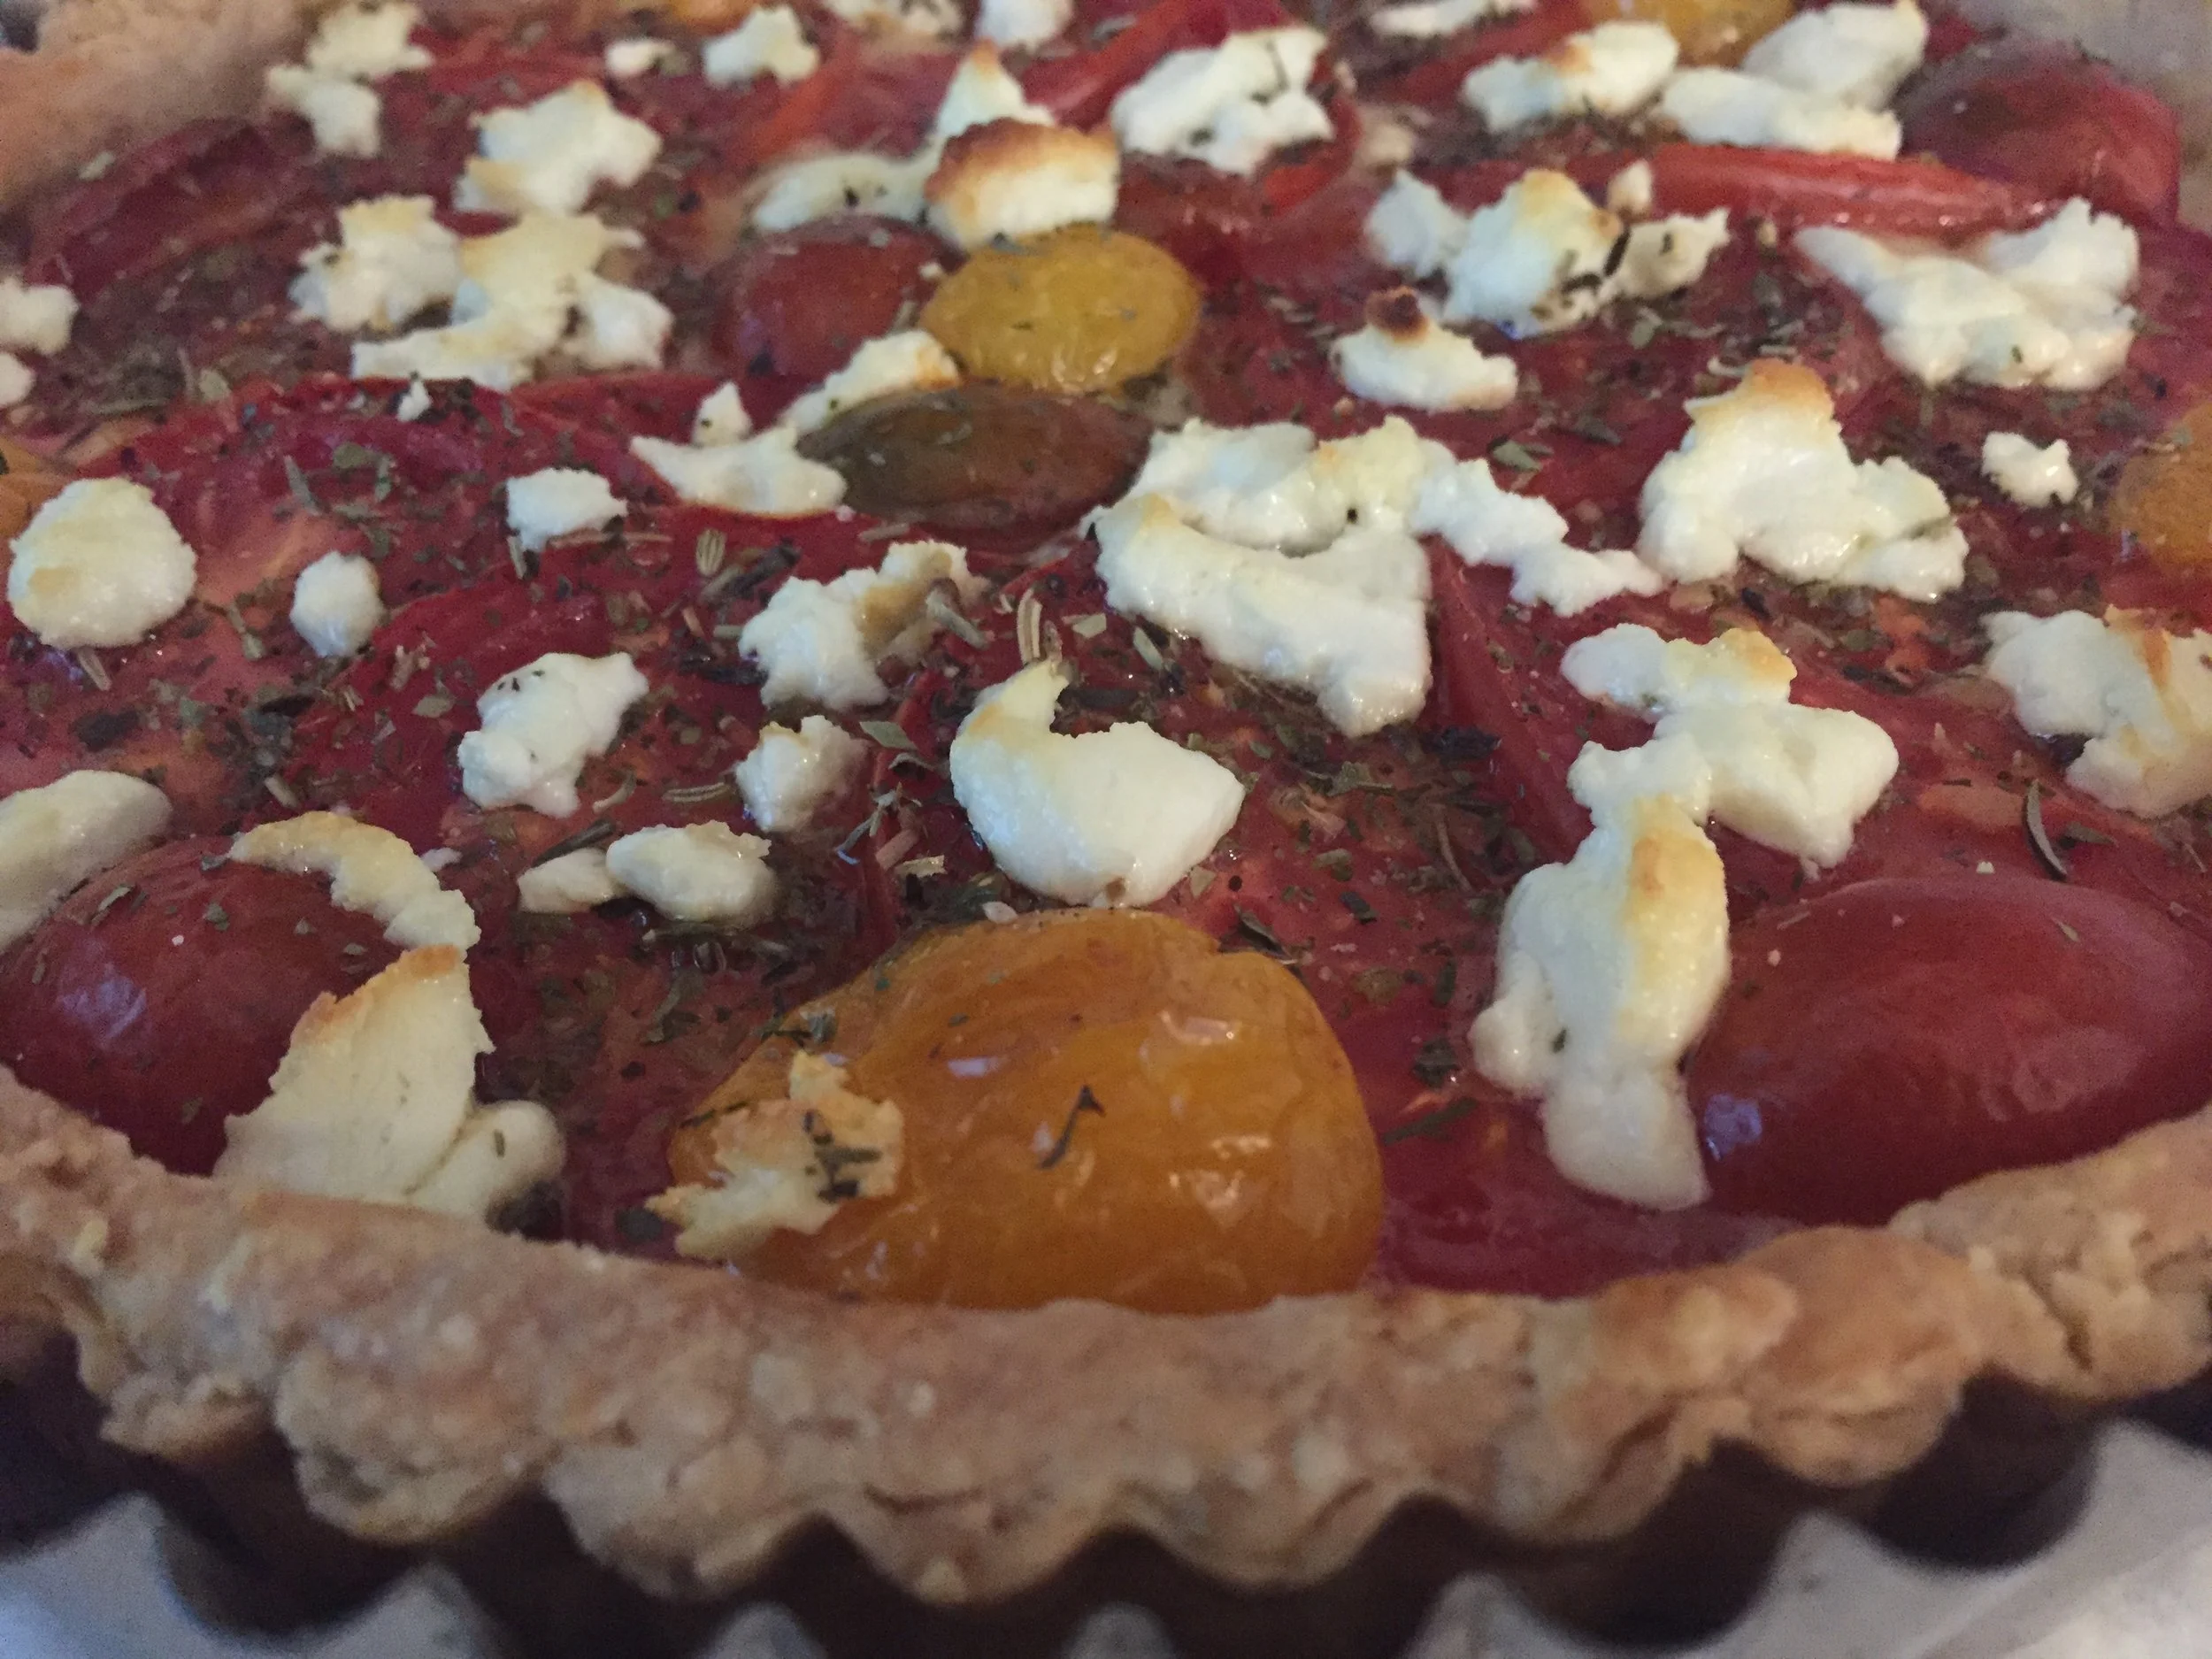
Ready for assembly!

I prefer using my standard pâte brisée for the crust. If you’d like a refresher tutorial on that, check this post out. For savory applications like this, the crust is especially tasty when you sub in spelt and rye flours for some of the all purpose.

As many of you know, I’m a recipe comparer and often take tidbits from similar recipes to make my own version. The base custard filling is one of those, being an amalgam of a quiche recipe in the October, 2018 issue of Saveur and one from the book “Tartine” by Robertson and Prueitt. The one thing that makes it different is the addition of flour to the traditional milk/cream/egg in classic quiche recipes. It enhances the texture, making it more velvet-y.

Here’s my full recipe PDF for quiche Lorraine, including pâte brisée and steps for its preparation as well this broccoli/cheddar filling option + one more.

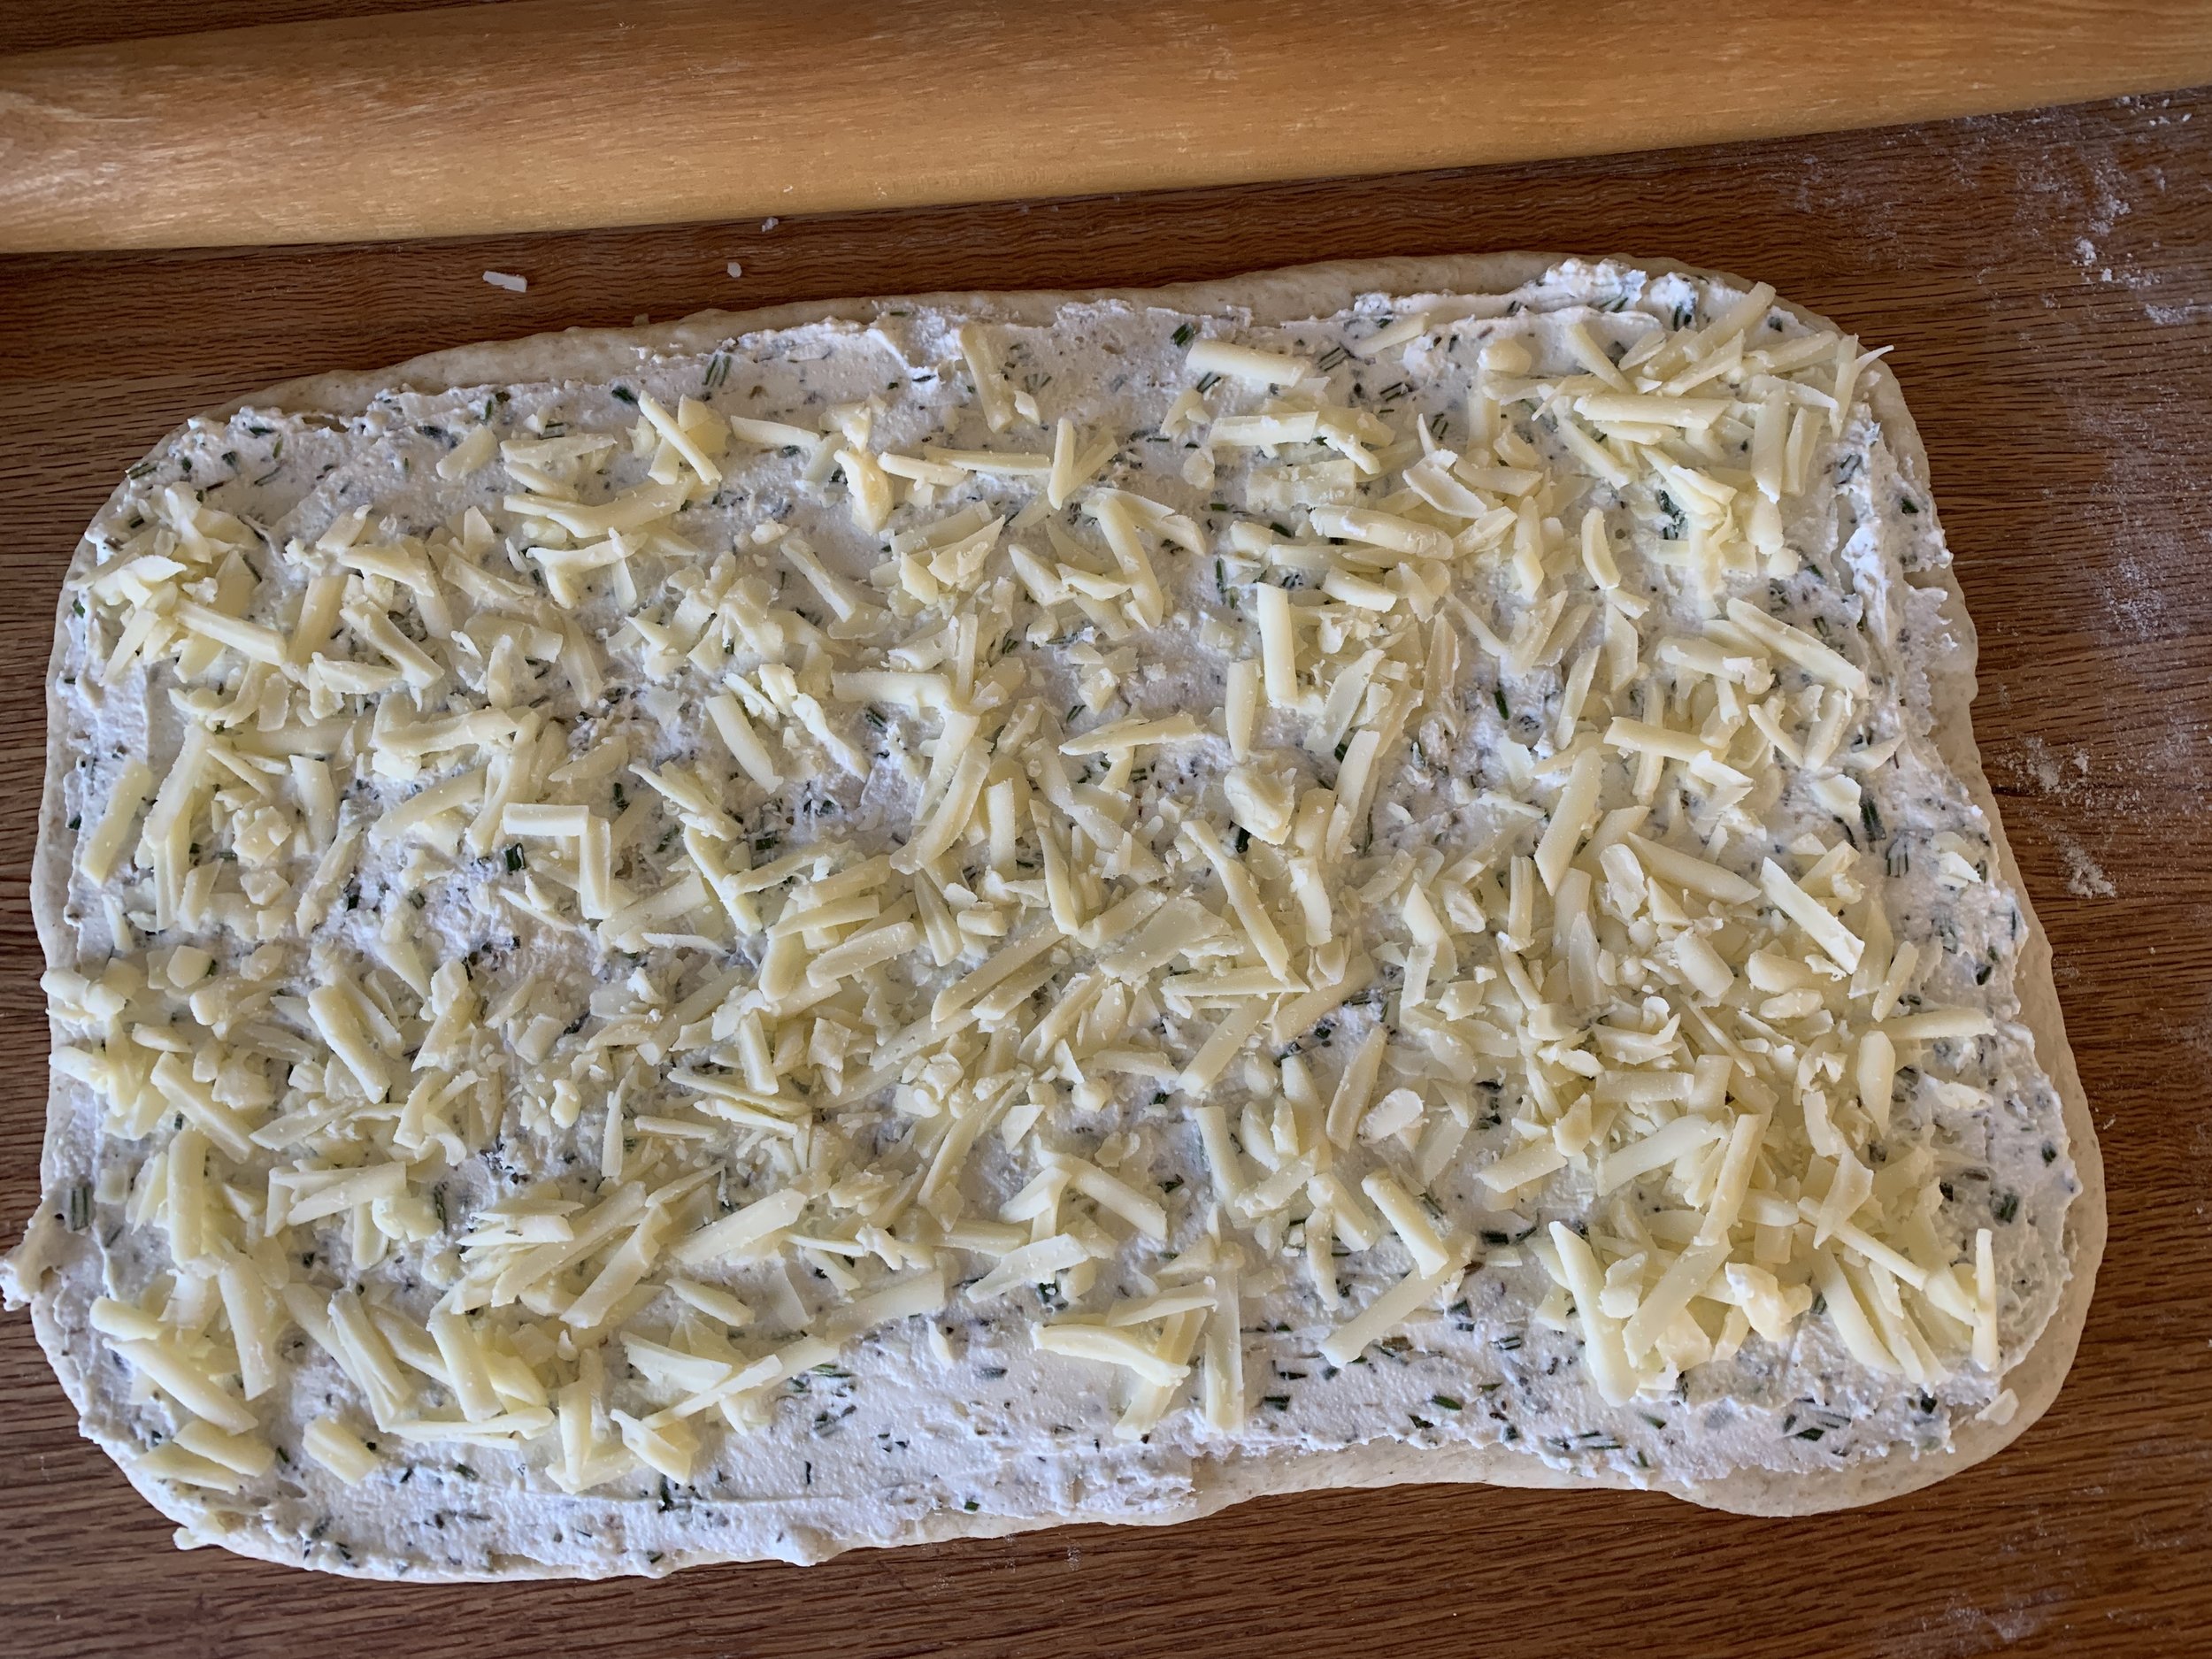
My blind baked crust is ready (using a deep fluted 9” tart pan as seen above). I blanched a cup of broccoli florets, grated 113 g / 4 ounces cheddar (I like Cabot’s seriously sharp cheddar) and caramelized a pound of sweet onions.

If you’ve made your custard ahead, just re-whisk it before pouring it in. It’s made with one cup whole milk, one cup heavy cream, 4 large eggs + one large yolk, 4 tablespoons all purpose flour, a teaspoon kosher salt, 1/2 teaspoon freshly ground pepper, a tablespoon of chopped fresh thyme (or herbs of choice) and a few grates of fresh nutmeg.

Heat your oven to 375ºF. Place your already blind baked crust on a parchment lined sheet pan. Distribute your filling additions evenly over the bottom.

Start of assembly

Carefully pour your custard in, letting it settle into the crevices as you go. Fill to just below the rim. Keep any filling you might have left.


Carefully place the panned up quiche into your heated oven and bake 10-15 minutes. Now, if you have leftover filling, poke a hole in the center of the quiche with a paring knife and slowly pour in the remaining custard. Reduce oven temp to 325ºF and continue to bake an additional 35-40 minutes.

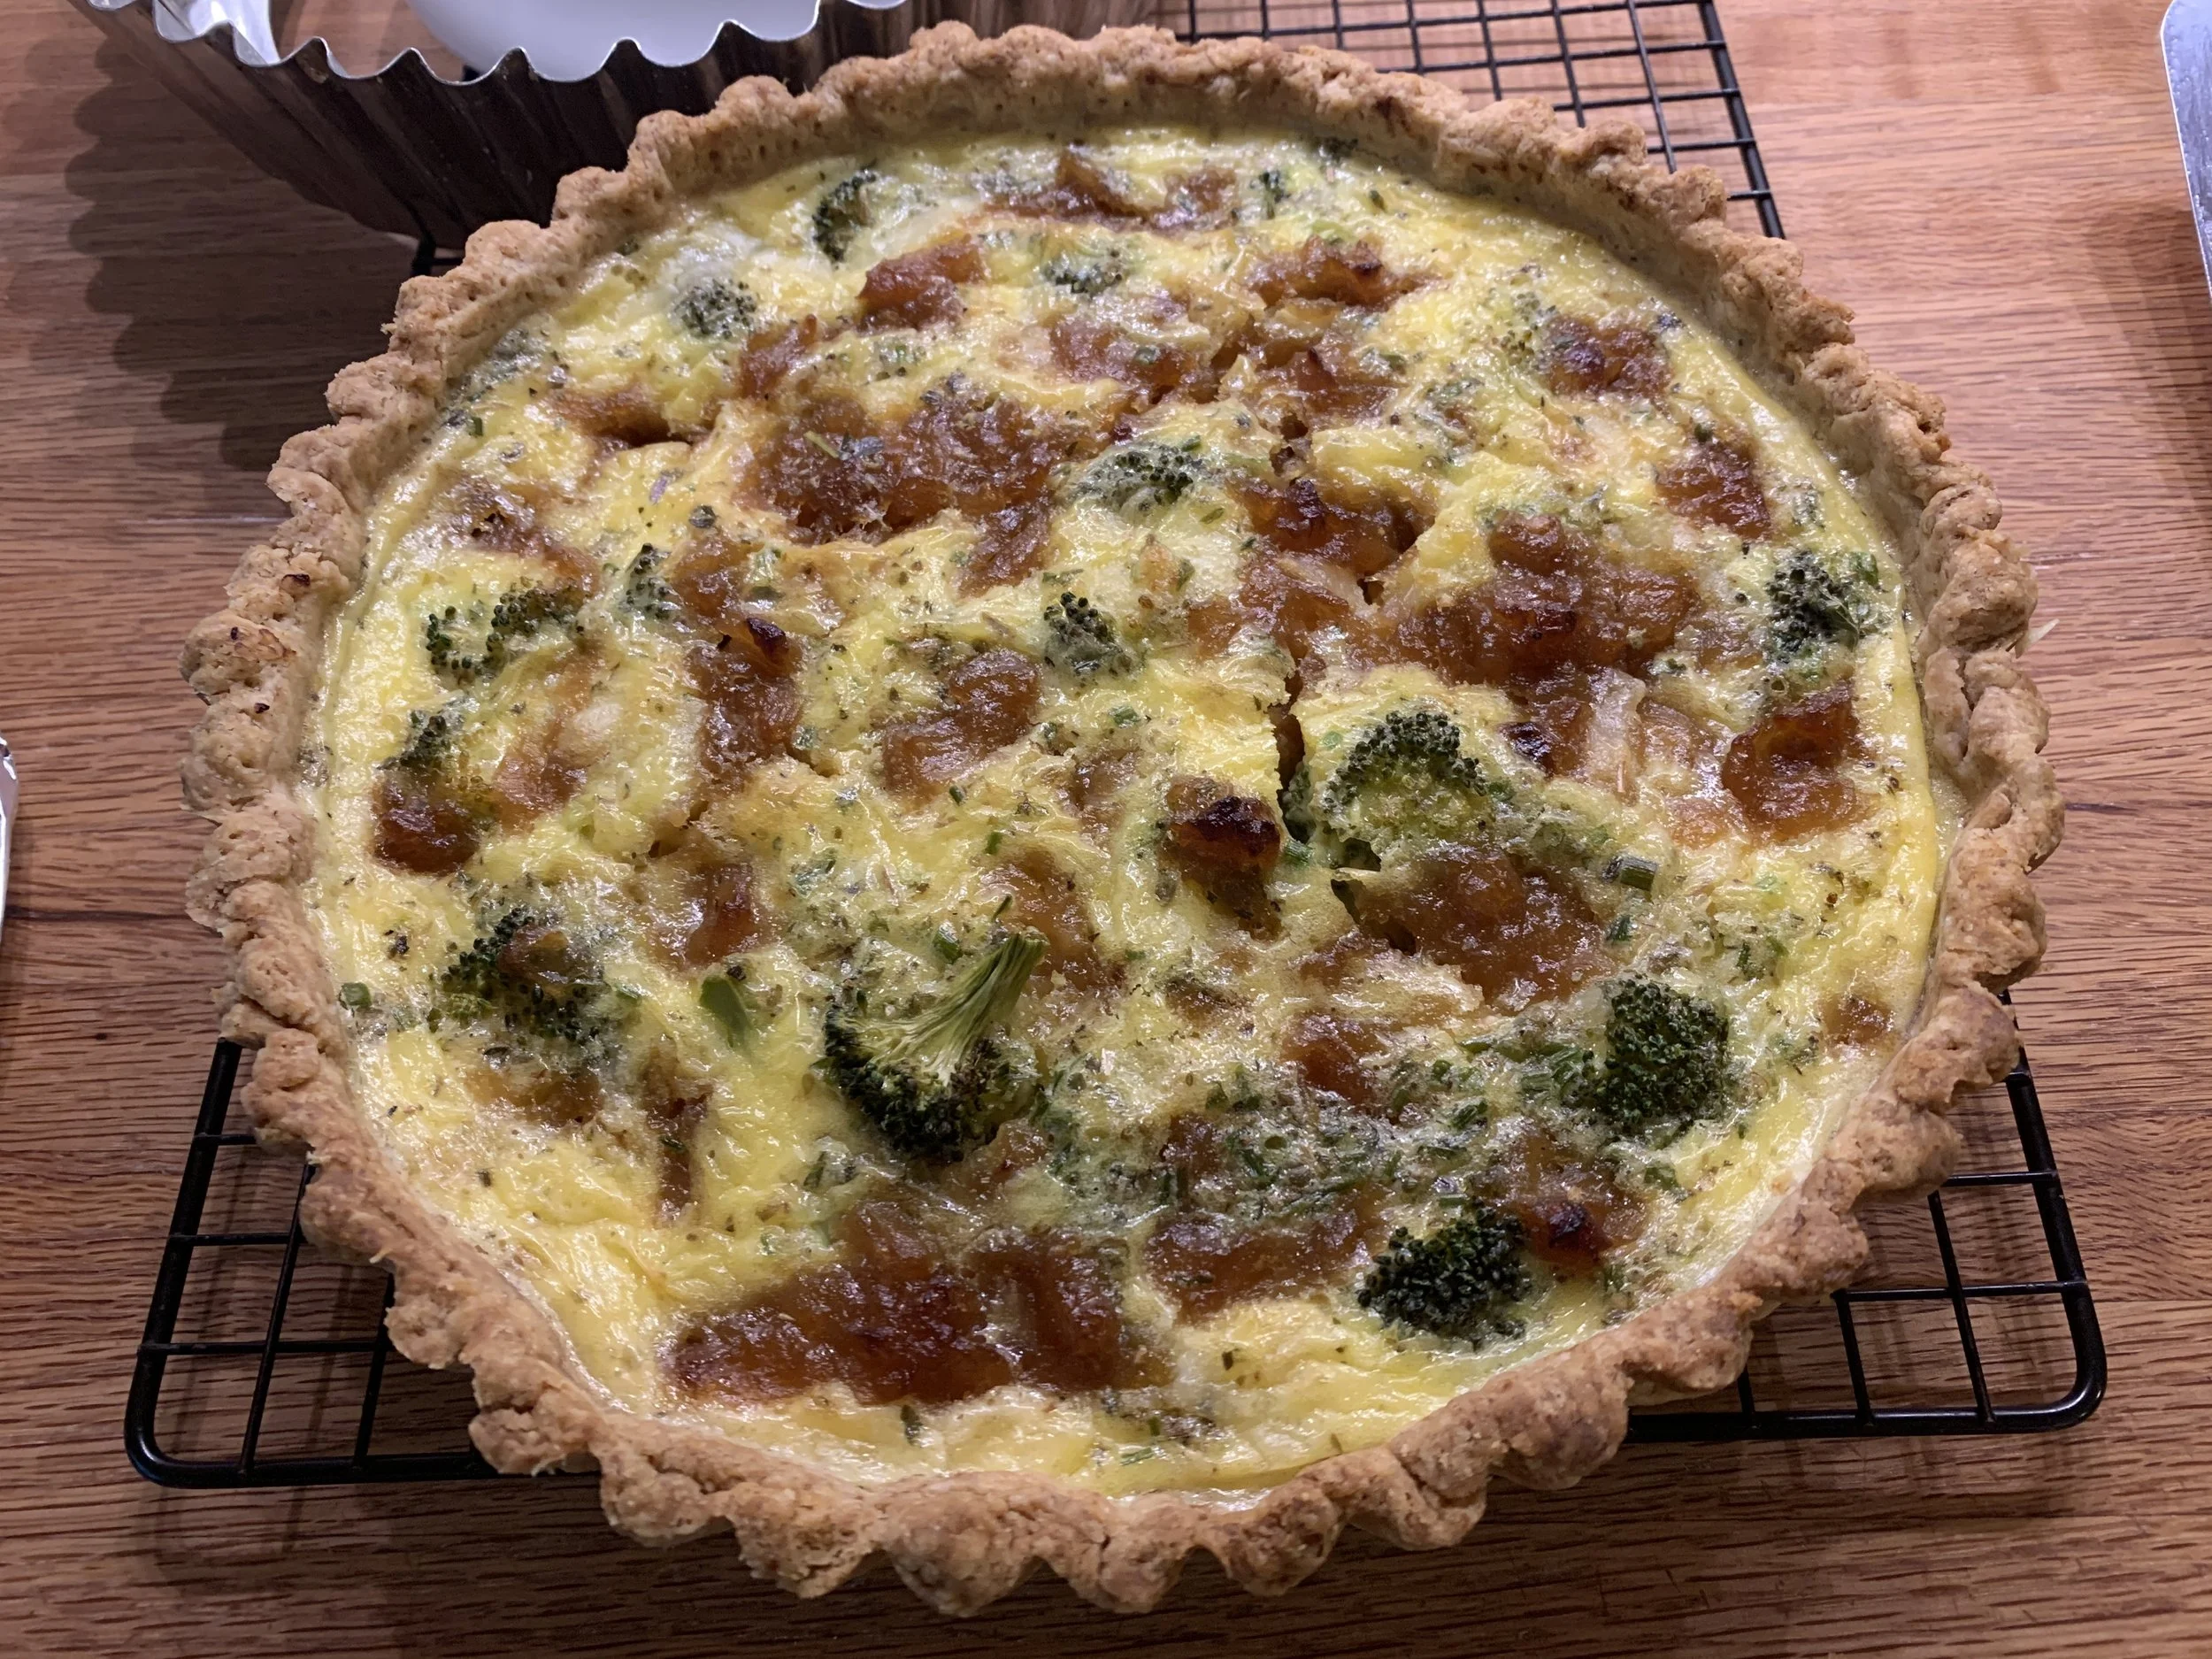
The center should feel firm - look for puffing, light browning and the filling set.

Just out of the oven

Let cool on a wire rack 20-30 minutes to allow the custard to set up before slicing. Serve warm or at room temperature.


Since I was making this for someone else, I decided to make a second one for Steve and myself - gotta test the product, don’t ya know.

We enjoyed a slice with a green salad and glass of red. Delicious!

Leftovers keep in the fridge over 2-3 days. Just warm up in a 325º oven for 15 minutes or so. Next day’s breakfast, brunch or lunch here we come!

A tasty light meal!

Create your own favorite combo of goodies for your next quiche and enjoy!

It’s February! What are you making for Valentine’s Day?? Have fun!


One great bread a few different ways

Sesame braid

Hi all. I gave you a sneak peek at this one awhile ago. My how time flies - seems like eons! I packed a lot into this post so get ready.

I LOVE this dough! It calls for an overnight preferment, a process that not only lends itself to planning ahead but also to a stellar end result.

This is my adaptation of scali bread from King Arthur Baking Company. I first came across it in the spring 2017 issue of SIFT magazine (now defunct -awwww!) and made it for the first time back in April of 2022. It’s said to be a staple in Boston’s North End, and, as is the case with the internet, I found a bunch of references/posts about it on line. Meatball sandwiches anyone?


Classically made as a three strand braid coated in sesame seeds, I started with KA’s base recipe for one braid but then doubled it and created my own recipe, subbing in some rye and white whole wheat flour. I’ve tried several different approaches - braid it, twist it, torpedo it, loaf it, herb it, cheese it, seed it - they’re all good!

Let’s take a look at the steps. Make the preferment the evening before. Please note - the dough/proofing images are for my recipe which would make TWO braids. I’m showing the shaping steps for ONE braid.

Give it 13-15 hours at room temperature after which it should be actively fermenting. It’s more stiff than let’s say a typical poolish which is equal weights flour and water.

Mix the preferment with the other dough ingredients and knead to a nice smooth end result.

Give it a 90 minute rise until nice and pouf-y.

That’s what I call a rise folks!

Proceed with your desired shaping. Here are the steps for one sesame coated braid using HALF of the above dough.

Deflate the dough gently, divide in three equal pieces (each should be about 230 g or so). On a lightly oiled surface roll each piece into a rough log and let rest 10-15 minutes.

Now roll each log out to a 10-12” length then brush each with egg white and coat thoroughly in sesame seeds.

Pinch top ends together and do a typical three strand braid. Tuck the ends under to neaten things up. I placed mine on parchment on an overturned sheet pan in preparation for sliding it onto my heated baking stone.

Cover with lightly oiled film wrap and let rise about 90 minutes until pouf-y.

Toward the end of the rise, heat the oven to 425ºF (400º convection) with your baking stone if using.

Bake 25-35 minutes until golden brown.

Cooled, sliced, buttered - oh so good!

Here are a few other things I made with my full batch recipe. Two basic loaves, one braided and one slashed before baking.

Butter basted braid and a simple loaf

Another full recipe went into making a couple versions of rolls and a cheesy braid.

For the rolls I used a tad less than half the recipe to make fifteen 45 g rolls - 8 as sesame knots and 7 as butter basted. The rest became the cheese loaf.

I formed eight “logs” that I rolled in sesame and knotted up and left the other seven as standard round rolls (with a top snip before baking).

shape, shape, shaping!

The rolls enjoyed a nice long rise of ~100 minutes.

REady to bake, Before the snip!

Oops! Forgot one snip!!

Sesame knots and butter basted dinner rolls

This cheesy braid is just like the sesame approach except I coated the ropes in grated cheese the quantity of which I eye-balled. I used sharp Cheddar but gruyère, emmental (or a mix of your faves can all work) and topped with more cheese. I’d use more next time. You could add herbs if you wish. Mmmm good.

Cheesy braid

Had enough yet?? Almost there, I promise.

I wanted to try a filled wreath, using half a recipe (~700 g) for that and dividing the rest into two for a couple of simple boules.

Ricotta herb wreath and two small boules

For the filling I mixed 3/4 cup whole milk ricotta, 1/4 cup cream cheese, a few pinches of dried oregano and herbes de provence plus ~2 tablespoons chopped fresh rosemary, one grated clove garlic and 4 ounces of grated sharp provolone which I ultimately thought too over powering - too much!. Live and learn, eh? Next time . . . . .

Roll the dough out to a rectangle of 8-ish by 16-ish inches.

Spread the ricotta filling over the dough and top it with the grated cheese. Press it down lightly.

Log roll it up and cut slits along one side every inch of so, half way through.

Form it into a wreath and pinch the ends together. Separate and twist the sections out a bit. Hmmm . . . looks like some sort of sea creature.

Cover lightly with oiled plastic wrap and let rise about 90 minutes.

Lightly brush top with egg white or water and grate more cheese on top - parmesan or locatelli work well.

Bake 25-30 minutes, let cool and enjoy.

Whew! The end. It’s a good dough to work with and so tasty no matter how you choose to bake it. Have fun!

Bacon cheddar corn scones

So much sweet corn this year - gotta try something a little different. Why not savory scones!

Steve’s been buying up batches of ears, cutting the kernels off and freezing a lot of it, but he’s also grilled some ears and cut off the grilled kernels for adding to stir fries, frittatas, fried rice, corn chowder - you name it!

I went with a slight variant of my cheddar scone recipe and added grilled corn kernels and bacon bits to the mix. A small pinch of cayenne gives it the right hint of heat without being overwhelming (you can always add more if you’re into the heat factor). If you’d like to make these, here’s a PDF of the recipe fully written for this particular project.

Remember - cold butter and cold cream/egg, work quickly and efficiently to bring it all together.

Place dry ingredients into a large enough mixing bowl to accommodate your hands; work cold butter into the mix by flattening the butter between your fingertips and “flaking” the butter into the flour mixture. Leave visible pieces of butter which will help achieve a light and tender crumb.

Place grated cheese (I like a combo of gruyère and cheddar), corn kernels and bacon on top of the dry ingredients. Pour the cold cream/egg mixture into the center and toss it all with a fork to moisten. Bring everything together quickly with a bowl scraper then turn out onto a lightly floured work surface to gently knead a few times to incorporate any dry bits.

This recipe yields about 900 g of dough. I divide it in two, form each half into a 5”-ish round about 3/4 inch thick and cut into 8 wedges for a yield of 16. I happen to prefer the petite sizes, but if you’d like larger scones, cut each round into 6 wedges (yield 12) or even 4 (yield 8) for a pretty generous sized serving. It’s all up to you.

Once the scones are placed on a parchment lined sheet pan, brush with a little milk and sprinkle more cheese on top.


I pop the tray into the freezer and place a second sheet pan in the oven while heating to 400ºF.

Place the scone pan onto the heated sheet pan, bake 10 minutes, rotate trays and bake another 10 minutes until nicely browned. Reduce oven temp to 375ºF half way through if browning too quickly. If I’ve said it once, I’ve said it a thousand times - all ovens are different!

Enjoy slightly warm or cool fully before serving. Hint - a drizzle of honey adds a nice touch.

Crispy outside, moist and studded with goodness inside. You bet.

Work your own wonders with fresh sweet corn. Time’s a wasting!

Happy autumn!!

Savory cheesy quick bread

IMG_0314.JPG

This one is thanks to my French teacher here in Grand Rapids, Rita Selles. Even though I have’t taken classes for awhile now, I certainly enjoyed our group sessions, learned a lot and still do my best to practice speaking en Français with myself when I’m out for my daily walks.

A few years back, at the end of our fall session of classes, we all brought something to eat as a mini holiday celebration. Rita provided this savory cake (is it bread or cake?), and I immediately asked her for the recipe. It’s one that you can suit to your own tastes using different veggies and cheese.

I opted for Rita’s suggestion of diced, sautéed zucchini, a vegetable I don’t often use. Truth be told Steve and I are avid broccoli/cauliflower fans pretty much all year long but also rejoice at the fresh green beans, juicy tomatoes and succulent sweet corn that we’re able to acquire at our local Fulton Farmer’s Market each summer.

For my loaf pan I used my mom’s longer/narrower aluminum Mirro brand pan that she’s had for beaucoup years (click the link for Wikipedia’s interesting history of the company, now defunct). I love the shape compared to a standard, wider 8 or 9 inch loaf pan - it reminds me of what might be called a “tea loaf” pan. Now that she’s living in her lovely apartment at Pilgrim Manor, her meals are provided and her baking days are a fond memory for all of us. Those blueberry and apple pies - man oh man! But I digress.

Lightly butter the loaf pan, line with parchment then lightly grease the paper as well. Heat the oven to 400ºF.

For your mise en place weigh/portion out 250 g / scant 2 cups all purpose flour; 8 g / ~1 tablespoon baking powder; 120 ml / 1/2 cup heavy cream; 60 ml / 1/4 cup milk (whole, 2% or !% all work) OR, as in my case, I used whole milk ricotta instead; 3 large eggs; 140 g / 5 ounces cave aged gruyère; one medium zucchini; 1 teaspoon herbes de provence (or herb of choice); pinch of sweet paprika; salt and pepper to taste.

IMG_0290.JPG

Grate the gruyère and set aside. Dice up the zucchini, heat a bit of olive oil in a sauté pan and stir fry it for several minutes to soften and brown it a bit. Let cool.

IMG_0292.jpg
IMG_0296.JPG

Mix the flour, baking powder, paprika, salt, pepper and herbes de provence in a medium bowl. Add the eggs, cream, ricotta and blend then stir in the cheese and zucchini. Pretty straight forward.

IMG_0298.JPG

Transfer the thick batter into the prepared loaf pan and smooth. I grated some extra cheese on top too.

IMG_0300.JPG

Bake for 30-40 minutes until the top is golden and a toothpick comes out clean. Ooooh -eee look at that cheese!

IMG_0303.JPG

I let it cool for 10-15 minutes, then turned it out of the pan onto a wire rack to finish that process.

Once cooled, Steve and I did our requisite taste test - yup it’s good all right!

We enjoyed a few slices with a hearty, bean-y chili that evening. For another meal Steve toasted a couple of slices up, put ‘em in the bottom of a shallow bowl and topped them with another tomato bean concoction with some pieces of grilled pork. Perhaps you don’t know this, but he is THE leftover king of the house!

The bread kept well wrapped for 2-3 days as we nibbled our way through it. Warmed a bit with a schmear of ricotta and some chopped roasted tomatoes for lunch wasn’t too shabby either.

As Rita suggests, try your own version with different sautéed or roasted veggies, add some chopped black olives, take it up a notch with some crisp bacon bits or sub in your favorite grating cheese. How about some toasted and chopped nuts like pecans or pistachios? I’m liking this. I hope you will too.

IMG_0316.JPG

As usual during these times in which we find ourselves, stay safe, be well and enjoy the simple things. And remember - spring is coming!

IMG_0415.JPG

Provençal tomato tart

IMG_3180.JPG

Wow this was good! Steve and I enjoyed this freshly baked, slightly warm tomato tart along with grilled chicken and fresh green beans. A delicious late summer meal.

Since tomatoes are out in FORCE right now I decided to make this Provençal tart, ramping up the cheese to include both Swiss cave-aged gruyère and a crumbling type chevre from Pélussin France, located in the Loire department just south of Lyon. Once again, thanks to The Cheese Lady here in Grand Rapids MI for a great selection of cheeses.

IMG_3164.JPG

This tart is one of those things that you can play around with, changing up the herbs, the cheese, the amount of mustard, even the size and type of tomato. It’s a simple approach - a blind-baked pâte brisée crust, a schmear of Dijon mustard and a layer of grated cheese all topped with slices of garden fresh tomatoes seasoned with a little salt, pepper and your choice of herbs. I added some dabs of goat cheese on top just to give it that certain something. Then it all goes into the oven.

Let’s go through the steps OK?

First line the tart pan with tasty pâte brisée.

IMG_3165.JPG

Once lined and pricked all over with my trusty fork, I place the tart pan on a parchment lined sheet pan and freeze it for 15-20 minutes while heating the oven to 425ºF. Once firm, it makes it much easier to line it with a round of parchment and fill it with dried beans for blind baking.

IMG_3168.JPG

Now bake it on the lower rack for 10 minutes, turn the heat down to 400º, move it up to the middle rack and give it another 5 minutes. Take it out of the oven and remove the weights. The crust should be starting to set although the bottom will be a bit moist and doughy and will need a bit more baking to finish it off.

Pop it back into the oven without the weights and give it another 5-10 minutes until golden brown. I often decrease my oven temp to 375 for this step and, as usual, keep on eye on what’s happening in there.

IMG_3172.JPG

Decrease the oven temp to 350º. While the crust cools, thinly slice 2-3 fresh, ripe medium tomatoes, grate up a cup (about 4 ounces) of gruyère and have some Dijon mustard at the ready. I like to blend some regular Dijon with a nice coarse grainy mustard, 2-3 tablespoons total. Maille is a great brand and, if you’re in Paris, you can visit their wonderful shop right near Place de la Madeleine.

Spread a thin layer of mustard over the bottom of the cooled crust. I used 2 tablespoons since I like a more subtle mustard flavor, but you can certainly use more if you wish!

IMG_3173.JPG

Sprinkle the grated gruyère over it.

IMG_3174.JPG

Arrange your tomatoes in concentric circles, overlapping each slice. I also tucked in some halved orange and dark red cherry tomatoes for some additional color.

IMG_3175.JPG

It’s pretty traditional to finish off these tarts with salt, pepper, fresh herbs and a drizzle of olive oil before baking, but I went for an addition of crumbled goat’s cheese dotted over the tomatoes. Then some freshly grated black pepper, a pinch of two of salt, a sprinkling of herbes de provence and it’s ready to go into the oven.

IMG_3177.JPG

Bake it for about 20-25 minutes until the goat cheese is starting to brown, the tomatoes are starting to shrivel and the aroma is hitting your nostrils just so.

IMG_3178.JPG

The combo of nutty gruyère, warm fresh tomatoes, the tangy, creamy goat’s cheese and the perfect hint of mustard and herbs was absolutely delicious. Not only that, it’s très, très facile. You can do it!

This one’s a keeper, right Steve?

IMG_3180.JPG