
Pita bread
/
Oh how I love the smell of freshly baked bread. No matter how often my attention turns to pastries, I still come back to bread - whether I'm reading various bread baking books or actually working with bread dough with my own two hands - it's such a rewarding process.
For the past few weeks we've been providing a weekend meal for my cousin Jen and family as they care for my Uncle John at home ( he's recovering from a stroke and a fractured hip.) Last weekend Steve made an excellent chili recipe from NYT and baked some rice to go along with it (rice and beans, don't ya know?!). Mom provided a fruit salad medley, and I decided pita bread was just the needed addition to the meal.
I've been contemplating flat breads for awhile now, especially after a delicious supper of grilled naan topped with burrata, avocado, roasted tomato, corn, salad greens and pesto vinaigrette at Dick and Dor's in Massachusetts over Columbus Day weekend. What a wonderful combination of flavors and textures. Thanks D&D!
I reviewed recipes from my various bread books as well as online resources and debated over naan vs. pita. As I read and absorbed the steps for these goodies, I opted for pita for my first foray into flat bread (although it's really a lot like pizza after all!).

The pita preparation process involves either baking in a very hot oven on a baking stone or preheated sheet pan or cooking in a skillet on the stove top. Both involve flipping the pita half way through and cooking one or a few at a time. As I contemplated opening a hot oven and flipping a number of baking pita, I opted for the cast-iron-skillet-on-the-stove-top approach.
The online recipe I chose was very straight forward. Containing water, yeast, olive oil, salt and flour, the dough came together beautifully in the stand mixer, and, after a 5-6 minute knead, felt lovely, springy and soft.

After a 1 1/2 hour rise, covered in a lightly oiled bowl the dough is turned out onto a floured work surface and divided into approximately 80 g pieces. I had doubled the recipe that typically makes 8 pita, so I ended up with 16 pieces.

Each piece is formed into a nice ball and they're all covered with lightly oiled plastic wrap to rest for 30 minutes.

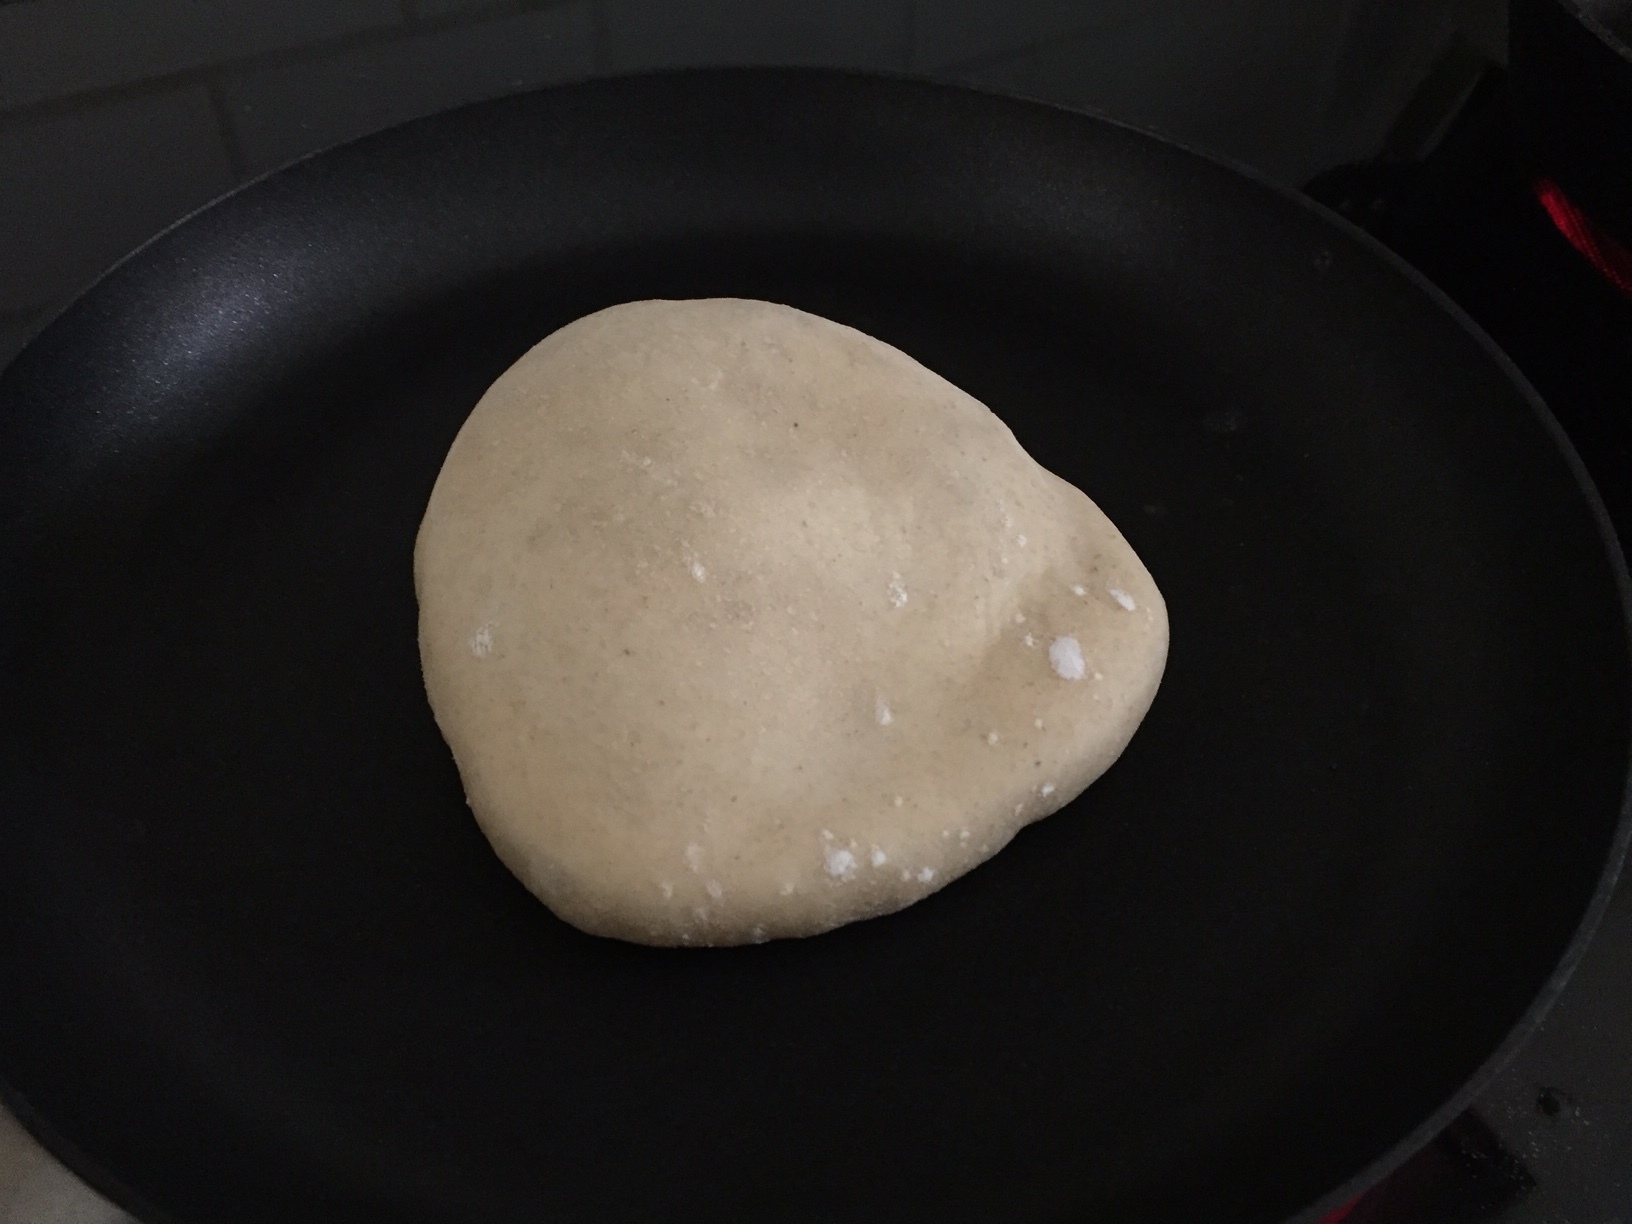
Each rested ball is then patted into a circle about 1/4 inch thick and rests for another 5 minutes. I shaped all my circles and layered them on a parchment sheet pan so I'd by ready to go.

Although the recipe instructed brushing the cast iron skillet with olive oil and heating to medium-high heat, I soon learned that it was way too hot with lots of smoking going on. Whoa baby, time to turn it down!
I did burn a couple of them (that's why I made a double batch, heh, heh) until I finally reached just the right low heat. I cooked each one about 2 minutes on the first side during which the puffing begins, then flipped it over to cook for another couple of minutes until lightly golden.

While the one-by-one cooking process seemed a bit daunting at first, it actually went pretty well once I got the hang of it and was very reminiscent of crêpe making. At Steve's suggestion I also put my non-stick ScanPan skillet into service which gave me a dual cooking process for quicker results. Yeah.
Once cooled I cut one in half and was able to separate the edges for a real pocket. Cool!


I know, this one is a touch over done, but still deelish!
The bottom line: the end result was soooo good! For the first tasting test I tore a couple up into pieces, dipped them in some hummus and had some roasted tomatoes on the side - man oh man!
Later that evening with our chili and rice dish, I cut them into strips for a perfect vehicle, either to spoon a bit on or dip them into the bowl.
Definitely a keeper.

Here's the recipe for 8 pita breads:
1. Place 7 gm instant or active dry yeast in the bowl of a stand mixer and add 1 cup tepid water (~100ºF) and 130 g all purpose flour. Whisk together and let stand about 20 minutes during which this loose sponge will begin to bubble and foam.
2. Add 1.5 tablespoons olive oil, 7 g salt and 228 g all purpose flour (I used half all purpose and half white whole wheat) to the sponge and mix with the dough hook on low speed until incorporated. Add up to 1/4 cup additional flour if the dough is especially sticky.
3. Knead on low speed for 5-6 minutes until springy and soft, then turn out onto a floured work surface and form into a ball.
4.Lightly oil the bowl with 1/4 teaspoon olive oil, place the dough ball in and turn it around to coat it, cover the bowl with cling film and let rise 1.5-2 hours until doubled in size.
5. Place the dough on a floured surface, pat into a rectangle, divide into 8 pieces of about 80 g each and form each into a ball. Cover with lightly oiled cling film and let rest 30 minutes.
6. Pat each ball into a circle about 1/4" thick and let rest about 5 minutes.
7. Brush a cast iron skillet with olive oil and place on medium-low heat. Place pita bread in skillet and cook about 2 minutes then flip over and cook another 2 minutes. The bread should puff up and develop some golden brown spots and blisters. Flip again and cook another 30-60 seconds.
NOTE: if smoking happens and your pita starts to char, turn the heat down! Lesson learned.
8. Repeat with all pita and stack them on a plate tented with foil. Once cooled, enjoy!
I froze some of the cooled pita and enjoyed one a few days later, toasted, with hummus. Yup.
Why don't you give it a try?

