Italian cookie trials and more

It's already November and the holidays are creeping up on us - watch out!!

Lately I've been busy in the kitchen testing out some Italian cookie recipes for holiday gift boxes for a local café. Brutti ma buoni (ugly but good), a ground nut (hazelnut version here) meringue cookie . . . .

Ricciarelli - a classic Senese almond cookie . . . . .

Biscotti doppio cioccolato - double chocolate biscotti . . . .

of course I had to dip some in chocolate!

and semolina shortbread (sorry - no pic!). They all turned out pretty darn tasty!

In the meantime I'm cranking out my own petite shortbread for some sample give away boxes.  I love to hand out goodies for folks to try.

Eight flavors of goodness

Recently I made a batch of reverse puff pastry to have on hand for whatever might come along.  And, being apple season, there's nothing like the combo of buttery puff and lightly sautéed, caramelized apples.  Yum, yum.  Here are some chausson aux pommes I made a couple of weeks ago.

Last week I visited Aquinas College's Browne Center to speak to the ladies there about getting on their "lifelong learning" adult education schedule to teach some pastry classes.  Yeah!

I never like to arrive empty handed so an assortment of treats was in order. In a slightly different take on a chausson I rolled out some puff, cut hexagons, brushed with milk and sprinkled with sugar . . .

and baked them.

puffed and sparkly

I make an indentation in the top of the baked puff, top them with a scoop of the above mentioned apples, drizzle some caramel on and bake them again just to warm the apples through.  So delicious.

I included these apple feuilletée along with matcha-berry financier and some gateau Breton aux amandes et confiture in the goodie box for the Browne center crew.

A brief postscript to the above:  I wrote about gateau Breton in my last post, but this time I topped the dough with either apricot or four fruits jam, a ring of almond cream and some sliced almonds before baking.  What buttery, nutty goodness.

all baked and ready to eat

Lots of fun and much more to do before New Year's Day hits!

Stay tuned.

Gateau Breton

Perhaps I've mentioned this wonderful goodie in previous posts, if only to speak of its ease of preparation and its delightful taste and texture.  In the wake of making a walnut version recently, I thought it time to focus on Breton dough a bit more.  

Absolument!

Gateau Breton au noix

In Brittany a simple gateau Breton is a common offering for petit déjeuner.  It's hard to describe its texture - kind of a cross between cake and shortbread.  When you first take a bite, there is a crispiness to the exterior, but then you reach a dense, almost cake-like interior full of buttery goodness. So deelish.

Breton dough is in the sablé category of dough, but differs from some pâte sablés by changing up the sugar, butter and flour ratios, adding more egg yolks plus baking powder, not a typical ingredient in shortbread and tart doughs.

There are many Breton dough recipes out there.  Most of them utilize equal weights (or close) of sugar and butter in addition to a number of egg yolks, and an amount of flour that is usually about 2 times by weight of that of the sugar or butter.  You can replace some of the flour with a ground nut flour of choice, e.g. almond, pistachio or walnut. Tons of variations exist!

The beauty of Breton dough is its ease of mixing and shaping.  Plus, depending on how thick you bake it, you'll end up with a crispy shortbread (baked thin) or a classic gateau Breton (baked thick).  How can you go wrong with those choices?!

For my walnut version I used Christophe Felder's sablé Breton recipe from his book Les Folles Tartes, replacing the almond flour with toasted, then ground walnuts (toasting nuts before using brings out their flavor!).

I'm a pastry chef who takes lots of notes.  In Felder's book the dough is described thus:  "sablé aéré et léger", and my notation of 2/11/11 was "c'est vrai!" On that date I baked this Breton dough in 60 mm rings and served it with ricotta custard, almond nougatine and a blackberry/raspberry sorbet.  Wow! 

How can something be dense yet airy and light at the same time?  You just have to taste it to understand.

I've since created versions of Breton tarts by topping the dough with almond or pistachio cream and berries or cherries before baking.  You can also add a layer of raspberry or apricot jam (or any flavor you want!) between two layers of dough before baking.  Or bake it plain and top with citrus curd and fresh fruit or coconut cream, candied lime zest and chopped crystallized ginger.  Just use your imagination!

On to the recipe.

les ingredients

There are different methods of mixing the dough - I use the one I learned at LCB in Paris in which one puts all the ingredients except the yolks in the mixing bowl, brings it to the crumbly stage, then adds the yolks and mixes just until the dough comes together.  So easy.

Here goes.  Place 140 g sugar, 150 g diced/cool butter, 200 g all purpose flour, 70 g ground toasted walnuts (almonds if you're following Felder's recipe), 1 teaspoon baking powder and 1/2 teaspoon salt in the mixing bowl.

NOTE:  Felder calls for 20 g baking powder which is about 2 tablespoons.  I opted to cut it back so as to avoid too heavy of a baking powder taste.

Mix with the paddle on low until coarse crumbs.  Have 3 egg yolks standing by.

ready to start mixing

coarse crumbs

Now add the 3 yolks and blend just until the dough comes together.

c'est fini!

I baked my gateaux Bretons in 80 mm (~3") wide, 2.5 cm (1") tall open rings.  Butter them first and place them on a parchment lined sheet pan.  Heat the oven to 325ºF (I use convection).

Here's the beauty of Breton dough.  When baking it this way, you don't have to chill it or let it rest first.  You can simply press it into place.  I divided the dough up among 6 rings ( ~105 g per ring) and pressed it down evenly.

all divided up

all pressed down evenly

On a side note, if you're baking this dough as a thin cookie, you should wrap and chill it for a couple of hours first.  Then you can roll it out on a lightly floured surface and cut shapes of choice.

Bake these gateaux for about 20-25 minutes and REMEMBER - always watch what's going on in your oven. You're looking for golden brown deliciousness, and the dough should have risen up along the edges of the rings.

golden brown

looks yummy

Let cool for about 10-15 minutes before gently removing from the rings.

I served the gateaux with warm, sautéed plums prepared as follows.

Thinly slice 4 plums, toss them with a bit of lemon zest,  about 1/4 cup of vanilla sugar and  a couple of teaspoons of cornstarch . . . .

all mixed up

then sauté them over med-low heat until the juices are released and start to thicken, 5-10 minutes.

thickened up and ready to go

And the piéce de resistance . . . .

Gateau Breton with sautéed plums, chantilly cream and nut crumble

Très, très délicieux!

Happy autumn tout le monde!!

Autumn baking and an afternoon tea medley

Once again it's been a long time since I've posted here - moving, unpacking, getting settled, painting rooms, figuring out our flow in the kitchen - it all takes awhile.  But now it's officially autumn and yes - it's baking season!!!

The weather here in western Michigan has been pristinely fall of late - cool, breezy, bright and sunny with leaves starting to turn those beautiful reds and oranges that make this time of year so gorgeous.

My last post in early August focused on a rustic peach crostata, and, at the risk of sounding like a broken record, I've continued on in a rustic galette vein (in Italy it's crostata and in France galette) since there have still been late season peaches and berries available at the Fulton Farmers Market.

A few weeks ago I made two galettes for a friend for her Sunday family dinner, and then recently taught my first "guest chef" class at the GR Downtown Market.  And guess what we made - individual galettes - yeah!  So easy and soooooo delicious.

On a different note I continue to contemplate how I'd like to pursue my pastry metier here in Grand Rapids. Aside from teaching classes, afternoon tea is still on my brain - where might I be able to offer such a calming, delicious experience - time will tell, right?  I'm making some connections and working at it "slow by slow" as brother-in-law Jim is fond of saying.

Speaking of afternoon tea, I was invited to share that experience with a former surgical mentor and colleague just the other day.  Of course I HAD to make an assortment of goodies to bring to the occasion.  And, to make that adventure even more enjoyable, our new Kitchenaid range is delivering perfect baked goods!

So it was moelleux chocolat, matcha financier, pear almond tartlets, sablés au miel et herbes de provence, sablés Earl Grey thé and cherry scones with lemon curd that accompanied me to my teatime with Dr. T.

pear almond tartlet, shortbread and scones

It was an enjoyable hour spent chatting about what the years have brought, hopes and aspirations and even how important it is in the medical world today to treat patients as people, not statistics.  I'm on board with that!

So now my head is swimming with ideas for upcoming blog posts, getting back to baking croissants, tarts and shortbread and putting aside (at least temporarily) the unpacking, sorting, organizing, arranging and painting that has been taking up so much of my attention in recent weeks.

It's fall after all!

Michigan peaches and a rustic crostata

It's peach season in Michigan again!!  Love, love, love it.  The photo below is actually one I posted back in October, 2014 from last summer's crop.  Deelish.

Fulton St. farmers market

It seems this summer has been taken up by trips back and forth between Providence RI and Grand Rapids, MI, as well as all the things that have to be done when moving and buying a condo - changing addresses, setting up new accounts (oh boy - more passwords!!!), spackling/sanding, painting and more, more, more.

Even so, I've been able to whip up a few different rustic crostatas in the past week or so.  Planning ahead for some family occasions I made a 3-crostata batch of pâte brisée sucrée (a slight variation on my usual pâte brisée with the addition of egg and a bit of cream), some of which went into the freezer until needed.  I find the texture and flexibility of this dough lends itself very nicely to the necessary dough pleating for a crostata.

Here is one version I made for Mom's birthday with Red Haven peaches plus a few blueberries (Michigan of course) and raspberries tossed in for extra measure.  Add a nice scoop of vanilla ice cream and you're all set.

nice and juicy

love that fruit

Happy birthday Mom!

Gâteau au yaourt and an interesting French measure

A few weeks ago our British friends, Richard and Pauline, came to Michigan for a visit.  They were kind enough to present me with a small gift - a new baking book!  It's in French (which is great practice for me) and is entitled DESSERTS de notre enfance.  

Chock full of classic French cakes, tarts and childhood treats, it soon had me making a list of the goodies I'd like to try.

One recipe that caught my attention was gâteau au yaourt, not so much for its subject but for the method of measurement - a pot de yaourt!  And to top it all off, I had some yogurt in the fridge that needed to be used up.

pots de yaourt measurements

After further research I learned that this is a very familiar and popular childhood French cake often served for le gouter (afternoon snack time) or for breakfast.  It's also one of the first cakes French kids learn to make - so easy!

So I asked myself - "how much is actually in a pot de yaourt?"  Off I went to the trusty internet and found that the majority of pots de yaourt  sold in France hold 125 grams.  I also found a couple of sources that gave me some of the comparable weights and measures for one of these pots:  liquid volume 125 ml; sugar 125 gm; flour 85 gm; rice 125 gm just to name a few.

It took me back to baking books from days of yore in which a recipe might instruct using a "juice glass" or a "coffee cup" as standard measures.  And so it is with the French - perhaps un verre of something or a noisette de beurre is called for; or a c.à.s. (cuillère à soupe) or c.à.c. (cuillère à café), both standard size spoons (akin to our tablespoon and teaspoon) that are typically found in the average kitchen.

But before moving on to making the gâteau au yaourt I had to do a little testing of my own using a 5.3 oz/150gm container of cherry yogurt.  I played around, separately weighing liquid, sugar and flour in the clean and dry container, then did a little math to compare what similar weights would be in a 125 gm yogurt container.  They came out pretty darn close to the figures I had discovered on line (don't worry - I won't bore you with the details).

Now let's make gâteau au yaourt!  

Since I don't have all my baking pans with me in Michigan yet, I rummaged around in Mom's cabinets and found the two different sized loaf pans she's used for many years, from meat loaf to banana bread.  I knew my batter would weigh about 780 gm, so I checked the pan volumes by weighing water in them.  That confirmed for me that the larger of the two pans (see photo below) was just the ticket - the batter would have overflown the smaller pan.  The pan I ended up using is not typical of the standard loaf pans one finds these days.  It's longer, narrower and straight-sided - very nice in fact.

Mom's longer, narrower loaf pan

The gâteau couldn't be simpler.  Butter and flour a medium loaf pan and heat the oven to 350º.

les ingredients

In a medium bowl mix the dry ingredients:  2 pots de yaourt of sugar (equal to 250 gm, although I decreased it to 225 gm, similar to my standard cup of sugar); 3 pots de yaourt of flour (equal to 255 gm which I rounded up to 260 gm or 2 cups); 2 teaspoons baking powder; 1/2 tsp kosher salt.

In another medium bowl whisk together the wet ingredients: one pot de yaourt (125 gm, although I used the full 150 gm of my cherry yogurt - figured the extra bit would add moisture to the cake); 2 large eggs; un demi-pot de yaourt  (63 gm or 1/4 cup) of vegetable oil and 2 teaspoons of vanilla extract.

Make a well in the center of the dry ingredients, pour the liquid mixture in and gently incorporate all with a spatula.

wet on dry

Fill the prepared loaf pan . . .

ready for the oven

and bake approximately 50-55 minutes.  Smelling good!

just out of the oven

Cool in the pan for 10-15 minutes then turn out onto the cooling rack to cool completely.

The end result had a nice crispy exterior and the cake had a good heft to it.

Upon slicing it's easy to appreciate the dense crumb.

The flavor was very pleasant, having the nuance of the cherries from the yogurt; the texture was definitely that of a pound cake.

Steve, Mom and I enjoyed it with some Talenti vanilla bean gelato - not a bad way to wind out a hot and muggy Saturday night.

It's summer after all!

Jour de l'Indépendence et les tartes aux saison - cerises et fraises

Happy July 4 tout les mondes!

Steve and I visited the Fulton Street Farmers Market here in Grand Rapids MI yesterday with the express purpose of buying fresh cherries for the tart I was planning for the day's celebration.

Not only did we find cherries, cherries, cherries but soooo much more.  The covered outdoor market is a colorful and enticing destination with all manner of veggies, fruits, perennials, herbs, meats, cheeses and a smattering of local artisans selling their wares.  And surely I've omitted some of the other goods we saw.

Fulton Street Farmers Market

As is often the case, I plan my tarts (and baking in general) around what fridge stock needs to be used up. This time it's ricotta and buttermilk, both perfect complements to fresh summer fruit.

I decided to bake two different tarts as a way to highlight some of the local seasonal fruit.  I was already planning on cherries but when I saw the strawberries, they looked so succulent I couldn't pass them up. I also bought a small box of California lemons for only ONE DOLLAR (such a deal!) - perfect for my lemon buttermilk filling.

So the day's duo includes tarte citron aux fraises and tarte aux cerises/vanille/ricotta.

laying out the fruit

I used my favorite pâte d'amande, blind baked, for both of the tarts.  First up is the tarte citron which is actually a lemon buttermilk tart à la Emily Luchetti.  She makes hers with raspberries baked in the tangy filling, but I baked it sans fruit, saving my fresh strawberries for the after baking garnish.

ready for blind baking

The filling is trés simple and is made by whisking together 3 large eggs, 1 1/2 cups sugar, 1 1/2 cups buttermilk, 2 tablespoons heavy cream, 1 tablespoon fresh lemon juice, 1/4 teaspoon vanilla extract, 8 tablespoons melted unsalted butter, zest of 2 lemons, 1/3 cup flour, 1/4 teaspoon salt and a pinch of ground nutmeg.

working on the filling

Pour the filling into the blind baked crust and bake at 325º for about 50 minutes until set.

just out of the oven

Once cooled I garnished the top with fresh strawberries brushed with a hint of vanilla syrup for a bit of sheen.

Next up - the cherry/vanilla/ricotta tart.  This filling is another straight forward preparation, made by whisking together 4 large eggs, 1/2 cup sugar, 1 tablespoon flour, the seeds scraped from one vanilla bean, plus 1 teaspoon vanilla extract and 2 cups ricotta (whole milk or part skim - your choice).

les ingredients

Pit and halve 1 1/2 cups of sweet cherries and place them on the bottom of the blind baked tart shell.

Pour the filling over . . . .

ready for the oven

and bake at 350º for about 30-35 minutes until set.

just out of the oven

Once cooled I garnished with a central pile of whole, unpitted cherries just for fun.

Nothin' fancy here folks!

Time to eat.

Slicing was a bit messy.  Steve and I shared a sample piece of each.  The lemon buttermilk was tasty with a nice tang that went well with the fresh, ripe strawberries, but we both found the cherry ricotta lacking a little something.  The texture was smooth but there wasn't much bold cherry flavor to complement the ricotta custard, and I would have liked a more intense vanilla component.

All in all not bad but next time I'd roast the cherries in raw sugar ahead of time (as I've done for gateau Basque) to provide a richer cherry experience.

So Happy Birthday USA!  On to the fireworks!!

A couple of delicious restaurant desserts

I cannot believe it's been a full month since I've posted anything here!  Moving from the Northeast USA to the Midwest seems to be taking up a good deal of our time.  I've already missed the bulk of the Michigan strawberry season, thinking last week that I would make a tarte aux fraises that, alas, never materialized.

Although it did feel good to squeeze in a batch of ricotta buttermilk scones the other day and start to dream of a Michigan cherry ricotta tart for July 4th.

Recently we took a short 2-day trip to Traverse City and the Leelenau Peninsula with our British friends, Richard and Pauline.  We enjoyed picture perfect Michigan summer weather as we toured around the Sleeping Bear national lake shore and dipped our toes in Lake Michigan (Richard actually went in, head under!).

Richard and I running down the dunes at Sleeping Bear

Prior to the trip we had been given some dining recommendations by Patricia Christopher, a fine chocolatier in Grand Haven that we met a couple of months ago.  One of those was Trattoria Stella in Traverse City, very big on the farm-to-table approach.  We enjoyed the food although the service seemed a bit frenetic and the servers somewhat stiff and serious as they delivered their obviously choreographed lines.  Hey folks - lighten up!

I normally skip dessert but when it was time for that portion of the meal, I was intrigued by the choices, since typically I find many restaurant dessert menus to be unimaginative and not all that enticing.

I chose the strawberry-hummingbird option which turned out to be a delicious tart with a hummingbird tea infused custard baked in a lovely crust, topped with lemon ice cream and fresh strawberries and garnished with "hummingbird nectar glaze".  It was very nicely done!

Upon briefly researching hummingbird tea I discovered it's a blend of rooibos tea and hibiscus (apparently very attractive to hummingbirds).  You learn something new every day.

Once we returned to Grand Rapids from the north country Richard and Pauline were kind enough to treat us to dinner out in downtown GR before they took off for Chicago the following day.

I had been to Reserve Wine and Food once before for a wine tasting and thought it deserved another visit.  It's in a refurbished bank and is touted as a "hip and elegant locale" highlighting "farm to fork" cuisine.

After we had finished our delicious, well prepared and nicely presented meals, imagine my surprise to see a Basque cake on the dessert menu!  Whoa baby, now you're talking my lingo!!

Pauline and I both went for it, but since they only had one serving left, our server split it for us and added a nice scoop of vanilla ice cream "for your trouble".  Topped with a strawberry-rhubarb compote, it was deeeelicious.

Yessiree, it's good to be back in Michigan and see how far the culinary scene has come since we lived here 21 years ago.  And it's only the beginning!

Crunchy topped choux

As a brief respite from traveling, moving and trying to figure out where we're going to live, I wanted to prepare something for dessert for my Aunt Marian's birthday lunch.  Part of the reason Steve and I are transitioning back to Michigan is so we can be on the ground, as it were, to lend a hand to my Mom and her sibs and sibs-in-law, all of whom are aging as we speak.  But then, aren't we all??

At first I was going to turn to one of my standards - financier, a tart of some sort, shortbread - all the usual suspects.  And then my thoughts turned to choux!

Some years ago while visiting my pastry friend Misato in Mulhouse (Alsace) I was perusing one of her pastry books by Jean-Michel Perruchon.  I was intrigued by the recipes for crunchy topping for pâte à choux, as well as the different fruity variations of pastry cream - a whole new world opened up to me!

Since then I had tried the crunchy topping thing as well as a pear pastry cream version for a tart I created and found them very satisfying.  For some reason I put those ideas aside as other things in the pastry world seemed to grab my attention.

But now, as I reviewed Dorie Greenspan's "Baking Chez Moi", I found her recipes for "Crackle-Top Cream Puffs" and "Bubble Eclairs".  The wheels started spinning.

Inspired by raspberries on sale at Meijer for $1! per 6 oz, I decided to make a raspberry pastry cream to fill my version of "bubble-crackle-top eclairs".


OK - so let's get to it.

First - the crackle-top dough.  This is basically akin to a crumble - mix 64 gm cool, diced butter, 100 gm sugar (in this case brown sugar), 85 gm all-purpose flour, a pinch of salt and 3/4 tsp vanilla extract . . . .

les ingredients

and form a rough dough that just holds together.

crumbly but holds together when squeezed

Form a disc . . . .


and roll it to 1/16" thick between two sheets of parchment paper.


Freeze it for a couple of hours (or until ready to bake your choux puffs), then cut into rounds that will later top the puffs.  You can hold this dough frozen and wrapped for many days!


I wrapped the scraps and froze them for another time.

Second - the pastry cream.  The beauty of this is its make-ahead-by-a-day-or-two feature.

Initially I found the whole idea of a fruit version of pastry cream (hmmm, fruit puree and milk?) kind of odd.  But, as I thought about it, we use fruit purees and dairy in many ways -ice cream,  smoothies, cheesecake, mascarpone cream to name a few.  Instead of using only milk as the liquid base as is typical for standard pastry cream, one can create variations by using a combination of fruit puree and milk, proceeding with the very same process used to make pastry cream with egg yolks, sugar and cornstarch.  I like to think of it as a cross between pastry cream and curd.

I wasn't sure how much puree my 12 oz of fresh raspberries would yield, so I smooshed and strained them with a yield of 215 gm.  Now I could figure out the quantities for the remaining ingredients.

In Perruchon's recipes a greater proportion of fruit puree is used compared to the milk e.g. 500 gm puree + 100 gm milk.  I tweaked the proportions based on my 215 gm of raspberry puree, using equal weights of puree and milk.

To sum up, my recipe used 215 gm raspberry puree, 215 gm whole milk, 95 gm egg yolk, 77 gm sugar and 40 gm cornstarch; 20 gm butter is added at the end of the cooking process.  If you don't know the standard process for making pastry cream, you can find many sources on line to help you.

Once the raspberry pastry cream was made I covered and chilled it until I was ready to use it the next day.

Next up - pâte à choux.  For this I went with my standard recipe from Michel Roux - in a medium pan bring 125 gm milk, 125 gm water, 1 1/2 tsp sugar, 1/2 tsp salt, 100 gm diced butter to a boil; remove from the heat and stir in 150 gm flour all at once; place back on the heat and stir for a minute or so to dry it (you'll see a thin film on the bottom of the pan); stir in 4 eggs, one at a time, until you have a smooth, silky paste.

Here is the panada (the paste before the eggs are added) . . . .

check out the thin coating on the bottom of the pan

and after the egg addition . . .


silky smooth

I piped out the puffs in series of three, each ball snuggling up to the next . . .


and topped them with the chilled crackle dough rounds.


ready for the oven

 Pretty cool!

Bake them at 375º for about 35 minutes until the tops are browned and the puffs are golden and firm to the touch.


Oh yeah - lookin' good!

Once the puffs are cooled it's time to garnish.

I typically lighten my pastry cream with a small percentage of whipped cream.  In this case I blended 100 gm whipped cream into my raspberry pastry cream.

whipped cream and pastry cream ready to be blended together

One can garnish puffs or eclairs in two different ways - slice the choux, pipe the cream decoratively on the bottom half and sandwich- OR fill the choux from the bottom.


the non crackle-top in the foreground was my practice version!

I opted for the fill-from-the-bottom technique, finding it much more user friendly than slicing each one in half.  Plus, I've filled a LARGE share of puffs and eclairs over the years, and it's like riding a bicycle.


Poke holes in the bottoms and, using a pastry bag with a 6 mm tip, fill each section until the cream starts to ooze out of the adjacent holes.  That way you know you've filled adequately.  Once you've done this multiple times you begin to understand what the "heft" of a well filled puff is all about.

I'm told that Parisians get mighty peeved if their eclairs and profiteroles aren't filled properly!

I scrape the excess off with a small offset spatula, place them crunch side up and dust them with powdered sugar.  And we're off to the races!


These were well received by the family, who had gathered at Uncle John's Clear Bottom Lake cottage to celebrate Aunt Marian's 86th birthday.  The crunchy top is such a wonderful contrast to the cool, creamy filling and the light as air choux.  I enjoyed the raspberry cream, although Steve still holds out for classic pastry cream (praline and chocolate are some of his faves too).

Happy Birthday Aunt Marian!

Moving, moving, moving and more hazelnut flour!

Wow - it seems like a long time since I've written about baking and delectable goodies!  I miss it but soon I'll be back in the saddle, as the old cowpokes say.

Steve and I are in the midst of our transition from Providence, RI to Grand Rapids, MI so my time spent in the kitchen has dropped pretty dramatically in recent weeks.  Yet . . .  I still have a few ingredients to use up, particularly the seemingly never ending supply of hazelnut flour in my freezer.

Soooooo - since we were planning on Memorial Day weekend supper at Dick and Dorothy's I developed a plan for dessert - the always popular pavé aux noisette, but this time with lime ice cream, blackberry sauce, fresh berries and toasted almonds.  YUM!

And, in addition, since making ice cream gives me egg whites to use up, I made a chocolate chunk hazelnut version of financier.  Delicious.


chocolate chunk hazelnut financier

hazelnut, lime, blackberry dessert

As the school year comes to a close and summer creeps up on us I suspect many of you will be spending more time out of doors and less time dealing with a hot oven.  It's only natural.

But for me, once we're settled in our new home (as yet to be determined), you can bet I'll be sharing my baking adventures with you.  Stay tuned!

A trio of treats for Sunday lunch at Mom's

Steve and I are currently in Grand Rapids spending time with my mom through the Mother's Day weekend.  She had planned a Sunday luncheon for a group of 12 lady friends so, of course, I had to make something for dessert!

The plan - blueberry financier, moelleux chocolat and Breton shortbread with orange mascarpone and fresh citrus garnish.

lovely colors for the plate

working on the plating

All in all pretty straightforward - chocolate, moist almond cake, buttery Breton, a bit of fruit and some orange zested cream.  What's not to like?

the final medley

It's always fun to put a trio together!

Gateau Basque from Christophe Felder

Hmmmm - Gateau Basque - now just what is that all about?  Well let me tell you.  It's a traditional Basque butter cake baked with a pastry cream filling and/or cherry jam (for those of you who like fruit in your desserts).  It's kind of a cross between a cake and a tart and leans toward either of those depending on which recipe you use.  More about that later.

Gateau Basque (let's call it GB) was one of the first cakes we made in the basic pastry curriculum at LCB in Paris.  We were told then that one can make it with pastry cream and cherries or can substitute prunes or dried apricots.  As I researched it online I found pictures of many variations for this cake - some with only pastry cream, some with only cherries (black cherry jam to be precise) - including a couple of chocolate versions and one with a pink tinged (cherry? strawberry? raspberry?) pastry cream filling.  Let's hear it for artistic license, eh?

Below are the individual versions of GB that I made in my pastry studio at Hope Artiste Village a couple of years ago.  I used the LCB recipe from my schooling days and baked them with pastry cream and dried tart cherries that had been plumped up first in hot water ( you could use cherry juice or liqueur if you wanted).


When I was reading up on the topic back then, I remember one source (can't for the life of me tell you where I found it!) advising that a good GB should be one in which the interior pastry cream layer becomes one with the dough during baking, sort of melding into it without being identifiable as a distinct layer.  That's how the above LCB versions came out, and they were tasty!  Buttery, crumbly, yet cake-like, not too sweet and oh-so-good with a cup of coffee or tea.

Now, as I review the topic again, I see many photos of the sliced cake showing very distinct pastry cream/fruit layers.  That seems to be the way of it.

On to the task at hand.

This time I opted to try Christophe Felder's GB recipe from his book Patisserie!.  His leçons focus on a particular component e.g. a type of dough or pâte and carry that through to a finished product.  I like that. 


As I compare his recipe with LCB's there are several variations - his has a bit less butter, less sugar, fewer eggs and calls for almond flour along with all purpose flour.


He treats this dough like a tart dough, whereas the LCB recipe uses it more as a batter (and a very thick one at that). 


les ingredients

For the pâte à gateau basque place 175 gm soft butter, 125 gm sugar, 85 gm almond flour and the zest of one lemon in a mixing bowl.  Blend it by hand with a spatula or in the mixer with the paddle attachment on low speed.  Then blend in one egg yolk plus 25 gm of beaten egg (1/2 an egg) followed by 225 gm all purpose flour and a pinch of salt.

I mixed it until it looked like large curds (as seen below),


then brought it together by hand.


Wrap it up and into the fridge it goes for a couple of hours.

In the meantime I made a batch of basic pastry cream in the usual fashion using 250 ml whole milk, 3 egg yolks, 45 gm sugar, 20 gm cornstarch and a tablespoon of hazelnut liqueur (in place of the recommended rum) whisked in after the cooking process.


crème pâtissière

I like to cool the pastry cream on a plastic lined quarter sheet pan, folding the plastic over it to eliminate air and pop it in the fridge.  It doesn't take long.

Next up - the cherries.  Since I preferred not having a jar of leftover cherry jam (Christophe calls for 150 gm confiture de griottes) on my hands, I roasted 150 gm of frozen cherries with a couple of tablespoons of raw sugar and a pinch of salt at 450º for about 8 minutes (watch carefully so they don't burn!).  Then I added a couple tablespoons of hazelnut liqueur and gave them another 5 minutes in the oven.


before roasting

after roasting

I poured the cherries onto a clean flat pan and let them cool to room temp which allowed the syrup to thicken up a bit.

Now for the assembly.

Remove the chilled pâte from the fridge and divide it in two.  Butter an 8-9" round pan, line the bottom with parchment and butter and flour that.

my nod to Mickey Mouse

Roll out each of the pieces of dough slightly larger than the diameter of your pan.


Trim off the excess and place one round into the prepared pan.  Roll the scraps into a long snake and place it around the periphery of the pan, gently pressing it in to adhere it to the sides of the pan and the bottom dough layer.


I piped a layer of pastry cream over the bottom, topped it with the cherries and finished off the cream over the cherries.


Note - you can put the cherries in first and pipe the cream over them, or pipe all the cream in and top with the cherries - it doesn't really matter.

Take the second round of dough and place it over the filling.  Tuck it in nicely around the edges and remove the excess.


I used most of the dough to create a nice rim all the way around, leaving very few scraps.


almost ready for the oven

Give the surface a brush with egg wash, pop it in the fridge for a few minutes, give a second coat of egg wash and create cross-hatch marks with a fork.


At LCB we were told that there are a variety of patterns one can use.  As I understand it, in true Basque fashion, certain surface markings indicate what type of filling is inside i.e. cream only or jam only.  I basically winged it with mine.

Bake in a 350º oven for approximately 40 minutes until golden.


Once cooled a bit, turn it out of the pan and let cool on a wire rack.

Whew!

I served this for dessert after a traditional Indonesian nasi goreng feast prepared by sister-in-law Dorothy's long time friend Jeanette from Toronto.  And what a feast it was!

What you see below are all of the cold portions of the meal which accompanied warm dishes of Indonesian fried rice, pork satay, coconut shrimp, beef with onions, chicken and various sauces.

My apologies Jeanette - I can't do the descriptions justice, but it was one delicious repast!


I felt almost too full for dessert, but the group was ready and willing so away we went.


Topped with crème chantilly and toasted almonds this was a delightful surprise.  While being in no way related to Indonesian food, it still seemed to fit the bill (more like a tart than a cake, not too sweet, buttery and cookie like) as a perfect ending to a meal full of flavorful contrasts.

The pastry cream/cherry layers remained distinct and certainly didn't detract from the overall experience, but in the future I think I'll go back to the LCB recipe.  In a nutshell its texture and overall flavor win out in my book.

And there you have it.


Glace à la ricotta et macarons craquelé aux noisettes

Making ice cream at home is a special treat, and now that spring weather has finally appeared here in Providence, it seemed right to make a batch of creamy goodness.


Hurray!!

For those of you who aren't familiar with them, many basic home ice cream makers (lets call them ICMs) come with a special insulated canister that has to be frozen before use.  I like to pop it into the freezer at least 24 hours ahead of when I intend to use it - it has to be brrrrrr cold.

My first ICM (many moons ago) was a Donvier brand, hand-crank version that had a simple handle that fit into the top and required turning every few minutes over the 20-25 minutes it took for the ice cream base to firm up.  It was a work horse and delivered some delicious stuff, but, of course, I couldn't wander off when I was supposed to be turning the crank.  Then I moved up to (and continue to use) a Cuisinart electric version that plugs in, turns on and churns the mixture for you.  It's been great.

But enough about that.

I had a container of ricotta in my fridge that was just begging to be used.  After considering a ricotta cake of some sort, a little light bulb went on . . . .  how about ice cream?!

For some years now I've been using a basic ice cream base recipe from David Lebovitz - it's delicious and can be "doctored" to create whatever flavor you might want.  He describes a ricotta version of it in a 2014 post, and I decided to run with it.

The base calls for 5 egg yolks, which means there are egg whites to be used later!!  Time for some rustic macarons to go with that ricotta ice cream.  Yes indeed.

First the ice cream.

les ingredients

David's standard base calls for 2 cups of cream and 1 cup of whole milk, whereas this ricotta version calls for 1 cup of cream and 2 cups of whole milk ricotta.

Start by making a basic crème anglaise.  Have 5 egg yolks ready in a separate bowl.  Warm 1 cup heavy cream with 1/2 cup sugar and a pinch of salt just until you see small bubbles forming around the edges.  Temper the warm mixture into the egg yolks then return it all to medium heat.  Cook while whisking until little bubbles form around the edges and the mixture just begins to thicken.  Don't boil!

Strain into a clean bowl placed in an ice bath and let cool, whisking periodically.


Once the mixture has cooled blend in 2 cups ricotta (see note below), 1/4 cup honey and a teaspoon of vanilla.


A note about ricotta - store bought varieties tend to be grainy, so to smooth it out I whizz it in my small Salton processor for a few minutes.


before whizzing
after whizzing
Still a bit grainy but definitely smoother.

Pour the finished mixture into a covered container and refrigerate.  I like to make my base a day ahead of the actual processing step - it thickens and matures in the fridge.


cover and pop into the fridge

When ready to "spin" the ice cream (as they say in the biz), just pull the canister from the freezer, set up the ICM, stir a teaspoon of fresh lemon juice into the base mixture . . .


pour it in and turn 'er on!


and away we go!

In about 20 minutes it becomes a lovely, thickened, creamy ice cream.  Yes.


et voila!

Planning for the use of my 5 egg whites and continuing to pare down my supply of hazelnut flour, I decided to make a rustic version of macarons.  I have always found the classic French macaron process to be fussy and often frustrating, so I definitely prefer a more "rough and tumble" end product that doesn't have to be so pristine and perfect.

Some years ago, while I was in the thick of macaron making at Gracie's, I purchased Stéphane Glacier's book un amour de macaron.  


After paging through the options I chose to make a noisette version of macaron craquelé aux amandes to accompany the ricotta ice cream.


Let's go.


les ingredients

Egg whites mount better when warm so I weighed out my 150 gm and let them sit a while in the mixing bowl at room temp while preparing the other ingredients.

Weigh out 125 gm powdered sugar and 125 gm hazelnut flour and whisk them up, breaking up any lumps with your fingers (alternatively you can sift the two together to achieve the same goal).

Weigh out 42 gm sugar in a small bowl, have a pinch of salt and 3/4 teaspoon lemon juice ready (for the egg whites).

Whisk the whites with the salt and lemon juice on low-med speed until they start to get foamy.  Then add the sugar and whisk on high to softly firm peaks.


love those peaks

Blend the dry ingredients into the whites in two steps, gently folding until just incorporated.


ready to pipe

Since I wanted a finished base on which to scoop the ricotta ice cream I piped out approximately 3 inch rounds on one sheet pan . . .


and smaller rounds (that would later be sandwiched with chocolate) on a second pan.


Into the oven they go (350º for about 15 minutes) until lightly browned and set.


little cuties
The beauty of these goodies is they hold extremely well in the freezer.  I made them a couple of days ahead of serving, so into the freezer they went.

On the day that I planned to serve this dessert, I sandwiched the little ones with a chocolate glaze (113 gm chocolate and 42 gm butter melted together over a bain marie).


I wanted some additional crunch so I baked up some honeyed hazelnuts for garnish.


It's time for dessert!

The ice cream was pretty firm, so I had to soften it up a bit for scooping.  Into the bottom of the bowl went a macaron round, followed by the glace à la ricotta (which got a little softer than I intended) and then a mixed berry and crunchy honeyed hazelnut garnish.  A couple of dainty chocolate sandwiched macarons along side and the deed was done.


et voila!
Now I'll admit that I snuck a taste of the ice cream right after processing it and, while the flavor was good, the texture was a tad grainy.  But somehow it smoothed out after a rest in the freezer for a day or two.

The final verdict - deeeeelicious!  The combination of fruity, nutty, crunchy and creamy was superb.  Just goes to show ya that it never hurts to try something new.


Cannelés Bordelais

cannelés Bordelais

I first made a Christophe Felder recipe for cannelés back in late winter/early spring of 2013 in my pastry studio at Hope Artiste Village in Pawtucket RI.  While the batter is trés simple I soon learned these delectable treats required baking in a hot oven (450-500º) for a good hour (or more!)   Since I couldn't justify dedicating the oven to one thing for that long, I didn't bake them on a regular basis.  But man are they good!

We're talking one tasty little tidbit.  With a custard like interior and darkly caramelized exterior they are a true taste and mouth-feel experience.


Also known as canelé de Bordeaux these babies are well known and very popular, not only in and around Bordeaux, but in many parts of France.  For years they have been baked traditionally in copper molds coated with beeswax, but, now that silicone molds are so prevalent, there's much less muss and fuss involved, especially for the home baker.

One of the big producers in France is Baillardran.  They have a shop in Paris, and when Steve and I were there in May, 2013 (soon after I had first made cannelés) we felt we HAD to try them.


yup - nicely caramelized

custardy pockets are de rigueur as I understand

Sad to say, we found them rather dry and unappealing, not like the delicious, custardy treats we had sampled at The French Tarte.

At any rate, fast forward 2 years to now.  Inspired by Dorie Greenspan's "Baking Chez Moi" it seemed only natural to try out her recipe for cannelés.


The batter preparation is straightforward and includes milk, sugar, butter, egg, flour, vanilla and usually rum.  Not being a rum fan, I substituted hazelnut liqueur.  Part of the planning involves making the batter at least a day before baking since it requires a good 12 hour (or more) rest in the fridge.


les ingredients

Here we go.  Bring 480 ml (2 cups milk), 150 gm (3/4 cup) sugar and 28 gm (2 TBSP) butter to a boil, stirring occasionally to make sure the sugar is dissolved.  Let it cool 10-15 minutes.

In a separate bowl sift 136 gm (1 cup) flour plus 100 gm (1/2 cup) sugar together.

Whisk 2 large eggs and 1 yolk in another bowl, then slowly add the warm milk mixture while whisking.  Then whisk in the flour/sugar mixture, beating vigorously as needed to blend everything.


ready to strain

Strain it into a clean bowl or pouring container and whisk in 2.5 TBSP rum (or liqueur of choice) and 2 teaspoons vanilla extract.


ready to cover and pop into the fridge

Cover and refrigerate for at least 12 hours (FYI - you can keep it in the fridge for several days).

On baking day brush the cannelé molds with melted butter and put them in the freezer for 30 minutes while heating the oven to 450º.


getting ready to butter the molds

When ready, take the batter out of the fridge and whisk it up, since the ingredients have a tendency to separate during their chilling time.  Fill each mold about 3/4 full.


ready for the oven

Bake at 450º for 30 minutes then lower the temp to 400º and bake another 30 minutes.  In my case I took Dorie's advice and removed one of the cannelé from the mold with a bamboo skewer so I could check the progress at about 40 minutes.


after a 40 minute bake

custardy pockets

I kept the remainder of the batch in the oven for another 10 minutes (total 50 minutes) and felt the browning was just right.


just out of the oven (the empty spot is the for the one I removed early)

Once out of the oven let them cool on a rack for 10 minutes before turning them out of the molds.


whoa baby!

not bad, eh?

Upon cutting one open the interior had the same custardy pockets as the one I had taken out of the oven ten minutes earlier.


So could I reduce the oven time in the future?  With these petite molds I say "yes"!  However, based on my previous experience a couple of years ago when I used a slightly larger mold, the cannelés required a full hour (if not more) in the oven.  Just remember that baking times vary depending on the size of the goods.

The moral of the story?  Pay attention to what's going on in your oven.

A quick note about the taste - firm and chewy on the outside yet with a moist and custardy interior.  In a word - delicious!

Steve took a bunch of these to work, later reporting that they were gone in 5 minutes and were enjoyed by all!

Yes, I would make these again (and again and again and again)!!


Hazelnut flour and Easter dessert Part 2: final assembly and tasting

Now for the finale of the 2015 Easter dessert!

But first a BIG thanks to Dick and Dorothy for a delicious Easter meal at their home.  Although the day dawned sunny and breezy it developed into a cloudy and (dare I say it) snow flurried afternoon.  Hey!  It's supposed to be spring already.

Just try and imagine the crocuses and tulips waiting to poke through the snow.


peering out of the sunroom windows

the Easter table

In my previous post I described the preparation of the various components for this hazelnut dessert.  So let's move on to the assembly, made so easy by having everything completed ahead of time.

I ended up using only one of the two hazelnut cakes I had baked, not wanting the final dessert to be too high.  After a thaw I split it into two layers, one for the bottom and one for the top.


Now it's a simple matter of building the stack.


I removed the still frozen custard/coulis/crumble layer (on the right in the photo above) from the form with a hot knife, then placed it on top of the cake.


After a short rest in the fridge to allow the custard to thaw and soften a bit, I added the second frozen custard layer and gently settled it in place.


On goes the top cake layer,


followed by a garnish of lightly sweetened whipped ricotta cream, a sprinkling of crumble,


and a few berries.


c'est fini

Now how about a little berry coulis and fresh blackberries with your dessert Ma'am?


The servings smushed a bit during the portioning part, but it didn't do the taste any harm.  A lovely combo of moist cake, smooth custard, somewhat tart berry and a hint of crumble crunch.

It seemed a bit sweeter than I was expecting but not excessively so - and the group gave it a thumbs up!

Not bad at all.

Thanks again D & D!


Hazelnut flour and Easter dessert Part 1: planning and components

As Steve and I get closer to our move back to Grand Rapids, Michigan in a handful of weeks I'm working on using up some of the ingredients in my larder.  My current focus is hazelnut flour.

I'm able to buy nut flours (primarily almond and hazelnut) here in Providence from the Virginia and Spanish Peanut Company, but they sell them in minimum 5 pound portions.  I go through almond flour fast, but I end up freezing the bulk of the hazelnut flour for periodic use.  I still have 3 lbs or so on hand, so I've been working on recipes that will help me reduce my stash before the move.

The other day I held a tart class during which we baked a hazelnut version of sablé Breton, garnished with an orange-zested, white chocolate pastry cream and some nut crumble.  Boy, was that tasty!

Being on tap for dessert for Easter dinner at Dick and Dorothy's, I turned to the recipes from my spring 2009 professional entremets course at LCB Paris.


I opted for my version of an almond-lemon-raspberry number, focusing on hazelnut-orange-fruits rouge as my flavor profile.  There's still a hint of winter in this combo, but, since Easter is on the early side this year, I figured this would be a last nod to late winter's tastes.  And besides, the weather hasn't figured out that it's spring yet!

Many chefs, whether savory or sweet, will sketch out a dish/dessert for assembly or plating.  I certainly don't claim to be an artist, but it's kinda' fun to draw out what one has in mind for a layered dessert (takes me back to those grade school coloring days).  It's all part of the mise en place.
    
In this case I was looking for a cake/custard/fruity/nutty ensemble.  Gotta have those contrasts!  And the good news is the components can be made several days ahead and frozen before final assembly.


First I created two 16 cm square cake "pans" by wrapping these bottomless forms in foil.  My intention was to make my components in the same square shape in which I would assemble them.


On to the prep!


les ingredients pour le pavé

For the pavé aux noisette blend 95 gm soft butter, 150 gm sugar, 2 gm salt and the zest of an orange.  Add half of 200 gm egg, then half of 190 gm ground hazelnuts; finish with remaining egg and ground hazelnuts, blending to smooth.


before the egg white addition

Whisk 100 gm egg white with 30 gm sugar to medium firm peaks . . .


and fold them into the butter/sugar/egg/nut mixture. 


finished batter

Butter the foil, divide the batter between the two forms . . .


ready for the oven

and bake at 375º for about 25 minutes (should look nicely browned and feel firmly spongy in the center).


nice!

Once the cakes cool, remove them from the molds, wrap and hold 1-2 days at room temp or up to 2 weeks in the freezer (the day before assembly place them in the fridge to thaw).

For the vanilla bean ricotta custard . . . .


les ingredients

blend 354 gm cream cheese, 177 gm ricotta, 112 gm sugar and the seeds scraped from one vanilla bean until smooth; blend in 2 eggs and 1 white, followed by 177 gm heavy cream until incorporated.  Pour into your chosen pan or ramekins.

I baked these in the same foil wrapped 16 cm square forms, placed in a water bath.  Steve was tickled that I had leftover custard to fill a handful of small ramekins to boot!


Bake at 300º for about 30 minutes until set.


Once the custard had cooled I put it in the freezer for 30 minutes or so, during which I made a mixed fruit coulis using IQF berries and cherries.


Thaw, puree and strain 227 gm/8 oz frozen fruit (yield 150 gm).  Warm the puree, add 20 gm sugar to dissolve, and whisk in 3 gm of bloomed sheet gelatin (softened in ice water and squeezed out).  Let the mixture cool a bit.

I poured it over one of the chilled custard squares, spreading evenly . . . .


and topped it with hazelnut/almond crumble, pressing it in gently.


Putting the crumble on the still liquid coulis and then into the freezer helps set the layers and keep them together for the final assembly.  The crumble will ultimately become the center layer of my creation (let's hope!)

Next up - final assembly and tasting!

Stay tuned.


Tarte aux fruits rouge pistache from Christophe Felder

Lately I've been delving into Christophe Felder's book Patisserie! in search of new recipes to try. Tarts being one of my favorite things, I settled on the first section of the book (Les Pates et Les Tartes)  and chose this one primarily because it uses a tart dough that I've never made.


Mmmmmm!

Even though I arrived at my list of favorite and regularly used tart doughs long ago, I can't resist trying a new one every now and then.  Just gotta' do it.

The array of tart dough recipes one can find is overwhelming, with so many variations on the theme, whether it's pâte brisée, pâte sablée, pâte sucrée or sablé Breton!  More butter? Granulated or confectioners sugar?  Greater butter to flour ratio?  Eggs, yolks?  Nut flour? A splash of cream?  The possibilities go on and on.

Felder's book has a great table at the beginning of the tart section giving an overall look at certain doughs' characteristics, how easy they are to make, what types of fillings work well with them, what oven temperature at which to bake them, etc.  Check it out if you get the chance.

Now on to the recipe for pâte brisée fondante and tarte aux fruits rouges pistache.  Let's go!  

The word fondante means "melting" which certainly gave me a clue as to how this might come out.  I compared the ingredients with a standard pâte brisée (flour, butter, water, salt and sometimes a little sugar) and found a higher ratio of butter to flour, plus a bit of egg yolk and milk in the fondante version.  And more butter definitely means "melt in your mouth".

Here's the dough:  mix 185 gm soft butter with 25 gm warm milk and 10 gm egg yolk; add a teaspoon fleur de sel and a teaspoon sugar; add 250 gm flour and mix just until it comes together.  Wrap the dough and chill it for a couple of hours.  (Note:  this dough amount was plenty for two 180 mm/7" tarts, plus probably one more).

When I took the dough out of the fridge and tapped it with my rolling pin to render it more malleable, I could appreciate the firmness of the buttery dough.  It rolled out pretty easily, although it was more stiff and breakable than other standard pâte sablée or pâte sucrée doughs I've used.

I lined the tart ring carefully (I made a 180 mm tart this time), pricked it with a fork and popped it into the freezer while I prepared the filling.

Now's the time to heat the oven to 350º.


I made 2/3 of the filling amount which turned out to be perfect for my 180 mm ring.


les ingredients

This is VERY easy!  For  2/3 recipe mix together 2 eggs, 16 gm almond flour, 66 gm sugar, 100 gm heavy cream, 16 gm melted butter, a splash of vanilla (the recipe actually calls for kirsch, but I don't keep that around) and a scant teaspoon flour.  In addition have 20 gm pistachios and 166 gm fruits rouges assortis ready to go.  I used a mixture of IQF raspberries, blackberries, blueberries and cherries.  Yum.


filling all mixed up

Sprinkle the pistachios and fruit into the shell (note - UNbaked shell!) . . .


love the colors

and pour the filling over.


ready for the oven

This baked about 40 minutes, pretty much on target with the recipe instructions.  You can tell it's ready when it nicely browned on top and the filling doesn't jiggle any more.


Once it's cool dust with some powdered sugar and serve it up!


Imagine my disappointment upon finding an unbaked center with a big dimple on the bottom - yuck!  That is one of my biggest pet peeves when baking tarts.


eeeuw!

When I read this recipe over the first time, I had a niggling sense in my brain that blind baking the crust was in order with this very liquid filling.  But Christophe Felder is a seasoned professional with an impressive resumé, so I decided to follow his lead.  Not.

The good news is that, in spite of the unbaked center, the tart was deeelicious and the crust definitely a "melt in your mouth" experience.

Not to be thwarted, I decided to take one more go at this one but with a blind baking approach.  Particularly with the lining step, one has to be very gentle and careful with this dough.

I started the bake with weights, but when I removed them there was a crack in the bottom crust.  I took a small piece of raw dough to patch it and finished off the blind bake.  Whew!  Is this really worth it??


Then, just to be sure, before putting the filling in, I brushed the bottom with egg white to seal it.  No leaks allowed here, folks.


c'est fini!

The crust developed a nice light golden color, although you can appreciate some cracking in parts of the periphery.

The good news is a well done, non-dimpled center bottom crust.  Now we're talking.


And it's still "melt in your mouth" delicious.

Moral of the story - blind bake first if you have a really loose, liquid filling!

Yes, I would make this again.


Mille-feuille chocolat - chocolate puff and other stuff

Before I start on the topic at hand, here are some pics of the delectable chocolate bread pudding I made using the left over chocolate croissant spirals from my last post.  I diced up the spirals, poured a basic chocolate custard over the pieces in my favorite square C&B ramekins, sprinkled on some vanilla sugar and baked 'em in a water bath.


just out of the oven

Just imagine one served warm with a scoop of vanilla ice cream.  Yes, indeed.

Now on to the task at hand.  What most of us know as napoleon, mille-feuille (literally "a thousand leaves") is that classic combination of puff pastry layered with vanilla pastry cream.  Of course, as is true of pretty much any classic you can think of, there are a multitude of ways to create variations on the theme.

Years ago, before pastry school was even a gleam in my eye, I made versions of this dessert using good old Pepperidge Farm puff pastry sheets, cut into squares and baked, then simply layered with a cream or custard and fresh fruit and/or a fruit coulis.  Always good.

Once pastry school was under my belt and I experienced what Paris had to offer, mille-feuille was often on my tasting hit list.  During my stage at Pascal Pinaud's shop on rue Monge in the 5th, raspberry-lemon mille-feuille was offered as a special treat only on Sundays.

When done well, the combination of crisp, flaky, buttery puff and smooth and creamy custard can't be beat.

Flash forward to the spring of 2013 when I took a class at Christophe Felder's school in Paris on mille-feuille chocolat.  I purchased his pastry tome Patisserie! and have been drawn into it lately to refresh myself on the classics as well as get inspiration for some new ideas (new tart coming up soon!).  My eyes lit up at the recipe for mille-feuille chocolat and off I went on a trip down feuilletage chocolat lane.


This recipe calls for cocoa powder added to the détrempe, just as in my recent chocolate croissant experiment.

les ingredients

I made half a recipe:  250 gm flour, 30 gm cocoa powder, 130 ml cold water, 43 gm melted butter and 5 gm salt mixed together just until everything is incorporated.


the creature from the Black Lagoon!

The détrempe felt dry, and it looked a lot more blotchy than when I make regular puff pastry.  I gave it a couple hour rest in the fridge and prepared the 168 gm butter block.


ready for the beurrage

Once I completed the beurrage and started the folds/turns the dough in general started to look a little better, but still blotchy.


after the first two turns - yikes!

But once all the turns were complete the dough looked and felt better - there was hope after all.


after six turns

I held the dough in the fridge overnight for use the following day.  Otherwise I would typically pop it into the freezer for another time.

When rolling out the puff for mille-feuille, it's important to roll it about 2-3 mm thick.  I divided the dough in two and rolled each piece to fit a quarter sheet pan.

It's important to let the dough rest - otherwise it shrinks when baking (as you'll see in the upcoming pictures).  It's also a good rule to freeze the rolled out puff for 10 minutes or so before baking to help stabilize the dough.


ready to bake

For comparison I baked one quarter sheet with a cooling grid over the pan (seen above) to help limit the puff's rise and the second one topped with a piece of parchment and a second sheet pan to weigh it down (the generally recommended method to keep puff under control).

I did NOT prick either one with a fork, having found instructions on line with and without (Felder's approach) fork pricking.

What really happened in the oven?  The weighted down version puffed anyway, and I actually pushed it down a couple of times during baking to try and keep it flat.

The one with the grid over it puffed up to the limits of the grid, but it ended up more irregular with undulating waves across the surface.

And both of them shrank.


Having chosen the weighted down piece for my assembly, I trimmed the edges and cut it into thirds,


and then a dust of powdered sugar and under the broiler for a couple of minutes to caramelize.


On to the assembly!

I made a simple whipped ganache filling using 250 gm heavy cream and 70 gm chocolate.  While I was piping the first layer I was reminded of the radiatore pasta Steve and I had just eaten a couple of nights before - ruffles!


first whipped ganache layer


second puff layer


second whipped ganache layer


completed layers

Once all the layers were assembled I popped the whole thing into the fridge for 30 minutes before topping with a basic 1:1 ganache.


getting ready to spread the ganache

used a decorative comb for design

The result looked pretty cool, but the flavor of the puff was disappointing - rather boring and not terribly chocolatey.  I also felt the puff layers were too thick and should have been more crisp and flakey.

What would I do differently next time?  Use standard puff pastry (not chocolate), roll it more thinly, let it rest longer so as to reduce shrinkage, and prick the dough with a fork before weighing it down and baking it.

Steve's reaction?  "What's so special about mille-feuille?"

OK, OK - back to the drawing board!


Ahhhhh croissants - old favorites and a chocolate trial

I held a croissant class recently, and, in preparation for that event, I baked a couple of croissants and pains au chocolat for class tasting purposes.

Just imagine that flaky, crisp exterior and lovely airy, not-quite-bready interior.  So good.


And for a special treat I had to do croissant aux amandes, bien sûr.  A big hit with the group.


In addition to the classics, I'm periodically on a path of discovering different things to do with croissant dough.  On one of my morning walks I started thinking chocolate, and, since I had recently finished a batch of chocolate pâte feuilletée, it seemed only natural to try croissant dough with a chocolate twist.

I made a half batch of my usual recipe, adding in some Dutch process cocoa powder (10% by weight of my flour amount) with the dry ingredients.  I increased the milk just a bit, since I find that cocoa powder tends to have a drying effect on dough.

the détrempe

In addition I worked some hazelnut flour into my butter block hoping to give it a nutty flair.  Yup!  Definitely wingin' it!!


hazelnut butter block


Ready for the beurrage . . . .


Finished dough after the three turns . . . .


Not long ago I added a new flexi-mold to my Silikomart collection and was itching to use it.  I had visions of dough spirals dancing in my head.  Even though these silicone molds are non-stick, I brushed them with soft butter so I could coat them with vanilla sugar before placing the spirals in to rise.


I rolled the finished dough out to allow for shaping a couple of typical croissants . . . .


plus a block of dough topped with vanilla sugar and mini chocolate chips . . . .


that I cut into 3/4" strips, rolled up into spirals and popped into my buttered/sugared molds.


I gave them a 1.5 hour rise . . .


after the rise

after the rise

and then on to the bake!  One thing's for sure - the chocolate makes it much more difficult to assess whether they've baked long enough, but I could appreciate some browning and the croissants had the "feel" of being fully baked (once you've felt it, you just know).


rather interesting, eh?


 I wanted to give the spirals a bit longer in the oven to make sure the interior layers were done.  I took them out of the molds, drizzled them with caramel, baked 'em another 5-10 minutes and called it a day.


Taste test time!!

Cutting into the croissant resulted in the hoped for shower of crispy exterior shards.  The inner laminations looked OK and the texture was good, but the taste wasn't much different from a regular butter croissant (although Steve thought it on the dry side).  And this is the key for me - minimal (if any!) chocolate flavor and no hint of hazelnut.  So much for that.


The spirals, however, offered a pleasant, crispy caramelized texture and flavor, and the mini chips added just the right touch of chocolate.


.


In the end, this attempt at chocolate croissant dough was not worth the effort.

Perhaps an increase in the amount of cocoa powder, or adding the chocolate to the butter block rather than the détrempe might make a difference, but at this point I'll stick with the classic dough from here on out.

Chocolate bread pudding here I come!


Golden raisin toast apple tart, thanks to Janet and Dorie

There are some occasions when I buy an ingredient that I wouldn't normally keep on hand for day to day use.  Golden raisins are one of those.  I purchased them awhile back when I was preparing to make biscuits fondants amande et fruits épicés for my 1/14/15 post.  I used only a portion of the box and was eager to finish it off.  But what, pray tell, might I make?

It was thus that I turned to a book that Steve and I have owned for a number of years - "The Cheese Course" by Janet Fletcher.  While I don't pull it off the shelf very often it offers some great ideas for accompaniments to cheese, including breads, salads with light and simple vinaigrettes, fruits, nuts, honey, olives and more.


I recalled that it contained a recipe for golden raisin bread, so I decided to go for it.  The bread is meant to be toasted and served with Bellwether Farms' crescenza, described as a yeasty, creamy cheese, similar to Italian stracchino.  But I digress - on to the subject at hand.


Besides chomping at the bit to bake more bread, I've been wanting to make a not so run-of-the-mill tart - something with a Parisian twist.  I had my eye on an apple tart recipe in Dorie Greenspan's book "Paris Sweets" (one of my faves) that calls for toast points to be tucked in between apple slices before baking.  I was on my way to a new adventure.

First the bread.  Soak 2 cups of golden raisins in 2 cups warm water for an hour or so.  Drain them, reserving 320 ml (1 1/3 cups) of the raisin water (add additional water if you don't have quite enough).  I wanted a bit of je ne sais quoi, so I added the zest of an orange and pinches of nutmeg, allspice and coriander to the dry ingredients.
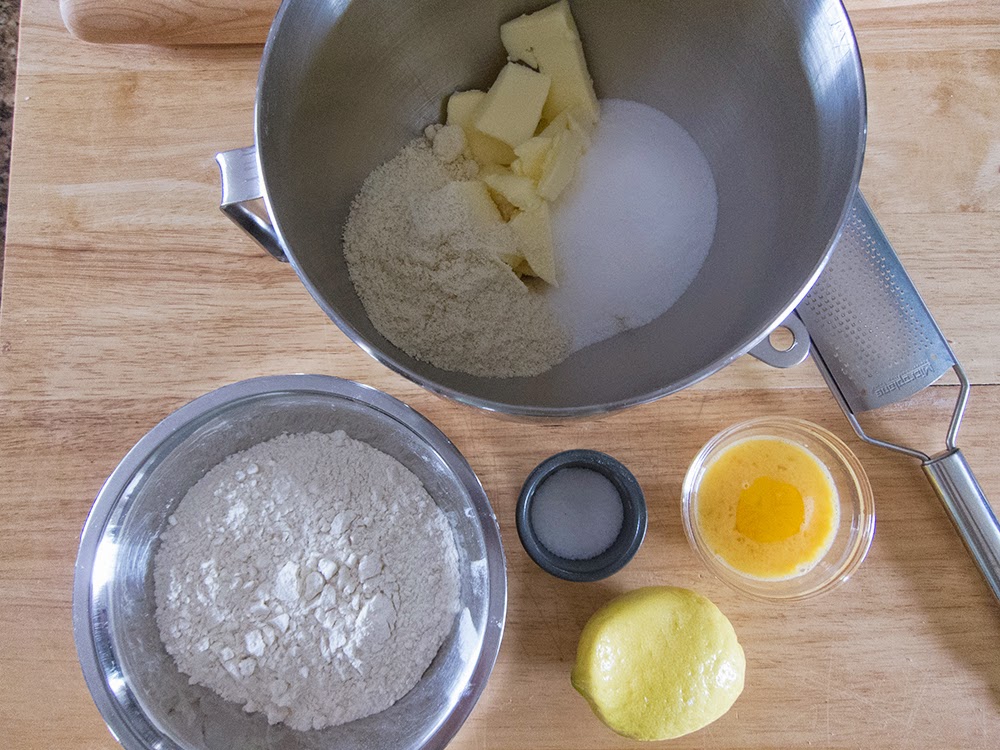
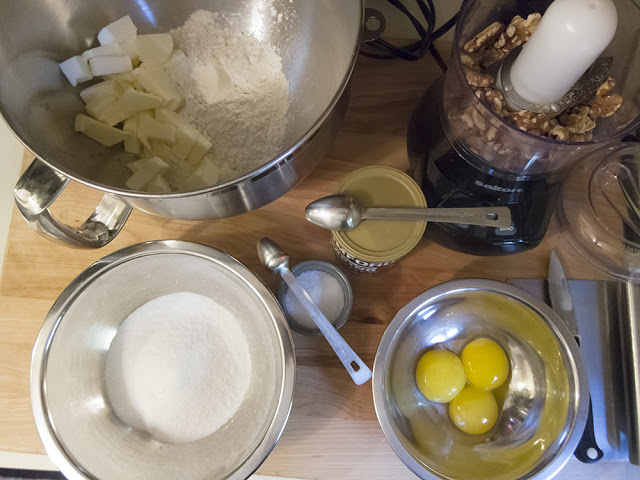
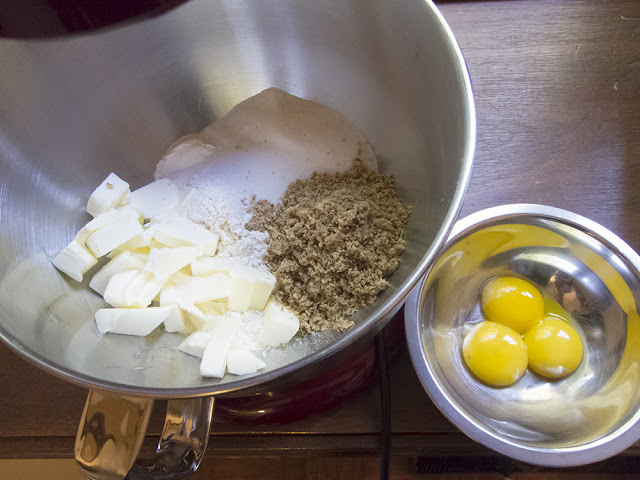
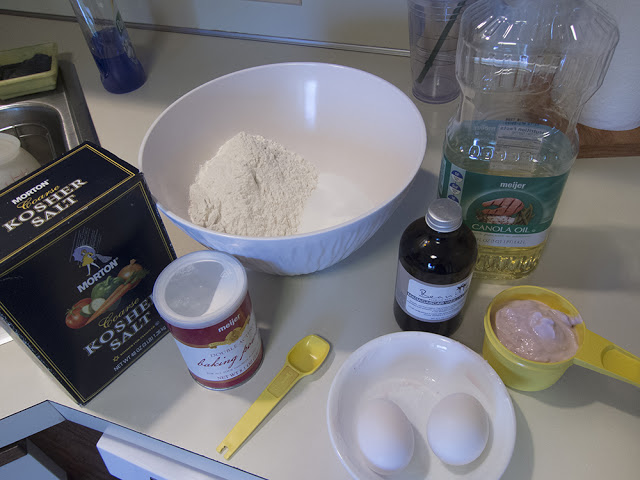
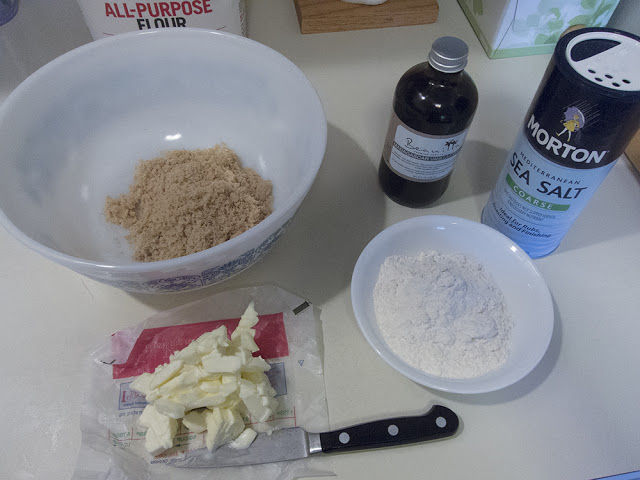
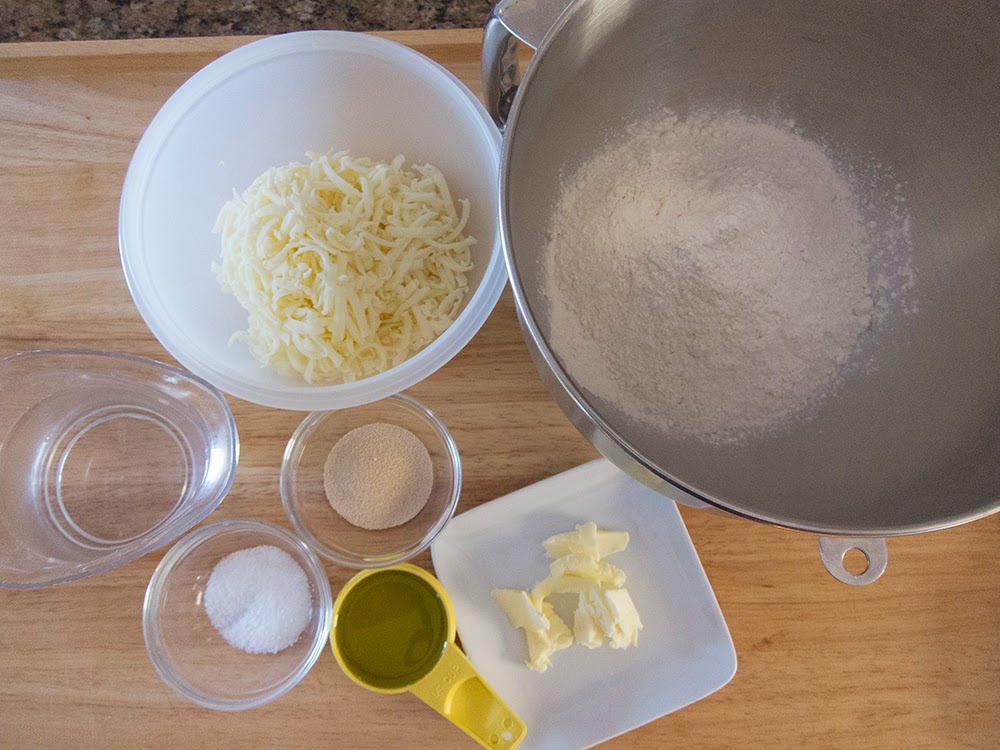

les ingredients

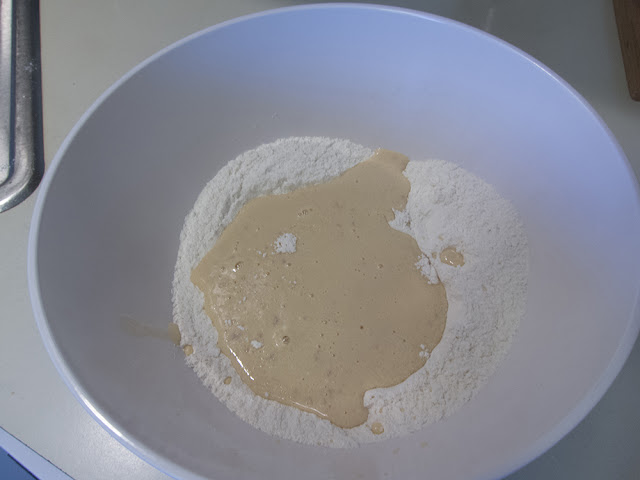
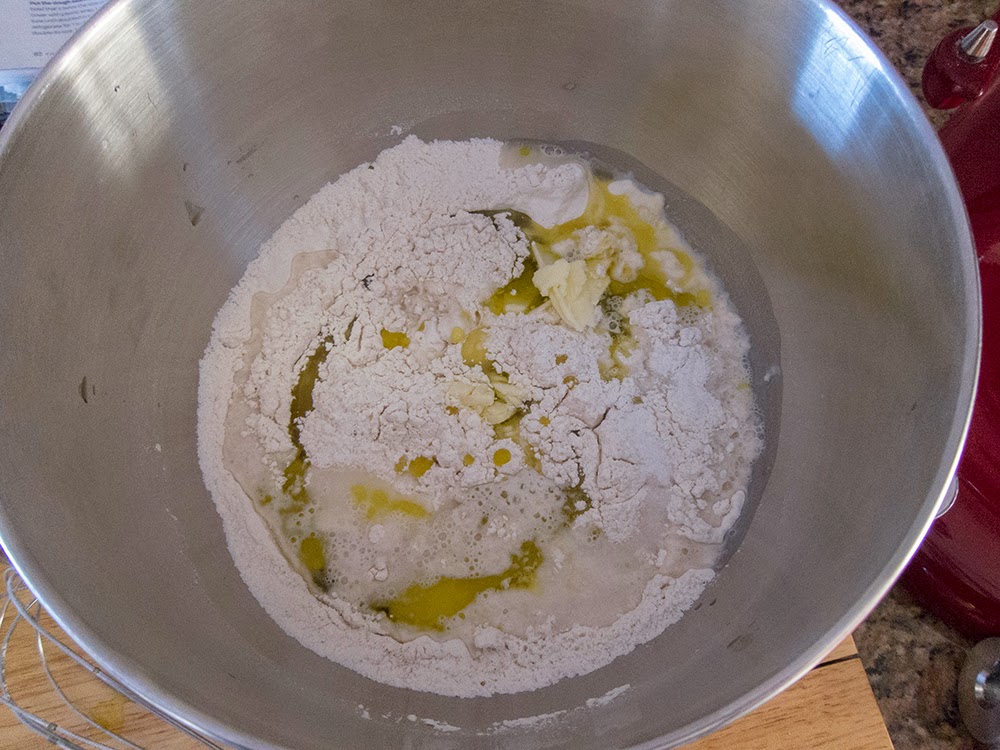
Weigh out 488 gm (3 3/4 cups) all purpose flour, holding 98 gm (3/4 cup) aside; whisk 390 gm (3 cups) flour with 8 gm (1.5 tsp) salt, 15 gm (1 TBSP) sugar, 8 gm (~ 2.5 tsp) instant yeast; stir in the tepid raisin water and 10 gm (2 tsp) soft butter.

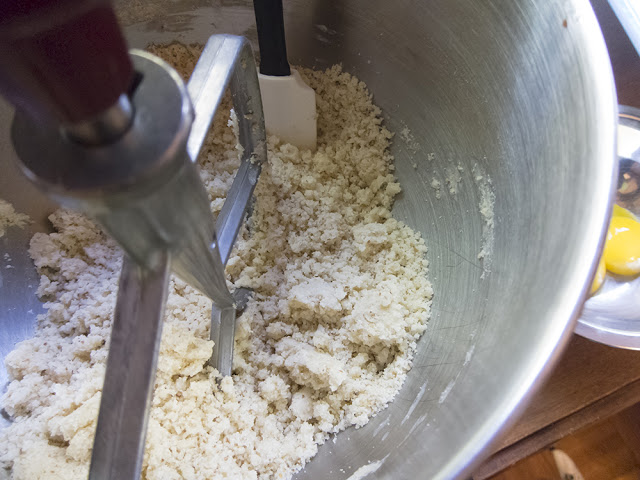
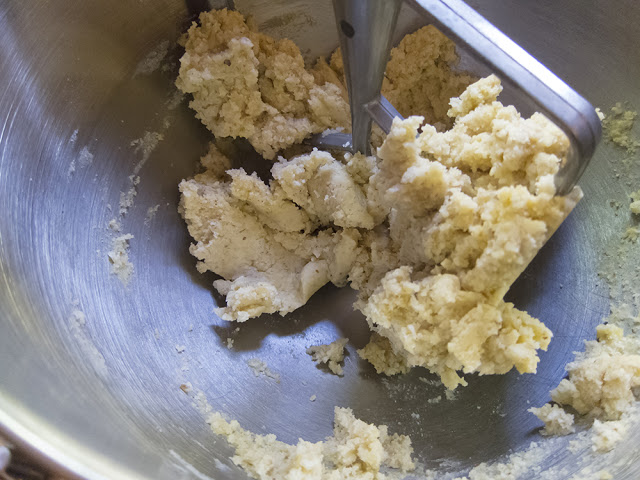
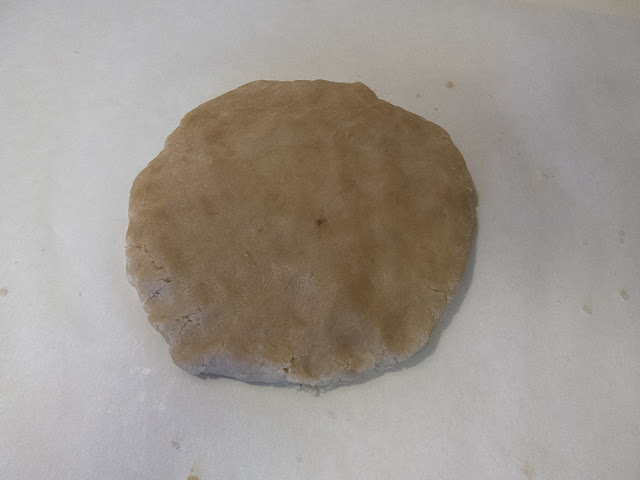
When it becomes too stiff to stir, turn it out onto a floured surface and knead, adding in the remaining flour as you go.  Knead about 5 minutes until the dough is firm, smooth and elastic and shape it into a ball.


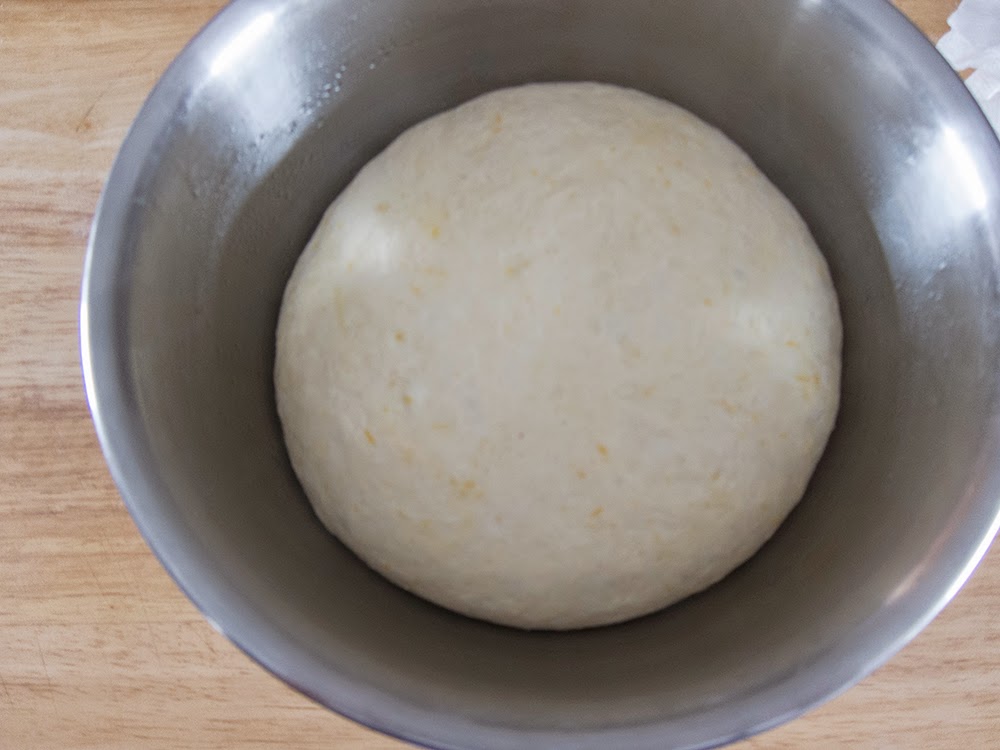
after the knead, ready for the first rise

Place in an oiled bowl, cover with plastic wrap and let rise about 1.5-2 hours.


after the rise

Pat the raisins dry and toss them in 3 tablespoons of flour.


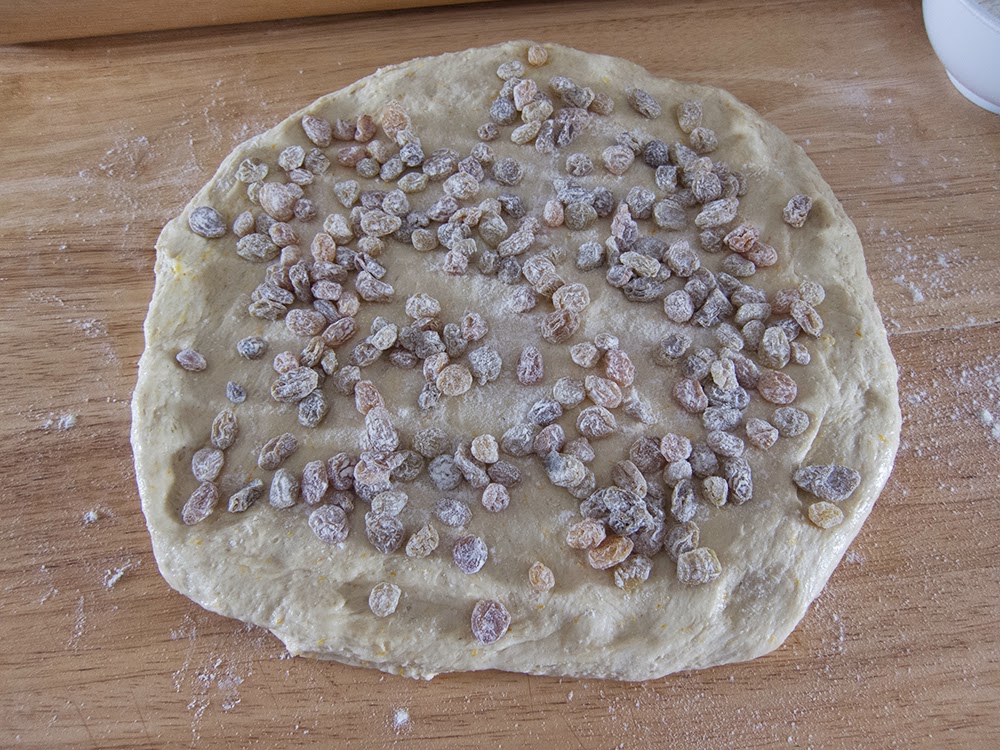
Without punching the dough down turn it onto the work surface and pat it firmly into a 14" circle.  Top it with 1/3 of the raisins, pressing them gently into the dough.


Fold the sides of the dough toward the center (I folded it into thirds, just like with a laminated dough) and then roll into a cylinder.


the first cylinder

Again flatten the dough into a circle, add another 1/3 of the raisins, fold the sides into the center and roll again into a cylinder.  Cover and let rest for 15 minutes before you do the same thing a third time, finishing up the raisins and forming the final cylinder.


kinda rough and tumble I'd say
 
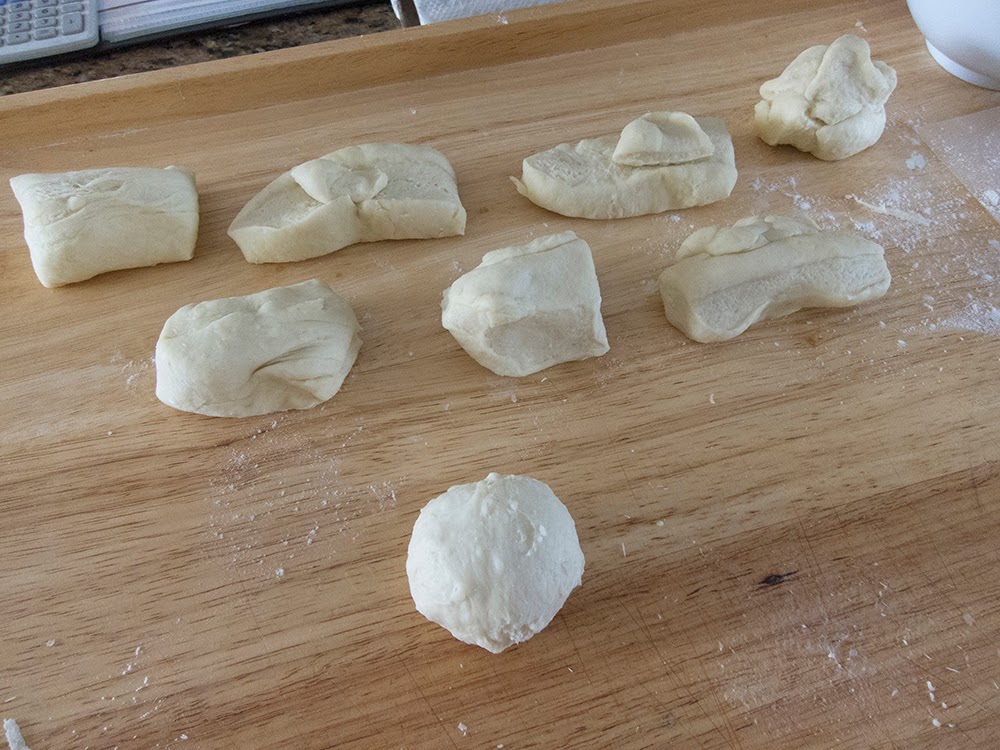
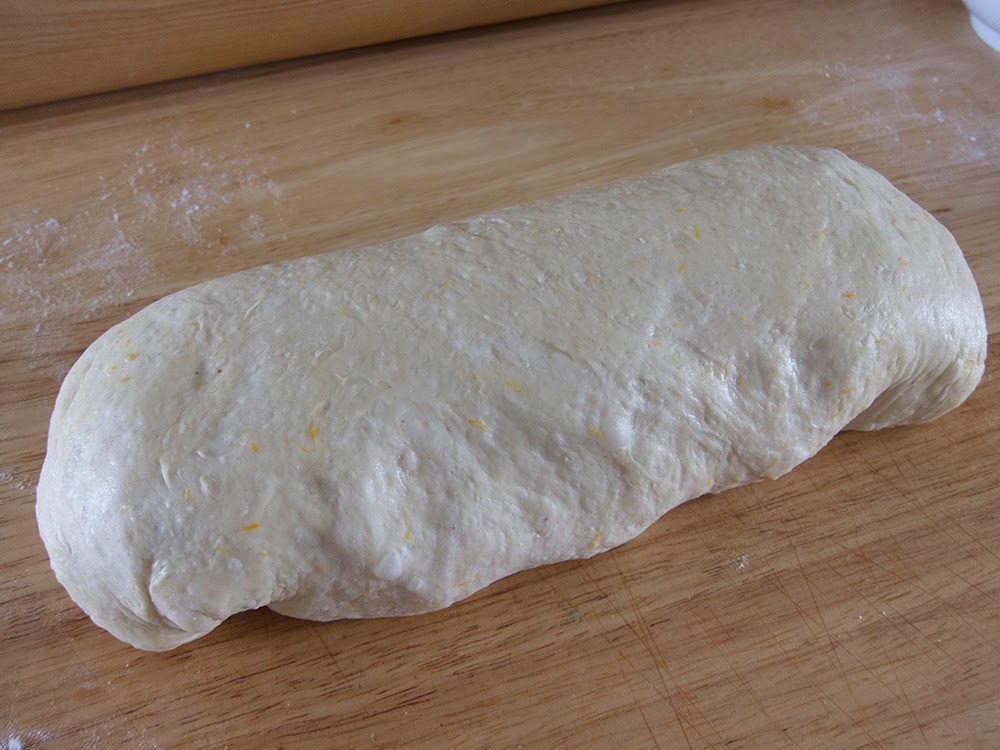
Now divide the dough in two and shape each half into a loaf about 12" long (mine came out shorter).


ready for the final rise

I will say these are not the most attractive loaves I've ever shaped.  The raisins made them all lumpy-bumpy, plus you have to keep the raisins tucked into the dough so they don't burn during baking.

Cover with a towel or lightly oiled plastic and let rise for an hour or so.  They look like some kind of funky subterranean creature!


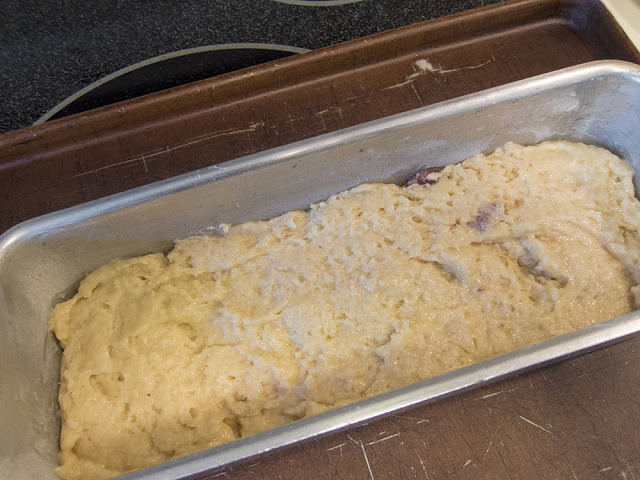
after the rise, ready for the oven

Heat the oven to 400º, bake for 5 minutes, then lower the temp to 375º and continue baking about 30 minutes more.  They should be nicely golden brown and have that tell-tale hollow thump of doneness.
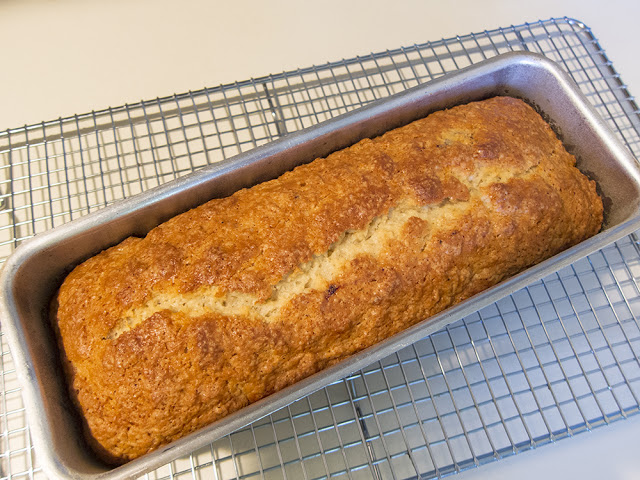
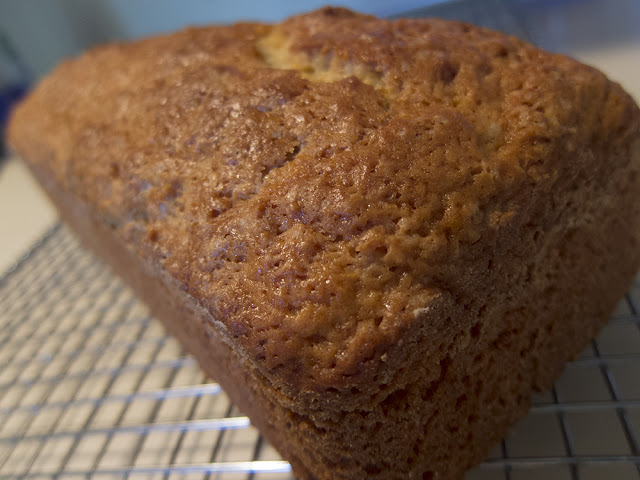
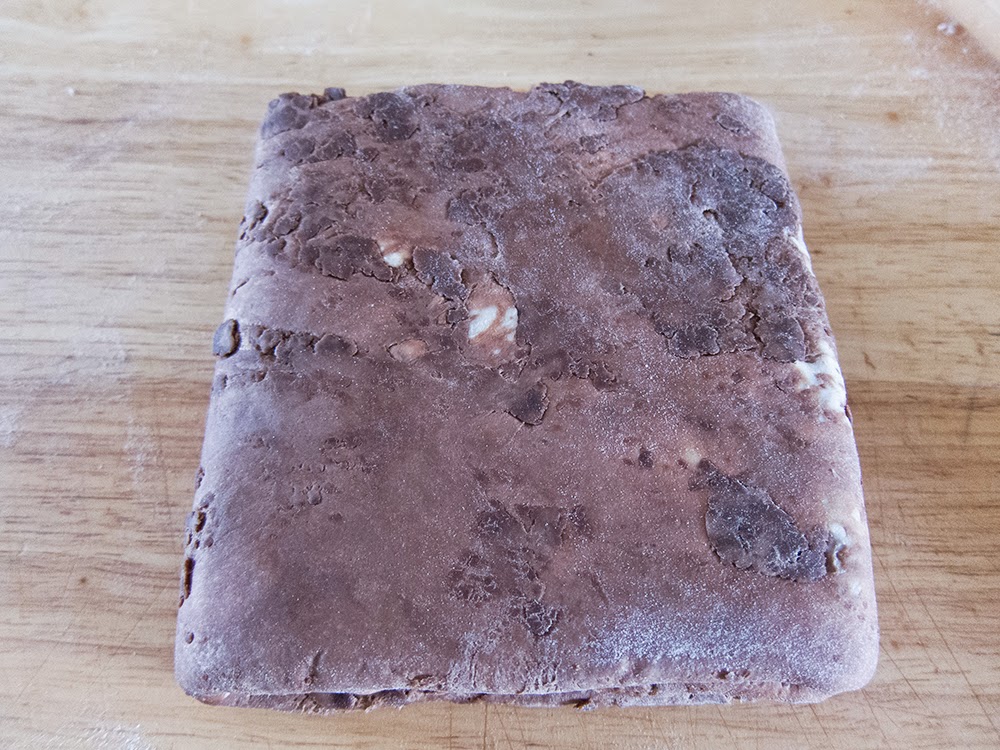
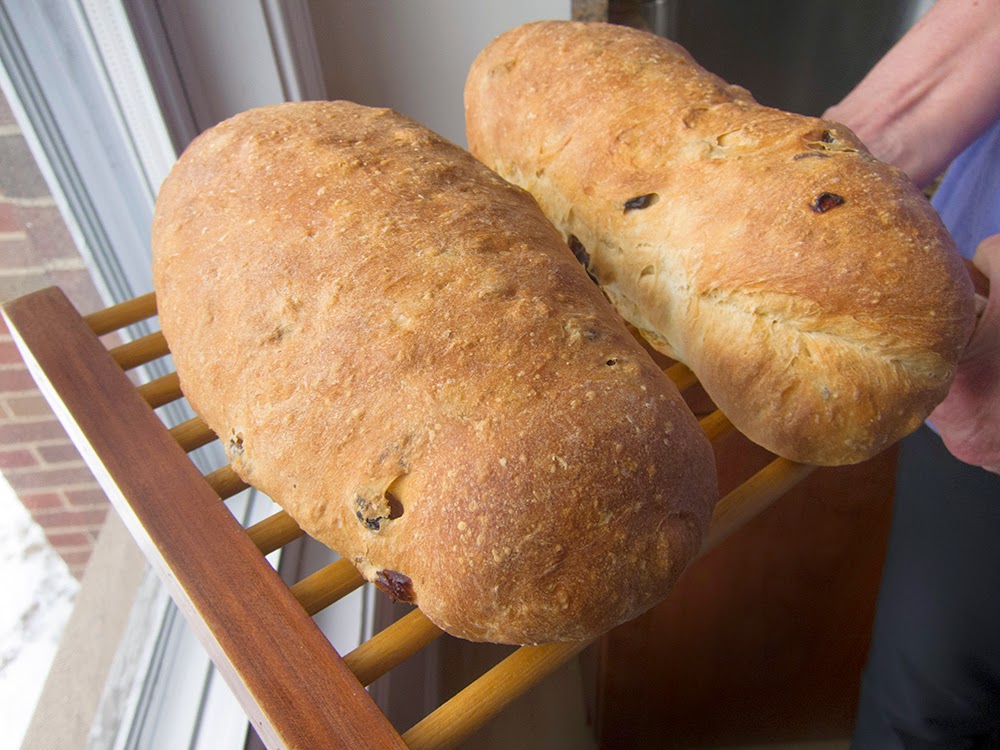

the end result

Once cooled, I sliced one for a taste test and was pleased with the hint of orange and spice, the plump raisins and the not too chewy texture.  I ultimately used about 1/2 loaf for the apple tart and froze the rest - lots of breakfast raisin toast coming up these next few weeks.  Yes!


So let's move on to the apple tart.  Dorie G's "Paris Sweets" recipe is an adaptation from Lenôtre and calls for the following components.

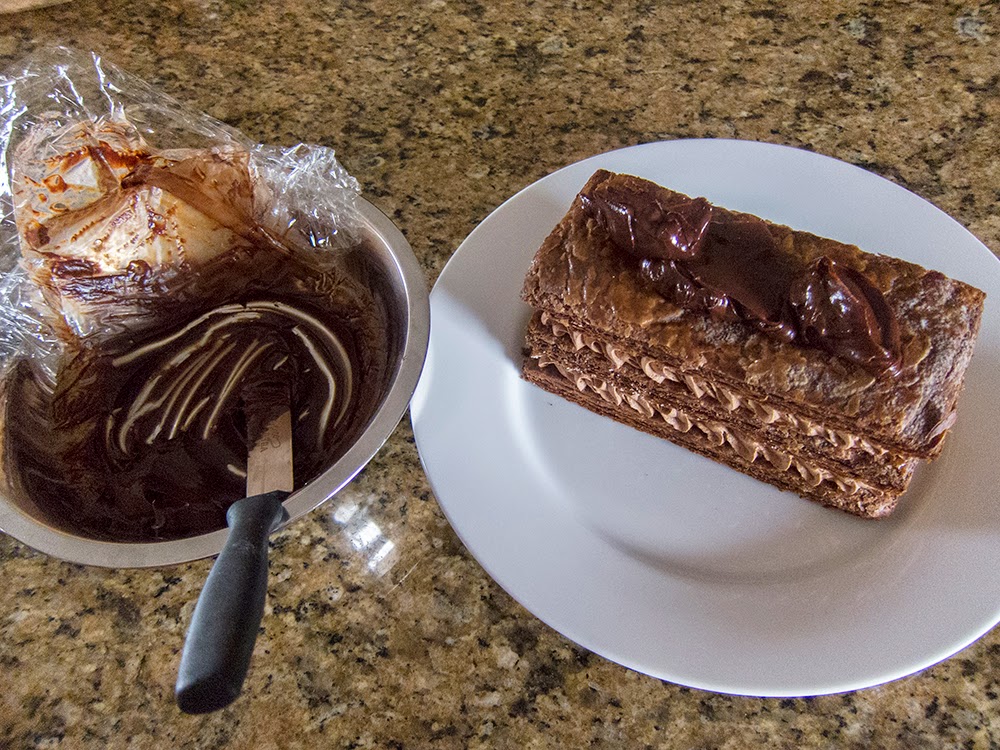
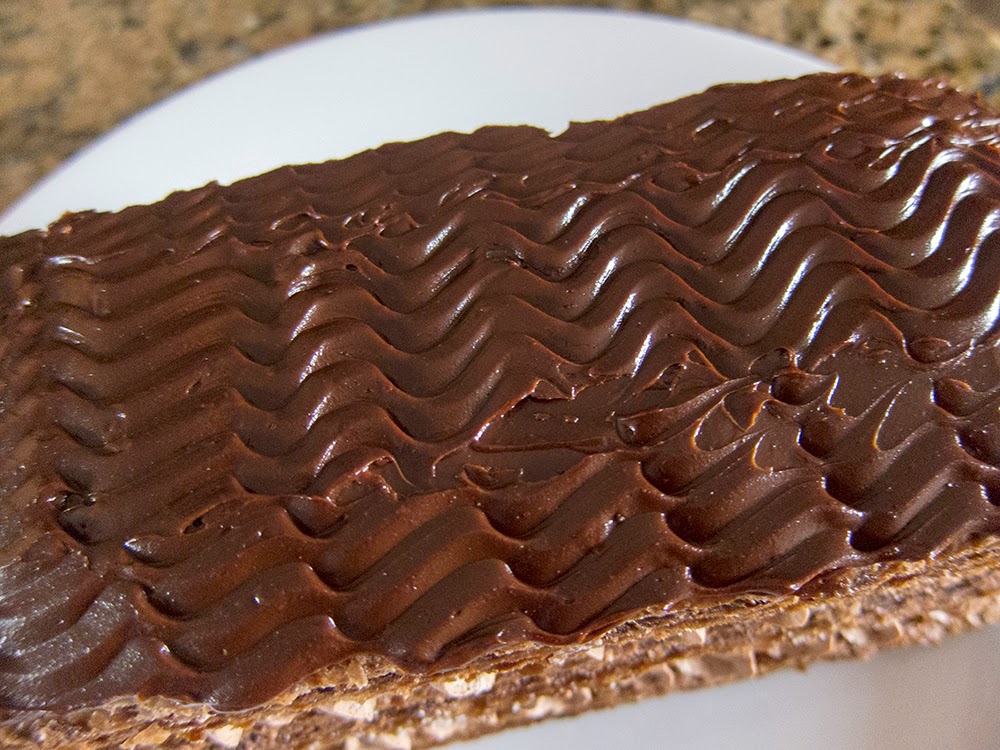
1.  Caramelized white bread (in my case golden raisin) toasts:  slice the bread, cut off the crusts, spread one side with a mixture of soft butter and light brown sugar (made by mixing 30 gm/2 TBSP butter with 30 gm/2 packed TBSP brown sugar) . . . .


then pop under the broiler for 2-3 minutes, flip over and broil another 2 minutes or so.  Pay close attention so they don't burn (if necessary, just scrape off any black edges with a sharp knife).


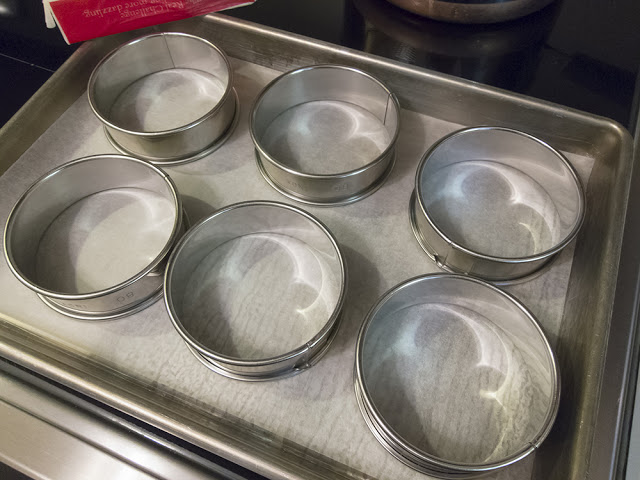
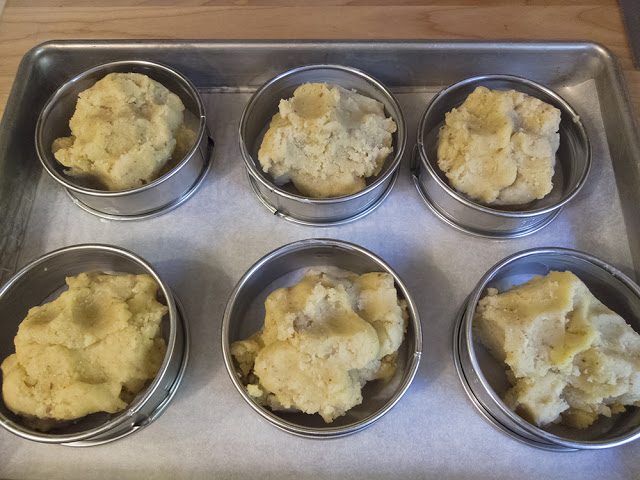
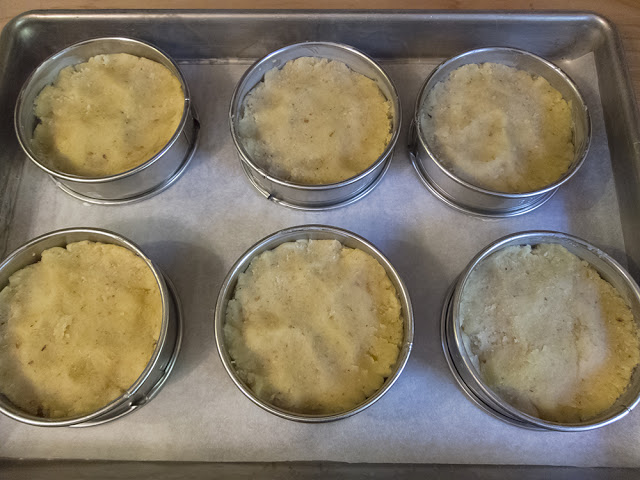
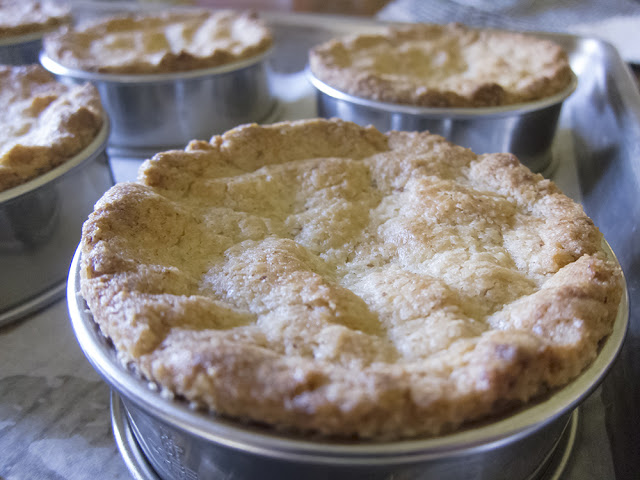
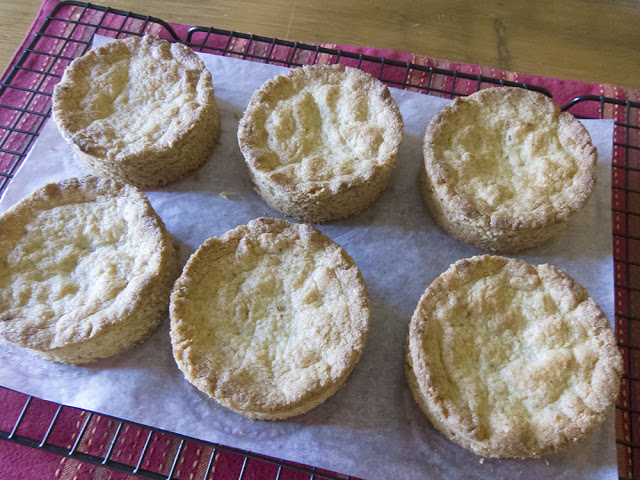
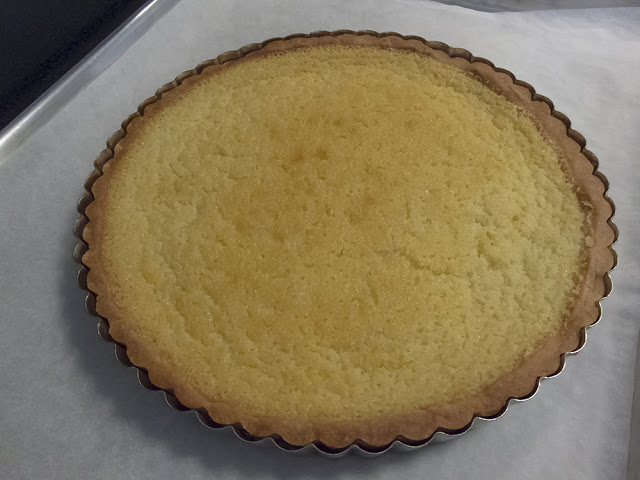
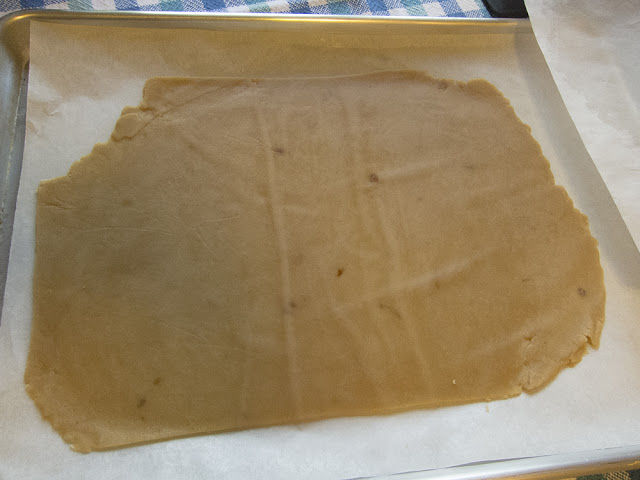
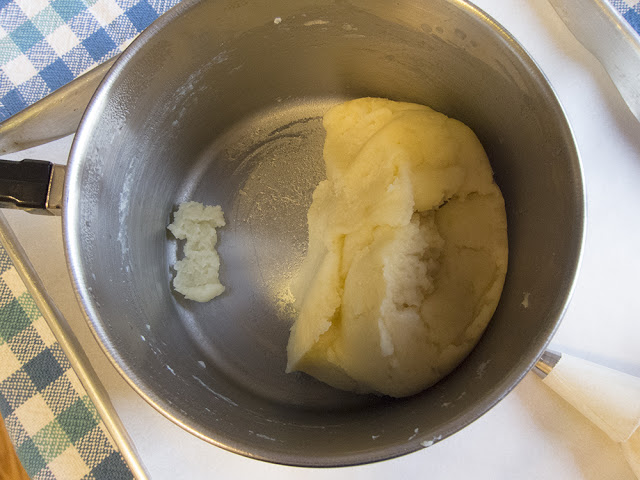
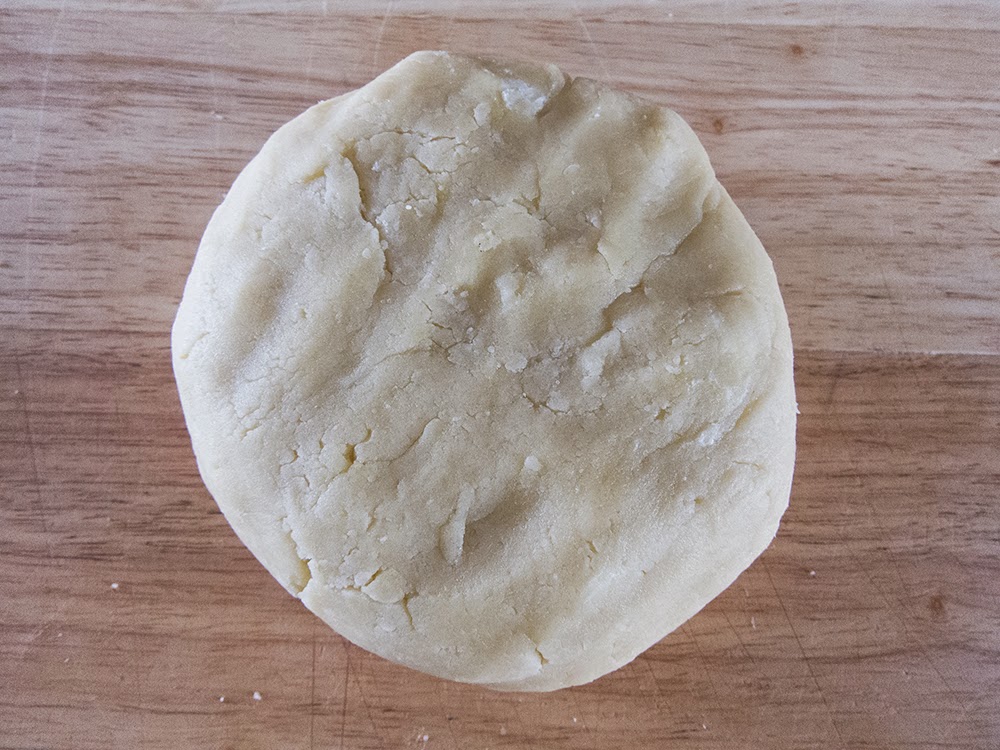
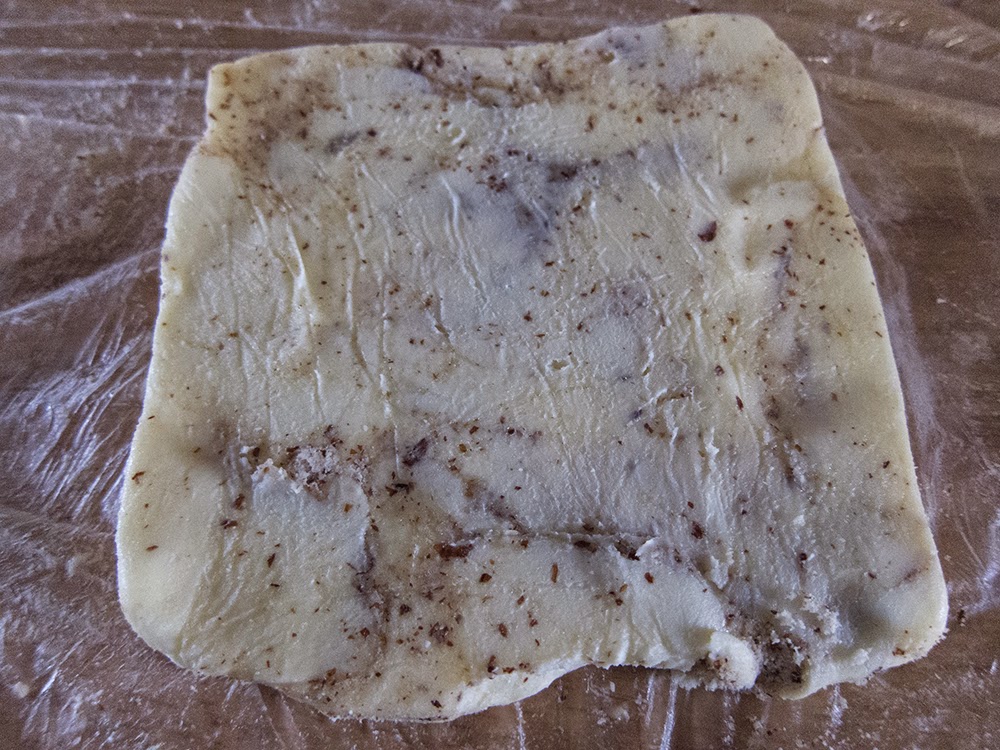
2.  A blind baked crust (I used my 240 mm / 9.5" tart ring and my favorite pâte d'amande dough) . . . .


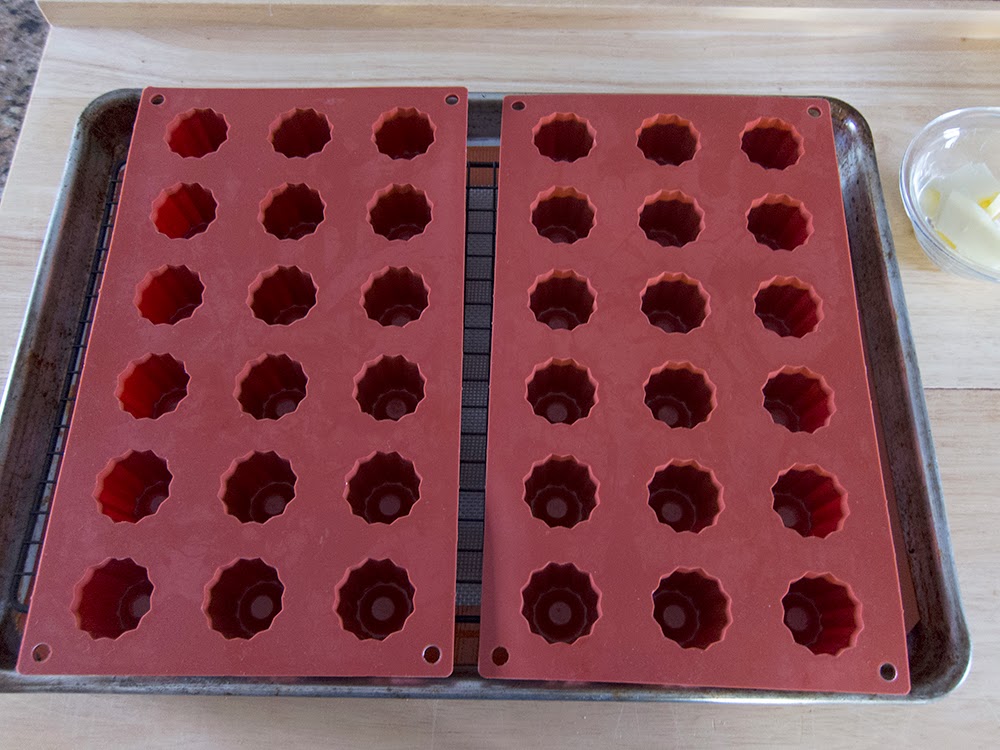
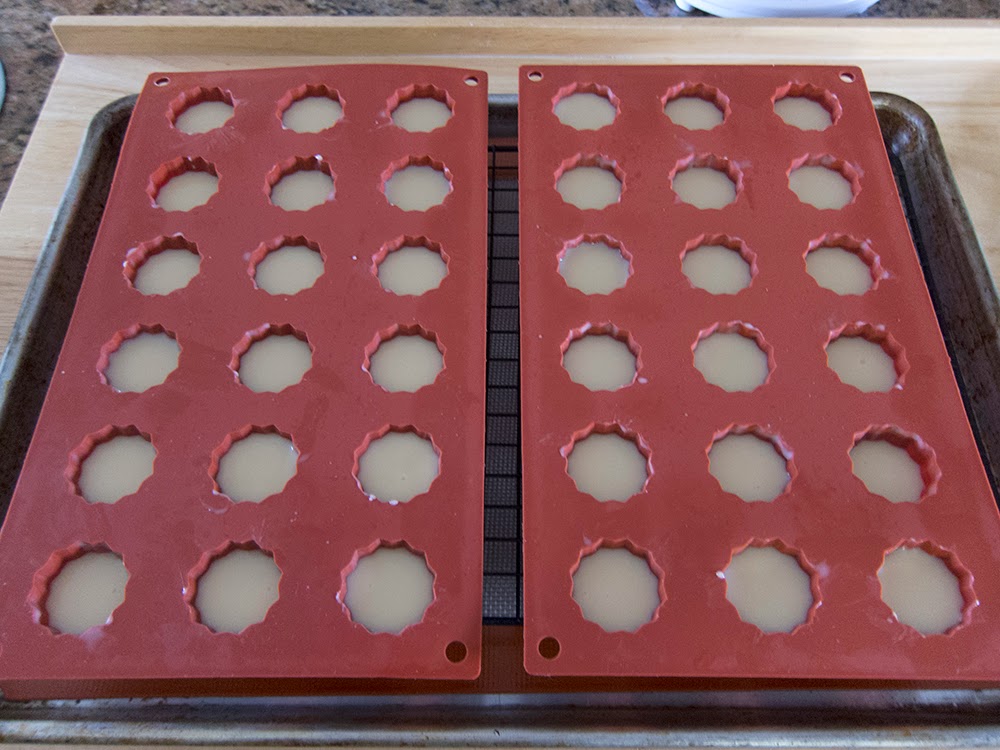
waiting for weights and ready to blind bake

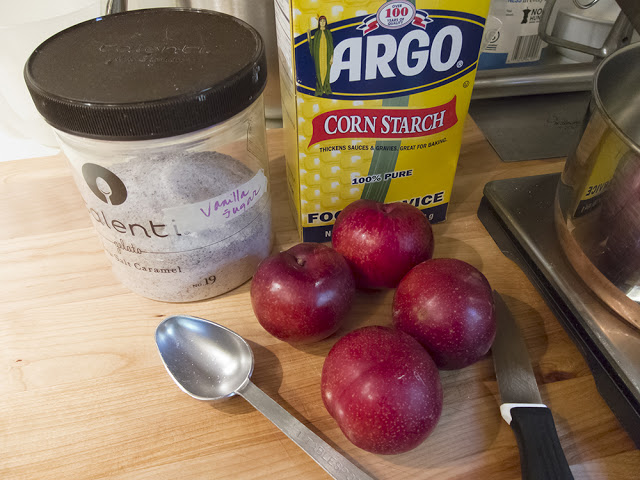
3.  Peeled, cored, cut-in-eighths Golden Delicious apples (4 of 'em) sautéed in butter, sugar and vanilla pulp . . .


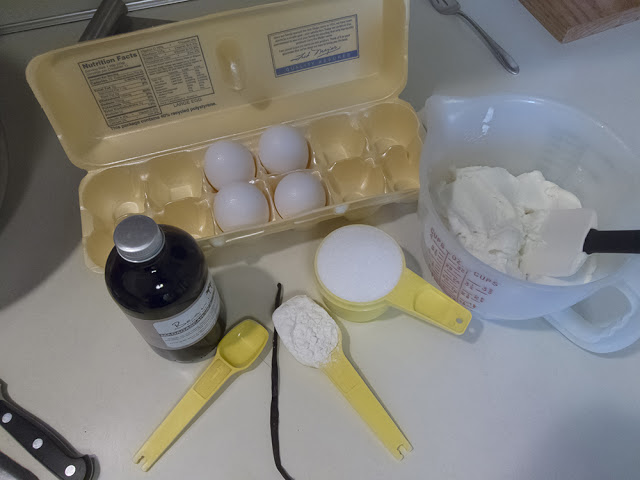
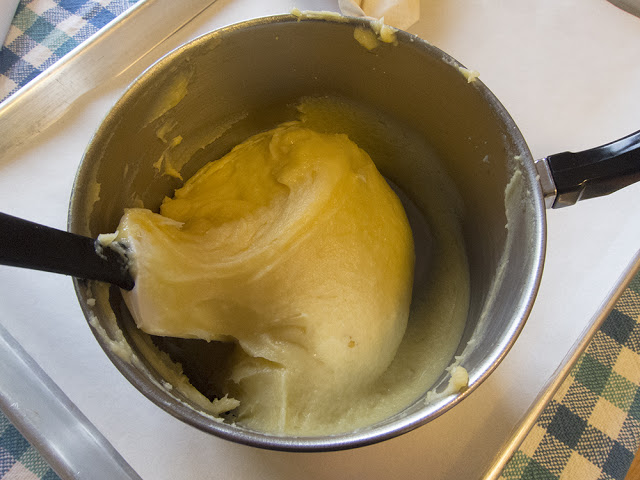
4.  A custard mixture made by whisking together one large egg, 3 large yolks, 70 gm (1/3 cup) sugar and the pulp from 1/2 vanilla bean until somewhat thickened and pale.

Then boil 300 gm (1 1/4 cups) heavy cream (stovetop or microwave - you decide) and pour the hot cream over the egg mixture bit by bit while whisking constantly.  Try not to be too vigorous - you don't want a lot of bubbles (tapping the container on the counter will help dissipate any bubbles that may have formed).


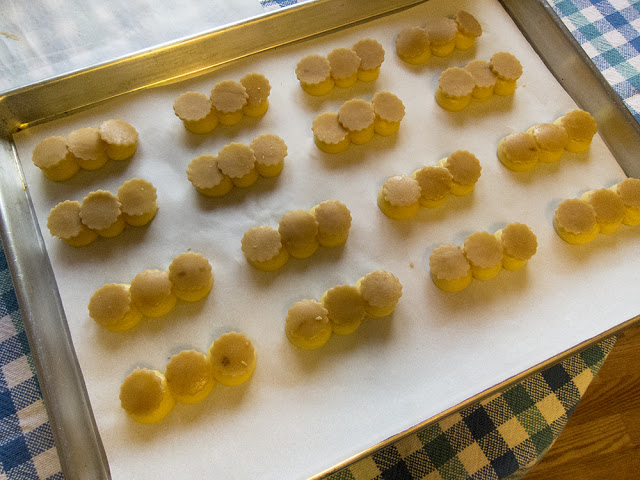
On to the assembly.  Heat the oven to 325º.  Place the blind baked tart shell on its parchment lined pan onto a second sheet pan (this provides some insulation and more gentle heat).  Slice the toasts.


everything at the ready  

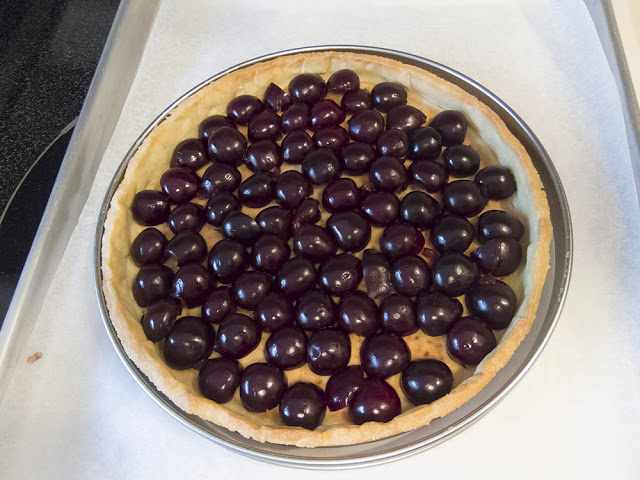
This was definitely the clunky part.  The idea is to line the apple slices up in the tart shell, then tuck the toast triangles (or in my case, more like rounds) decoratively between the apples slices.  Easier said than done.


I had a few gaps into which I tucked smaller pieces of apple, and I did my best with the toast placement.  Pretty rustic.

Dorie calls for sprinkling a couple tablespoons each of walnut pieces and raisins over it all, but, since I was using raisin bread, I left them out.

Carefully pour about 1/3 of the custard over the apples, letting it find its way into the crevices.  Bake for 10 minutes to settle the custard a bit.  Then pour additional custard over until it reaches the tart rim - not too much or it will spill over (I didn't use all of mine).


the custard poured in


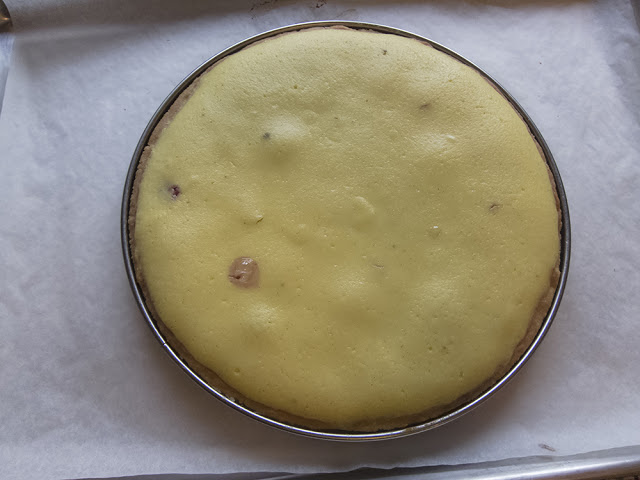
Bake for another 40-45 minutes until the custard is set.


interesting look, eh?

one more view

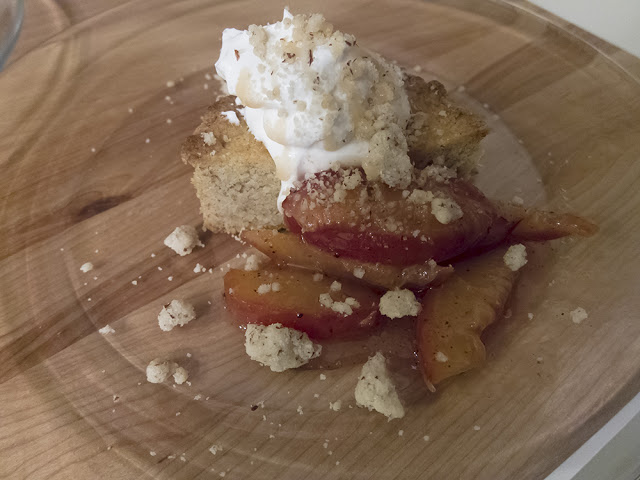
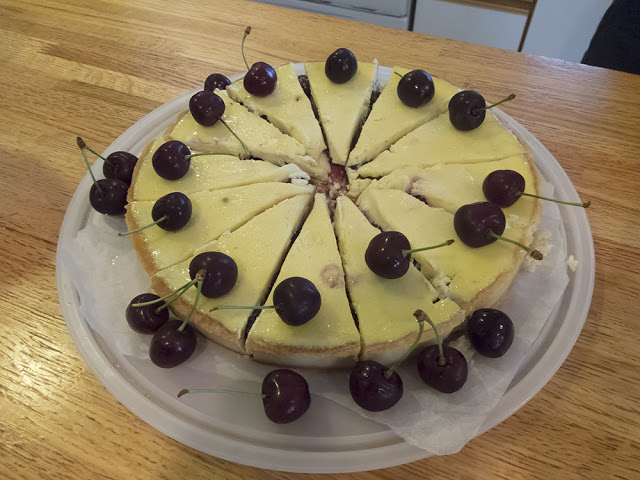
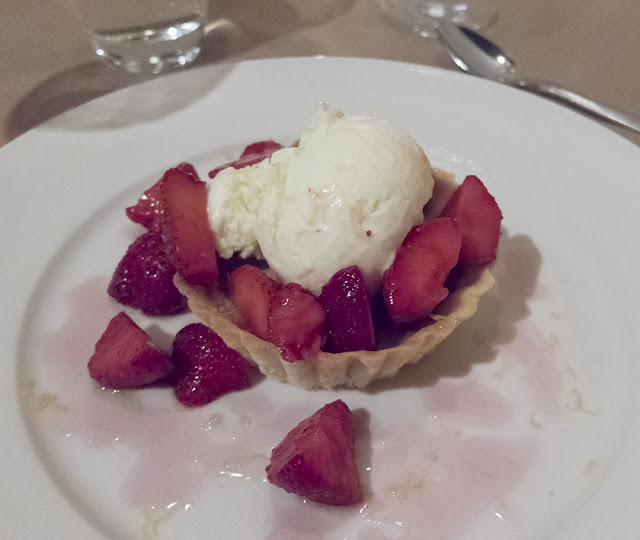
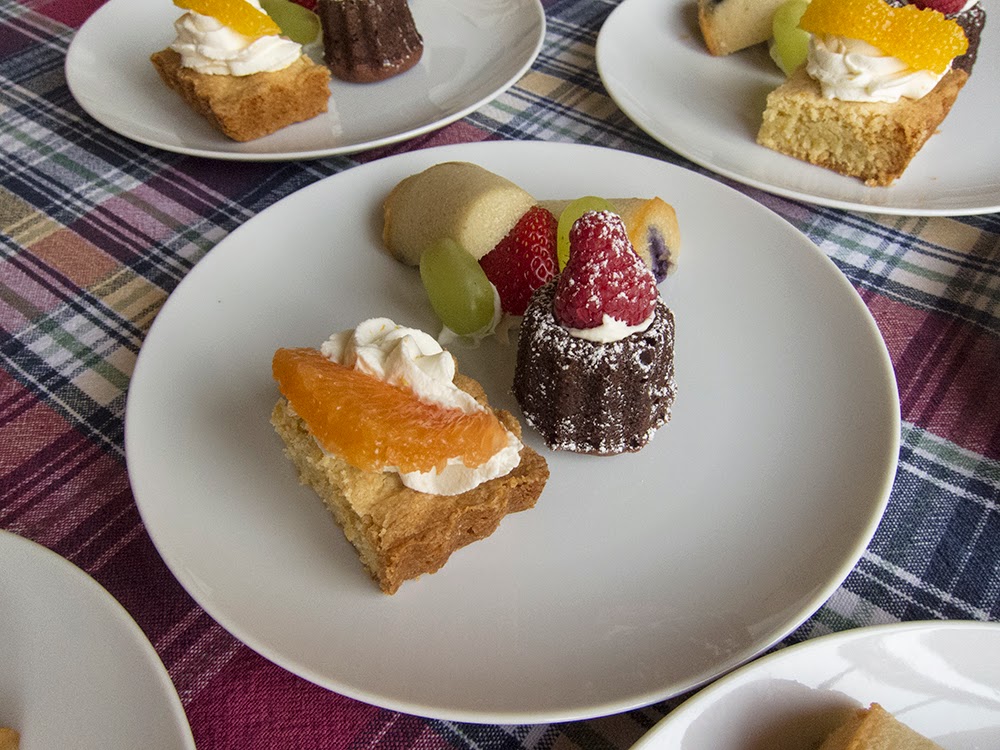
I served this for dessert that same evening, garnished with a dollop of chantilly and some nut crumble.  Despite my skepticism going in, this turned out to be one delicious tart!  Dick, Dor, Carl and Steve all thought so too.  And I still have golden raisin bread in the freezer - cool!

And next time?  I'm already envisioning thinner apple slices and a rectangular tart pan to allow for more attractive rows of apples and toast.  Yes, I would do this again.

And now for something completely different - Provolone rolls

As I gear up for more bread baking this year I like to play around with some of the variables involved in the process - refrigerated slow rising doughs, proofing and resting times, scoring patterns, creating steam in the oven, high heat "hearth" baking - you name it.  Lots to learn.

I have a recipe for prosciutto and provolone bread from the 2004 edition of CIA's "Baking and Pastry:  Mastering the Art and Craft".  I've made it a number of times over the years without the prosciutto, finding the sensa carne version made with a sharp provolone to be just the ticket with a hearty chili or beefy soup or stew.  The base recipe has a huge yield of almost 15 pounds of dough, so in previous preparations I've paired it down and made only a quarter recipe, dividing that amount of dough into four torpedoes or batards of about 370 gm (13 oz) each.

This time, since Steve was making a big pot of chili over the weekend, it seemed oh so right to make smaller provolone rolls to serve along side.  Based on the weight of my chunk of provolone (200 gm) I adjusted the recipe down even more with the plan to make ~60 gm size (a skosh over 2 oz) rolls.  This also brought the dough quantity into the perfect range for my 6 qt Kitchenaid.

This is a direct dough - no starter, preferment, poolish, biga or what-have-you - ingredients are combined, kneaded, given a bulk rise, then divided, pre-shaped, bench rested, final shaped, final proofed and, last but not least, baked!  Whew!

I've been drawn more and more to recipes that call for a longer, slower bulk fermentation in the refrigerator, so I decided to take that approach this time.


les ingredients

The recipe calls for bread flour, but this time I substituted all purpose flour for about a fourth of the flour amount.  I wanted to see how that would ultimately affect the crumb of the final roll.

So here's the recipe I ended up with:  combine 370 gm bread flour, 100 gm all purpose flour and 6 gm instant yeast; add 290 ml tepid water, 47 gm olive oil, 13 gm soft butter, and 11 gm salt.


ready to start mixing

Mix with dough hook on low speed for 4 minutes then medium speed for 2 minutes . . .


then add 200 gm grated provolone and mix 1 more minute on medium.

go provolone!

The dough looked and felt great - here it is in its early boule form.


My plan involved a short 30 minute room temp bulk ferment with a fold halfway through, then into the fridge in a lightly oiled covered container overnight.

On baking day I took the dough out of the fridge and let it hang out on the counter for about 30 minutes to acclimatize itself.  Then I divided it into seventeen 60 gm pieces which I then preshaped into boules.


After all the boules were preshaped I covered them with lightly oiled plastic wrap and gave them a 20-30 minute bench rest.  Then I "re-bouled" them into their final shape.  I could tell a difference in the feel of the dough after that bench rest - more relaxed and easier to manipulate.  I like that.


ready for final proofing

I put the sheet pans in my oven at the 85º proofing setting and gave them a solid 1.5 - 2 hours to rise.  I went for a simple crossed scissors snip on the top of each.


they feel just right!


With the oven heated to 425º I threw a splash of water in to create some steam and popped those babies in.  They baked about 20 minutes, looking nice and golden brown and offering a sign-of-doneness hollow thump when tapped.


can't wait to try 'em!

Next time I'd be a bit more aggressive with my scissor snips, but I was pretty happy with the final result.

I brushed a little melted butter on the warm rolls . . .


and lined them up to cool on a rack.


They were indeed the perfect accompaniment to a bowl of chili.  The texture was superb - I think the all purpose flour gave them a less chewy and somewhat gentler crumb, if you will.  While the exterior still had a hint of crustiness, it was easy to tear or bite into.  The provolone offered a subtle presence, so next time I'd add more of a sharper version than I had on hand for this go-around.  A delightful, well rounded roll.

Yes, I would make these again!