Flan Parisien


OK! It’s time to get down to brass tacks. October is flying by, and I want to share one of my favorite baked goods ever. Being a huge lover of all things custard (think cooked vanilla pudding with melty chocolate chips as a child), my focus here is on le flan Parisien, essentially a custard baked in a crust. Yum.

Ever popular, flan has made its mark as a favorite le gouter after school snack for many French kiddos and is a staple in many pâtisseries across the country. There are many versions of flan across the globe - Mexico and Spain to name just two.

And let’s not forget the many classic custard based desserts that you’ll find world wide. Some of my favorites are crème brulée, pot de crème and my favorite ice cream base, crème anglaise, which I (and many!) consider the mother of custard sauces.

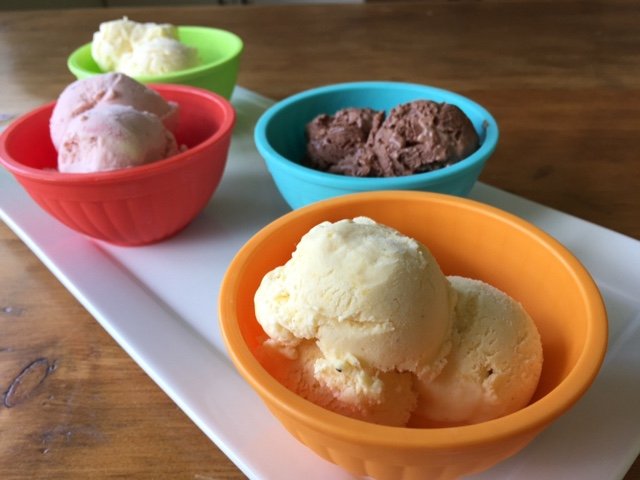
LIme coconut, raspberry/strawberry, chocolate almond, peach ice creams

I do digress. Sorry ice cream! I have to get back on track, but I couldn’t resist bringing you into the picture.

A custard is essentially a blend of dairy, egg and sugar with the occasional added thickener like cornstarch and/or flour, as is the case with crème pâtissière. You’ll see MANY variations in custard recipes using only milk, only cream, a blend of milk and cream, some yolks, some whole eggs - you get the idea. It would take me an entire post to try and explain the differences. Suffice it to say - all or mostly cream and all yolks in a custard make for a more unctuous mouth feel and richer taste. Switch in some whole milk for some of the cream and some whole eggs for yolks and you’ll experience a lighter, airier custard.

During my stage at Pâtisserie Pascal Pinaud in Paris’ 5th arrondisement, the house flan was made with puff pastry scraps for the crust and a simple crème pâtissière filling using whole eggs rather than yolks. Chef Pascal would line a 10-11 inch (25-28 cm) open ring with puff, hold it in the freezer and then I (oui moi!) would make the crème pâtissière that would be poured directly from the hot saucepan into the unbaked frozen shell. Into the oven it went. Always a hit.

At The French Tarte, my small shop in Pawtucket RI (2012-2014) , I occasionally made a version from Phillipe Conticini’s Pâtisserie des Rêves. His offered a unique approach whereby the custard filling was cooked, cooled then placed into unbaked puff lined rings and into the freezer for a couple of hours before baking. Right out of the freezer, directly into the oven! I looked back at my notes from July 25, 2013, having done a comparison between frozen and not - frozen won out for its creamier texture. Who knew.

I had already created my own flan custard base a few years back after doing a comparison of several recipes I had tried over the years. It incorporates whole milk, cream, eggs, yolks, sugar, cornstarch, vanilla bean. It was tasty back then so I went with it for this project. Plus, I hadn’t made a flan in forever!!

My goal here was not so much to revisit the custard portion BUT to compare using puff pastry scraps and my favorite pâte brisée for the shells. Blind baked or not and filling them with hot/cooled/frozen in the shell versions of the custard filling. While not a very scientific or well controlled experiment, it gave me the answers I sought.

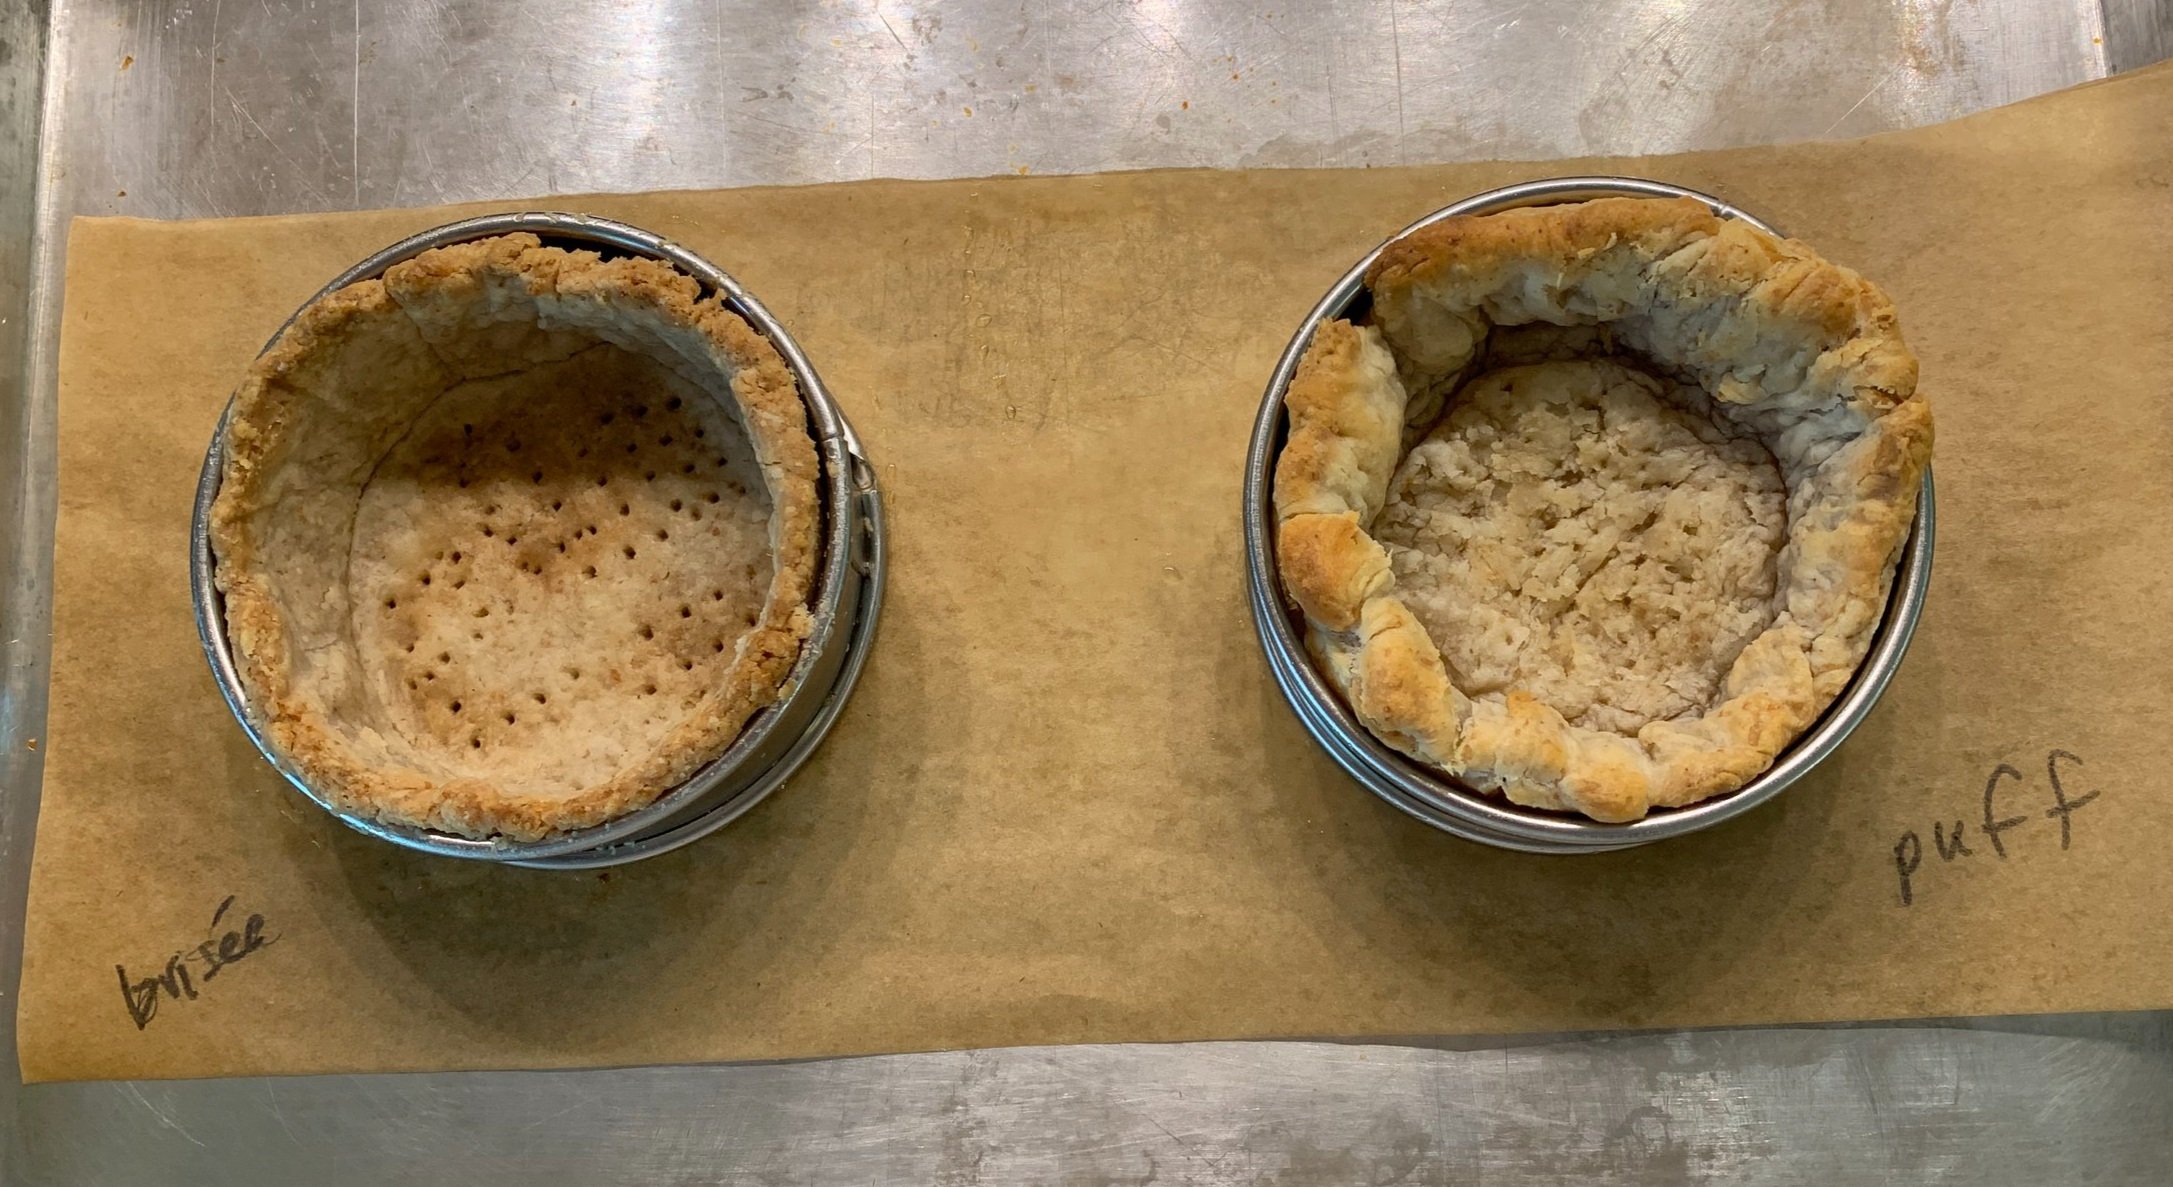
I used my 80 mm (3”) diameter, 2.5 cm (1”) high open tart rings, lining three with puff pastry scraps and three with pâte brisêe. I blind baked one each of brisée and puff and left the rest unbaked.

Ready for Baking

As I suspected it would, the puff puffed up in spite of the weights, resulting in a pudgy crust.


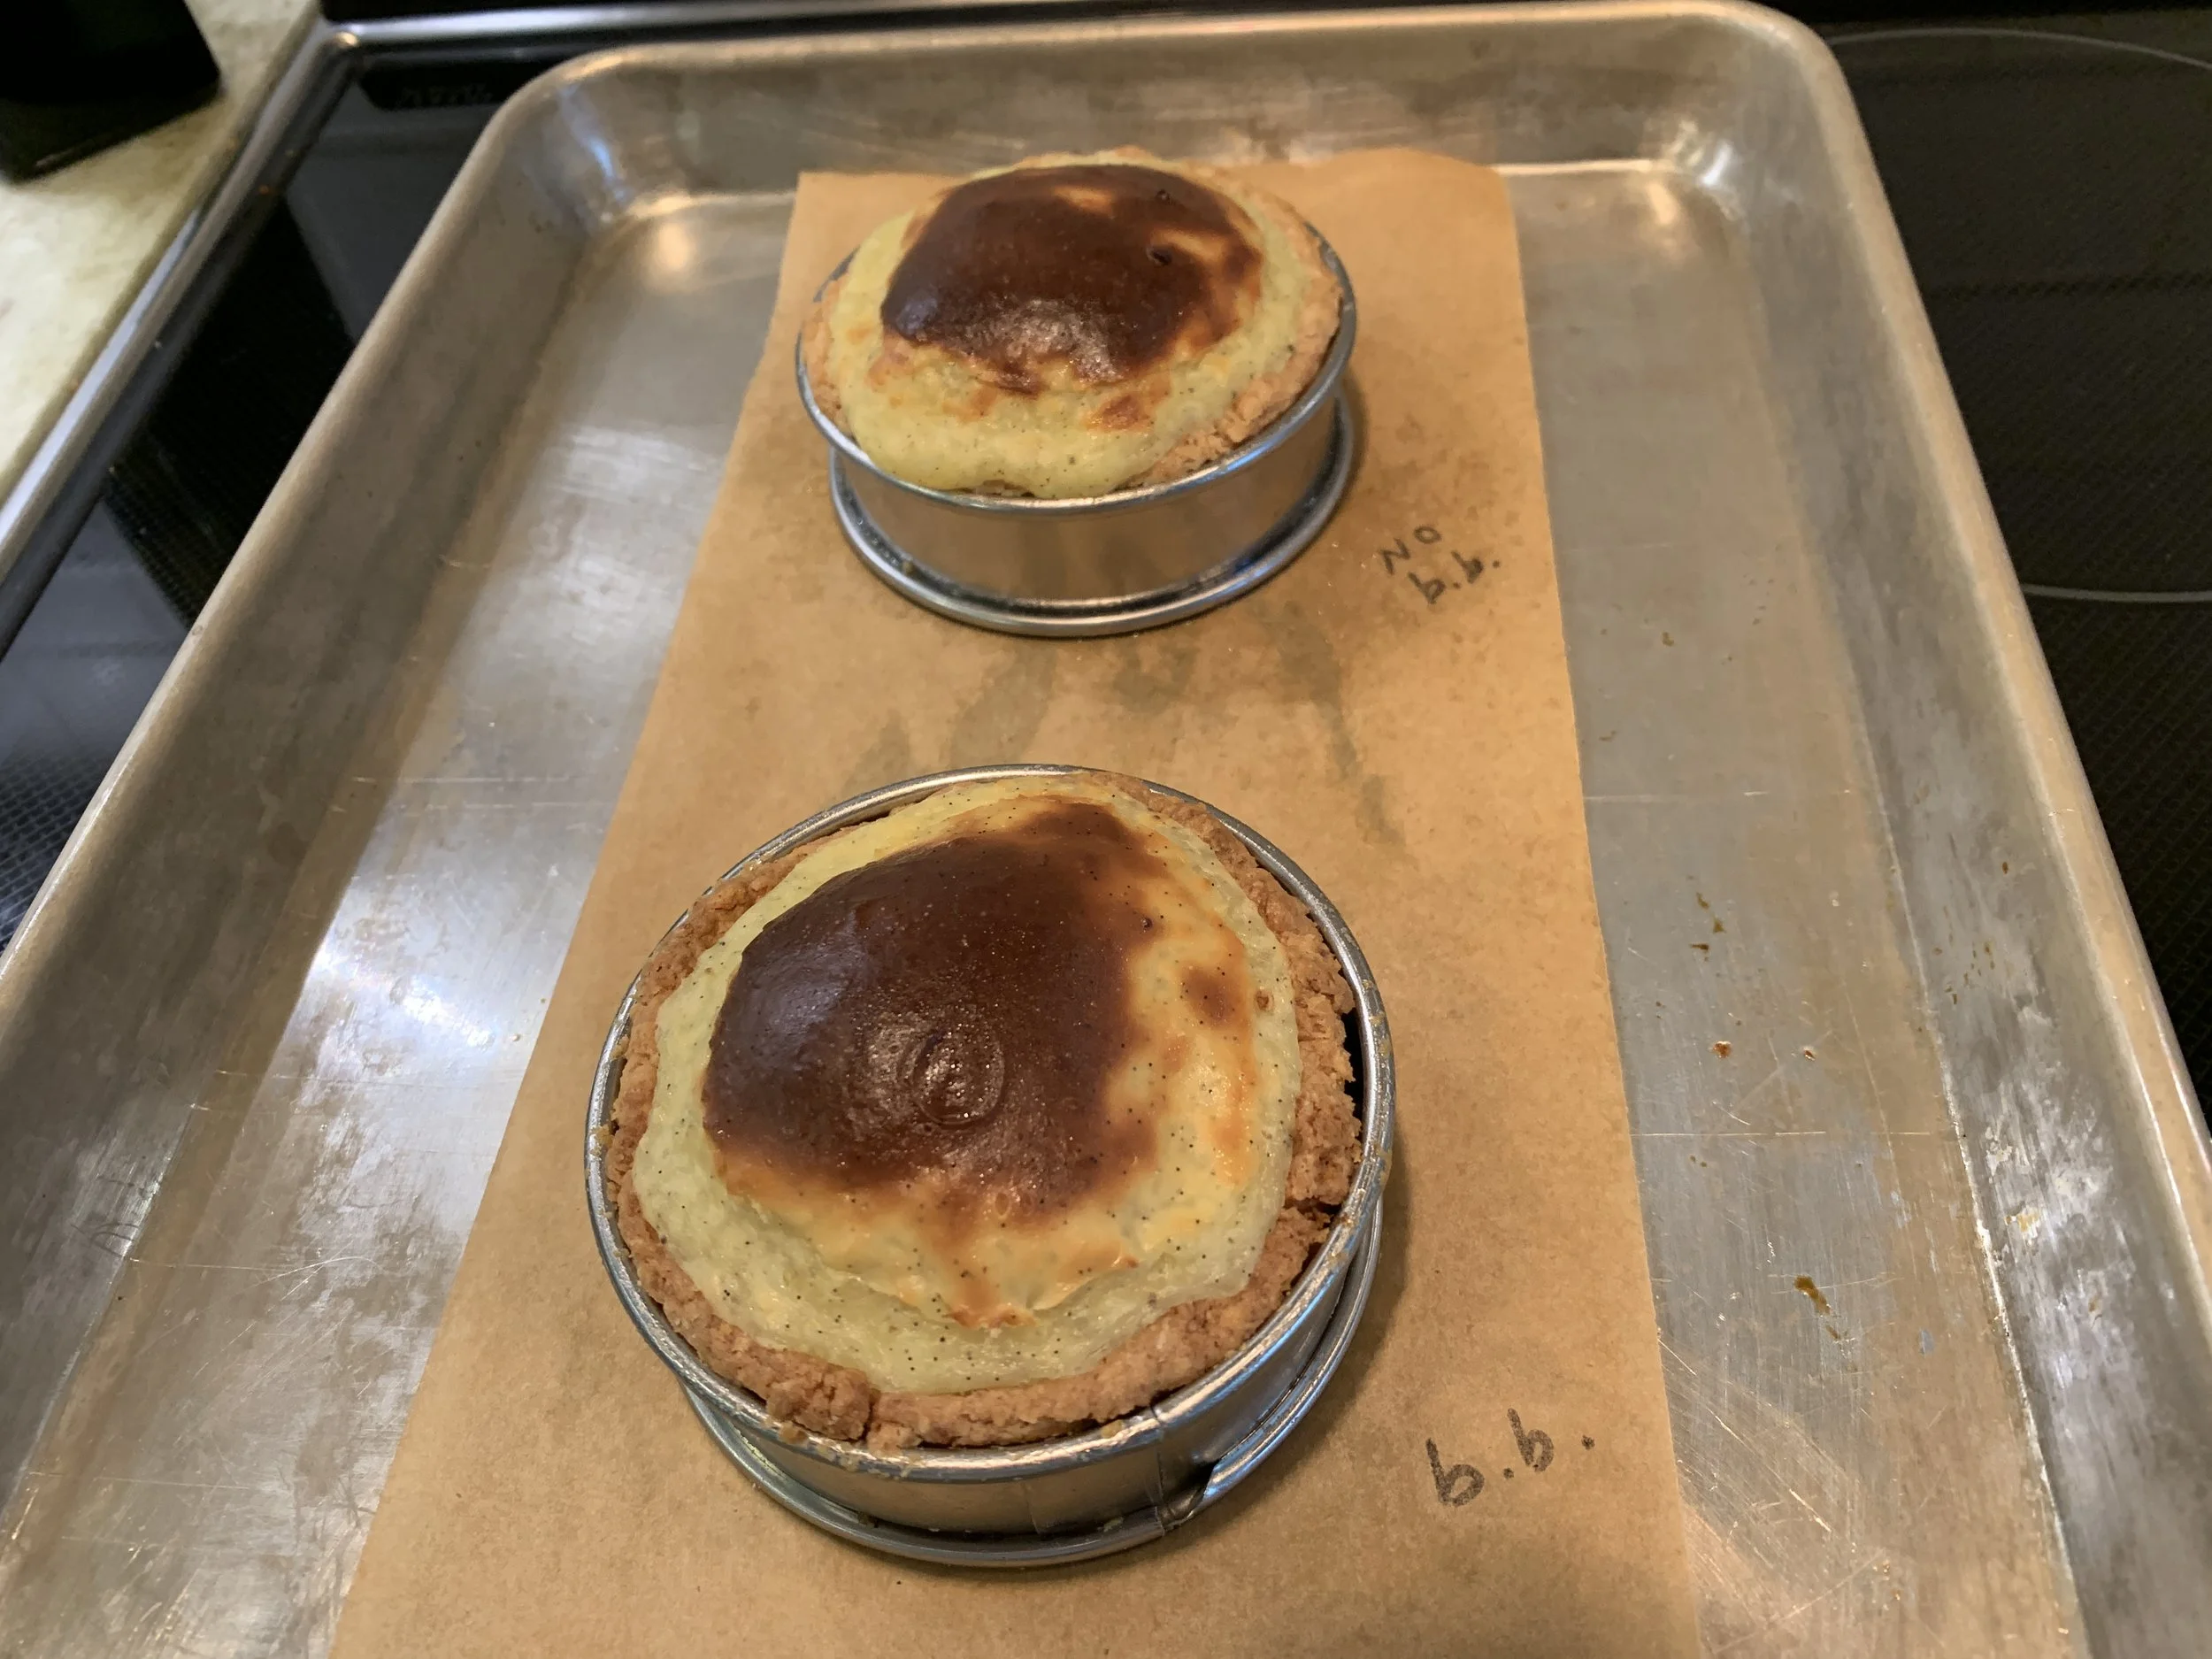
I then proceeded to make a batch of my flan custard, filling both a blind baked and an unbaked pâte brisée shell with HOT cream and then right into the oven.

Look for the nicely browned (in some cases almost black) top and just a hint of jiggle in the otherwise set custard. Both crusts baked up brown and crisp, blind baked or not. Good to know.

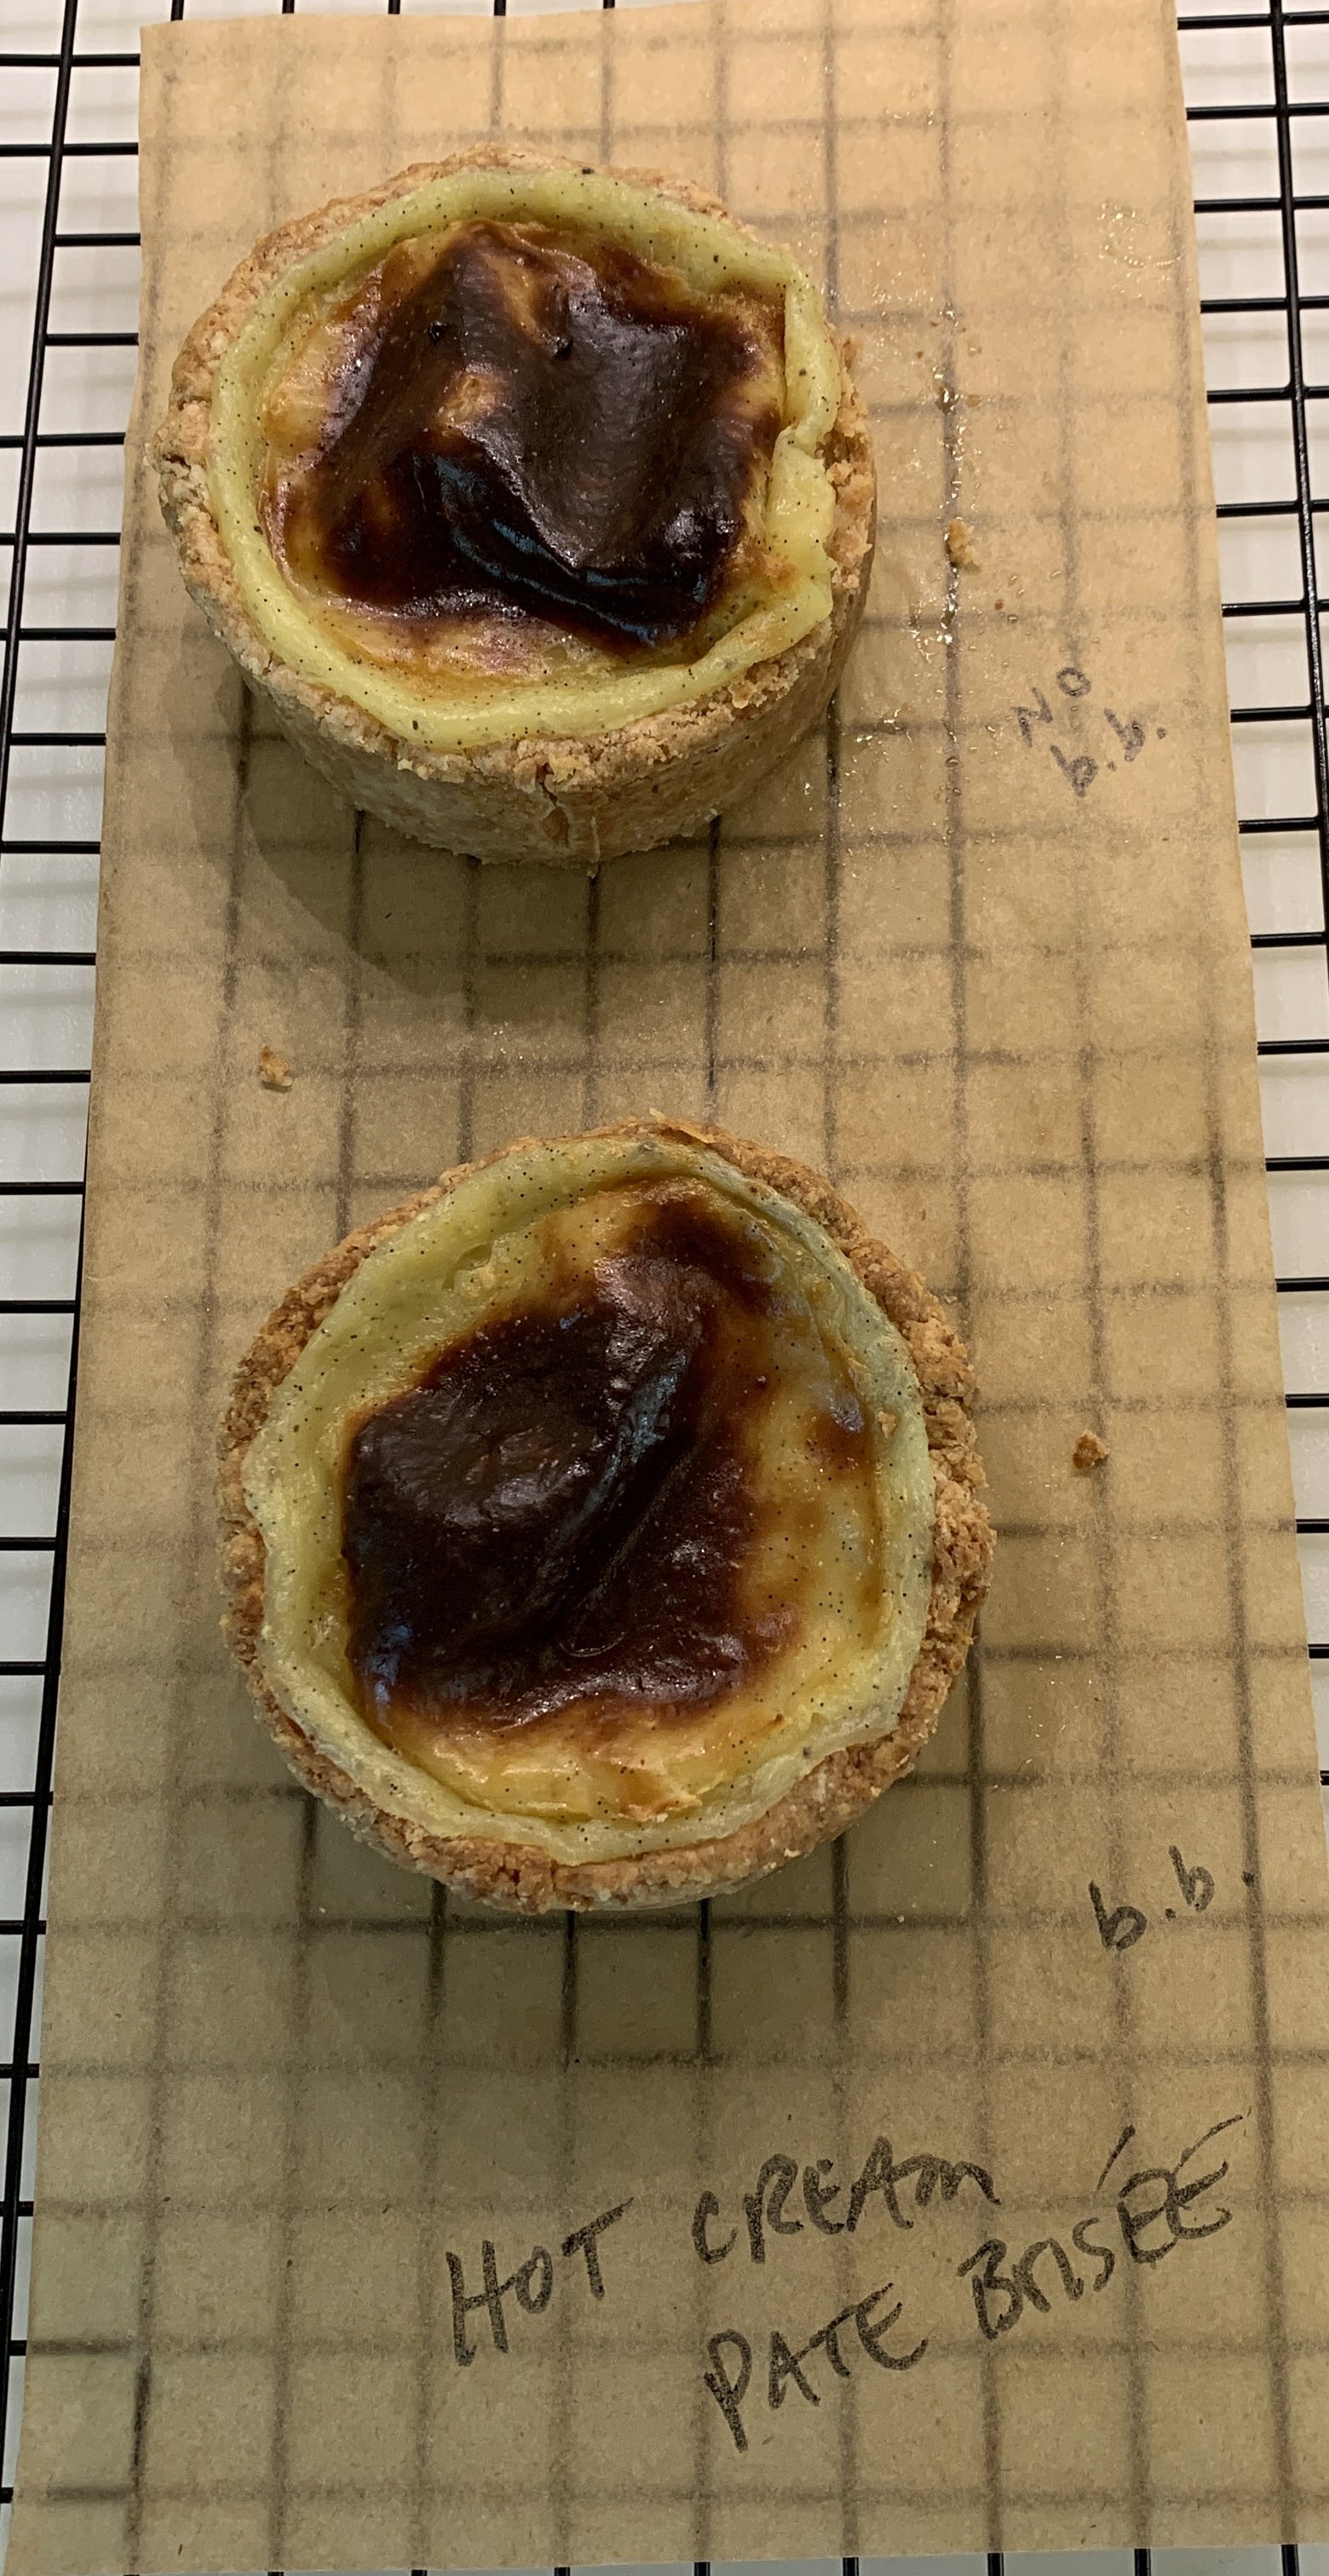
pâte brisée/hot cream just out of the oven

The flans do deflate while cooling as seen below.

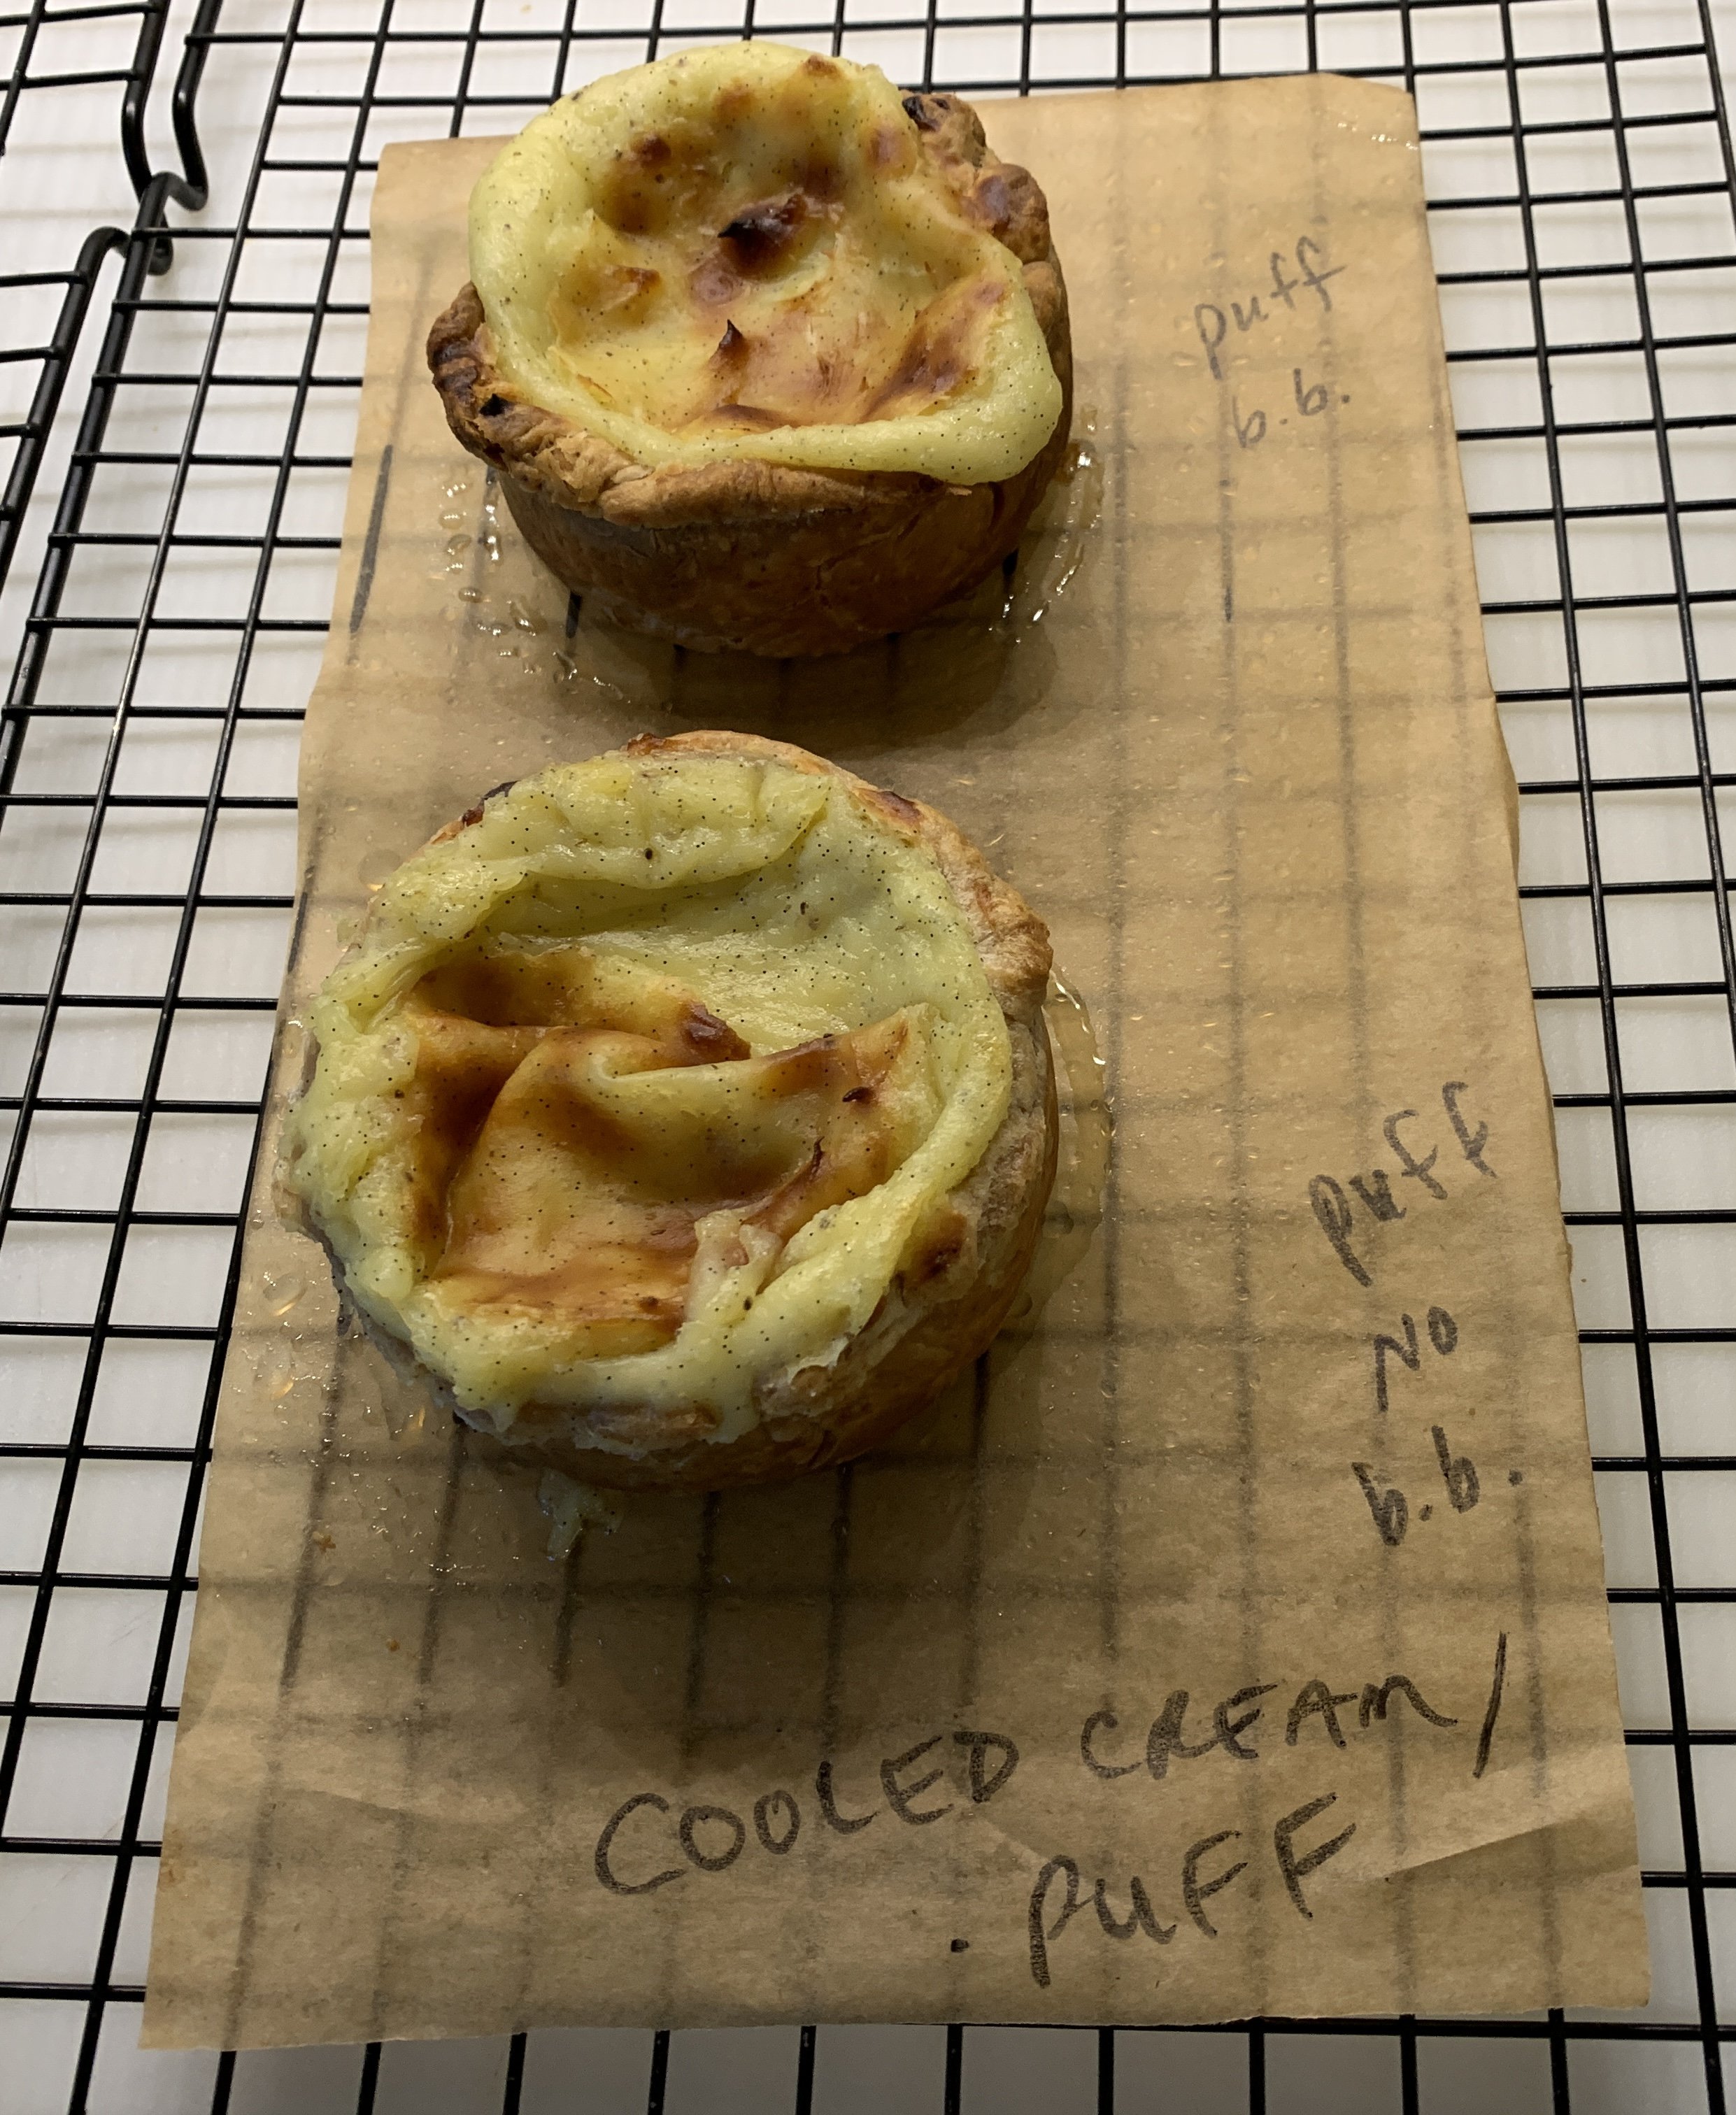
I allowed the remaining flan cream to cool about 30 minutes and filled a blind baked puff and an unbaked puff with the cooled cream.

Ready for the oven

Not a pretty picture since the unbaked puff puffed, essentially pushed the filling out and over the edges. Yikes! The blind baked one didn’t fare too well either. Too much filling on my part, although it did settle down once cooled.

rather a mess

Last but not least I filled my remaining two unbaked shells (one brisée and one puff) with cooled custard and froze them for a couple of hours before baking. I was a bit short on filling, but they were still good for the testing phase.


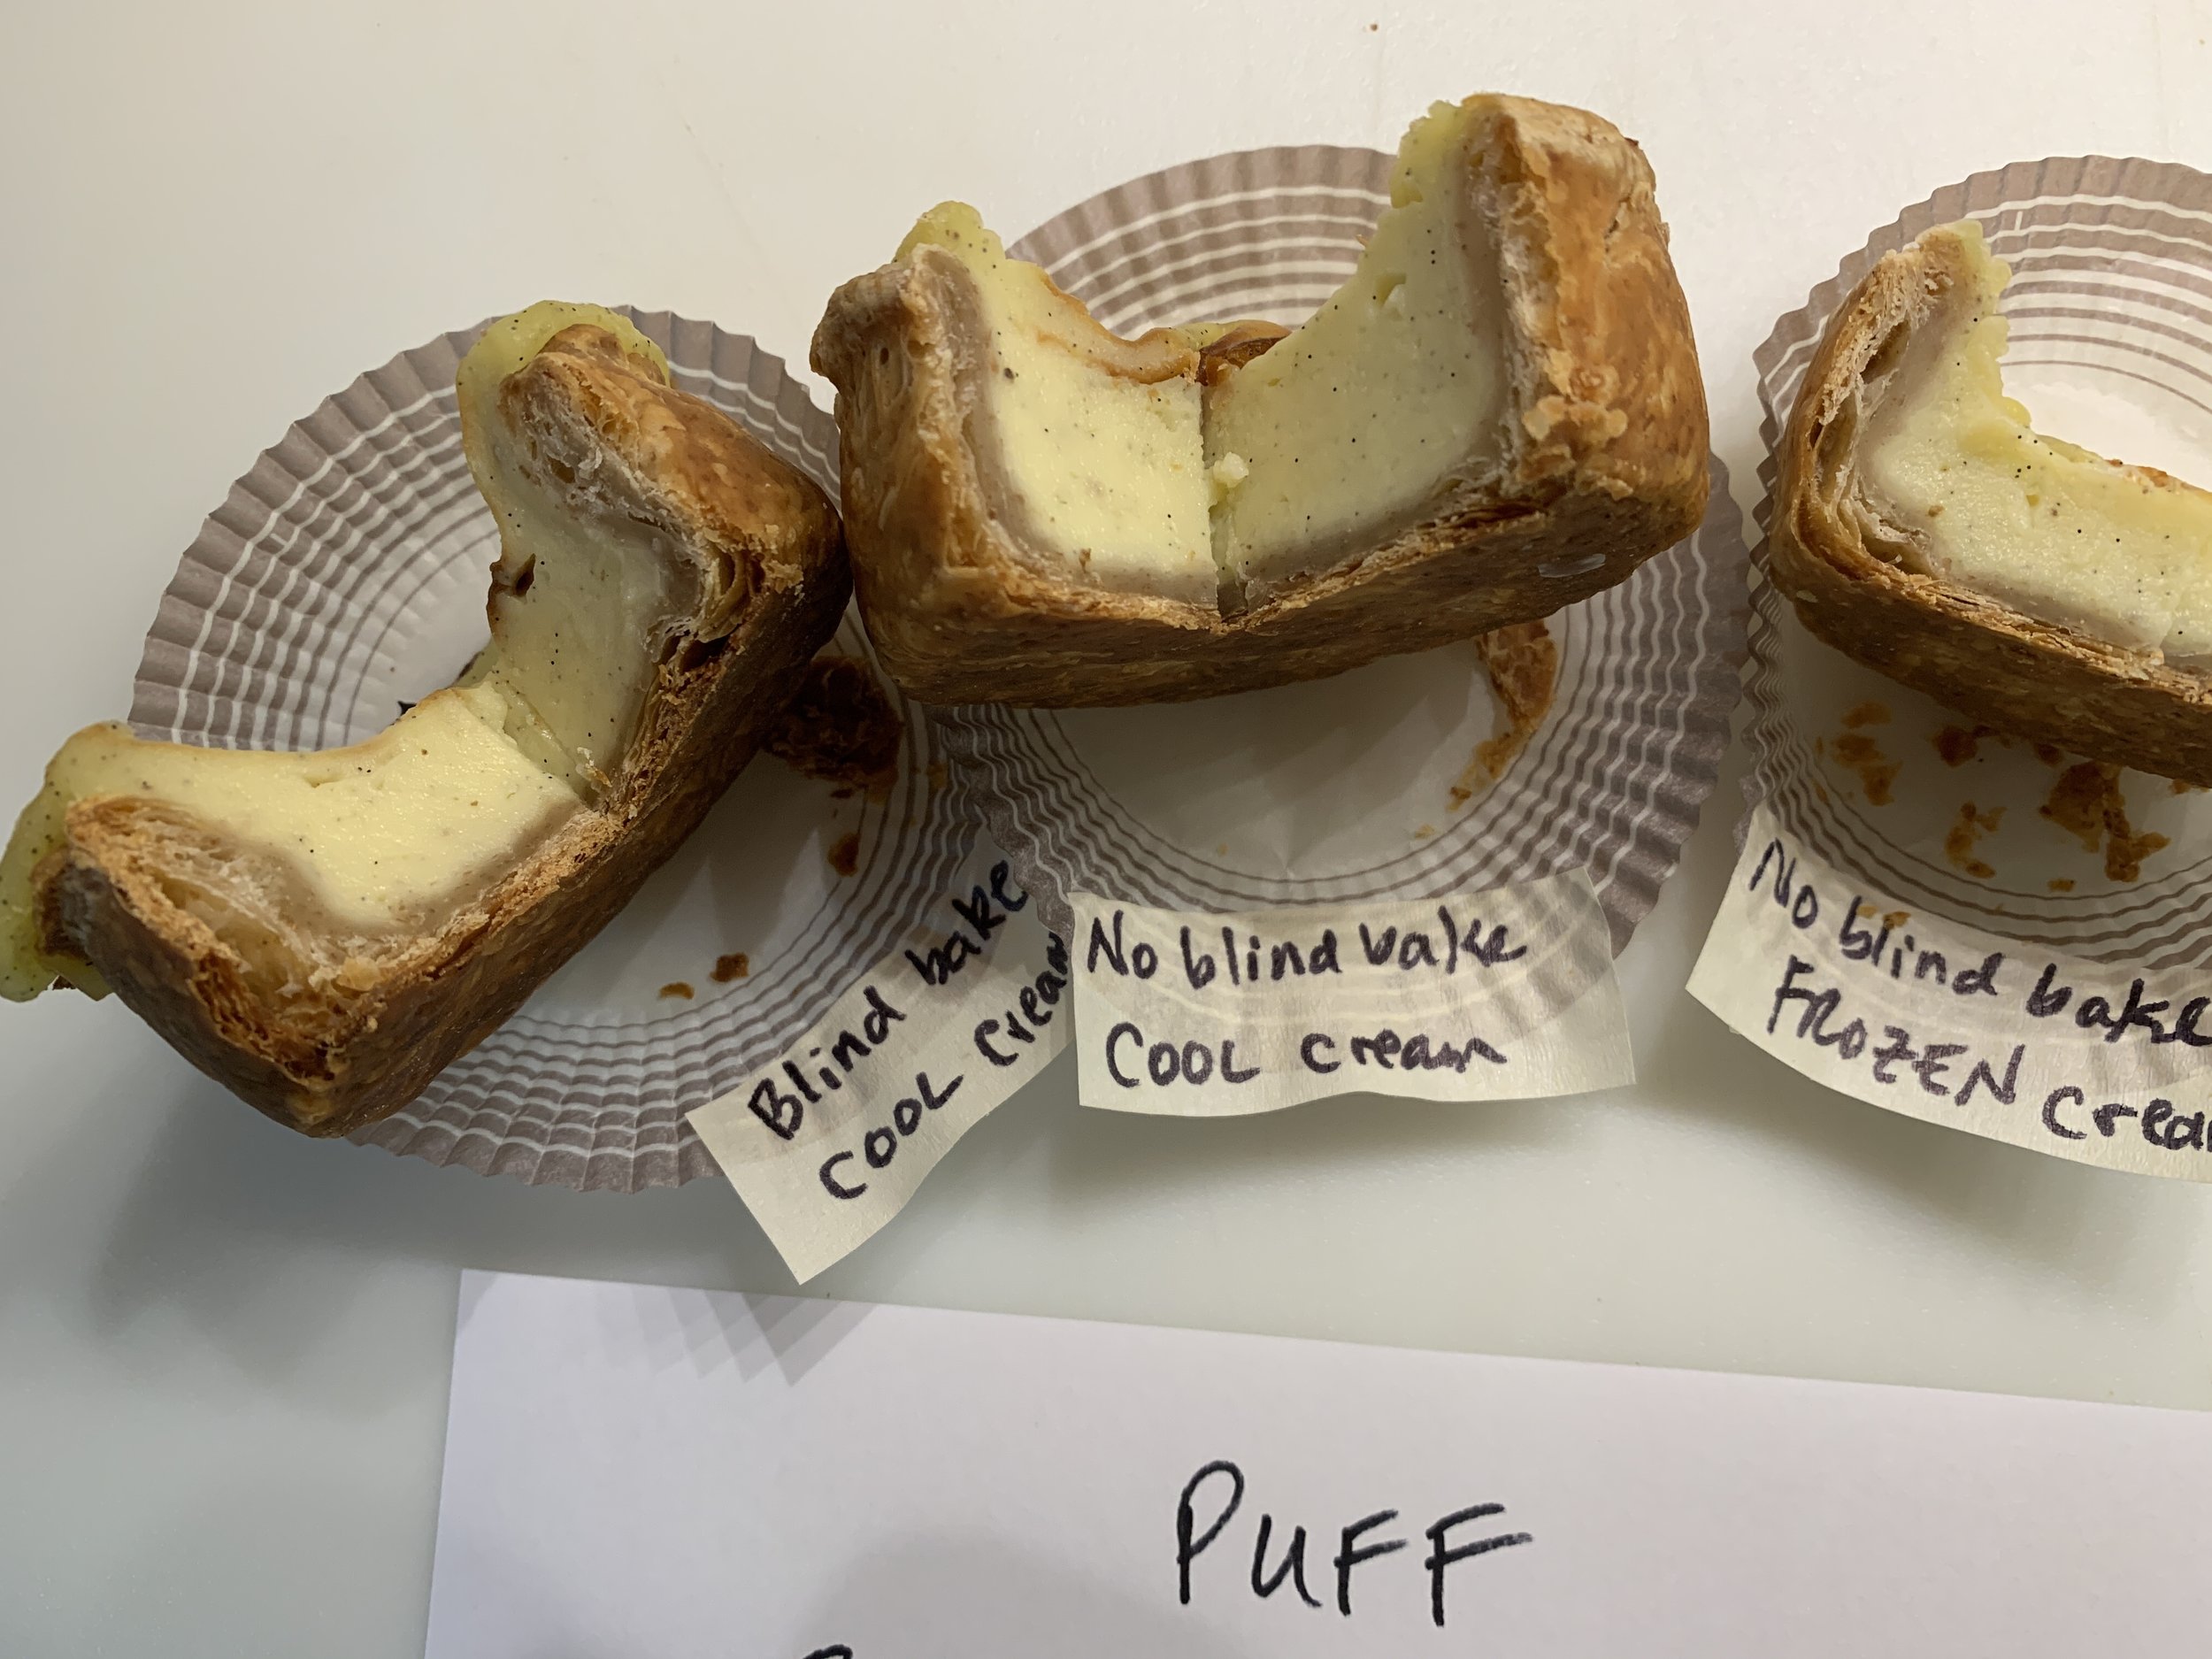
Taste test time! The first image is of the three puff crusted flans. You can see the inner layer of puff isn’t fully baked, even in the blind baked one. The custard was a winner in all versions, whether hot, cooled or frozen.

Here’s a closer view of the puff versions. Can’t have that doughy layer, no sirree!

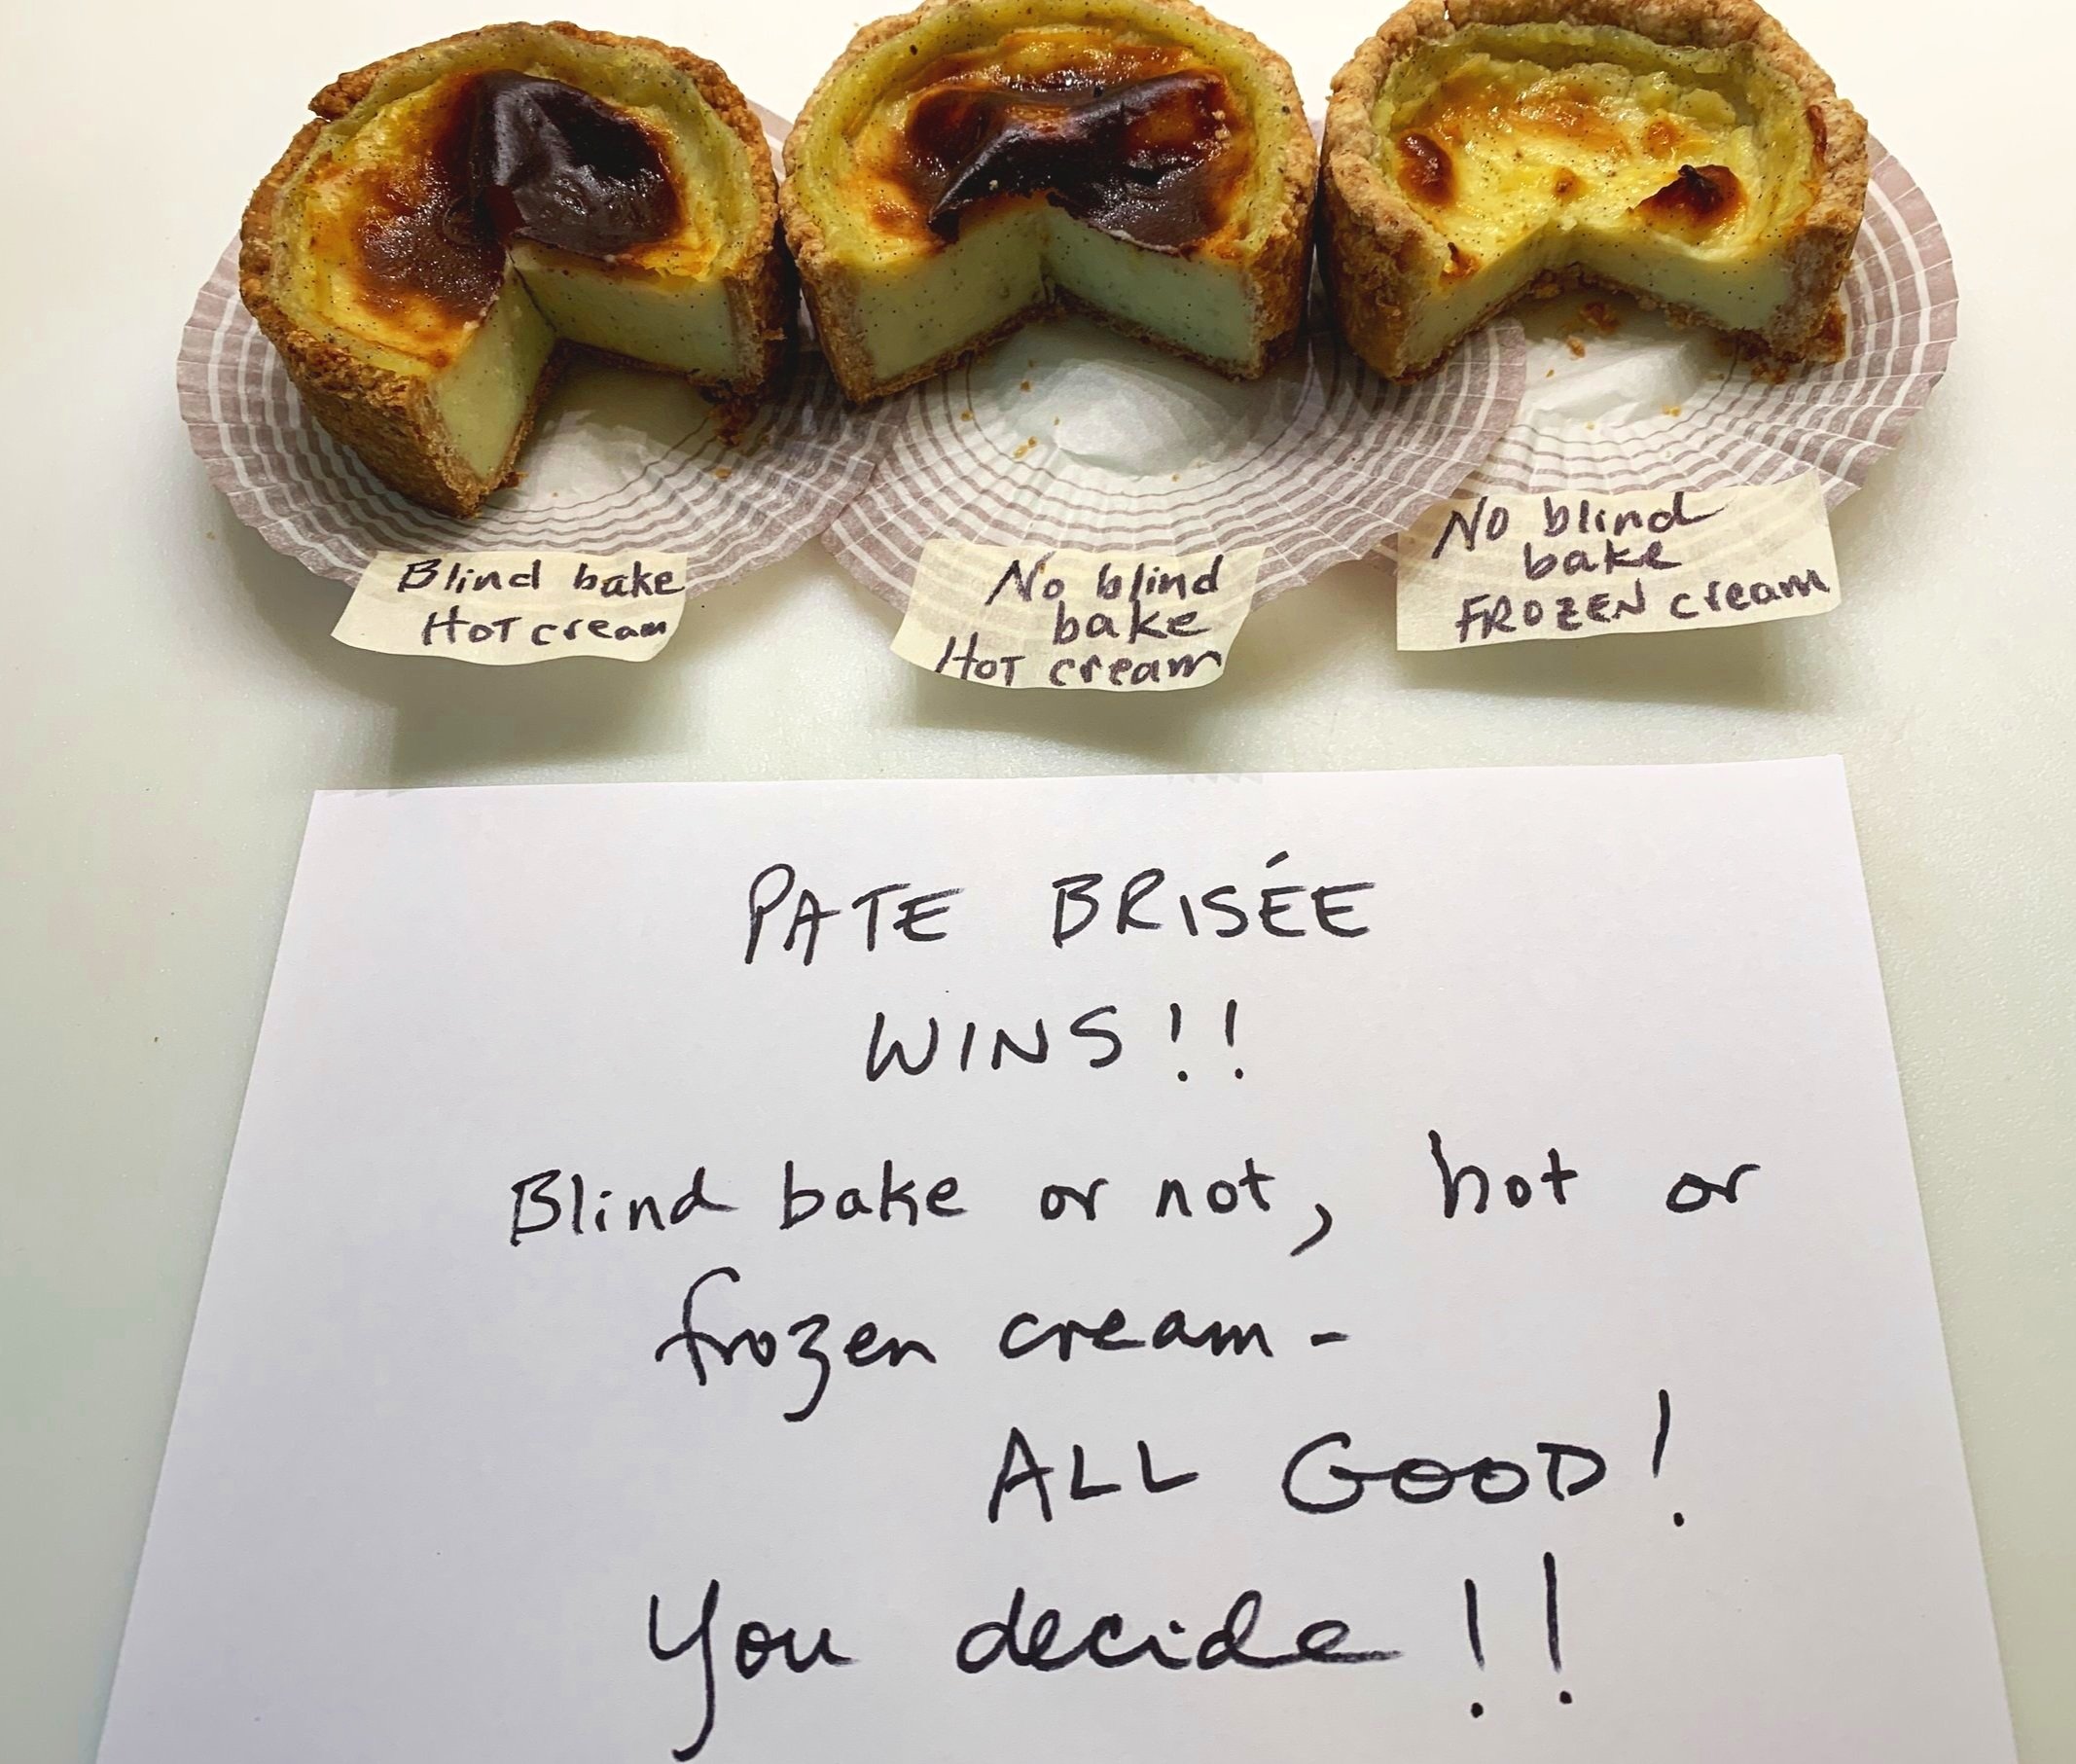
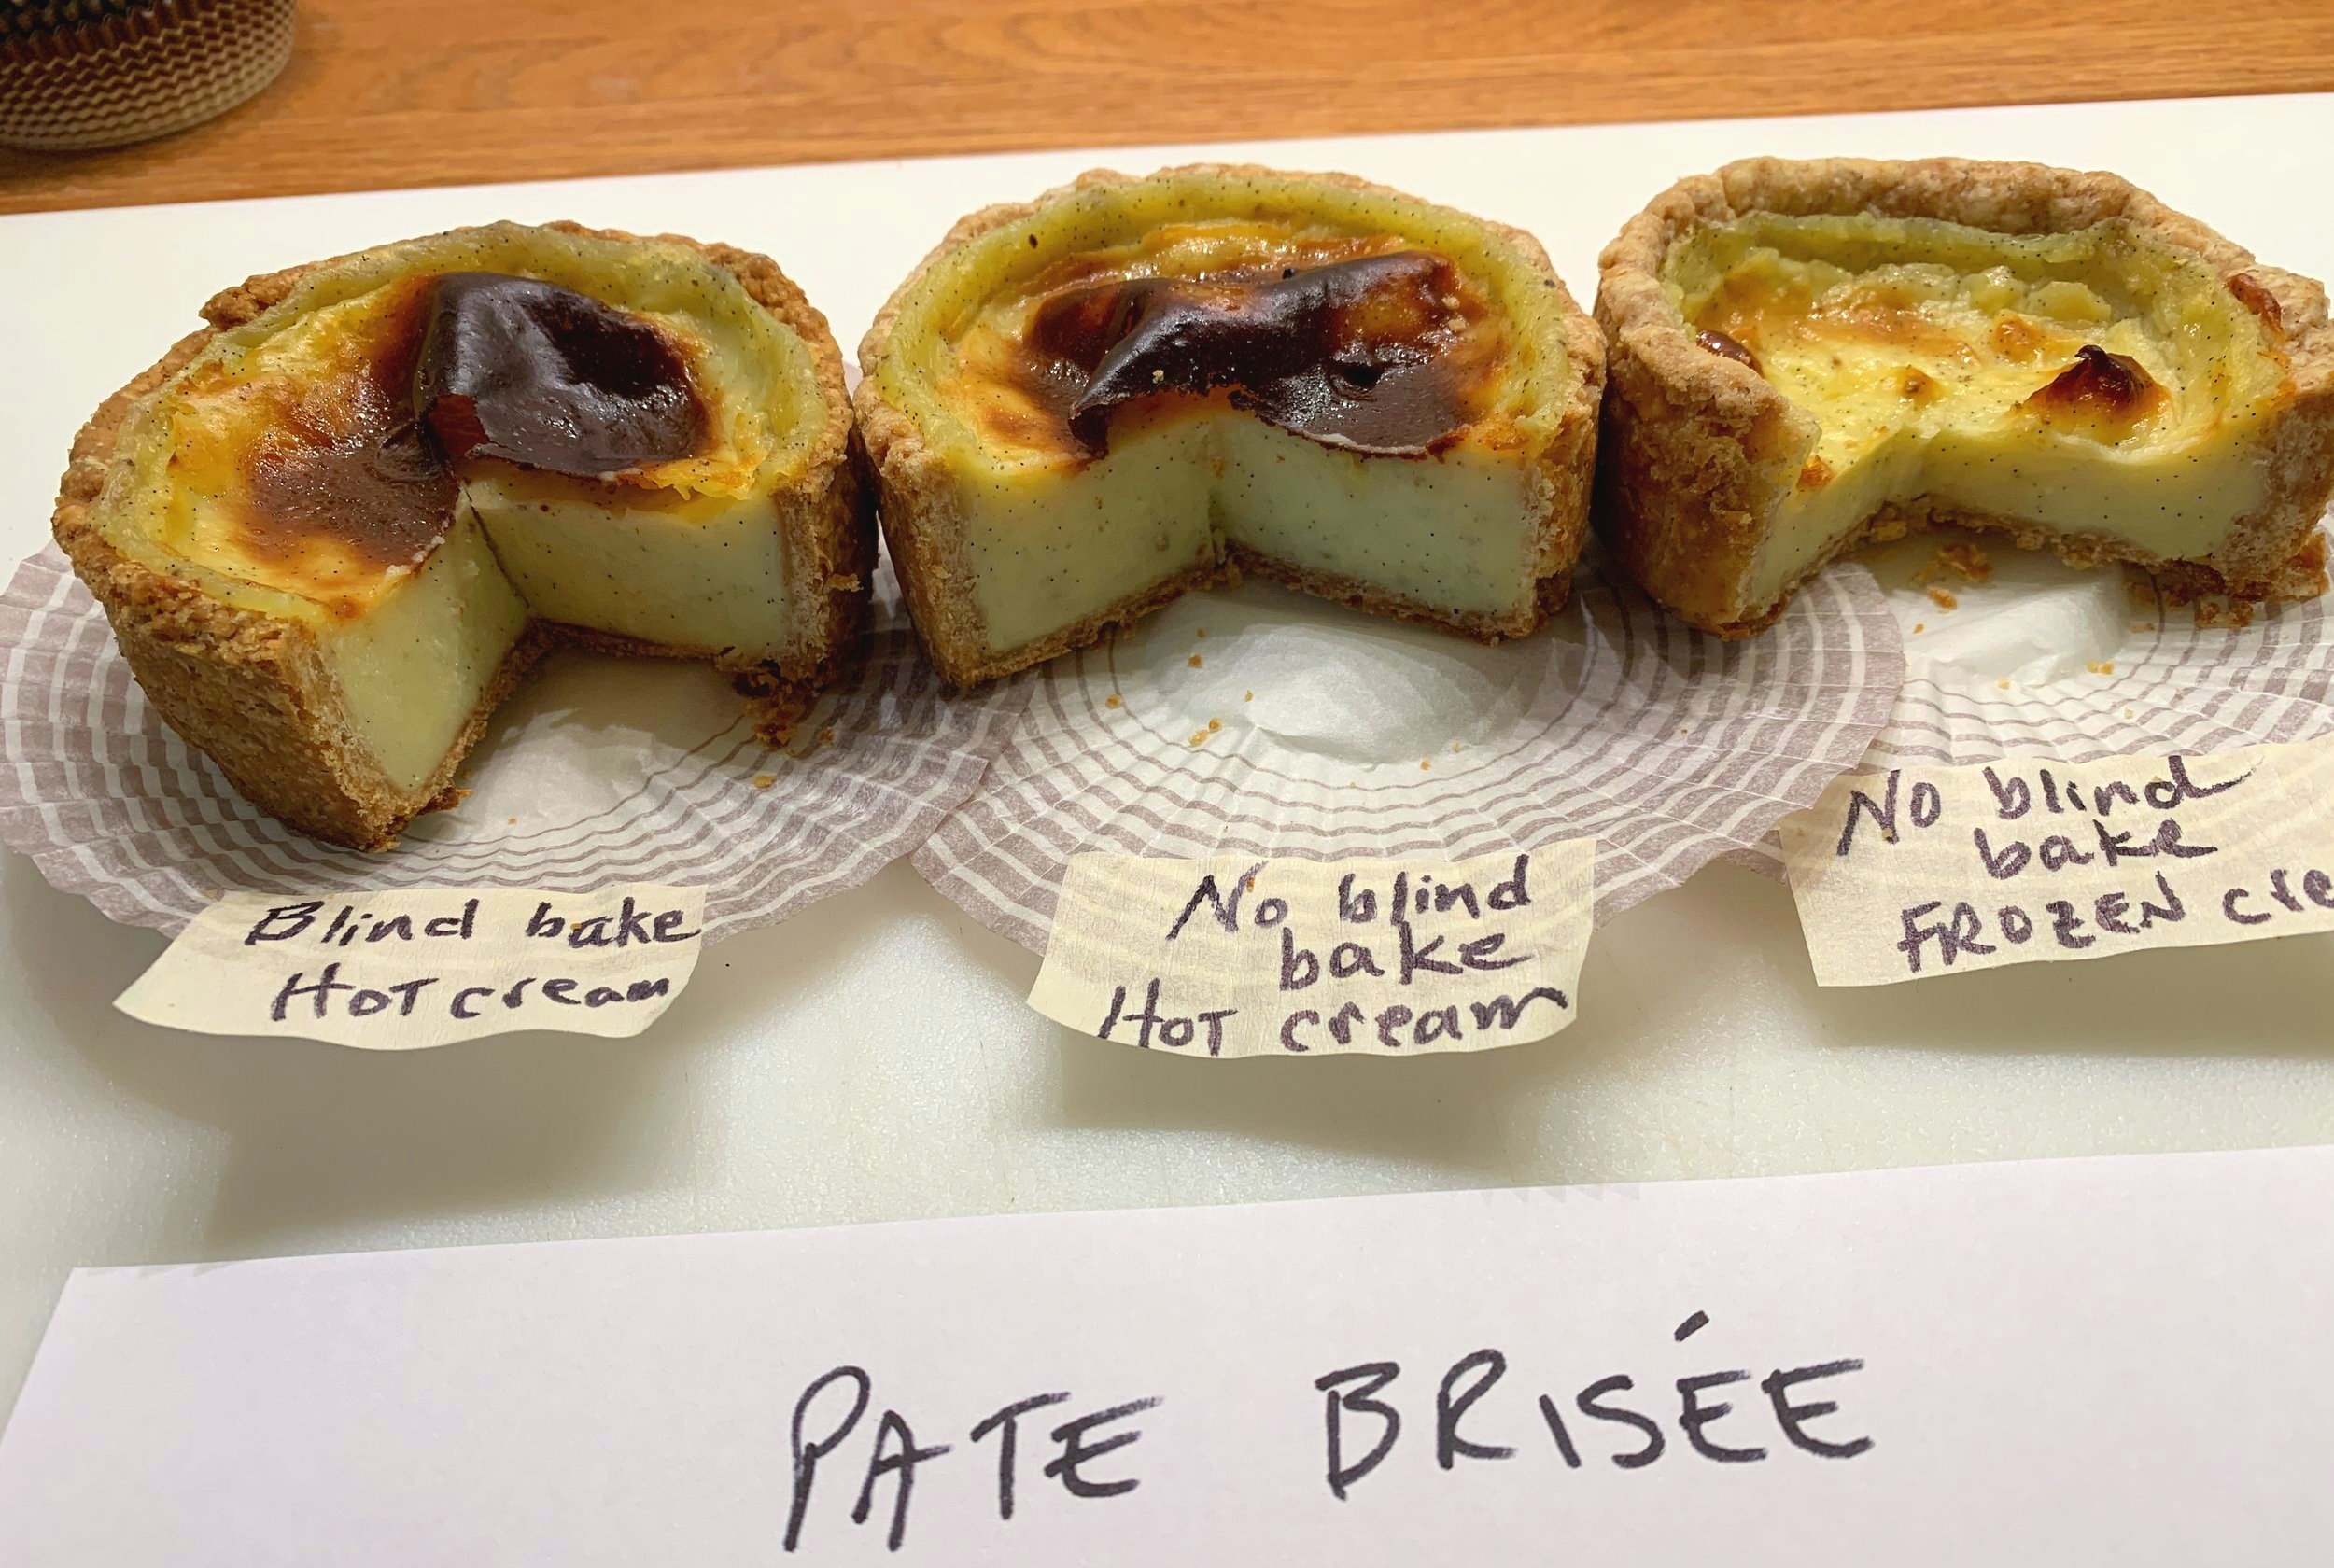
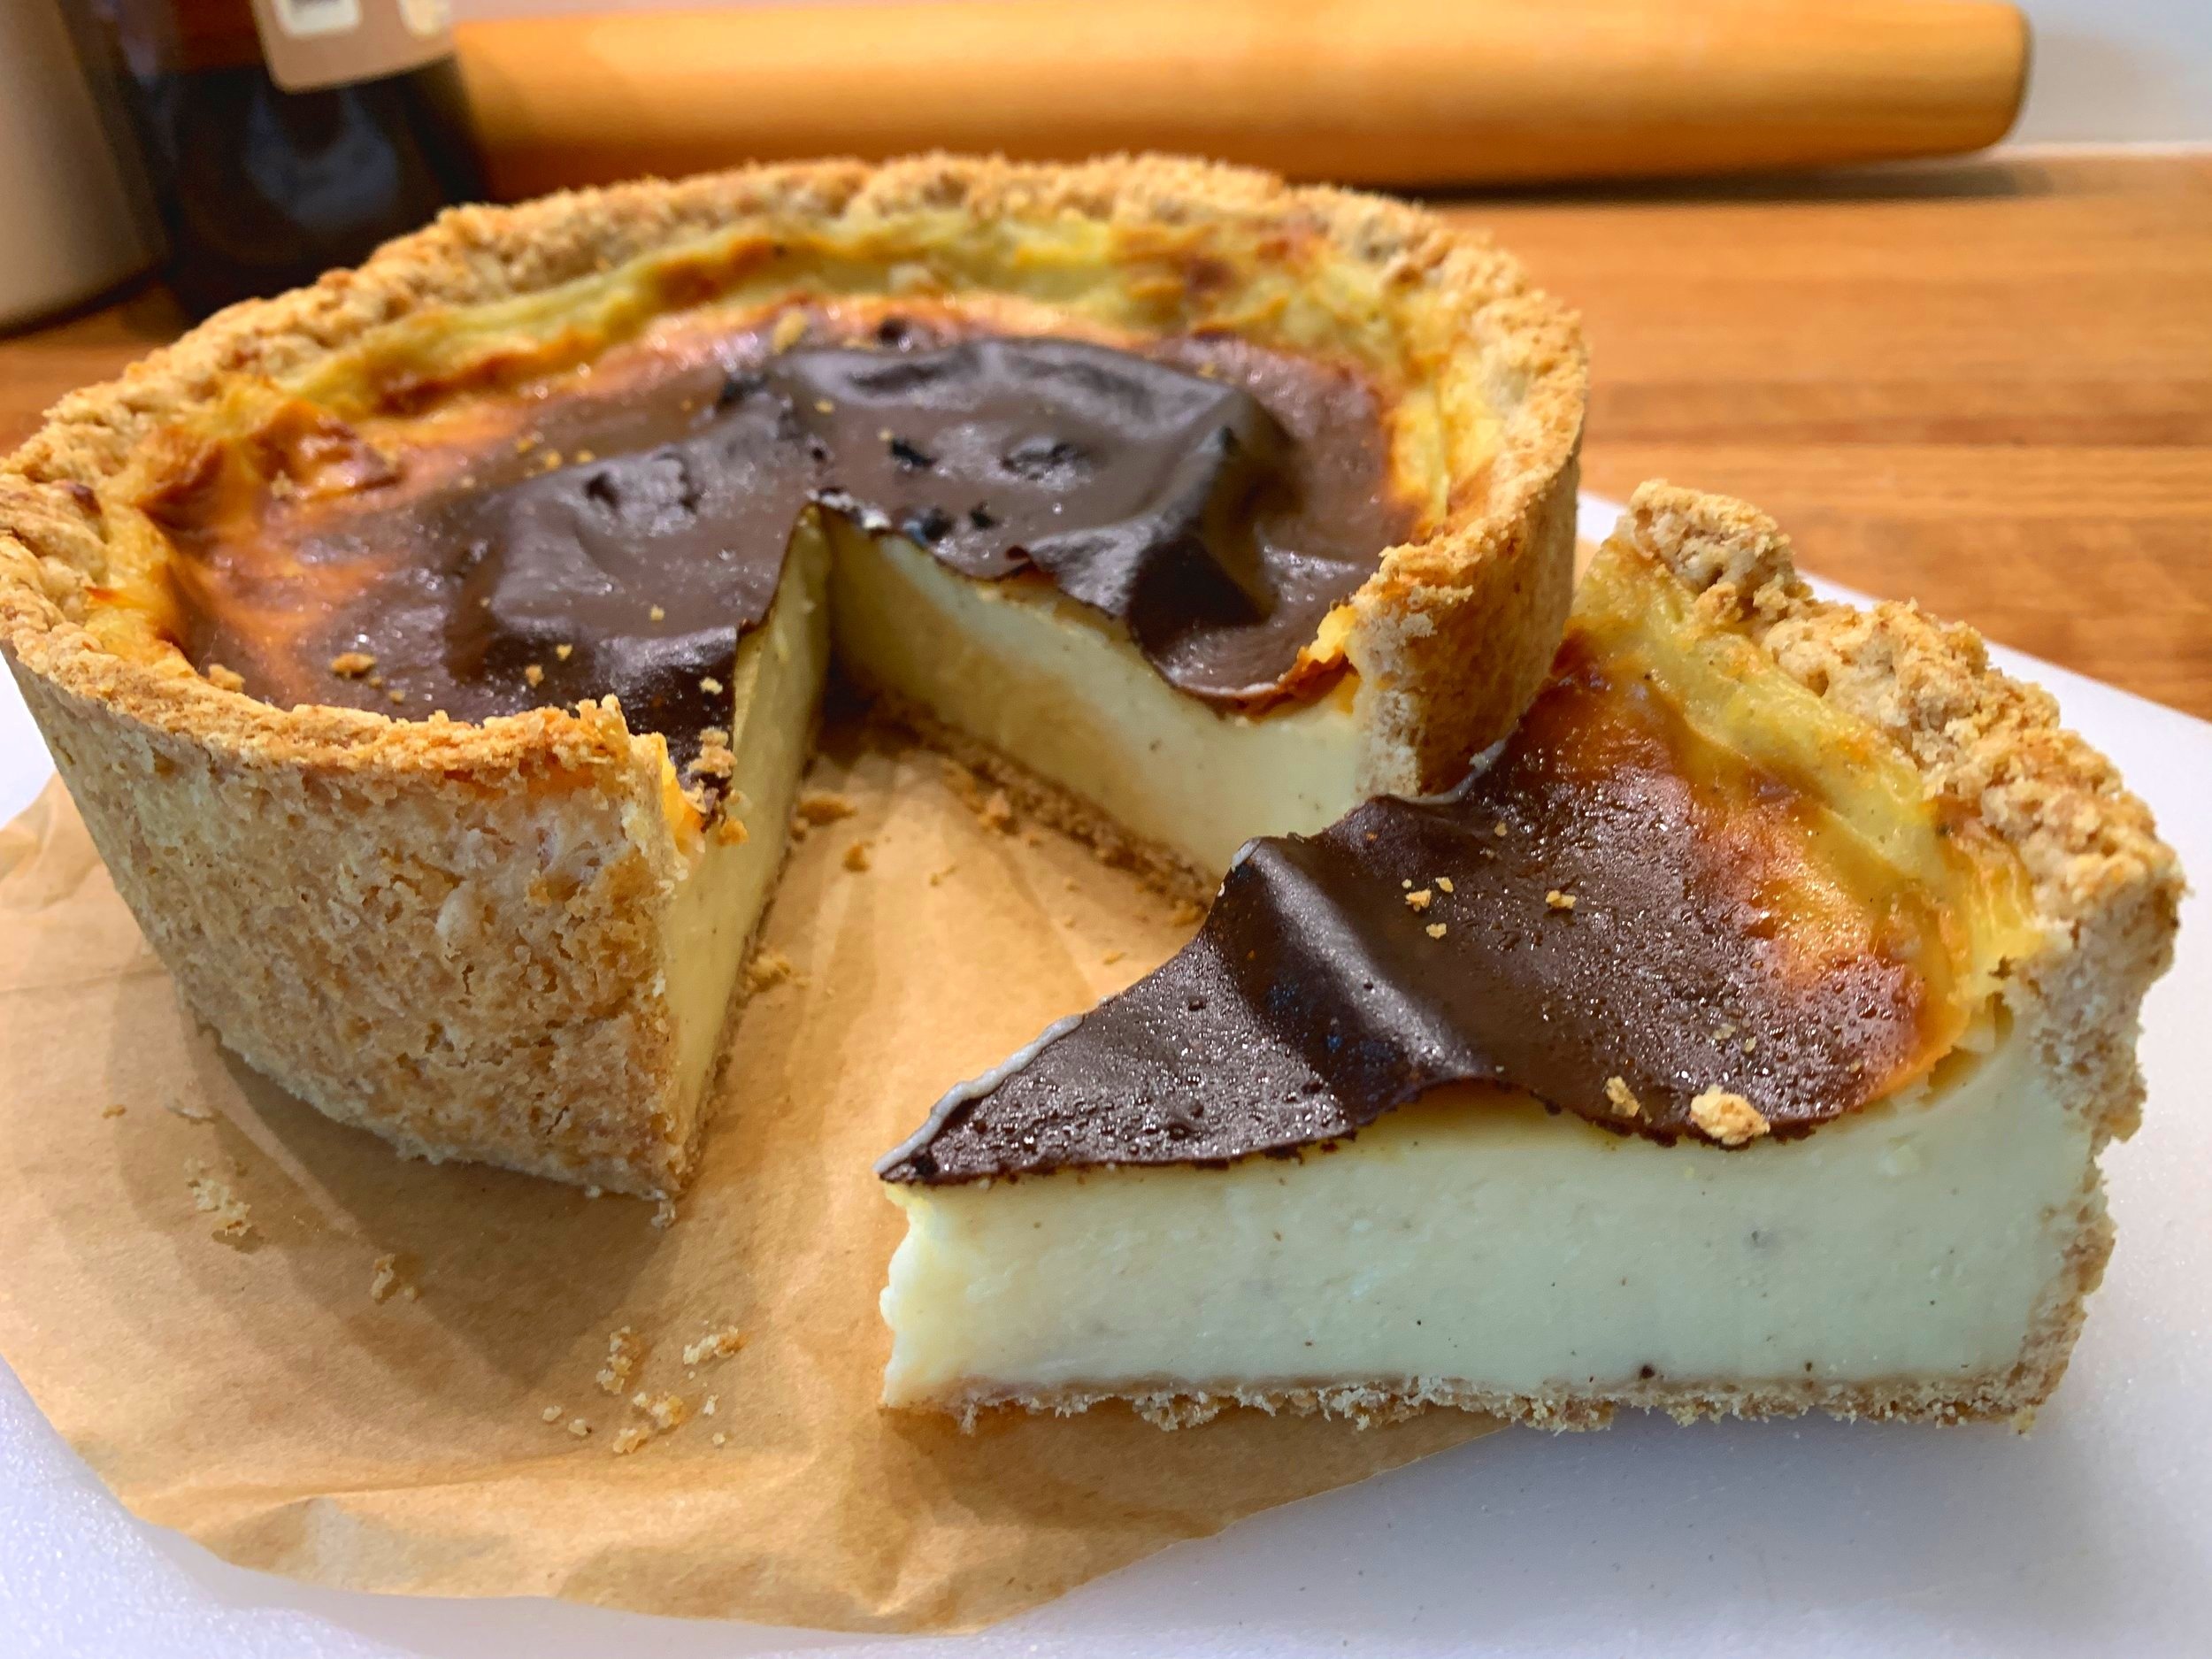
The brisée versions all baked up beautifully. The crust so nice and crisp, browned and buttery and the custard silky smooth with a lightness that seemed just right.


Here’s a closer look at the brisée crusts.


The final analysis? Pâte brisée, hot custard and no need to blind bake. Straight forward indeed.

I simply had to do one final version using a 16 cm open ring. As seen below, I did the let-the-raw dough-hang-over-the-edge-of-the-ring approach, something I’ve seen in a couple of different pastry books. Once the whole thing is baked and cooled, you carefully cut away the excess dough to create a clean edge. It worked OK but I wouldn’t bother with it in the future.

Over hanging dough approach

Place lined ring/sheet pan in the freezer while preparing the custard. Fill shell with hot cream and bake.

Ready for the oven

All Baked up

Crust trimmed

Once cooled, trim off the excess crust (snack on it!), lift off the ring and cool the flan in the fridge overnight. This holds well refrigerated over 3-4 days, and I’ll admit that Steve and I each enjoyed a daily slice during that time. A keeper.


Have fun making your own flan Parisien!

Before I go, let me share this photo of a beautiful double rainbow seen out of our west windows this morning. The rising sun in the east was hitting the trees/oncoming rain clouds to the west to give us a vision of nature’s finest. Until next time - happy baking!

Canadian butter tart trials

Please note: when this post first published, the text mistakenly read the “left half of the pan was eliminated”. That has been corrected to “the right half”. Apologies!

7E720EA9-E600-4B82-8506-5CFE869FBB1B_1_201_a.jpeg

It’s so cool when I come across something new (for me) in the baking and pastry world and not long thereafter I receive a request to make just that very thing. The ever popular Canadian butter tart is one of those. It’s kismet!

75D12CD5-87C8-4AB1-97B9-53891244E0A0_1_201_a.jpeg

It turns out that a local Grand Rapidian has a Canadian friend who adores butter tarts, and she wanted to gift some to said friend for her birthday, a lovely gesture indeed. Being confident that I could deliver, I took to reviewing a number of recipes including one from NYT (the one I remembered reading not too long ago.)

For my money I’d call it a sugar tart since the filling and taste experience are indeed quite sweet (true confession - a bit over the top for me!).

As I reviewed the dough portion of a number of recipes, I found most of them contained whole egg or yolk in addition to the typical crust components of flour, butter and ice cold water. Some used a combo of lard and butter and some went with my preferred method - all butter.

I decided to follow the recipe from the NYT article and compare the dough with my standard pâte brisée (no egg). For the filling I made two versions of NYT’s and found another filling that spoke to me from the site Little Sweet Baker - less sugar and more butter plus a splash of cream - it’s a BUTTER tart after all!

Mine is certainly not a scientific study but simply my way of sharing my inaugural (and limited) experience with the butter tart world. The results are frankly hard to fully explain in terms of why a certain filling baked the best in a particular dough. Hmmm.

BCA2FDCE-D7CC-47AE-B473-E7B4997E938C.jpeg

I blind baked the two doughs by lining a standard muffin tin (3 wells for each dough), freezing it to firm up the dough, then lining with papers and using sugar in place of dried beans as my weight, a tip learned from Stella Parks of “Brave Tart” fame. While the sugar doesn’t toast for very long this way, you can still save the sugar and use it in your shortbread or tart dough recipes to give them a hint of toasty-ness.

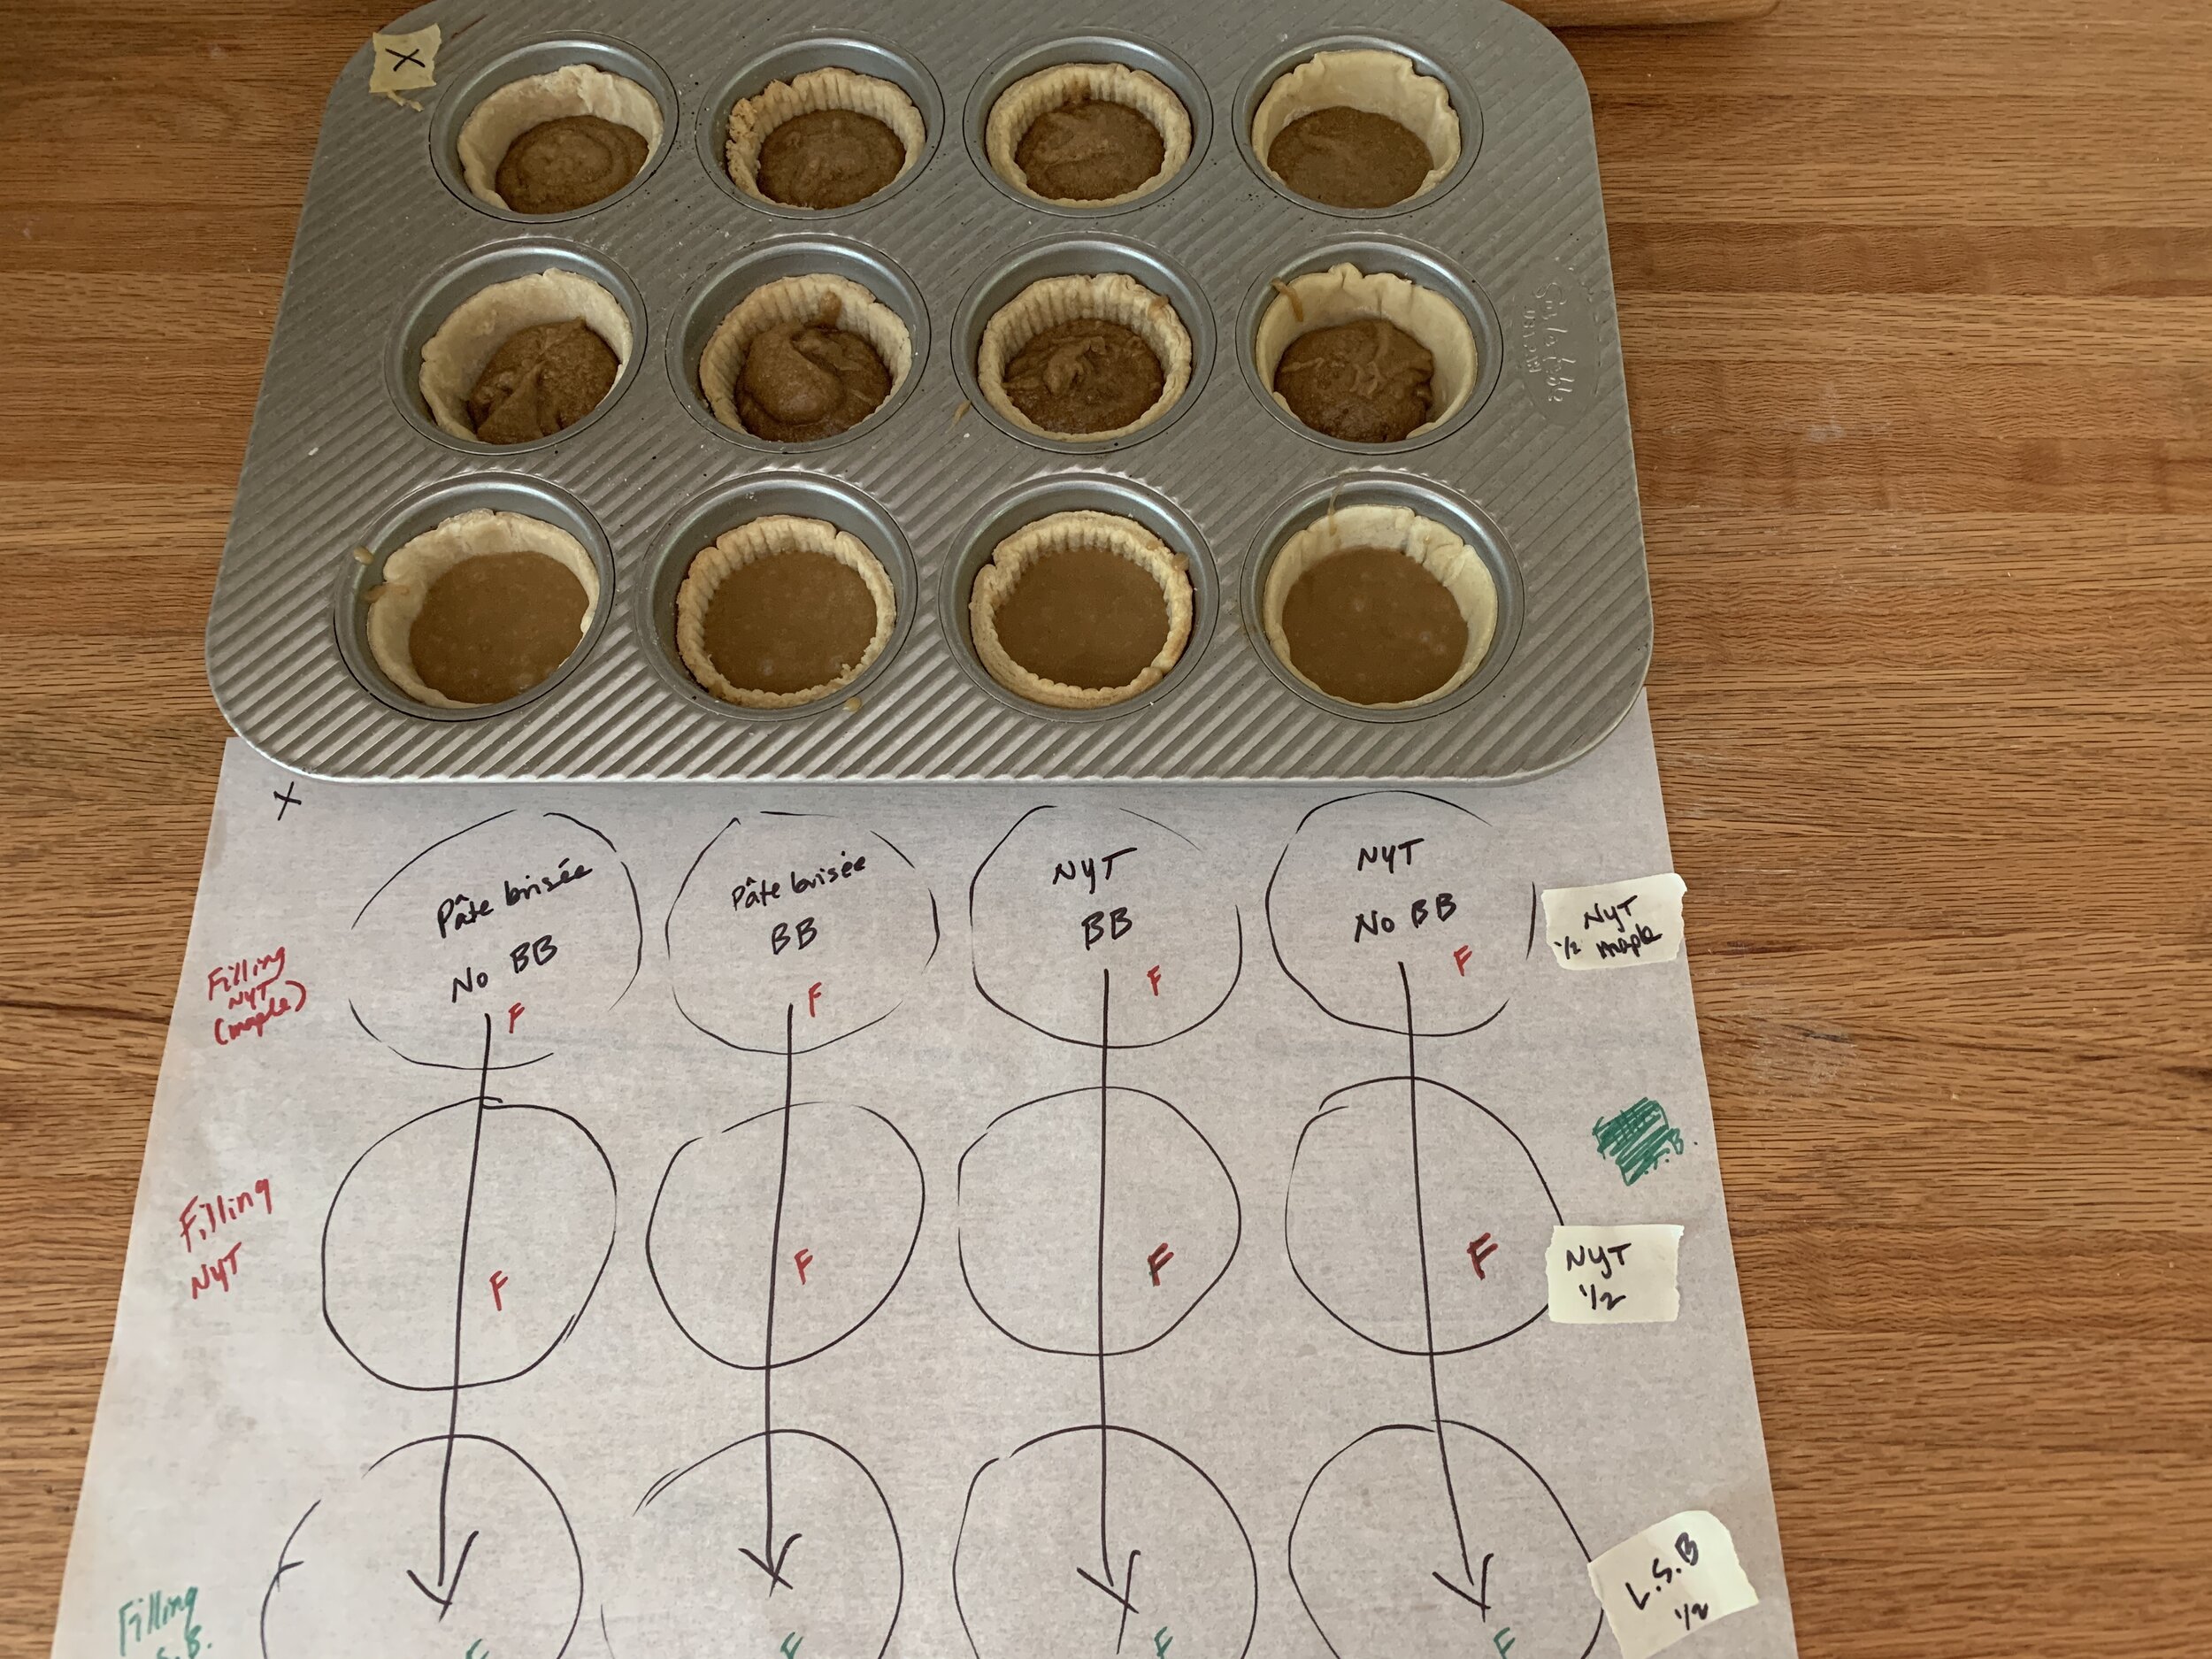
Once the blind baked shells were cool, I lined the remaining empty wells, 3 with each dough and proceeded with the fillings.

When making the filling, it is suggested that one use very soft or melted/cooled butter and blend the filling by hand so as to avoid incorporating air into the mix, resulting in a final, enhanced gooey-ness. I chose to keep it simple, not adding nuts or raisins as some iterations do.

The full NYT recipe blends 200 grams brown sugar ( I used dark) with 1/2 teaspoon salt; blend in 57 g soft, unsalted butter by hand until smooth, followed by 1 large egg and a teaspoon vanilla (pretty easy, eh?). The second NYT version I made replaces the 200 g brown sugar with 150 g brown sugar and 1/4 cup maple syrup with the remaining ingredients the same (meant to result in a runnier filling that some reportedly prefer).

Little Sweet Baker’s filling blends 150 g brown sugar with 75 g melted and cooled butter; add in 1 large egg, I teaspoon vanilla and 1 tablespoon heavy cream. Again, easy-peasy.

For my testing purposes I used half recipes (for the egg, whisk up one egg then weigh out 25 g which is about half a large egg.)

05F8FDD1-B805-48C9-8C25-1618A97E8A27_1_201_a.jpeg

I guestimated about 28 g or so of filling for each tart and proceeded to dole the different fillings into the shells. Remember the central 6 wells are blind baked and the outer 6 are not.

B9F5ED14-AF96-49BA-AAE3-B23C5C2DEA8A.jpeg

Here they are, all filled up and ready to go.

129D2521-A69F-4682-8608-0983D39927B3_1_201_a.jpeg

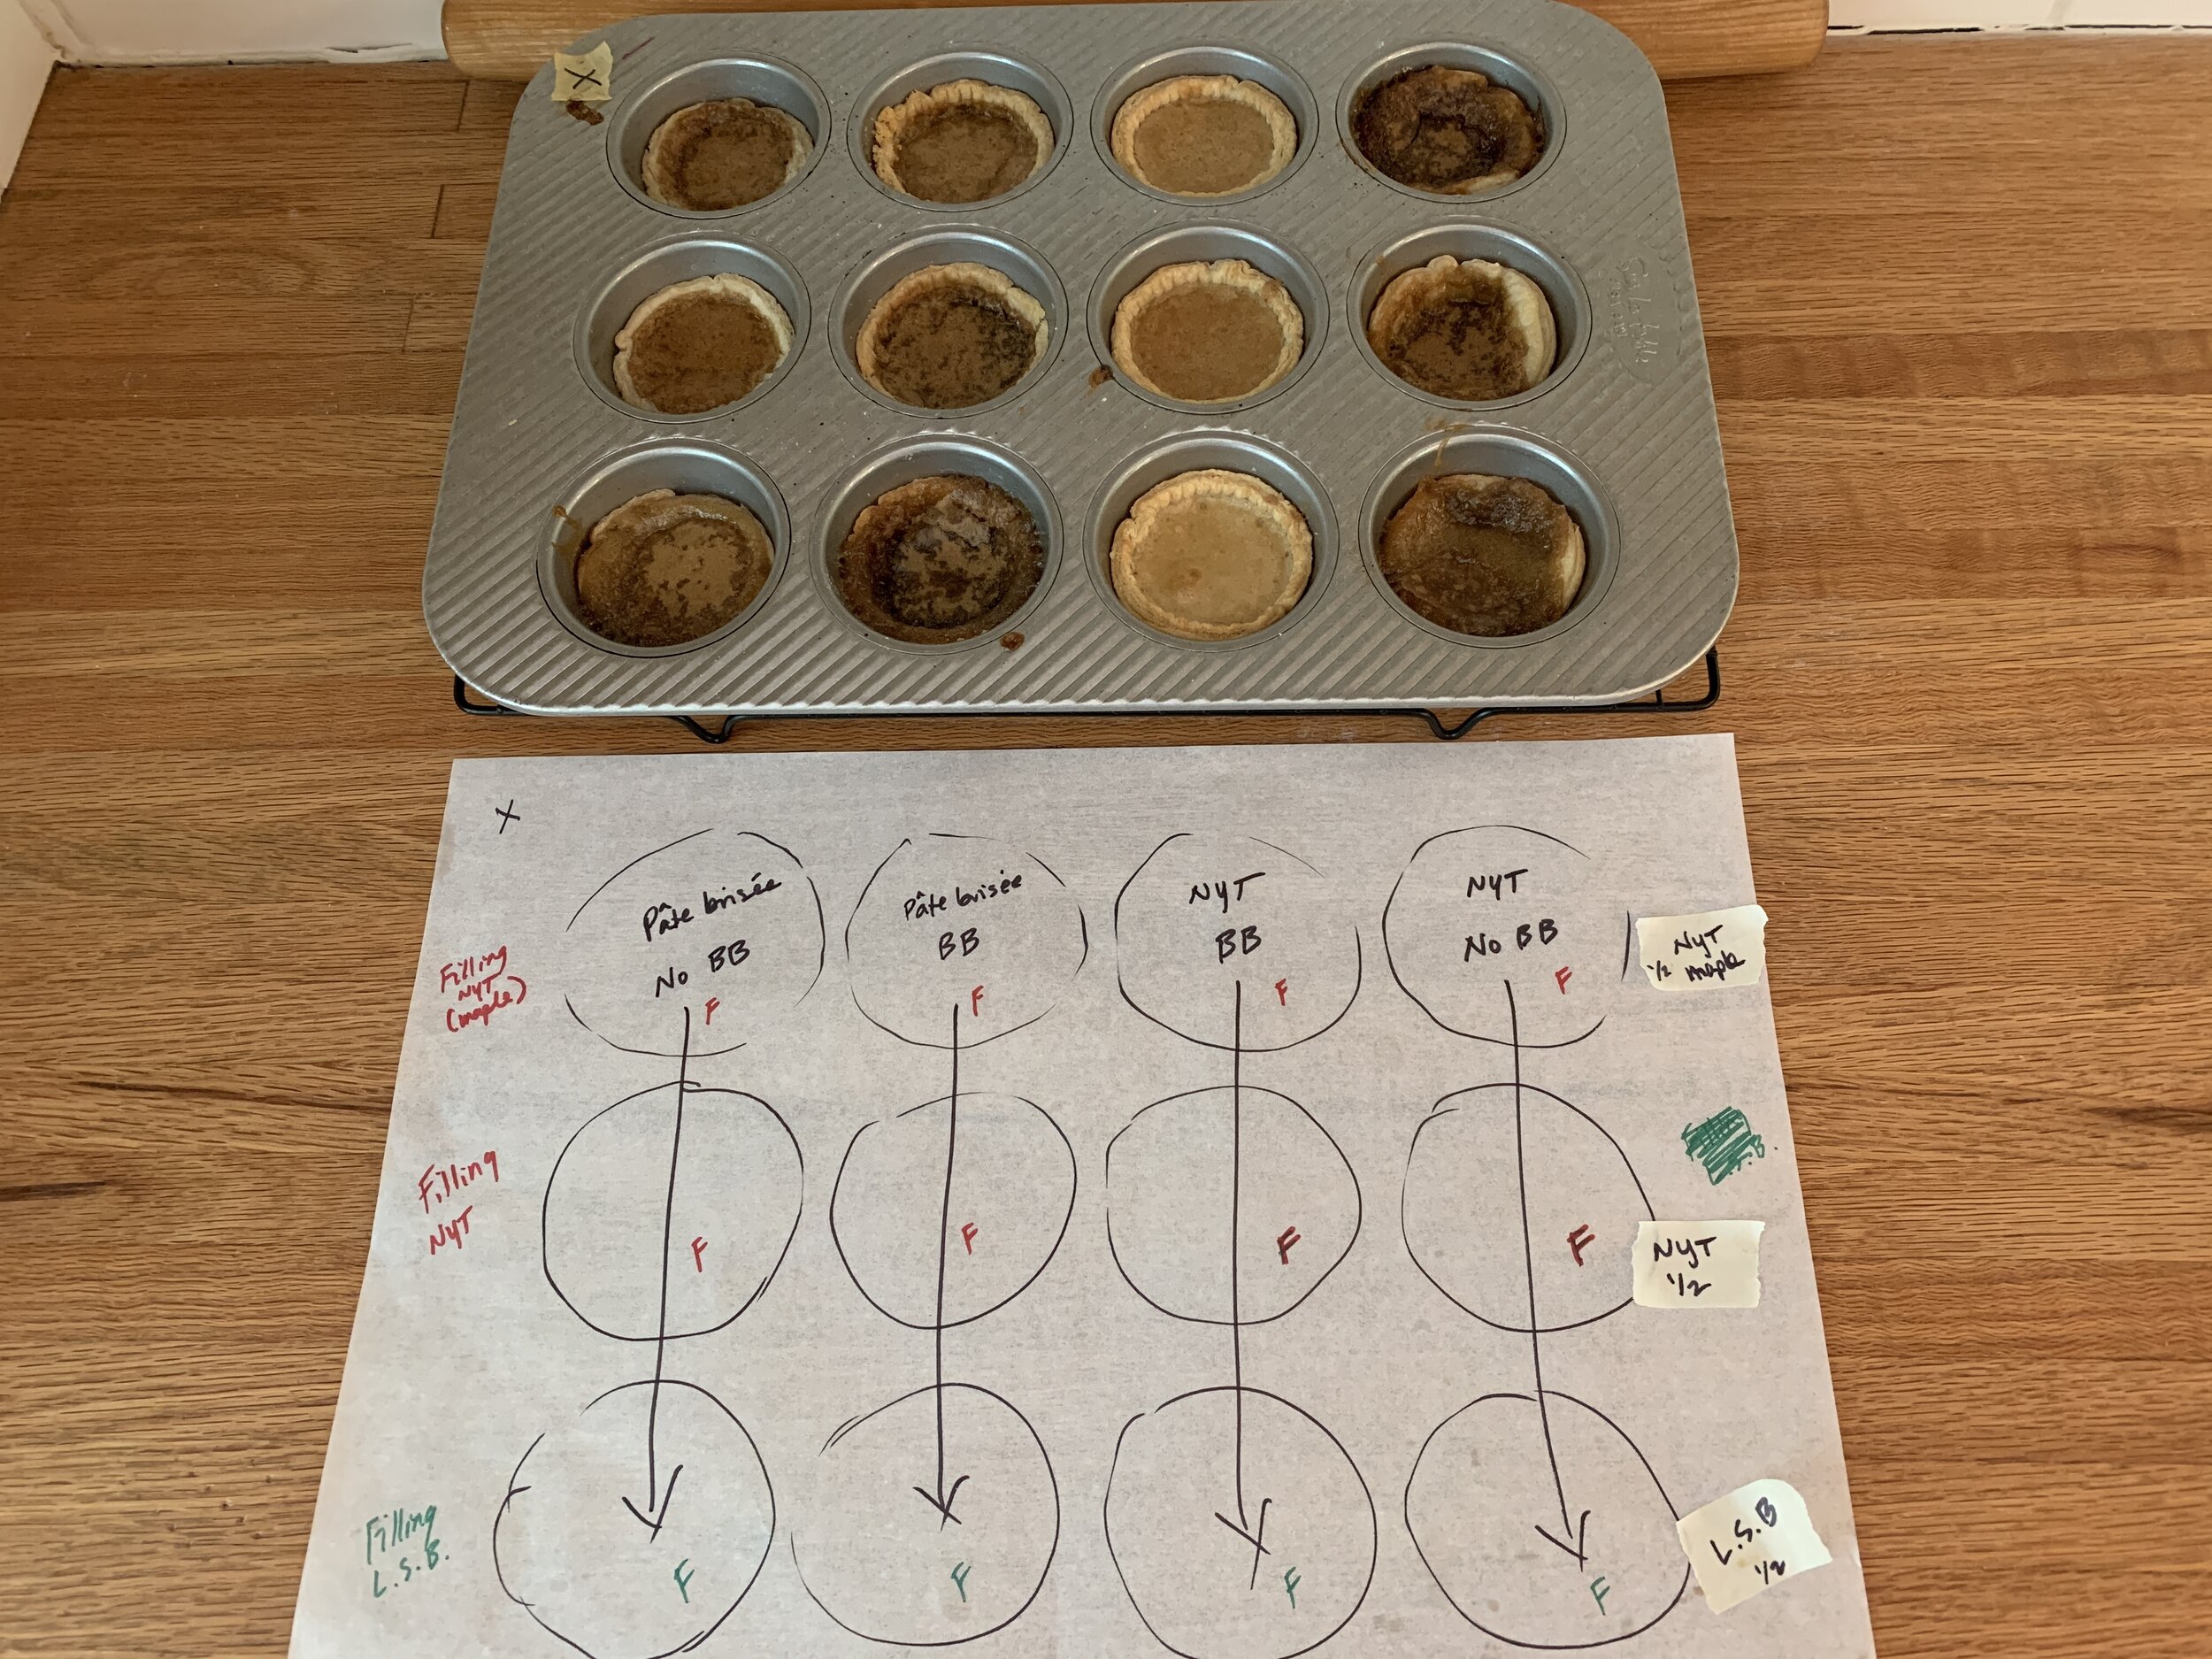
Bake at 400ºF for about 13-15 minutes for a gooier result or up it to 17-19 minutes for a firmer result. I went for the gooey time frame - you want the crust to be nicely browned and the filling looking set and deeper brown. What surprised me is the stark difference in the color of the third (from the left) column of tarts (the NYT blind baked ones) - much lighter golden vs the deep caramel-y brown of the others.

7E720EA9-E600-4B82-8506-5CFE869FBB1B_1_201_a.jpeg

Once baked, run a small offset spatula (my FAVE tool!) around the edges to loosen any sticky goo before it hardens. Then let them cool completely, lift them out of the tins and enjoy.

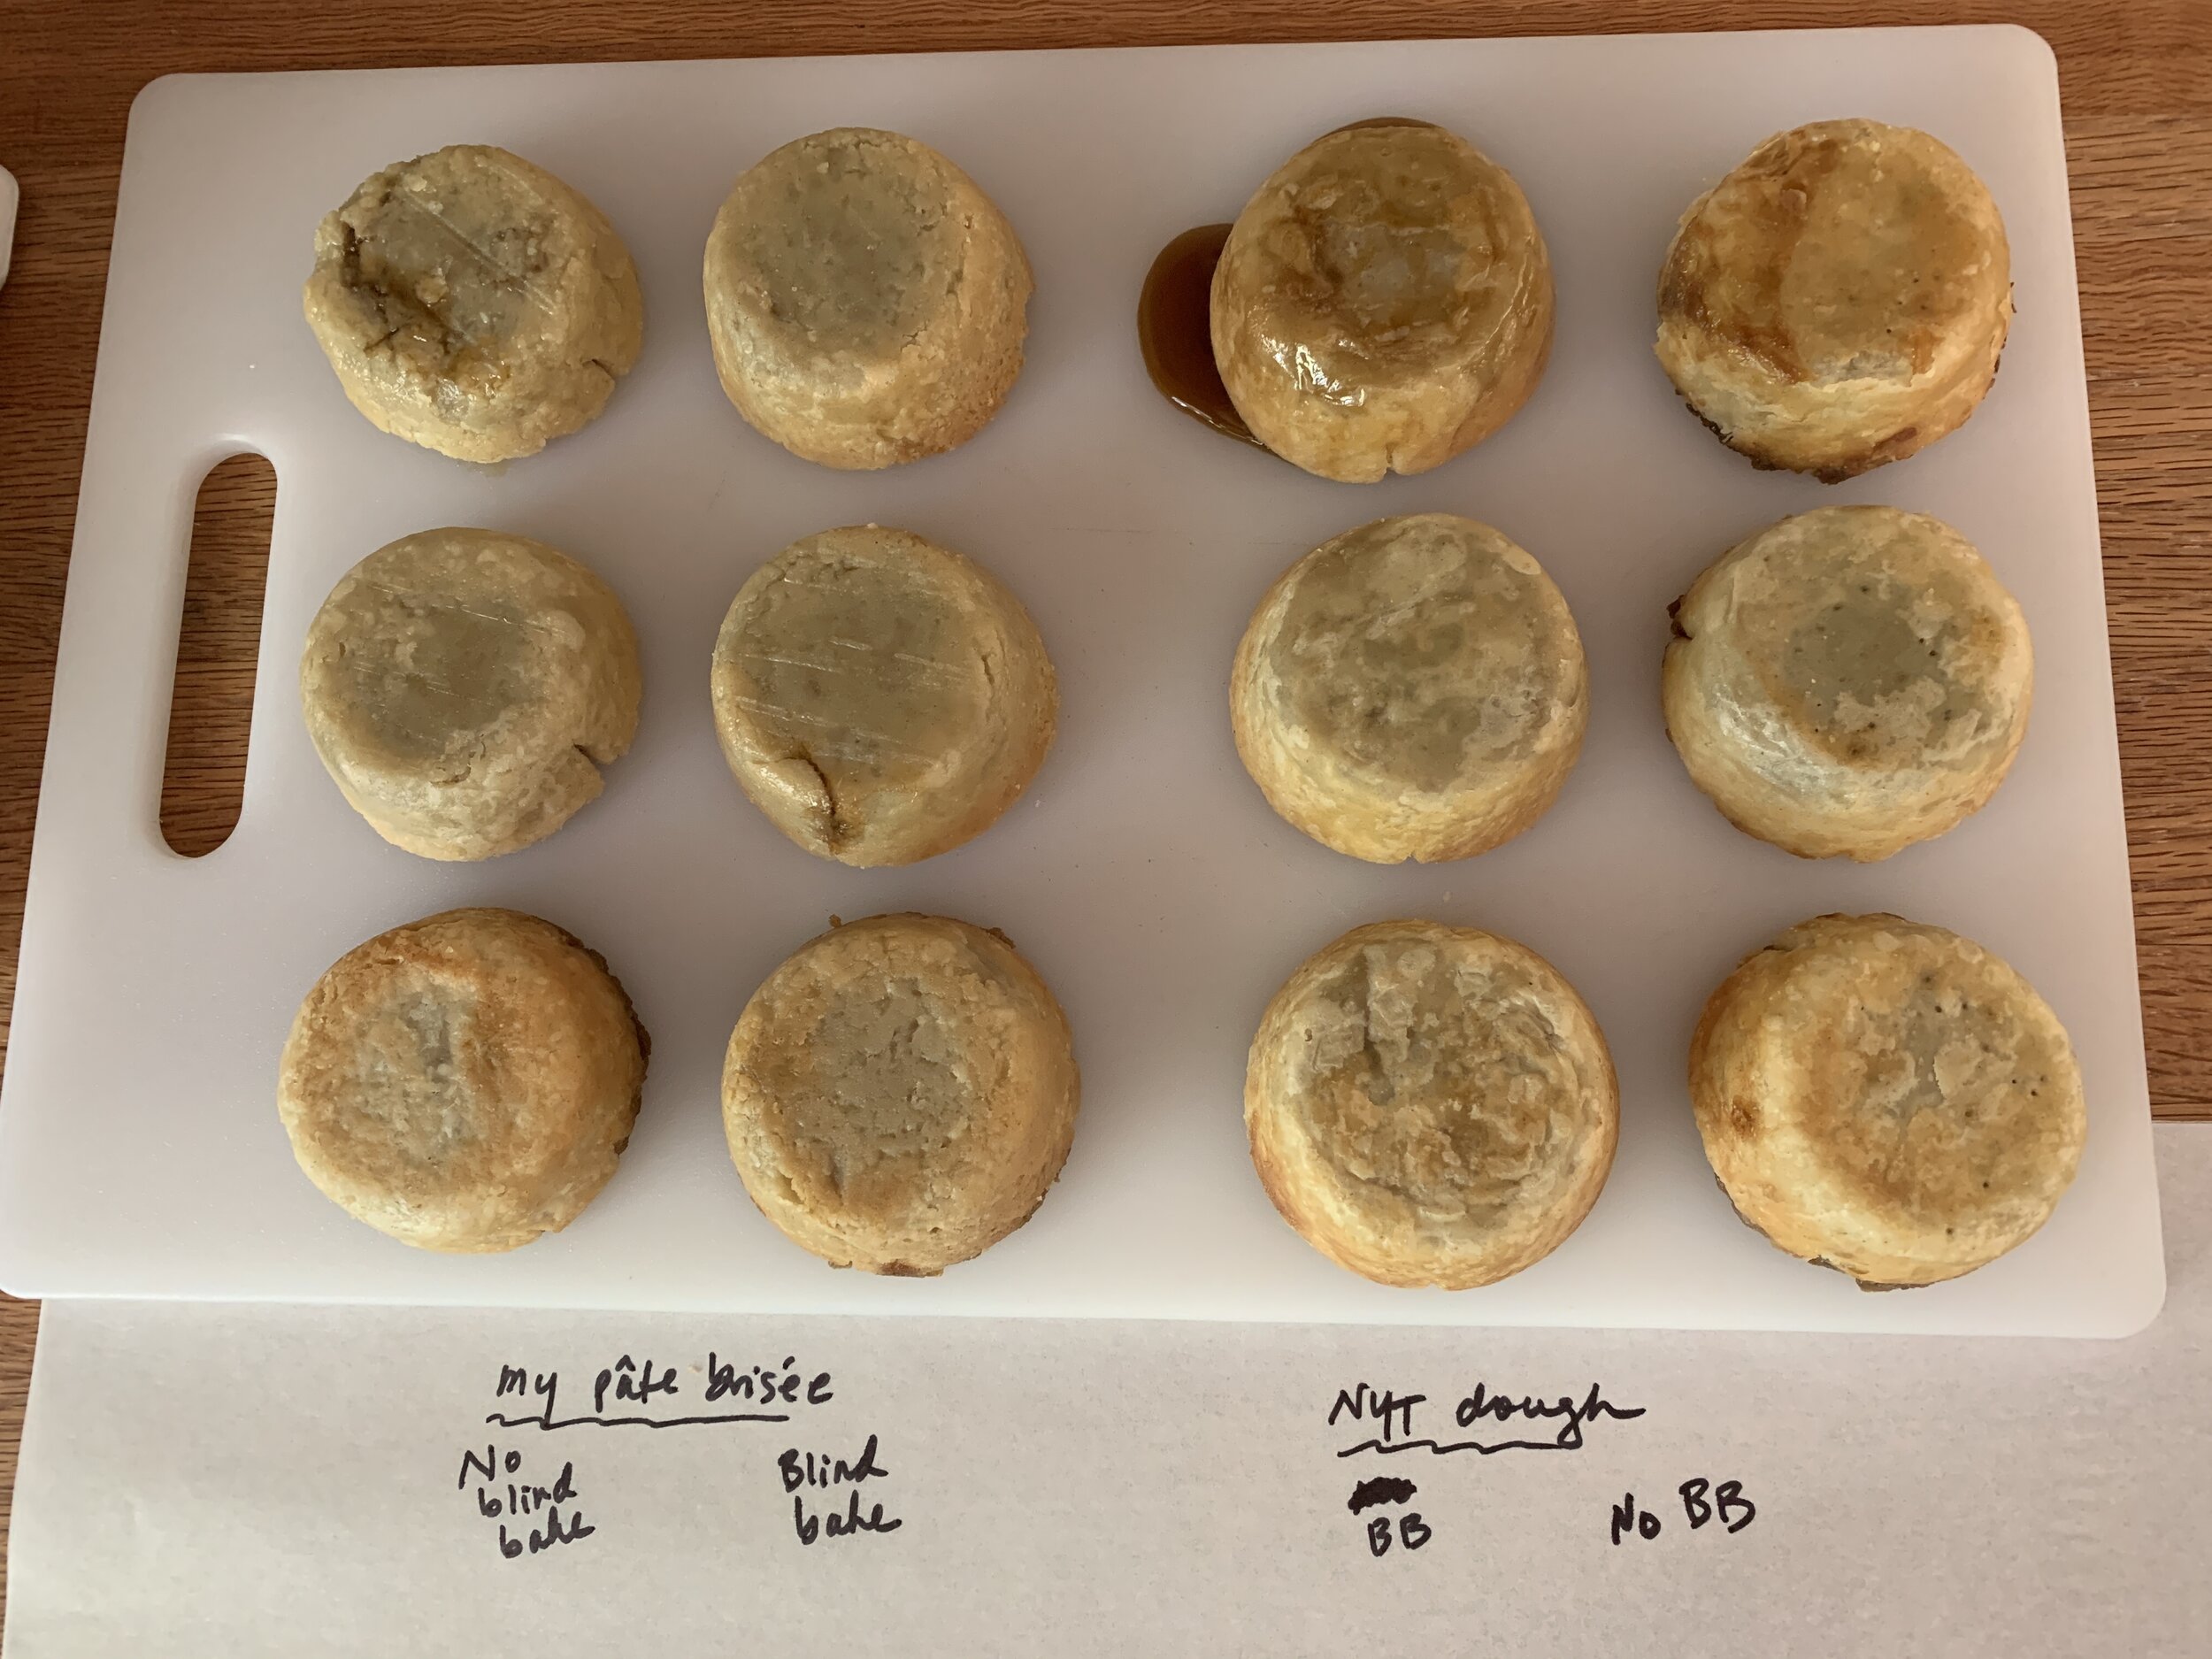
I turned them all out upside down (note the filling oozing out of the top, 3rd to the left tart) to assess the bottom crusts. I must say I’d be hard pressed to tell which were blind baked and which were not if I didn’t already know.

B84A839E-4F7F-4A4F-A429-E12A71FB5393_1_201_a.jpeg

Time to taste! Steve was a good sport for this one - we agreed that too many tastes became quite overwhelming with the sweetness of it all.

There was no rhyme nor reason to which fillings baked up runny and which gooey - you can see below that the NYT dough/blind baked threesome yielded a runny result for all three fillings. Go figure! Lucy I just can’t ‘splain it.

4082F727-347A-4D56-8C36-62E7E4175C95_1_201_a.jpeg

The NYT dough was unpleasant in the mouth - chewy and less flaky than good old pâte brisée - and the maple syrup filling was simply too runny. Due to those two things, the right half of the pan was eliminated.

Our final analysis: the pâte brisée plus Little Sweet Baker filling won the day, and it didn’t seem to matter at all whether the crust was blind baked first.

EA001655-E6C2-444E-8B93-8C5CA2AE515F_1_201_a.jpeg
257BA32C-31D0-41D7-99A5-4FB46E1C7D49_1_201_a.jpeg

For my final round of butter tart baking for the actual birthday order I used my classic pâte brisée, no blind baking needed. I upped the Little Sweet Baker filling recipe by 50% since I found the base recipe meant for 12 tarts to be meager. Of course, let’s remember I’d had no prior experience making these but it just felt right.

The final bake: 400ºF for 7 minutes; rotate the pan 180º and bake another 5 minutes; decrease to 375ºF and bake another 3 minutes. Since I had 12 of these for the order, I didn’t have an extra one to cut into but . . . . . imagine the end result looking like the close up above with a skosh more filling to enjoy. Sounds pretty darn good to me.

Et voilà! All boxed up and ready to go. And the feedback from the Canadian birthday girl: “a big hit”! Yippee!!

75D12CD5-87C8-4AB1-97B9-53891244E0A0_1_201_a.jpeg

Any tips or tricks of the trade from all of you butter tart aficionados are welcome!

Stay healthy everyone!!

Cherry almond Bakewell tartelettes

C2BBB01E-CAE0-4B10-9E6D-82D4F8E19828.jpeg

Let me just say that there’s nothing like the satisfaction of making a stellar tart. Just the right well baked, crisp and golden crust, the beautiful marriage of fruit with almond cream and a tempting garnish of toasted nuts. Mmmmmm!

Anything with almonds (or nuts in general) is a winner in my book. There are various almond based fillings that one may come across in the baking and pastry world, particularly in Scandinavia, Britain and Northern Europe. Many regions of the globe have their own love affair with almonds and the goods you can create with them.

The terms frangipane and almond cream (crème de amandes en Français) are often used interchangeably but, depending on where you are, they might mean slightly different things. In my Parisian schooling we were taught that frangipane is actually a blend of crème d’amandes and crème pâtissière (used for example in galettes des roi), whereas the term in Britain and Italy (and I’m sure many other countries) refers to what the French call crème d’amandes on its own.

Both will work nicely when making fruit or jam almond tarts, although more typically it’s crème d’amandes that fills the bill (or the tart shell - ha!).

51349C67-2871-4013-9C81-A033CD1B148D.jpg

Of course there are beaucoup des tartes one might create - anything from chocolate ganache to zesty, pucker-y lemon-lime as well as the classic almond cream/fruit combos that one sees in most pâtisseries In Paris and beyond. Think pear, fig/raspberry, plum (the mirabelle is a favorite), cherry, apricot or essentially any fruit or combo thereof you might imagine. So many tarts, so little time!

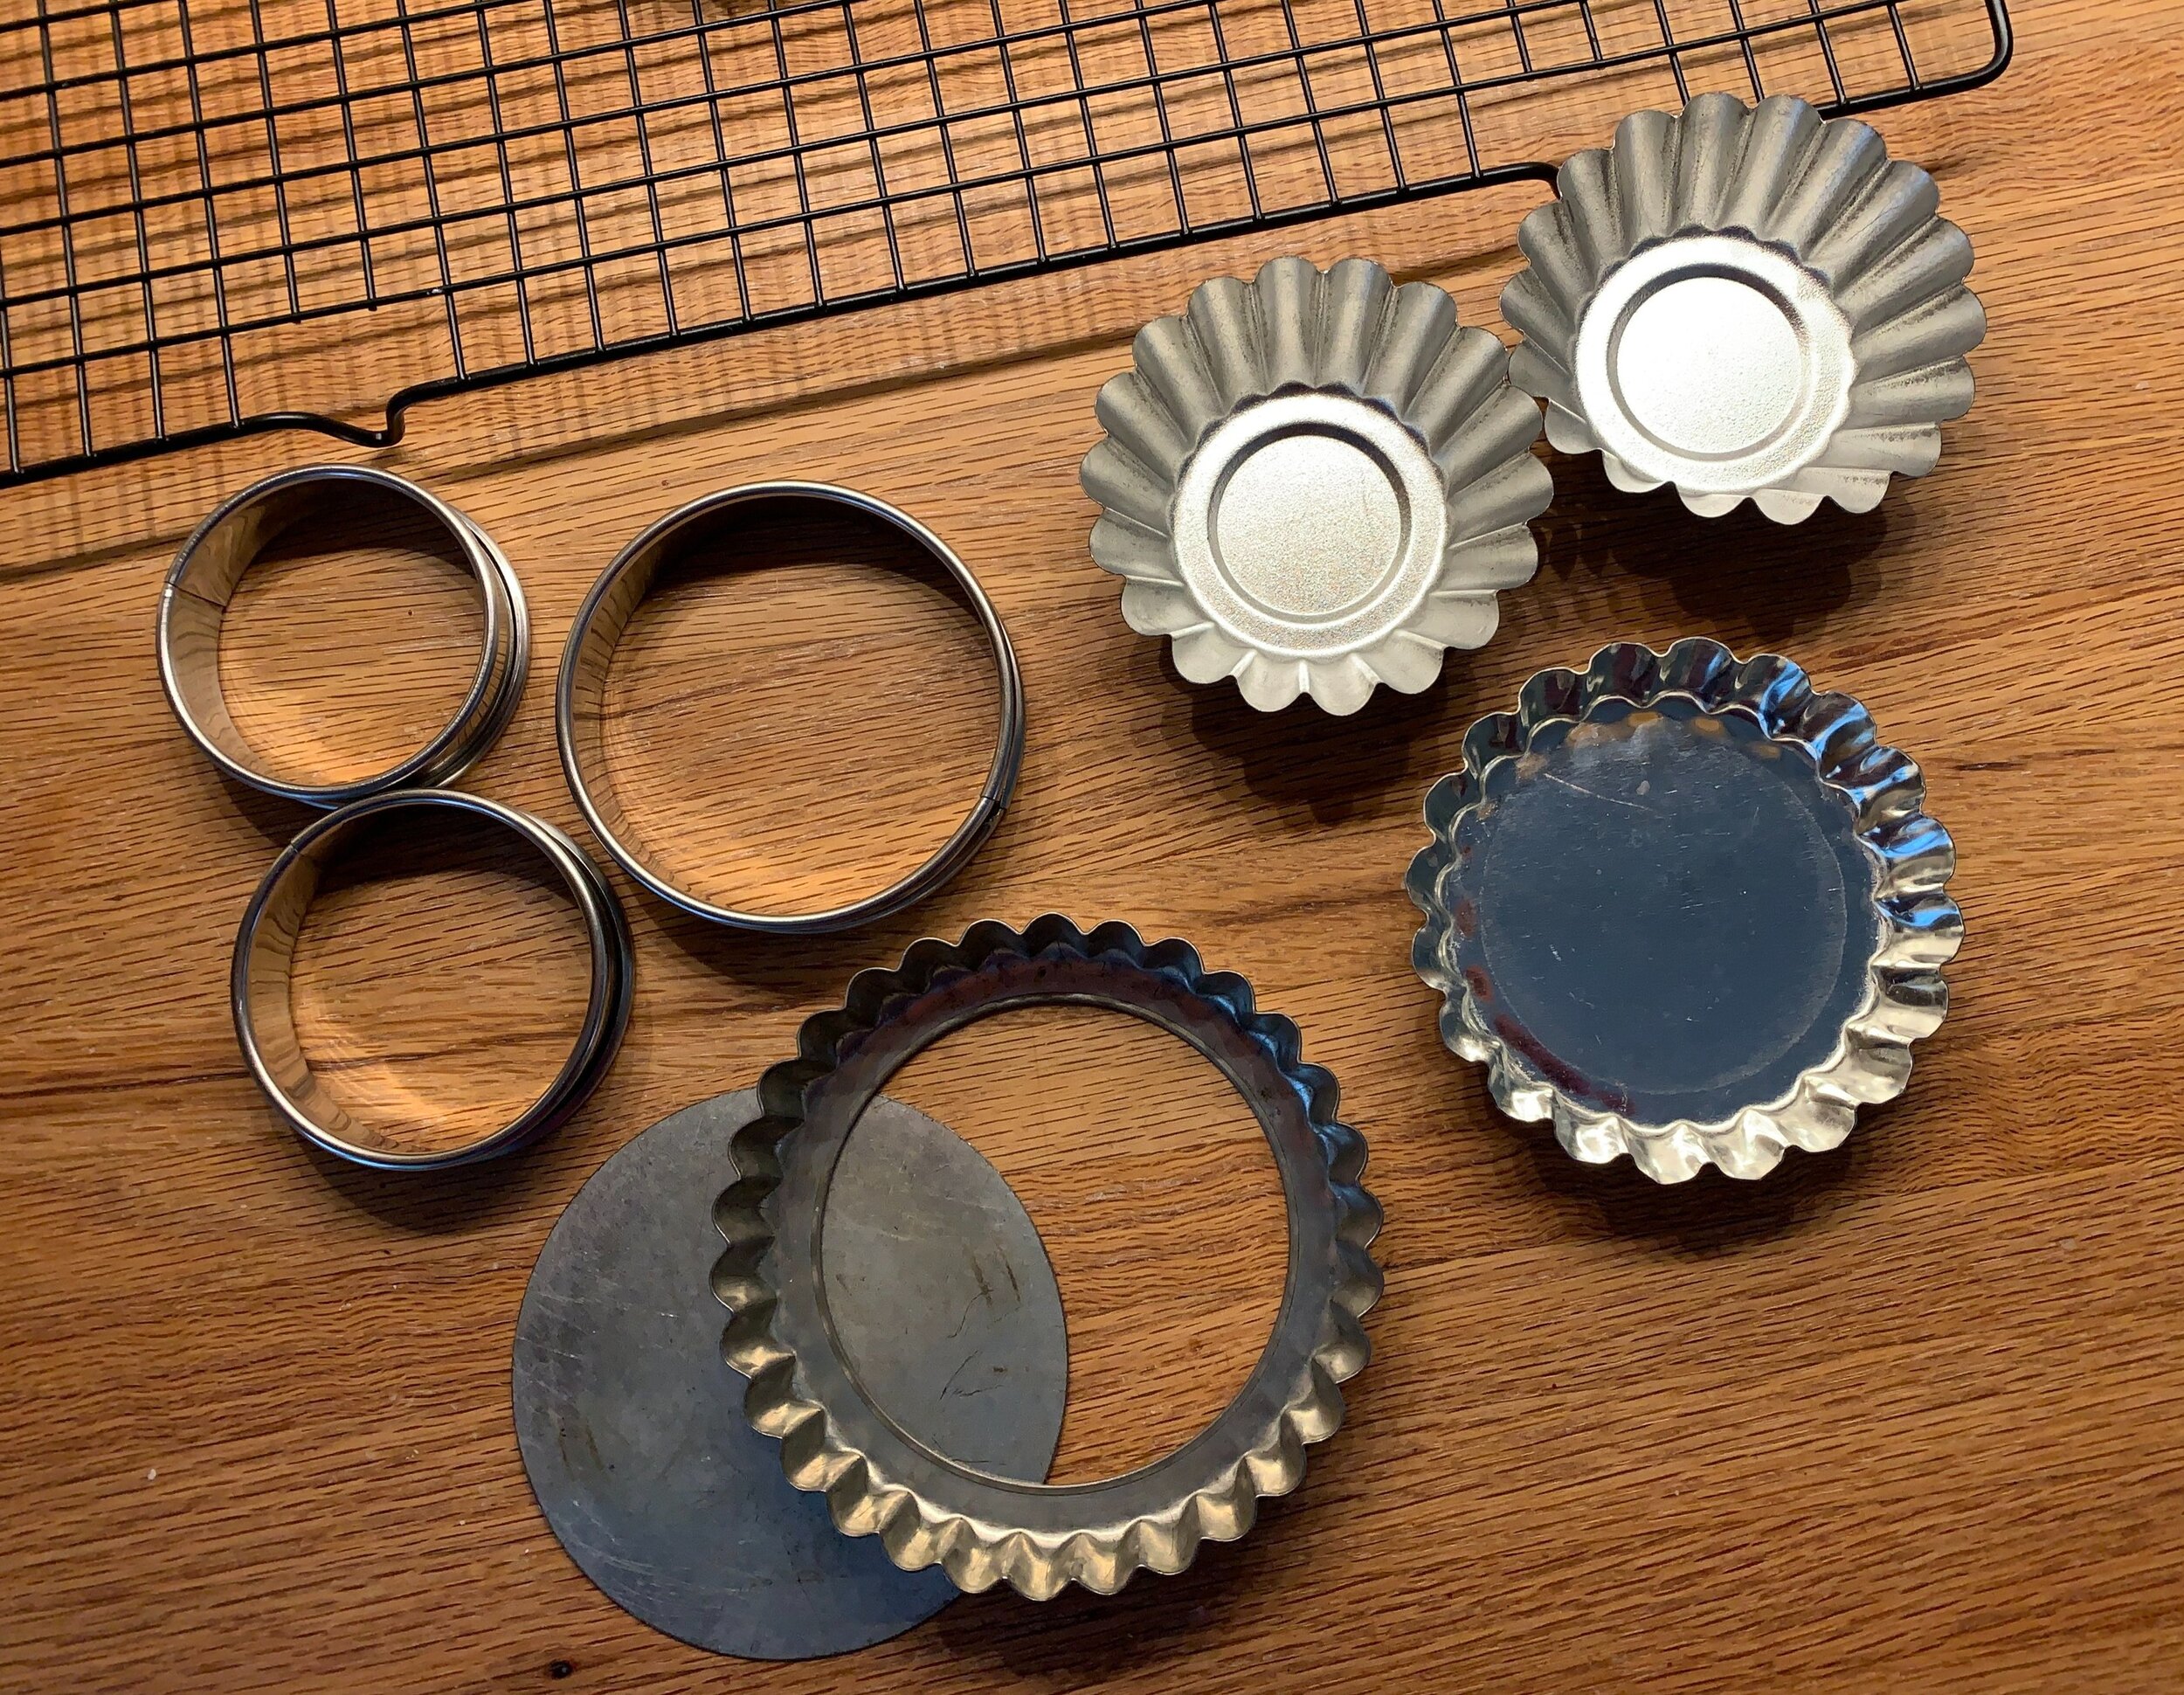
I usually bake tarts, whether large or small, in smooth edged open tart rings. The absence of a metal base allows for more thorough baking of the crust which is better exposed to the oven heat. Plus I like the simplicity of the straight sided, smooth finished tart. It speaks to me.

Buuuut . . . . . If I’m in the mood for a fluted edge, I have the option of removable bottom tart forms vs. solid bottom versions, in which case, depending on the filling, blind baking may come into play. While I love small brioche type tins for tarts, a well baked bottom can be elusive unless you blind bake first then fill and bake to finish.

News flash! I’ve had a Eureka moment in preparation for this post - the oven stone - yay! Prior to this recent discovery, my tendency was to use the open rings or remove the bottom of the fluted pans so as to be sure that my bottom crust baked thoroughly. My experience has shown, particularly with the almond fruit type tarts, that led to a successful bake. Can’t have a soggy bottom now, can we.

B69559DC-5F46-42AF-8535-619F7A0D9C21.jpg

The Bakewell tart is generally associated with England and the town of Bakewell in Derbyshire. Many say it’s a variation on the Bakewell pudding which has more of a jam/custard filling baked in puff pastry or a bottom sponge type cake. The tart version is typically made with an all butter short crust (as the Brits would say) and a jam/almond cream filling. Many recipes use raspberry jam but I decided on cherry from my favorite jam maker Bonne Maman.

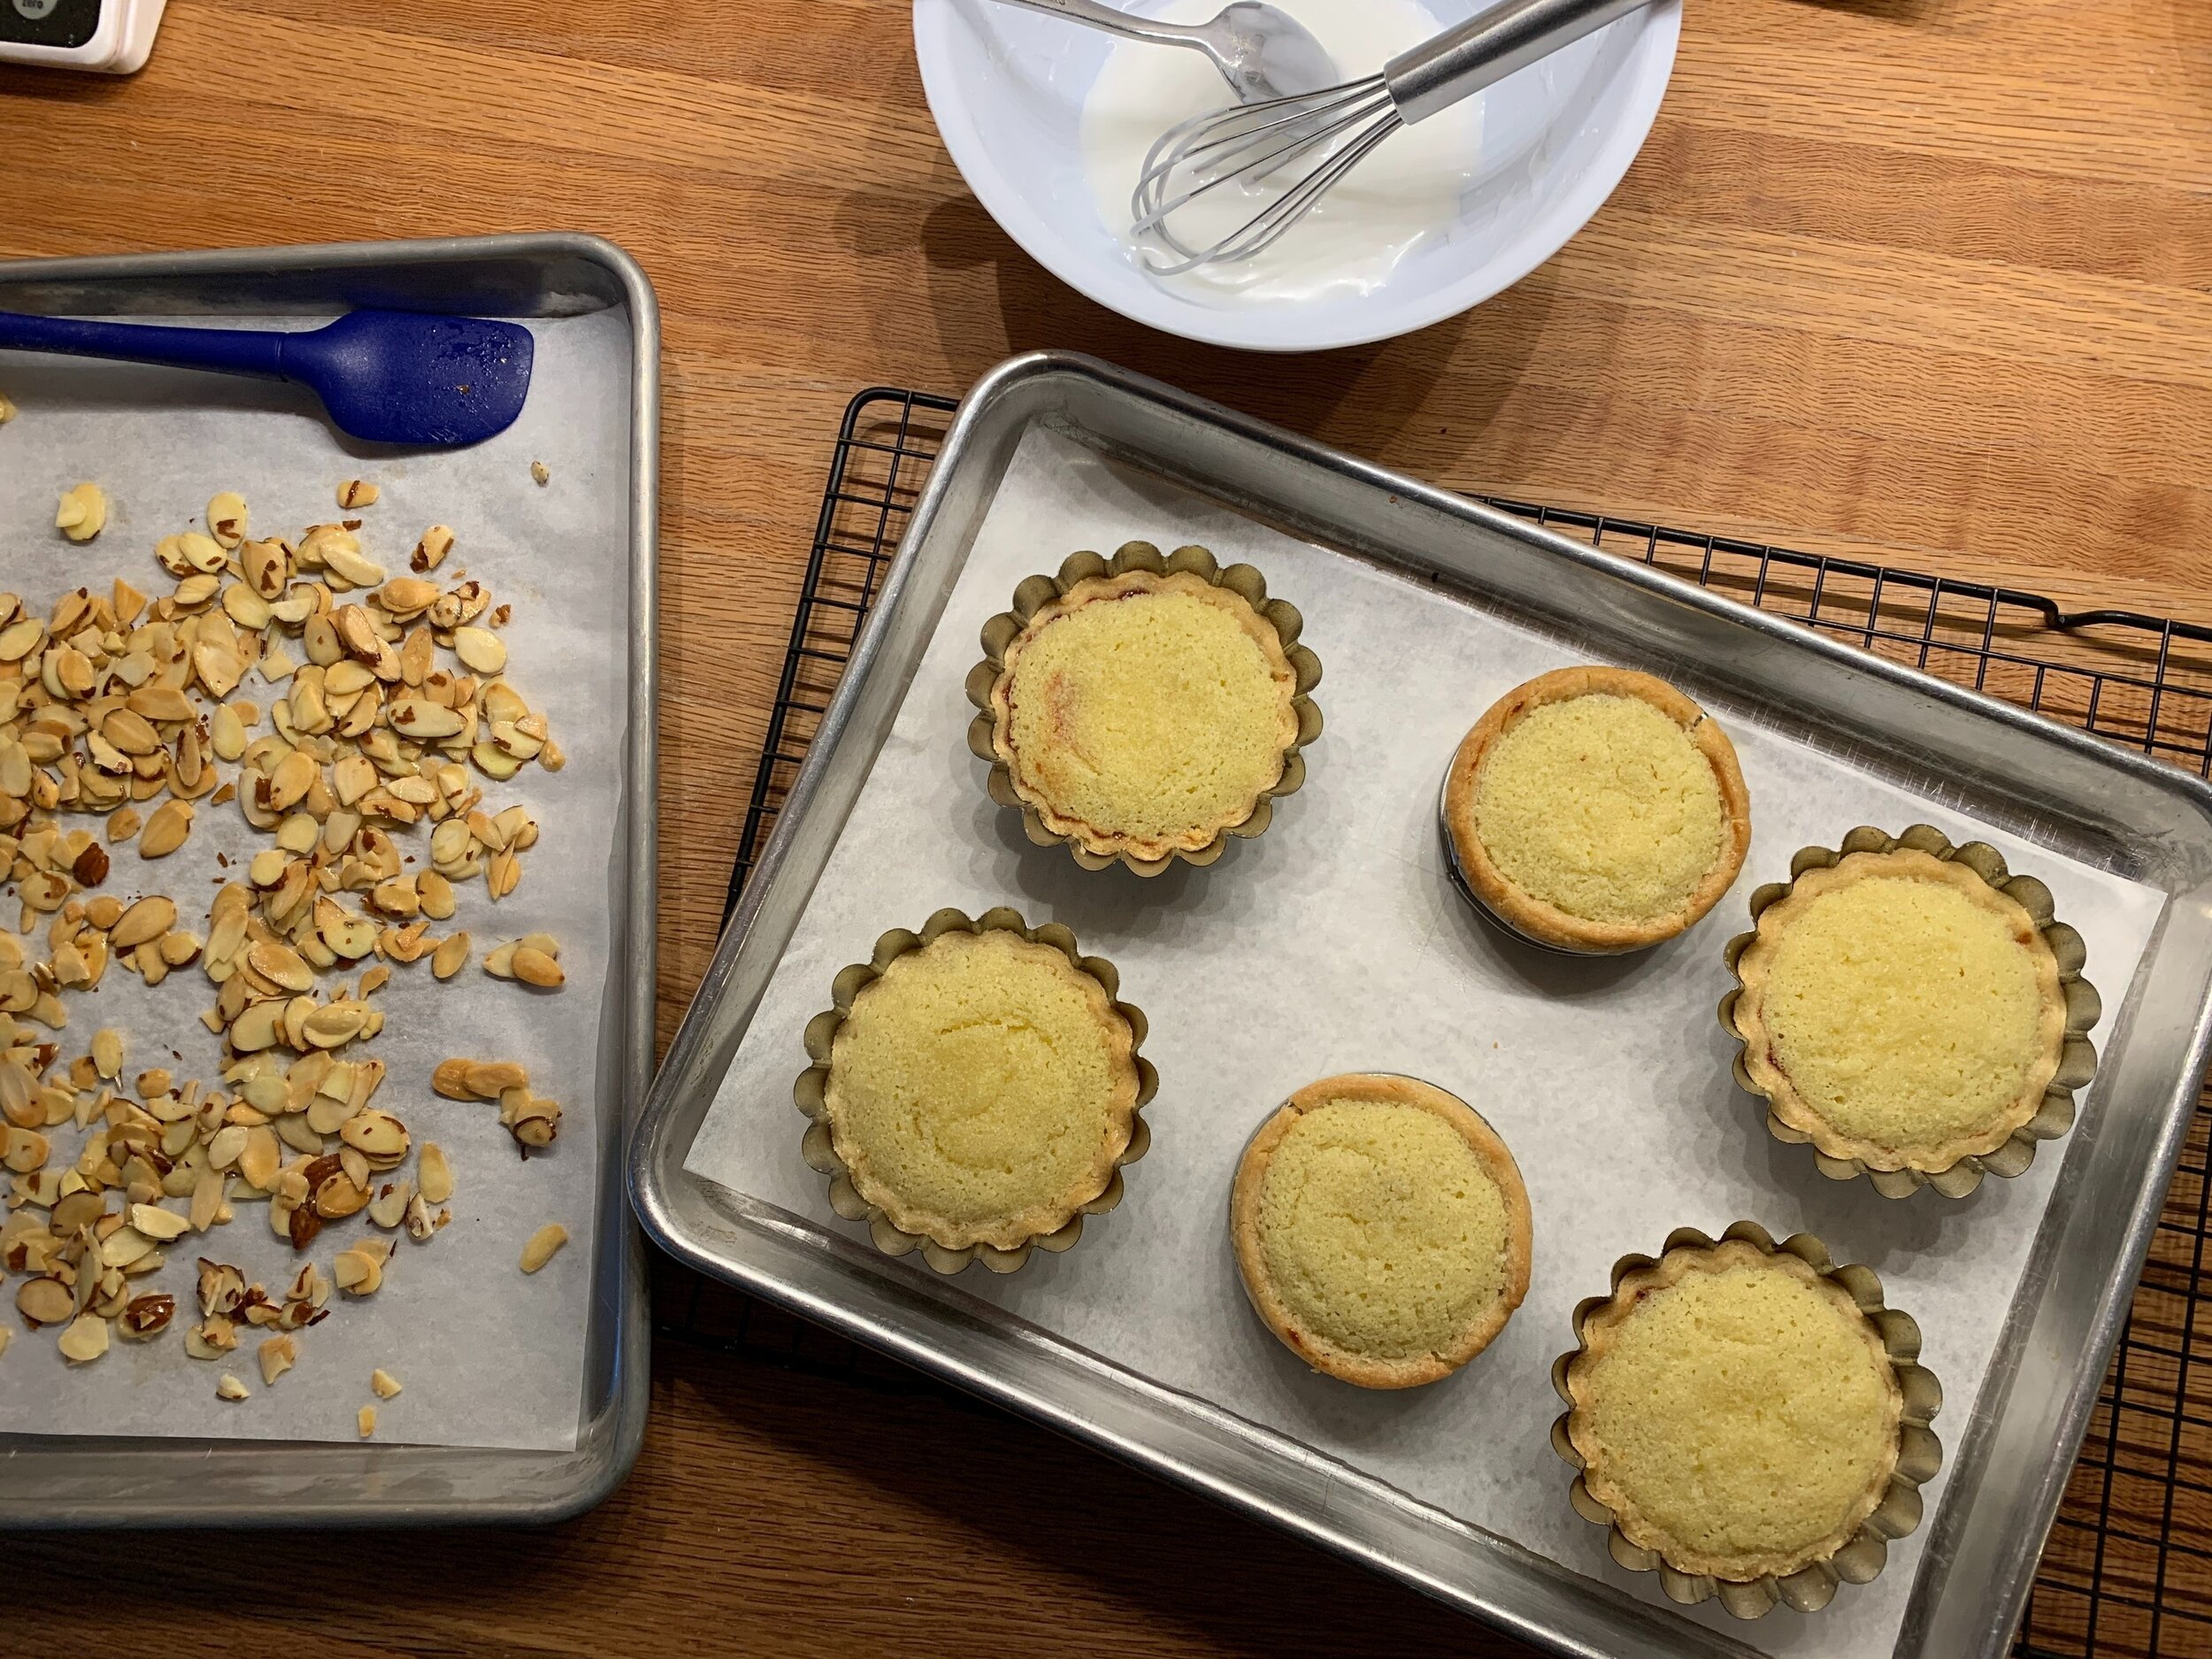
I intentionally approached this one to see how well my pâte sucrée would bake in both closed bottom brioche tins and open tart rings. For my first go, I lined my forms and assembled the tarts with a dollop of jam in the bottom and almond cream piped over it. Don’t overfill since the almond cream does puff up during baking.

I baked them on my heated baking stone on which I had also heated a second sheet pan, thinking this would give even better heat transference. Ahhhh . . . . not so.

58D0F830-9B1E-495A-9108-D063FBE9016D.jpg

After a 20-25 minute bake at 325ºF (convection), the almond cream was set and lightly golden and the crust edges looked browned.

B33CA05E-65EB-49D5-8CF6-732E2FE7AACF.jpg

The bottom crust of the open ringed tarts was nicely browned, however, the solid bottom brioche tin tart bottoms were not baked all the way through (take my word for it). Fortunately I removed them from the tins and popped them back into the oven, baking another 5-10 minutes for well baked bottoms.

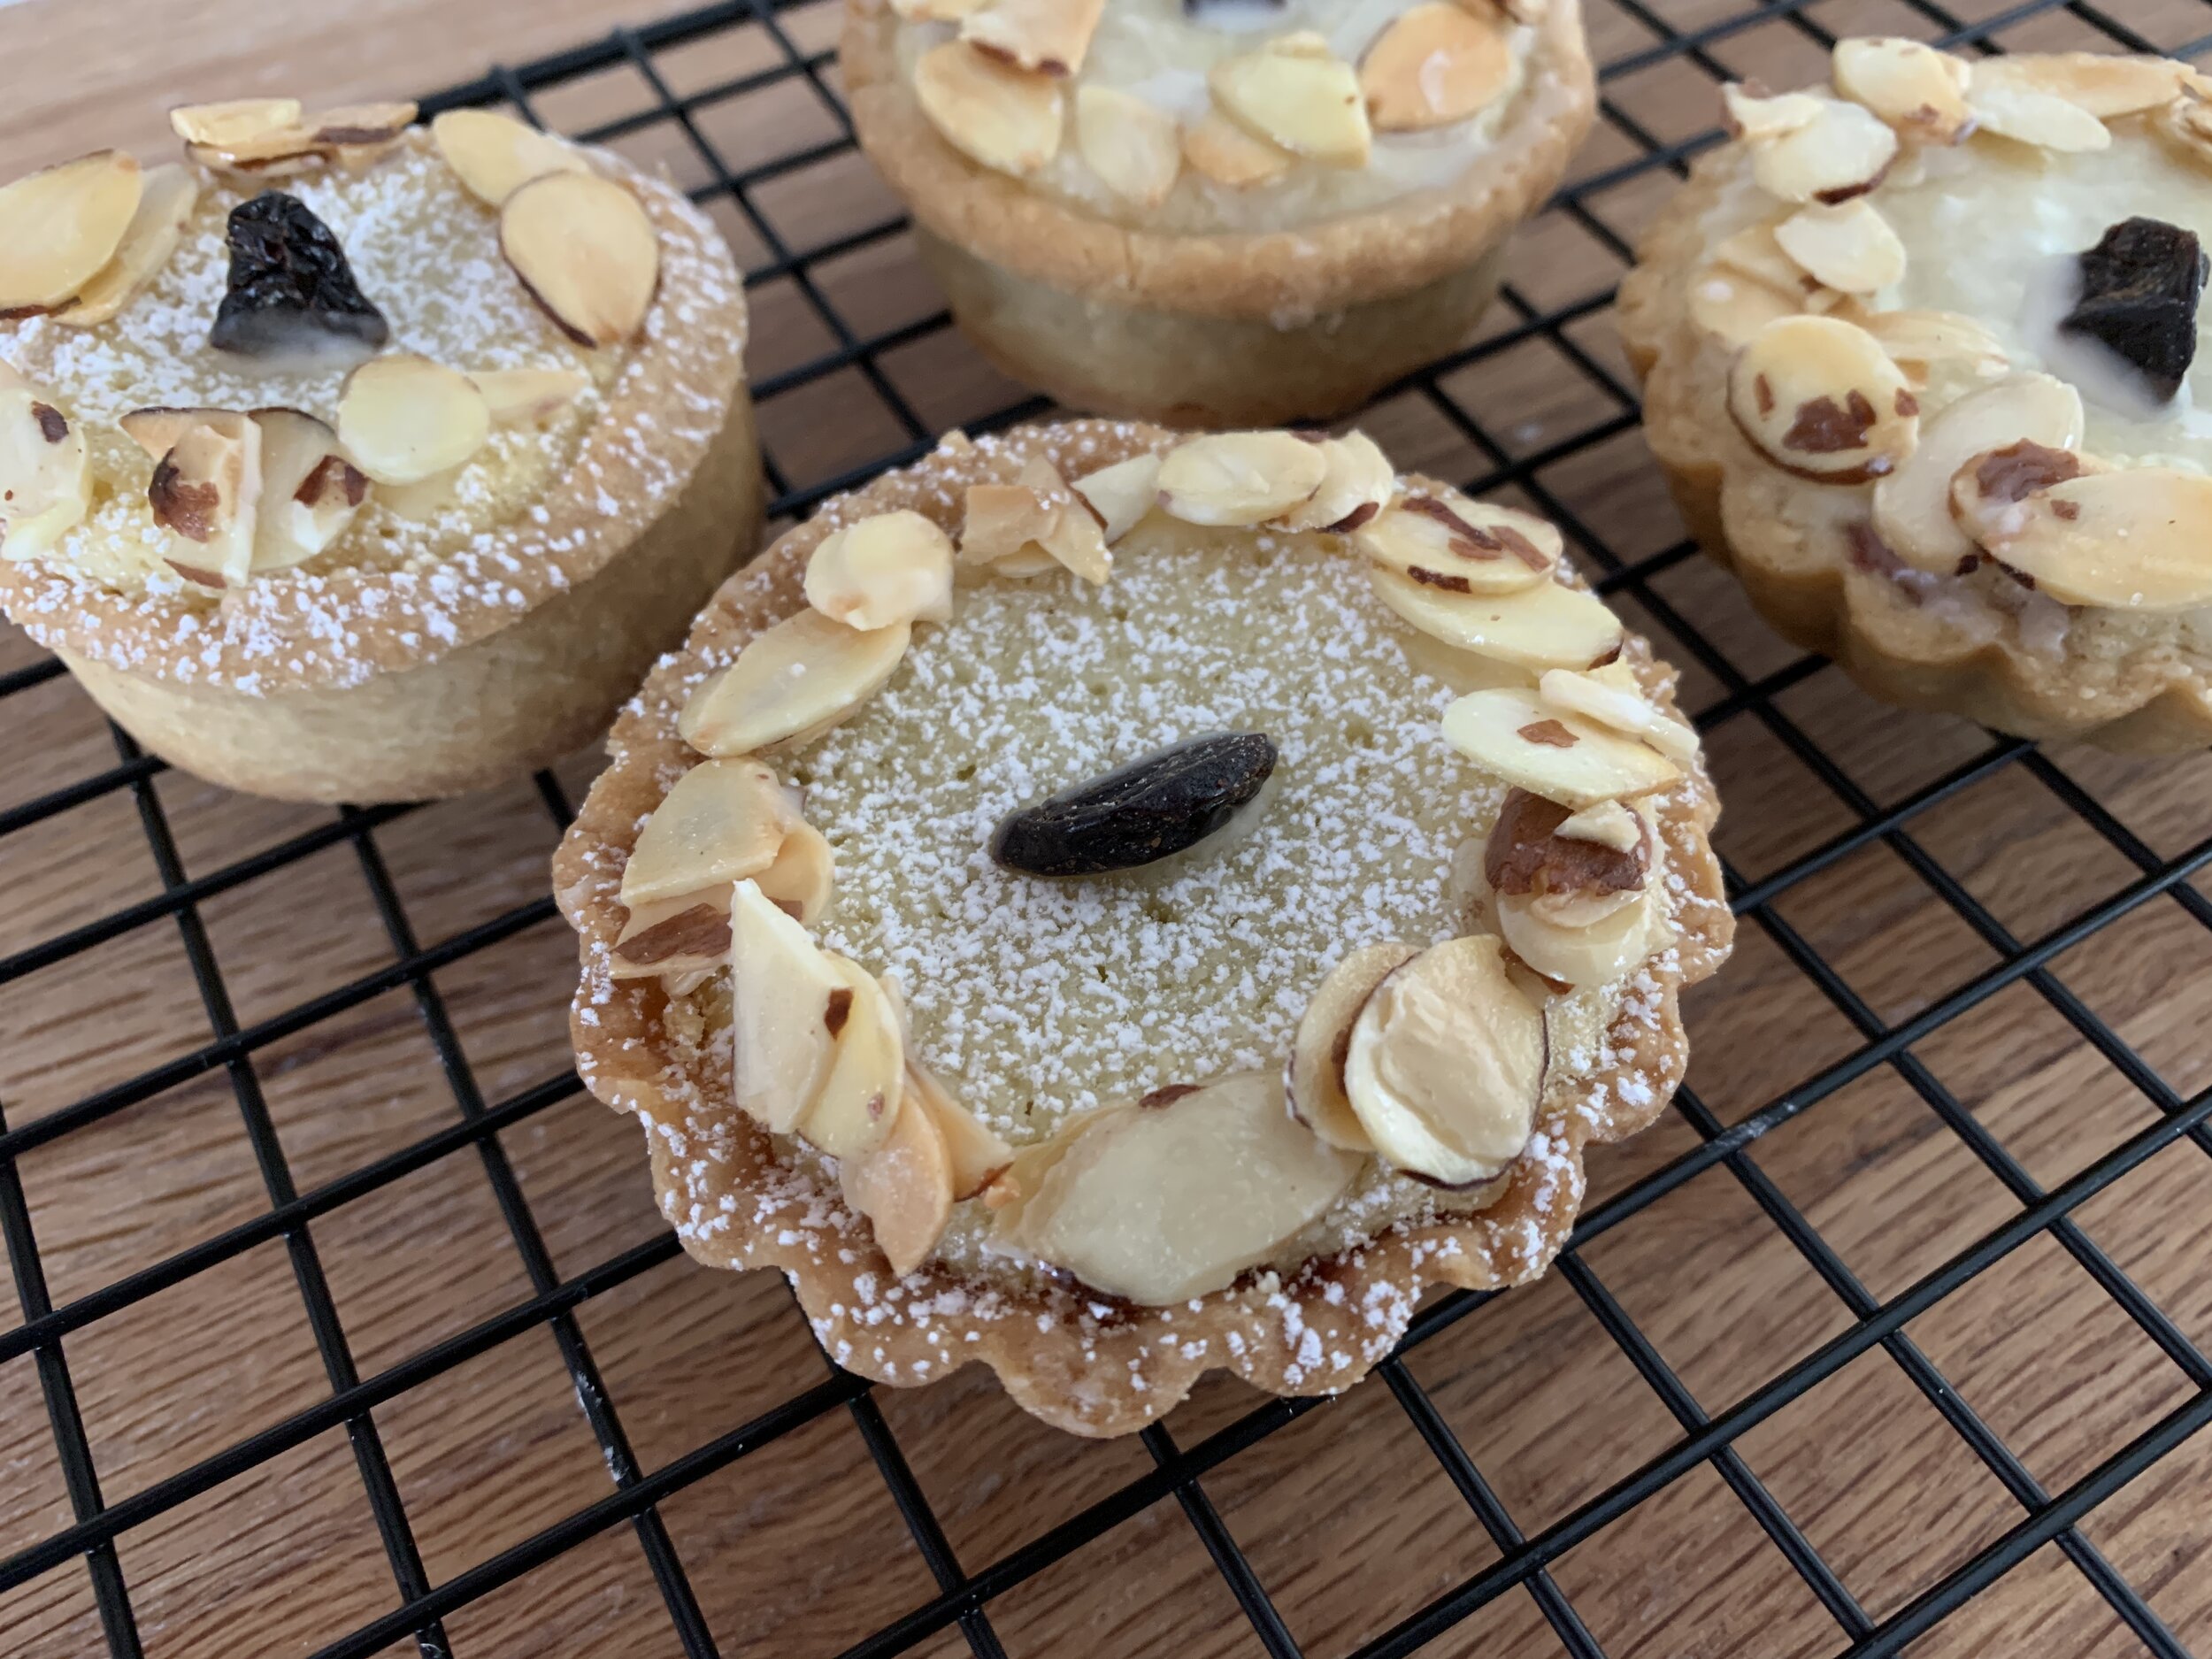
A confectioner’s sugar glaze, a ring of lightly candied sliced almonds and some tart dried cherry bits in the center finished them off.

EB4F7AED-280E-4804-998E-65589D847E05.jpeg

I have one word for you - delicious. While I thought the glaze was too sweet for our tastes (I admit I put it on a bit too thick), this is one stellar tart. Just the right marriage of jam and almond goodness; and the crunch of the candied almonds gives it that wonderful textural contrast.

6D4446FE-681A-4B01-B31B-7EF12A0458AD.jpg

But wait! Not quite finished. My results pushed me to give it one more go. This time I blind baked both an open ringed crust and a closed bottom brioche tin crust. Once cooled, I panned those up with non-blind baked versions. The assembly and baking were the same with one exception - I ditched the second baking sheet and put my sheet pan directly on the heated baking stone.

Here are the results. The blind baked crusts on the left are a bit browner but the other two look pretty darn good too.

CF47BCB7-D018-408D-A5B7-B1A81A6E1EA3.jpeg

And check out the bottoms! Not bad at all - no barely baked bottoms here.

5E76E66D-4C2A-4AEE-B444-EBC613289D8F.jpeg

This time I lightened up my glaze, giving two of the tarts just a light brushing. For a bit of visual comparison the other two got a light dusting of powdered sugar. I stuck the candied almonds around the edges with a bit of glaze et voilà! Steve and I liked these just as much as the first batch.

The lesson: no need for a second sheet pan heated on the stone - it actually seems to have reduced the heat transference, leaving my brioche tin crusts under baked.

The second batch benefited from the consistent heat coming from the baking stone allowing for excellent browning even without first blind baking. Yippee!

One quick note: in general, when baking a tart with a very loose or liquid-y filling, I typically blind bake first. The oven stone may change that perhaps?? We’ll see.

1B975BAF-2A2D-4232-A2B4-F9C3BA078AC9.jpg

I’ll leave you with a final wintry scene looking out our front door. That’s our metal sculpture, Clarence the praying mantis, peeking out of the snow.

Be safe, remain steady and let’s make it to spring in good shape!

4233F6A0-C443-4480-A2F9-3D67A18E20C6.jpeg