Challah

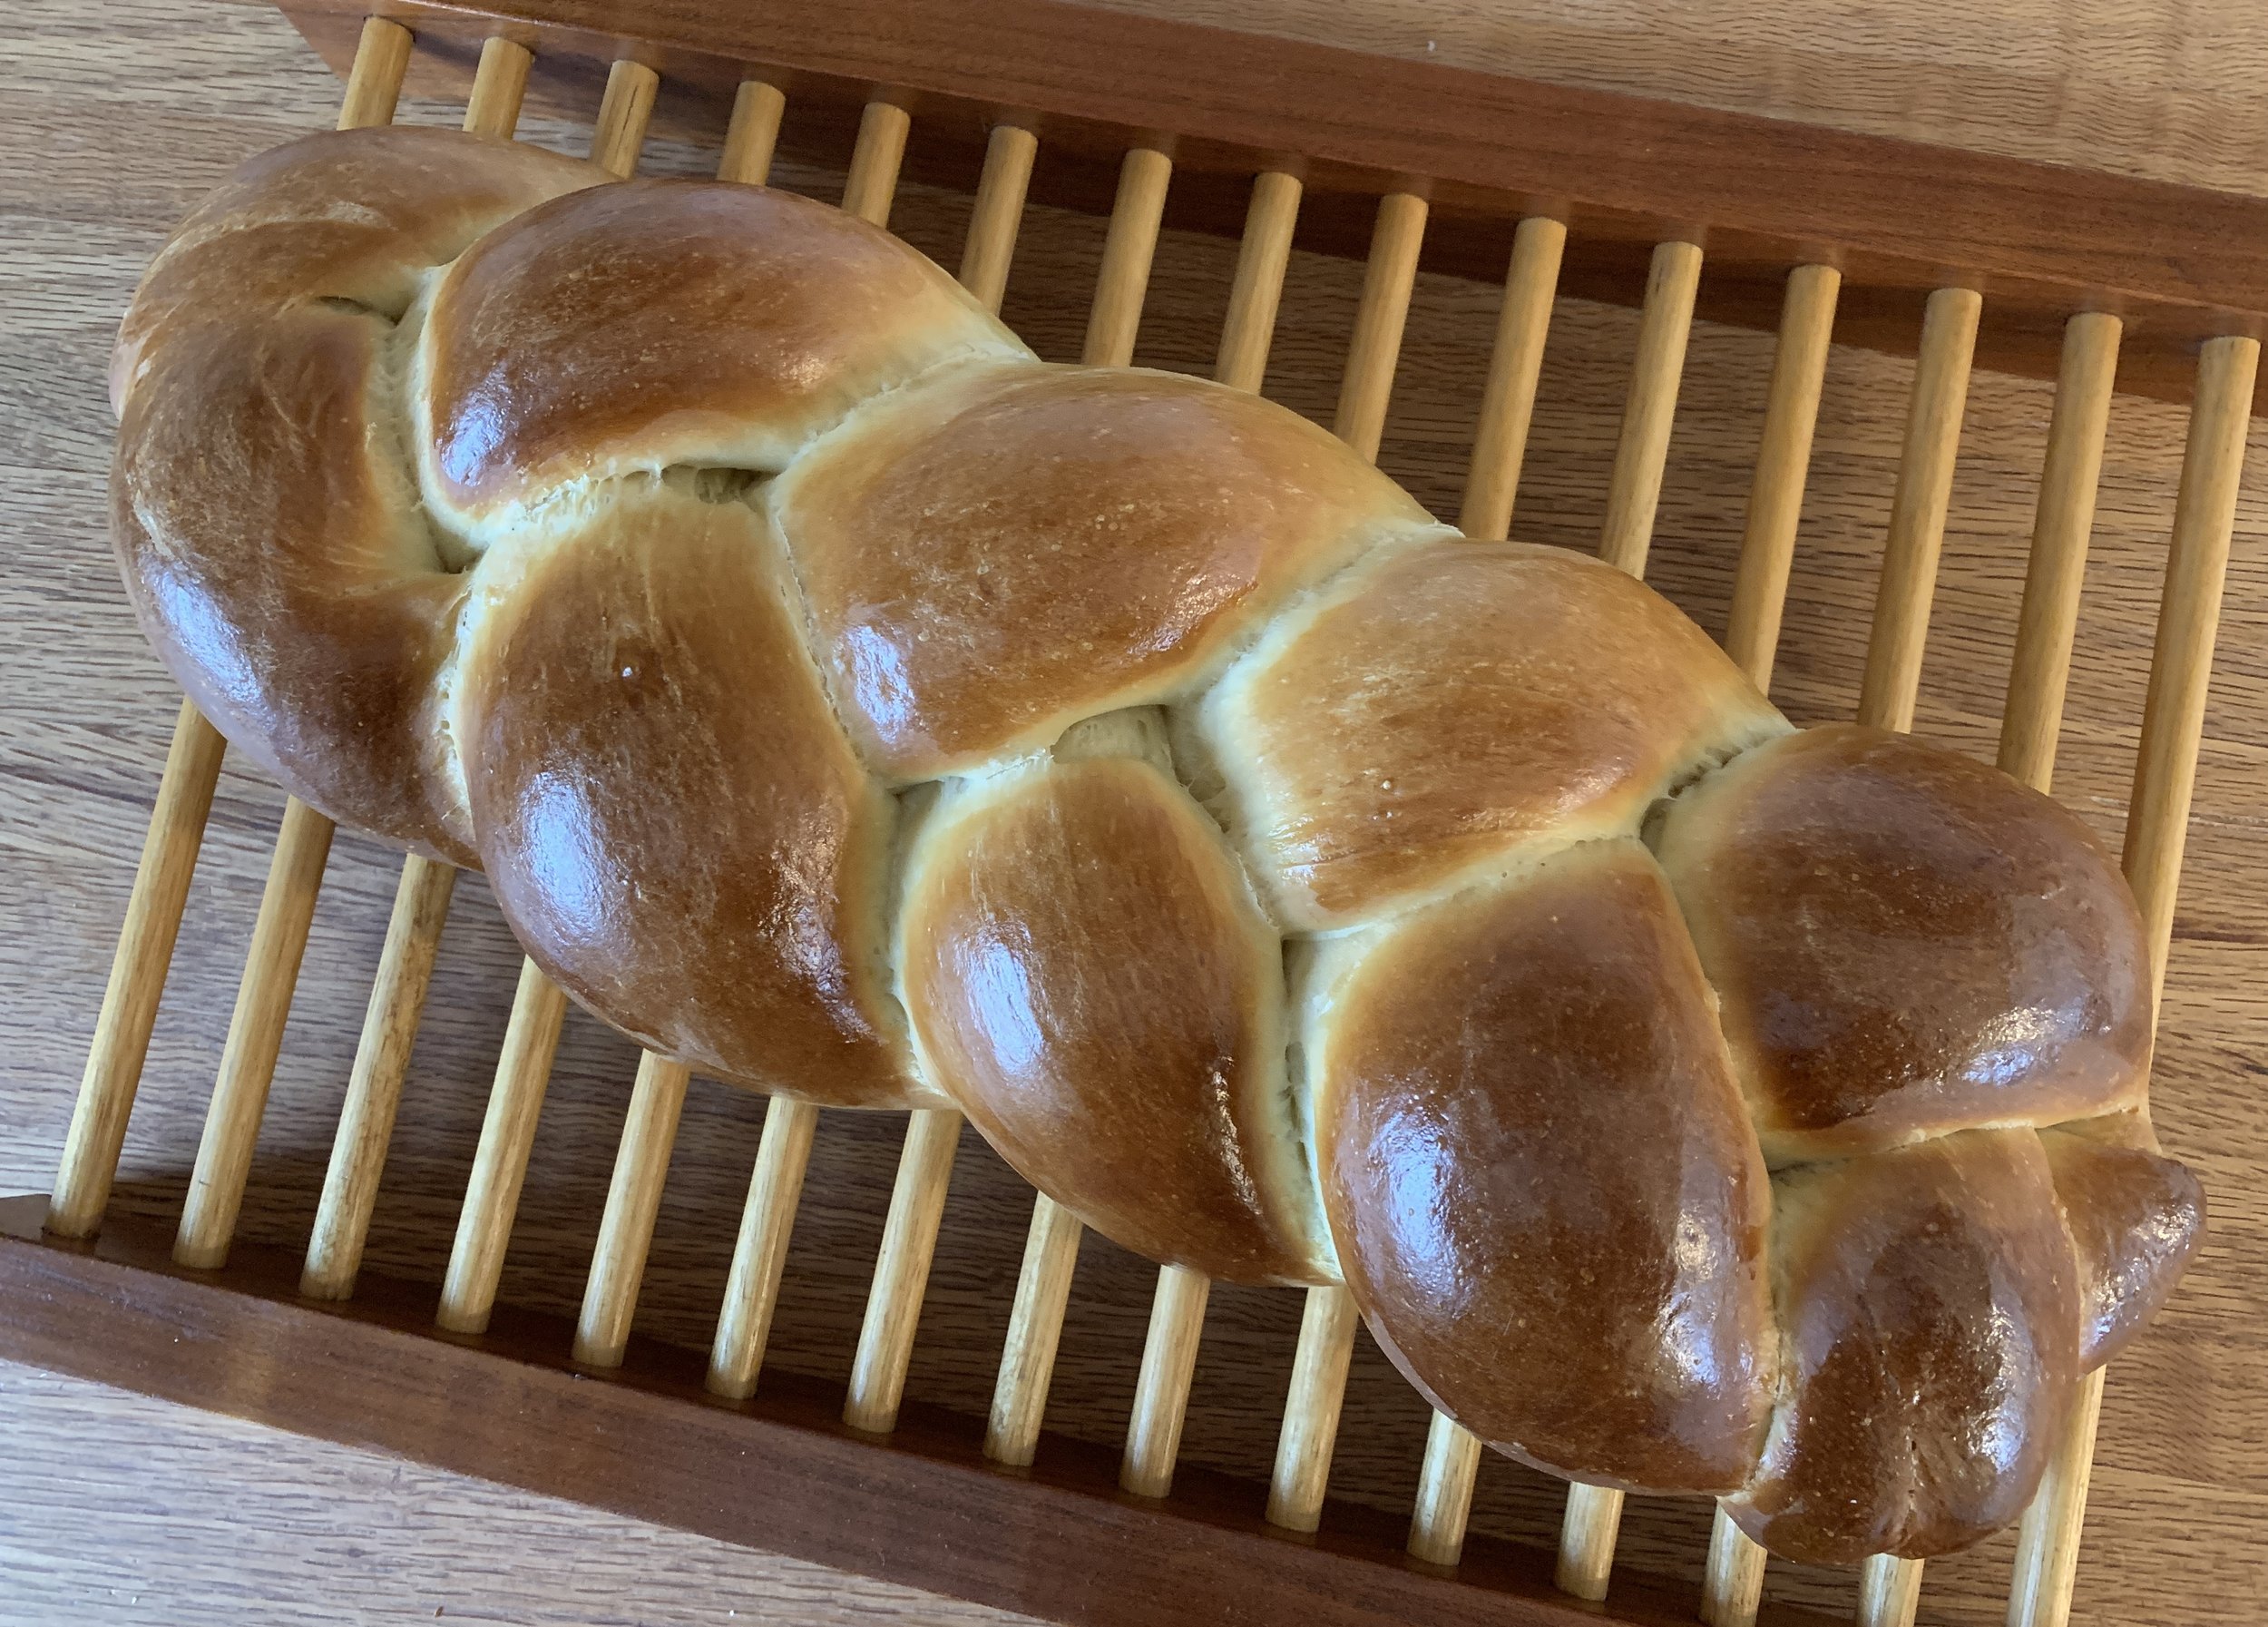
This is just one of the many times of year when these lovely shiny loaves appear. Steeped in Jewish tradition, served on the Sabbath and for holidays, this egg bread is also enjoyed by folks from many different backgrounds and parts of the globe. A very similar bread is also popular around Easter, often enriched with butter added to the dough (and maybe dyed Easter eggs tucked on top).

I embarked on this project after receiving a request from a friend for a pair of loaves as part of an egg related scavenger hunt she was planning for a group. Sounds like fun!

I’ve made challah on occasion over the years but have never posted on the topic. While there are tons of recipe variations and reams of information about its history and preparation, I barely skimmed the surface in deciding how to approach this. All purpose or bread flour? How many eggs? Whole or yolks? Honey vs sugar? Three or four (or six!) strand braid?

Particularly when I’m baking for an order, I want to be sure that the end result will be tasty. Of course that means a trial or two. I was inspired to do a test between a King Arthur recipe that I’d made in years past (to excellent reviews) and a recipe from a new book I purchased recently entitled “Breadsong: How Baking Changed Our Lives”. I’ve paged through the book’s recipes and am truly enjoying the story written dually by Brits Kitty Tait and her father Al Tait. It’s their story of Kitty’s journey through some difficult times in her young life with bread baking ultimately becoming her salvation. They now own/run “The Orange Bakery” in Watlington, Oxfordshire UK. Cool story.

test bakes

I won’t focus on recipe details yet, but, suffice it to say, both half loaf trials turned out OK. Kitty’s adds some butter to the dough but the recipes are otherwise quite similar. Both used two eggs for the full recipe unlike the one I ultimately went with.

Perhaps I over baked them a bit since they were a tad dry. With a fine, light crumb, both are excellent spread with a bit of butter/jam, especially toasted. I recommend either for bread pudding or French toast, easy and delicious ways to revive and repurpose.

After a bit more review, I went with an adaptation of the recipe I ultimately turned to - Jeffrey Hamelman’s challah in his book “Bread: A Bakers Book of Techniques and Recipes”. This one uses more egg than many recipes I reviewed along with the usual suspects - flour, vegetable oil, water, honey, salt, yeast.


Let’s get started! I’ll go through the steps, listing ingredients in gram weights but remember you can go to the recipe PDF for equivalent measures and read through it at your leisure.

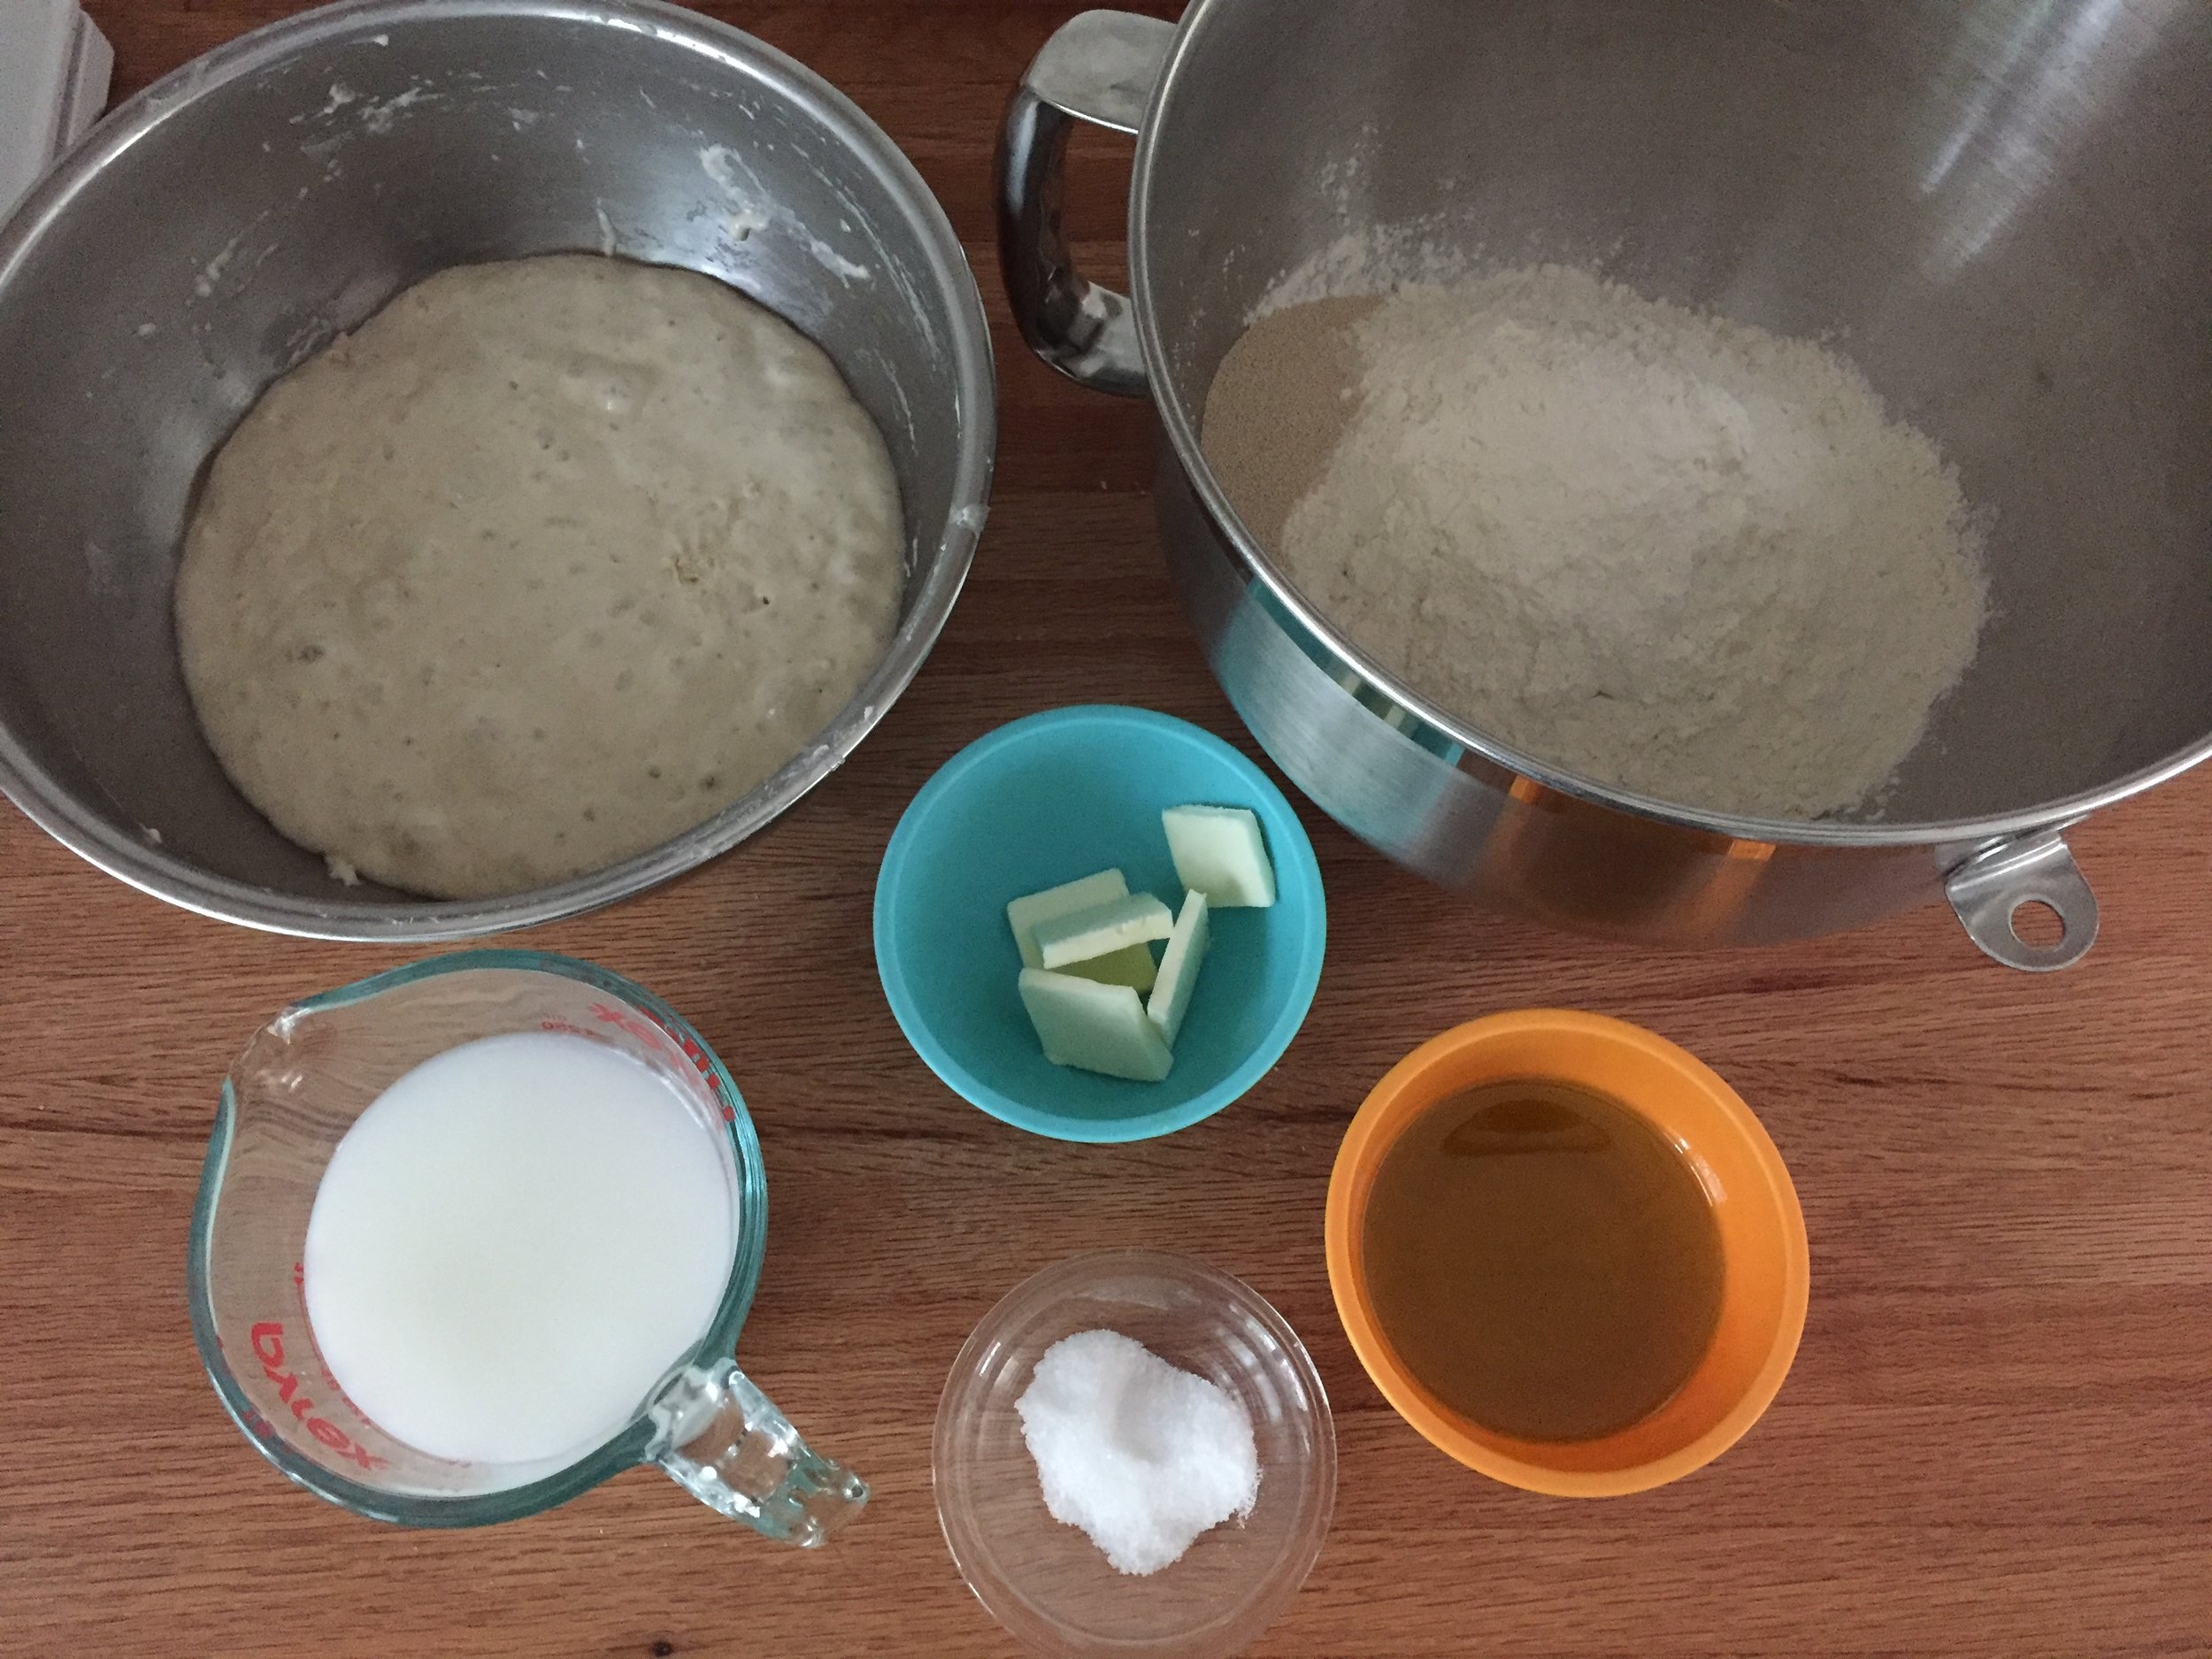
First have all your ingredients mised out: 600 g all purpose flour, 300 g bread flour, 160 g honey, 2 large eggs plus 5 (or perhaps 6) yolks, 85 g vegetable oil like canola (EVOO is tasty!), 300 g water (tepid/coolish), 17 g instant yeast, 13 g kosher salt.

Place all ingredients in the bowl of a stand mixer fitted with the dough hook. My 6 quart Kitchenaid bowl works well for this. I may have mentioned this in the past but I have an 8 quart commercial Kitchenaid stand mixer. The beauty of it is that not only is the mixer’s motor more heavy duty than a 6 quart, the attachments are much more work-horse like, solid and heavy. And! - they work with my 6 quart bowl that fits on the 8 quart stand! The six quart is my go to size for most bread, croissant or large batches of shortbread or tart doughs. Love it.

All in!

I give it a stir up with a spatula to gets things moistened.

iinitial blend

Then blend with the dough hook on low speed (stir on a Kitchenaid) for several minutes to incorporate the ingredients.


Now knead on speed 2 for about 6 minutes to develop the gluten. The dough should ball up and pull away from the sides of the bowl.


Give the dough a couple of quick kneads by hand and round it up, then place in a lightly oiled bowl for the first proof.


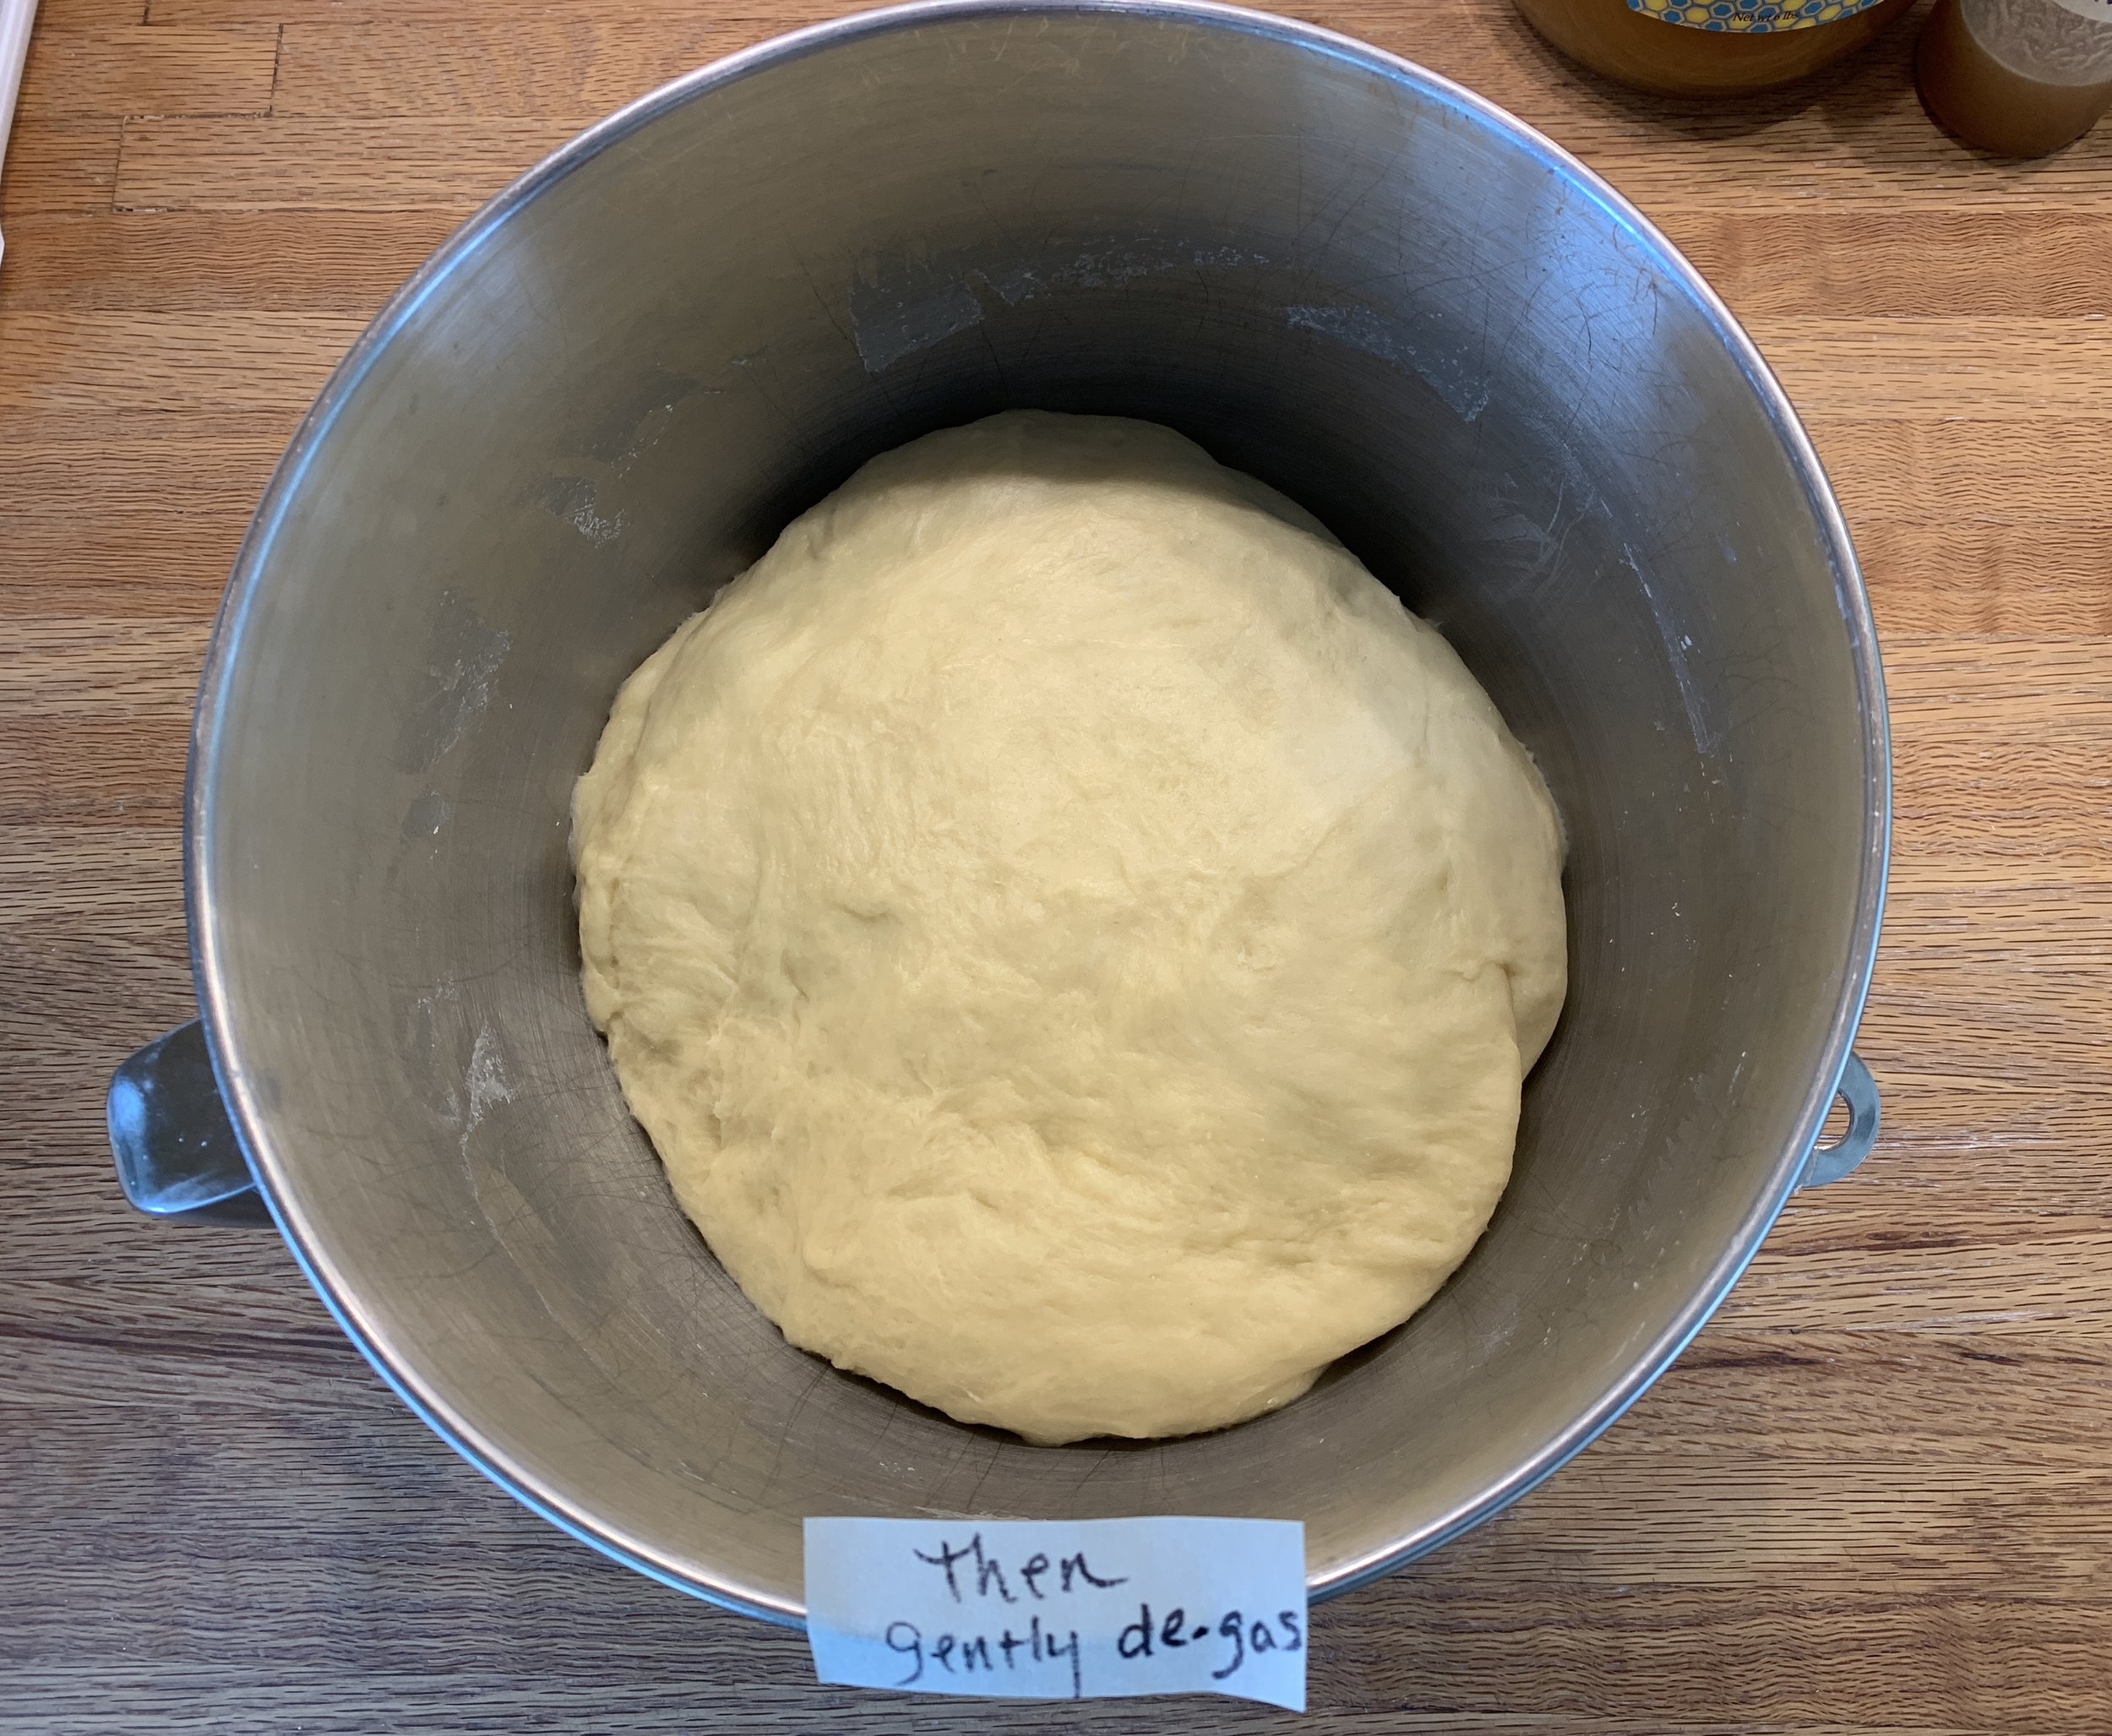
Let rise in a warm place for 1.5 - 2 hours, gently de-gassing at 1 hour. OPTION: after the first de-gassing, refrigerate the dough for several hours or overnight, de-gassing a couple of more times during the first few hours. The dough is easier to work with/shape when cool, plus you can create your own time table to mesh with your schedule.

For my project I de-gassed at hour one, then refrigerated the dough for an hour and a half (due to my schedule that day!). Then another de-gas and a 45 minute room temperature rise before shaping. Here are the visuals.


nice fridge rise!

dough is feeling good!


Place the risen dough on your work surface - you don’t need much flour at all for the dividing/shaping/braiding. Use a bit if needed, but the dough handles well without being sticky.

For two 3-strand braids, divide the dough in half then each half into three equal pieces. Do a rough, stubby torpedo pre-shape of each piece and let rest 20 minutes covered lightly with plastic. I made two 750 g braids and used the rest of the dough for a mini two strand twist so I could do a taste test.


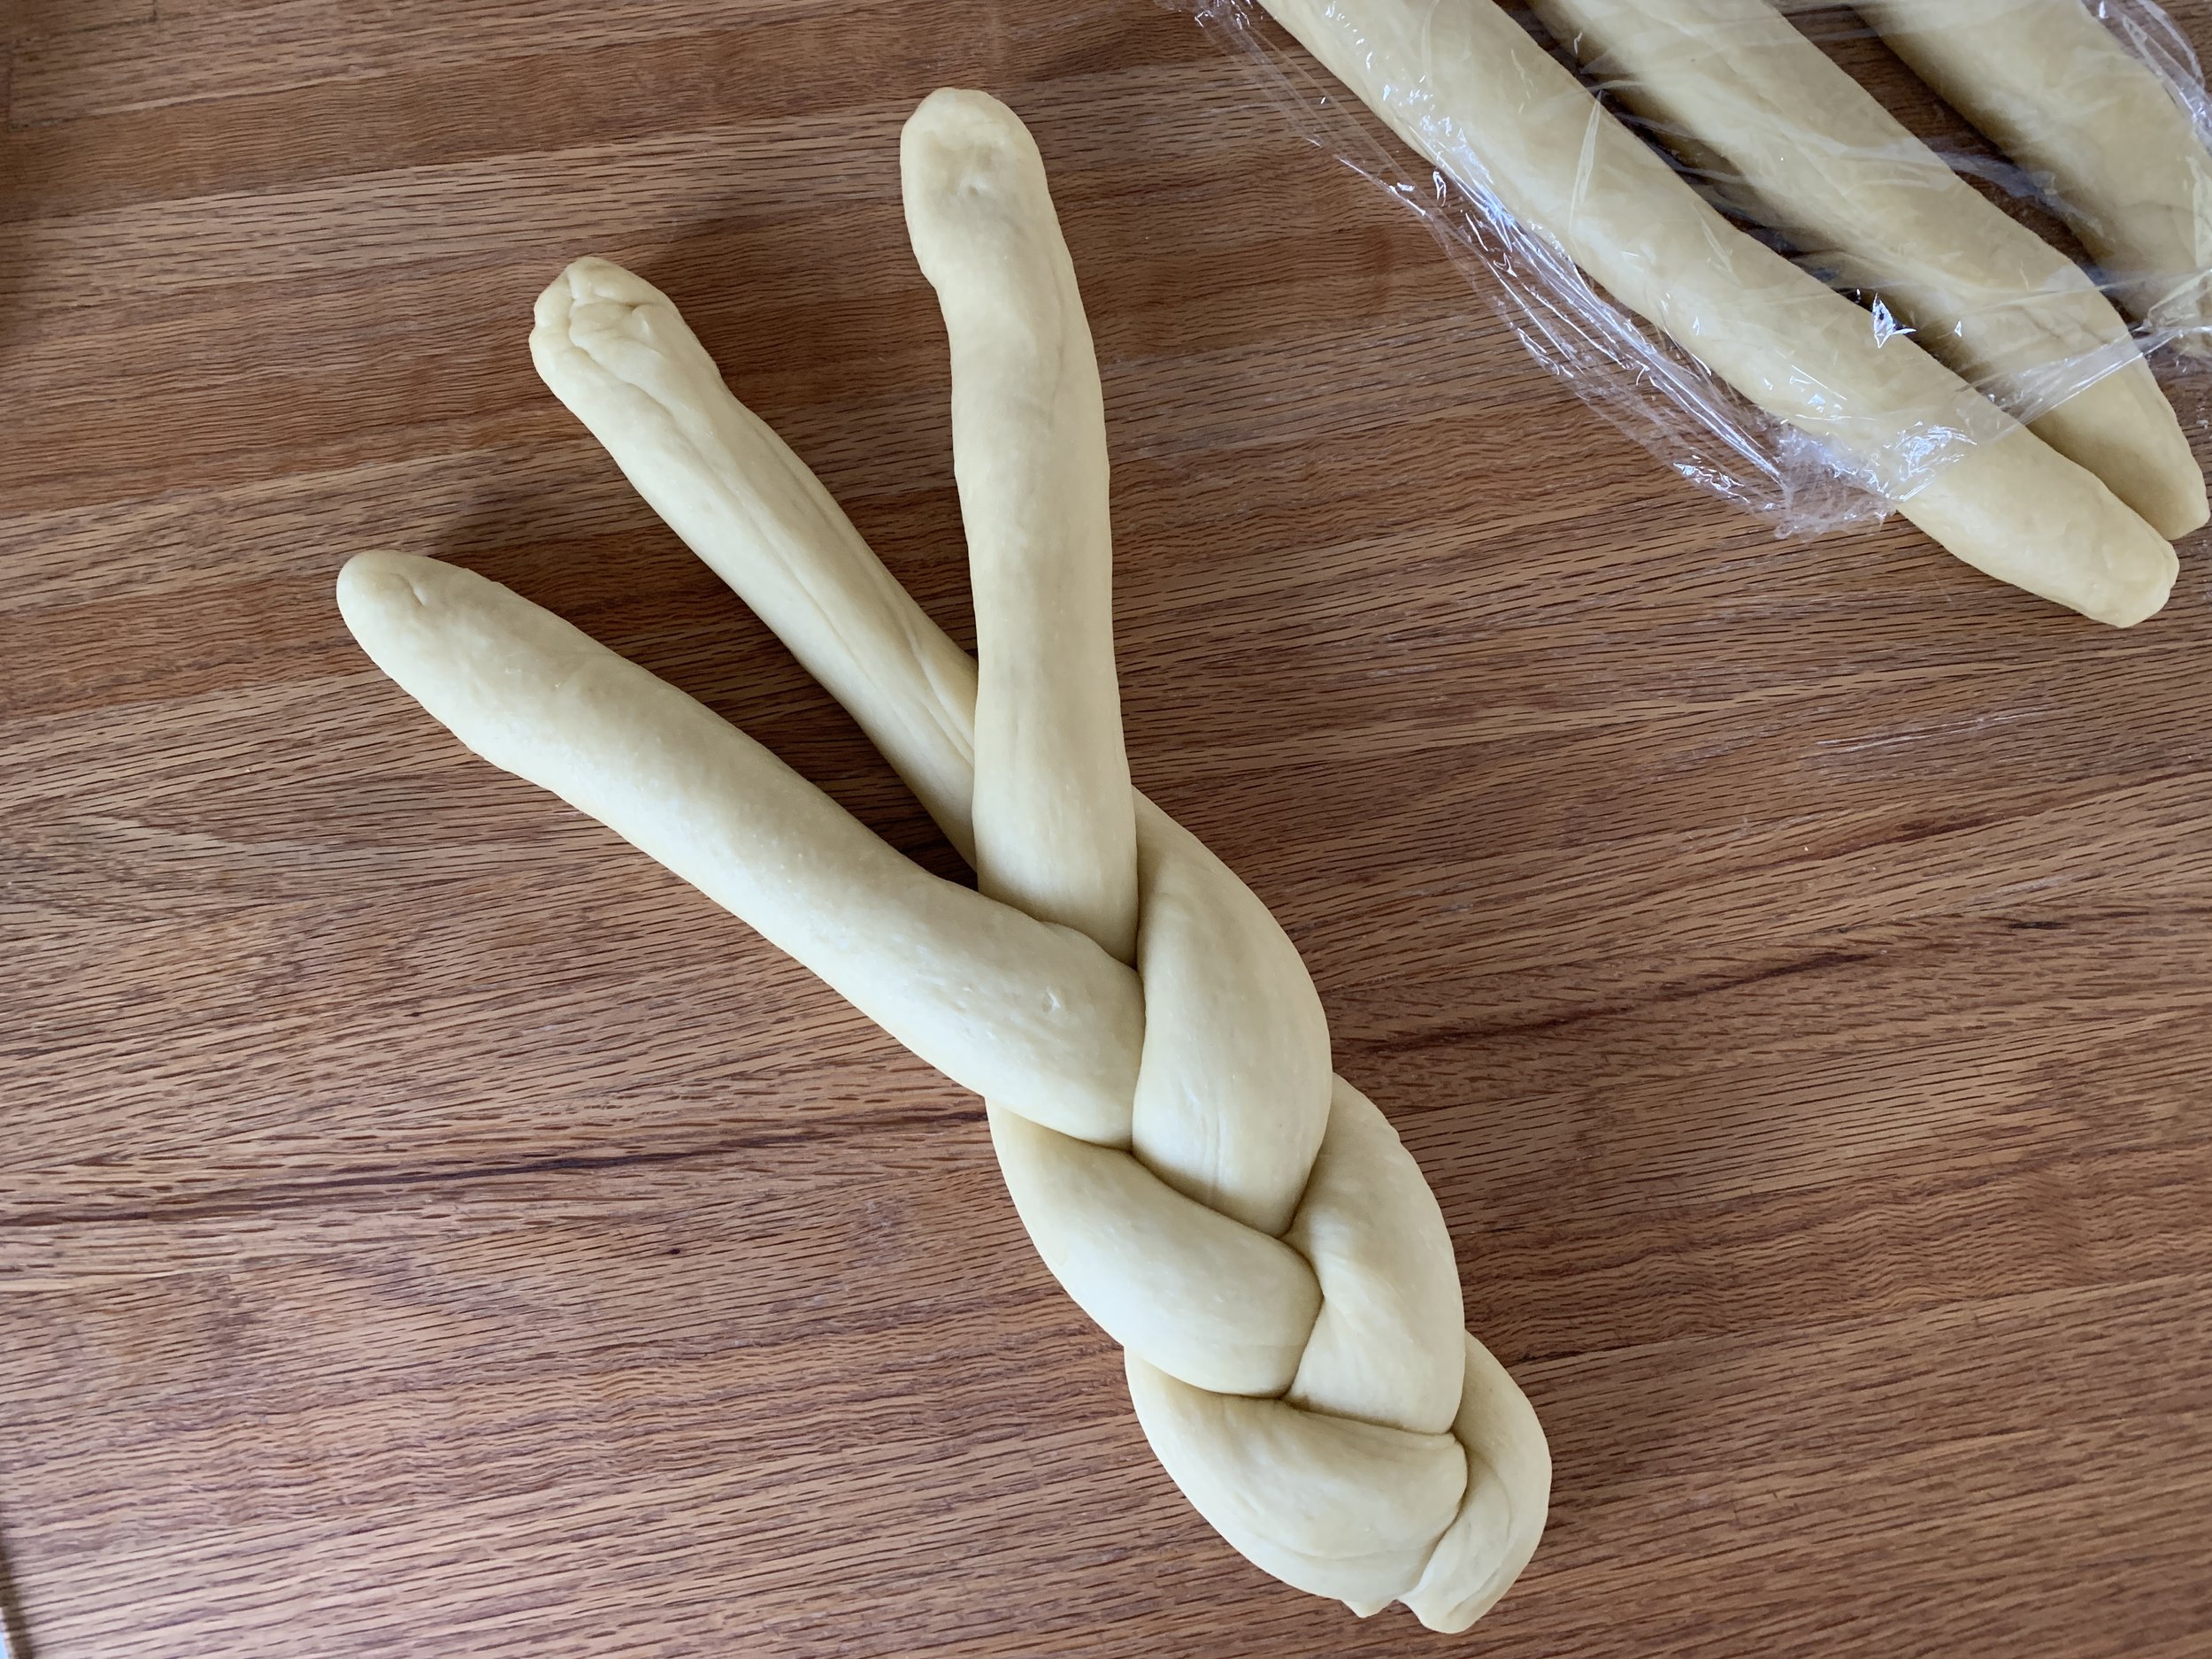
After the rest, roll each piece into a 14”-ish rope. Set up three pieces for your first braid.


One way to braid is to start in the middle, braid toward one end then flip it and finish braiding from the center to the other end.

first half complete


Tuck the ends under to clean things up

Once both loaves are braided, place them on a parchment lined sheet pan, lightly cover with a cotton towel and cover that with plastic wrap. This protects the dough from drying out but also reduces moisture accumulation between the braids by eliminating direct contact with the plastic wrap on the dough surface.

Let rise for two hours. Toward the end of the rise heat the oven to 375ºF.


These are looking great after the two hours. Thoroughly egg wash the surfaces.

You can see my mini twist on the right, sprinkled with poppy and sesame seeds.


Bake about 30 minutes until golden brown. Cool on grids.


Serve when ready. The challah loaves freeze well - remove from the freezer a couple of hours or so ahead to thaw at room temperature.

Here’s a look at my mini twist. I tried it with a schmear of butter and sandwiched it with a bit of ham and cheese. Good crumb, tender and tasty!


The report from those who received the full sized loaves was a thumb’s up. Good deal!


Just a final bit of nature for you. Happy spring!

cherry blossoms in le jardin des plantes, paris

Brioche feuilletée revisited - chocolate hazelnut braid

IMG_0825.jpg

I would never have imagined that the most viewed post on this blog would be Brioche feuilletée, written back in November, 2016. I launched that project by tweaking the brioche recipe from a Le Notre Paris class I attended in September of that year. Reducing the butter in the base dough, adding a butter block and putting it through three 3-folds yielded a lovely laminated result.

Since then, as is my wont, I’ve reviewed a number of additional brioche recipes and techniques from the likes of Dorie Greenspan and Jeffrey Hamelman (of King Arthur Flour fame) and developed a new version of the base dough in November, 2018. The dough can be used for any brioche option you wish - Nanterre, brioche à tête, coffee cake, cinnamon buns or brioche rolls topped with pastry cream/jam/fruit. Lots of choices.

In this recipe PDF I go into more details about brioche, adjusting the recipe to yield either a leaner or an even richer dough plus some options for laminating the dough. So many possibilities.

It helps me to assess a brioche recipe by looking at the butter to flour ratio. A medium brioche dough typically contains butter that is about 50% the weight of the flour. Brioche can run from lean (where the butter may be as low as 25% of the flour) or rich where the butter can be all the way up to 100% of the flour.

The full batch of the base brioche dough (before adding any butter block/laminations) yields about 1300 g (2.8 lbs) of dough. So you can make the full batch and then separate out the 600 g for this braided two loaf project. Wrap and freeze the remaining dough for later or use it for other projects you might have up your sleeve.

Using Hamelman’s guidelines for these braided delights, I laminated 600 g of the base dough with an additional 120 g/4.25 ounces of butter which, by my calculations gave the final result a butter to flour ratio of 1:1. Now THAT’S a rich brioche! Remember - this makes TWO braids.

IMG_0829.jpg

Let’s do a quick review on laminating the dough - it never hurts, since the more you do it, the more it becomes second nature.

Roll the dough out to a 6”x12” rectangle. Have a 6” butter block ready - it should be cool and malleable.

IMG_0796.jpg

Place the butter on half of the dough . . . . . .

IMG_0797.jpg

then fold the dough over the butter, pinching the edges closed to fully envelope the dough. This is the beurrage.

IMG_0798.jpg

If your kitchen is pretty warm or your dough and butter seem warm and starting to squish, wrap it up and refrigerate for 30 minutes before proceeding. Now roll the dough out to about 18” long and 6” wide, always with the short side parallel to the work surface and rolling to and from yourself (not sideways) to achieve the length. Do a 4-fold (book fold) by bringing each short end into the middle with edges meeting . . . . . .

IMG_0799.jpg

then fold it on itself.

IMG_0800.jpg

Wrap and chill the dough for 30 minutes to allow it to relax then proceed with a 3-fold (business letter fold). Before rolling remember to turn the dough 90 degrees so the “spine” or fold is on your left then roll out to approximately 18”x6” again, rolling to/from yourself. Don’t get hung up on exact measurements - you’re going for about three times length to width.

IMG_0807.jpg

Visualizing the dough in thirds, fold one end up . . . . . .

IMG_0808.jpg

and the other down over it. Congrats! Your laminated dough is complete.

IMG_0809.jpg

Now wrap it snugly and refrigerate for a good 1-2 hours to let it relax and firm up before rolling it out for your intended purpose.

For this braid project I divided the dough in half - look at those buttery layers!

IMG_0814.JPG

Each half of the laminated version weighs about 360 g (before filling) and is good for a medium loaf pan size braid.

I created a chocolate hazelnut filling by taking 200 g of a hazelnut remonce mixture I had left from this hazelnut/almond couronne project and adding 50 g / ~2 ounces of Nocciola crema and a bit of egg white and simple syrup to loosen it a bit for piping.

IMG_0803.JPG
IMG_0802.JPG

Butter two medium (8”x4”) loaf pans and have the filling ready in a piping bag.

On a lightly floured surface roll one half of the dough into a 10”x10” square and divide it in three strips.

IMG_0815.jpg

Egg wash (I used egg white since I had some on hand) along one long edge of each strip then pipe a line of filling along the opposite edge.

IMG_0816.jpg

Roll each strip up into a log and press the edge to seal.

IMG_0817.jpg

With seam sides down do a classic three strand braid.

IMG_0818.jpg

As you come to the end of the braid, just tuck the ends under then pop it into a buttered loaf pan.

IMG_0819.jpg

Repeat the steps with the second half of the dough.

Cover the pans with buttered plastic wrap and let rise for a good 1.5 hours. Toward the end of that proofing time heat the oven to 375ºF.

IMG_0821.JPG

Brush the loaves with egg wash and bake about 35 minutes until nicely golden.

IMG_0823.jpg

Remove them from the pans and, if you’d like to gussy them up a bit, brush with either some simple syrup or apricot glaze for a bit of shine and even go another step and drizzle on a confectioner’s sugar/milk/vanilla glaze. I left mine au naturel.

IMG_0825.jpg

Once cooled, I sliced into one of these babies. Oooooh - buttery with just the right swirl of choco-hazelnut and pretty darn delicious to boot. Nothing like a good brioche, eh?

IMG_0831.JPG

I love the feel of dough, the shaping, the proofing, the baking, the aromas and, of course, the tasting! Dough reigns!!

Orange glazed brioche

IMG_3619.JPG

Yes, I admit that I love delicious brioche, both making and eating it. Even though there’s a good deal of butter and egg in this enriched dough, if the base recipe is just right and the process is executed just so, it’s a real winner in my book. Light and pillowy with a tight yet soft crumb, it’s a canvas for so many different creations.

I’ve written about brioche in the past, but I’m one of those folks who loves to peruse recipes, compare and tweak the ingredient ratios as well as the methods used to produce some version of this particular delight. Knot rolls coming up!

IMG_3615.JPG

This time I had citrus (orange to be exact) on my mind. During the winter months I often have a mix of orange segments with their juice plus some cut-up apples in a bowl in my fridge for that all important daily fruit quotient that we all need. Not wishing to waste any part of the orange, I zest my oranges before segmenting them, then wrap the zest in little packets, stashing them in the freezer so the zest is handy for my next citrus baking adventure.

I reviewed Dorie Greenspan’s brioche recipe in her book Baking Chez Moi in addition to Jeffrey Hamelman’s in his book Bread - A Baker’s Book of Techniques and Recipes. While there are tons of recipes out there for brioche, what I took away from this review was one small interesting technique that Hamelman recommends when using a planetary stand mixer (like the ubiquitous Kitchenaid that many of us have). He notes that it’s more difficult to adequately develop the dough in a planetary mixer so suggests holding back half or more of the sugar at the beginning of the knead.

Sugar is hygroscopic and actually acts as a liquefying agent, so if it’s all added at the beginning, the result is a looser textured dough that doesn’t develop as well. Who knew? Learn something new everyday.

NOTE: if you’re interested in a quick run down on planetary (most commonly used) and spiral mixers (more specifically for bread and artisan dough) check this out.

The mixing process went well, the resulting dough had that silky, buttery texture one hopes for before the overnight refrigeration, and the following morning the division and shaping proceeded apace. I divided my dough into 42 g / 1.5 ounce portions, did the preliminary ball shaping and gave them a 10 minute rest.

Balled up dough ready for final shaping

Balled up dough ready for final shaping

I rolled each one into a snake and then formed ‘em into single knots. Kind of reminds me of some sort of creature peaking out of its burrow or a coiled snake (hopefully not ready to strike!)

IMG_3609.JPG

One of the important steps in the brioche making process is the final rise - if it’s too short, the end result isn’t that wonderful light, airy and oh-so delicious creation on which you’ve spent a decent amount of effort. Especially during the winter months in my 69º kitchen, I’m careful to give the dough plenty of time, sometimes up to 2 hours, for that all important rise.

Note that since brioche is such an enriched dough, the rise may not be as obvious as that of lean breads, but you should be able to appreciate the increased fullness and puffiness of the risen dough.

IMG_3612.JPG

These baked at 375º F for about 20 minutes - all nice and golden brown.

IMG_3617.JPG

Once cooled I opted for an orange cream cheese glaze that set these babies off with just the right touch. Delicious. Soft, delicate crumb, light and wonderful.

IMG_3618.JPG

Here’s the recipe for my orange brioche dough, yield 1320 g / approximately 2.9 lbs.

  • 537 g flour, half bread and half all purpose

  • 90 ml whole milk, cold

  • 90 ml water, cold

  • 5 large eggs, cold

  • 11 g salt

  • 68 g sugar, divided in two portions

  • 18 g instant yeast

  • 255 g unsalted butter, cool and pliable, medium diced

  • 1 tablespoon orange zest (from 2 medium oranges)

  1. Place flour, milk, water, eggs, salt, yeast and half the sugar in the bowl of a stand mixer fitted with the dough hook. Mix on low to incorporate then knead on speed 2 for 5-7 minutes until you have a strong dough using the windowpane test.

  2. Add the second half of the sugar and knead for 2 more minutes.

  3. Add butter bit by bit on speed 2. Once all added, knead for 8-10 minutes until the dough cleans the sides of the bowl and sheets nicely.

  4. Place the dough in a lightly floured bowl, tuck plastic on and around the top and let it rest for 1 hour at room temperature.

  5. Fold the dough gently, place it back into the bowl, cover with plastic wrap and refrigerate. De-gas 2-3 times over several hours then refrigerate overnight.

  6. Proceed with dividing and shaping as noted above . For these orange rolls I divided the dough into fifteen 42 g portions, using about half the dough (a full batch would give you 30 rolls!). You don’t have to use all the dough - just tightly wrap any unused dough with plastic wrap and freeze for later.

  7. Once the knot rolls are shaped, cover lightly with buttered plastic wrap and let rise 1.5-2 hours depending on the temperature of your kitchen.

  8. Heat the oven to 375ºF and bake for approximately 20 minutes until golden brown.

  9. Cool before icing.

For the icing I blended 227 g / 8 oz softened cream cheese, 2 T corn syrup, 2 T heavy cream, 75 g / 3/4 cup confectioner’s sugar, 1 tsp vanilla, pinch salt and the zest from one medium orange. You may not need all of it - it keeps in the fridge, covered for a week or so.

I used my leftover glaze on some petite citrus financiers. Deelish. Now go have some brioche fun!

IMG_3625.JPG

Roasted garlic cheese bread

IMG_3223.JPG

Ooooh I loved this baking adventure! Not only did I use Fontinella, a delicious bread-worthy cheese from The Cheese Lady, but added in some roasted garlic that the Steve-man has recently been providing in spades.

IMG_3208.JPG


I’ve been wanting to experiment more with different ways of filling and shaping bread dough and am often inspired by ideas I absorb from King Arthur Flour’s “Sift” magazine and/or their website which is chock full of wonderful tips, tricks and ideas.

In addition, I’m learning more about the ways to tweak one’s bread recipe from a straight or direct dough to a pre-ferment approach to build more flavor into the final result. Not only is it fun but appeals to my scientific bent.

In addition to KAF’s website, my go-to resources for bread baking include Rose Levy Beranbaum’s “The Bread Bible”, Peter Reinhart’s “artisan breads every day” and Jeffrey Hamelman’s “Bread”. So much to learn.

For this project I married ideas from a provolone bread recipe from CIA’s “Baking and Pastry” that I’ve been making for some years now with a KAF recipe for a cool looking twisty cheese/sundried tomato/herb number. I wanted to do a poolish this time and found some great tips on the “Weekend Bakery” blog, written by a Dutch couple who bake at their home. Lots of good stuff there too.

I’m not here to slog through the calculations but, in a nutshell, a poolish is equal weights of flour and water taken as a percentage of the whole from the base bread recipe you’re using. Based on my understanding of how one goes about this, I created my poolish with 200 g bread flour, 200 g water and 1/8 + 1/16 teaspoon of instant yeast, looking for a 6 hour room temperature fermentation. NOTE: the amount of yeast you add will vary depending on how long you wish your poolish to ferment.

Here’s my poolish after about 5.5 hours - nice and active and bubbly!

IMG_3210.JPG

To make the final dough I combined the poolish with 510 g bread flour, 7 g instant yeast, 235 ml tepid water/milk mix, 71 g olive oil, 20 g butter and 16 g salt.

IMG_3209.JPG

Using the dough hook I mixed everything for 4 minutes on low speed and then 2 minutes on medium speed. Then a 30 minute bulk fermentation followed by a fold-over then another 30 minutes before dividing.

After the bulk fermentation

After the bulk fermentation

I divided my dough into two 740 g portions with a plan for two different shaping approaches.

IMG_3212.JPG

The first shape involves rolling the dough into a rectangle and sprinkling it with 227g grated cheese (fontinella in my case). Then I took 6-7 cloves of roasted garlic and smooshed and pieced them up, scattering the pieces over the rectangle. A light sprinkle of Penzey’s salt free pizza seasoning mix, then roll up a snug log.

Starting the log roll

Starting the log roll

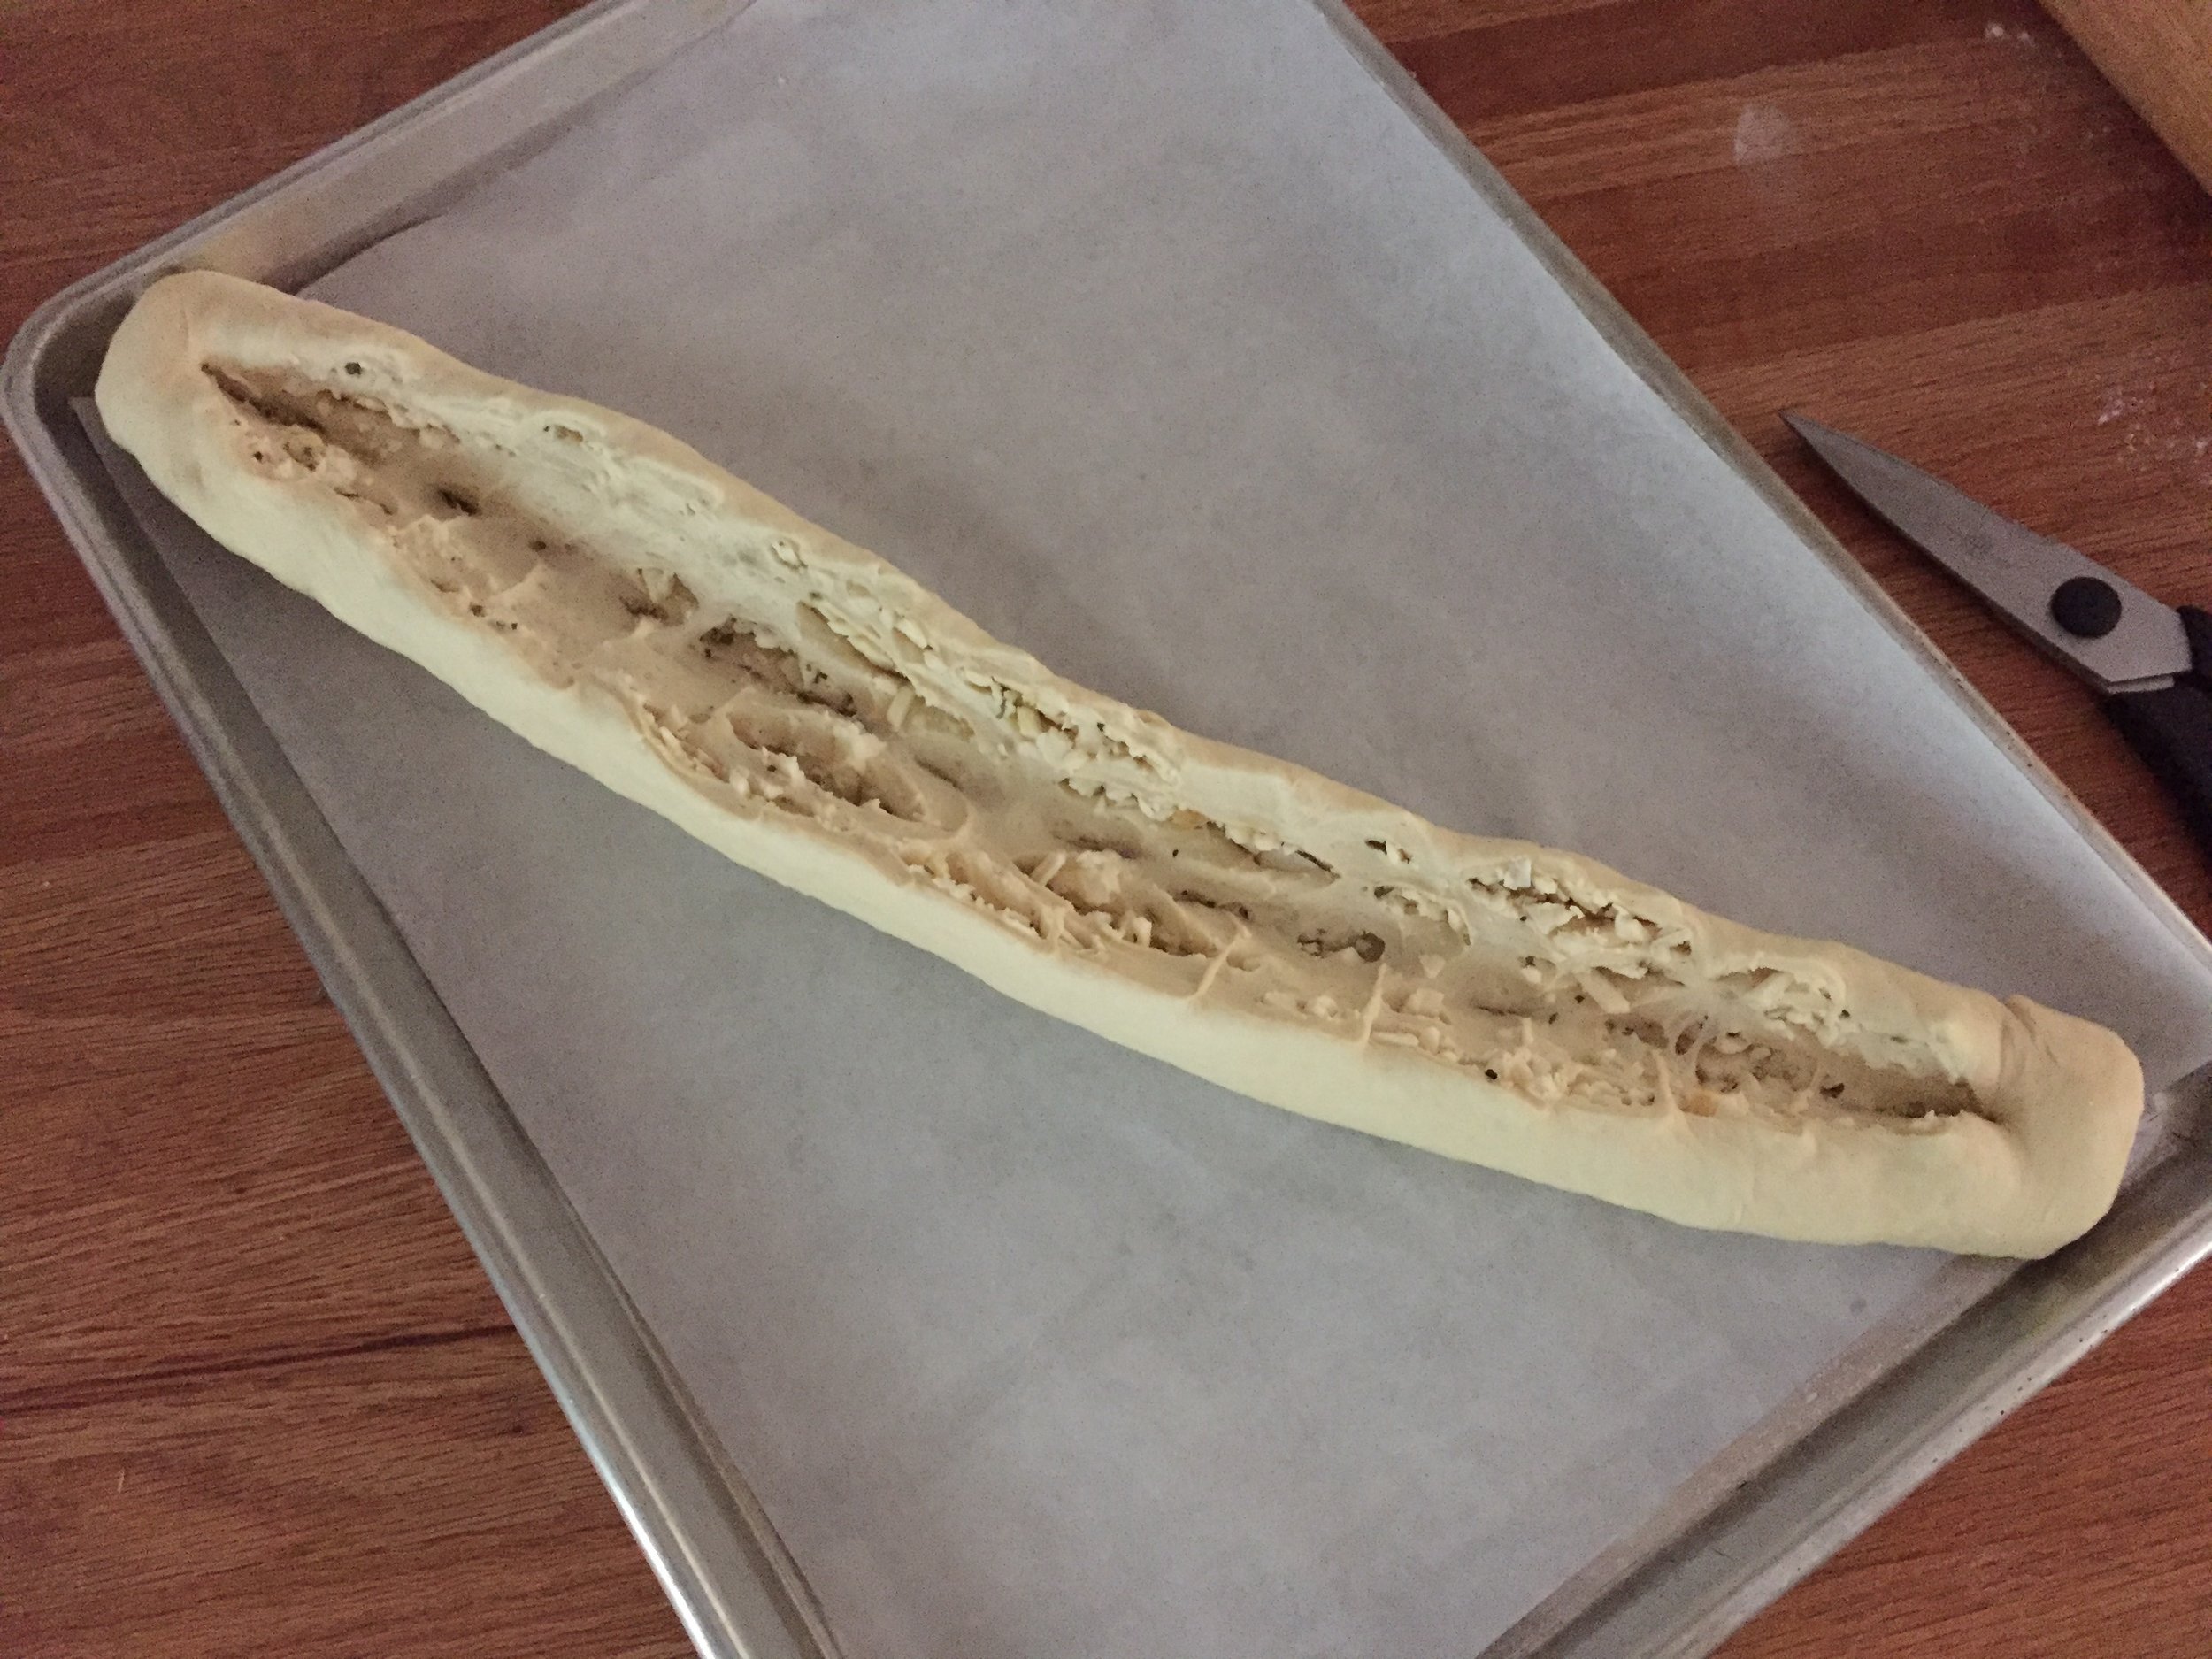
Once the log is complete, pinch the seams, place it seam side down on a parchment lined sheet, slit it down the middle to a depth of about an inch, leaving the ends intact. The log will open up to expose the filling.

IMG_3215.JPG

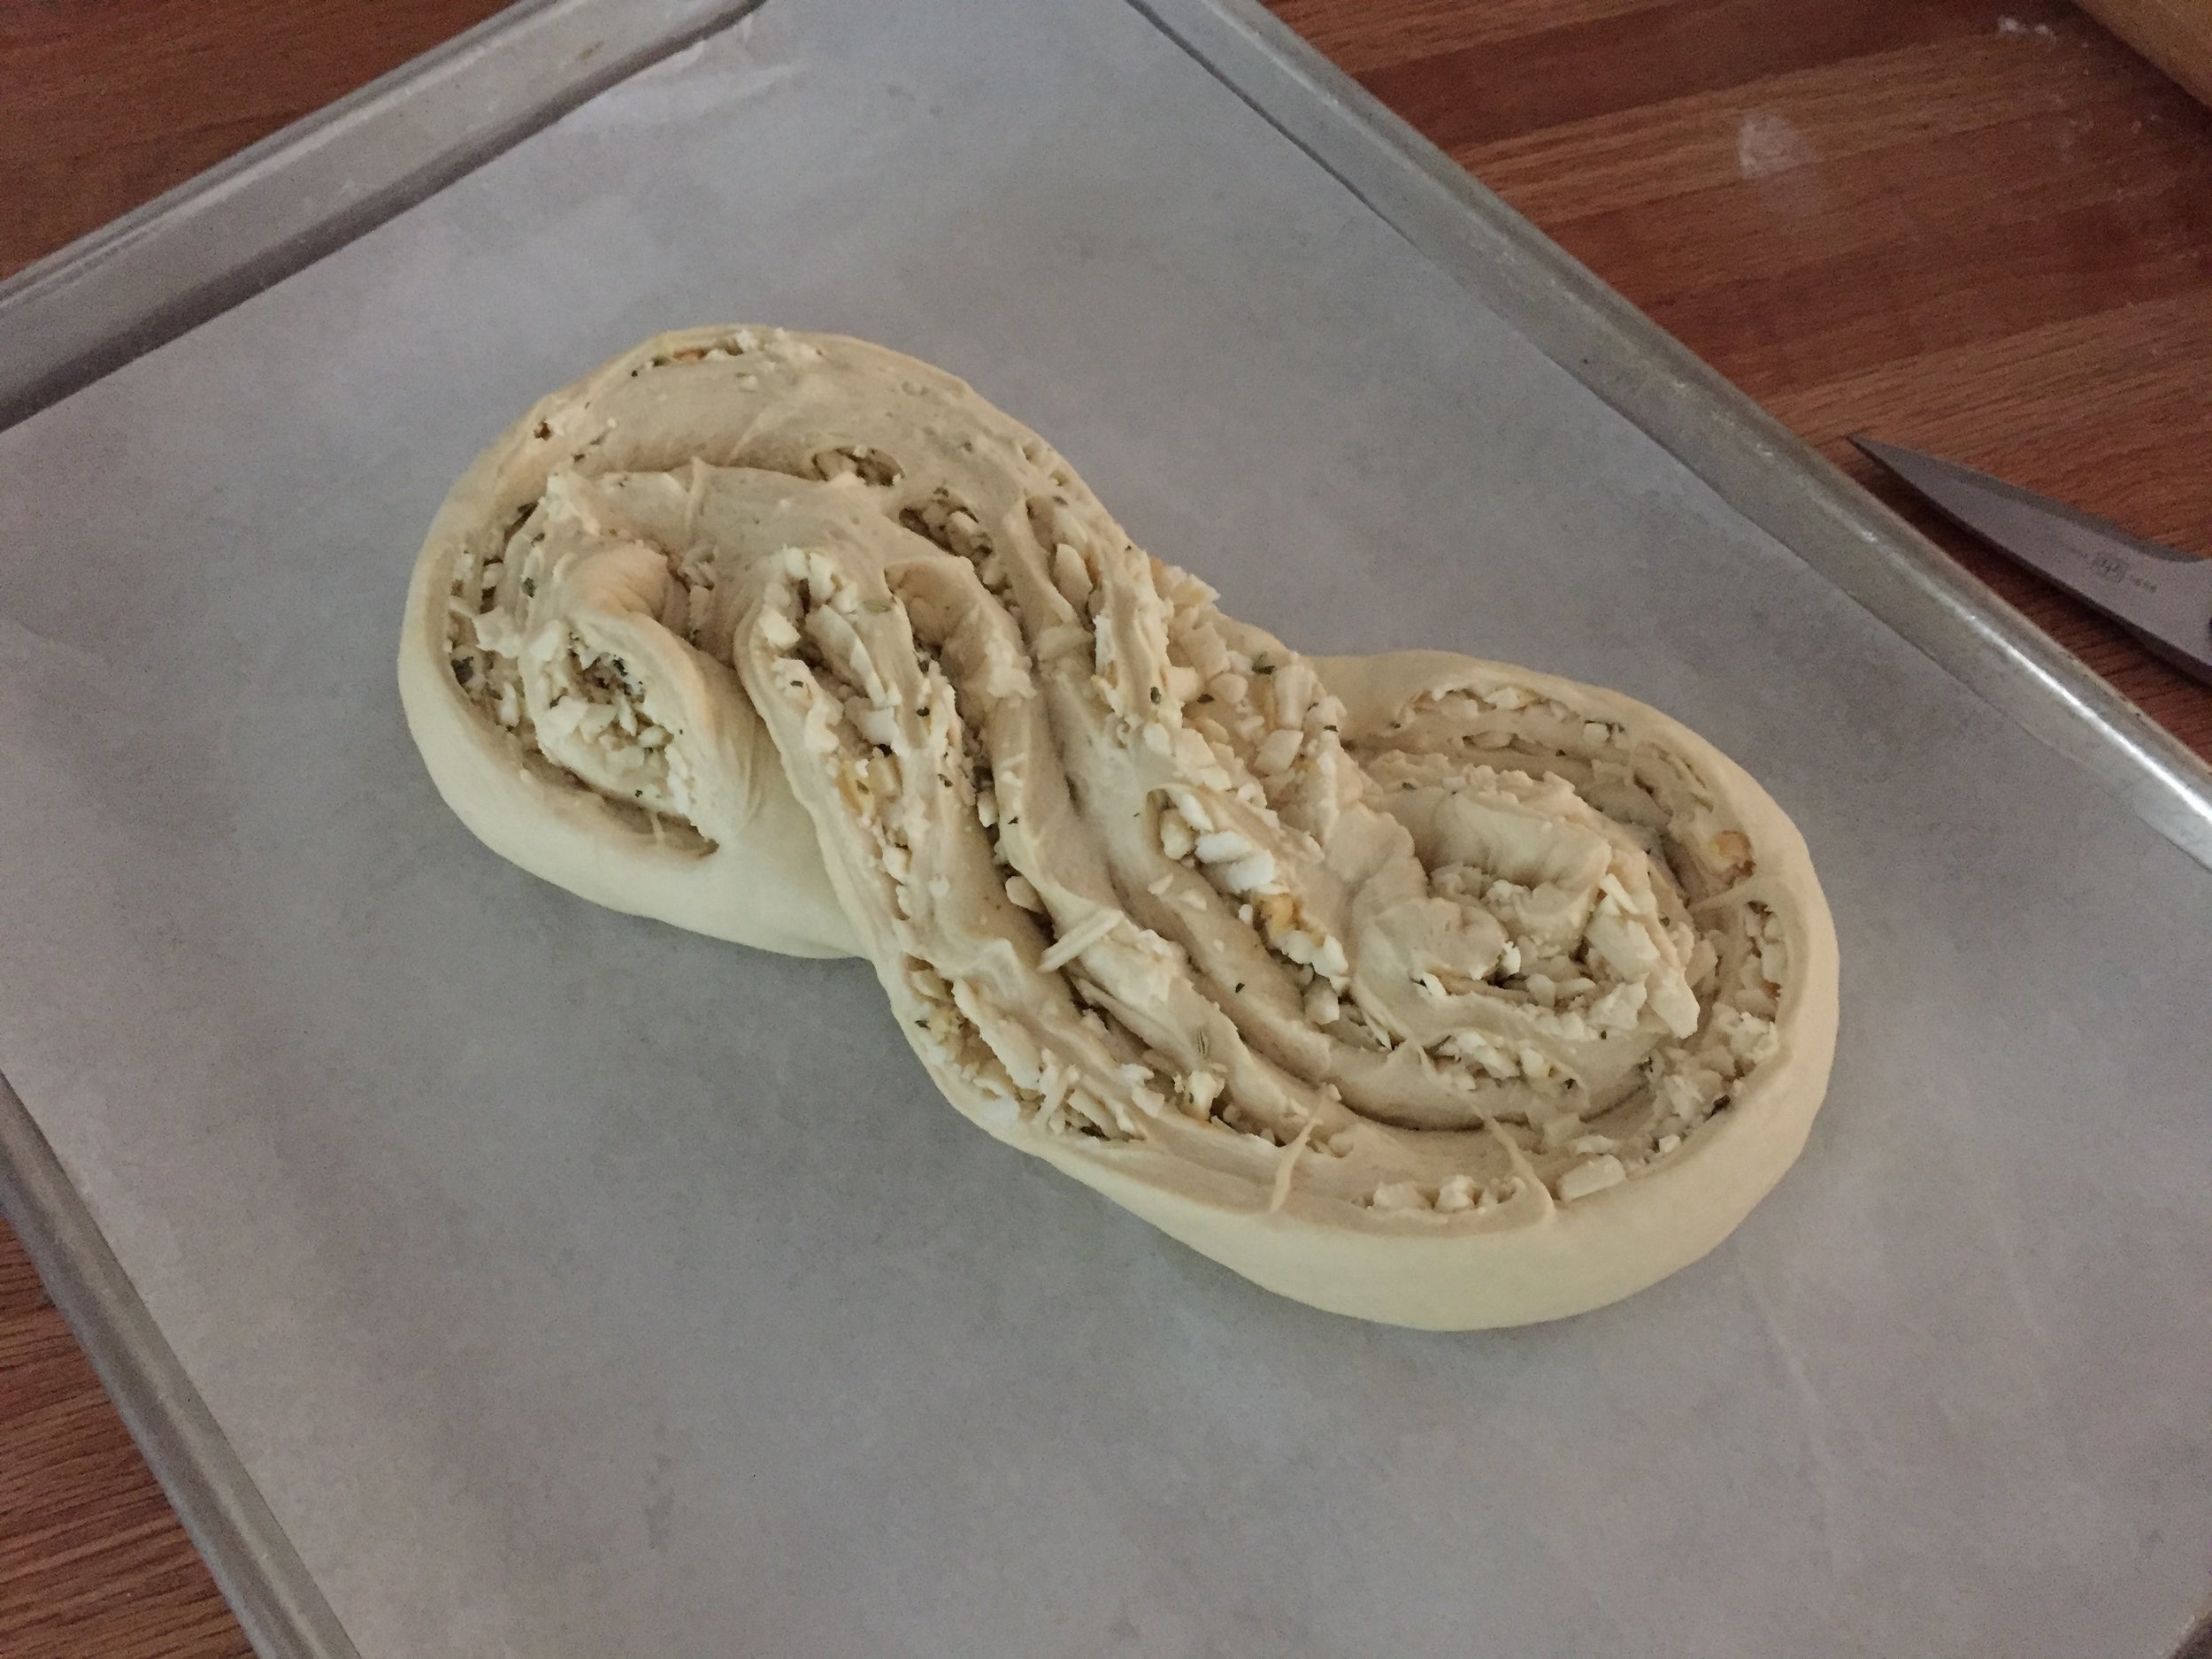
Then shape it into an “S” and tuck the ends under. Pretty cool.

IMG_3216.JPG

My second shape followed the method used for babka in which you roll up the log as already described, then slit the log entirely down the middle yielding two separate pieces filling side up.

IMG_3218.JPG

Begin at one end and twist the two pieces over and under each other, continuing to keep the filling side up as best you can (I could use some more practice on this one!). In this case I then went for a couronne or crown by forming it into a ring and tucking the ends under.

IMG_3219.JPG

Cover and let rise in a warm place for about 45-60 minutes, heating the oven to 350ºF during the last half of the rise.

Bake for 35-40 minutes until nicely browned.

IMG_3225.JPG
IMG_3226.JPG

The fontinella and roasted garlic went a long way to making this one a truly delectable bread experience.

IMG_3232.JPG
IMG_3231.JPG

For a family supper we sliced it, drizzled some melted butter over it, loosely wrapped it in foil and warmed it for about 10 minutes in a 325ºF oven. Oh my.

Yup. I’d make this again.

Smashed potato rolls


Some weeks back for the Memorial Day gathering at Clear Lake we planned to bring brats and sausages from Kingma's market (good stuff by the way) for the main course. There was also a potato contest in the works to see who might create something that could hold a candle to one of the family favorites, cheesy potatoes.

Steve planned to make his famous potato galette, and I wanted to contribute something potato-y as well. Hey! How about potato rolls to go with those delicious brats? Why not.

Embarking on my potato roll quest, I reviewed a couple of recipes that used roasted potatoes in the dough but ended up with a dinner roll recipe from King Arthur Flour that seemed like just the ticket.

Back during our Vermont days we would often prepare and enjoy food with friends Ross and Candi Walton. Candi always referred to mashed potatoes as "mashies", a term we have used now for many years when referring to that particular dish.

For this roll recipe I boiled up some Yukon Golds and gave them a rough mash - something I like to refer to as "smashed". I think Candi would be on board with that one, don't you?


Let me tell you! This recipe process was molto interessante as the Italians would say. I pretty much followed the KAF recipe (it'll come, don't worry), aside from reducing the egg a bit, but what really tangled me up was the lack of any guidelines for the kneading time of this starchy, enriched dough. Soooooo sticky!

I kneaded it for 8 minutes in my Kitchenaid stand mixer then gave it a 30 minute rest with an every 10 minute stretch and fold over. It was still pretty sticky so I gave it another 6-7 minute mixer knead. Frankly I wasn't quite sure where I was with this dough.

But I plowed ahead, placed it in a lightly greased bowl covered with plastic wrap and let it rise about 90 minutes.


I had intended to make hot-dog style buns, but, when it came to dividing and shaping the dough, I found it simply wasn't behaving the way I had hoped. It remained quite sticky, so I tried both the flouring-the-surface-and-hands method and the oiling-the surface-and-hands method to be able to handle this interesting dough. Both worked - sort of.

First I created 75 g pieces, gave them an initial boule shape, let them rest 5-10 minutes and then attempted to roll them into hot-dog, log-like shapes. Nuh-uh. It was not happening.

So I reverted to the boule roll form and persevered. FYI - I almost gave up on this one.

Once shaped and placed on a parchment lined sheet pan, I gave them a 1.5 hour rise until puffy.

I heated the oven to 350ºF and baked 20-25 minutes until nicely browned.

Hmmmmm. Maybe this will work after all.


They felt REALLY soft once cooled, but, not to be thwarted this far into the process, I decided to let them sit overnight covered with parchment.

Boy howdy! These babies were delicious. A wonderful soft texture, delicate flavor but with enough structure to hold up to a good turkey-lettuce-mayo sandwich. Yum.

Steve declared them unfit for brat use (not the right shape don't ya know), so into the freezer they went and we've been enjoying them since. Burgers, sandwiches. It's all good.

Now for the recipe. Going against my usual grain, I'm providing this in good ole measurements as opposed to metric weights. It just feels right here.

2 large eggs (I backed that off to about 1.5 eggs)
1/3 cup sugar (I made this one a scant 1/3 cup)
2 teaspoons salt
6 tablespoons butter, soft
8 ounces smashed potatoes (unseasoned), at room temperature
2 1/4 teaspoons instant yeast
3/4 cup lukewarm water, preferably water in which the potatoes were boiled. I used half potato water and half milk.
4 1/4 cups unbleached all purpose flour (King Arthur of course - after all, this is I recipe I found on their website!)

1. Mix and knead all the ingredients to make a smooth, soft dough. No time frame is given so I winged it as described above.

2. Place dough into a lightly greased bowl, cover with plastic wrap and let rise about 90 minutes until doubled in bulk.

3. Gently deflate the dough and divide into desired sized pieces. For a good size hamburger bun I used 2 5/8 ounce or 75 grams with a yield of 16 rolls. Round each ball into a smooth roll.

4. Place the rolls on parchment lined pans, cover lightly with greased plastic wrap and let rise 1.5-2 hours until quite puffy. Toward the end of the rise preheat the oven to 350ºF.

5. Bake for 20-25 minutes until golden brown and feel set. Remove from the oven and transfer to wire racks to cool. (Option - brush with melted butter)

6. Serve warm or at room temperature. Store well wrapped in plastic for several days at room temperature or freeze (what I did).


All I can say it there is so much to learn about bread baking. I recently purchased Jeffrey Hamelman's book "Bread" and have just begun delving into it. So much detail, so many variables and so many ways to make delicious bread. 

With this recipe I based my kneading time somewhat on the fact that this is an enriched dough with butter, egg, and sugar, reminiscent of lean brioche. It seemed like a longer kneading time was the thing to do. Was that the right approach? I'm not sure. All I know is they taste good and that's what counts!