Petite Pavlova


For last weekend's Mother's Day a friend asked if I would make a Pavlova with fresh berries for her Sunday dinner celebration with family.  As I was in the mode, I decided to make some small versions for my own use.  Et pourquoi pas?!

Pavlova, reportedly named after the Russian ballerina Anna Pavlova who danced in the late 19th and early 20th centuries, is a baked meringue that is typically filled with whipped cream and topped with fresh fruit of choice.


The French also use the word vacherin (NOT the cheese) for a similar meringue based dessert, often filled with ice cream and topped with fresh fruit.  Ice cream?  Whipped cream?  Either one works, so you decide!

A general meringue formula uses approximately 2 parts sugar to 1 part egg white, often with a pinch of salt or cream of tartar added to help the mixture hold its shape once whipped.

My base recipe for an 8-9 inch Pavlova calls for 4 large egg whites, a pinch of salt and a cup of superfine sugar whipped to glossy peaks.  Since I was making an 8 inch-er plus a bunch of small ones I made 1.5 times the recipe.  Plenty for my needs.

There are three methods of making meringue.

The French method, which I use here, involves whipping sugar and room temperature egg whites to glossy, stiff peaks, piping out shapes and drying them in a low oven to achieve a crispy exterior with a somewhat chewy interior.
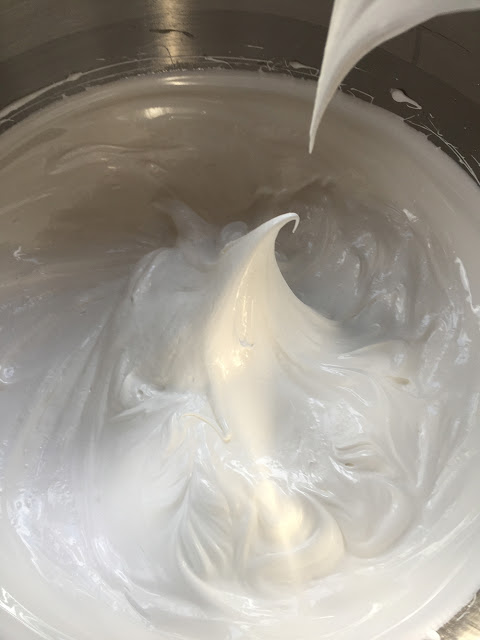
love those peaks!

The Swiss method involves heating the sugar and whites over a barely simmering bain marie and then whipping them until cooled, glossy and peaked.  This version is more stable and can be piped and shaped.

Side note:  I used the Swiss method when I made "Baked Rhode Island" (a Kenyon's white cornmeal cake/coffee ice cream version of "Baked Alaska") at Gracie's in Providence many years ago.  I piped a lot of those little babies!  Reminds me of a hedgehog or sea urchin!

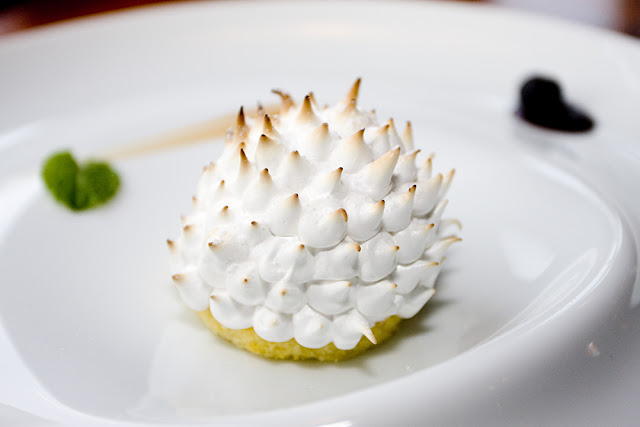
Gracie's "Baked Rhode Island"

And last but not least is the Italian method.  This calls for boiling a sugar syrup to the soft ball stage (240-245ºF), cooling it slightly, then pouring it over stiffly beaten whites while continuing to whisk until completely cool and glossy.  This is the most stable of the three and can be used alone or as a base for buttercream for cake icing or folded into mousses and creams to lighten them.  Some French macaron recipes call for Italian meringue as well.

Let's get on with the petite Pavlovas!

Once my French meringue was nicely whipped I blended in a mixture of 1.5 teaspoons each of cornstarch, water and vanilla extract.  This served to add a bit of flavor from the vanilla as well as enhance the crispy tenderness of the meringue.

For piping I used a simple trick that I had learned back in 2007 during my stage at Pâtisserie Pascal Pinaud in Paris - use a round cutter or tart ring dipped in confectioner's sugar to provide a size guide for your desired shapes.  Pretty nifty!


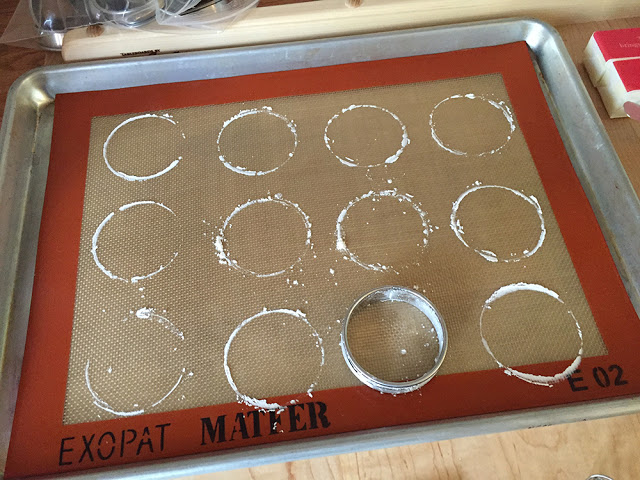
Psst!  I prefer to bake meringues (macarons included) on Silpats - they pop off very easily once baked.

I piped simple circles with a star tip while my oven was heating to 300ºF . . . .


. . . popped them into the oven, turned the temp down to 250ºF and left them in to bake (i.e. dry) for 1.25 hours.  Then I turned the oven off and let it cool down before removing the meringues.
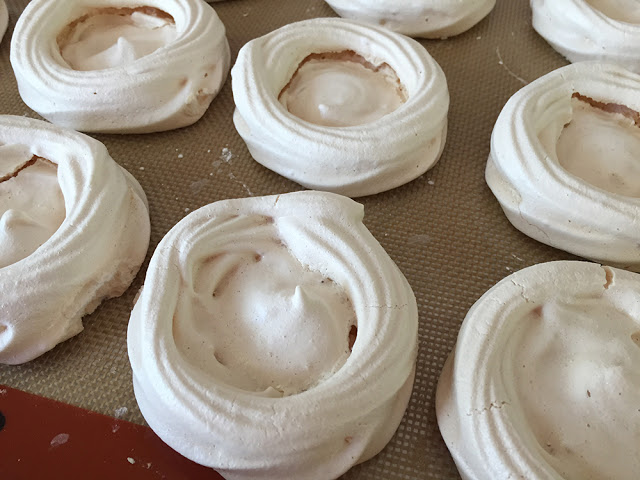

all dried out

 Invariably there will be some cracks in the finished product, but that's par for the course.  Don't worry.


These will keep for several days in a covered container in a cool, non-humid environment OR can be frozen for several weeks.  Just pop a few out as you need them!

I chose to fill my petite Pavlovas with a whipped ricotta cream (one cup ricotta whipped with 1/2 cup heavy cream) to which I added seeds scraped from a vanilla bean and my homemade caramel sauce.  What's not to like!

see those vanilla bean specks?


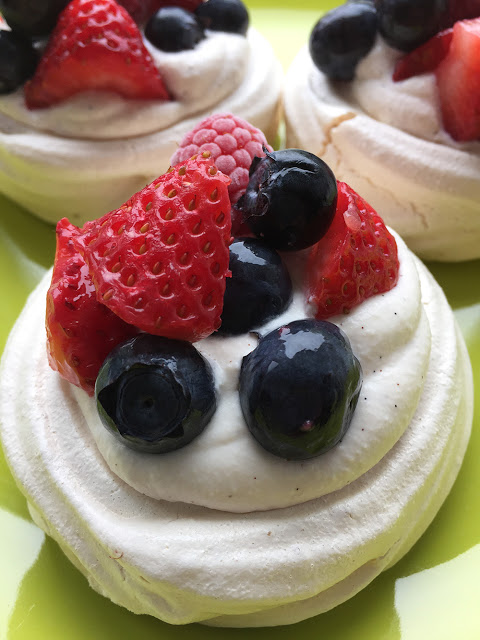
I must confess that I'm not a big meringue fan (sorry you macaron lovers), but I found this combination quite pleasing.  The meringue was crisp with a hint of chew inside and the ricotta creamy and luscious with vanilla and caramel.  Yum.  And, of course, you simply CAN NOT go wrong with fresh fruit.

And to top it off, as a test I put several of these (uncovered no less) in my fridge for a day.  Boy oh boy, were Steve and I pleased!  The flavor was superb, the exterior of the meringue still crisp, the interior had softened to near gooey-ness and even the fruit was none the worse for wear after a day sitting next to leftovers.

Yes indeed.

And wouldn't you know I still have several meringues in my freezer and some freshly churned lemon ice cream waiting to go?

Now what do you think of that?!

Pain gourmand au chocolat

This was my first attempt at making pains gourmands au chocolat, the second recipe in La Patisserie des Reves by Philippe Conticini, and what a pleasant surprise!

Here I'll share a bit about the process and offer some ingredient suggestions. The recipe is straight forward, the dough easy to prepare and handle, and the final product a lovely roll with a small crumb, nice texture and smooth chocolate flavor.  What a great addition to a special breakfast, weekend brunch or afternoon tea.

Here's a brief synopsis of the process:  melt the chocolate and butter over a bain marie and let cool until tepid.

Mix the rest of the ingredients (except for the chocolate chips) and knead on low for 5 minutes and then on medium for 5 minutes.  Turn back to low speed and add the tepid chocolate-butter mixture in three additions, blending after each addition until incorporated.

As you can see my 6 qt KitchenAid can handle this amount of dough very easily.  See how the dough has cleaned the sides of the bowl.  Now add the chocolate chips on low speed.

And here's the dough, all chocolate chipped, ready to be divided and shaped into boules.

Above: boules ready for a 3 hour room temp rise.

Below: after the rise, egg washed and sprinkled with raw sugar

Just out of the oven . . . . .

and time for a taste!

Steve and I sliced into one for a first taste sans garniture, then followed that with a dollop of raspberry jam, which was delightful.

The wheels are already turning with other possibilities - how about sandwiched with layers of chocolate ganache and caramel mascarpone cream?  Or a chocolate version of Bostock with chocolate almond (or hazelnut!) cream and lightly spiced poached pear?  Or a delicious bread pudding with tart cherries, pecans and chocolate chunks?  Just imagine!

Now for a few ingredient notes: when the recipe calls for chocolat noir, sucre roux, fleur de sel, cacao en poudre, I use the following:  Valrhona Manjari 64%, coarse raw sugar, Beanilla's vanilla fleur de sel (one of my favorite things!), and Penzey's Dutch process cocoa powder. 

It is not uncommon for French recipes to call for water and powdered milk in some viennoiserie doughs. When I see those two ingredients, I replace them with whole milk, e.g. 200 ml of water and 12 gm of poudre de lait = 212 gm of whole milk in my book.

This recipe calls for farine type 55 which is a French flour often used for both bread and general baking. Based on online research, as well as some experimentation of my own while in Paris, when type 55 is the recommended flour, here in the USA I use all purpose flour, but replace a percentage (15-20% by weight) with bread flour to yield a decent equivalent of French type 55. Oh, and I use King Arthur!

A note about yeast: many French recipes call for levure boulanger or fresh yeast. I use instant dry yeast and convert by taking 30% by weight of the amount of fresh yeast called for in the recipe.  e.g.  25 gm fresh yeast = ~7 gm instant. The beauty of instant yeast is longer shelf life (fresh has only 2 weeks at most) and no need to hydrate or "proof" it before adding it into your dough.

I followed the recipe instructions to divide the final dough into six approximately 150 gm boules, but since I generally prefer smaller portions, next time I'd consider 60-80 gm pieces, shaping them into rolls or loaves, depending on what I plan to do with them.

Next up - Chausson Napolitain!

Kouign-aman

As I was pursuing my pastry studies in Florence and Paris in 2006, I never imagined all of the adventures I would have, from being a stagiaire in a Parisian pâtisserie, to baking in a Maine café, to creating desserts in a Providence fine dining restaurant and, finally, to starting up and running my own petite pastry studio at Hope Artiste Village in Pawtucket, RI.

Inspired by the many pâtisseries in Paris and the innumerable pastry books on the market, I’m always eager to learn more, try new recipes or even tweak some tried and true favorites. One never knows what great little tip or new technique you might come across as you explore the world of baking and pastry.

This is my way of sharing some of the things I’ve learned (and continue to learn!) along the way.  Happy baking!

Kouign-aman

Inspired by Philippe Conticini’s pastry shop and book La Pâtisserie des Rêves, I hope to bake my way through his wonderful collection of recipes. I use the French edition, but it’s also available in English through Amazon.

First up is Kouign-amann léger. Ever since Chef Xavier Cotte at Le Cordon Bleu in Paris demonstrated his version of Kouign-amann to our pastry class, I’ve wanted to recreate this delectable caramelized, buttery treat. Over the past couple of years I’ve compared and tested recipes for this traditional Breton specialty from the likes of Alain Ducasse, Philippe Conticini and Pierre Hermé (just to name a few).

Below is my recipe copy with my notes and musings - seems to be a lot going on.

As Kouign-amann (hereafter referred to as K-a) becomes increasingly well-known and available in the United States, many recipes can be found on line and in print. You can find all sorts of variables in proportions of ingredients, kneading times, resting and rising times and even oven temps and baking times. My intent is not to present the recipe per se, but to highlight a few tips for success in making this laminated dough.  It’s all about planning and timing!

If you’re not familiar with the techniques for laminated dough, there are many publications and online sources that will take you through the steps.

OK, so the first step is to make the dough: the key here is to mix the ingredients (flour, salt, yeast, water, a bit of soft butter and usually a bit of sugar) just until they come together, followed by 30-60 seconds of low speed kneading. Avoid prolonged kneading at this stage, since you don’t want to develop a lot of gluten and have your dough become tough.

Let the dough rest for 30-60 minutes, covered with plastic film at room temp, followed by 1-2 hours wrapped in plastic in the fridge. That gives it enough time to relax and cool before incorporating the butter.

Next comes the butter. Some chefs recommend using European style butter, which is higher in butter fat and lower in water content than our American butter (which is why the French refer to it as “dry butter”). I’ve been using Cabot’s standard unsalted butter for years with excellent results. Working with butter at about 65-68ºF is ideal for me. It still has a cool feel to it, and it’s malleable and able to be shaped easily. As long as your work environment is cool and you work efficiently, once your butter block is shaped you can even go right to the beurrage step (encasing the butter in the dough) without having to re-chill the butter. Just remember that if the butter becomes soft, warm and squishy, it’s time to chill it before you continue!

Once you’ve completed the beurrage, give your dough-butter package a 20-30 minute chill before starting the turns. Even after that short chill the butter can tend to crack a bit as you begin to roll, so I tap the dough with my rolling pin to make sure everything is malleable again before starting the turns.

On a lightly floured surface roll the dough out to a rectangle about 3 times longer than it is wide. Do one three fold (also known as a business letter fold), turn the dough 90º and repeat. Wrap the dough in plastic and rest for 30 minutes in the fridge. Do 2 more three folds, turning the dough 90º after each, this time rolling in sugar rather than flour. As you roll, continue to sprinkle sugar on your dough and keep rolling it in – and don’t skimp on the sugar!

Important tip: Chef Franck Geuffroy at Alain Ducasse’s école de cuisine in Paris was kind enough to share his K-a recipe with me, and this tip has made a huge difference:  after the two turns with sugar let the dough rest at cool room temp for 30 minutes, NOT in the fridge (I wrap it lightly in parchment).

If the dough sits in the fridge at this stage, even for 30 minutes, the sugar starts to melt; the first time I made K-a I was faced with a soupy, sugary mess when rolling the dough out for the final shaping. You still have to work efficiently after a room temp rest, but there is much less of a syrupy mess to deal with.

Now, once the dough has rested, you’ll want to roll it into a rectangle for cutting. As you roll be sure to give it a break every now and then, so it’s relaxed before you actually cut it. Your squares will hold their shape better.  Dredge both sides of your square with more sugar, fold up the corners and place them in your buttered rings or pans.

Rising times vary from recipe to recipe, anywhere from 30-90 minutes. I've found that a good 60 minute rise at warmish room temp (75ºF or so) is adequate. As is true of laminated doughs in general, if you let them rise at too warm a temp (over about 82-85º) the butter will start to melt out, pool on the baking sheet, and you'll lose some of the buttery layering you've worked so hard to achieve.

I’ve baked K-a in both open tart rings and traditional muffin tins, and I prefer the end result with the muffin tins. While the open tart ring version is still delicious, the sugar on the bottom of the K-a can over caramelize and burn if you’re not paying attention.

Which brings me to baking times and temps.  Learn your oven and understand that recipes are guidelines. It is SO important to use all of your senses to help you determine when something is done:  ahhh the aroma; ooohhh what a lovely golden crust; wow, that feels done!  And, of course, taste is the piéce de resistance!

So choose a recipe and GO! Bon chance tout le monde!!