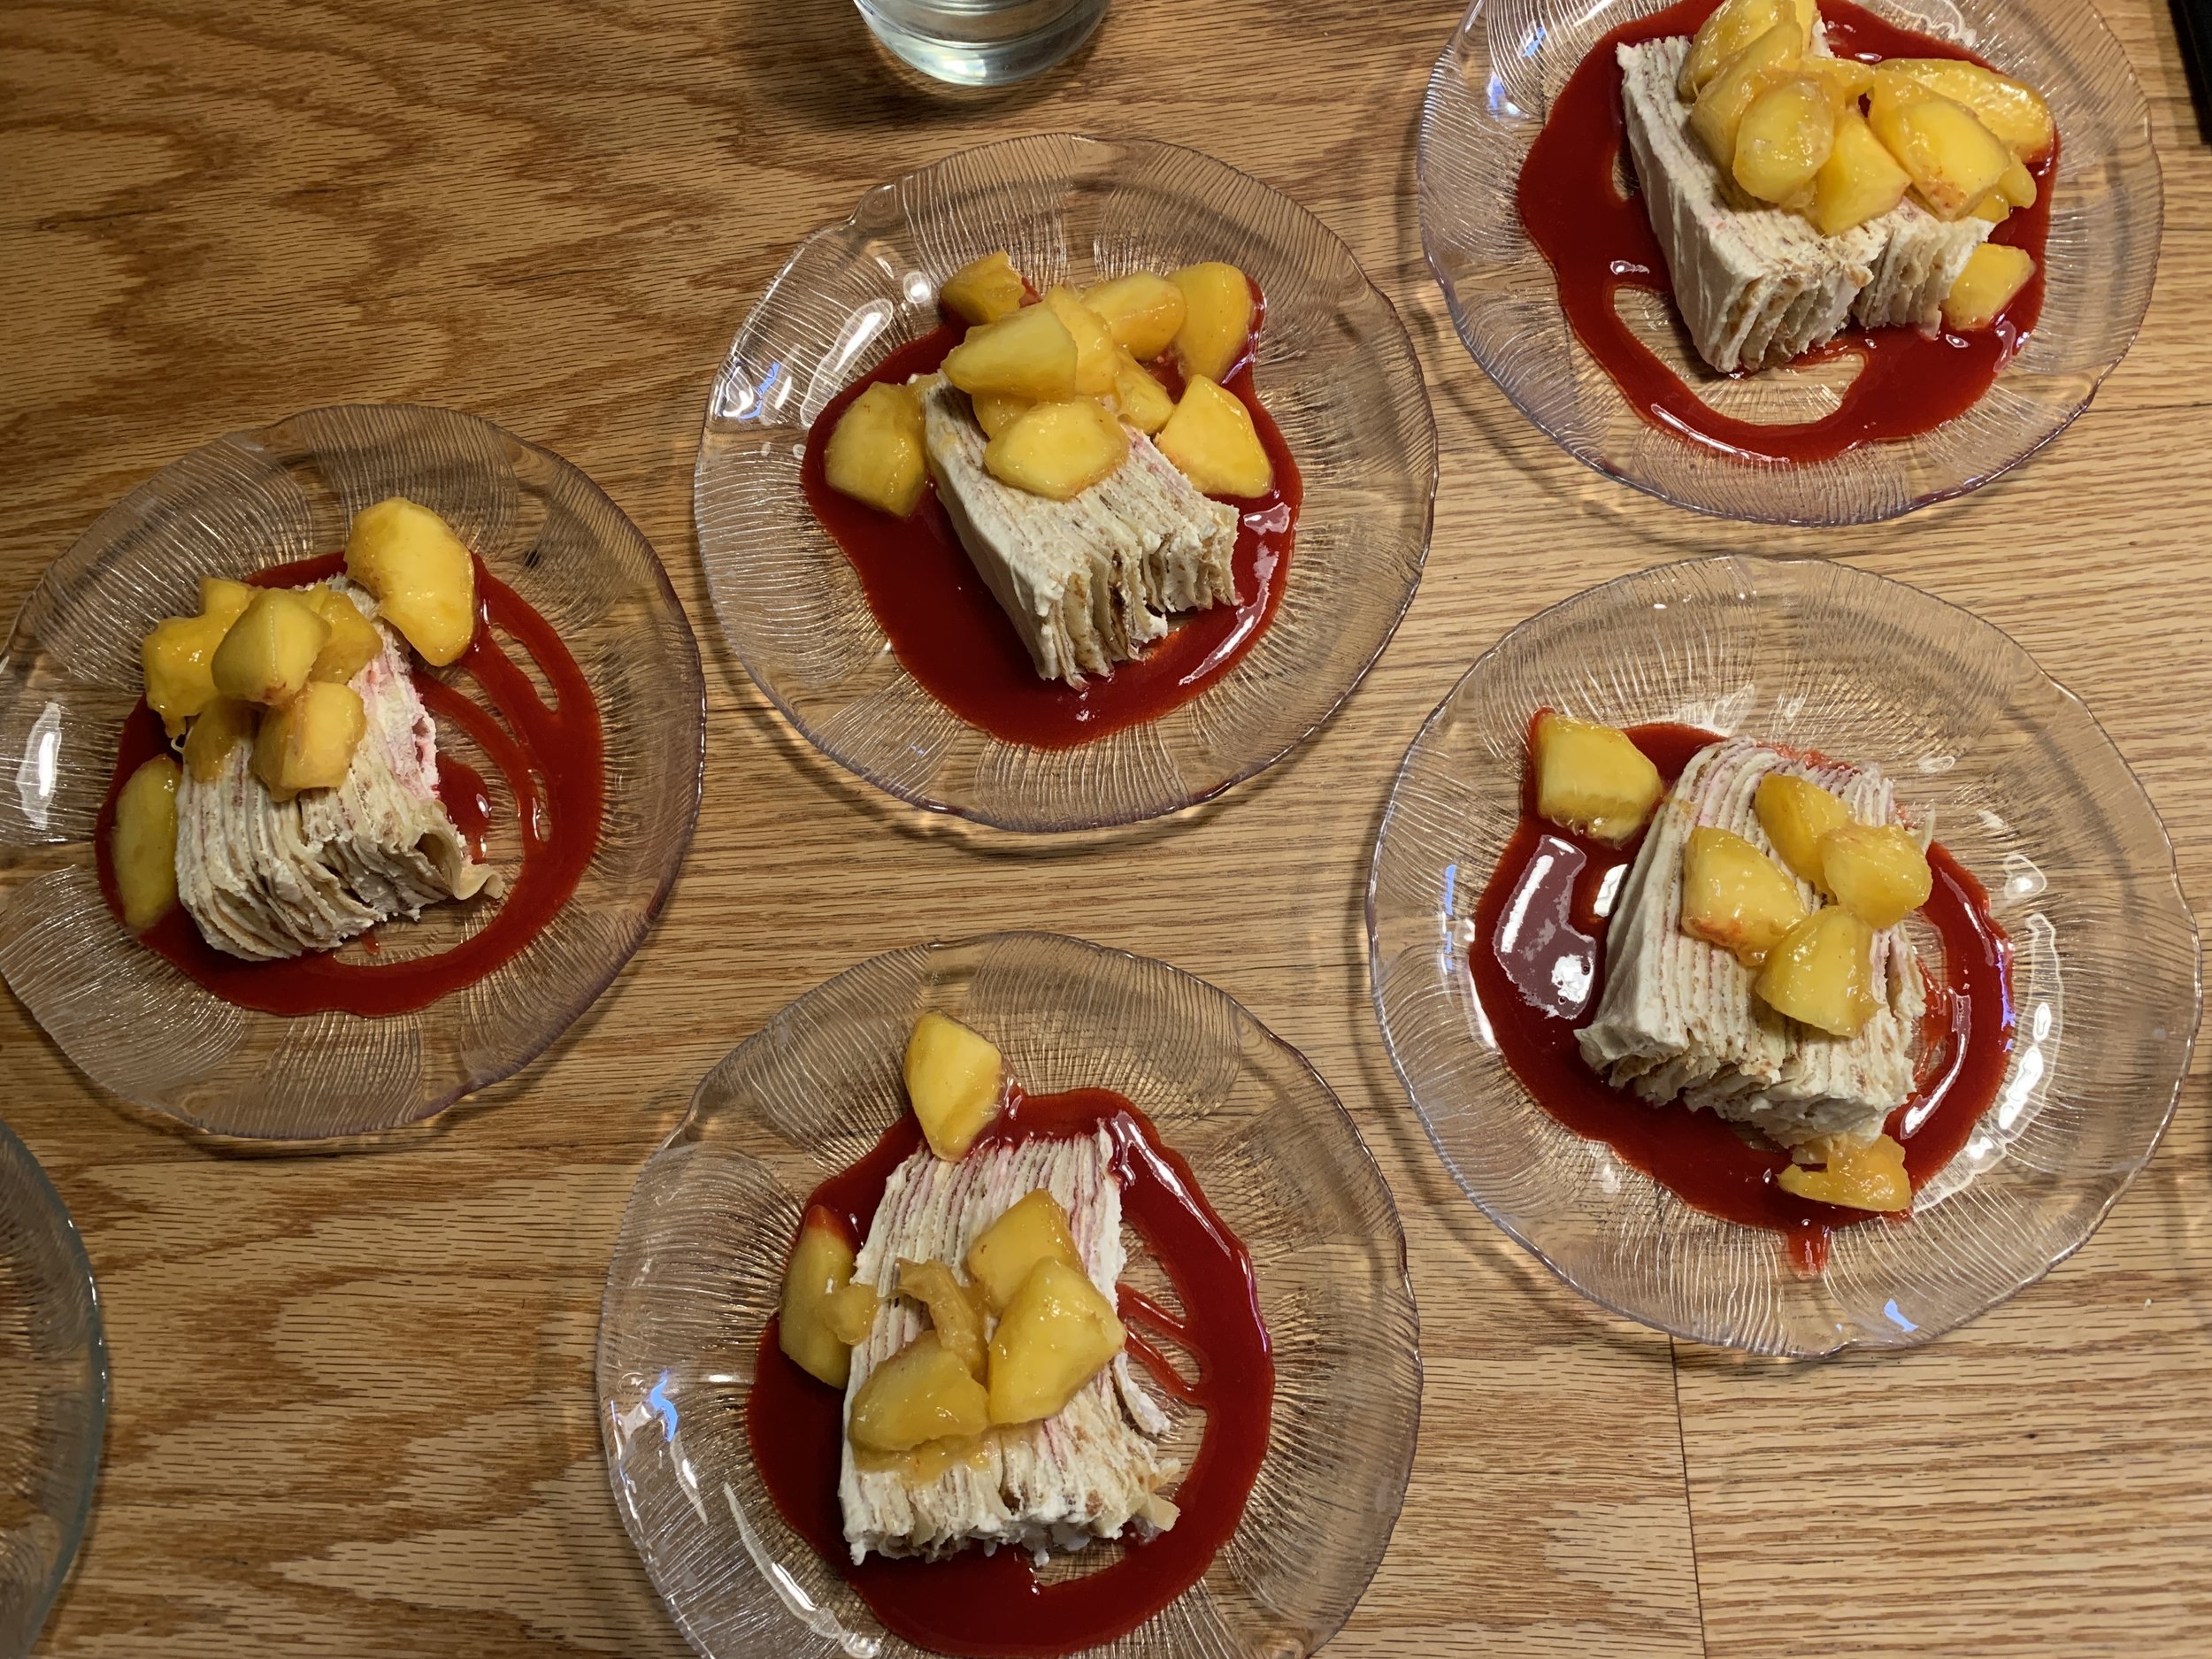
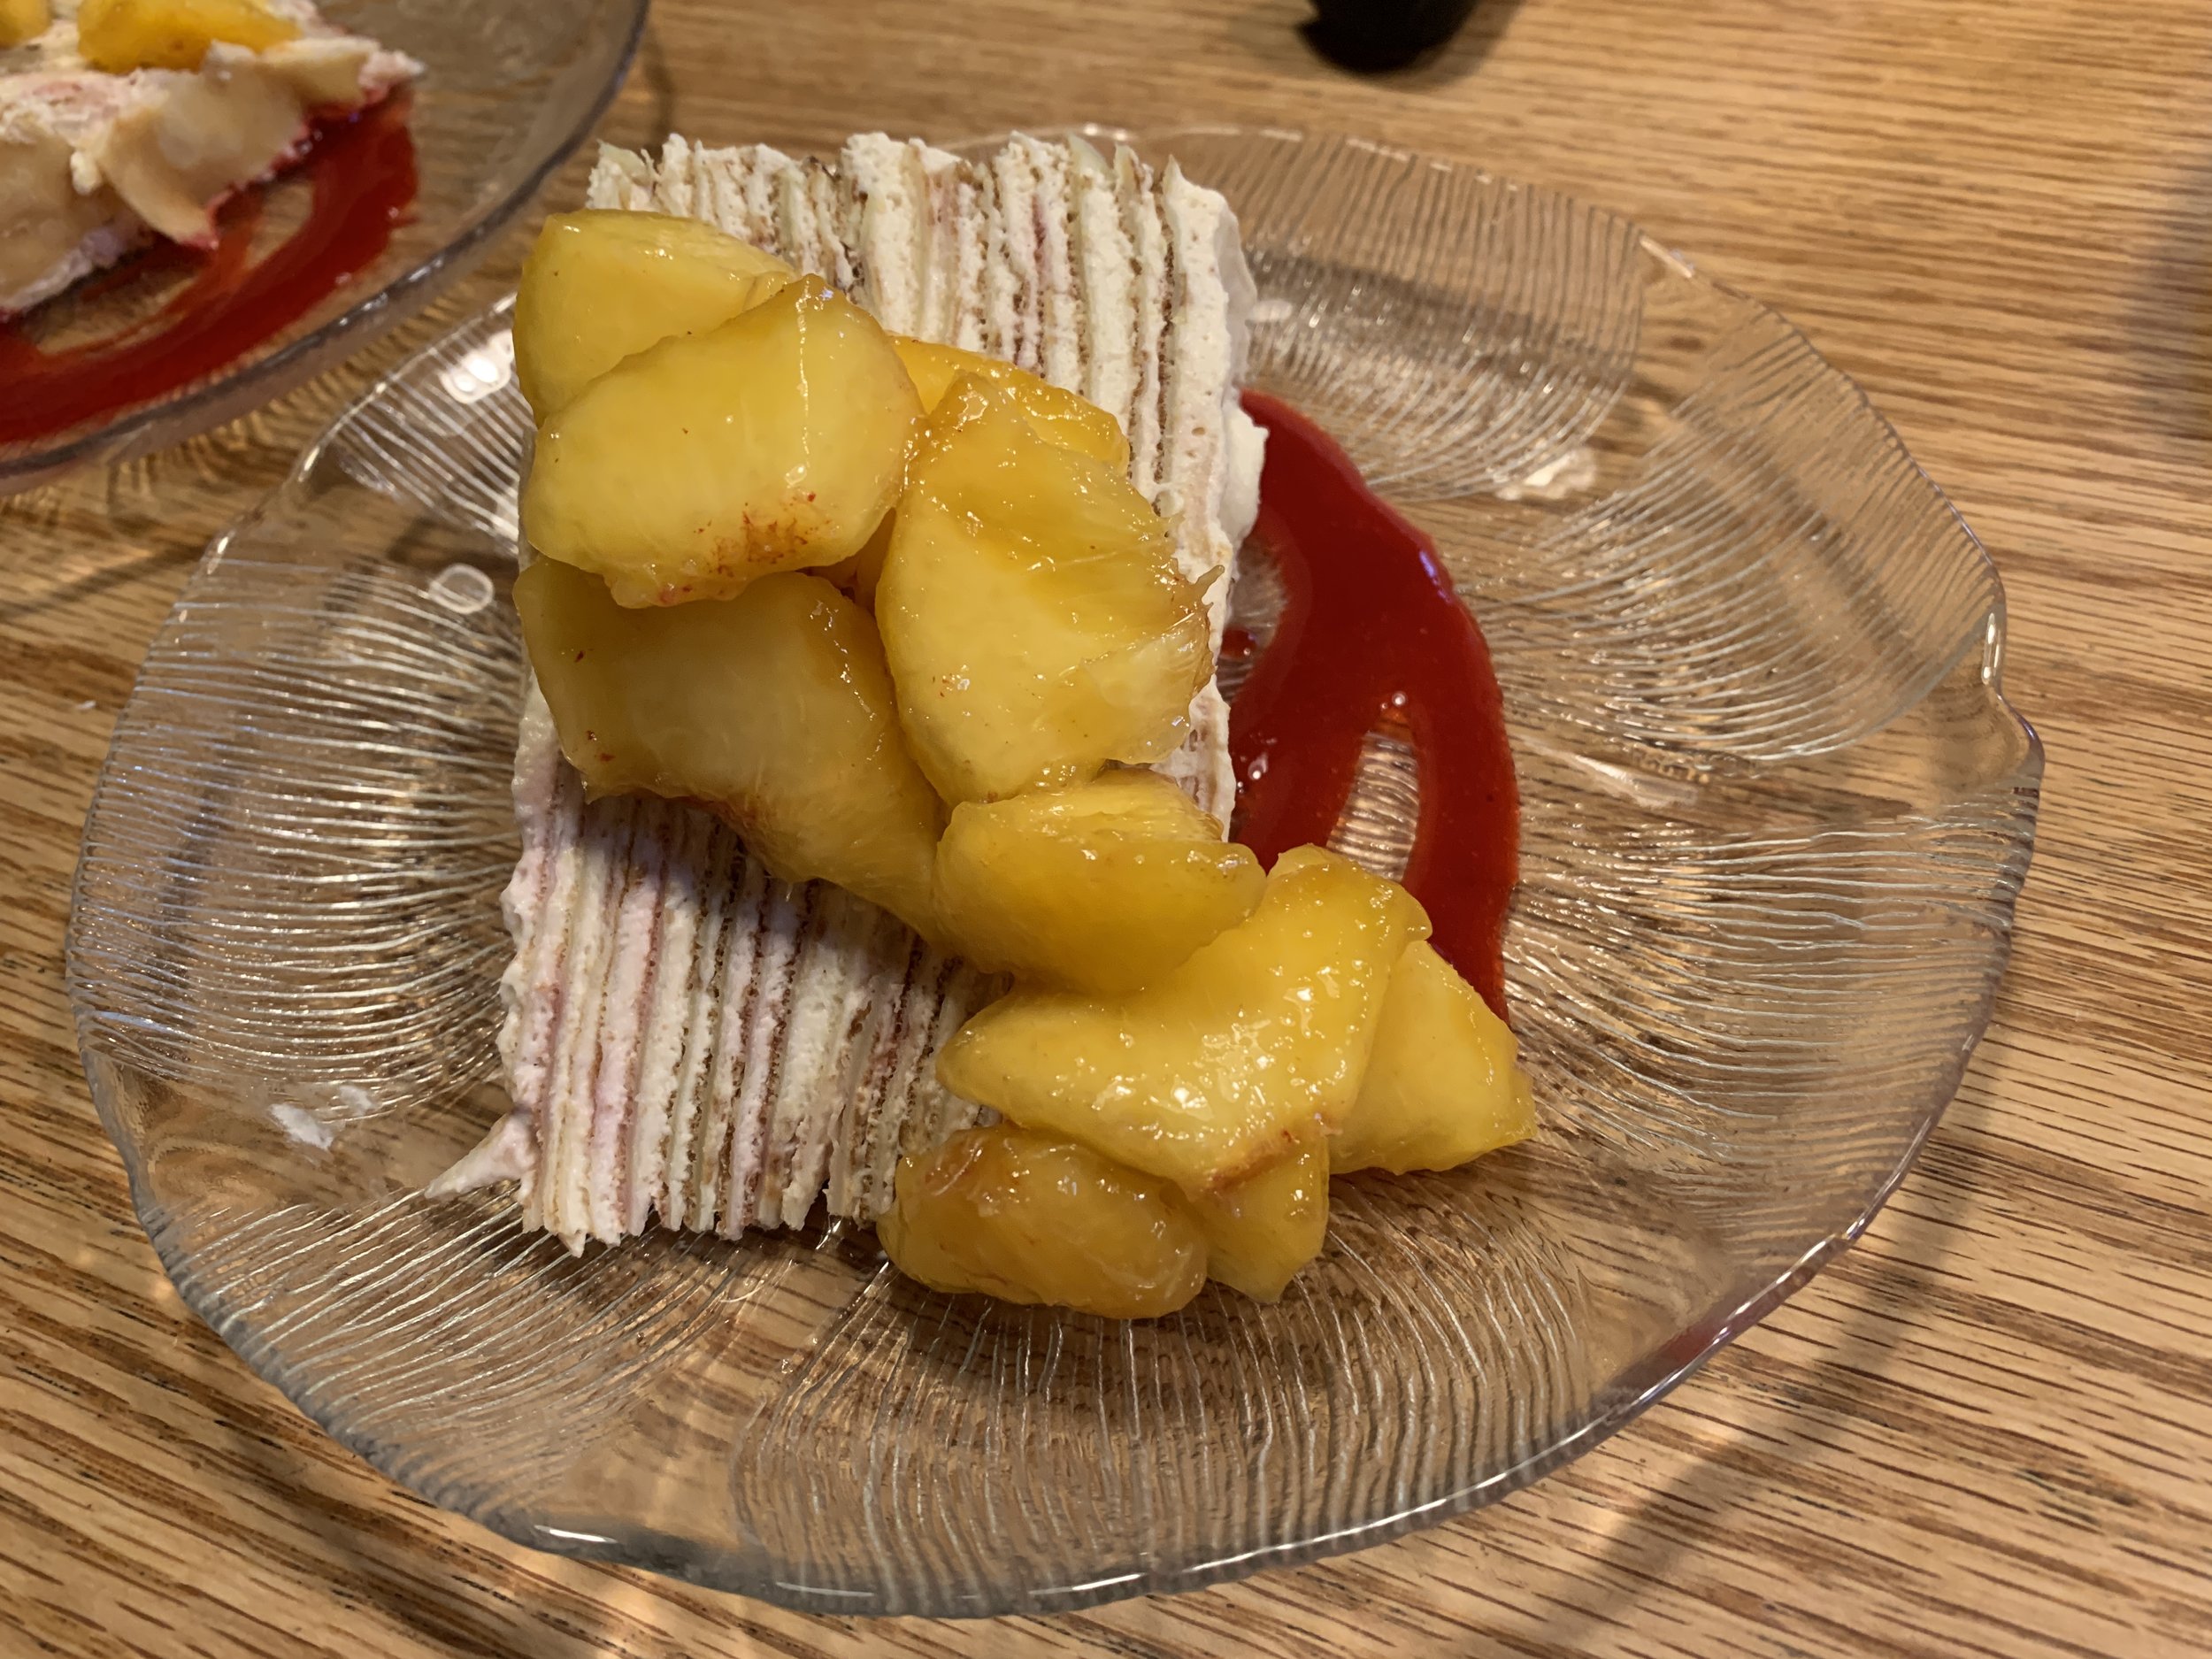
Peach melba crêpe cake

Happy September everyone! Autumn is my favorite season and the bounty of summer is still with us - peaches, blueberries, corn, tomatoes and more. Gotta love it.

On the heels of a savory crêpe making demo at a nearby independent living facility, my mind started thinking about a crêpe cake using late summer fruits - peaches and raspberries to be exact.

I was spurred along by both the memory of a chocolate crêpe cake I made back during our Providence days as well as dessert planning for a family meal at cousin Jen’s. Peach melba crêpe cake it is!

Many have written about the story of peach melba - classically vanilla ice cream, lightly poached peaches and raspberry sauce - a match made in many heavens if you ask me. It was created in the late 1800s by Auguste Escoffier in honor of the Australian soprano Nellie Melba. And the rest is history as they say.

As I planned my creation, along with the obvious crêpes, I went with peach caramel mascarpone cream and raspberry coulis for the assembly. Here’s the full recipe for the dessert - I’ll take you through the steps now. You can prepare the components ahead and assemble it all either the day before or the day of serving.

I did my crêpe cooking a couple of days ahead and held them wrapped in the fridge. I prefer these French pancakes nicely browned unlike some who claim they should be light in color. Nuh-uh - not me.

A friend had gifted me one of those cool wooden crêpe tools that help spread the batter out thinly with rounded (sorta) edges - it takes a bit of practice. It took a couple of tries to get the wrist motion just right, and it worked nicely on the non-stick pan I used. Actually I ended up trimming the thin pancakes to 8-inch rounds for stacking so I didn’t really care if my edges were goofy.

The peach purée can be made a couple of days ahead as well. Here I peeled, stoned and sliced 3 medium-ish Red Havens (the BEST Michigan peaches!), mixed with a couple of tablespoons sugar, a pinch of salt and a squeeze of lemon juice.

I blended it all up with my immersion blender then brought it to a boil over medium heat to dissolve the sugar. Simmer for 10-15 minutes to reduce by about half.

Reducing

Well on the way to concentrated flavor

The initial weight of the un-prepped peaches was about 500 g and in the end, after peeling, pitting, slicing, cooking and reducing, the purée yield was about 200 g.

In a similar vein, to create my raspberry coulis I puréed about 400 g raspberries, pressed the mix through a sieve to separate the seeds, leaving me with about 200 g of lovely-ness. Once I’ve puréed and strained fruit, I typically add about 10% by weight of sugar (in this case about 20 g), a pinch of salt and a squeeze of lemon juice.

Bring to a boil to dissolve the sugar then either cool and refrigerate for later or reduce it down a bit for flavor concentration.

My 8-inch open tart ring worked like a charm to trim all the crêpes to 8-inch rounds, and Steve and I snacked on the trimmings!

The mascarpone cream is a combo of 8 ounces mascarpone, a cup of heavy cream, 1/4 cup of caramel sauce and a teaspoon of vanilla extract. Whipped up to medium soft peaks, it’s a delicious layering and garnishing cream. I finished it off by blending in about 120 g of my peach purée. Yum.

Let’s assemble! One crêpe down on the plate, a layer of mascarpone spread over, a drizzle or dotting (artistic license here) of raspberry coulis and repeat, repeat, repeat . . . .

I had just enough cream for 18 layers of crêpes as well as a top coating.

Making progress

As you layer this kind of tower, it helps to use your flat palms to press gently on each crêpe layer (before you add the next spread of cream) to try and keep things even. Mine ultimately came out a bit tilted but it still tasted wonderful.

I used my handy small offset spatula to clean the sides up but you don’t really have to do that since this is a rather devil-may-care process for a rustic finish.

Once assembled, refrigerate it at least a couple of hours before serving. Alternatively you can have it ready a day or even two ahead of time.

Dessert time! A pool of raspberry coulis on the plate, a slice of cake topped by fresh peach chunks.

The group loved this! The tart raspberry sauce and just-sweet-enough juicy peaches gave a perfect balance to the creamy crêpe layers. Yes.

And the leftovers weren’t too shabby either!

As we move through September and beyond don’t forget to appreciate the beauty around you. There’s something about petite sweet peas poking out of the undergrowth that always makes me smile.

And you can’t beat this gorgeous contrast! Here’s to autumn!

Caramel apple tarts

IMG_3127.JPG

Yippee - it’s officially fall! The recent autumnal equinox dawned bright, crisp and clear with morning temps in the mid-40s, perfect for walking, baking or pretty much anything one might feel like doing. My time of year!

Apples are everywhere - farmers markets, grocery stores, orchards and farm stands - and one can choose the pick-your-own thing or simply buy your favorite of the many varieties available here in west Michigan.

IMG_3160.JPG
 
IMG_3120.JPG

Having a go-to simple apple tart in one’s repertoire is a beautiful thing. As is my practice, I periodically assess my freezer stock of various doughs and decide when it’s time to use something up. This time it was one of the pâte sucrée doughs that I like to use for rustic galettes.

Here’s a printable PDF of the recipe/process using pâte brisée (another fave!).

The approach is very straight forward, not unlike the Provençal tomato tart I just wrote about, although this time there’s no blind baking involved. Gotta like that.

First line the tart rings. In this case I’m making four 100 mm/4 inch diameter tarts, just enough to share with a few folks for dessert. Once lined, I sprinkle a mixture of equal parts sugar/flour (almond flour or fine bread crumbs work too) on the bottom to protect against sogginess from juicy fruit. With apples it’s not as much of an issue as it might be for juicier fruits like berries or stone fruits, but it’s a good practice nonetheless.

If I happen to have some diced/sautéed apples on hand, I put a smattering of those into the tart shell too.

IMG_3121.JPG

For the remaining apple filling I thinly slice a few medium apples and toss them with some vanilla sugar (1/2 to 1 tablespoon per cup of apples, or to taste). You can switch to brown sugar if you prefer that bit of toffee like essence. I generally keep the apples as the centerpiece of flavor and forego adding cinnamon or other spices, but those are popular options with many apple tart/pie bakers. You decide.

I’ve used a number of different apples over the years and love the combination of Jonagold/Fuji or Granny Smith/Macintosh. During my internship in Paris back in 2007 Chef Pascal Pinaud used Golden Delicious for his apple tarts, and they were mighty fine too. Isn’t it fun to experiment?

NOTE: a pound is about 3-4 medium or 2-3 large apples and should yield 3-4 cups. That worked well here with a handful of slices left over. I go for the more the merrier, especially since I like to pile ‘em on.

IMG_3123.JPG

I drizzle a little melted butter over the apples then pop the tray into the freezer while I heat the oven to 400ºF. Start the bake on the lower rack for 10-15 minutes, then move up to the middle rack, turn down to 375ºF and bake for another 10-15 minutes. Some of the apple slice tips start turning brown and I’ll begin to see some juiciness and bubbling developing along with the lovely aroma of baking apples and nicely browning crust. At this point I’ll often turn down to 350ºF and give them another 10-15 minutes. In a nutshell I typically plan a 35-40 minute total bake time for these tarts.

Once out of the oven I drizzle my homemade caramel sauce over and give them 3-4 minutes more in the oven to set the caramel.

Looking good.

IMG_3126.JPG

Served with vanilla ice cream (Steve believes everything is better that way), these were a tasty end to the meal. Très délicieuse!

Here’s to many more autumn baking adventures!!

IMG_3129.JPG

Beet sugar vs cane sugar - live and learn!

Here's a quick tip - pay attention to what the granulated sugar package in your grocery store aisle tells you!  If it doesn't specify CANE sugar it's most likely BEET and, it turns out, the two can behave very differently.

I thought I was quite attentive to that little detail when buying sugar at my local MEIJER store, but, just the other day I realized that their largest line of granulated sugar is actually beet sugar.  Heretofore I don't recall that was actually printed on the bag - but now it is.  Turns out the purple and white Meijer brand bags of granulated sugar are actually beet sugar, while the green and white bags clearly state CANE sugar.

Why am I bringing this up, you might ask?

Since we've been living in Grand Rapids MI I've made a couple of batches of my favorite caramel sauce, a staple I always like to have on hand in my fridge and a recipe I've made many, many times. While it appeared that the sugar cooking process proceeded normally to the medium-dark amber stage, once I added my cream, a little butter and a good pinch of vanilla fleur de sel and chilled the caramel in the fridge, weird things started happening.

The caramel turned a paler tan color and had chunks (and I mean CHUNKS) of crystallized sugar in it - not a pretty picture!  I had to warm it up to try and dissolve the chunks or strain them out, but the stuff still was not the same as my usual deep brown, rich, tasty caramel sauce.

So I finally went on line and found my answer - beet sugar caramelizes differently.  I won't go into the various scientific explanations, but, suffice it to say, I learned my lesson.  I'll be sure to pay very close attention to the sugar package labeling from now on.


what a difference!

I should note that you shouldn't be too concerned about beet vs. cane when doing every day baking like many cookies, brownies, quick breads and more, for many folks won't notice any difference in flavor.  In fact, I made a batch of Steve's favorite brownies just the other day, using the (at the time unrecognized) beet sugar, and they came out just fine and dandy!

FYI - two cane sugar brands available here in GR are Domino and C&H.

So here's to paying attention to the little things!


Tuiles au caramel et gingembre confit - trials and tribulations

Now that I've resumed working on the recipes in Philippe Conticini's book La Pâtisserie des Rêves (Biscuit Secs section, to be exact) I am reminded of the frustrations I encountered with some of the previous recipes.  Editing?  Recipe testing?  Who's doing it??

the recipe

I've made tuiles on rare occasions, and, since I'm always up for doing something that isn't in my usual repertoire, I approached this recipe with a light heart and an excitement for a unique version of this crisp cookie.

Tuile is the French word for tile and refers to a light, thin cookie which is usually formed over a rolling pin while warm, giving it a curved, terra-cotta-roof-tile appearance.  It's a great dessert vehicle, particularly as an accompaniment for mousses, ice creams, sorbets or what-have-you.

Most tuile recipes are very straight forward and come together in a flash!  Some use ground nuts and most use egg whites, not yolks or whole eggs.  You refrigerate the mixture until you're ready to bake.  What's not to like?  This one, although not really time consuming, takes a bit of thought before putting it all together.

In a nutshell, it requires making two different caramel sauces (la sauce au caramel and la ganache au caramel) in addition to the pâte à tuiles.  The sauces are then incorporated into the pâte.

A word about caramel sauce: it isn't difficult - it's a matter of cooking sugar (110 gm here) and a little water (3 tablespoons here) to an amber color, removing from the heat and adding cream (in this case 25 ml of milk and 35 ml of cream ) and a bit of butter (10 gm), creating a lovely, smooth concoction that is so good for sooooo many things!  And it keeps for weeks in the fridge.  I always have a batch of caramel sauce on hand (I've been using the recipe from Emily Luchetti's "Star's Desserts" for years and love it!).


les ingredients pour la sauce au caramel

Pay attention!  Wear gloves, particularly when adding the dairy, since there's a lot of bubbling going on - and this stuff is hot, hot, hot!!!


adding the dairy - notice the oven glove!

This caramel sauce recipe led me to contemplate some differences.  While Em's recipe uses a 3:2 ratio of sugar to cream, this one uses 2:1.  The end result was indeed a deeper, richer amber caramel due to the lower amount of cream (you'll see it in an upcoming picture.)

The second caramel recipe was a tad more involved.  It called for 80 gm sugar and 3 tablespoons water cooked to 125º C at which time a scant teaspoon of glucose is added.

The addition of glucose (I substituted honey) at the early stage of sugar boiling is intended to prevent crystallization, but I'm not sure why Philippe uses it here and not in the first caramel.  Artistic license?  Perhaps it's to insure a smooth, silky caramel ganache with the addition of the white chocolate at the end?

les ingredients pour la ganache au caramel

Continue the cooking to a nice amber color, then, off the heat, add 65 ml heavy cream and a noisette de beurre (use your judgement - I used a walnut sized piece).

After a bit of cooling add 45 gm chopped white chocolate and a pinch of fleur de sel and blend til smooth.

Both caramel sauces can be made ahead and refrigerated.  Since I was making the pâte à tuiles the same day, I proceeded once the caramels had cooled a bit.

les ingredients pour la pâte à tuiles
This preparation is trés simple:  melt 180 gm butter; whisk together 4 egg whites, 4 eggs and 35 gm brown sugar; add 90 gm flour and the melted butter; after brisk whisking add in 130 gm sauce de caramel (there was just enough!) and 30 gm ganache au caramel (plenty with leftovers) and blend.

In the above photo note the deep caramel sauce on the right and the lighter ganache au caramel below it.


the finished pâte à tuiles

Place the covered mixture in the fridge for a good hour (I left it over night).

Mince 20 gm crystallized ginger and have some fleur de sel on hand for garnish.

When ready to bake, heat the oven to 350º.  Philippe calls for parchment lined sheet pans and instructs you to form oval discs, the diameter of which you choose.  The recipe claims a yield of 20 tuiles, but there is no guideline as to how much batter to use per tuile or how thin it should be.

 To get a sense of apportionment I divided the total batter weight by 20 and came up with 40 gm (or about 3/4 of a 1/4 measuring cup).  I had to start somewhere, so I used the 1/4 cup as my ladling device . . .

ginger and fleur de sel garnish, tuile batter

and proceeded to scoop the batter onto the sheet pan.  I must admit I was harboring some skepticism, so I only did three on a 1/4 sheet pan as my initial trial.


I spread them out into ovals and sprinkled some ginger and fleur de sel on top.


ready for the oven
 I wasn't sure how long they would bake, since the recipe gave no hint of baking time.  Now I do understand that principle, since I was always taught that "you bake until it's done", but it is a bit helpful to have a general time frame, ne c'est pas?

This first batch baked for about 15 minutes.  The batter ran together and I had to trim around the edges to neaten up the shapes.  They stuck to the parchment paper and were obviously too thick and underdone.  I did proceed to shape them but knew this was NOT the result I was seeking!


the first try - too thick and soft!

For the next batch I used one of my handled ice cream type scoops to dole out a lesser quantity of batter in hopes of making a thinner, smaller tuile.  This batch baked about 15 minutes, and I even bumped up the oven temp a tad;  the batter again ran, requiring some trimming before they finished baking.  Not a pretty picture.


running batter and weird shapes!
However, I was getting there - even though these also stuck to the paper, they shaped up quite nicely and didn't look too bad in the final analysis . . .


the second batch
Finally the light bulb went on - Silpat!!  Why didn't I think of that sooner??

For my final batch I used even less batter and tried to smooth it out thinly on Silpat lined sheet pans.

ready for the oven

This time they baked about 15 minutes, became nicely browned and peeled off the silicone as easy as pie!

and no running!

Onto the rolling pin they went . . .


At last!  These shaped beautifully, came out nice and crisp and didn't look half bad!!


I used vanilla fleur de sel - see the grains?

And finally - what about the taste??  Steve and I agreed that, even though I used a light hand (or so I thought) with the fleur de sel, there was too much salt - and there should have been more ginger coming through.  They were also very greasy, leaving our fingers with a coating that had to be wiped off.

The texture was crisp and the caramel flavor quite pleasing, but overall a disappointment, particularly considering the steps involved for component prep, and the trials and tribulations of portioning and baking times.

Too bad - here's another one that's going into the "don't do again" file!

If I ever makes tuiles again, I'll go to the many basic recipes available in my baking books or on line and choose a straight forward approach.  Live and learn.

And what did I do with the finished product?  Crushed 'em up, put 'em in the freezer and hope to use the crumbs to create a croustillant (a crunchy layer for desserts generally made with ground toasted nuts (or nut paste), melted chocolate and crushed gavotte crepe cookies.)  Yeah!