Canadian butter tart trials

Please note: when this post first published, the text mistakenly read the “left half of the pan was eliminated”. That has been corrected to “the right half”. Apologies!

7E720EA9-E600-4B82-8506-5CFE869FBB1B_1_201_a.jpeg

It’s so cool when I come across something new (for me) in the baking and pastry world and not long thereafter I receive a request to make just that very thing. The ever popular Canadian butter tart is one of those. It’s kismet!

75D12CD5-87C8-4AB1-97B9-53891244E0A0_1_201_a.jpeg

It turns out that a local Grand Rapidian has a Canadian friend who adores butter tarts, and she wanted to gift some to said friend for her birthday, a lovely gesture indeed. Being confident that I could deliver, I took to reviewing a number of recipes including one from NYT (the one I remembered reading not too long ago.)

For my money I’d call it a sugar tart since the filling and taste experience are indeed quite sweet (true confession - a bit over the top for me!).

As I reviewed the dough portion of a number of recipes, I found most of them contained whole egg or yolk in addition to the typical crust components of flour, butter and ice cold water. Some used a combo of lard and butter and some went with my preferred method - all butter.

I decided to follow the recipe from the NYT article and compare the dough with my standard pâte brisée (no egg). For the filling I made two versions of NYT’s and found another filling that spoke to me from the site Little Sweet Baker - less sugar and more butter plus a splash of cream - it’s a BUTTER tart after all!

Mine is certainly not a scientific study but simply my way of sharing my inaugural (and limited) experience with the butter tart world. The results are frankly hard to fully explain in terms of why a certain filling baked the best in a particular dough. Hmmm.

BCA2FDCE-D7CC-47AE-B473-E7B4997E938C.jpeg

I blind baked the two doughs by lining a standard muffin tin (3 wells for each dough), freezing it to firm up the dough, then lining with papers and using sugar in place of dried beans as my weight, a tip learned from Stella Parks of “Brave Tart” fame. While the sugar doesn’t toast for very long this way, you can still save the sugar and use it in your shortbread or tart dough recipes to give them a hint of toasty-ness.

Once the blind baked shells were cool, I lined the remaining empty wells, 3 with each dough and proceeded with the fillings.

When making the filling, it is suggested that one use very soft or melted/cooled butter and blend the filling by hand so as to avoid incorporating air into the mix, resulting in a final, enhanced gooey-ness. I chose to keep it simple, not adding nuts or raisins as some iterations do.

The full NYT recipe blends 200 grams brown sugar ( I used dark) with 1/2 teaspoon salt; blend in 57 g soft, unsalted butter by hand until smooth, followed by 1 large egg and a teaspoon vanilla (pretty easy, eh?). The second NYT version I made replaces the 200 g brown sugar with 150 g brown sugar and 1/4 cup maple syrup with the remaining ingredients the same (meant to result in a runnier filling that some reportedly prefer).

Little Sweet Baker’s filling blends 150 g brown sugar with 75 g melted and cooled butter; add in 1 large egg, I teaspoon vanilla and 1 tablespoon heavy cream. Again, easy-peasy.

For my testing purposes I used half recipes (for the egg, whisk up one egg then weigh out 25 g which is about half a large egg.)

05F8FDD1-B805-48C9-8C25-1618A97E8A27_1_201_a.jpeg

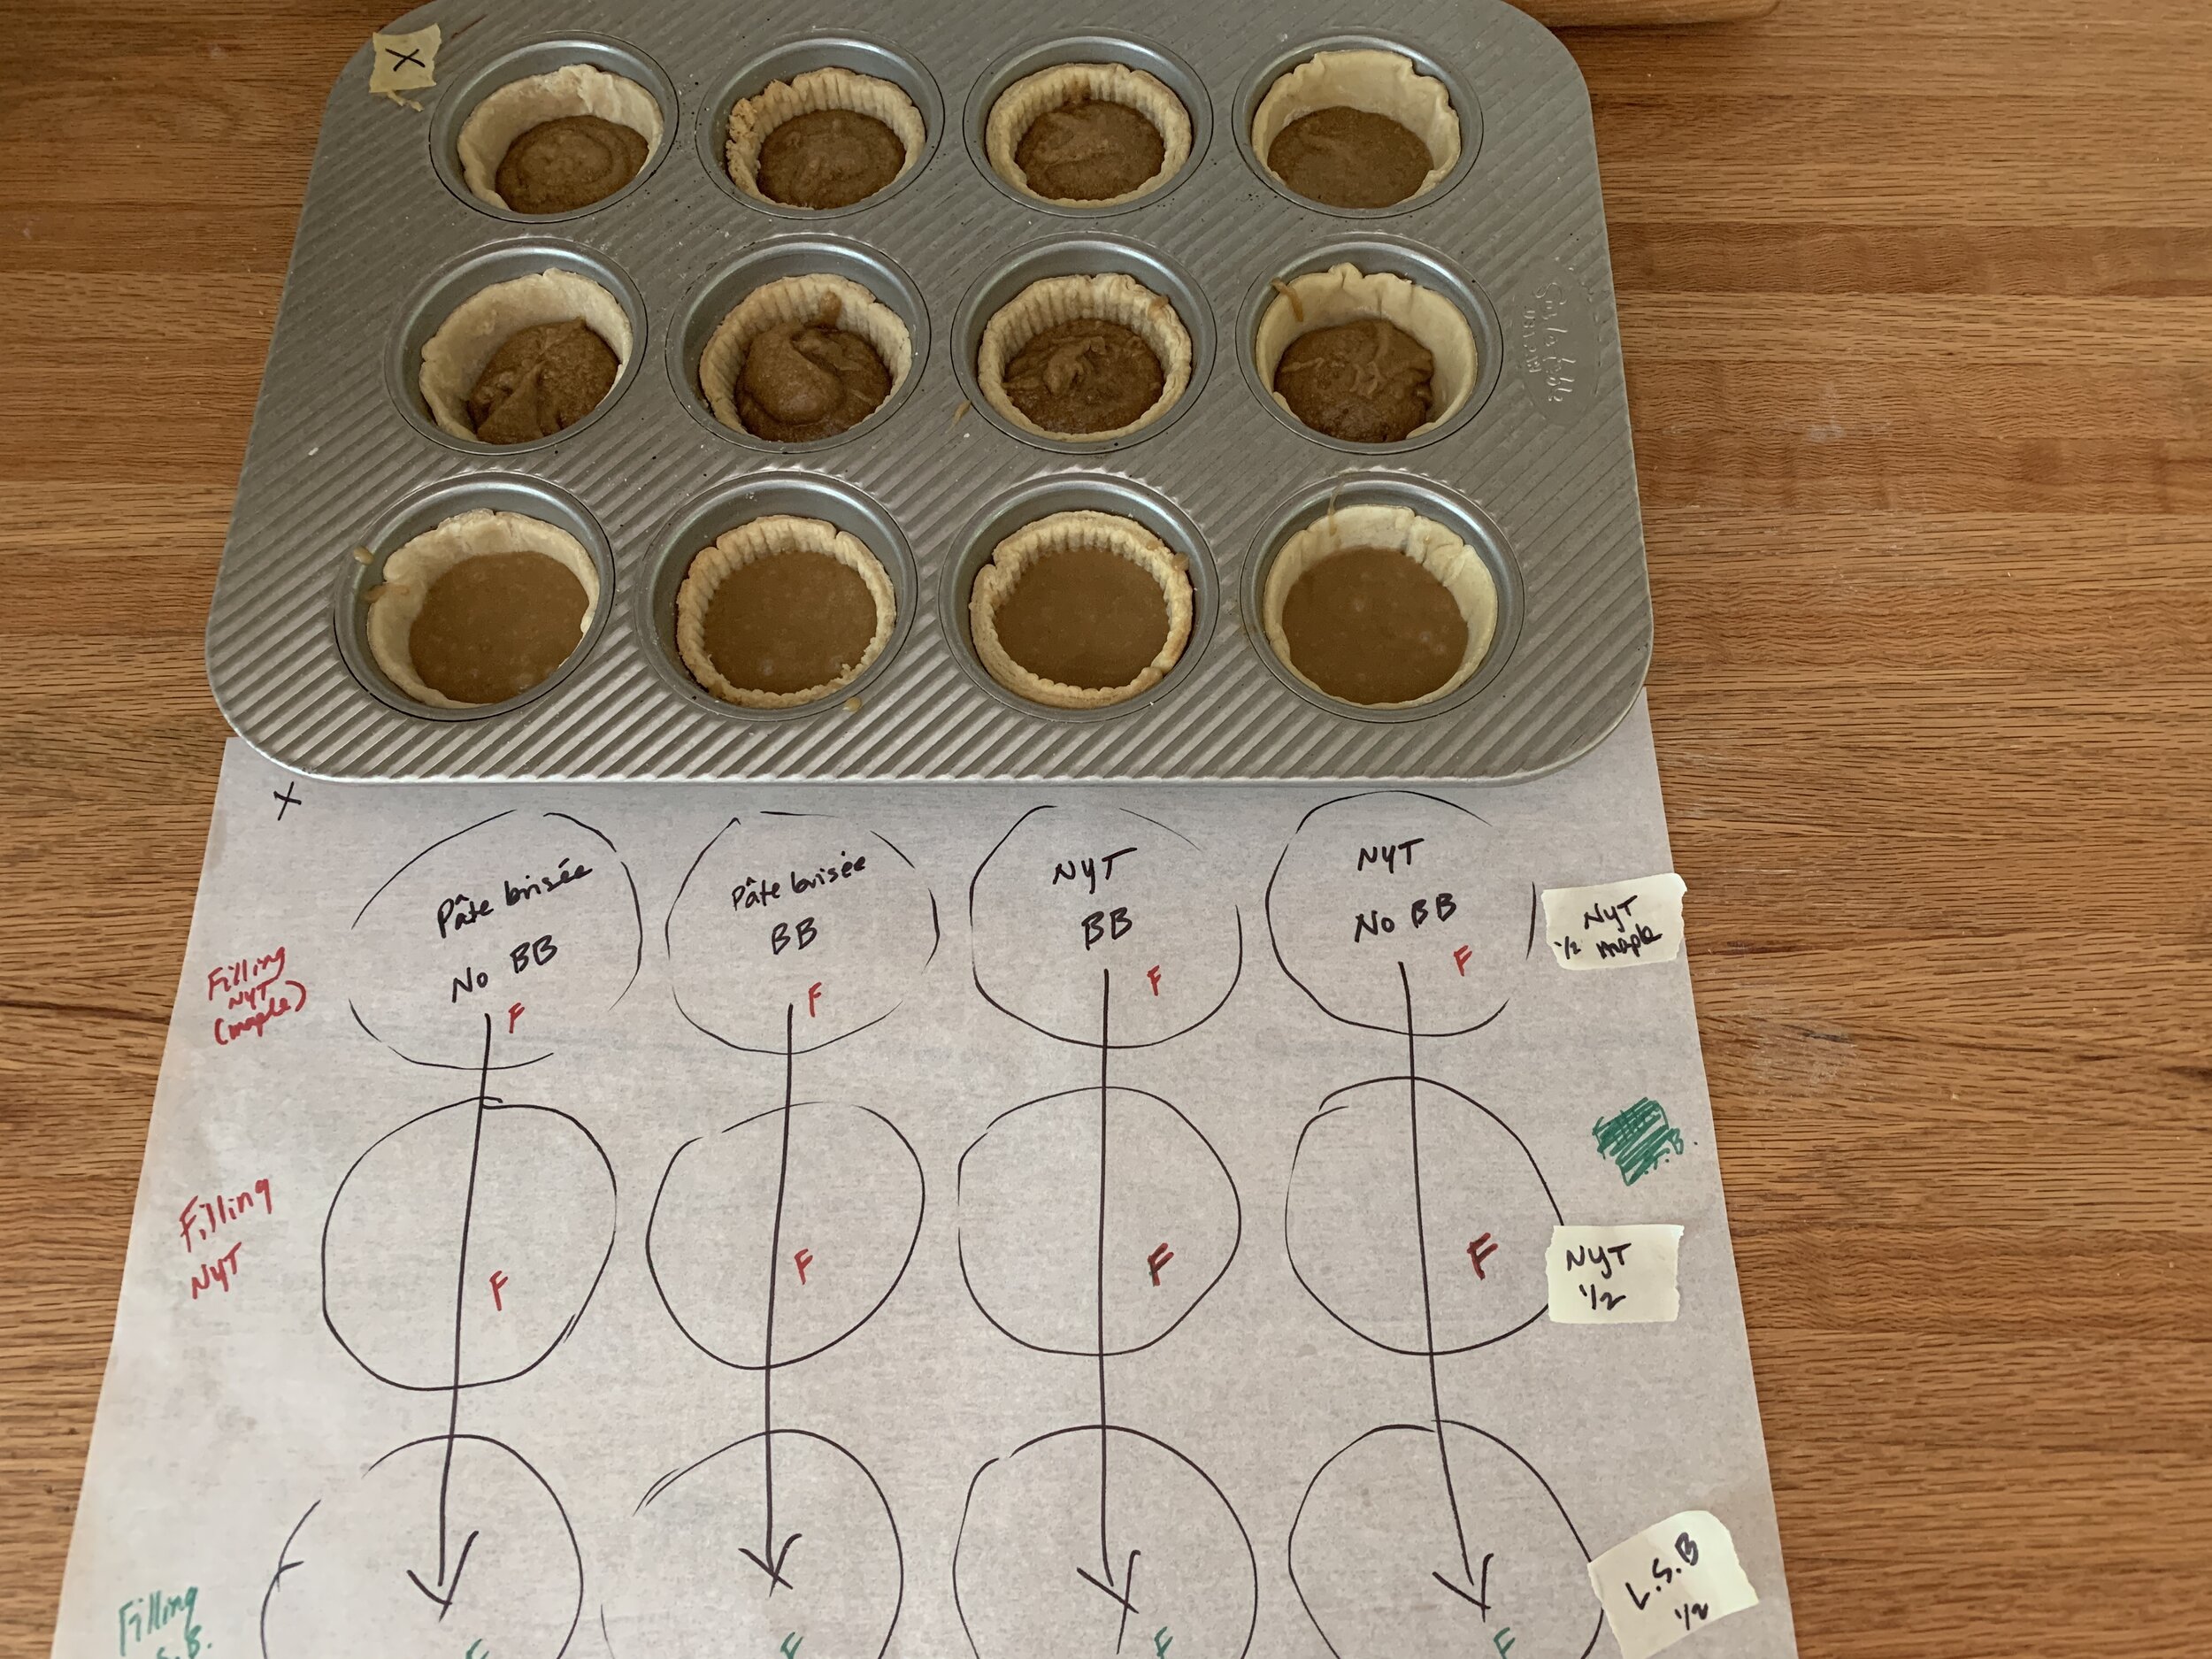
I guestimated about 28 g or so of filling for each tart and proceeded to dole the different fillings into the shells. Remember the central 6 wells are blind baked and the outer 6 are not.

B9F5ED14-AF96-49BA-AAE3-B23C5C2DEA8A.jpeg

Here they are, all filled up and ready to go.

129D2521-A69F-4682-8608-0983D39927B3_1_201_a.jpeg

Bake at 400ºF for about 13-15 minutes for a gooier result or up it to 17-19 minutes for a firmer result. I went for the gooey time frame - you want the crust to be nicely browned and the filling looking set and deeper brown. What surprised me is the stark difference in the color of the third (from the left) column of tarts (the NYT blind baked ones) - much lighter golden vs the deep caramel-y brown of the others.

7E720EA9-E600-4B82-8506-5CFE869FBB1B_1_201_a.jpeg

Once baked, run a small offset spatula (my FAVE tool!) around the edges to loosen any sticky goo before it hardens. Then let them cool completely, lift them out of the tins and enjoy.

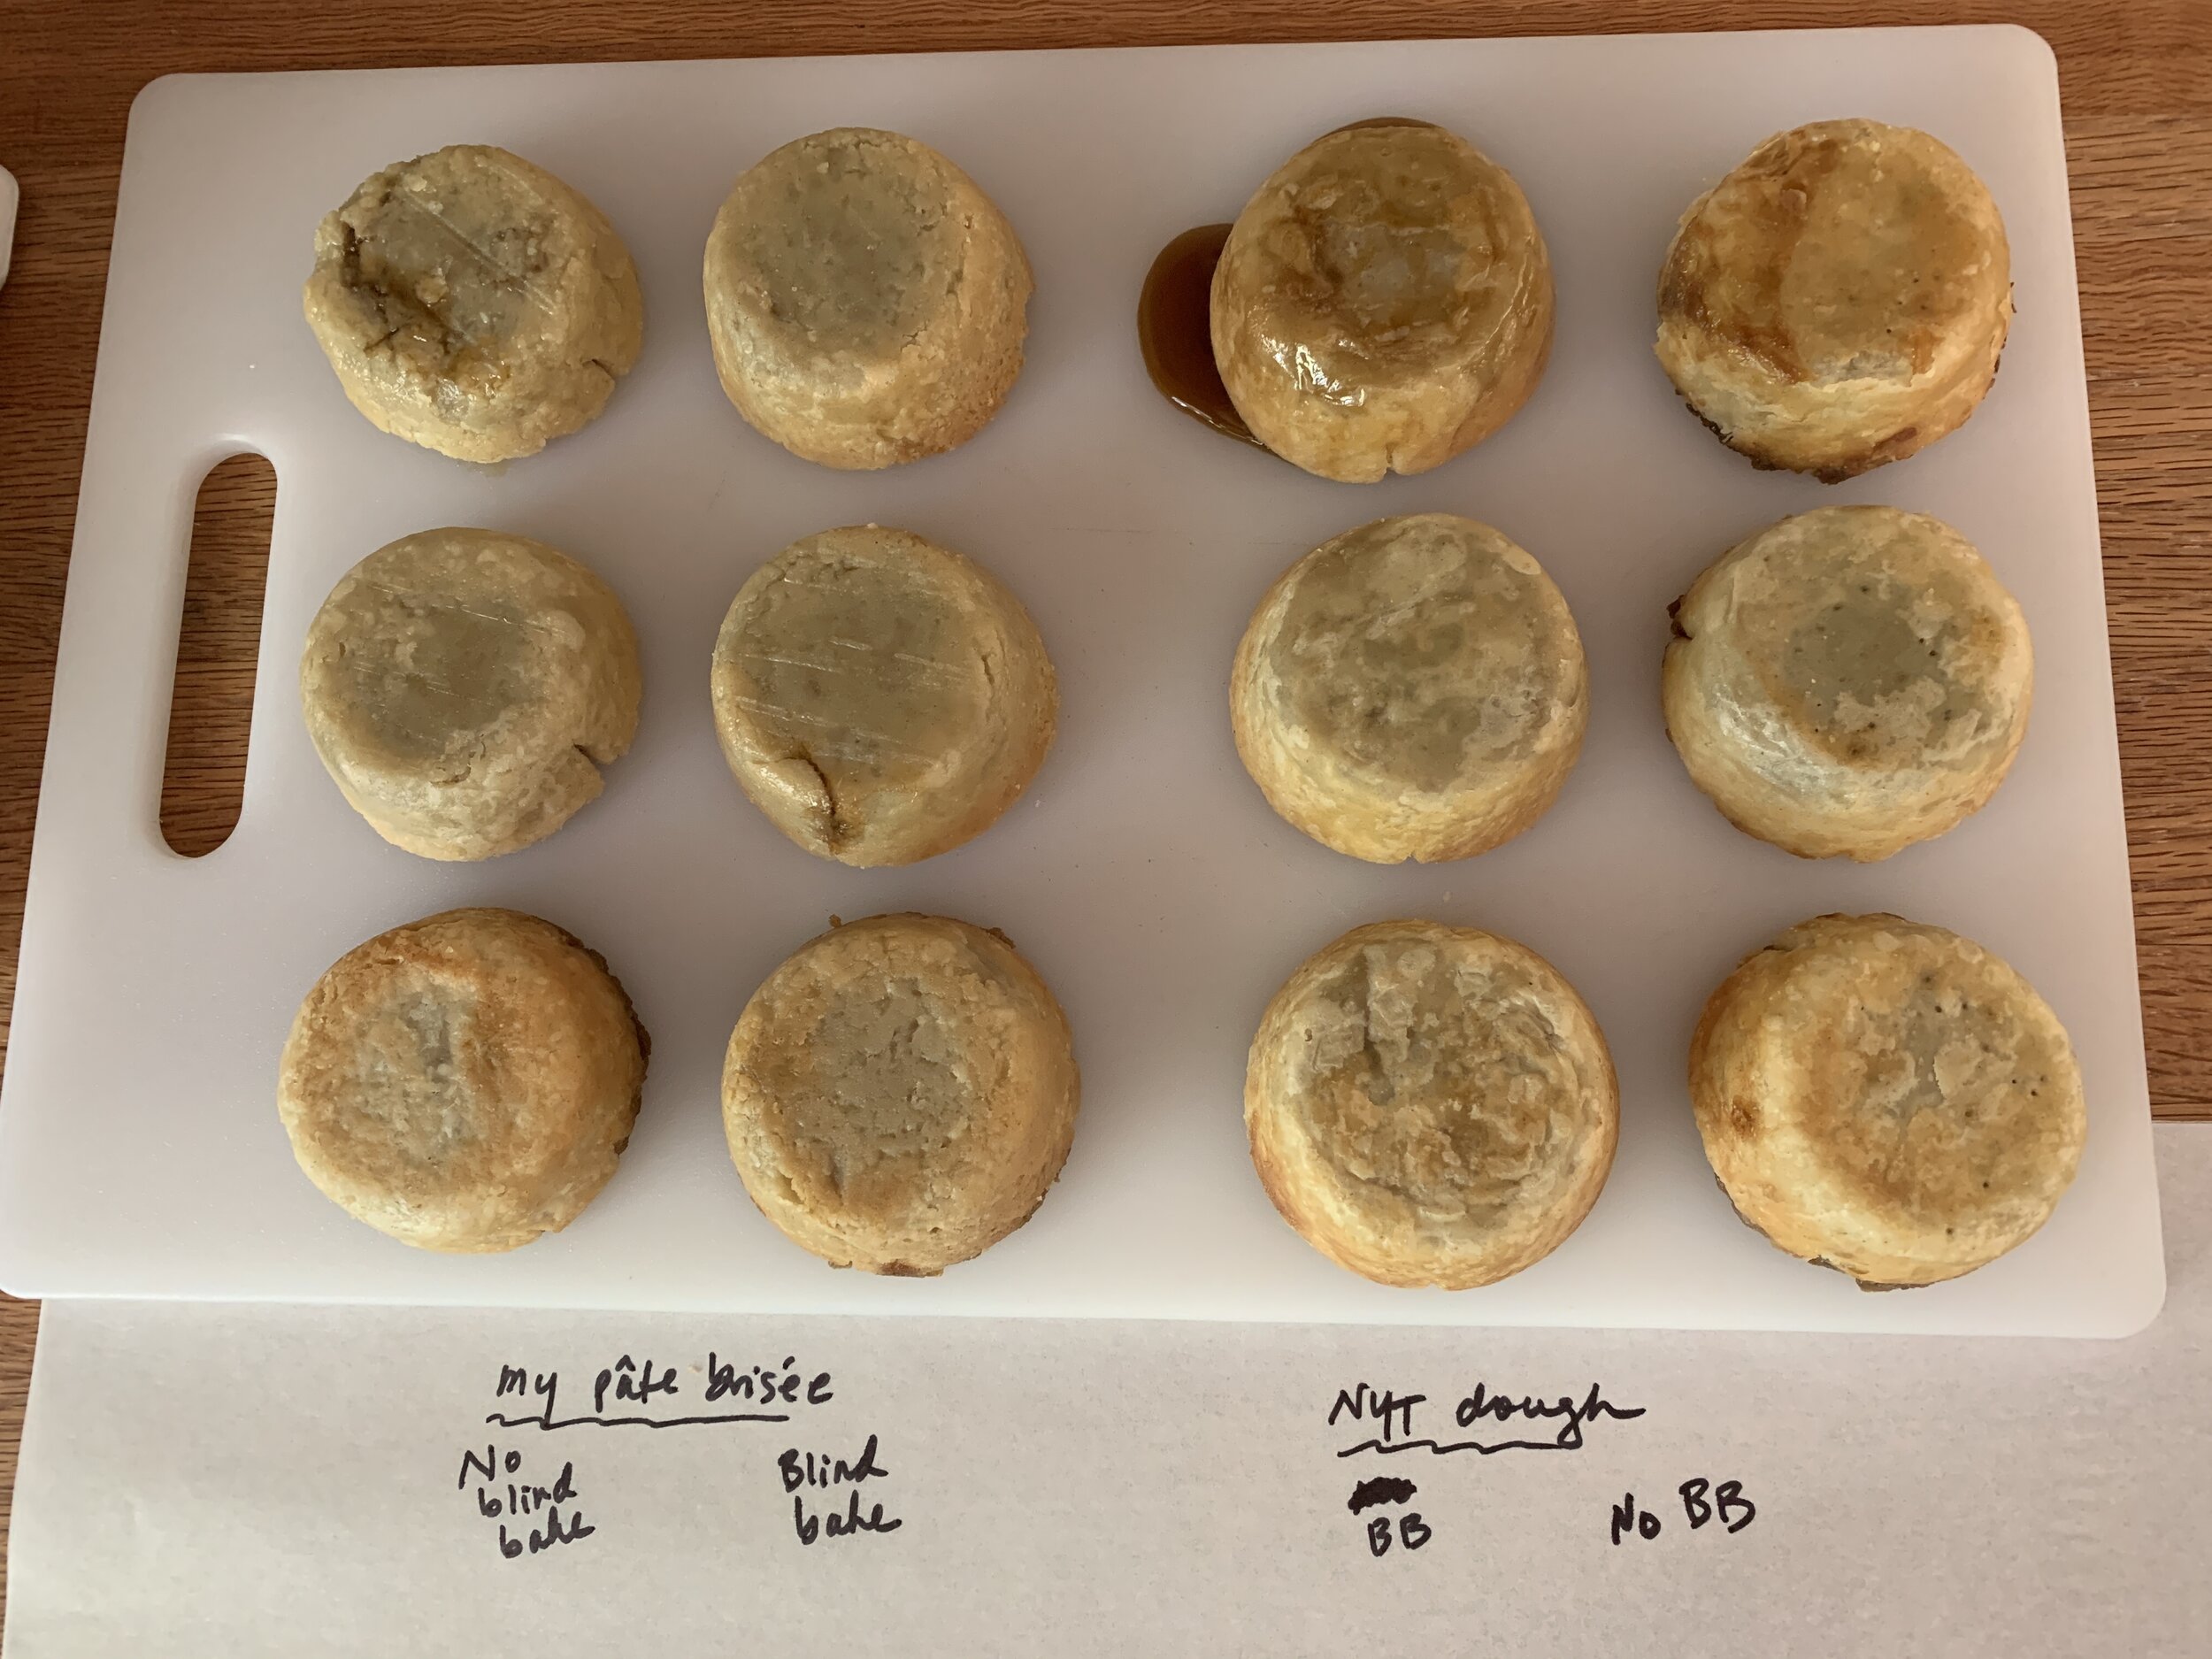
I turned them all out upside down (note the filling oozing out of the top, 3rd to the left tart) to assess the bottom crusts. I must say I’d be hard pressed to tell which were blind baked and which were not if I didn’t already know.

B84A839E-4F7F-4A4F-A429-E12A71FB5393_1_201_a.jpeg

Time to taste! Steve was a good sport for this one - we agreed that too many tastes became quite overwhelming with the sweetness of it all.

There was no rhyme nor reason to which fillings baked up runny and which gooey - you can see below that the NYT dough/blind baked threesome yielded a runny result for all three fillings. Go figure! Lucy I just can’t ‘splain it.

4082F727-347A-4D56-8C36-62E7E4175C95_1_201_a.jpeg

The NYT dough was unpleasant in the mouth - chewy and less flaky than good old pâte brisée - and the maple syrup filling was simply too runny. Due to those two things, the right half of the pan was eliminated.

Our final analysis: the pâte brisée plus Little Sweet Baker filling won the day, and it didn’t seem to matter at all whether the crust was blind baked first.

EA001655-E6C2-444E-8B93-8C5CA2AE515F_1_201_a.jpeg
257BA32C-31D0-41D7-99A5-4FB46E1C7D49_1_201_a.jpeg

For my final round of butter tart baking for the actual birthday order I used my classic pâte brisée, no blind baking needed. I upped the Little Sweet Baker filling recipe by 50% since I found the base recipe meant for 12 tarts to be meager. Of course, let’s remember I’d had no prior experience making these but it just felt right.

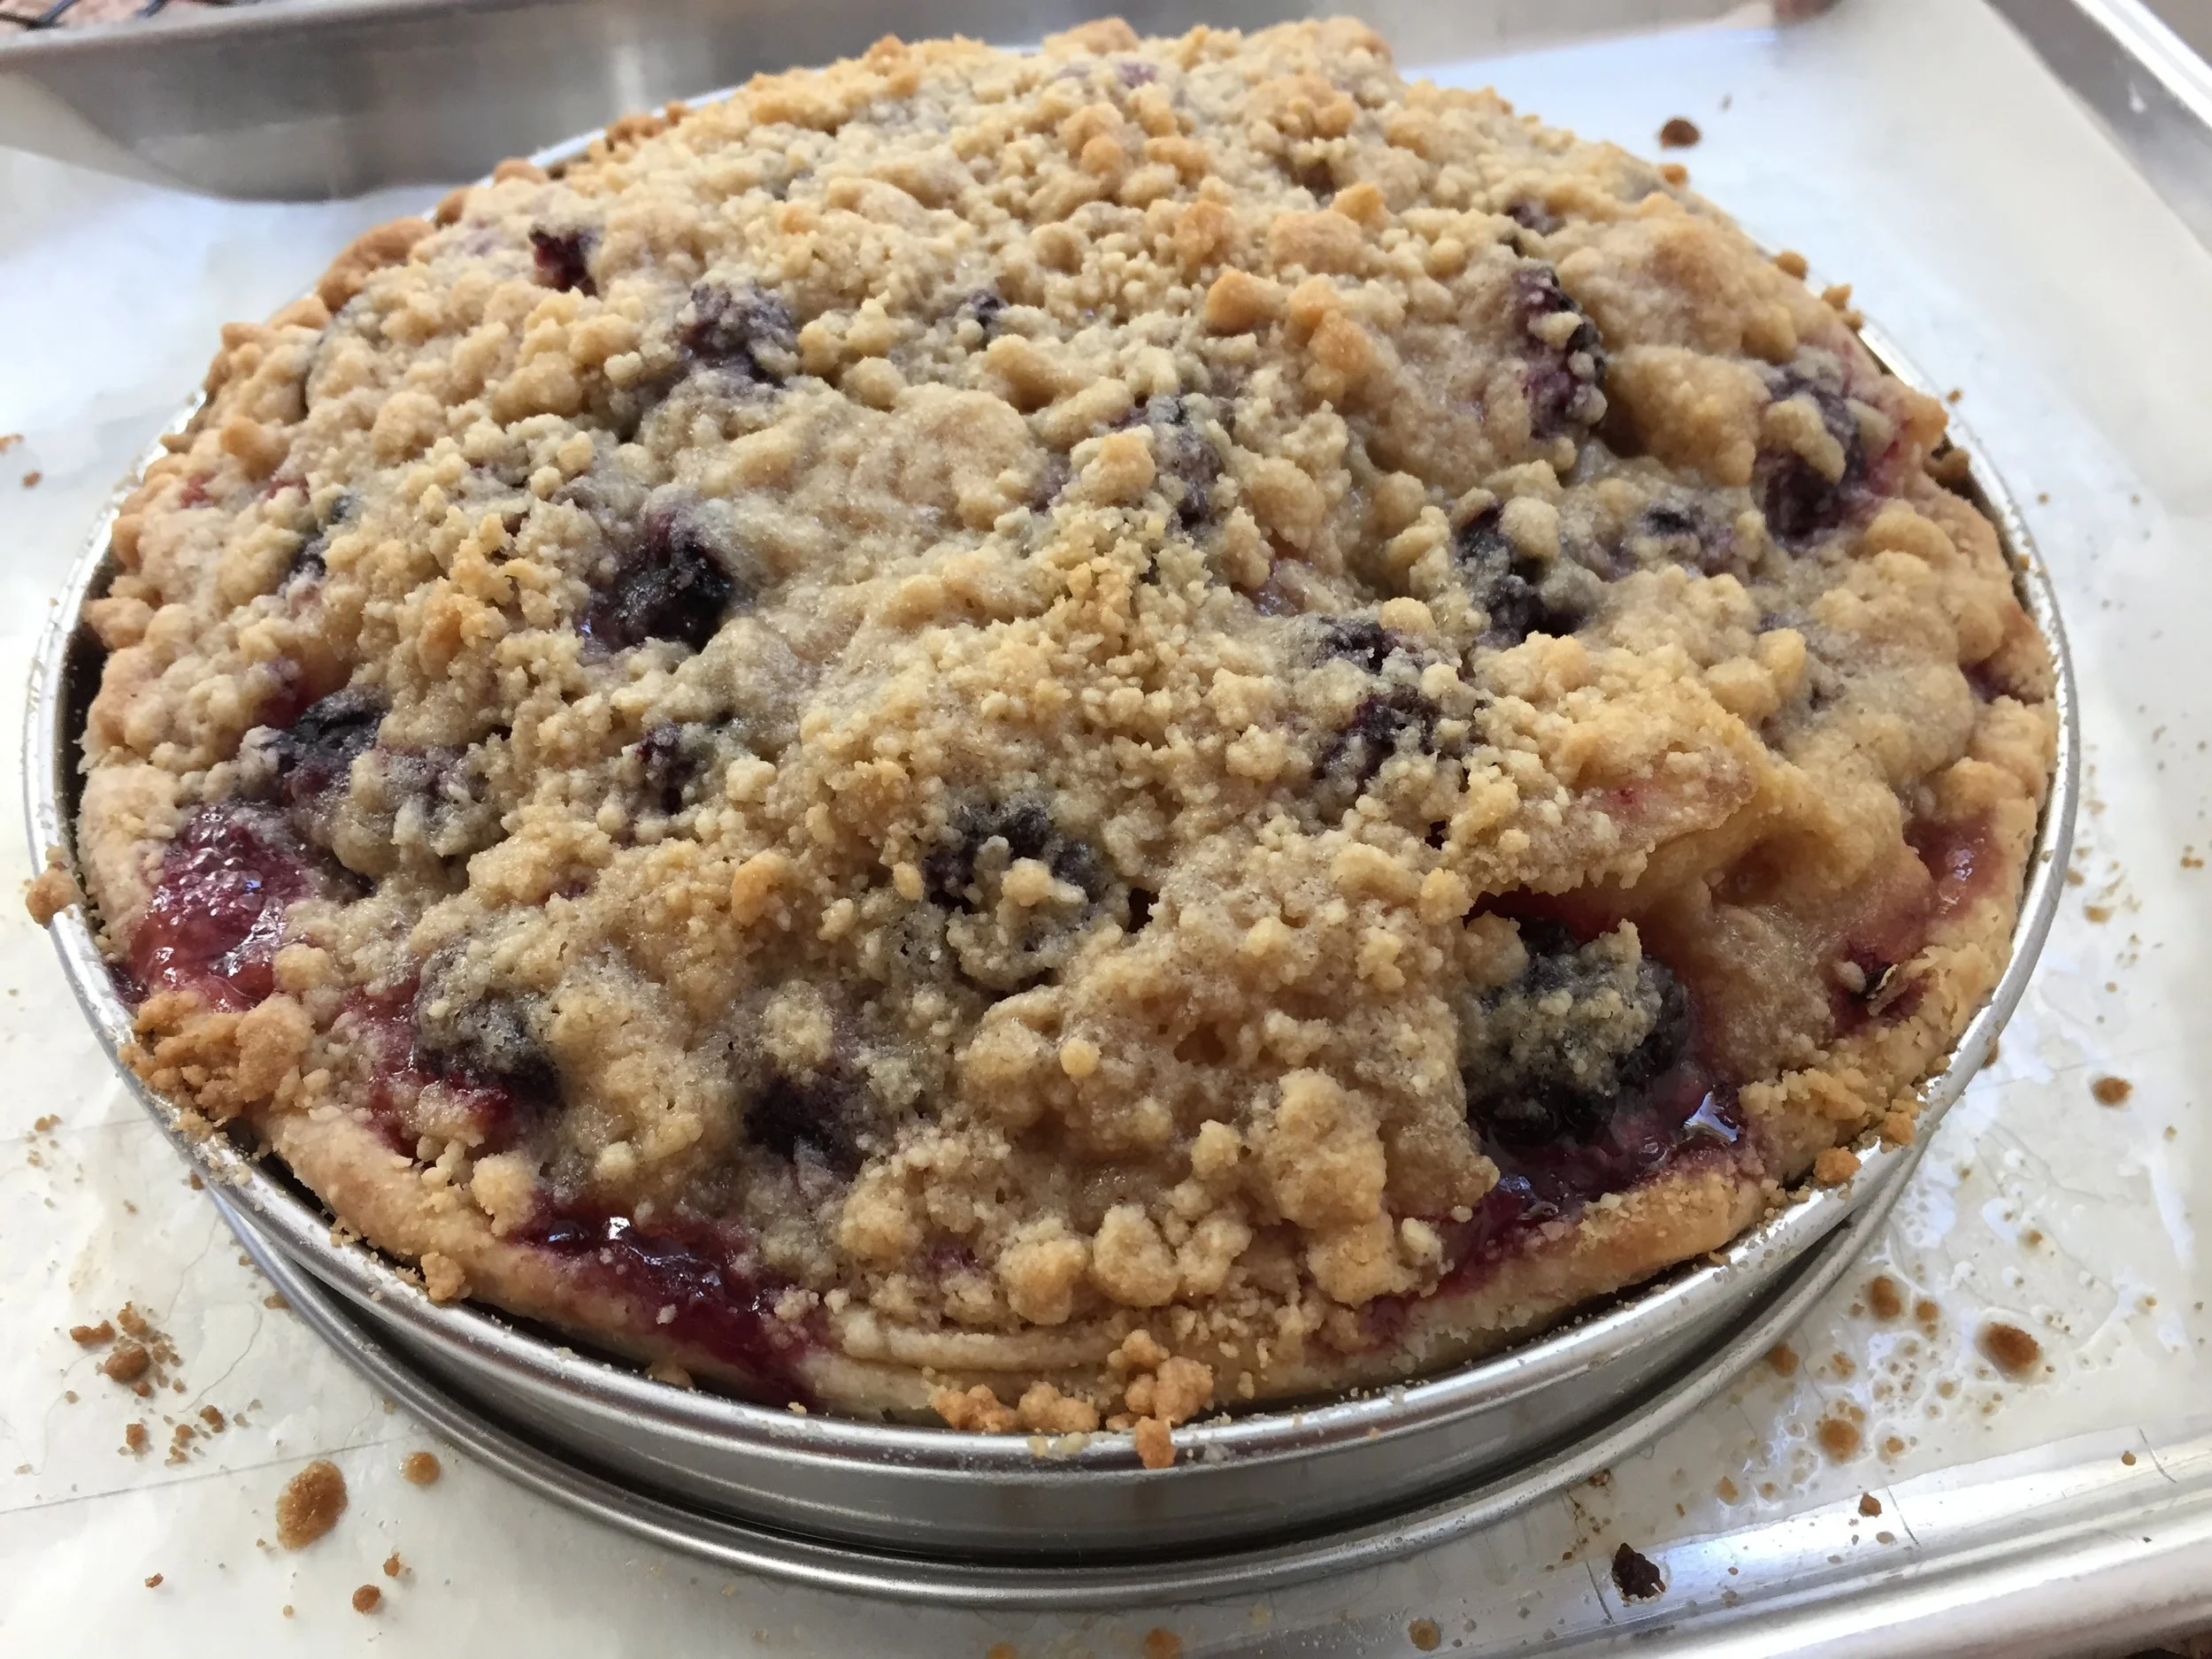
The final bake: 400ºF for 7 minutes; rotate the pan 180º and bake another 5 minutes; decrease to 375ºF and bake another 3 minutes. Since I had 12 of these for the order, I didn’t have an extra one to cut into but . . . . . imagine the end result looking like the close up above with a skosh more filling to enjoy. Sounds pretty darn good to me.

Et voilà! All boxed up and ready to go. And the feedback from the Canadian birthday girl: “a big hit”! Yippee!!

75D12CD5-87C8-4AB1-97B9-53891244E0A0_1_201_a.jpeg

Any tips or tricks of the trade from all of you butter tart aficionados are welcome!

Stay healthy everyone!!

Cinnamon knots

IMG_4395.jpg

Having been inspired by my recent purchase of Richard Bertinet’s latest book “Crumb”, I felt it was time to make some cinnamon knots with my own take on his approach to this tasty treat. Warming spices, brown sugar, butter, tender slightly sweet dough . . . aaahhh. Perfect for autumn which has finally arrived in its full glory. Too bad that once the the brilliant reds and oranges are making us smile, we get the winds and rains of late October and early November to blow them all down. It’s nature’s way.

For this project I utilized a basic cinnamon roll type sweet dough using a recipe I discovered on Ambitious Kitchen.com (minus the cream cheese frosting). Once the dough is mixed and undergoes the first rise, I roll it out into a 14”x15” rectangle and spread it with softened butter which is topped with light and dark brown sugars and cinnamon. With the 15” longer edge parallel to the edge of my worktop I fold the dough up onto itself and cut 1” wide strips.

Now it gets a little messy. Leaving the folded edge end intact, cut the dough the length of the strip and twist the two portions around each other. Then form knots. As you can see, the dry stuff fell everywhere, but I simply scooped it onto the shaped knots. Next time - mix the dry with the butter and spread away so it all holds together!

IMG_4389.jpg

Once all the knots are shaped, place them on a parchment lined sheet pan (cover loosely with plastic wrap) and give them a 30 minute rise while heating the oven to 350ºF.

IMG_4393.jpg

Bake for about 20 minutes until golden brown.

I opted for a light drizzle of a milk/confectioner’s sugar/vanilla extract glaze to give them a certain je ne sais quoi.

IMG_4395.jpg

These were wonderfully tender, buttery and cinnamon-y - the perfect treat for a blustery autumn day. I served them at a morning coffee gathering down the street, and they were a hit!

I’ve been very intrigued of late with various twists, coils, spirals, knots or whatever shape one might imagine when creating what I’ll refer to as a “sweet roll” for lack of a better term. As the holiday season approaches I hope to add some new crowns, festive twists and star shapes to my sweet dough baking projects.

It’s all about learning and experimenting!

A couple of autumn tarts

IMG_3305.JPG

Apples! Pears! Berries! What better way to celebrate autumn, eh?

On the prowl for a couple of Sunday desserts, as well as a way to use some of the local Michigan pears and apples I had on hand, tarts were definitely on my mind. Natch! This project involved two versions of tart, one apple/pear/blackberry with classic brown sugar crumble topping and one apple/pear/raspberry with crunchy almond topping. Ooooohhh how delicious.

IMG_3297.JPG
IMG_3291.JPG

I’ve been a fan of Bosc pears for some years now, and, on the apple side of things, this season I’ve taken quite a shine to Jonagolds too.

I typically poach my pears soon after purchase as a way to avoid the ripening wait as well as to hold them in the fridge for use when needed. But after reviewing some of my numerous pastry books I opted for the slice/dice/sauté in a little butter and sugar approach. Works like a charm!

For a couple of full sized tarts I peeled, halved, cored and thinly sliced about 4 pounds of apples. That would normally be a decent quantity for one tart, but, since I was mixing in pears and berries, it worked very nicely for two.

Then on medium heat melt 2 ounces/56 g unsalted butter in a sauté pan or Dutch oven large enough to hold all of the apples, then stir in the slices until coated. Add 100 g dark brown sugar, a large pinch of salt, the zest of one lemon and a large squeeze (a tablespoon or so) of lemon juice, increase heat to medium high and stir about a minute.

Now here’s where I took Elisabeth Prueitt’s advice from her “Tartine all Day” book - cover the pan, reduce the heat to low and let the apples cook for about 10 minutes until softening and juice-releasing has happened. Then scoop the apple slices out with a slotted spoon (I placed them in a large strainer over a bowl to allow dripping then transferred them to a clean bowl) and cook down the juices for a few minutes until very thick - apple caramel! Mix the thickened juices in with the apples and you’re good to go. You can add a little cinnamon and nutmeg here if you’d like - I kept mine au naturel. Set aside to cool until you’re ready to fill your tart shell.

For the pears, again using about 4 pounds, I peeled, halved, cored and diced them into 1/2 inch cubes then followed a similar sauté approach in butter and sugar. For these, simply cook them over medium high heat until they start to soften and become lightly caramelized (maybe 5-8 minutes) then set them aside to cool until ready to fill the tarts. No juice reduction here.

I used two of my favorite tart doughs - pâte brisée for the blackberry version and pâte sucrée for the raspberry - blind baking them before filling. Once baked I brushed the bottom with egg white and popped ‘em back in the oven for a couple of minutes to “dry”. That provides a seal to the dough and reduces the chance for a soggy crust.

Pear apple blackberry waiting for assembly

Pear apple blackberry waiting for assembly

I mounded the apple/pear mix in first then tucked my blackberries into the various nooks and crannies. These were plump frozen berries that I broke up into pieces for more efficient cranny-ing.

IMG_3294.JPG
 

The brown sugar crumble is equal weights flour, brown sugar (you can use light or dark, whichever you prefer) and diced cold butter sanded into the dry ingredients. I usually make a bunch and store it in a zip-top bag in the freezer to use at a moment’s notice.

Loaded with crumble!

Loaded with crumble!

Since the crust is already baked and the fruit “cooked”, the primary task here is to brown the crumble and get the fruit to juicy-up. Bake at 350ºF for 20-25 minutes until the crumble is golden and some juicy bubbling is visible.

IMG_3296.JPG
 

The approach to the raspberry version is pretty much the same. Fill the blind baked crust with the pear/apple/raspberry mix.

IMG_3288.JPG
 

But this time the topping is made with 2 large egg whites, 100 g/1 cup confectioner’s sugar and 125 g/1.25 cups sliced almonds all mixed together and spread over the fruit.

Ready for the oven

Ready for the oven

This one also bakes at 350ºF for about 25-30 minutes until the nuts are browned and have taken on a certain luster and there’s some fruit juiciness visible around the edges.

IMG_3290.JPG
 

Talk about a treat! Whether it’s crunchy toasty almonds or a more classic crumble that melts in your mouth, both of these tarts delivered with the lovely fall flavor of pears, apples and berries. And a side of vanilla ice cream doesn’t hurt either!

Now don’t hesitate to make your own version of a delicious autumn tart.

Happy baking!

IMG_3302.JPG

Caramel apple tarts

IMG_3127.JPG

Yippee - it’s officially fall! The recent autumnal equinox dawned bright, crisp and clear with morning temps in the mid-40s, perfect for walking, baking or pretty much anything one might feel like doing. My time of year!

Apples are everywhere - farmers markets, grocery stores, orchards and farm stands - and one can choose the pick-your-own thing or simply buy your favorite of the many varieties available here in west Michigan.

IMG_3160.JPG
 
IMG_3120.JPG

Having a go-to simple apple tart in one’s repertoire is a beautiful thing. As is my practice, I periodically assess my freezer stock of various doughs and decide when it’s time to use something up. This time it was one of the pâte sucrée doughs that I like to use for rustic galettes.

Here’s a printable PDF of the recipe/process using pâte brisée (another fave!).

The approach is very straight forward, not unlike the Provençal tomato tart I just wrote about, although this time there’s no blind baking involved. Gotta like that.

First line the tart rings. In this case I’m making four 100 mm/4 inch diameter tarts, just enough to share with a few folks for dessert. Once lined, I sprinkle a mixture of equal parts sugar/flour (almond flour or fine bread crumbs work too) on the bottom to protect against sogginess from juicy fruit. With apples it’s not as much of an issue as it might be for juicier fruits like berries or stone fruits, but it’s a good practice nonetheless.

If I happen to have some diced/sautéed apples on hand, I put a smattering of those into the tart shell too.

IMG_3121.JPG

For the remaining apple filling I thinly slice a few medium apples and toss them with some vanilla sugar (1/2 to 1 tablespoon per cup of apples, or to taste). You can switch to brown sugar if you prefer that bit of toffee like essence. I generally keep the apples as the centerpiece of flavor and forego adding cinnamon or other spices, but those are popular options with many apple tart/pie bakers. You decide.

I’ve used a number of different apples over the years and love the combination of Jonagold/Fuji or Granny Smith/Macintosh. During my internship in Paris back in 2007 Chef Pascal Pinaud used Golden Delicious for his apple tarts, and they were mighty fine too. Isn’t it fun to experiment?

NOTE: a pound is about 3-4 medium or 2-3 large apples and should yield 3-4 cups. That worked well here with a handful of slices left over. I go for the more the merrier, especially since I like to pile ‘em on.

IMG_3123.JPG

I drizzle a little melted butter over the apples then pop the tray into the freezer while I heat the oven to 400ºF. Start the bake on the lower rack for 10-15 minutes, then move up to the middle rack, turn down to 375ºF and bake for another 10-15 minutes. Some of the apple slice tips start turning brown and I’ll begin to see some juiciness and bubbling developing along with the lovely aroma of baking apples and nicely browning crust. At this point I’ll often turn down to 350ºF and give them another 10-15 minutes. In a nutshell I typically plan a 35-40 minute total bake time for these tarts.

Once out of the oven I drizzle my homemade caramel sauce over and give them 3-4 minutes more in the oven to set the caramel.

Looking good.

IMG_3126.JPG

Served with vanilla ice cream (Steve believes everything is better that way), these were a tasty end to the meal. Très délicieuse!

Here’s to many more autumn baking adventures!!

IMG_3129.JPG