Flåm, boller and fjords

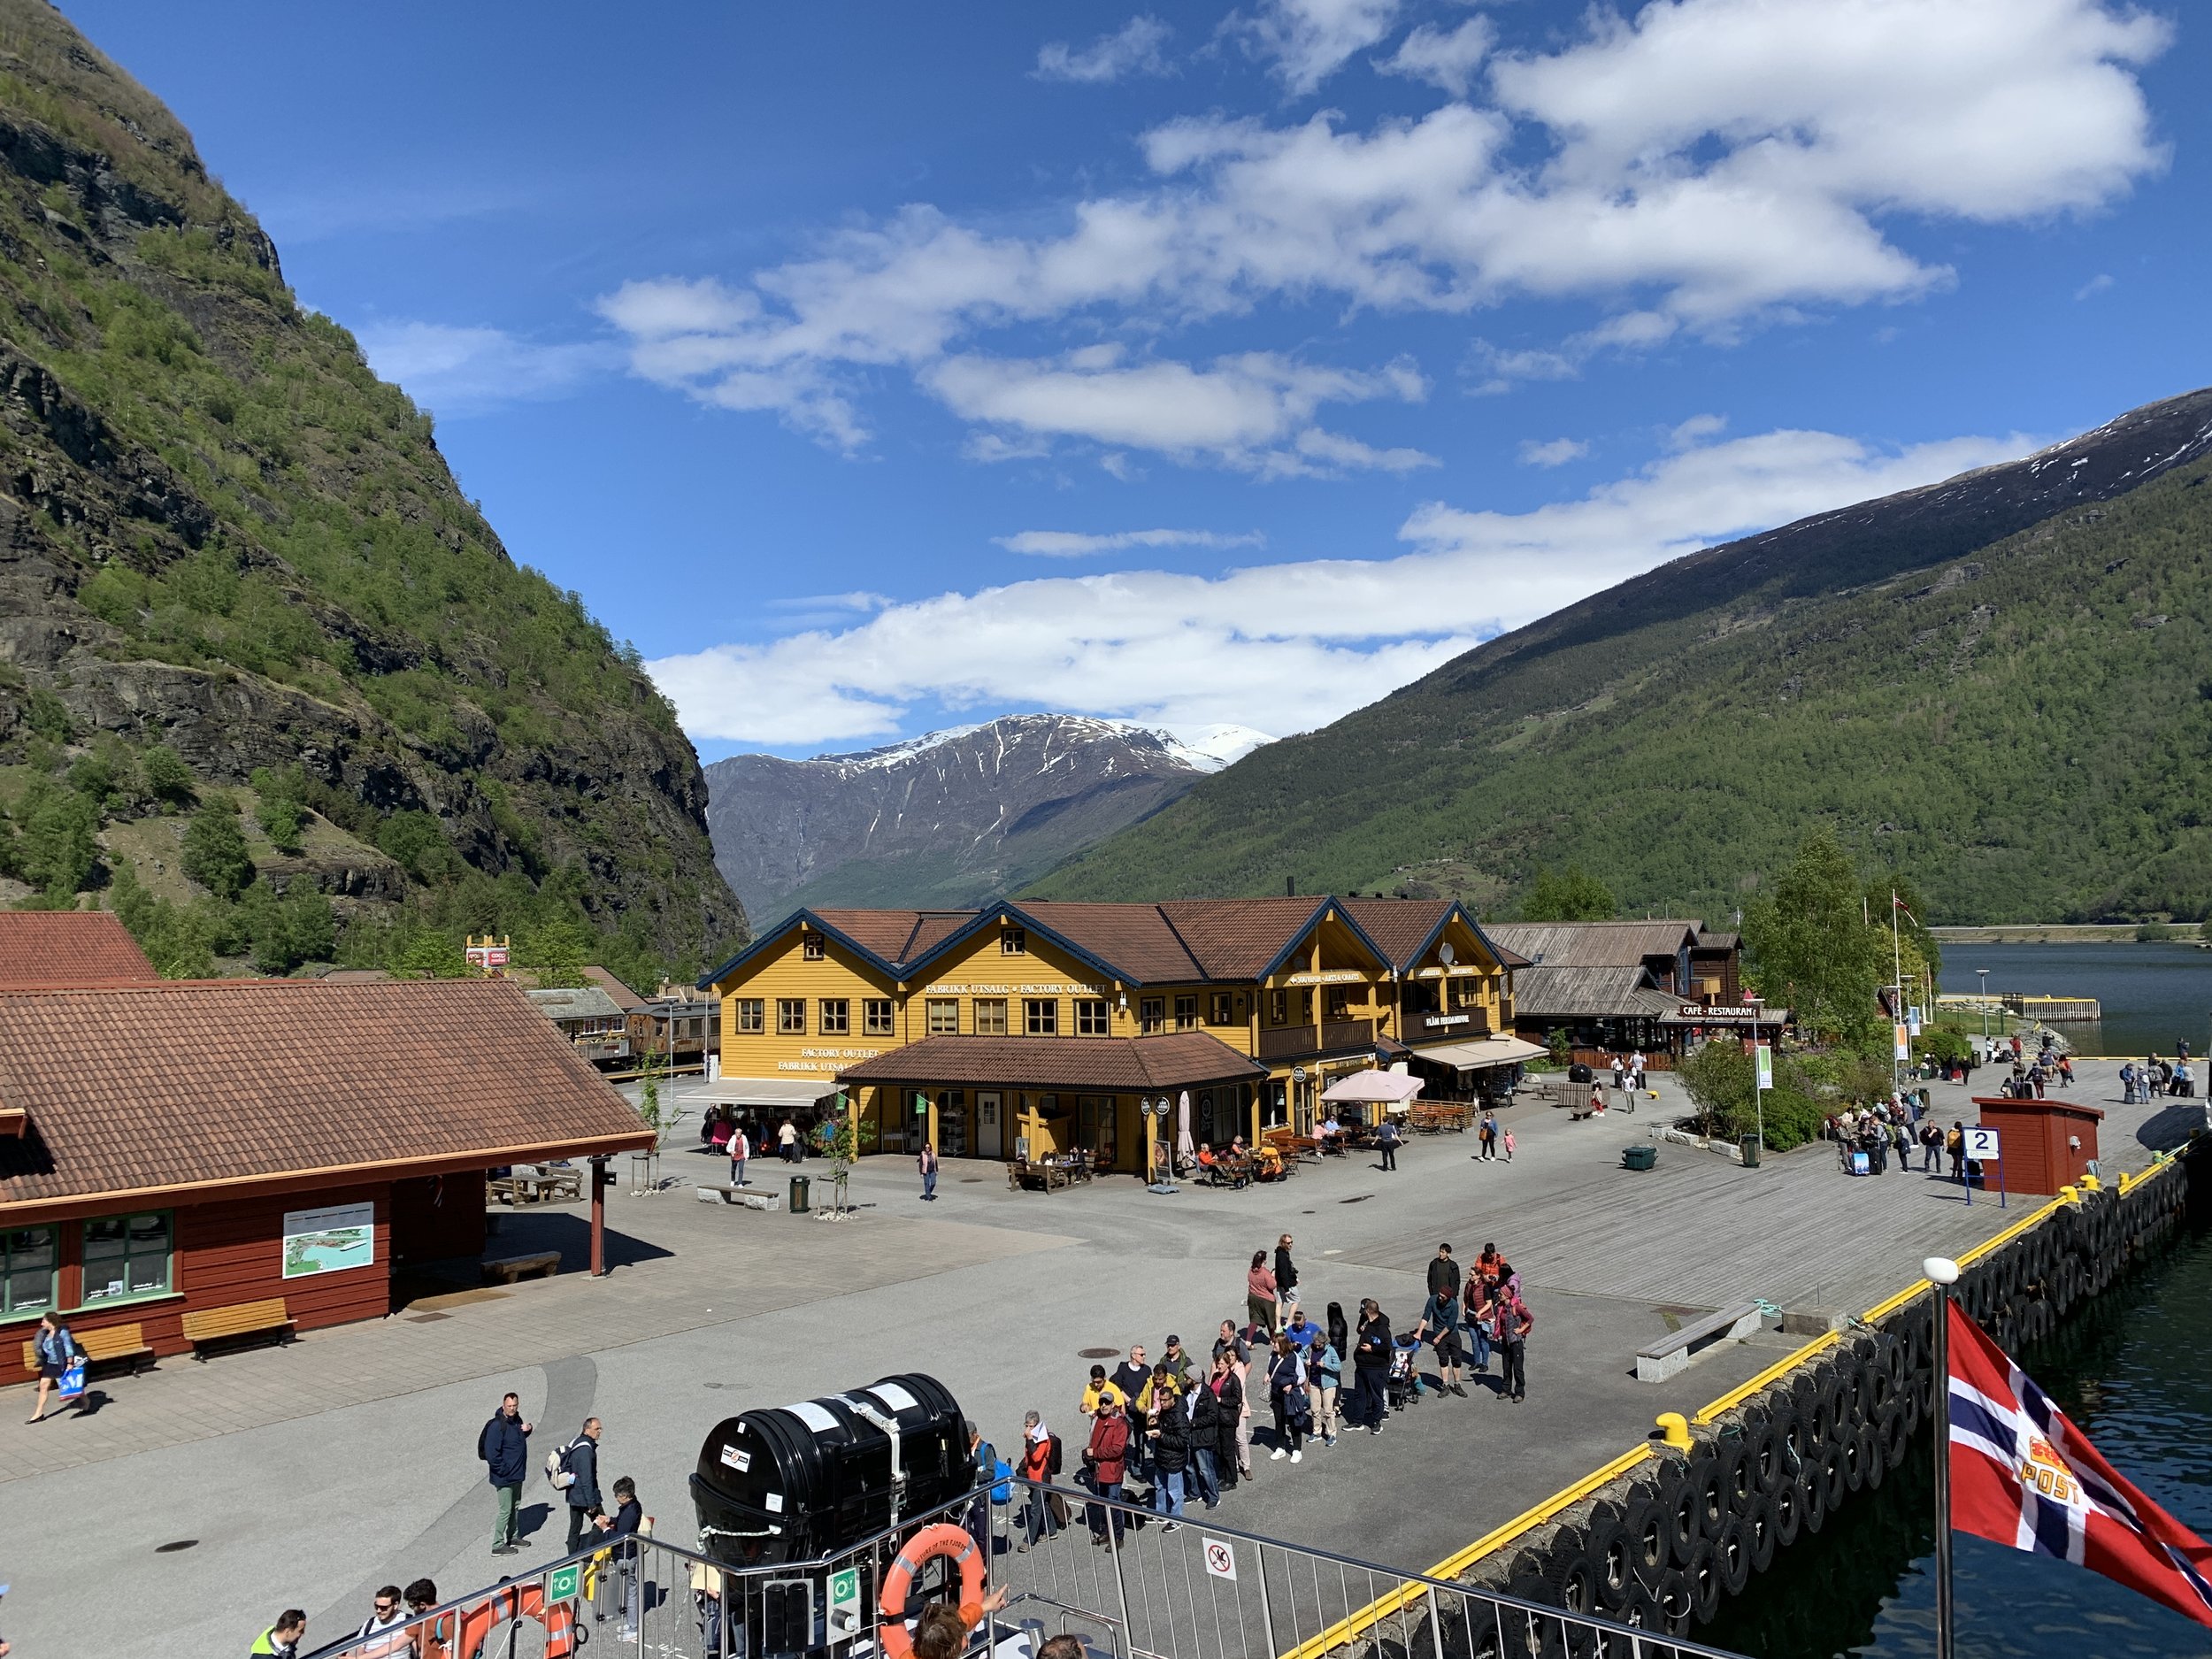
We had planned our visit to Flåm for the purpose of seeing the fjords from both land and water but were also anticipating catching our breath with the peace and quiet of the mountains. We had plenty of time upon our arrival in this small ville to visit the TI office, check into fjord cruises/local eateries and generally get a lay of the land.

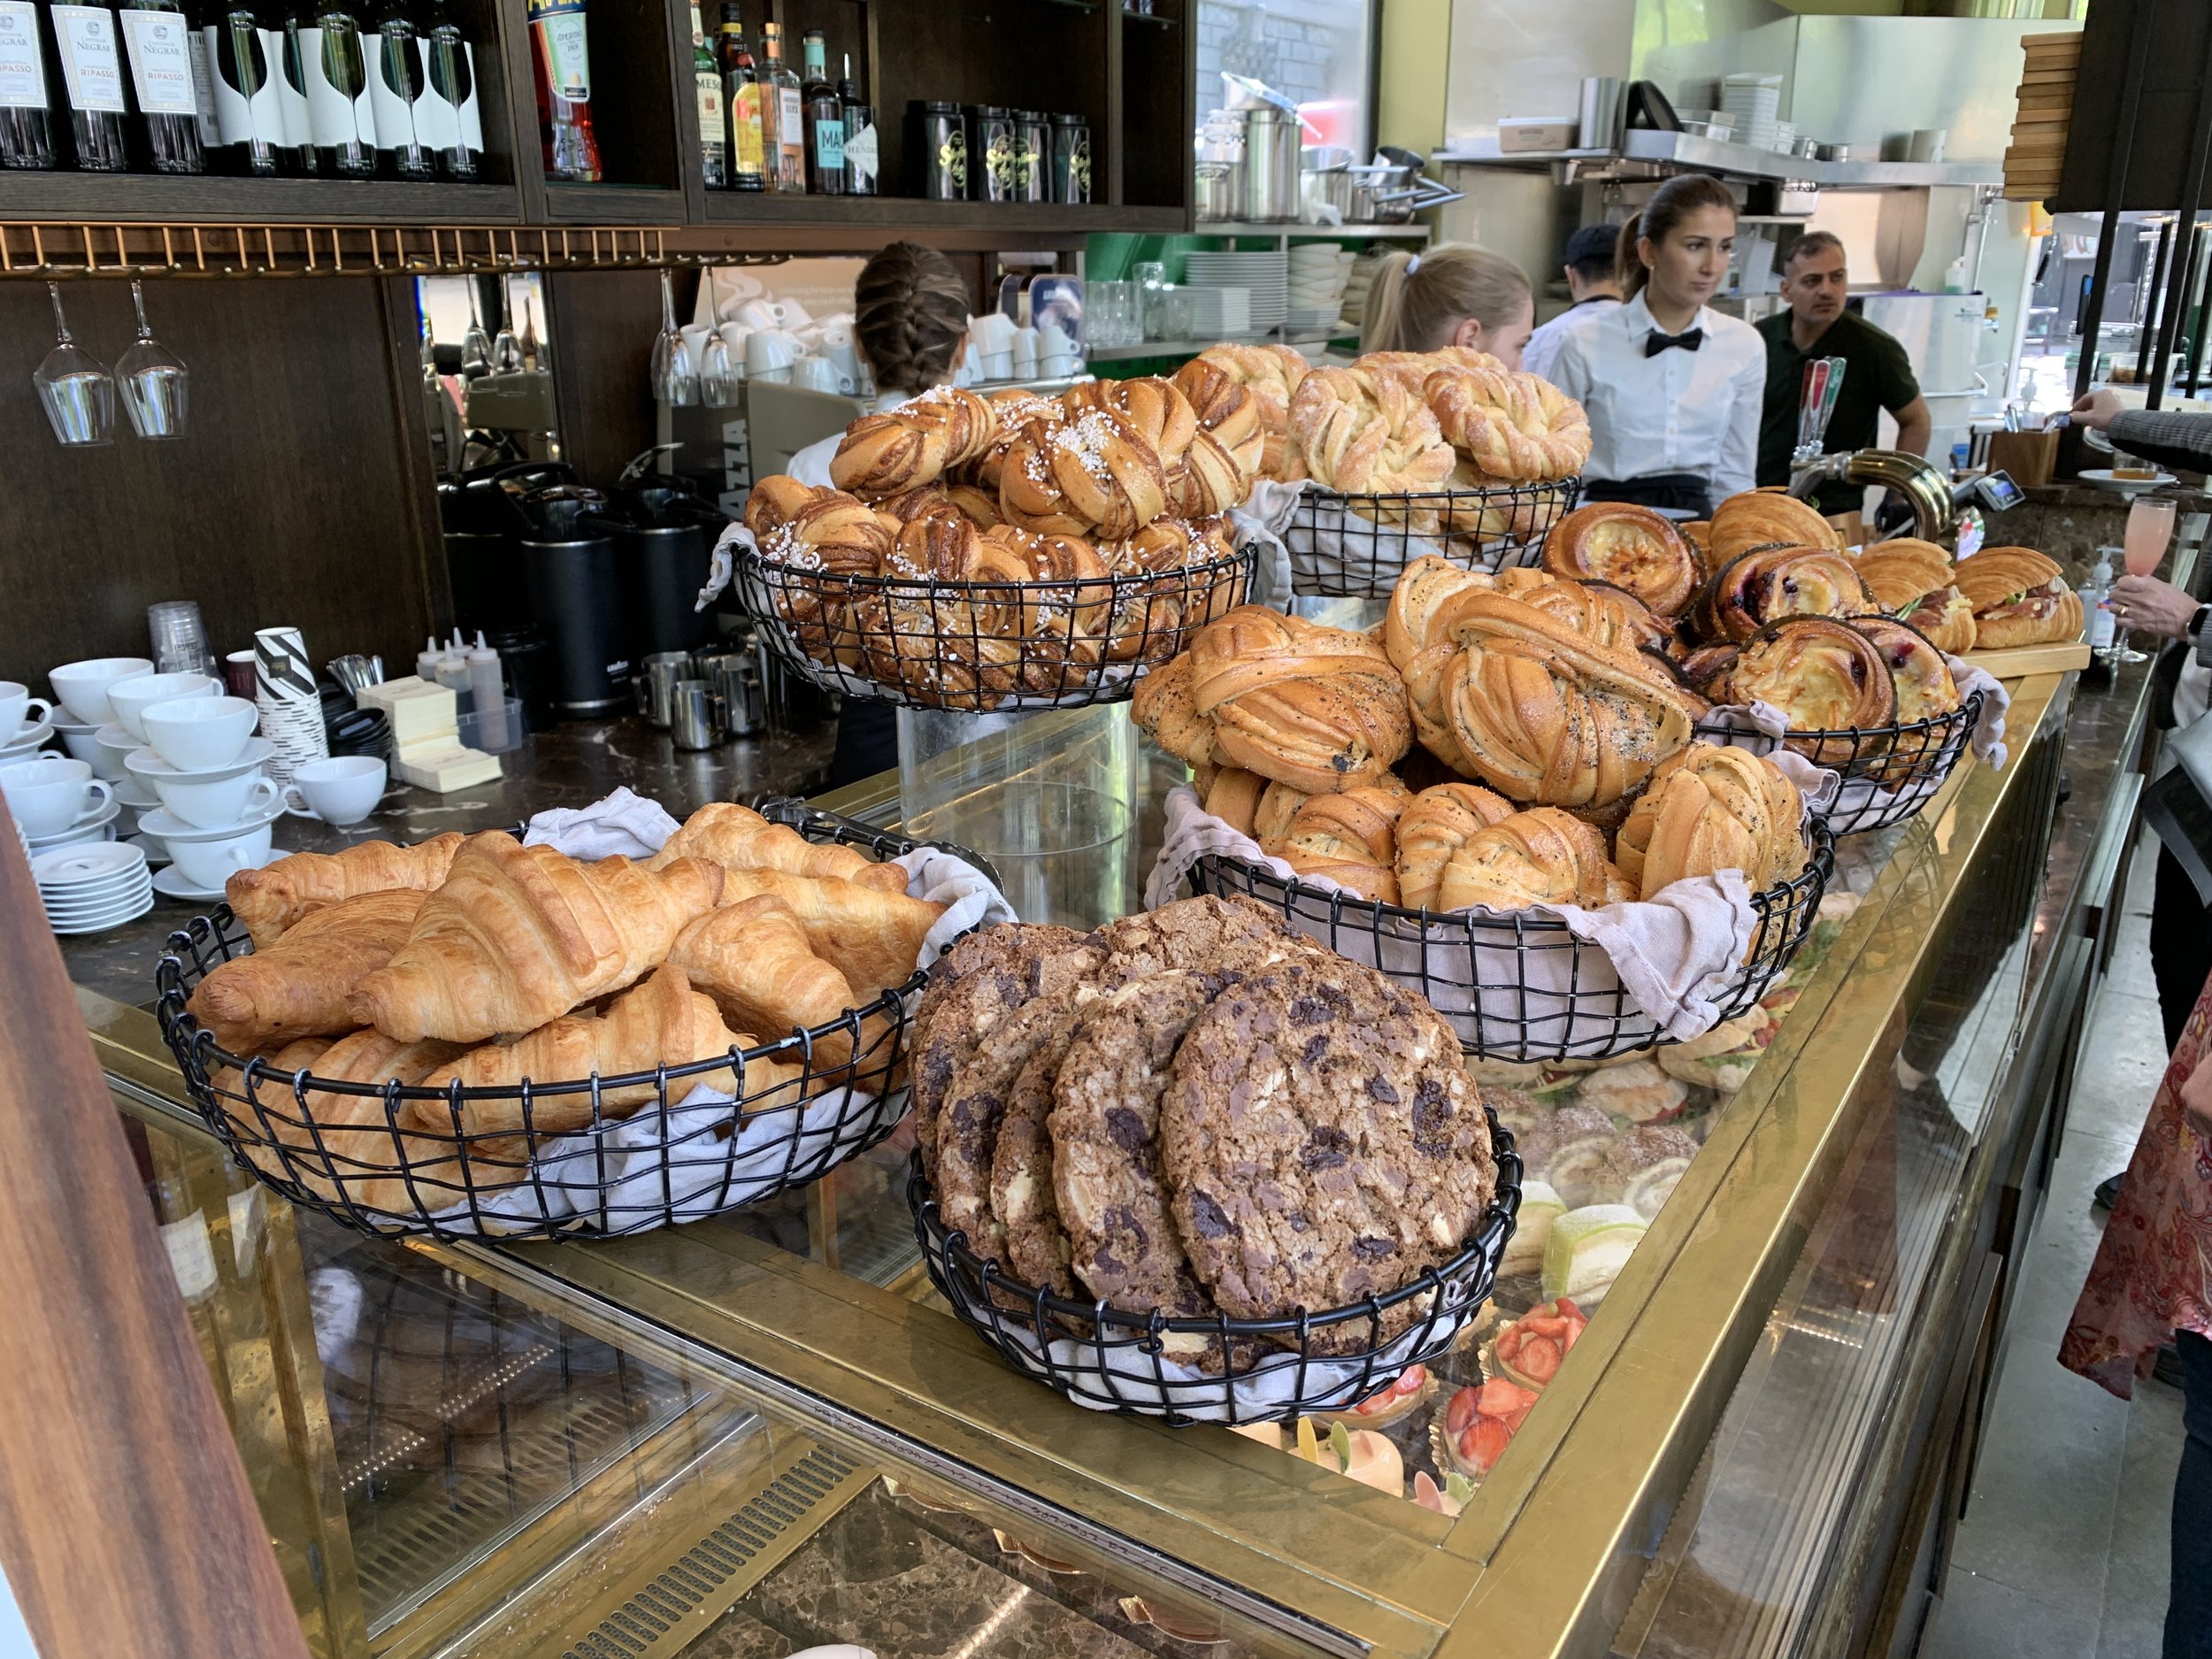
After a leisurely breakfast on the first of our two mornings in Flåm, we picked up our fjord cruise tickets and then headed for the Flåm Bakeri which we had heard about through the local vibe. We would enjoy our treats later.

Note the yellow and red paint colors above - we saw many buildings of similar colors dotted throughout the countryside.
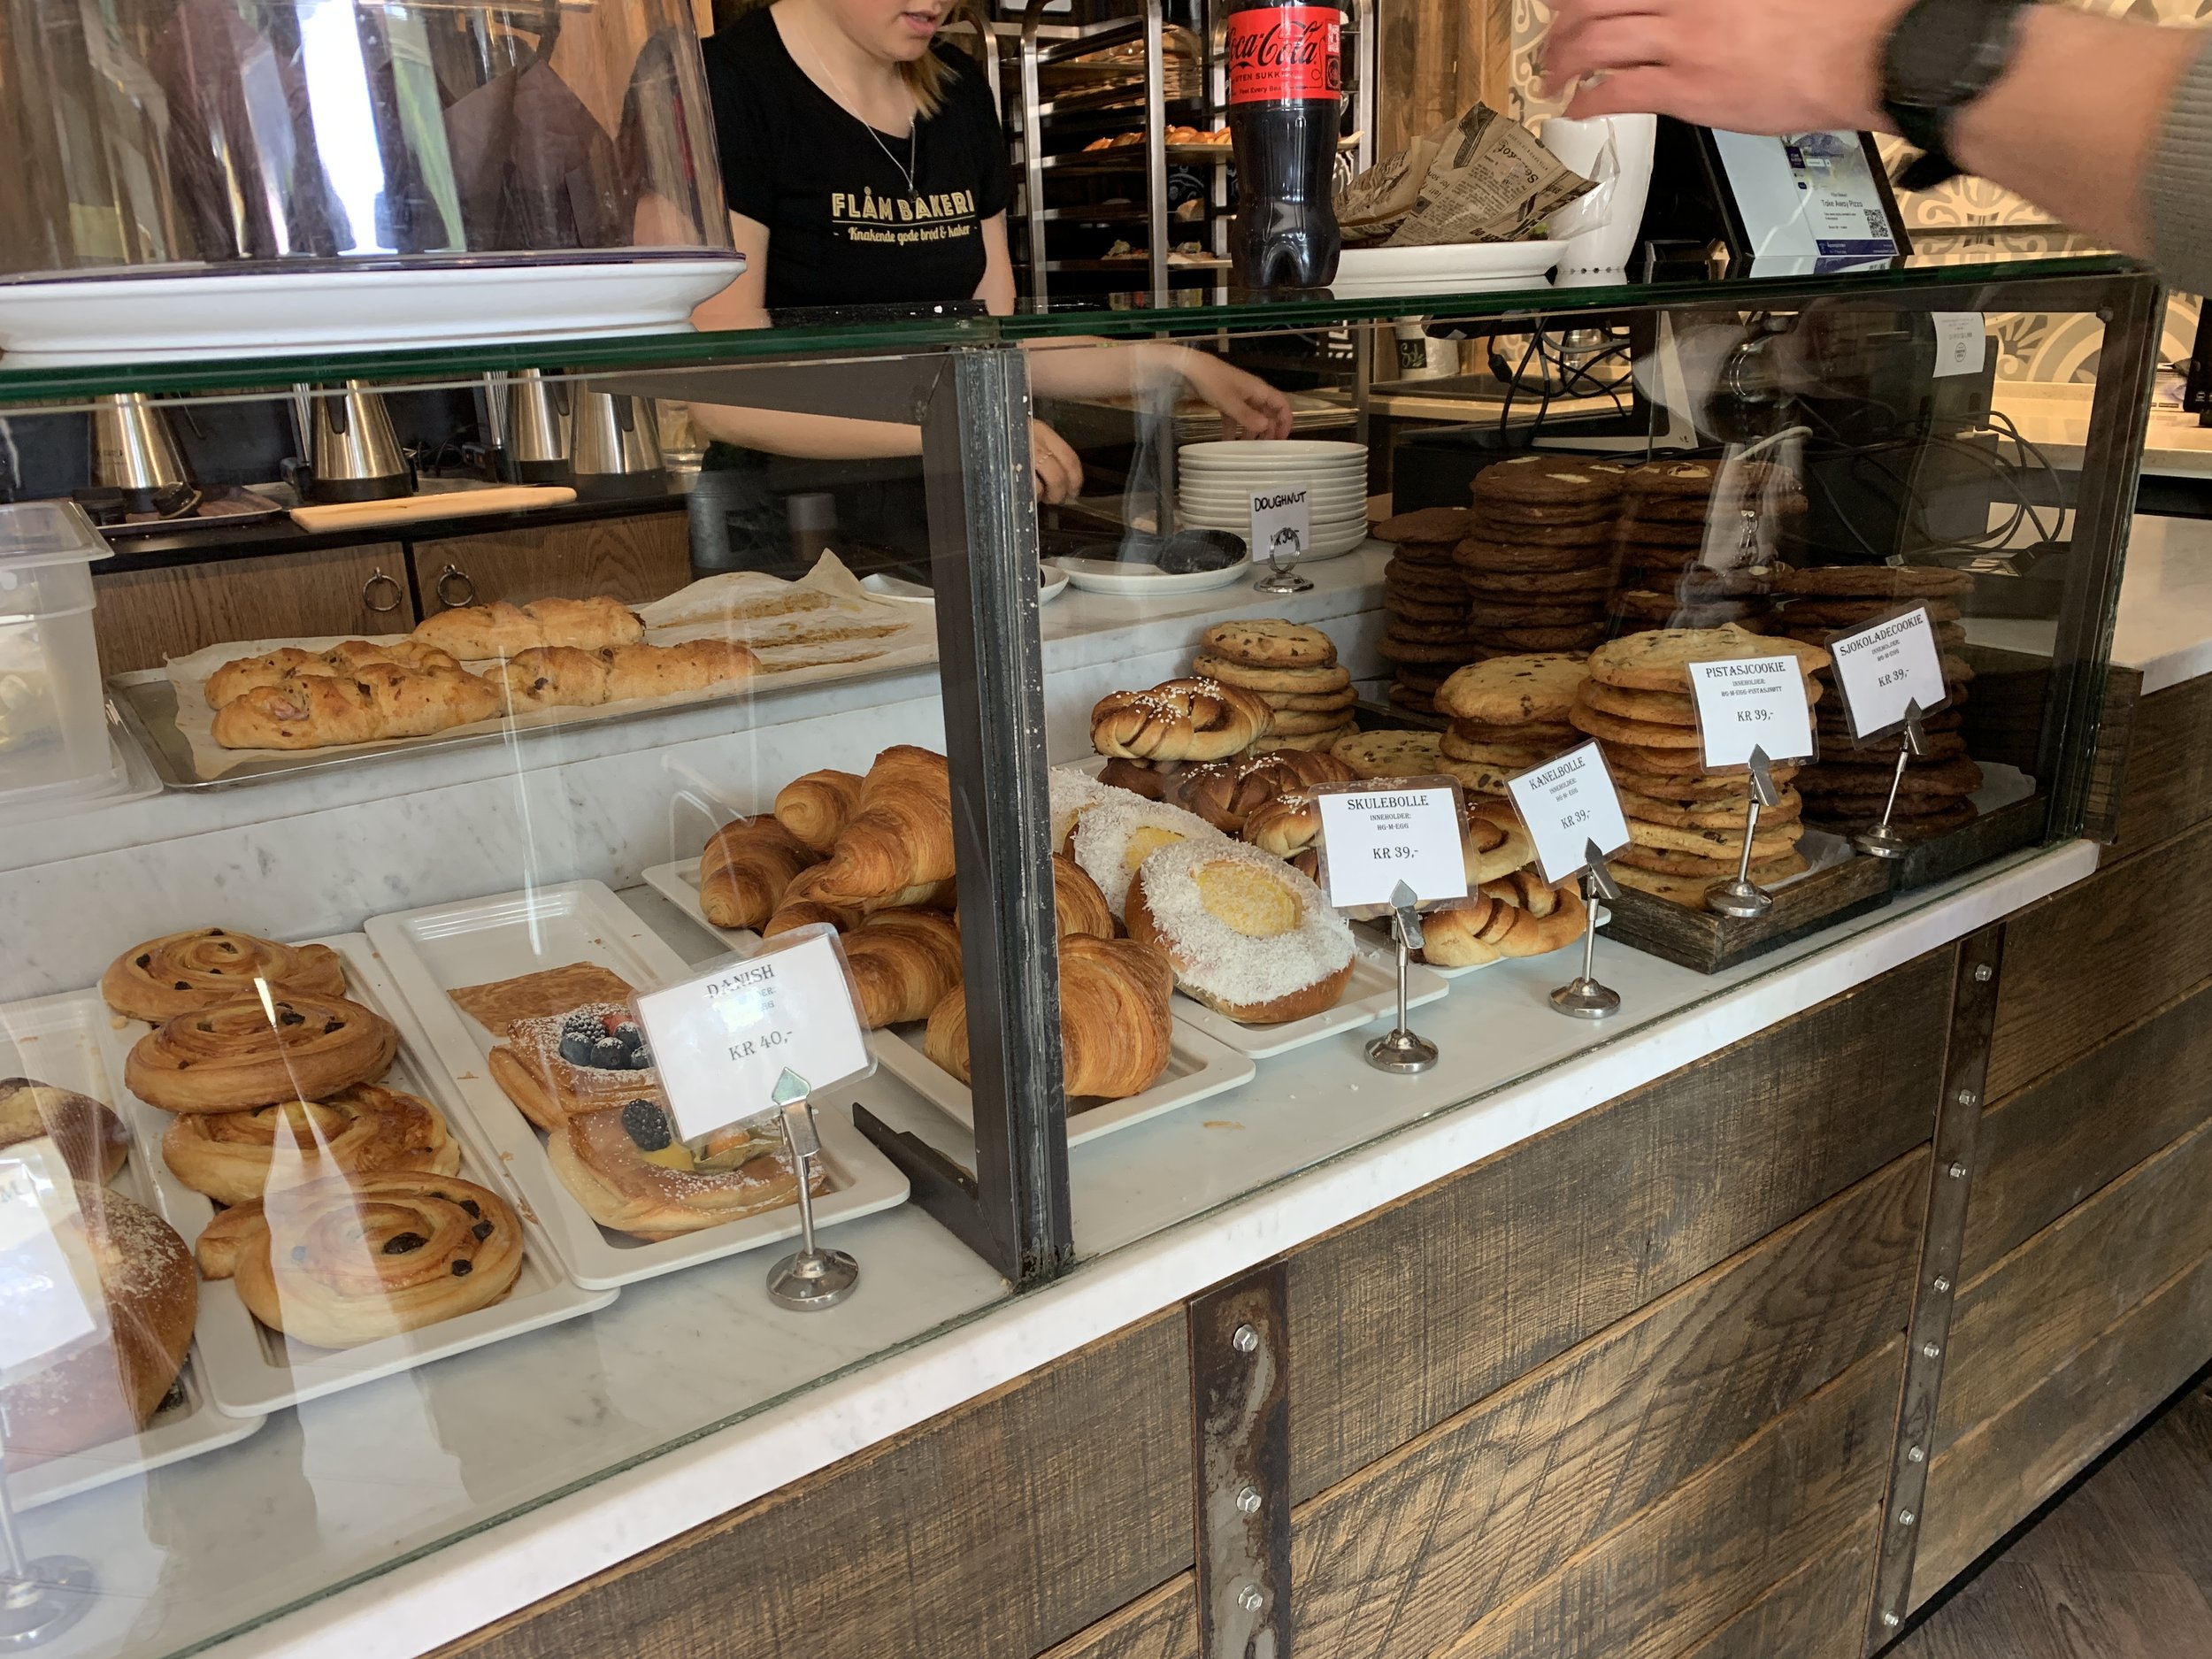
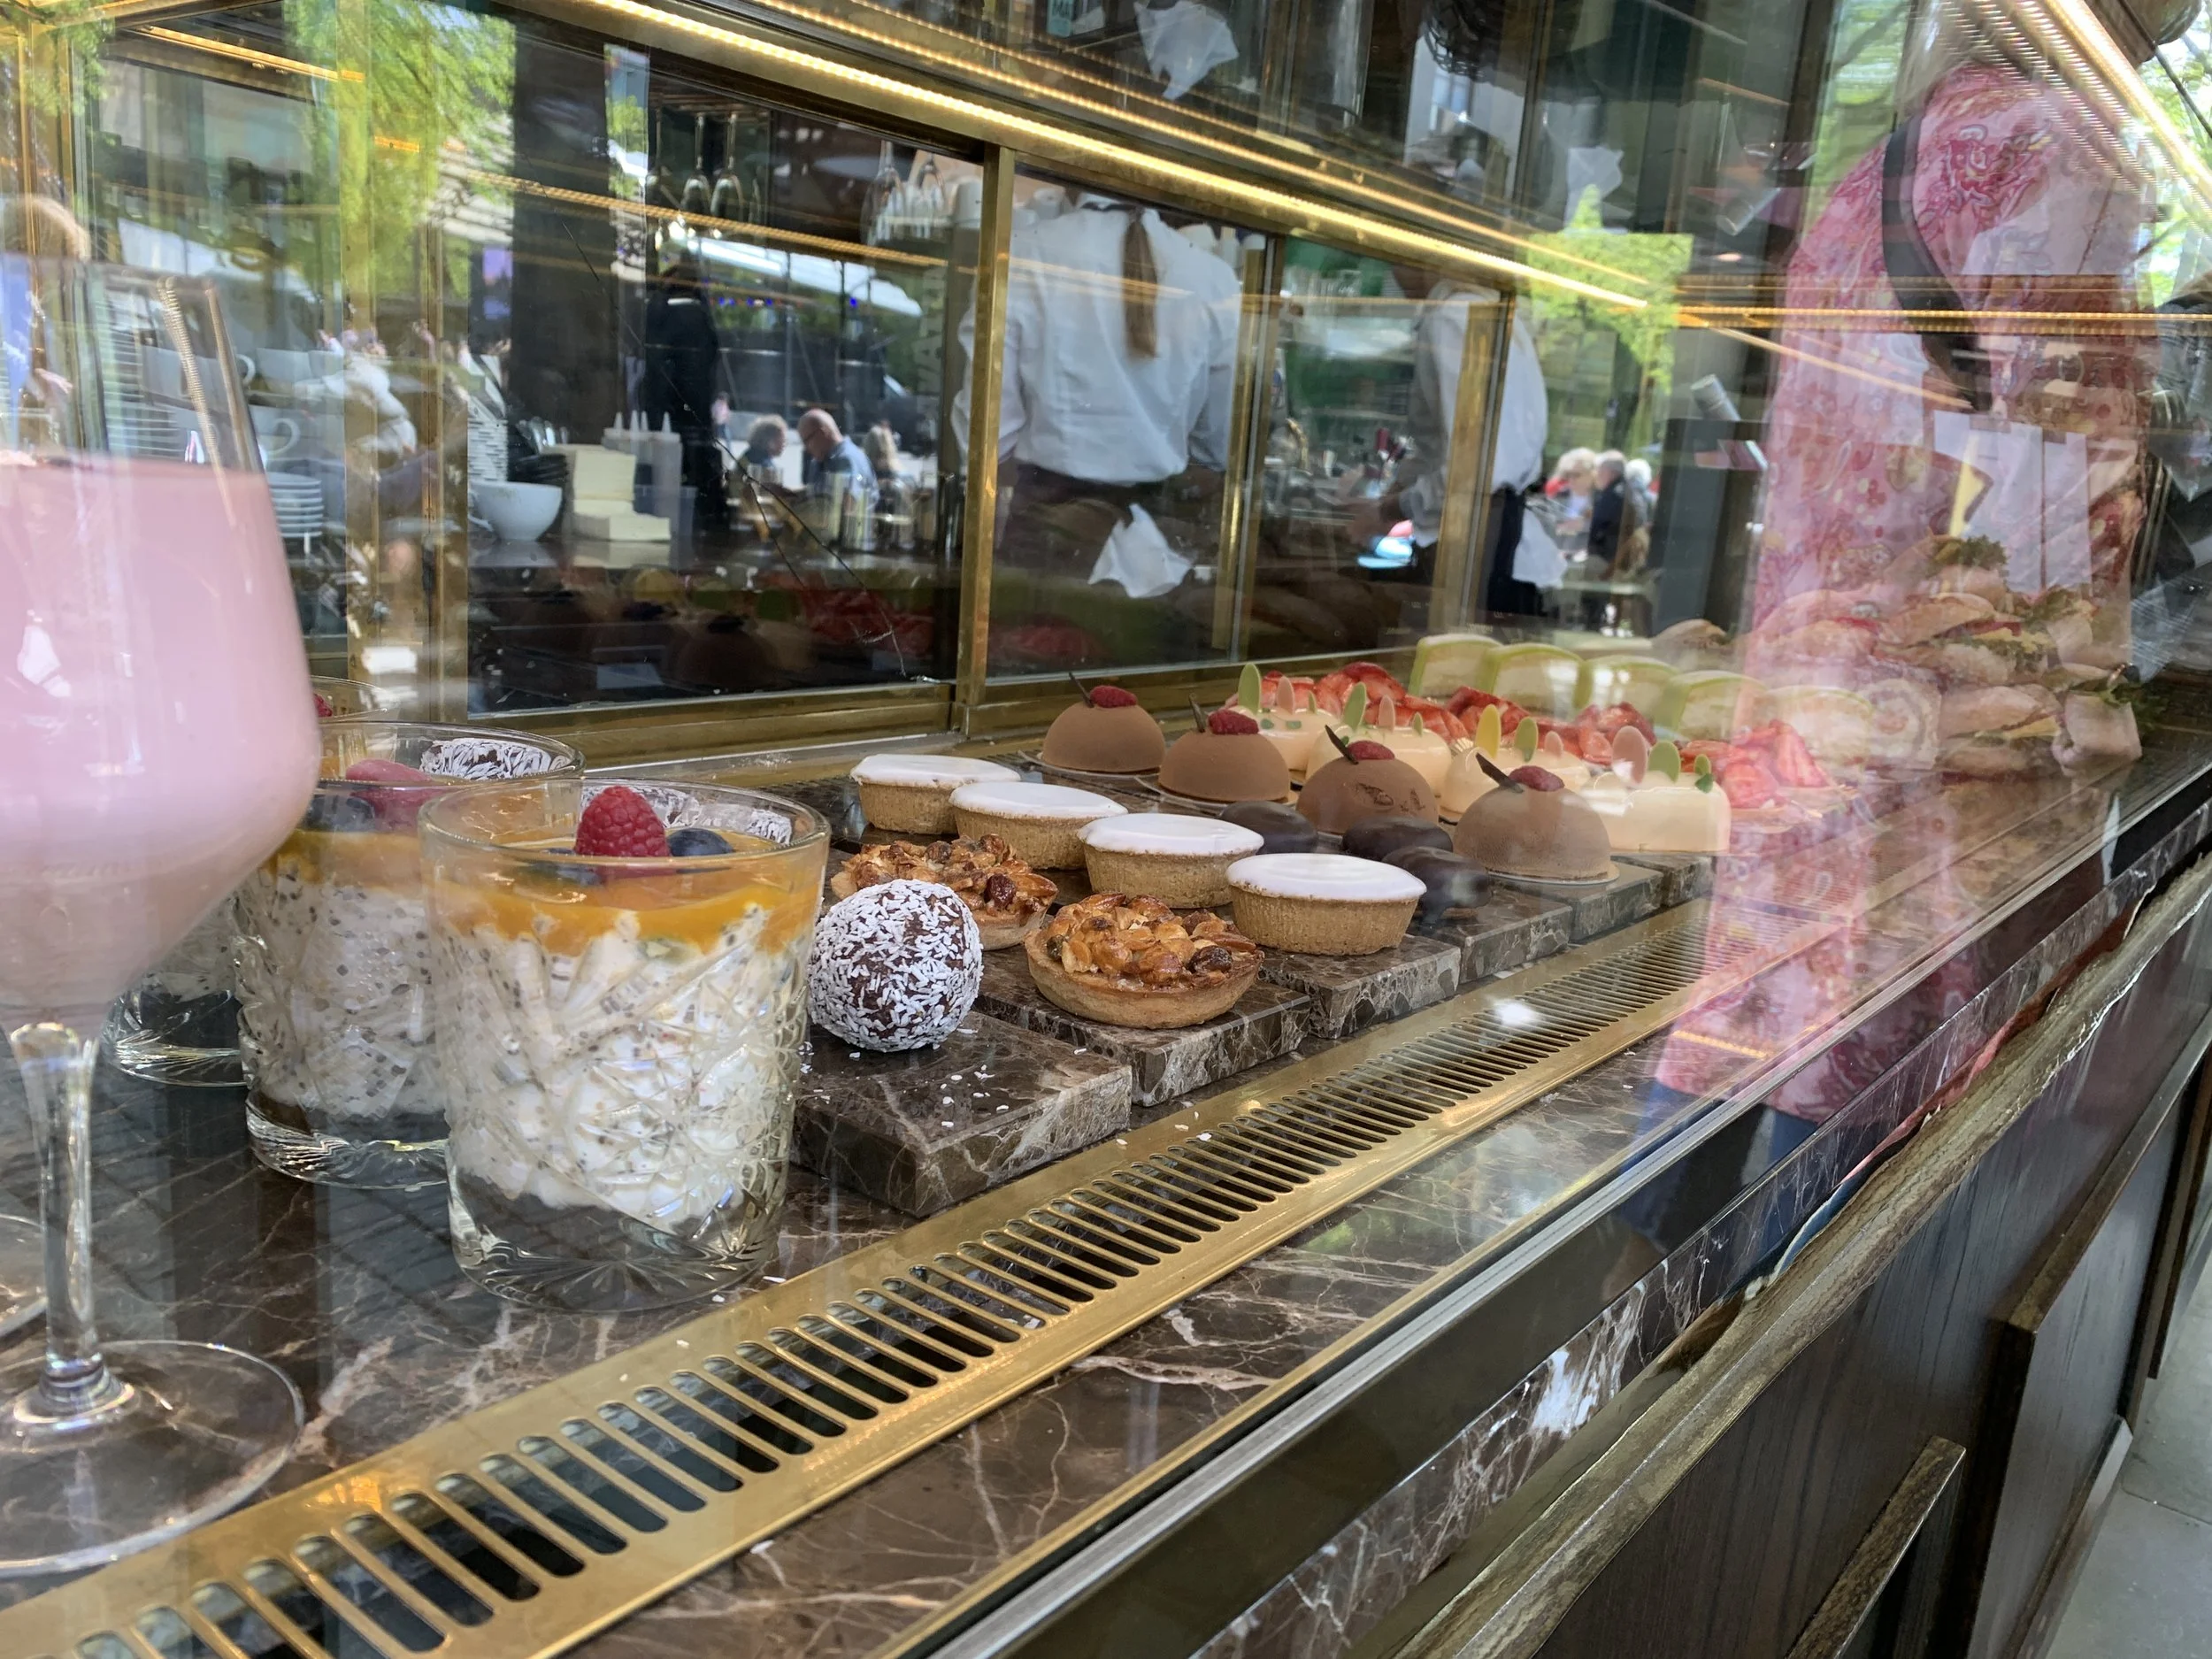
The pastry case

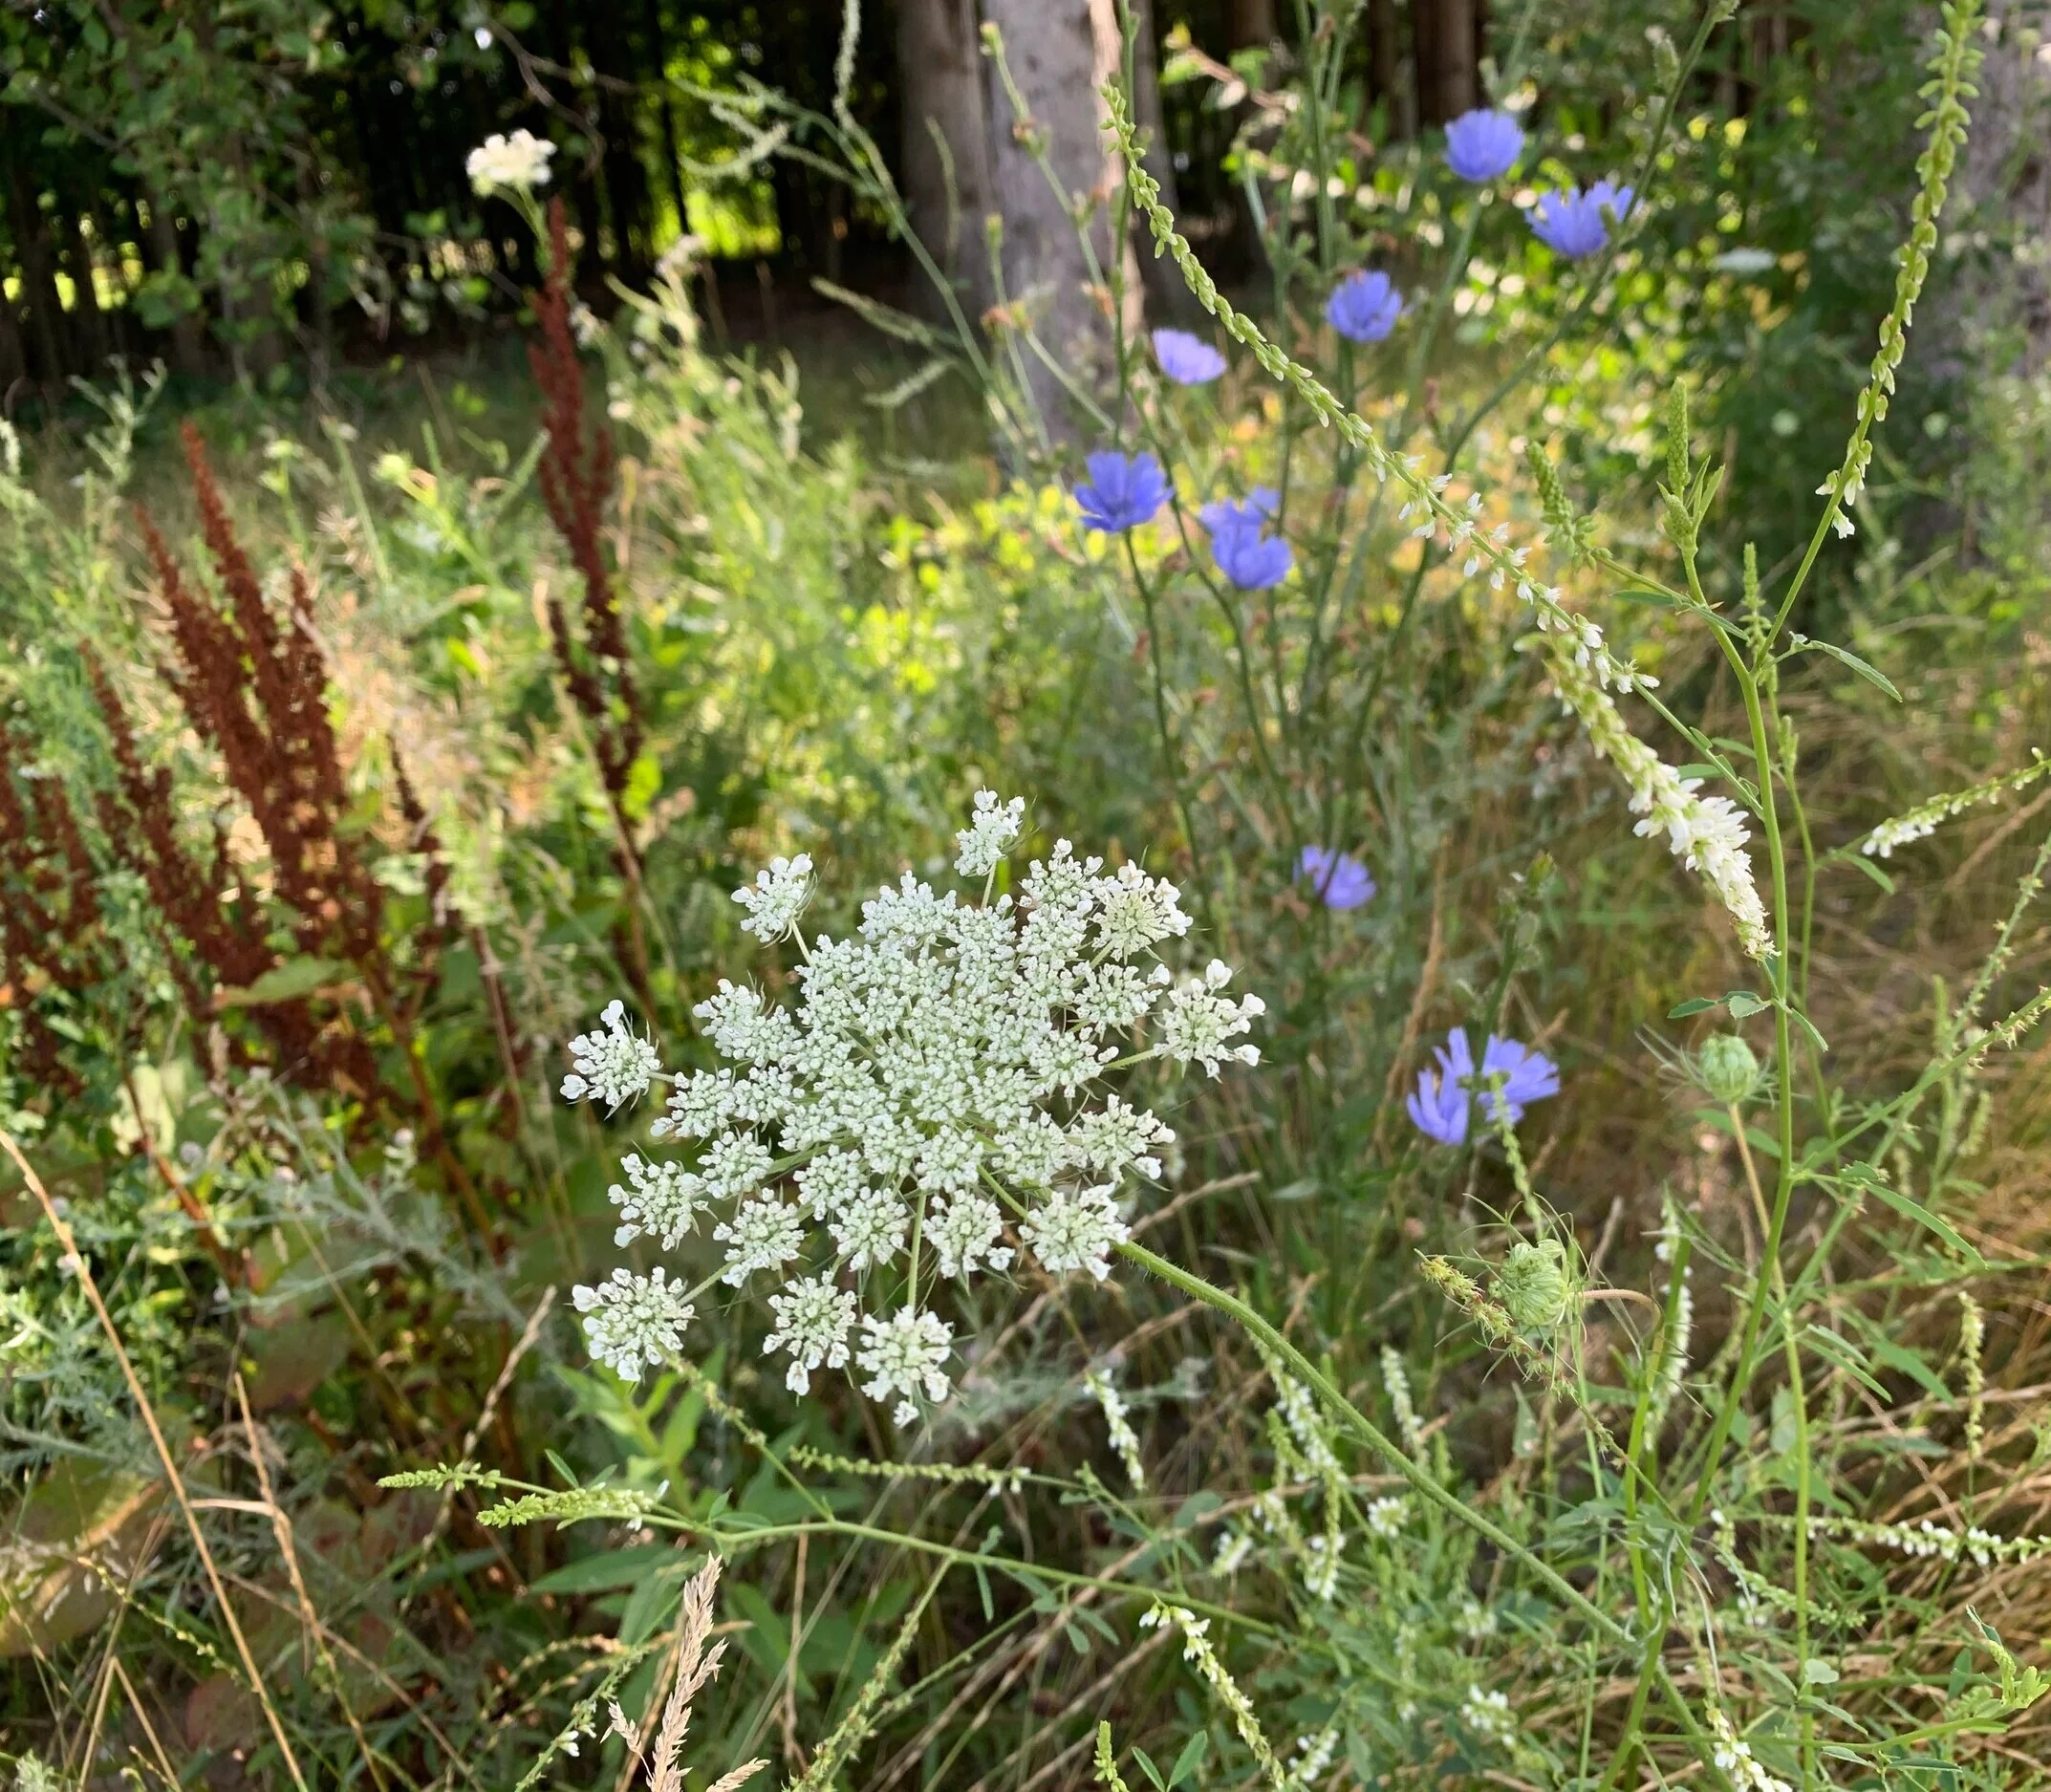
While Steve worked on some photos and blog notes, I went for a brisk walk in and around town - something I’ve been missing during our days of city sightseeing. Gurgling streams, picturesque homes, gorgeous mountains - lovely.

Just around the bend from town - our hotel is the brown building complex (center of photo)

Typical Norwegian homestead

Babbling stream

Looking across the water from our room

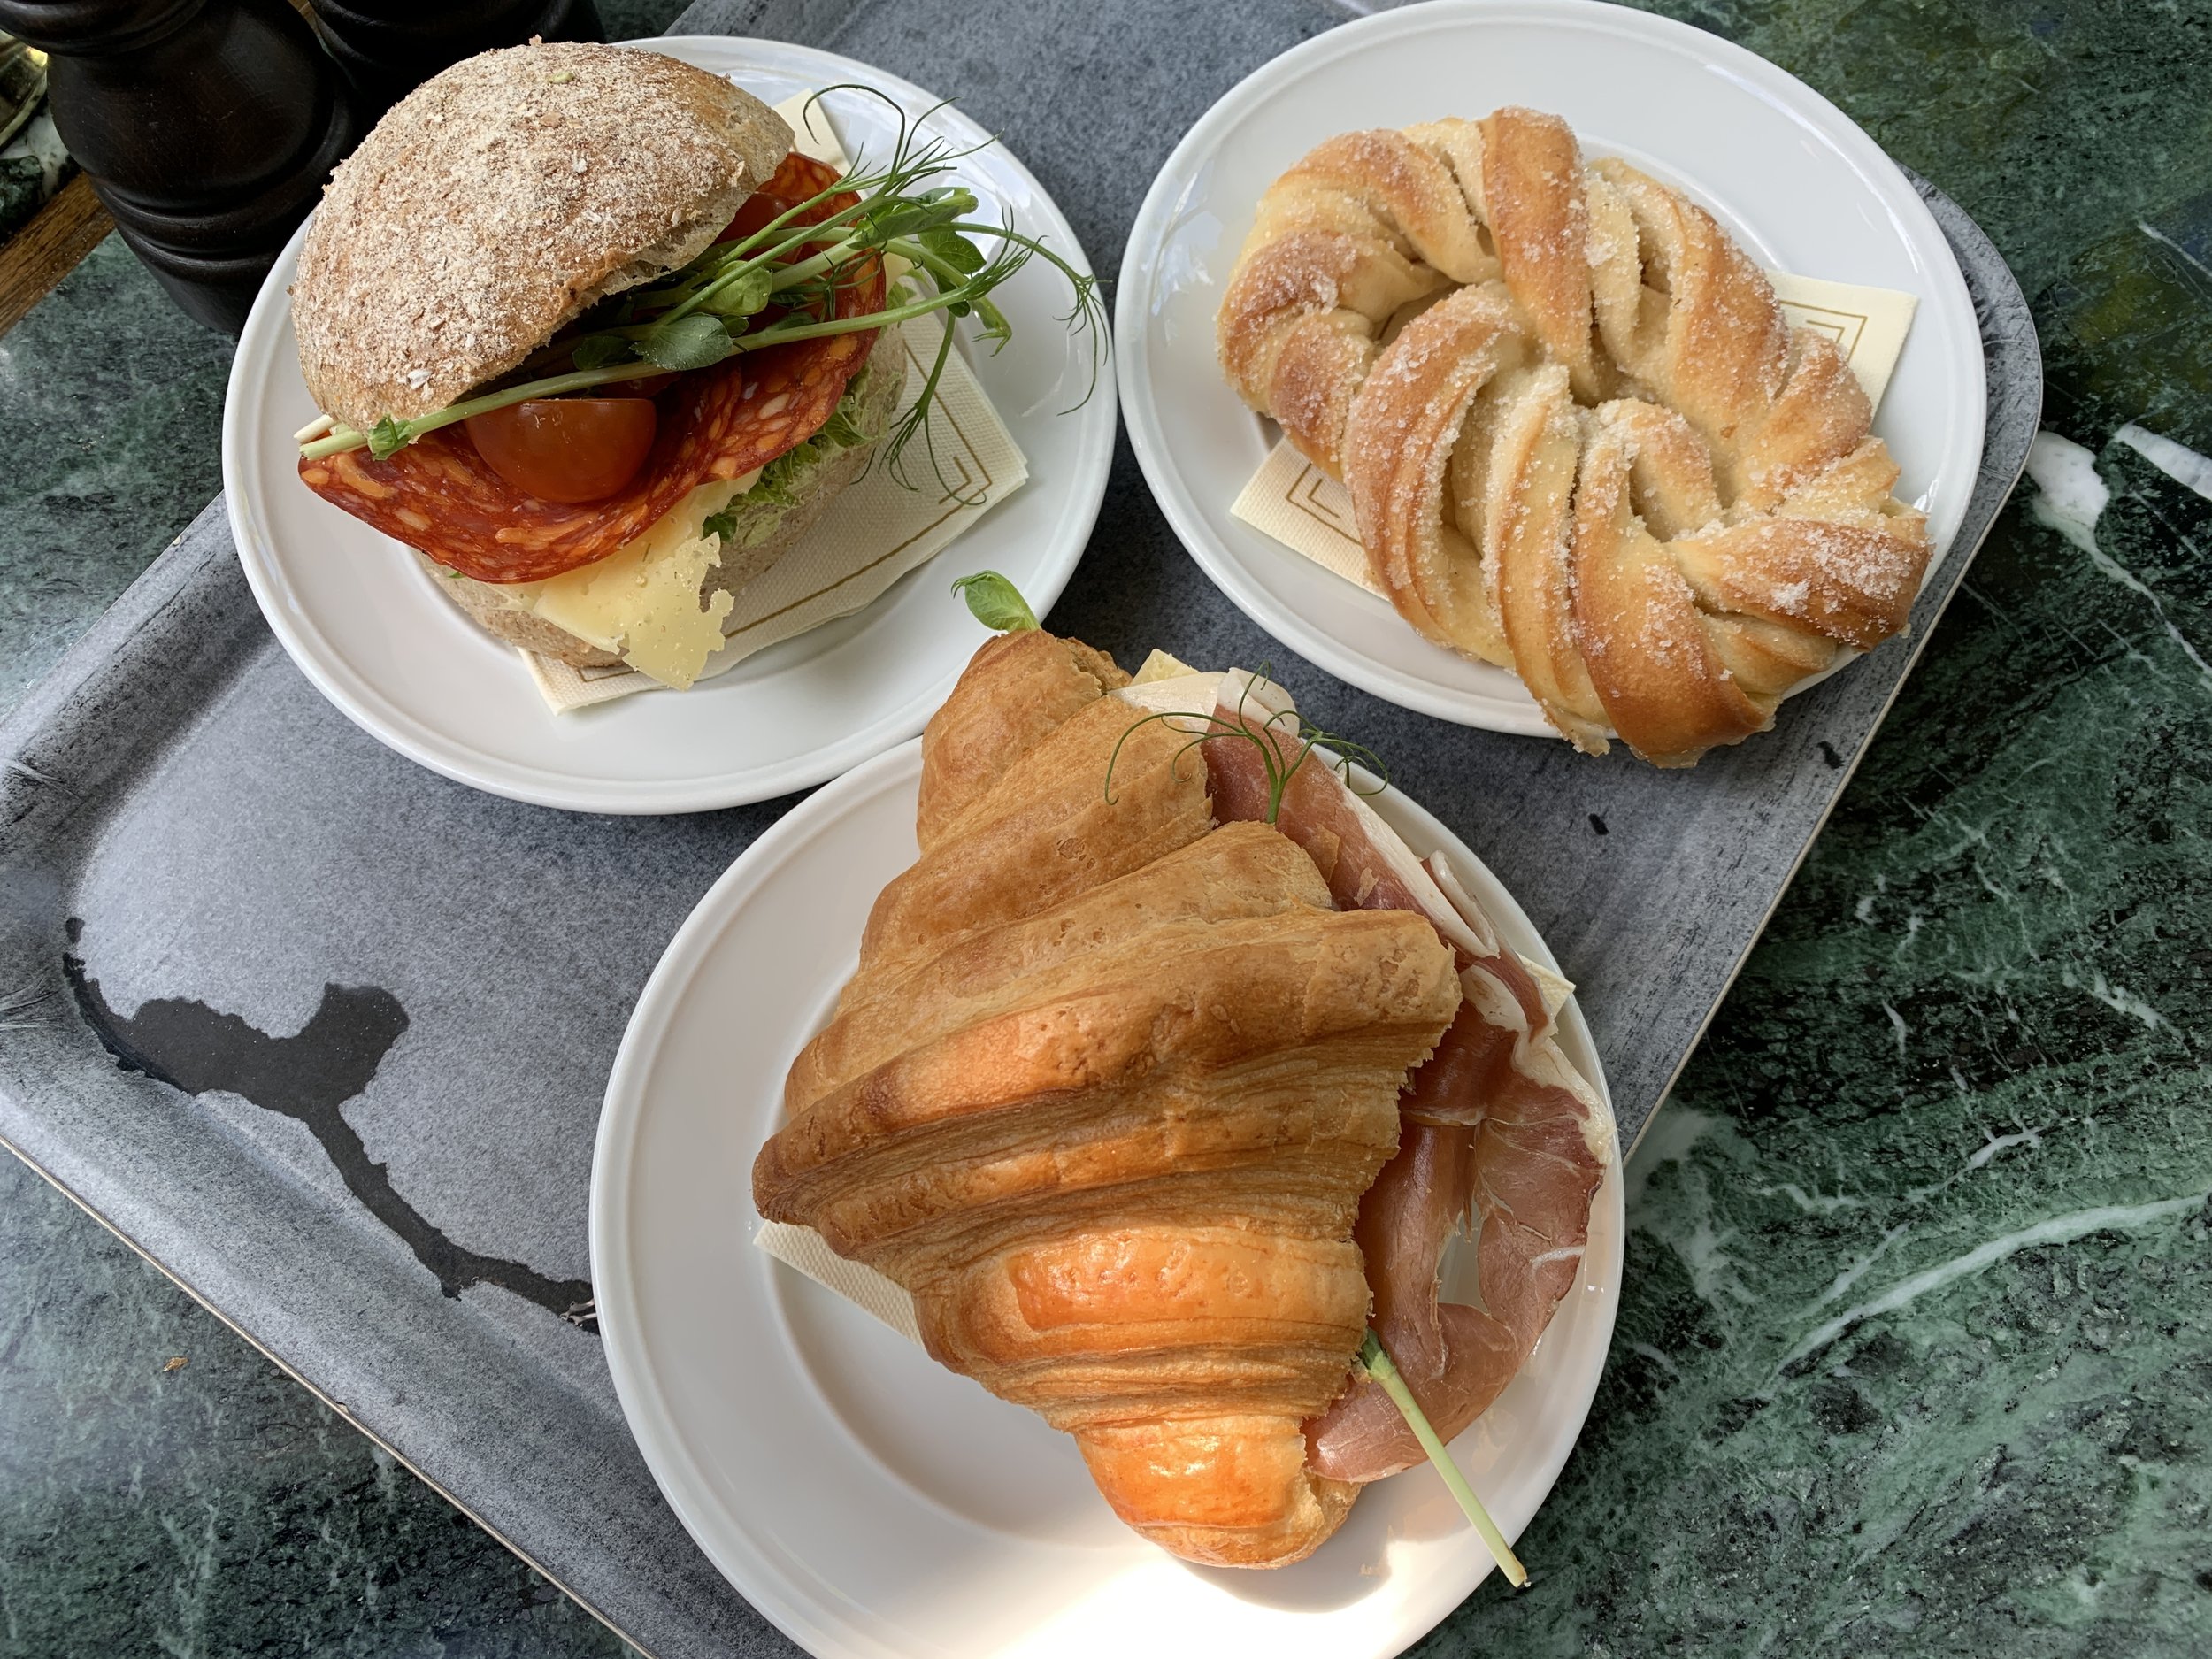
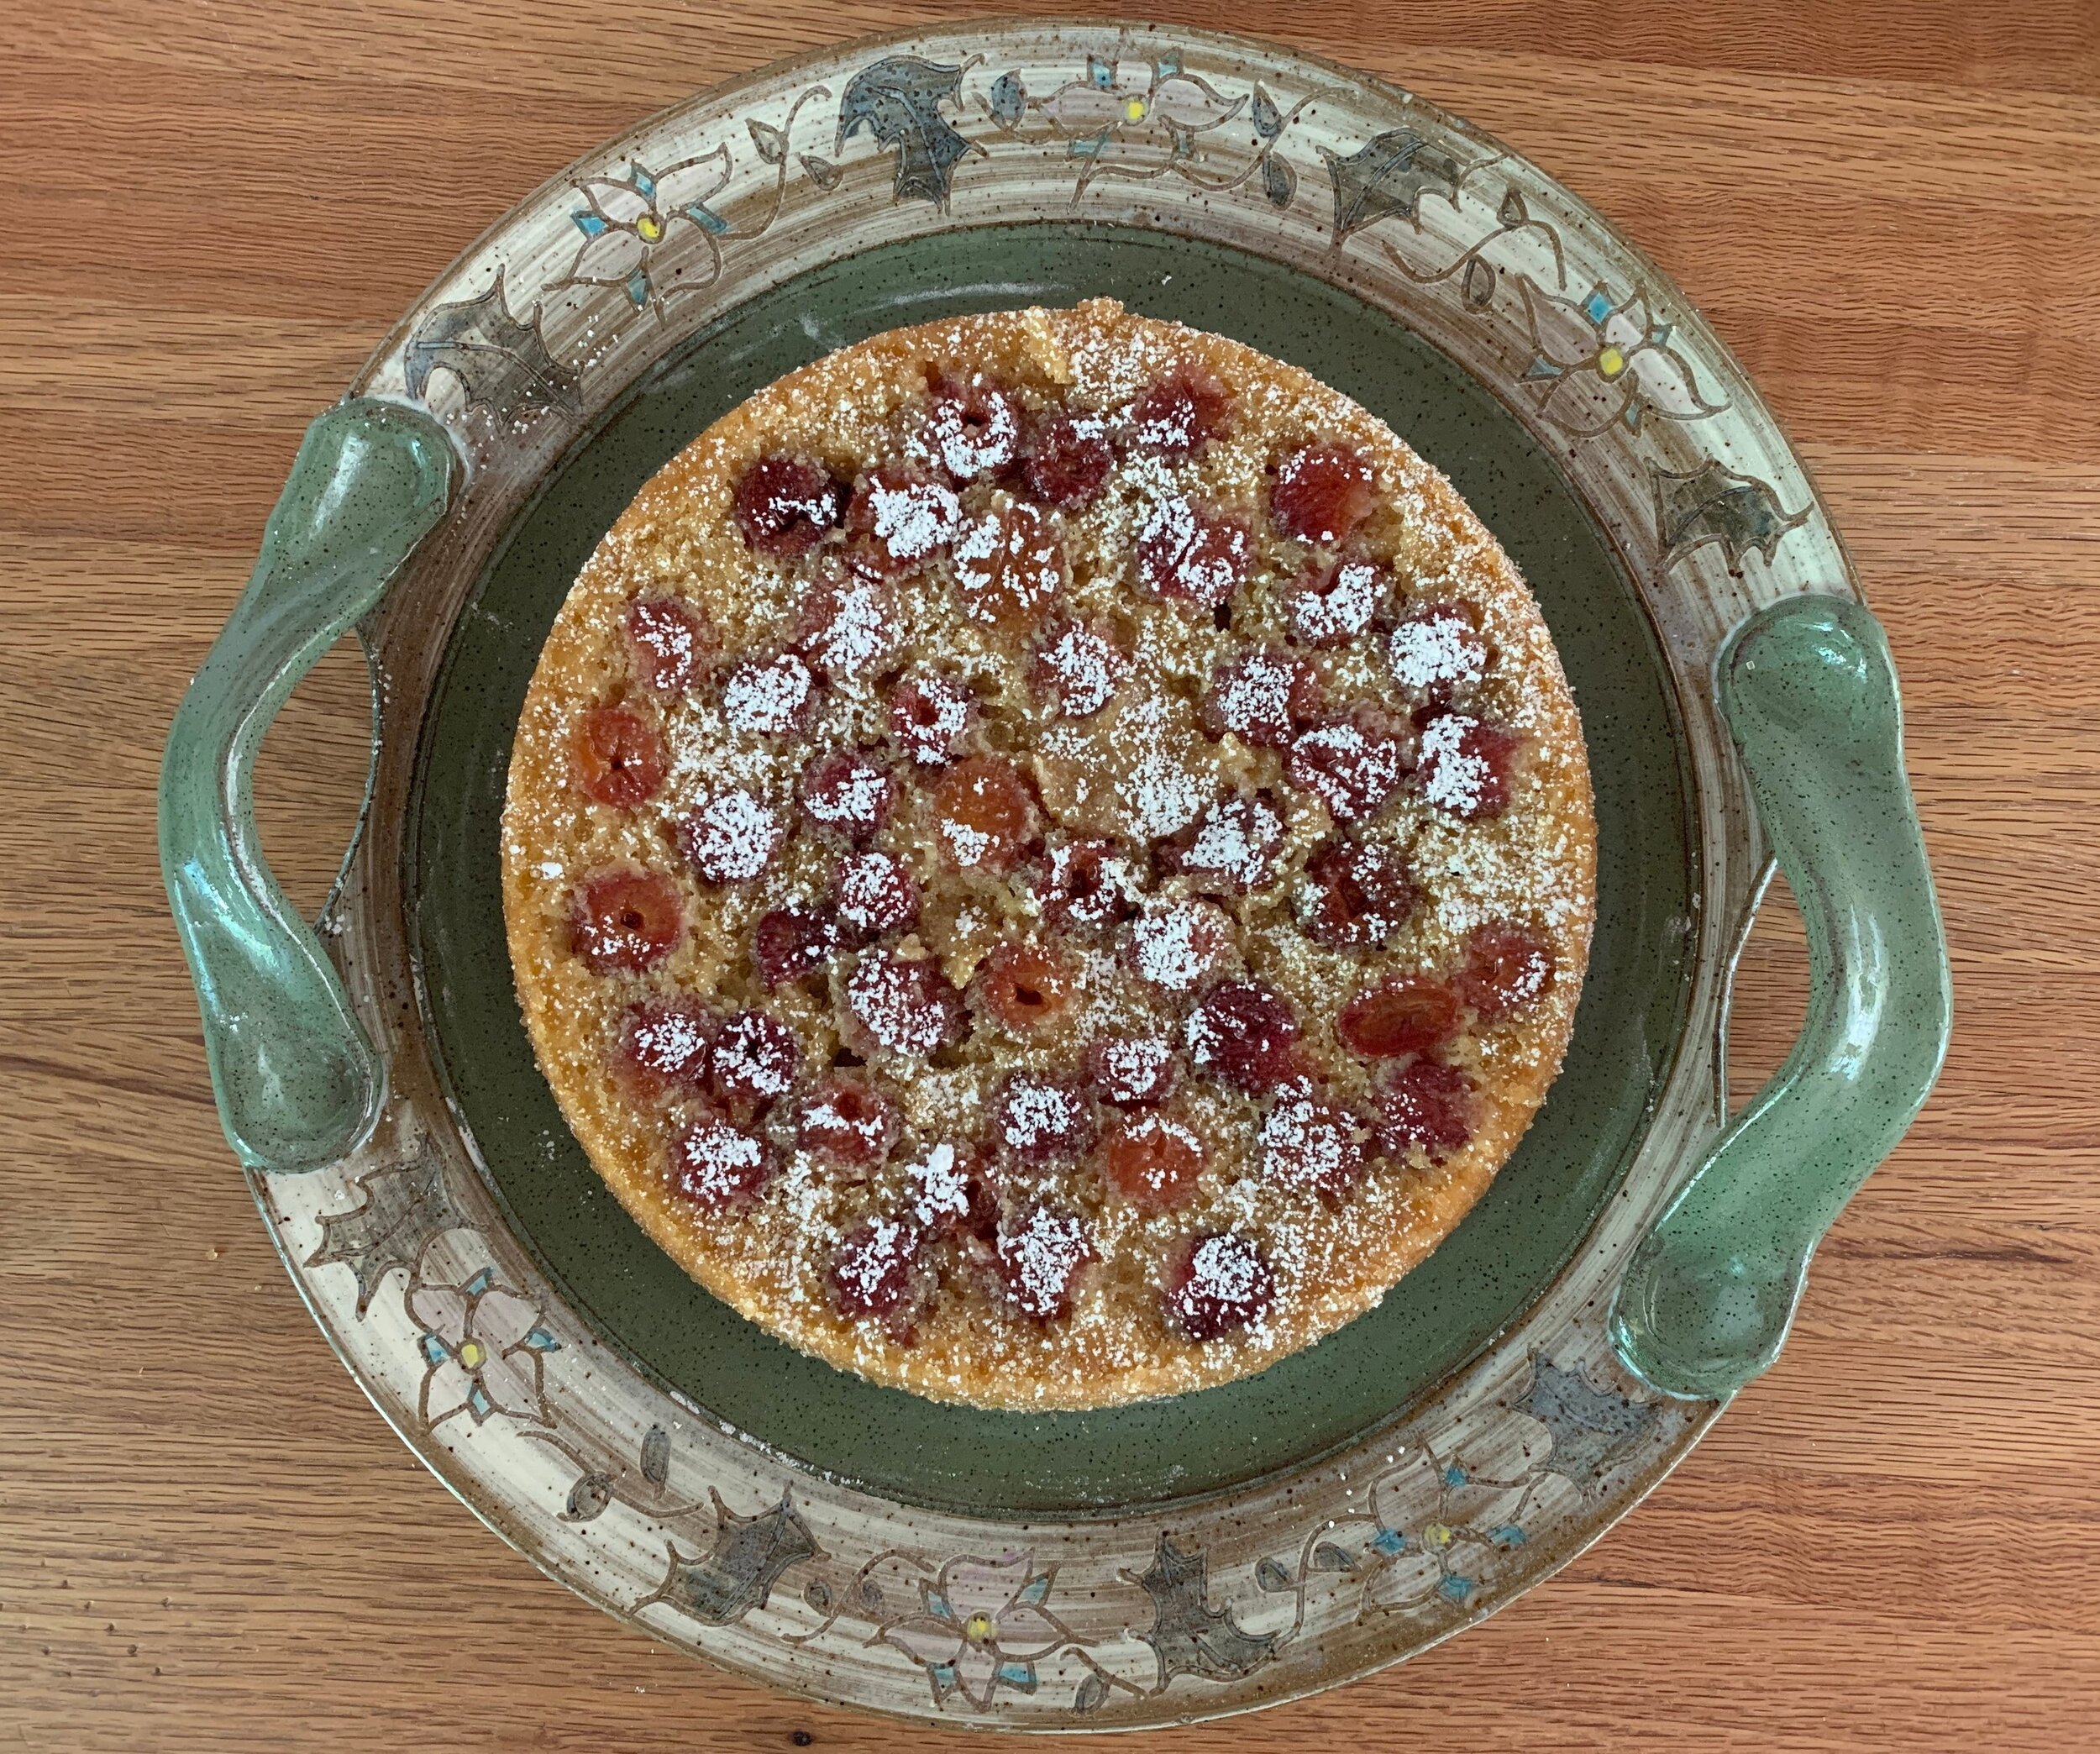
Time for pastries! We had chosen two different boller/bun versions from Flåm Bakeri. First is Solbolle, literally translated as sun ball or sun bun - a cinnamon (not always) swirled yeasted dough topped with pastry cream and baked. It’s reportedly one way Norwegians (particularly above the arctic circle) celebrate the return of the sun in late January after the sunless dark days of winter.

Second is Skulebolle/skolebolle or school bun - sweet yeasted bun (not unlike the solbolle) filled with pastry cream, iced and coated with shredded coconut. I hear it’s a favorite to celebrate the last day of school. Oh - by the way - boller is the plural of bolle.

Solbolle and Skule (or skole) bolle

We shared these goodies a little before we headed out for our fjord cruise and pronounced them both delicious! Nicely textured bun (not too soft, not too chewy), smooth vanilla scented cream and great flavor all around. Steve especially liked the skule/skolebolle for its coconut-ness.

Quick note - after doing a search about Norwegian buns there are many variations out there folks. Later in our travels we came across another place that sold fyltboller which basically translates as filled bun - talk about a blank canvas! At any rate any type of bolle/bun rules in Norway!

Let’s hit the fjord!

Boarding our cruise boat

The day was pretty perfect - breezy, 60s, sunny with scattered clouds - time to cruise. Though once we got out onto the water it was more chilly, especially on the shaded sides of the boat, and we had to jockey for just the right position to have a good view as well as stay protected and warm. Here a few scenic images for you.

Small village on the fjord

Motoring along

Snowcaps

Laegdafossen - the most stunning waterfall along the route (foss is Norwegian for waterfall)

The boat landed in Gudvangen where we hopped on a bus back to Flåm. A good trip indeed.

Next up - Bergen! I’ll be back.
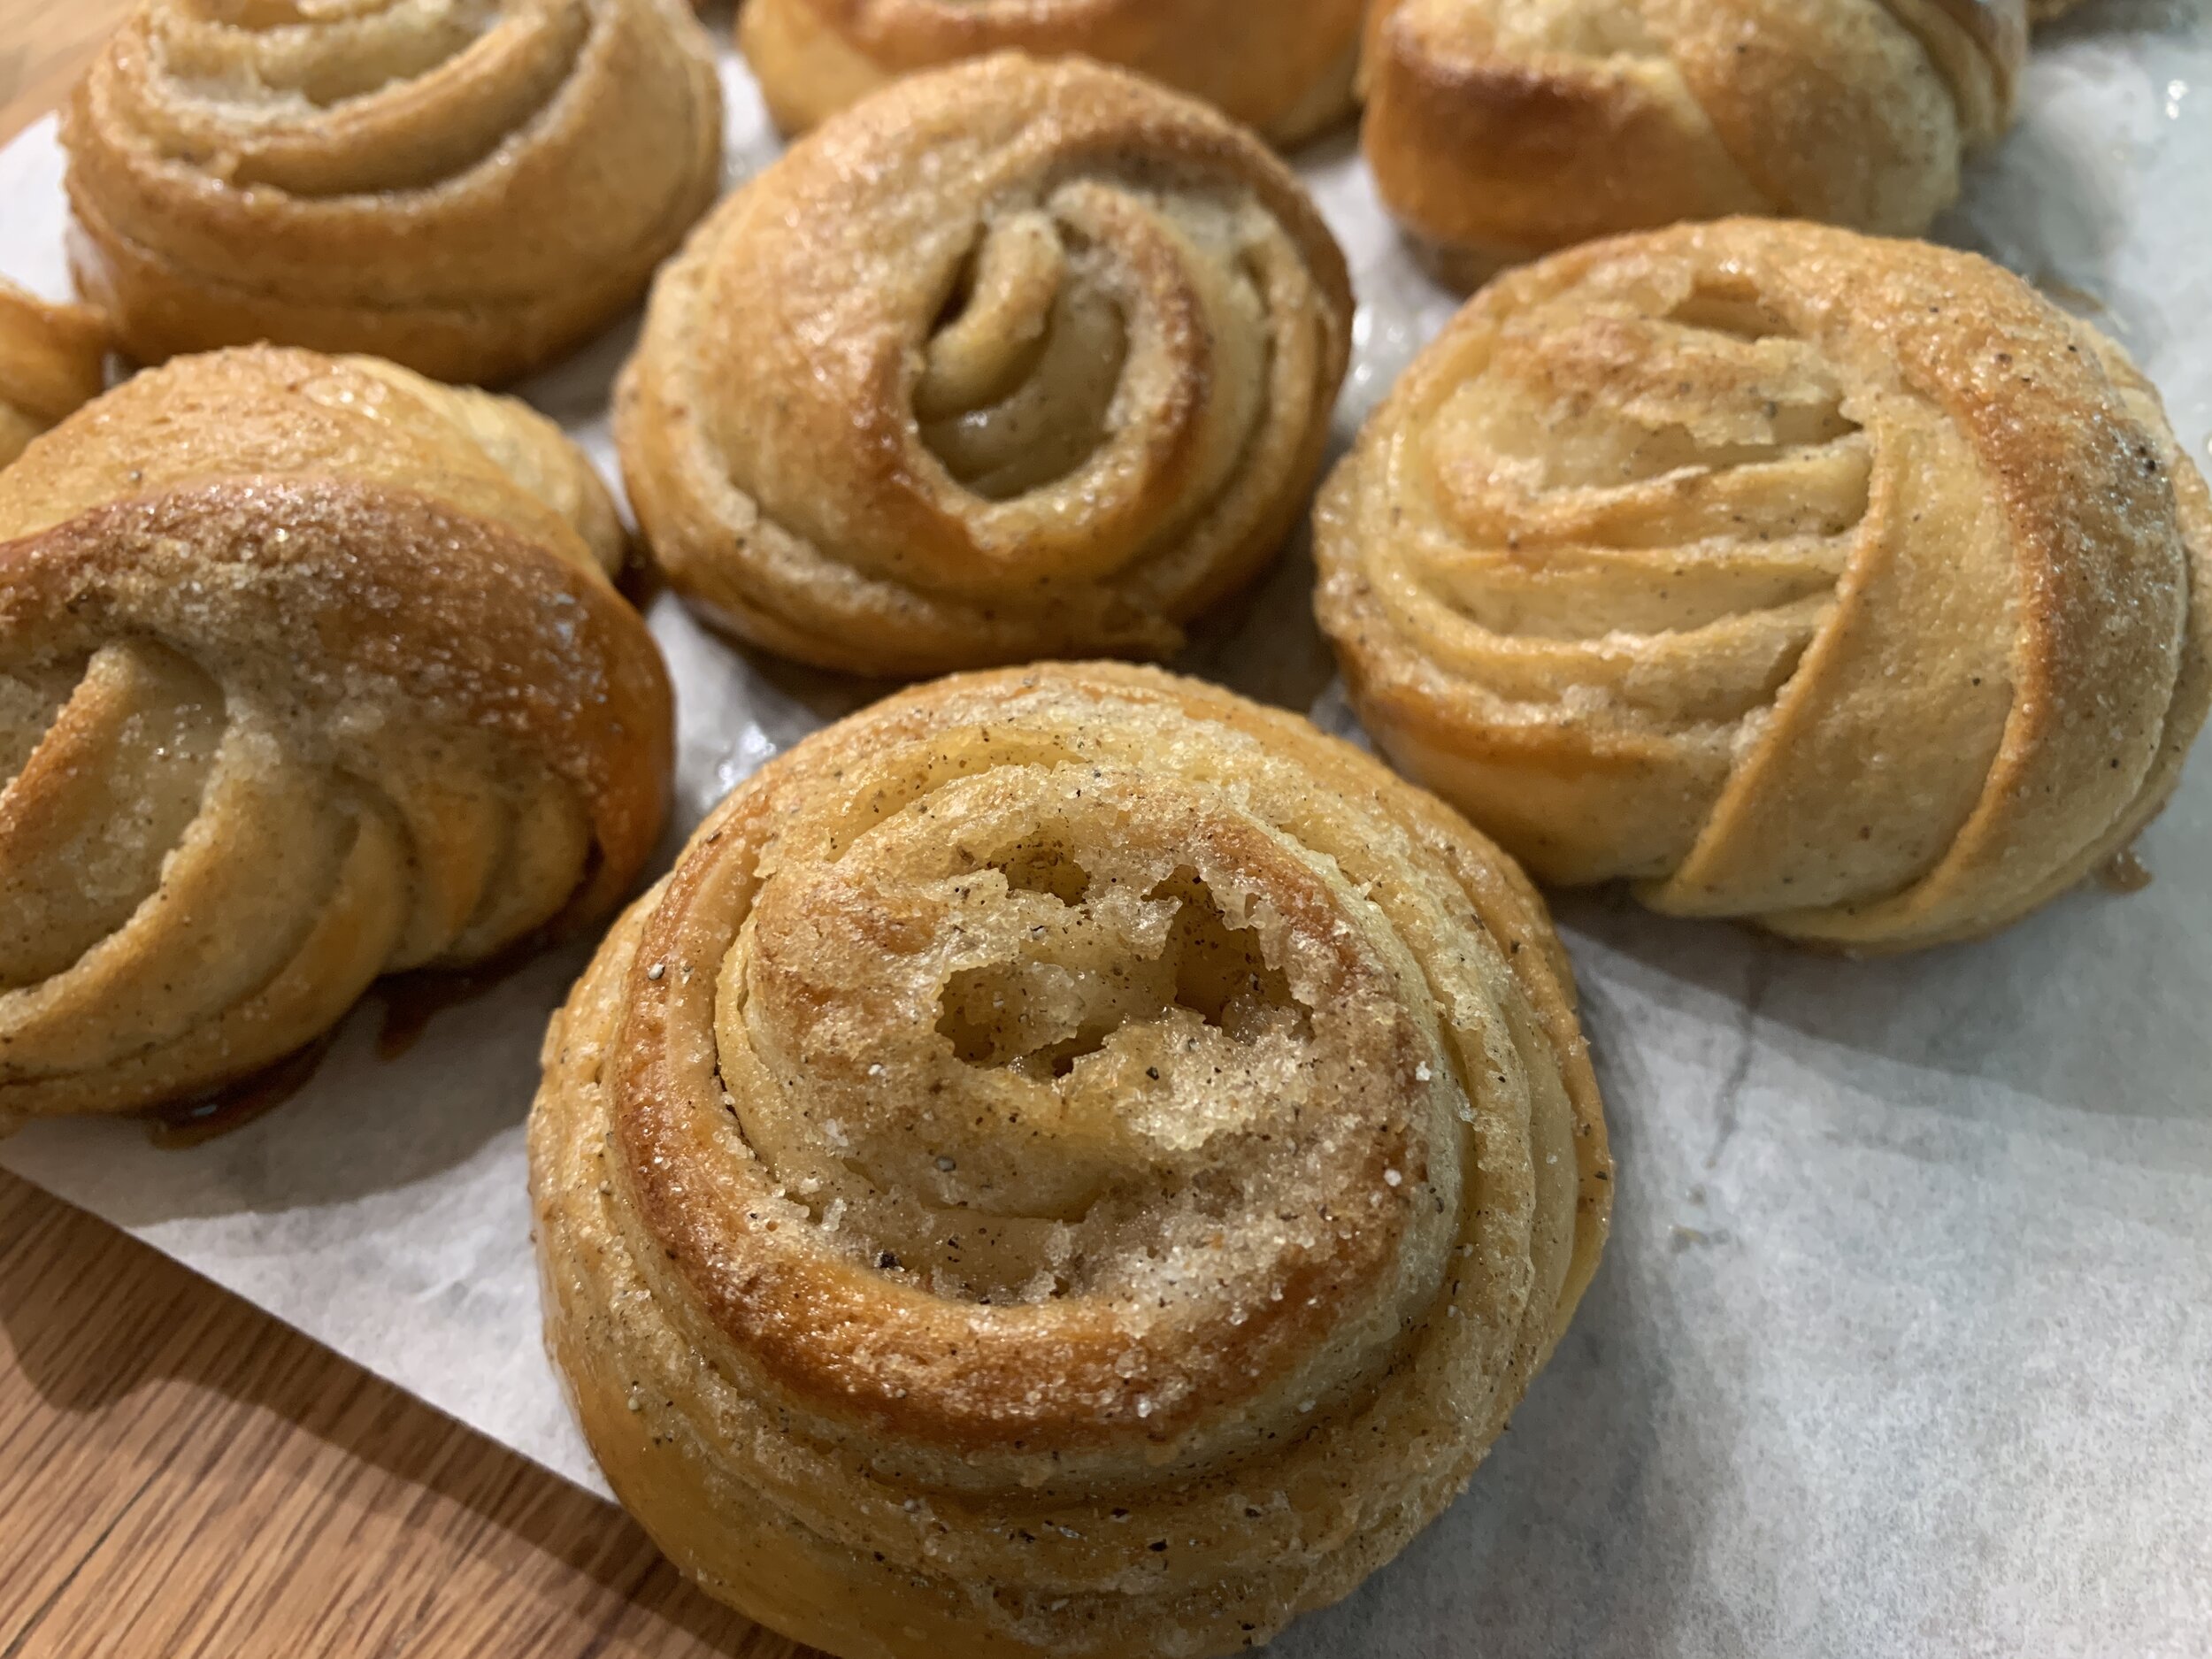
These make me smile

Fika in Stockholm

I believe I’m probably the gazillionth person to mention the Swedish tradition of fika which is essentially a coffee (or tea) break during the day when folks get together to set their cares aside, chit chat and enjoy a piece of cake or pastry. Much like the French le gouter or British afternoon tea, it’s a lovely tradition enjoyed by so many.

For our Stockholm visit we met up with British friends Richard and Pauline and enjoyed getting to know the city and see some of its many sights. One beautiful day we visited Skansen, a large park/zoo/open air museum on the island of Djurgården, just one of the many in the archipelago.

In one of the historic buildings in the town quarter we discovered a small cafe serving coffee and baked goods and decided to go for it. With a rustic cozy flair and a lovely outdoor space it offered us a chance to rest ourselves for a bit.

All four of us snagged a cup of coffee, Richard had a slice of rhubarb cake with crème anglaise and Pauline and I chose the almond cake option with a side dollop of whipped cream. Aside from the coffee, Steve abstained.

I wanted to see how the almond cake stacked up to the one(s) I had made and written about in this post a couple of years ago. Although somewhat disappointed (feeling my efforts had yielded a much more tasty result!), the topping had some crunch and the almond cake base was okay save for the rather dry edges. It was still a worthwhile comparison though. You never know unless you try!

Our treats were served on different patterned plates, and we enjoyed them out in the sunny courtyard garden before continuing our exploration of the Skansen grounds.

On another day of strolling from island to island in central Stockholm, we stopped at Thelins Grand Cafe on the Kungstradgarden, an outdoor gathering space with gardens at one end, cafes flanking and lots of people about. It was obviously a popular spot with a line out the door and outdoor tables at a premium.

Just A glimpse of the pastry case

In addition to the intriguing items in the case, my eye spied the variations of bullar, classic intricately twisted buns such as cinnamon and cardamom. Once again I was eager to sample a true Scandi version of bulle (the singular of bullar) after my own attempts at cardamom buns a while back. There was a lighter version that appeared to be sprinkled with a bit of sugar (top rear below) - I chose that.

Some of the cafe’s treats

We were happy to grab a table inside since it was pretty breezy and cool that day.

Richard and Pauline chose savory sandwiches and Steve continued to exert great will power and abstained except for a sparkling drink.

I anticipated that perhaps my bulle had a thin schmear of almond filling since it’s so commonly used in many Danish pastries, but, alas, I couldn’t really confirm that as I ate. It was tasty nonetheless with a light sweetness, simple lovely bun texture and delicious with my large cup of hot chocolate.

Here’s to the fika traditiion and all it stands for. Thanks Sweden!!

Apfelstrudel in Salzburg

As is my wont when traveling in Europe, I like to incorporate a pastry class or two into my itinerary. Even if it’s a topic with which I’m familiar, I love to quietly observe the instructor, the process, the group interactions and invariably pick up a tip or two. I might even chime in with a baking nugget of my own.

My only recollection of making apple strudel was back in the early days of my pastry schooling at Apicius in Florence. Since strudel is classically Austrian, one might ask - strudel in Italy?? Why yes as it turns out. Part of the curriculum at Apicius focused on specialties from all regions of Italy, each having its own culinary charm. In Northern Italy strudel is popular in the Trentino-Alto Adige which borders on Austria and, as a matter of fact, once belonged to Austria. As I envision the Apicius teaching kitchen, I see in my mind’s eye a large sheet of dough that we stretched and pulled until paper thin before rolling it around an apple filling and baking it to perfection.

As Steve and I were planning this trip I looked for a strudel class in or around Munich but alas, no dice. But never fear - the trusty internet led me to Edelweiss Cooking School in Salzburg, Austria just over the German border. We had Salzburg on our hit list so it seemed like the perfect thing to do.

View of Salzburg’s altstadt

We took the train from Munich to Salzburg, the bus into the old town then a short walk to Ursulinenplatz 9 where we found the school, literally built into the rock of Mönchsberg, a large part of the backdrop of the old city. Steve dropped me off and ambled off for some cemetery tromping.

The school’s space is cave-like with light and shadows playing off each other. Quick aside - I’ve done my best to lighten and reduce the shadowing in my photos - please understand!

Chef Johann was on hand to welcome me along with the 5 young German women from Augsburg who appeared just behind me. They were on a much belated bachelorette outing (thanks COVID) with some surprise activities planned for the bride-to-be (who actually was married three years ago!!). We were ready for action.

Johann began with a demo of mixing the apple filling and the initial rolling out of the strudel dough which had been made and allowed to rest for a couple of hours before the class. He then gave us a stretching demo to shape the dough into a larger rough square, thin enough to see through.

Preliminary round

All stretched out

He proceeded with the filling and rolling up of the strudel and then it was our turn. My compatriots grouped off at two tables as a pair and a trio, while I was stationed at a table alone with Johann as my partner.

First up - the apple filling. As Johann pointed out, strudel is very forgiving and something you can adjust to your whims. Add a bit more sugar or cinnamon to the apples, add dried cherries or cranberries instead of raisins, add nuts, use apricots or a savory filling like cabbage - all kinds of options.

The apple work had been completed for us - peel, core, slice about 4 cups of apples (e.g. Golden Delicious, Granny Smith, Gala or even a mix), sprinkle on a couple tablespoons sugar, a couple of shakes of cinnamon and a couple tablespoons raisins. Mix it up and set aside. Remember - your dough must be made ahead and ready for you, so wait to mix up your apples until assembly time.

Johann’s dough recipe is simple: 210 g / 1.66 cups flour (recommended ~12% protein which FYI is in between King Arthur’s all purpose and bread), 125 ml / 1/2 cup water, 1 tablespoon neutral oil like sunflower or canola (consider olive oil for a savory strudel) and 1/4 teaspoon salt. Blend all in a bowl and knead by hand to a smooth, silky dough. Lightly oil the dough, cover and rest two hours.

NOTE: I did a quick review of a couple of other strudel recipes, both of which use egg yolk and vinegar (helps tenderize) in the dough and one which utilizes a long mixing time and an overnight rest in the fridge before proceeding. Hmmmm . . . . . . future project methinks.

Rolling and stretching time! It’s very helpful to have a square table, something you can walk around to stretch the dough. Cover the work surface with a large tea towel, linen or oilcloth tablecloth, flour it and place the dough in the center. Flour the dough surface, turn over and flour again; roll out to a round (mine is rather oblique). Johann cautions not to lift/rotate the dough as you might for tart or pie dough - just roll.

Now using the backs of your fisted hands, get under the dough and stretch it out all around to a rough square. The dough may tear but is forgiving and will be wrapped up around the apples anyway.

Whoa! Mine isn’t nearly as nice as Johann’s.

Trim the thicker, irregular edges with a pizza cutter then drizzle 2-3 tablespoons melted butter over the dough (don’t brush since it may tear the dough) then a couple tablespoons bread crumbs. These help absorb some of the liquid from the apples during baking.

Place the apple mixture over the lower third of the dough, fold the sides over and the bottom up . . .

then using your cloth as a lifter, roll up the whole thing, leaving it seam side up. Snug it up a bit at the ends if needed so it will fit into your pan. Pretty rough and tumble, eh?

Have a buttered or parchment lined 1/2 sheet pan or metal 9-ish by 13-ish baking pan at the ready and, using Johann’s method, pick up the strudel with your towel or cloth and gently roll it onto/into the pan so the seam side is down. Brush melted butter over it and bake in a preheated 400º oven for about 30-35 minutes.


We all gathered round the table for a lunch of delicious goulash and a sampling of the soufflé-like Salzburg specialty Nockerl (a future post perhaps?) that we had whipped (literally!) together during class.

Salzburger Nockerl

Then it was time to sample our strudel, dusted with confectioner’s sugar and hot out of the pan.

Crisp crust, mellow apple flavor, not too sweet - all in all a worthwhile endeavor and a fun experience in old Salzburg. Thanks Johann! I look forward to making it at home, especially when autumn rolls around.

Steve and I finished our Salzburg visit with a boat ride on the Salzach River and a stroll through Mirabellgarten (Sound of Music anyone?) before our return train ride back to Munich.

Happy spring and take care until next time. Who knows what I may have up my sleeve.

Swedish (cardamom) buns

IMG_0927.jpg

Time for more Swedish fun! Once again inspired by Brontë Aurell’s “Brontë at Home” as well as Beatrice Ojakangas’ “The Great Scandinavian Baking Book” (a recent acquisition as a result of a birthday gift card!) and a NYT article on cardamom buns, I’ve plunged into the depths of bun recipes and options. Whoa - so much out there!

As I’ve come to learn, the Swedes (and let’s be honest, Scandinavians in general) are HUGE bun lovers - cardamom, cinnamon, blueberry just to name a few. The dough is a pretty basic enriched dough made with milk, usually (but not always) some egg, butter, sugar, salt, yeast, cardamom and flour of course. Once the dough is made and rested/risen, you roll it out and spread it with a filling of butter and sugar (white or brown, either way), fold it in thirds, roll out again, cut it into strips, twist, wind and tuck and voilà, there’s your classic Swedish cardamom bun.

The process as just mentioned is the less buttery bare beginnings of a fully laminated dough, and you can take it in other directions with different shapes and fillings. Think jam, chocolate hazelnut spread, citrus zest, chopped toasted nuts, fresh or dried fruit, almond paste . . . the list goes on.

My first attempt sprang from the NYT article on classic Swedish cardamom buns, and, being intrigued by the shaping technique, I was ready to give them a try. One sees a hint of the shaping in the article images although the shaping instructions in the recipe didn’t give my brain a good image to work with. I played around with it, finally resorting to an online video or two which helped a lot. Just remember - there’s more than one way to shape a bun!

If you’re interested in checking out the NYT article, a quick note on the filling - I found it to be too much butter. There was a LOT of butter leaching out during baking so I’ve reduced the filling amount for this post and for my future bun projects.

As you see below I ended up with a number of different looks to my buns as I twisted, coiled and tucked. Interesting indeed. The one on the bottom left looks like a conch shell, don’t you think?

IMG_0920.jpg
IMG_0926.JPG

After reviewing WAY more recipes than I should have, the more I compared them, the more I realized that I can simply take my base croissant détrempe, the dough BEFORE any added butter block/laminations occur, sub in some egg for part of the milk, bump the butter and sugar up a touch, throw in some vanilla extract and add cardamom or cinnamon or a spice mix of choice and you have your basic bun dough. Here’s the recipe I came up with.

In addition to being able to create a variety of buns from that base dough, you can also take that dough even further by adding a butter block and fully laminating it too! It then becomes Danish pastry dough (wienerbrød) like that in the Danish Kringle I wrote about here. Lots more buttery layers to be had.

Let’s take a look at the steps for the Swedish cardamom buns (let’s call it my first trial and error go at it).

I’ve had some green cardamom pods on hand for a while now - time to use these babies. Open the cardamom pods, remove the seeds, toast them over medium heat then crush and grind them with a mortar and pestle. Generally around 6-7 pods will yield seeds to give you about a teaspoon of ground cardamom. You’ll need 1-2 teaspoons for the dough (to your taste), another teaspoon (optional) for the filling and an additional teaspoon to make cardamom sugar for sprinkling. Remember - feel free to sub in other spices!

IMG_0894.JPG
IMG_0914.JPG

Make the dough as directed in the recipe. It will be a bit sticky. Lightly ball it up, place in a greased bowl, cover with plastic wrap and let rest/rise about an hour at room temperature. Give it a good stretch and fold then ball it up nicely. Wrap tightly with plastic wrap and refrigerate at least 4 hours or up to overnight. I usually make my dough in the late afternoon/early evening for use the following morning. It’s all about planning ahead.

IMG_0896.jpg

On baking day prepare the filling by blending 80 g soft unsalted butter with 80 g sugar (white or brown as you wish), one tablespoon flour, a teaspoon vanilla plus a teaspoon ground cardamom if desired.

Note: You can ramp the filling up by grating 80 g good quality almond paste then blending it into the butter/sugar mixture.

Remove the dough from the fridge about 20 minutes before rolling, filling and shaping. On a lightly floured surface roll it out to a ~ 13”x18” rectangle, the short edge parallel to the work surface.

IMG_0902.jpg

Spread the filling in an even layer then fold the dough in thirds, the top down toward you . . . . .

IMG_0903.jpg

and the bottom up over that.

IMG_0904.jpg

Roll the dough out a bit more to ~9”x14” and trim any uneven edges. By the way - don’t get hung up on precise measurements, just go with the flow.

IMG_0905.jpg

Cut 2 cm strips. I also created a couple of scrap buns by braiding some of the edge pieces and coiling them up. Why not?!

IMG_0906.jpg

Pick up and gently stretch each strip, wrap it around three fingers a couple of times then bring it across and tuck it under. NOTE: in the future I’ll twist the strip as I wrap it for an even greater twisty look.

This is where I was a bit confused and my first attempts were clunky. but once I figured out the moves it worked out OK. Even so - variety is the spice of life so do whatever makes you happy.

Hmmmm . . . . going from the top down? Probably not.

Hmmmm . . . . going from the top down? Probably not.

Hmmmm . . . . not really it, but I do like a basic coil

Hmmmm . . . . not really it, but I do like a basic coil

Still a mish mash but, once I watched a video I finally got the cross-over-the-top thing to happen!

Still a mish mash but, once I watched a video I finally got the cross-over-the-top thing to happen!

At any rate, once you’ve shaped your little heart out, place the buns on parchment lined pans, cover lightly with plastic wrap and let rise 30-45 minutes.

Meanwhile heat the oven to 350ºF. Once risen, brush the buns lightly with egg wash and sprinkle cardamom sugar (1/2 cup mixed with a teaspoon ground cardamom) on top.

You can also wait on the cardamom sugar until after baking in which case, once out of the oven, brush your buns with simple syrup and sprinkle with the sugar.

IMG_0917.JPG

Bake around 10-15 minutes or until nicely golden brown. Remember all ovens are different so watch what’s going on in there!

IMG_0926.JPG
IMG_0927.JPG

I haven’t fully decided how I feel about the flavor of cardamom on its own. It can be a bit overwhelming but mixed in with other spices like cinnamon, coriander, ginger and nutmeg, I find it’s a very pleasing combo. Steve and I gave the overall bun texture and crumb a thumbs up. Even a couple of our neighbors who weren’t familiar with cardamom thought they were pretty darn good. Yay!

I did one more batch (doubled) along the cinnamon lines, this time with some variants on the twisty coils. Of course I’ll keep playing around with it.

IMG_1172.JPG

Now get into your kitchen and create your own shapes and fillings - and just have fun!

On a final nature note, here are a few images from my August walks. Summer marches on.

Keep a steady course, stay safe and find comfort in the trees, skies, flowers and plants. It helps.

Hydrangea

Hydrangea

Black-eyed Susan

Black-eyed Susan

Summer annuals going strong

Summer annuals going strong

Mid-July update

IMG_1149.jpg

Seeing Queen Anne’s lace in bloom is a sure sign of summer’s march into August and beyond. Still plenty of time for outdoor enjoyment, fresh air and sunny skies.

As we come to grips with the fact that (whoa!) it’s already mid-July, would any of us have foreseen all that’s happened in the past four months?! No sir.

Lately we’ve had quite a string of hot days, punctuated over this past weekend with pleasant days, cool nights and clear, low humidity skies. Baking is happening in waves, and now seems as good a time as any to share a few of the things I’ve been making in recent months.

Cinnamon oat crunch scones

Cinnamon oat crunch scones

A number of projects were done with an eye toward becoming blog posts and are currently in their draft phases. I’m working on them bit by bit, often side tracked by various other at-home activities that seem to take precedence. Time has taken on a much different sense, don’t you think?

Some of these goodies go into the freezer for future enjoyment, some are shared with neighbors and family and some go into the occasional pastry order that pops up every now and then.

Chocolate hazelnut swirl brioche loaf

Chocolate hazelnut swirl brioche loaf

Gateau renversé aux cerises (cherry upside down cake)

Gateau renversé aux cerises (cherry upside down cake)

Mixed berry mascarpone trifle

Mixed berry mascarpone trifle

Swedish cardamom buns

Swedish cardamom buns

Baguette

Baguette

Croissant

Croissant

Stay tuned! Baguette! Brioche! Swedish buns! Yippee!!

Meanwhile enjoy summer, be kind and helpful. It works.

Cinnamon knots

IMG_4395.jpg

Having been inspired by my recent purchase of Richard Bertinet’s latest book “Crumb”, I felt it was time to make some cinnamon knots with my own take on his approach to this tasty treat. Warming spices, brown sugar, butter, tender slightly sweet dough . . . aaahhh. Perfect for autumn which has finally arrived in its full glory. Too bad that once the the brilliant reds and oranges are making us smile, we get the winds and rains of late October and early November to blow them all down. It’s nature’s way.

For this project I utilized a basic cinnamon roll type sweet dough using a recipe I discovered on Ambitious Kitchen.com (minus the cream cheese frosting). Once the dough is mixed and undergoes the first rise, I roll it out into a 14”x15” rectangle and spread it with softened butter which is topped with light and dark brown sugars and cinnamon. With the 15” longer edge parallel to the edge of my worktop I fold the dough up onto itself and cut 1” wide strips.

Now it gets a little messy. Leaving the folded edge end intact, cut the dough the length of the strip and twist the two portions around each other. Then form knots. As you can see, the dry stuff fell everywhere, but I simply scooped it onto the shaped knots. Next time - mix the dry with the butter and spread away so it all holds together!

IMG_4389.jpg

Once all the knots are shaped, place them on a parchment lined sheet pan (cover loosely with plastic wrap) and give them a 30 minute rise while heating the oven to 350ºF.

IMG_4393.jpg

Bake for about 20 minutes until golden brown.

I opted for a light drizzle of a milk/confectioner’s sugar/vanilla extract glaze to give them a certain je ne sais quoi.

IMG_4395.jpg

These were wonderfully tender, buttery and cinnamon-y - the perfect treat for a blustery autumn day. I served them at a morning coffee gathering down the street, and they were a hit!

I’ve been very intrigued of late with various twists, coils, spirals, knots or whatever shape one might imagine when creating what I’ll refer to as a “sweet roll” for lack of a better term. As the holiday season approaches I hope to add some new crowns, festive twists and star shapes to my sweet dough baking projects.

It’s all about learning and experimenting!