Apple pie tart
/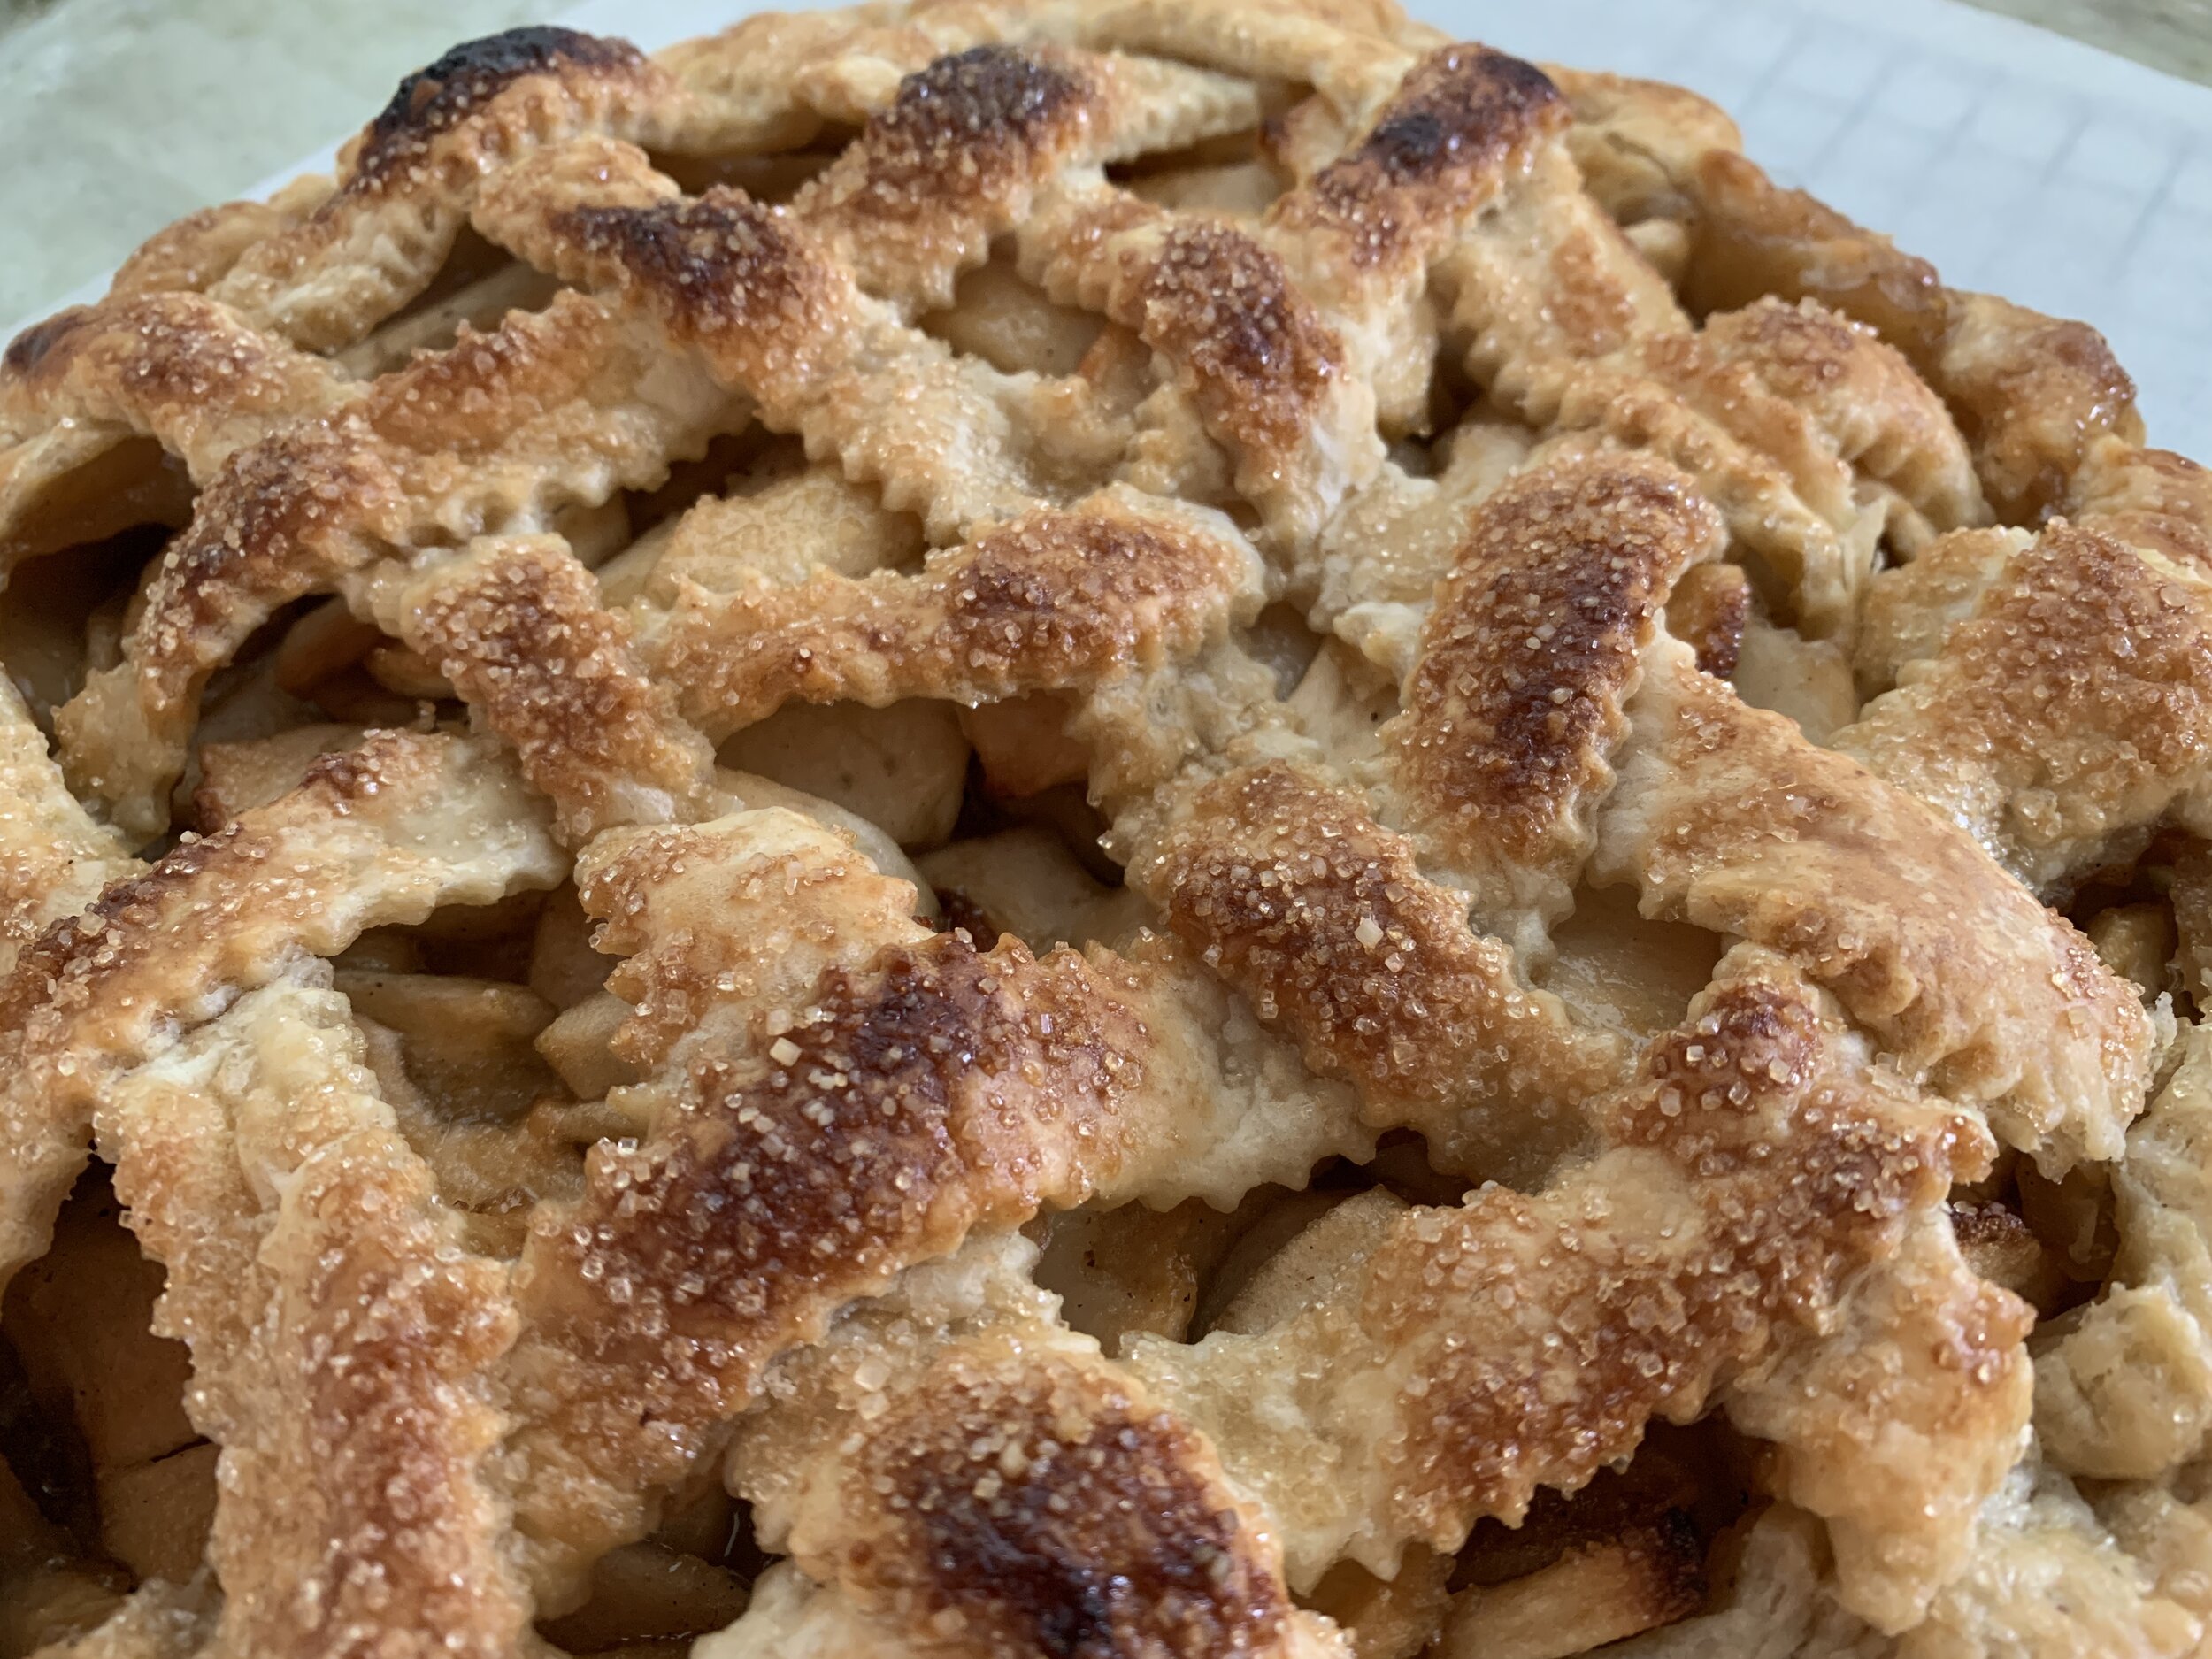
It’s a pie! No wait, it’s a tart! What?? Frankly, it kinda looks like some kind of coral reef creature.
For a recent supper at cousin Jen’s, I was in the mood to make something apple. Besides that, I had sprung for a bottle of boiled cider from King Arthur Flour and was so ready to try it out. It’s made in Springfield VT, a state which Steve and I called home for nearly 12 very enjoyable years.

If you’re a regular reader of this blog, you’ve most likely realized by now that I LOVE reading baking and pastry books, comparing recipes and techniques and continuing to gain knowledge about this craft. They give me much pleasure and inspiration to boot! Some of my faves are FOOD 52’s “Genius Desserts” and anything by Rose Levy Beranbaum. They are chock full to overflowing with cool stuff.
As I approached this apple project I reviewed apple pie recipes (again!) from “Tartine”, “Art of the Pie”, “The Baking Bible” as well as “Genuis Desserts”. GD’s is essentially a review of RLB’s recipe for fruit pies, creating a filling with concentrated flavor by cooking down the juices. I’m IN!
In my fall 2018 post on a couple of apple/pear/berry tarts, I followed Tartine’s method of cooking the apples in butter and sugar first then draining off the liquid and cooking that down. They were deelish! The Genius Desserts/Rose LB approach is a bit different - macerating but not cooking the fruit, then reducing down the drained off liquid to a lovely caramel.
Here goes! This go-around I used a combo of Granny Smith and Jonagolds. Years ago I used to think peeling and coring apples was such a chore, but it’s amazing how one can get into a rhythm and actually make a bit of sport out of it, racing against the clock to see how fast you might finish. It’s so satisfying!

Once the 2.5 pounds of apples for a 9-inch tart are peeled and cored, slice them up into ~1/4 inch slices and toss them in a large bowl with 50 g light brown sugar (or dark if you prefer), 50 g granulated sugar, a tablespoon freshly squeezed lemon juice, 1/4 teaspoon fine sea salt, some freshly grated nutmeg and 1/2 teaspoon cinnamon. Cover and allow to sit a room temperature for at least 30 minutes and up to three hours to juice ‘em up.
In the meantime take your favorite pâte brisée, roll it out about 1/8” thick and line your chosen tart pan or pie plate. I chose an open 220 mm tart ring this time, and since I planned a lattice top I made sure I had a 2-crust quantity of dough on hand. Cover the dough with plastic wrap and hold in the fridge until ready to fill.

I rolled out the dough for my lattice as well, cut my strips and held them in the fridge until ready for final assembly. I thought I’d be creative and cut curvy pieces, but, when it came time to create my lattice, the strips didn’t really feel like staying very curvy until I coaxed them into submission. I made the best of it and it worked out just fine and dandy.

Ready to finish the filling! Transfer the apple mixture to a colander set over a bowl and let drain to release anywhere from 1/2 - 1 cup liquid. Sounding good already.
Pour the juice into a small saucepan along with 2 tablespoons unsalted butter and bring to a boil. Cook until caramelized and reduced to about 1/3 cup. Then I added a tablespoon or so of boiled cider to intensify the apple flavor.
Transfer the drained apples back into the large bowl and mix them with 1 tablespoon plus 1 teaspoon of cornstarch.

Place a baking stone or empty sheet pan on the bottom rack of your oven and heat to to 425ºF.
In the meantime blend the reduced apple caramel liquid into the apples and transfer it all into the lined tart ring. Create the lattice, trim, tuck and crimp or flute the edges. Brush with milk and sprinkle with raw sugar. Hold in the freezer while the oven heats.

Bake approximately 50-55 minutes. If your crust edges are browning too quickly, place an aluminum foil ring over them. Watch for bubbling juices and tender fruit when poked with a small, sharp knife. My pie-tart baked about an hour before I was happy with the bubbles and texture. Looking pretty tasty!

One problem with this baby is that a small section of the crust bottom and edge seemed to collect a lot of juice and didn’t bake through. It was also an interesting challenge to get it out of the tart ring. I ended up cutting a cardboard round slightly smaller in diameter, slid it under the pie/tart and lifted it up and out of the ring. Whew. Maybe a solid pie plate or lovely fluted ceramic pie dish next time, eh?
No matter - it was delicious, the boiled cider adding just the right tang and deep apple flavor. A classic, particularly topped with a scoop of vanilla ice cream.

Always remember - there’s more than one way to skin a cat!
Now can’t you just imagine the hint of spring just around the corner? It won’t be long folks. Happy baking!