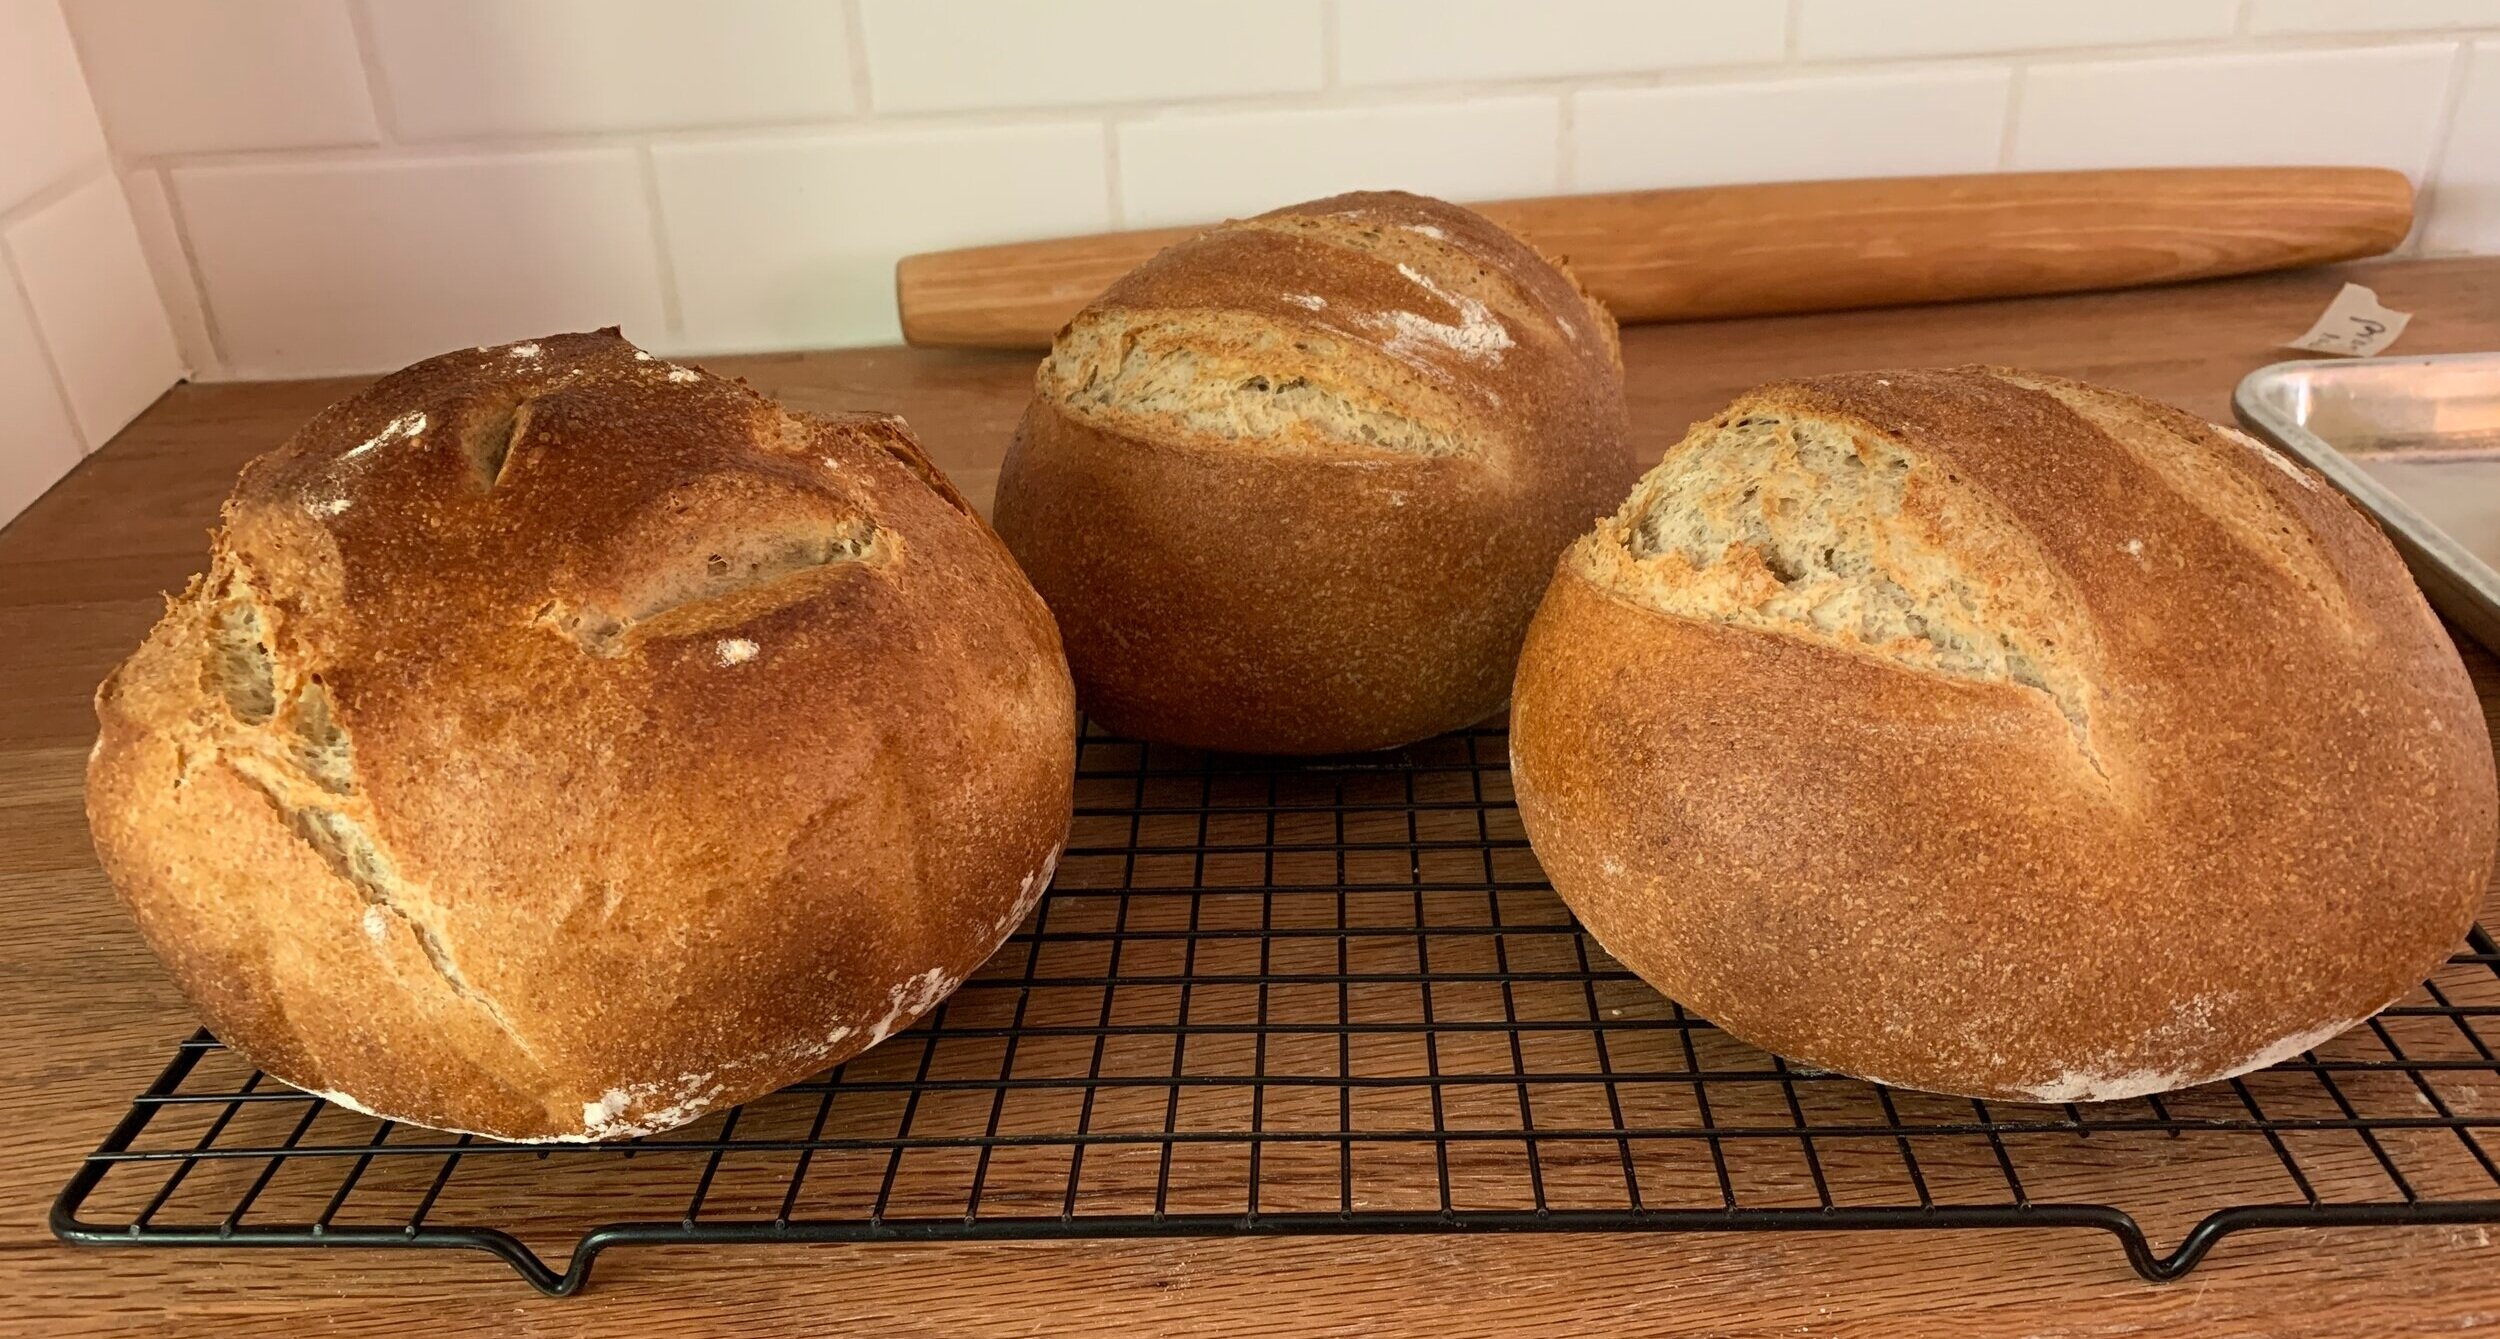
Giving thanks for daily bread: Semolina rye 2 ways

B0A379E3-8A65-4BAD-99F5-D090C98D69C3.jpg

This one was fun to work on. I adapted a King Arthur Baking Company direct dough recipe, created a poolish version and tried it a couple of different ways - boules and standard sandwich loaves. Don’t you just love dough? And bread? And pastries? And . . . . . . . ! It’s all fantastic!!

I’ve written about poolish most recently in my baguette post. It’s in the category of pre-ferments or dough starters and is made up of equal weights flour and water. Fermented for some hours before being added to the final dough, it kick starts the fermentation process, adding more structure, flavor and a longer shelf life to the end result. All great reasons to do it! It just takes a bit of planning ahead.

I turned to Rose Levy Beranbaum’s book “The Bread Bible” for guidelines to convert a direct dough recipe to a poolish method. Generally you’ll weigh 1/3 to 1/2 the amount of the total water in the recipe (in my case 540 g x 0.33 = 180) and 22-33% the amount of the total flour (826 g x 0.22 = 180 give or take a gram) to create your poolish. Mix 180 g cool water, 180 g bread flour plus a pinch of instant yeast, cover and let sit overnight.

Note: as you can see, RLB gives a range within which you can work to create the poolish . I chose the lower ends of the spectrum.

Here’s the result after an overnight room temperature ferment.

91233A40-091E-46EC-9134-F6A283220B5E.jpg

Here’s my full recipe. I love writing recipes out by hand - something I got used to during my stage in Paris in 2007. It’s a great way to place the mixing steps along side of the ingredients which for me makes it more user friendly. Notes can easily be added in the margins as well.

0E0FEECF-AB27-4B11-94E5-4860BF20EA0C.jpg

I’m a big fan of King Arthur’s all purpose and bread flours, and I turn to Bob’s Red Mill for other specialty flours, in this case semolina and dark rye.

699A4916-0BAB-440E-AAFD-712315B70F95.jpeg

When ready to mix the final dough, weigh out the remaining dough ingredients. Add the warm water to the poolish and mix to loosen. Place the bread, rye and semolina flours and the instant yeast in the bowl of a stand mixer fitted with the dough hook, then add the poolish/water to it. At this point I give it an initial blend with a spatula to get things started. Then let the mixer do the work!

79404B96-C4D1-4E8F-AEFC-82724B650D86.jpg

Mix on low speed and add the sugar, olive oil and salt. Once the majority of the flour has been blended in, increase speed to 2-4 and knead for 7-8 minutes to a smooth, slightly sticky dough.

5C9FA152-774E-4BC7-B97A-163672719556.jpeg

Since the dough is a bit sticky, lightly wet your hands and bowl scraper to help you form a ball. Cover with lightly oiled plastic wrap and let rise 60 minutes.

After the first rise

After the first rise

My first round with the full recipe was to make boules. Many months ago I had snagged a great deal on a 2 1/4 quart Le Creuset lidded enameled cast iron saucepan at Sur La Table (now sadly closed here in Grand Rapids), and I wanted to make a cast iron pot loaf as well as a couple of on-the-baking-stone boules.

9996A523-B6C0-4063-AD3C-D83931EA2888.jpg

Divide the dough into three ~479 g portions and shape three boules. Place one on a piece of floured parchment cut as seen below to allow for easy lifting and placing into the pot. Cover lightly with oiled plastic wrap and let rise one hour.

Now’s the perfect time to heat the oven to 450ºF with the empty covered pot inside. You want the pot nice and hot! I also keep my baking stone on the bottom rack so that heats up for the next two loaves too.

All risen!

All risen!

Set the other two on a parchment lined overturned sheet pan, cover and let rise one hour.

Note: Since I planned to bake in two batches, I popped these two into the fridge at the end of the rise so as to avoid over proofing while my pot bread was baking.

Risen!

Risen!

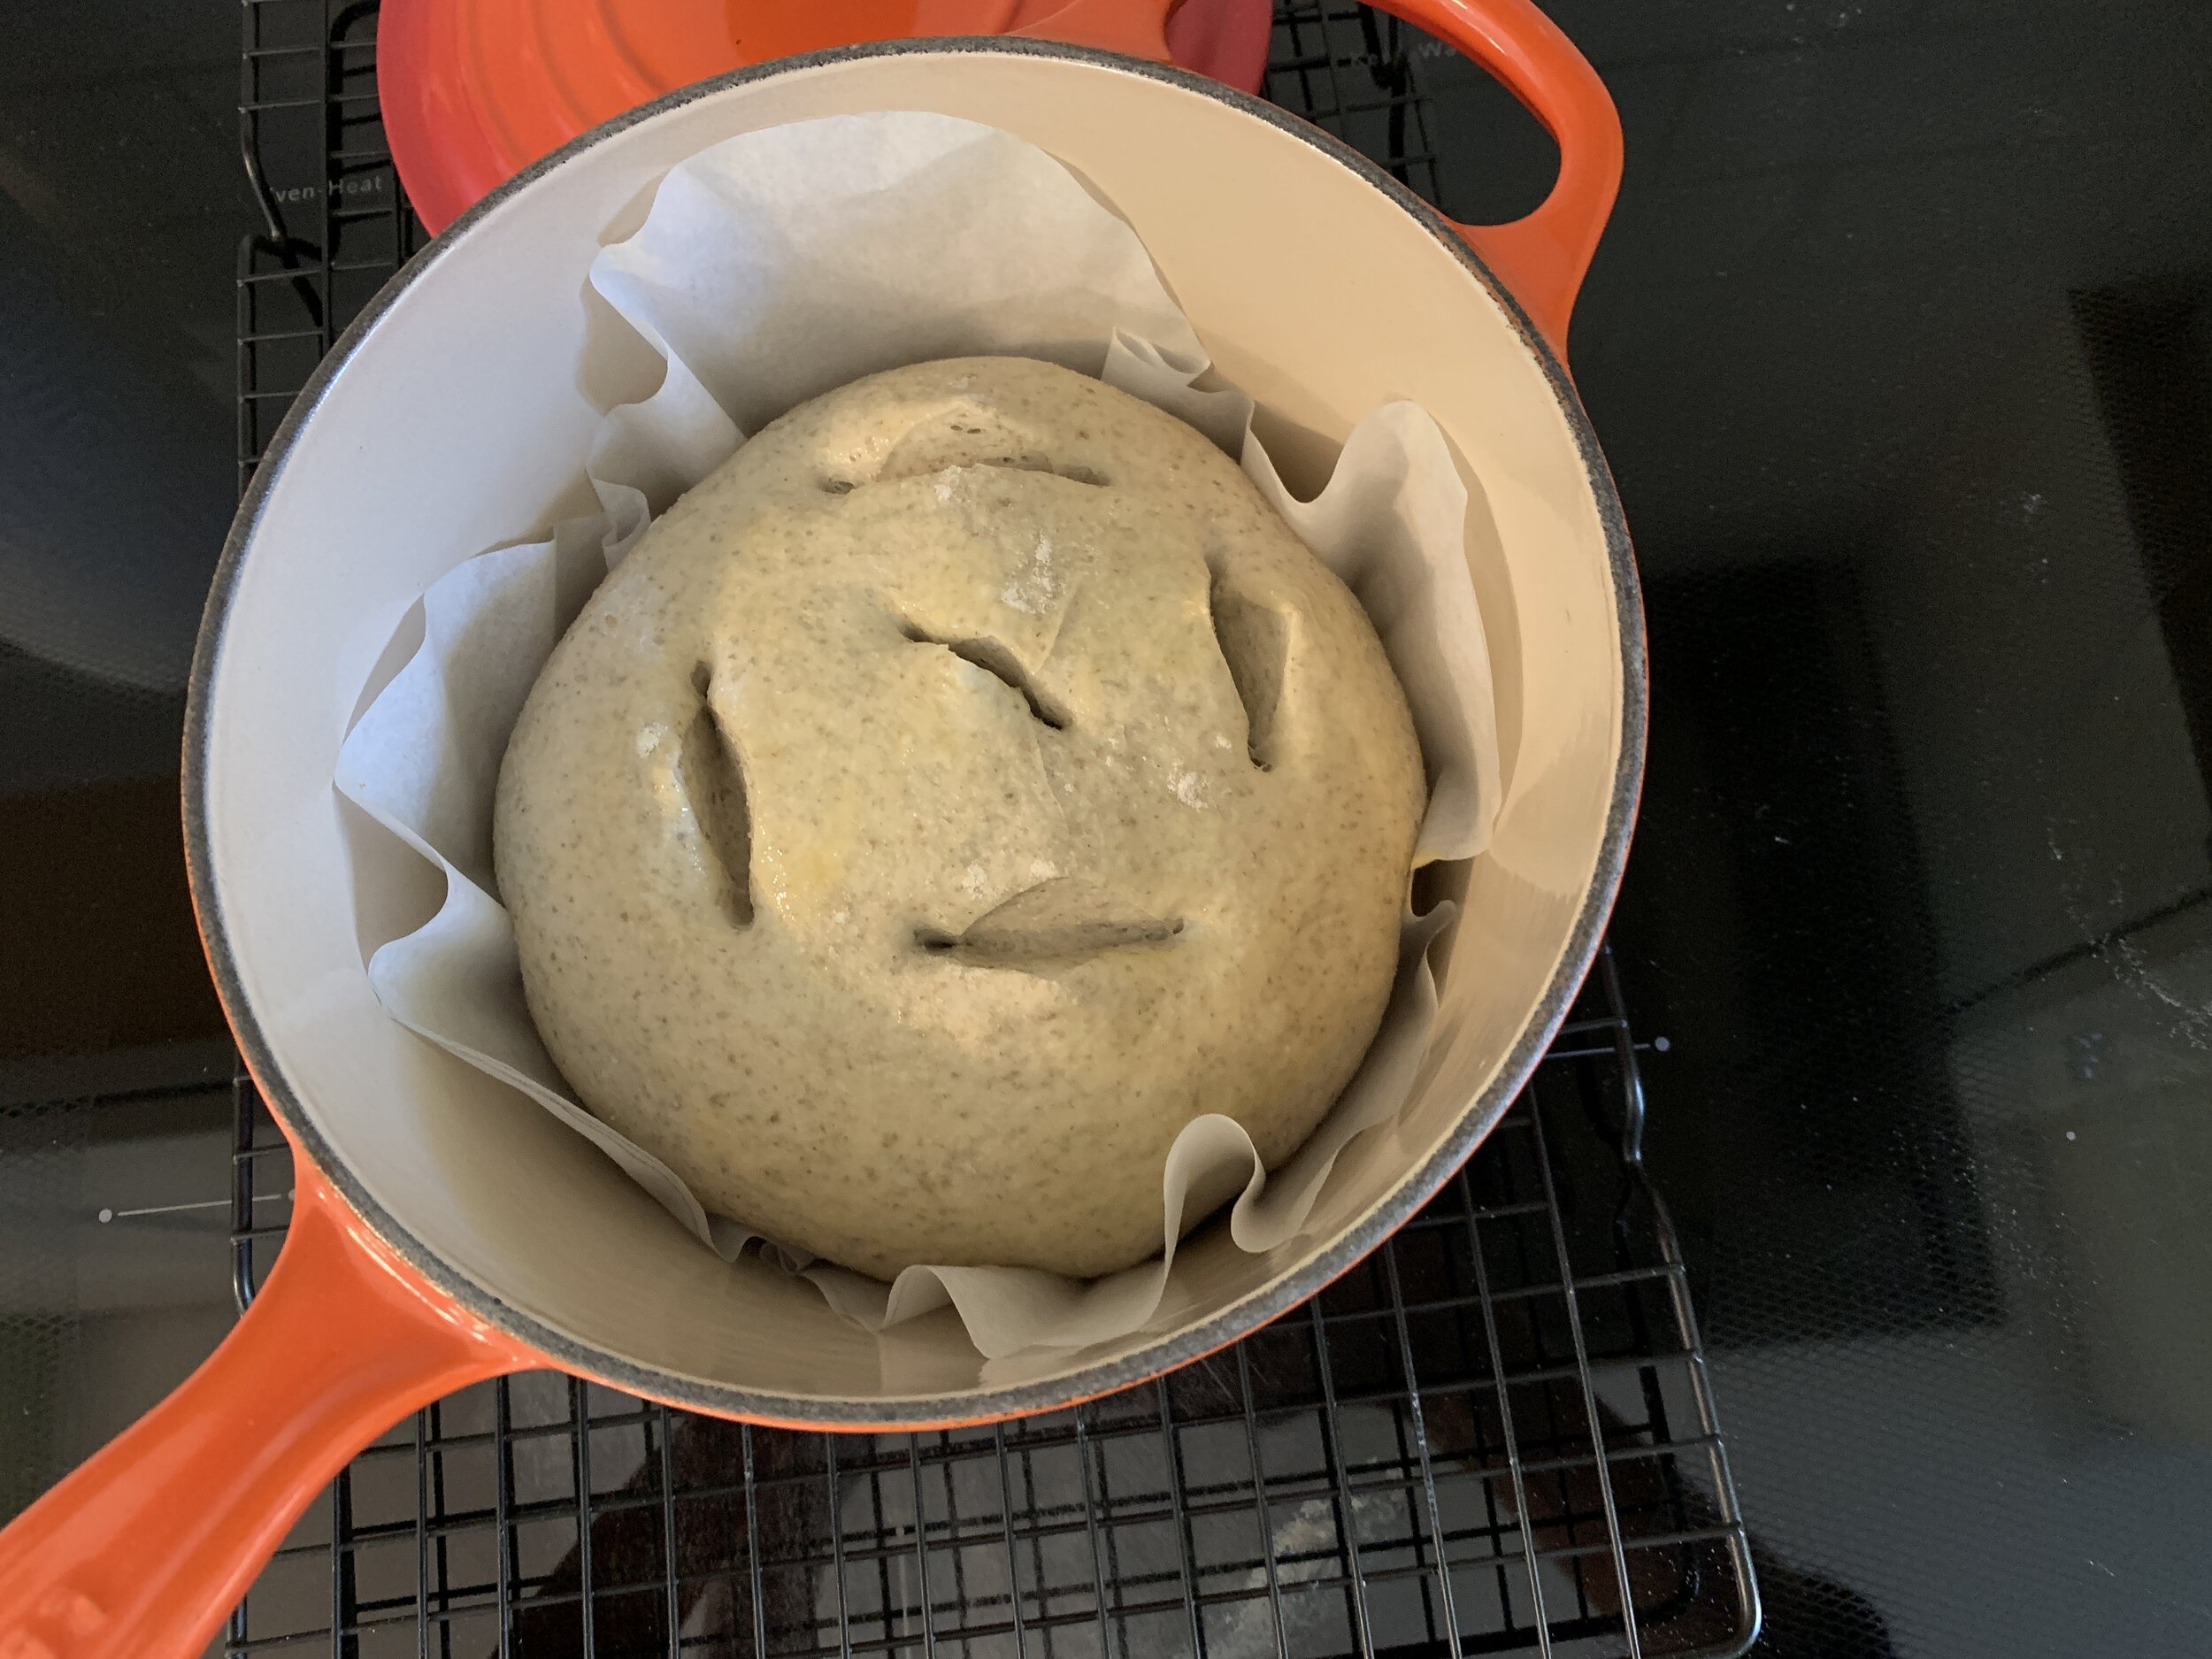
When ready to bake the first loaf, very carefully remove the heated pot from the oven, lift the boule by the parchment and lower it into the hot pot. Don’t burn yourself!!

185E773C-9735-40D9-8783-6351C16CDAB3.jpg

I opted to snip the top with scissors rather than score it - my pattern came out somewhat catty-wompus - hmmmmm, what exactly was I going for here? Looks like a strange Halloween pumpkin. I realized after the fact that I forgot to snip across each slash like an X to create little ears that would open up during baking. Oh distraction!! At least it didn’t negatively affect the end result!

4AFDB0E1-E126-4E32-A604-7D18ADBEBA73.jpeg

Brush it with egg wash or a little milk and bake covered for about 20 minutes . . . . .

C3CCB502-554A-4C7F-A9EB-DB8F315CA118.jpg

then uncovered for an additional 10-15 minutes until nicely browned.

Voilà

Voilà

Lift it out and let cool on a rack. Don’t you think the scissors snips actually lend it a certain carefree character?

7905D48F-6843-439C-934C-9004B09B4950.jpeg

For the other two boules, turn the oven down to 400ºF, egg wash, score and slide them, with the parchment, off the sheet pan onto the baking stone which has been heating up all along. I squirt 3-4 ounces of hot water into the metal pan in the bottom of my oven to give a burst of steam, then close the door and let the baking begin.

1879FF45-3E0D-45ED-B46A-92CA0B3E0452.jpg

Give them 10 minutes at 400ºF then turn down to 375ºF for another 20 minutes or so until nicely browned. Cool on a rack (keep your pot bread company!).

971A3650-03D0-4BDA-8A61-46C1C627342F.jpeg

My second session with the full recipe was geared to making standard sandwich loaves. Steve and I love having good bread around for toast or sandwiches and this one fits the bill. The primary difference here is dividing the first risen dough into two portions about 715 g each, shaping loaves and tucking them into oiled medium loaf pans.

E74468D7-B160-49AA-AC37-D099F4736F25.jpeg

Cover with lightly oiled plastic wrap and let rise about an hour until the dough is nicely mounding above the rims. Meanwhile heat the oven to 375ºF.

87AD36D0-C3E5-4698-A4DA-FF5525B3F940.jpeg

Score . . . .

D9E72207-C162-458C-9ED5-BD6BBC9DB5F5.jpeg

and bake 30- 40 minutes until nicely browned and a digital thermometer in the center reads 190ºF.

While scoring isn’t strictly necessary here, it allows for a more uniform oven rise to the bread.

52039F65-21AE-4F30-A422-D903F860681E.jpeg

Remove from the pans and let cool on a rack.

734FC5C9-46D5-4A56-AF66-FDC10BCDCA6E.jpeg

I am so happy with this bread! Both the boules and the loaves have a nice chew to the crust, a tight crumb and the texture holds up well to a hearty sandwich. And let’s not forget morning toast with a fried egg on top or your favorite nut butter and jam. Yes.

4D9FF201-8697-4027-B6C5-BCA8E9DF6CD3.jpeg
6E9BBEDE-D58E-4DD2-9D55-4DA50817D31A.jpeg

Here’s a big cheer for dough and bread making - Hip hip hooray!

Let’s give thanks for safety and health as we look forward to next year and new beginnings. Meanwhile, think about a bit of holiday spirit, cut some local greens and twigs and tuck them into pots. You’ll be happy you did.

Happy Thanksgiving to all!

F1C4D47E-9971-4554-A5AD-5F98FDC81C4F_1_201_a.jpeg


Roasted strawberry ice cream and ginger shortcakes

IMG_1009.jpg

This is strawberry shortcake at it’s best! Roasted balsamic strawberries churned into a deelish ice cream, paired with fresh strawberries and ginger scones. Oh boy!

Recently I was perusing Rose Levy Beranbaum’s “The Bread Bible” (I can’t remember exactly why!) when I came across “Rich and Creamy Ginger Scones”. I had forgotten that she includes a section on quick breads, muffins, biscuits and scones in this wonderful bread tome of hers.

Never one to deny myself a new scone experience, since I had crystallized ginger in my cupboard (still working through the pantry!) and heavy cream in my fridge, I definitely wanted to give these a try.

IMG_0878.jpg

It also just so happened that I had purchased some strawberries at our local Meijer supermarket that wouldn’t necessarily be considered primo, if you get my drift. I decided to roast them up, purée em and make strawberry ice cream. The strawberry ginger shortcake idea was born.

IMG_1011.jpg

When you hear the terms scones, shortcakes and biscuits, one can’t help but ask “What’s the diff?” They’re pretty similar all-in-all although some have egg, some not; some heavy cream, some buttermilk or other dairy like yogurt or even ricotta; some softer self-rising flour like Lily White (i.e. biscuits) and some with a flour twist like replacing a portion of all purpose flour with spelt or whole wheat pastry flour. LOTS of options.

Most shortcake recipes I’ve used or reviewed contain flour, sugar, baking powder, salt, cold butter chunks and cream, all put together with a light touch. The word short refers to the fact that the butter coats the flour to prevent gluten strands from lengthening (hence short), keeping the product flaky, light, crispy and delicious all rolled into one!

Let’s make the principal players.

IMG_0879.jpg

To roast the berries hull and chunk up about a pound of strawberries, toss them with a tablespoon of good quality balsamic vinegar, a tablespoon of brown sugar (light or dark, it’s up to you) and 1/4 teaspoon freshly ground pepper. I used a Silpat but parchment is fine too. Roast them at 375ºF for about 20 minutes until dark and syrupy, stirring them a couple of times. Note to self - punch up the balsamic and pepper next time.

IMG_0880.JPG

Let the berries cool then either mash them with a potato masher or purée them if you’d like them a bit more refined. I made my usual ice cream base and blended in the berry mash while chilling the base over an ice bath. I let the strawberry blended base mature in the fridge for a couple of days before processing and freezing.

On to the ginger scones. The primary difference in this recipe from the one I normally use is more butter (170 g vs 113 g), twice as much sugar, no egg, same amount of cream (but whipped!), a teaspoon of ground ginger, zest of a lemon and the addition of 113 g finely diced crystallized ginger.

To get ready, whip the 180 g/3/4 cup cold heavy cream to soft peaks and cube the cold 170 g/6 ounces of butter - hold both in the fridge. The mixing steps are the same as for your typical scone, biscuit or shortcake: blend in a medium mixing bowl 260 g/2 cups all purpose flour, 66 g/1/3 cup turbinado sugar, 14 g/1 tablespoon baking powder, 1 teaspoon ground ginger, zest of a lemon and 1/8 teaspoon salt; rub and flatten the cold butter pieces into the dry ingredients to a mix of coarse crumbs and visible pieces of butter; add in the crystallized ginger; fold in the whipped cream. You got it!

Remember the key to scone mixing is cool, quick, decisive - don’t over handle the dough. Turn it out onto a lightly floured surface and give a few quick kneads to bring it together.

I like the way RLB divides the dough in half, forms 2 six-inch rounds about 3/4” thick, then cuts them in either 6 or 8 pieces depending on the size one prefers.

IMG_0881.JPG

Heat the oven to 400ºF with either a baking stone or a sheet pan on the middle rack. The scones go onto a second sheet pan, parchment lined, brushed with cream and sprinkled with raw sugar then placed in the freezer for 15 minutes or so to firm them up and keep that butter COLD!

Don’t forget that you can take it to this step and freeze them for baking another time. I love plan ahead projects.

IMG_0883.jpg

Pop the baking sheet onto the heated sheet pan and bake for 15-20 minutes. I usually give them 10 minutes, rotate the tray and check again in about 8 minutes. If they seem to be browning too quickly I turn the oven down to 375ºF.

IMG_0885.JPG
IMG_0888.JPG

These have an ethereal quality -crispy outside, light and flaky inside, just the right amount of ginger and oh so good.

I’m a firm believer in eating scones, shortcakes and biscuits the day they’re made, otherwise freezing them the day they’re baked to preserve their like-fresh quality. This time I did a little test: I took 4 baked scones out of the freezer, loosely wrapped them in parchment paper, left them at room temp and the next morning gave one a 5-8 minute warm up in a 300º oven. Still SO GOOD. Crisp out and light in, a match made in heaven.

I repeated this over the following 2 days and found they continued to offer that just baked enjoyment. For THREE days, they sat wrapped in parchment at room temperature and did not disappoint. Amazing.

Steve and I enjoyed the combo of roasted strawberry ice cream, great quality fresh berries that we happened upon at Kingma’s market and of course the perfect ginger scones. Thanks Rose.

IMG_1010.jpg

Apple pie tart

IMG_0032.JPG

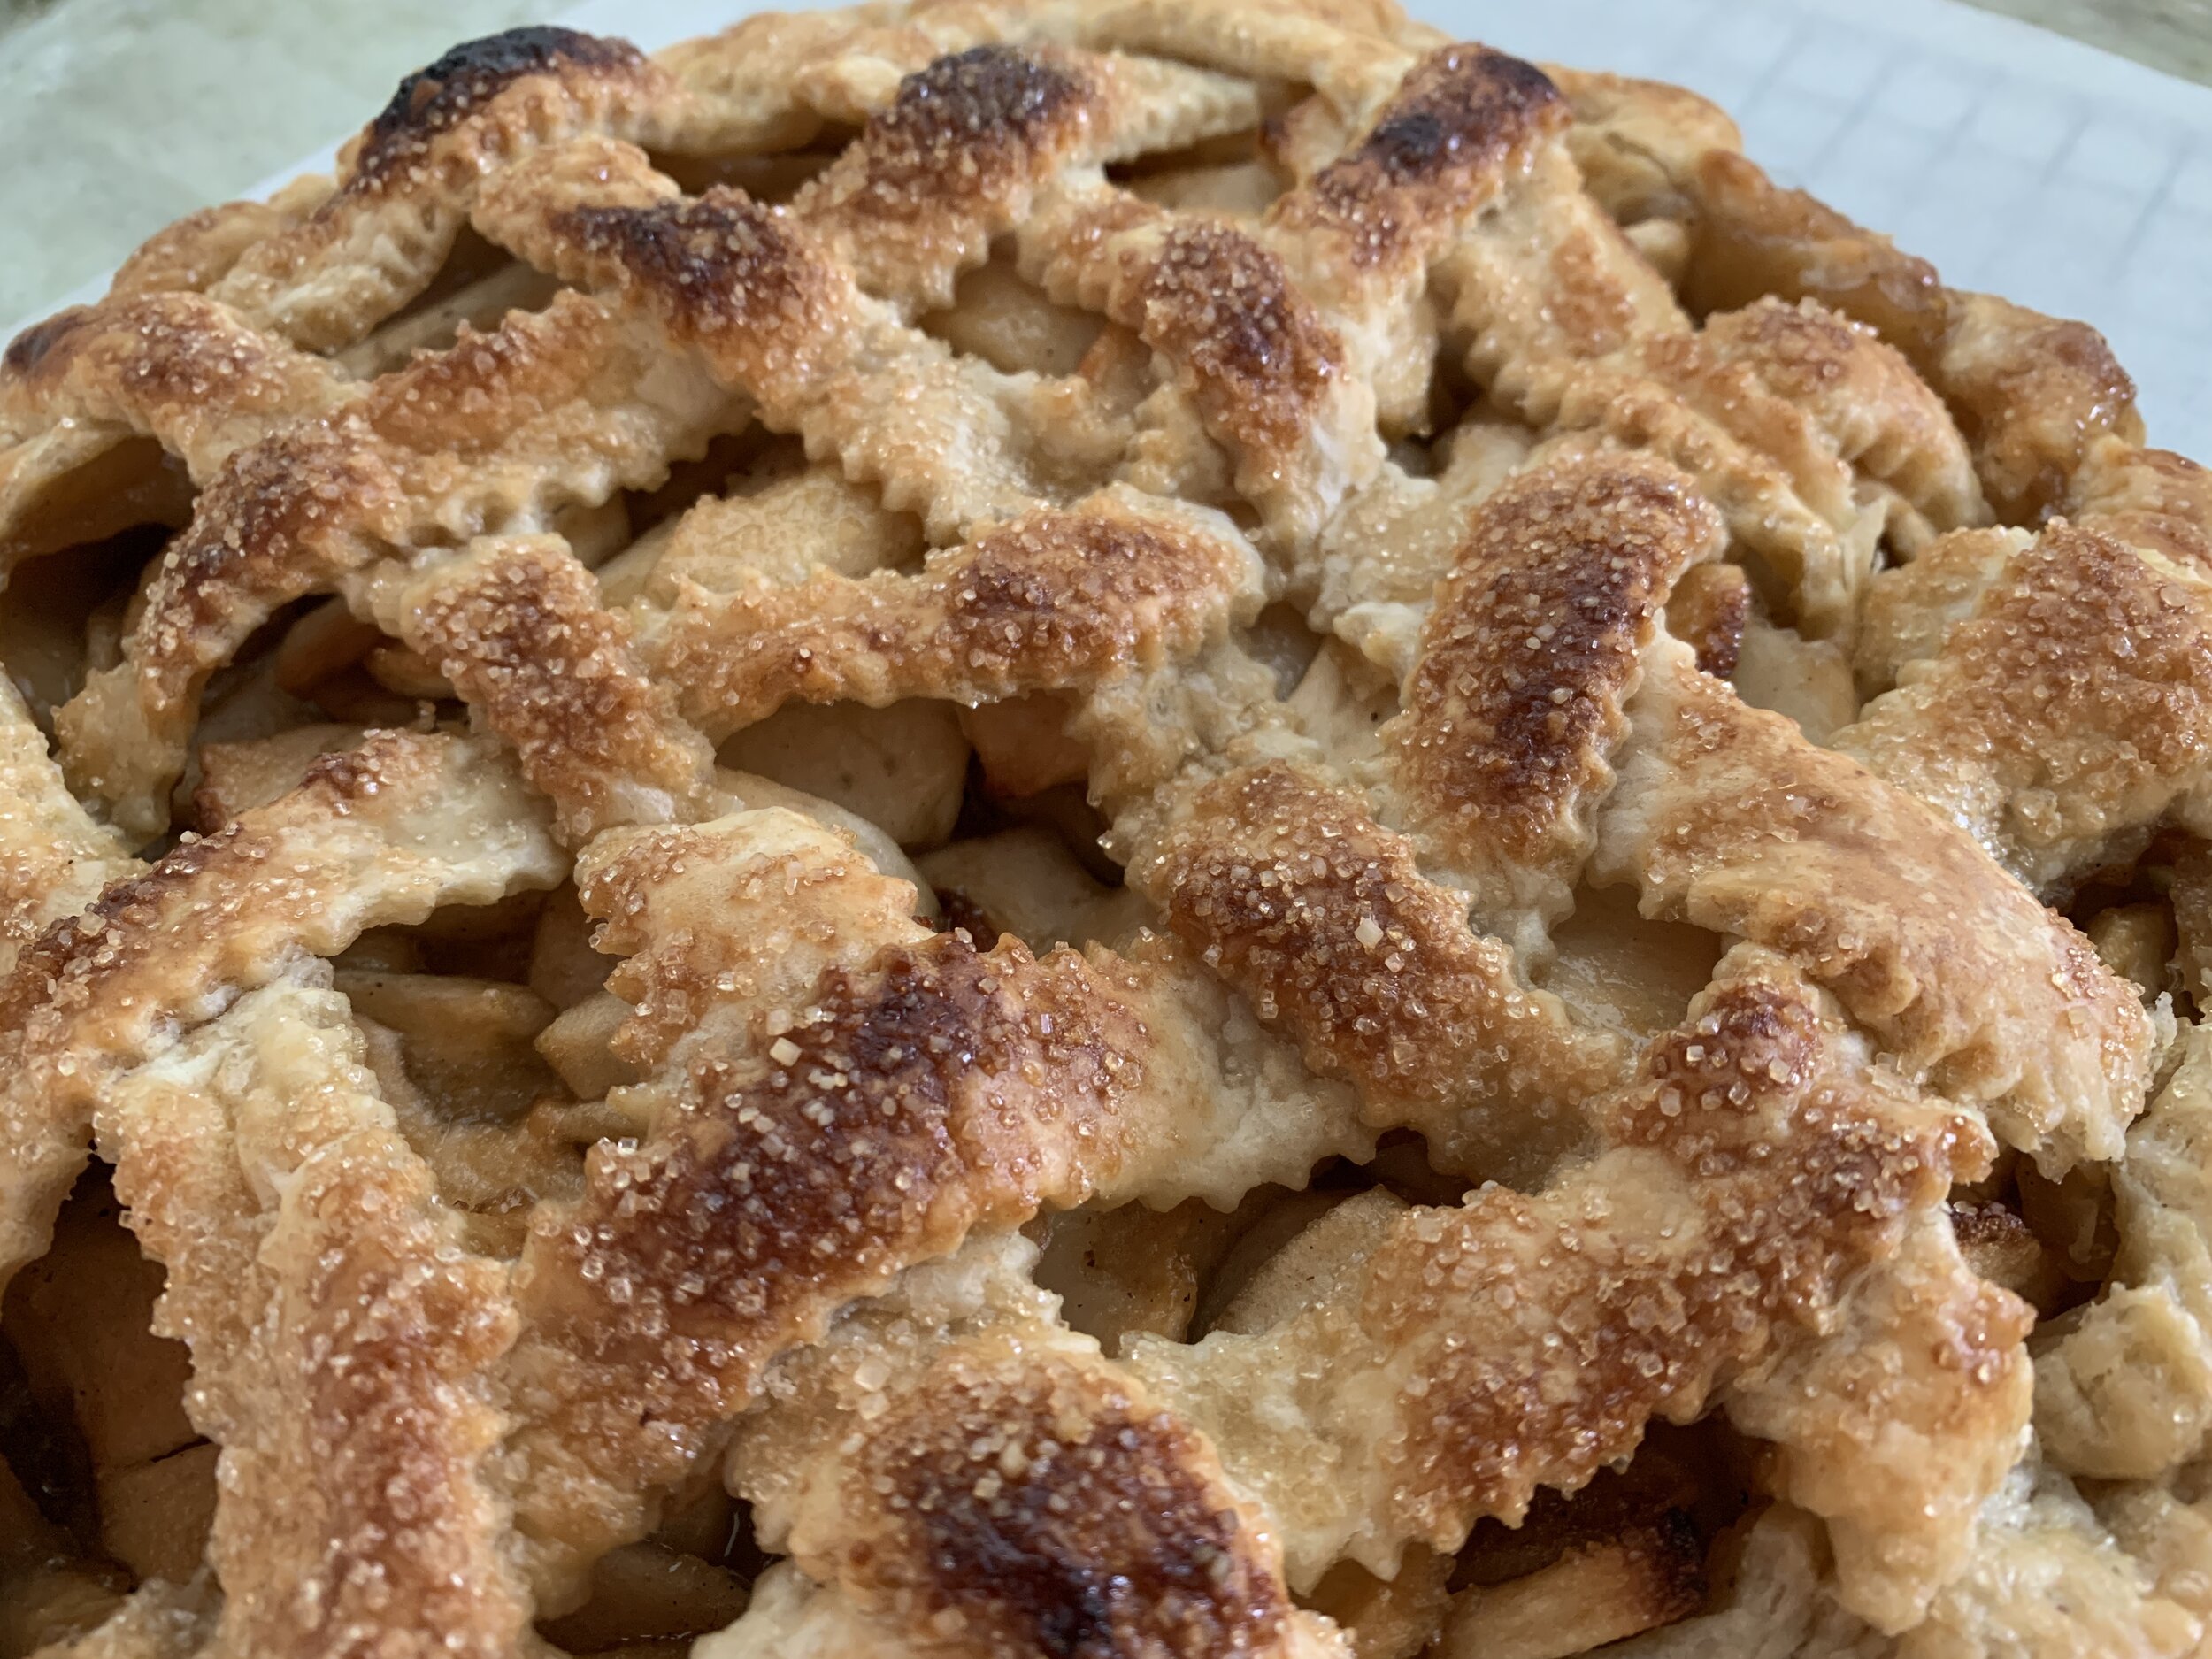
It’s a pie! No wait, it’s a tart! What?? Frankly, it kinda looks like some kind of coral reef creature.

For a recent supper at cousin Jen’s, I was in the mood to make something apple. Besides that, I had sprung for a bottle of boiled cider from King Arthur Flour and was so ready to try it out. It’s made in Springfield VT, a state which Steve and I called home for nearly 12 very enjoyable years.

IMG_0022.JPG

If you’re a regular reader of this blog, you’ve most likely realized by now that I LOVE reading baking and pastry books, comparing recipes and techniques and continuing to gain knowledge about this craft. They give me much pleasure and inspiration to boot! Some of my faves are FOOD 52’s “Genius Desserts” and anything by Rose Levy Beranbaum. They are chock full to overflowing with cool stuff.

As I approached this apple project I reviewed apple pie recipes (again!) from “Tartine”, “Art of the Pie”, “The Baking Bible” as well as “Genuis Desserts”. GD’s is essentially a review of RLB’s recipe for fruit pies, creating a filling with concentrated flavor by cooking down the juices. I’m IN!

In my fall 2018 post on a couple of apple/pear/berry tarts, I followed Tartine’s method of cooking the apples in butter and sugar first then draining off the liquid and cooking that down. They were deelish! The Genius Desserts/Rose LB approach is a bit different - macerating but not cooking the fruit, then reducing down the drained off liquid to a lovely caramel.

Here goes! This go-around I used a combo of Granny Smith and Jonagolds. Years ago I used to think peeling and coring apples was such a chore, but it’s amazing how one can get into a rhythm and actually make a bit of sport out of it, racing against the clock to see how fast you might finish. It’s so satisfying!

IMG_4383.jpg

Once the 2.5 pounds of apples for a 9-inch tart are peeled and cored, slice them up into ~1/4 inch slices and toss them in a large bowl with 50 g light brown sugar (or dark if you prefer), 50 g granulated sugar, a tablespoon freshly squeezed lemon juice, 1/4 teaspoon fine sea salt, some freshly grated nutmeg and 1/2 teaspoon cinnamon. Cover and allow to sit a room temperature for at least 30 minutes and up to three hours to juice ‘em up.

In the meantime take your favorite pâte brisée, roll it out about 1/8” thick and line your chosen tart pan or pie plate. I chose an open 220 mm tart ring this time, and since I planned a lattice top I made sure I had a 2-crust quantity of dough on hand. Cover the dough with plastic wrap and hold in the fridge until ready to fill.

IMG_0018.JPG

I rolled out the dough for my lattice as well, cut my strips and held them in the fridge until ready for final assembly. I thought I’d be creative and cut curvy pieces, but, when it came time to create my lattice, the strips didn’t really feel like staying very curvy until I coaxed them into submission. I made the best of it and it worked out just fine and dandy.

IMG_0024.jpg

Ready to finish the filling! Transfer the apple mixture to a colander set over a bowl and let drain to release anywhere from 1/2 - 1 cup liquid. Sounding good already.

Pour the juice into a small saucepan along with 2 tablespoons unsalted butter and bring to a boil. Cook until caramelized and reduced to about 1/3 cup. Then I added a tablespoon or so of boiled cider to intensify the apple flavor.

Transfer the drained apples back into the large bowl and mix them with 1 tablespoon plus 1 teaspoon of cornstarch.

IMG_0026.jpg

Place a baking stone or empty sheet pan on the bottom rack of your oven and heat to to 425ºF.

In the meantime blend the reduced apple caramel liquid into the apples and transfer it all into the lined tart ring. Create the lattice, trim, tuck and crimp or flute the edges. Brush with milk and sprinkle with raw sugar. Hold in the freezer while the oven heats.

IMG_0029.jpg

Bake approximately 50-55 minutes. If your crust edges are browning too quickly, place an aluminum foil ring over them. Watch for bubbling juices and tender fruit when poked with a small, sharp knife. My pie-tart baked about an hour before I was happy with the bubbles and texture. Looking pretty tasty!

IMG_0031.JPG

One problem with this baby is that a small section of the crust bottom and edge seemed to collect a lot of juice and didn’t bake through. It was also an interesting challenge to get it out of the tart ring. I ended up cutting a cardboard round slightly smaller in diameter, slid it under the pie/tart and lifted it up and out of the ring. Whew. Maybe a solid pie plate or lovely fluted ceramic pie dish next time, eh?

No matter - it was delicious, the boiled cider adding just the right tang and deep apple flavor. A classic, particularly topped with a scoop of vanilla ice cream.

IMG_0033.JPG

Always remember - there’s more than one way to skin a cat!

Now can’t you just imagine the hint of spring just around the corner? It won’t be long folks. Happy baking!

Kouign-amann pudding

Now here's a good one - essentially a bread pudding made with leftover Kouign-amann.  What?!


Of course some might argue that once Kouign-amann are made they'll be gobbled up and there won't BE any leftovers.

Not so in my case.  A couple of months ago I decided to make a batch of K-a, but, instead of baking them in open tart rings, I baked them in flexi-molds.  I thought it would lend itself to much easier release of the final baked goods from their sticky, caramelized holders.

Nuh-uh.  Because the dough was essentially "shielded" by the silicone molds, the K-a exteriors did not caramelize, the dough layers did not bake through and were pale and floppy.  It was a gooey mess.

Note to self: certain things bake and brown much better surrounded by metal.  Yup.

Some of the edges were actually OK and the flavor was there, so something wouldn't allow me to throw them all away and into the freezer they went.

After the holidays I was visiting Schuler Books here in Grand Rapids, looking of course at baking books, and was excited to find a recipe from Rose Levy Beranbaum's The Baking Bible (with Kouign-amann on the front cover no less) for "souffled French toast".

It uses day-old K-a baked in an egg, milk, cream, vanilla custard.  What's not to like.

I removed 480 grams of K-a from the freezer some hours ahead and let them thaw at room temperature.  Notice the misshapen K-a lumps in the photo below.


notice the doughy interior layers


Cut the K-a into cubes and place them in an 8"x8" glass baking dish.

Mix 6 large eggs, 160 ml heavy cream, 60 ml whole milk and 1 teaspoon vanilla extract.


Pour the custard over the K-a, cover and soak the mélange in the fridge over night.


ready for an overnight soak

Heat the oven to 350º F.  Bake covered with foil for 10 minutes, then remove foil and bake an additional 10 minutes or until the pudding is puffed, set and nicely browned.


We ate this for dessert au naturale, still slightly warm (when it's at its best, by the way).

I can just imagine it topped with a little chantilly cream, a drizzle of maple syrup and some fresh berries, either for dessert or for breakfast or brunch.  YUM.

So now you know what you can do with those leftover or not-so-perfect Kouign-amanns that you just might have lying around.

Thanks Rose.


A chocolate génoise entremet

When we're invited to someone's home for a weekend supper, I always (almost) volunteer to make dessert. Thus it was that I was on the hook again to provide something tasty and not too heavy for the meal's finale.

My dessert leanings tend to veer towards a simple tarte (classic apple, fruit/almond, lemon, caramel nut, ganache to name a few) or something custardy like pots de crème, perhaps served with some buttery shortbread. But, every now and then, I like to create a layered entremet.

The word entremet is actually translated as "between servings" and can refer to a small dish served between courses or to a dessert. In the modern pastry world it most often refers to a layered dessert made with some type of cake along with various creamy, crunchy textural components. The possibilities are pretty much limitless - just look in any French pâtisserie window and you'll know exactly what I'm talking about!

Since Steve and my brother Dick are both chocolate lovers (truth be told Dor and I don't mind the stuff either), I focused on a chocolate plan. I had it in the back of my brain to utilize the leftover "duja" (a mixture of chocolate and ground hazelnuts) that I had made for the sablés au praliné post on 1/25/15, so I popped it out of the freezer and into the fridge for an overnight thaw.

Whenever I have a cake question or need ideas for the type of cake I might like to make, I turn to Rose Levy Beranbaum's The Cake Bible. The information in this book is exhaustive - just in the section on génoise alone, you'll find many variants with detailed explanations about the differences.

Génoise belongs to the sponge cake family and is typically made with eggs, sugar and flour. It tends to be on the dry side and thus is imbibed with a syrup to moisten it before being layered with cream or mousse of some sort.

I chose the "moist chocolate génoise", a recipe I've made several times before. It calls for bittersweet chocolate, so I got out my favorite array of chocolates.  I like to mix and match, combining different percentage chocolates to achieve about a 60-62% result.

This recipe utilizes an interesting technique with the chocolate (described below) - Rose says this releases the chocolate's flavor.

The ingredient portions here are for 1/2 recipe since I only wanted to make one cake (the full recipe makes two 9" cakes). In the picture below you see the chocolate mixture in the forefront, made by pouring 120 gm (1/2 cup) boiling water over 113 gm chocolate, then simmering it until it achieves a pudding like consistency. It has fully cooled and is ready to go!

Remember - this is 1/2 recipe!  Beat 4 eggs and 100 gm sugar in the mixer using the whisk on high speed until tripled in volume, about 5 minutes.

Amazing how eggs and sugar transform from a yellow, grainy mixture to a light, pale and airy froth of goodness!

Sift 75 gm of cake flour over the mixture and fold it in gently. The flour has a tendency to fall to the bottom, so pay attention so you don't have lingering clumps of flour in your batter. Then fold in the chocolate mixture until incorporated.

Pour the batter into a 9" cake or springform pan that has been lined with parchment then buttered and floured.

Bake at 350º for about 30-35 minutes. I use the touch-the-center technique to decide if the cake is done - it should feel firm, set and spongy (get it? Sponge cake!). I also gently jiggle the pan, and if there's movement in the center, it needs more time.

Loosen and remove the outer ring of the springform (if that's what you've used) and let cool on a wire rack.

Then invert the cake onto a rack, remove the pan bottom and re-invert.  Once cooled you can wrap it and hold it at room temp or in the fridge for a couple of days OR freeze it for a month or so.

Earlier in the day I had made my go-to ganache-for-whipping using 3 parts heavy cream to 1 part dark chocolate (240 gm cream and 80 gm chocolate in this case). Once the mixture is chilled it is whipped to a spreadable consistency and ready for layering.

I also created a thin round with the chocolate/hazelnut ("duja") mixture by softening it over a bain marie along with a tablespoon or so of butter, then spreading it in a 220 mm circle on silpat. Into the freezer it went until assembly time.

Now it's time for assembly. My components, seen below, are the genoise (split in two layers), vanilla simple syrup, the "duja" round, whipped chocolate ganache, plus a mixture of hazelnut nougatine and chocolate crumbs that I had in my freezer from previous projects.

First a layer of genoise; brush it with simple syrup; top it with the round of "duja".

My thin round is a tad too big, so I took my kitchen scissors and trimmed around the edge.

Then I spread a layer of whipped ganache . . .

topped it with my crunchy mixture . . .

then my second cake layer topped with more ganache and crunchies.

Looking good!

The assembly can be completed a day before serving - just store the entremet covered in the fridge.

One can take this a step further and coat the sides with additional whipped ganache and crunchies, but I decided to leave it au naturel. Nothin' fancy here.

Now slice it up and enjoy!

The consensus was all thumbs up on this lovely blend of chocolate and hazelnut, not too heavy and not too sweet - just delicious!

OK, so I admit I didn't go the extra mile as far as any garnish for this dessert, but some great accompaniments would be a dollop of chantilly, some chopped candied hazelnuts and a flourish of candied orange rind.

Or how about a nice pool of apricot coulis and a drizzle of caramel? Or a dose of warm créme anglaise and some fresh raspberries?

You get the idea. Now get into that kitchen of yours and create your own entremet!

My first English muffins!

Not long ago Steve and I had lunch at one of our favorite local haunts (Nick's on Broadway) where Steve ordered a fish sandwich served on the house-made English muffin.  Boy was it good!  Nothing at all like the store-bought varieties - thicker, flavorful and a wonderful vehicle for sandwich fixins.

I decided it was time to try my hand at making some, and what better day than when we were expecting (and ultimately getting) a blizzard here in Providence.


only the beginning

lots more comin'

Whenever I'm making something new, I enjoy reading and reviewing a number of recipes for whatever that something new might be.  I checked out Rose Levy Beranbaum, Bouchon Bakery, Peter Reinhardt and King Arthur Flour and settled on Peter Reinhardt's recipe as my initiation into English muffin making.


Little did I know that English muffins are "baked" on the stove top - I had no idea!  Plus I find it so intriguing to compare techniques and processes - Rose's uses a poolish (dough starter), Bouchon bakery uses a liquid levain (another version of a starter), whereas the one I chose to follow is a straight forward direct dough that is as easy as pie to put together and can sit in the fridge for up to four days!  I like that.  Thanks Peter!

On to the recipe.

ingredients

Whisk 14 gm (2 teaspoons) honey and 14 gm (1 tablespoon) olive oil into 1.5 cups (340 gm) of lukewarm milk.  In a separate bowl whisk together 340 gm (2 2/3 cups) unbleached flour, 1 1/4 teaspoons kosher salt and 6 gm (2 teaspoons) instant yeast.

the dry and the wet

Now blend the wet into the dry, mixing for a minute or so to moisten all the flour.  Scrape down the bowl and mix the batter for a few more seconds.


ready to cover and refrigerate

Cover tightly with plastic wrap and refrigerate overnight or up to 4 days.

On the day you plan to bake the muffins remove the dough from the fridge a good 2 hours ahead of time.  I chose to bake the following day, so my dough had an overnight rest in the fridge.


just out of the fridge after an overnight rest

After a couple of hours you should see that the dough has bubbled a bit.  It's subtle, but it's there.


can you see the difference?

Now it's time to dissolve 1/4 teaspoon of baking soda in 3 tablespoons of warm water and fold that gently into the dough.


Let the dough rest for 5-10 minutes.  In the meantime prepare your English muffin rings (in my case I used my 7/8" high, 80 mm tart rings) by oiling them and coating the insides with corn meal (I used semolina).


Heat a flat griddle or cast iron skillet over medium heat and place the prepared rings on the cooking surface.  I'm using a non-stick flat griddle, but if you're using a classic cast iron "stick" pan or griddle, mist or coat it with oil first.


Sprinkle cornmeal in the rings . . . .


Lightly oil a 1/3 measuring cup and use it to scoop the dough into the prepared rings.


The dough is a bit sticky but just go for it - scoop away!  Sprinkle a little more cornmeal on top . . .


and cook the muffins for about 12 minutes over low-medium heat - the dough will start to rise and fill the rings.


away we go!

Then it's time to flip them over, rings and all . . . .


all flipped

You want them to be golden on the bottom before the flip, and then you cook them for another 12 minutes or so to achieve the same golden-ness on the flip side.  You can peek underneath to check for the degree of browning, and they should also feel springy to the touch.

At that point remove them from the pan, let them cool a couple of minutes and then remove the rings.

Based on some of the techniques I gleaned from reading different recipes, I decided to pop them into a 325 oven for 5-10 minutes to finish them off.  Since I haven't made these before, I wasn't sure how they should feel when they're done, and there's nothing worse than an under baked end result.  Think of it as "baking insurance"!


the finished goods


After a good 30 minute cool down Steve and I simply had to do a taste test.  I performed a "fork-split" and found the interior to have that quintessential "nooks and crannies" appearance that one hopes for in an English muffin . . . .


First we toasted one and topped it with a little butter . . .


and then a second one with butter and cherry jam . . . .


yup - that's good!

So the English muffin test was a success.  Crispy outside yet tender with an almost custard like interior, a medium-coarse crumb and a just right taste.

Yes, I would make these again!