Caramel apple tarts

IMG_3127.JPG

Yippee - it’s officially fall! The recent autumnal equinox dawned bright, crisp and clear with morning temps in the mid-40s, perfect for walking, baking or pretty much anything one might feel like doing. My time of year!

Apples are everywhere - farmers markets, grocery stores, orchards and farm stands - and one can choose the pick-your-own thing or simply buy your favorite of the many varieties available here in west Michigan.

IMG_3160.JPG
 
IMG_3120.JPG

Having a go-to simple apple tart in one’s repertoire is a beautiful thing. As is my practice, I periodically assess my freezer stock of various doughs and decide when it’s time to use something up. This time it was one of the pâte sucrée doughs that I like to use for rustic galettes.

Here’s a printable PDF of the recipe/process using pâte brisée (another fave!).

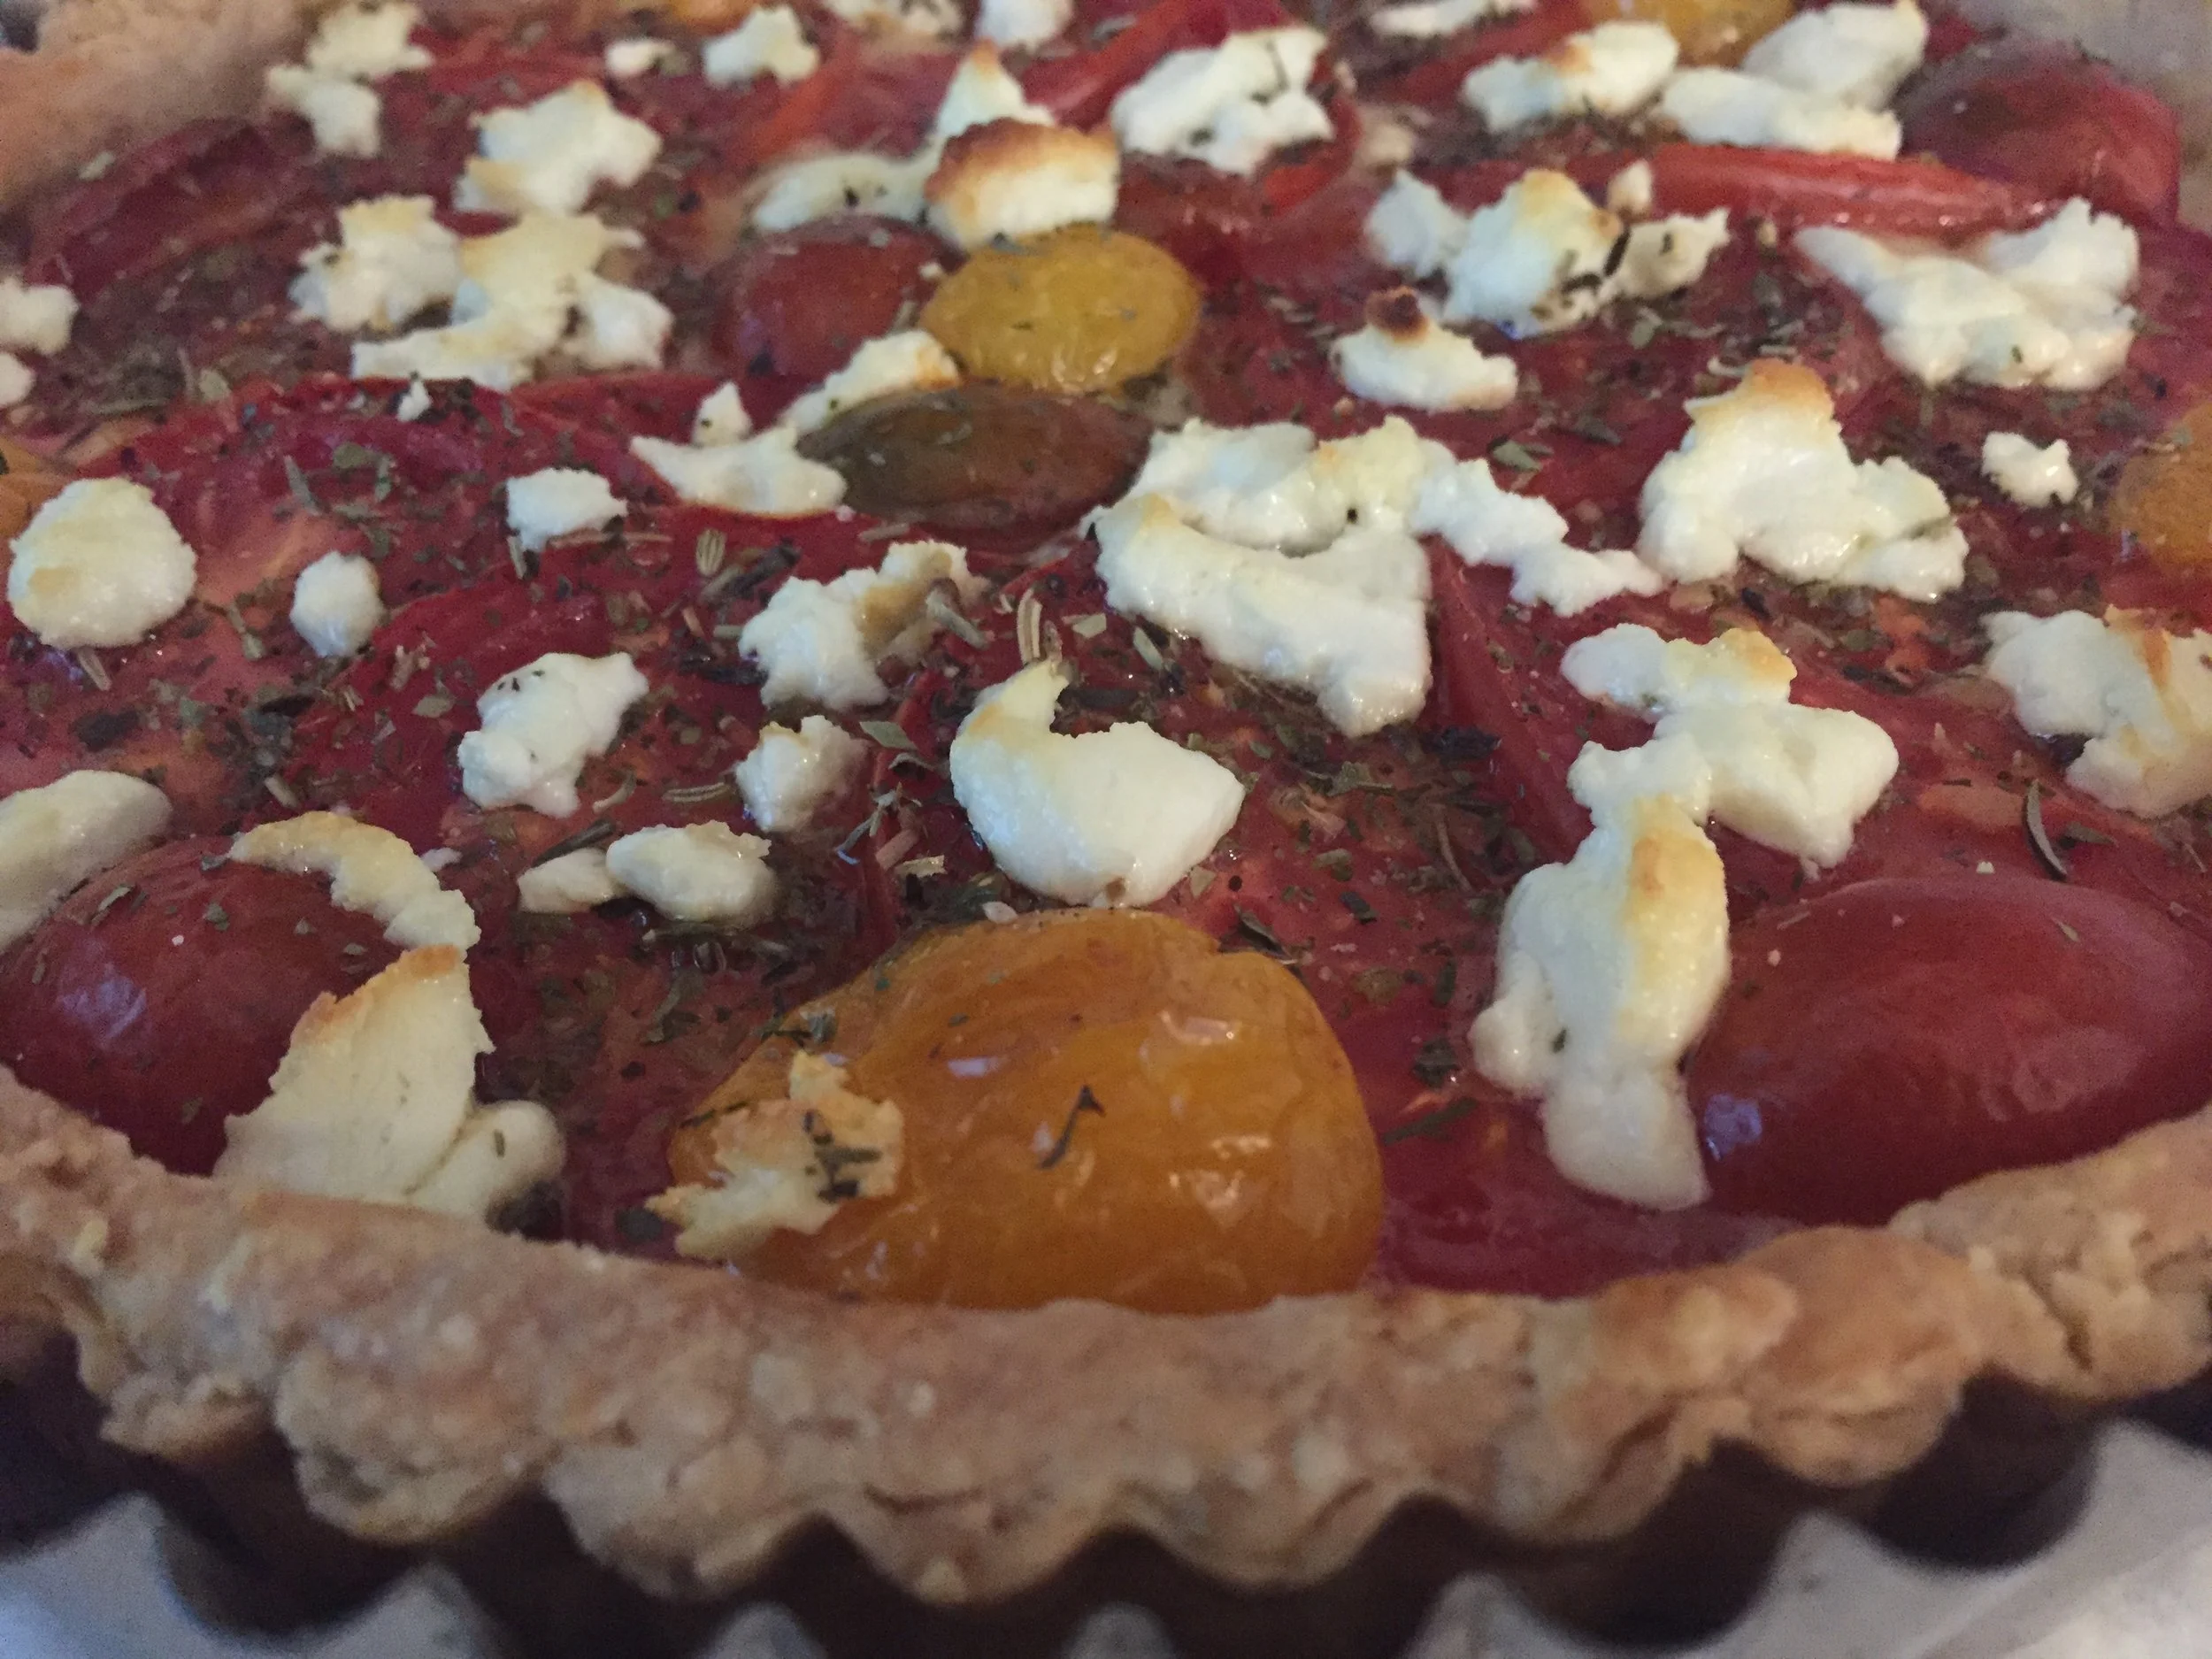
The approach is very straight forward, not unlike the Provençal tomato tart I just wrote about, although this time there’s no blind baking involved. Gotta like that.

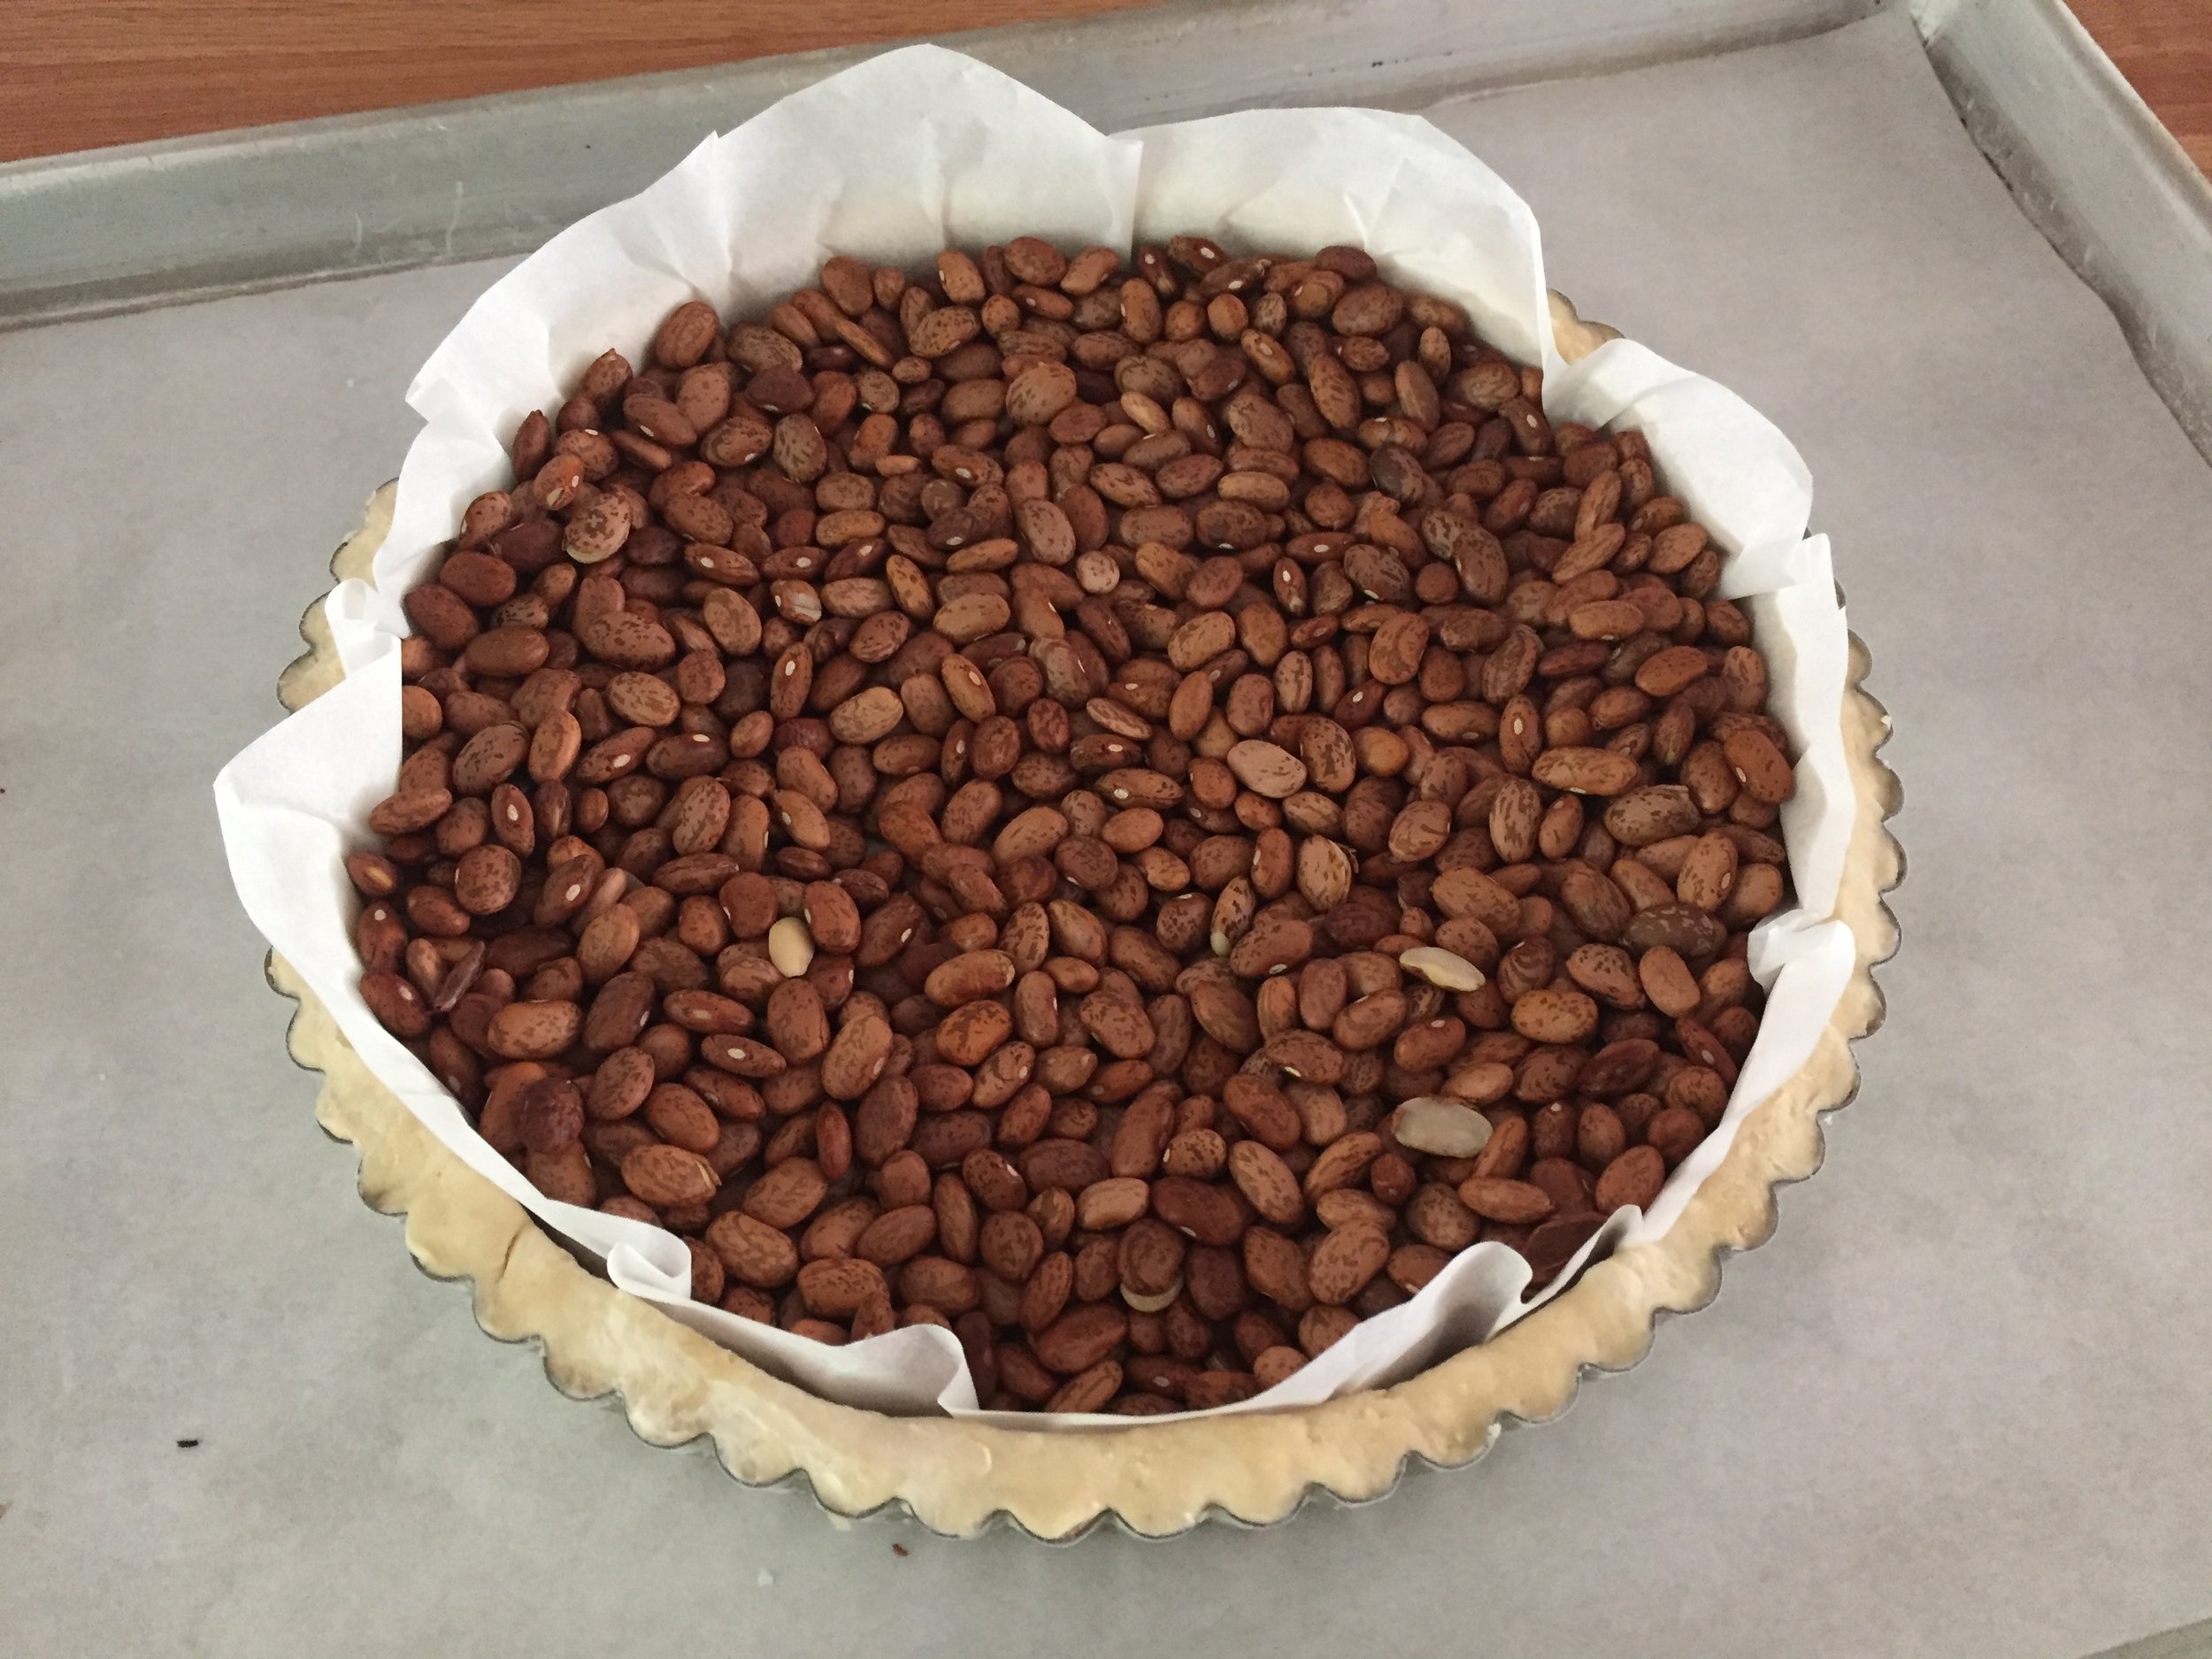
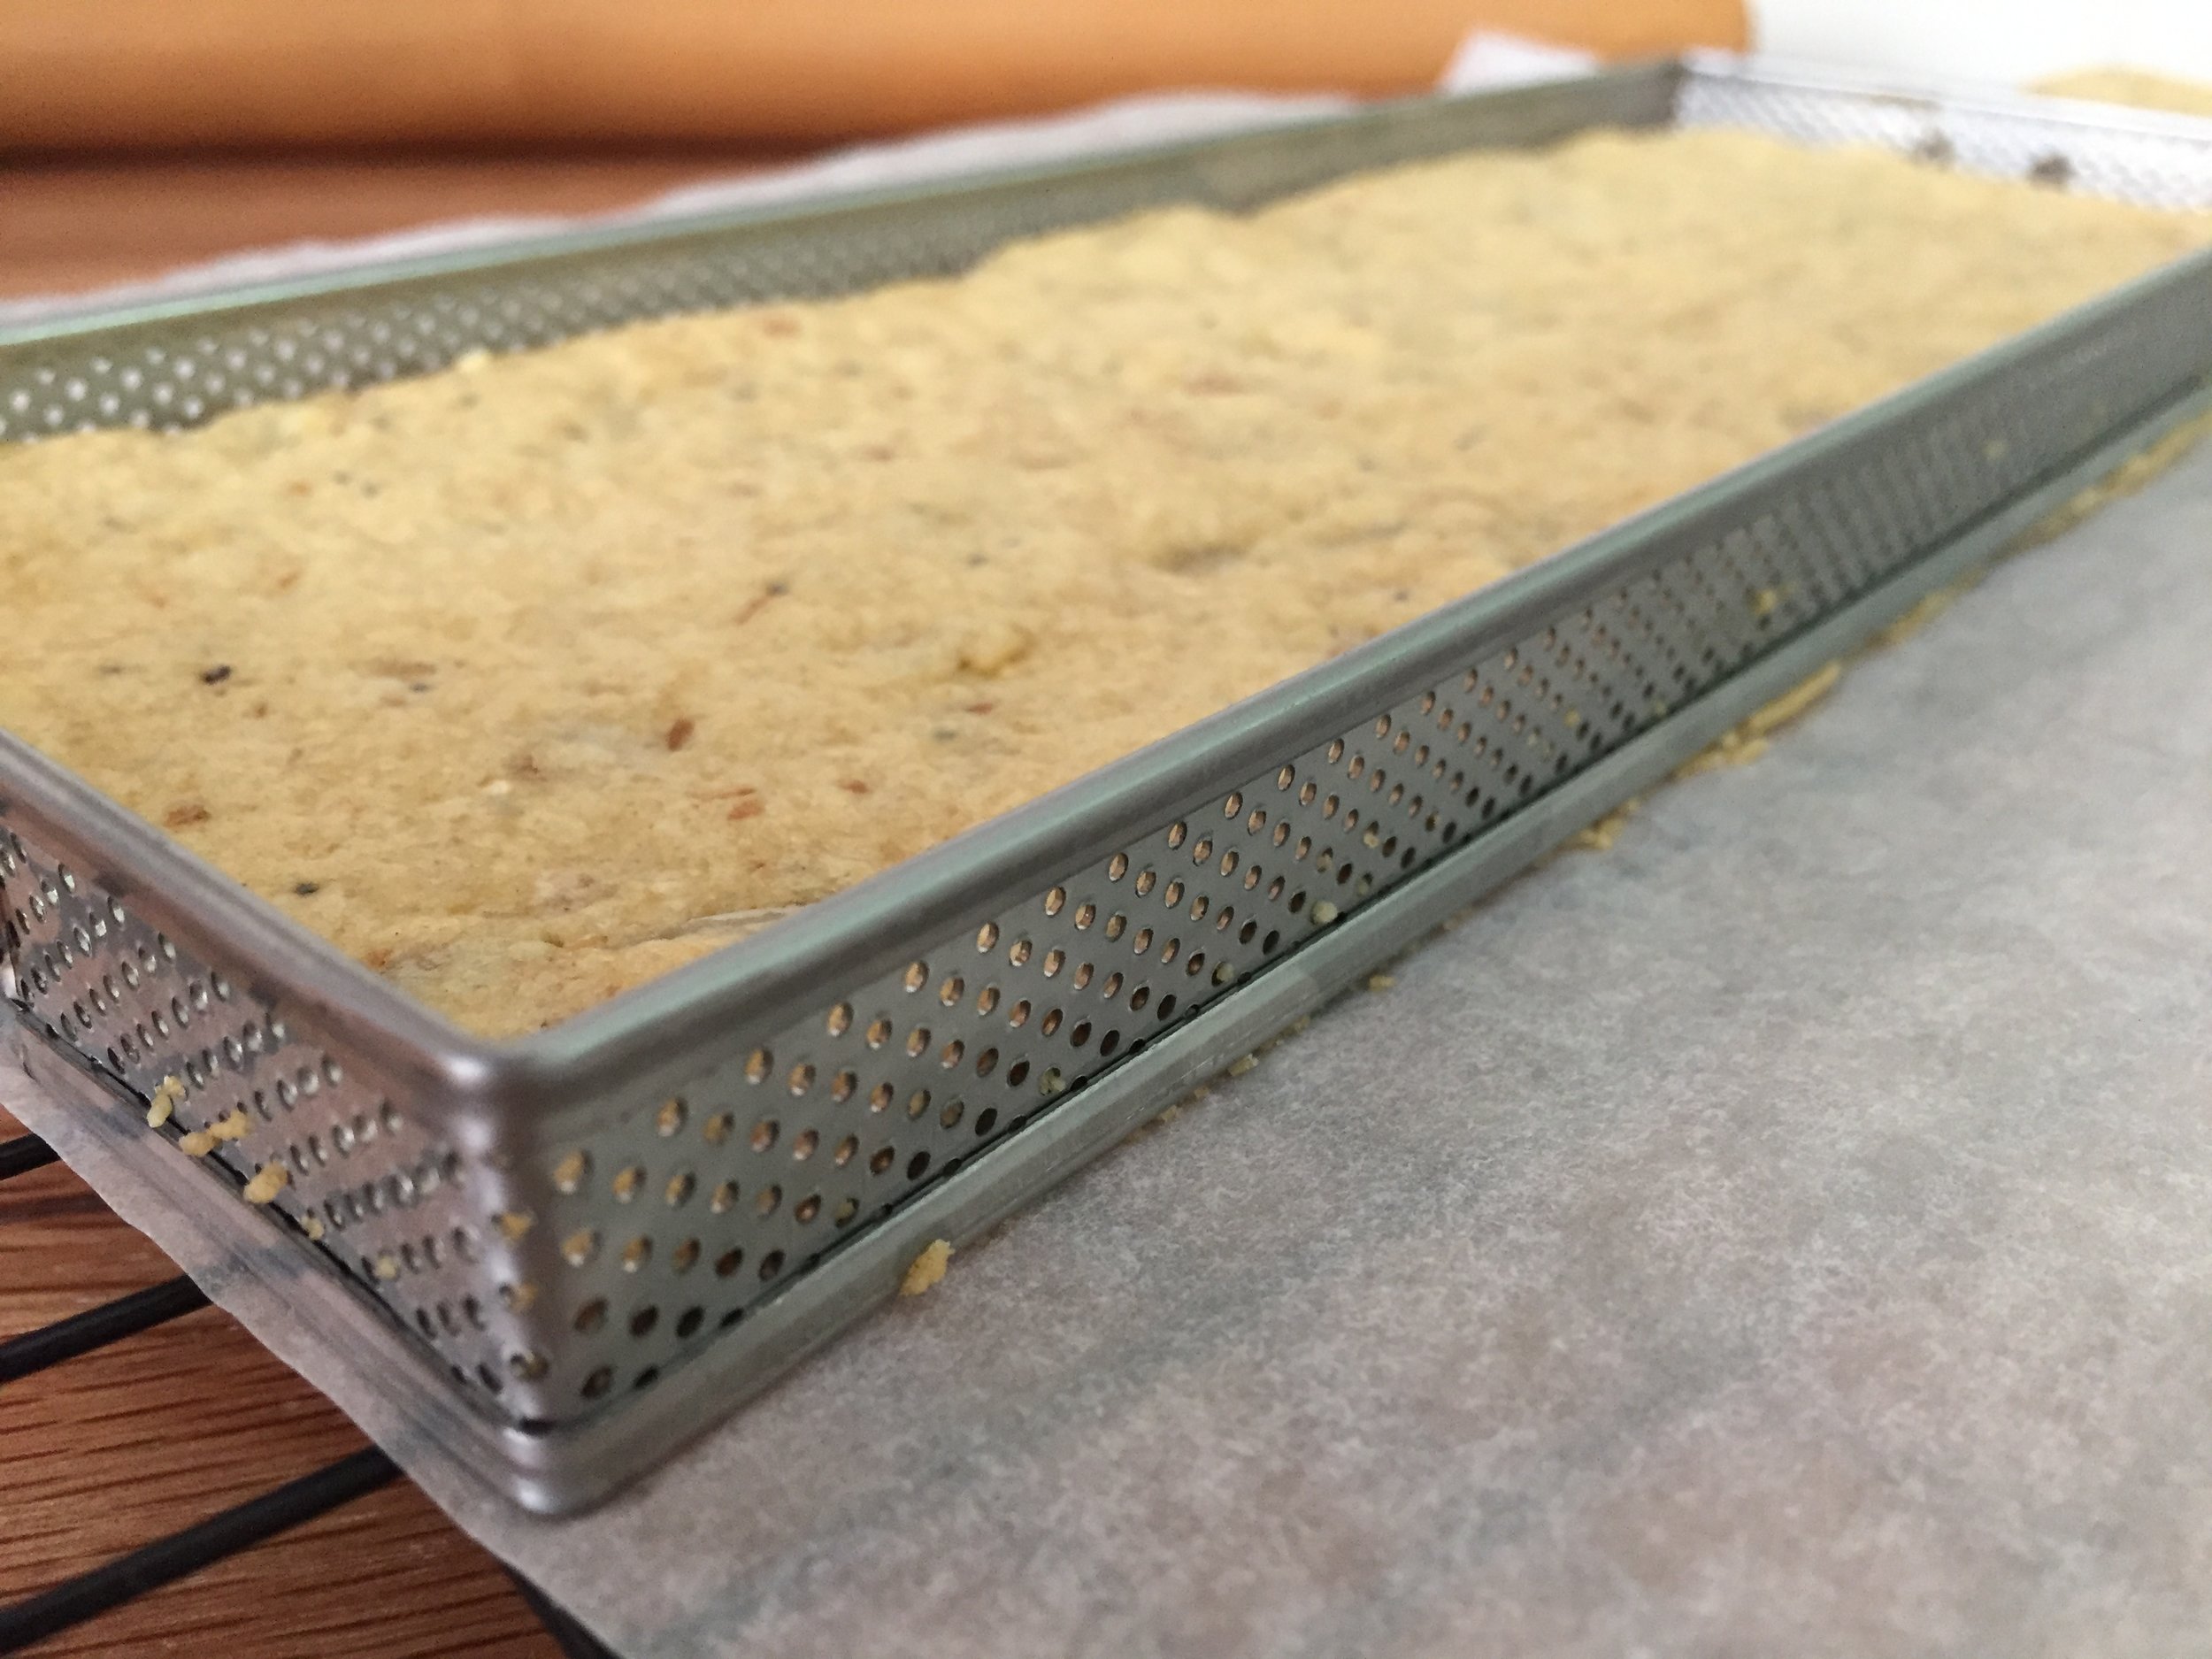
First line the tart rings. In this case I’m making four 100 mm/4 inch diameter tarts, just enough to share with a few folks for dessert. Once lined, I sprinkle a mixture of equal parts sugar/flour (almond flour or fine bread crumbs work too) on the bottom to protect against sogginess from juicy fruit. With apples it’s not as much of an issue as it might be for juicier fruits like berries or stone fruits, but it’s a good practice nonetheless.

If I happen to have some diced/sautéed apples on hand, I put a smattering of those into the tart shell too.

IMG_3121.JPG

For the remaining apple filling I thinly slice a few medium apples and toss them with some vanilla sugar (1/2 to 1 tablespoon per cup of apples, or to taste). You can switch to brown sugar if you prefer that bit of toffee like essence. I generally keep the apples as the centerpiece of flavor and forego adding cinnamon or other spices, but those are popular options with many apple tart/pie bakers. You decide.

I’ve used a number of different apples over the years and love the combination of Jonagold/Fuji or Granny Smith/Macintosh. During my internship in Paris back in 2007 Chef Pascal Pinaud used Golden Delicious for his apple tarts, and they were mighty fine too. Isn’t it fun to experiment?

NOTE: a pound is about 3-4 medium or 2-3 large apples and should yield 3-4 cups. That worked well here with a handful of slices left over. I go for the more the merrier, especially since I like to pile ‘em on.

IMG_3123.JPG

I drizzle a little melted butter over the apples then pop the tray into the freezer while I heat the oven to 400ºF. Start the bake on the lower rack for 10-15 minutes, then move up to the middle rack, turn down to 375ºF and bake for another 10-15 minutes. Some of the apple slice tips start turning brown and I’ll begin to see some juiciness and bubbling developing along with the lovely aroma of baking apples and nicely browning crust. At this point I’ll often turn down to 350ºF and give them another 10-15 minutes. In a nutshell I typically plan a 35-40 minute total bake time for these tarts.

Once out of the oven I drizzle my homemade caramel sauce over and give them 3-4 minutes more in the oven to set the caramel.

Looking good.

IMG_3126.JPG

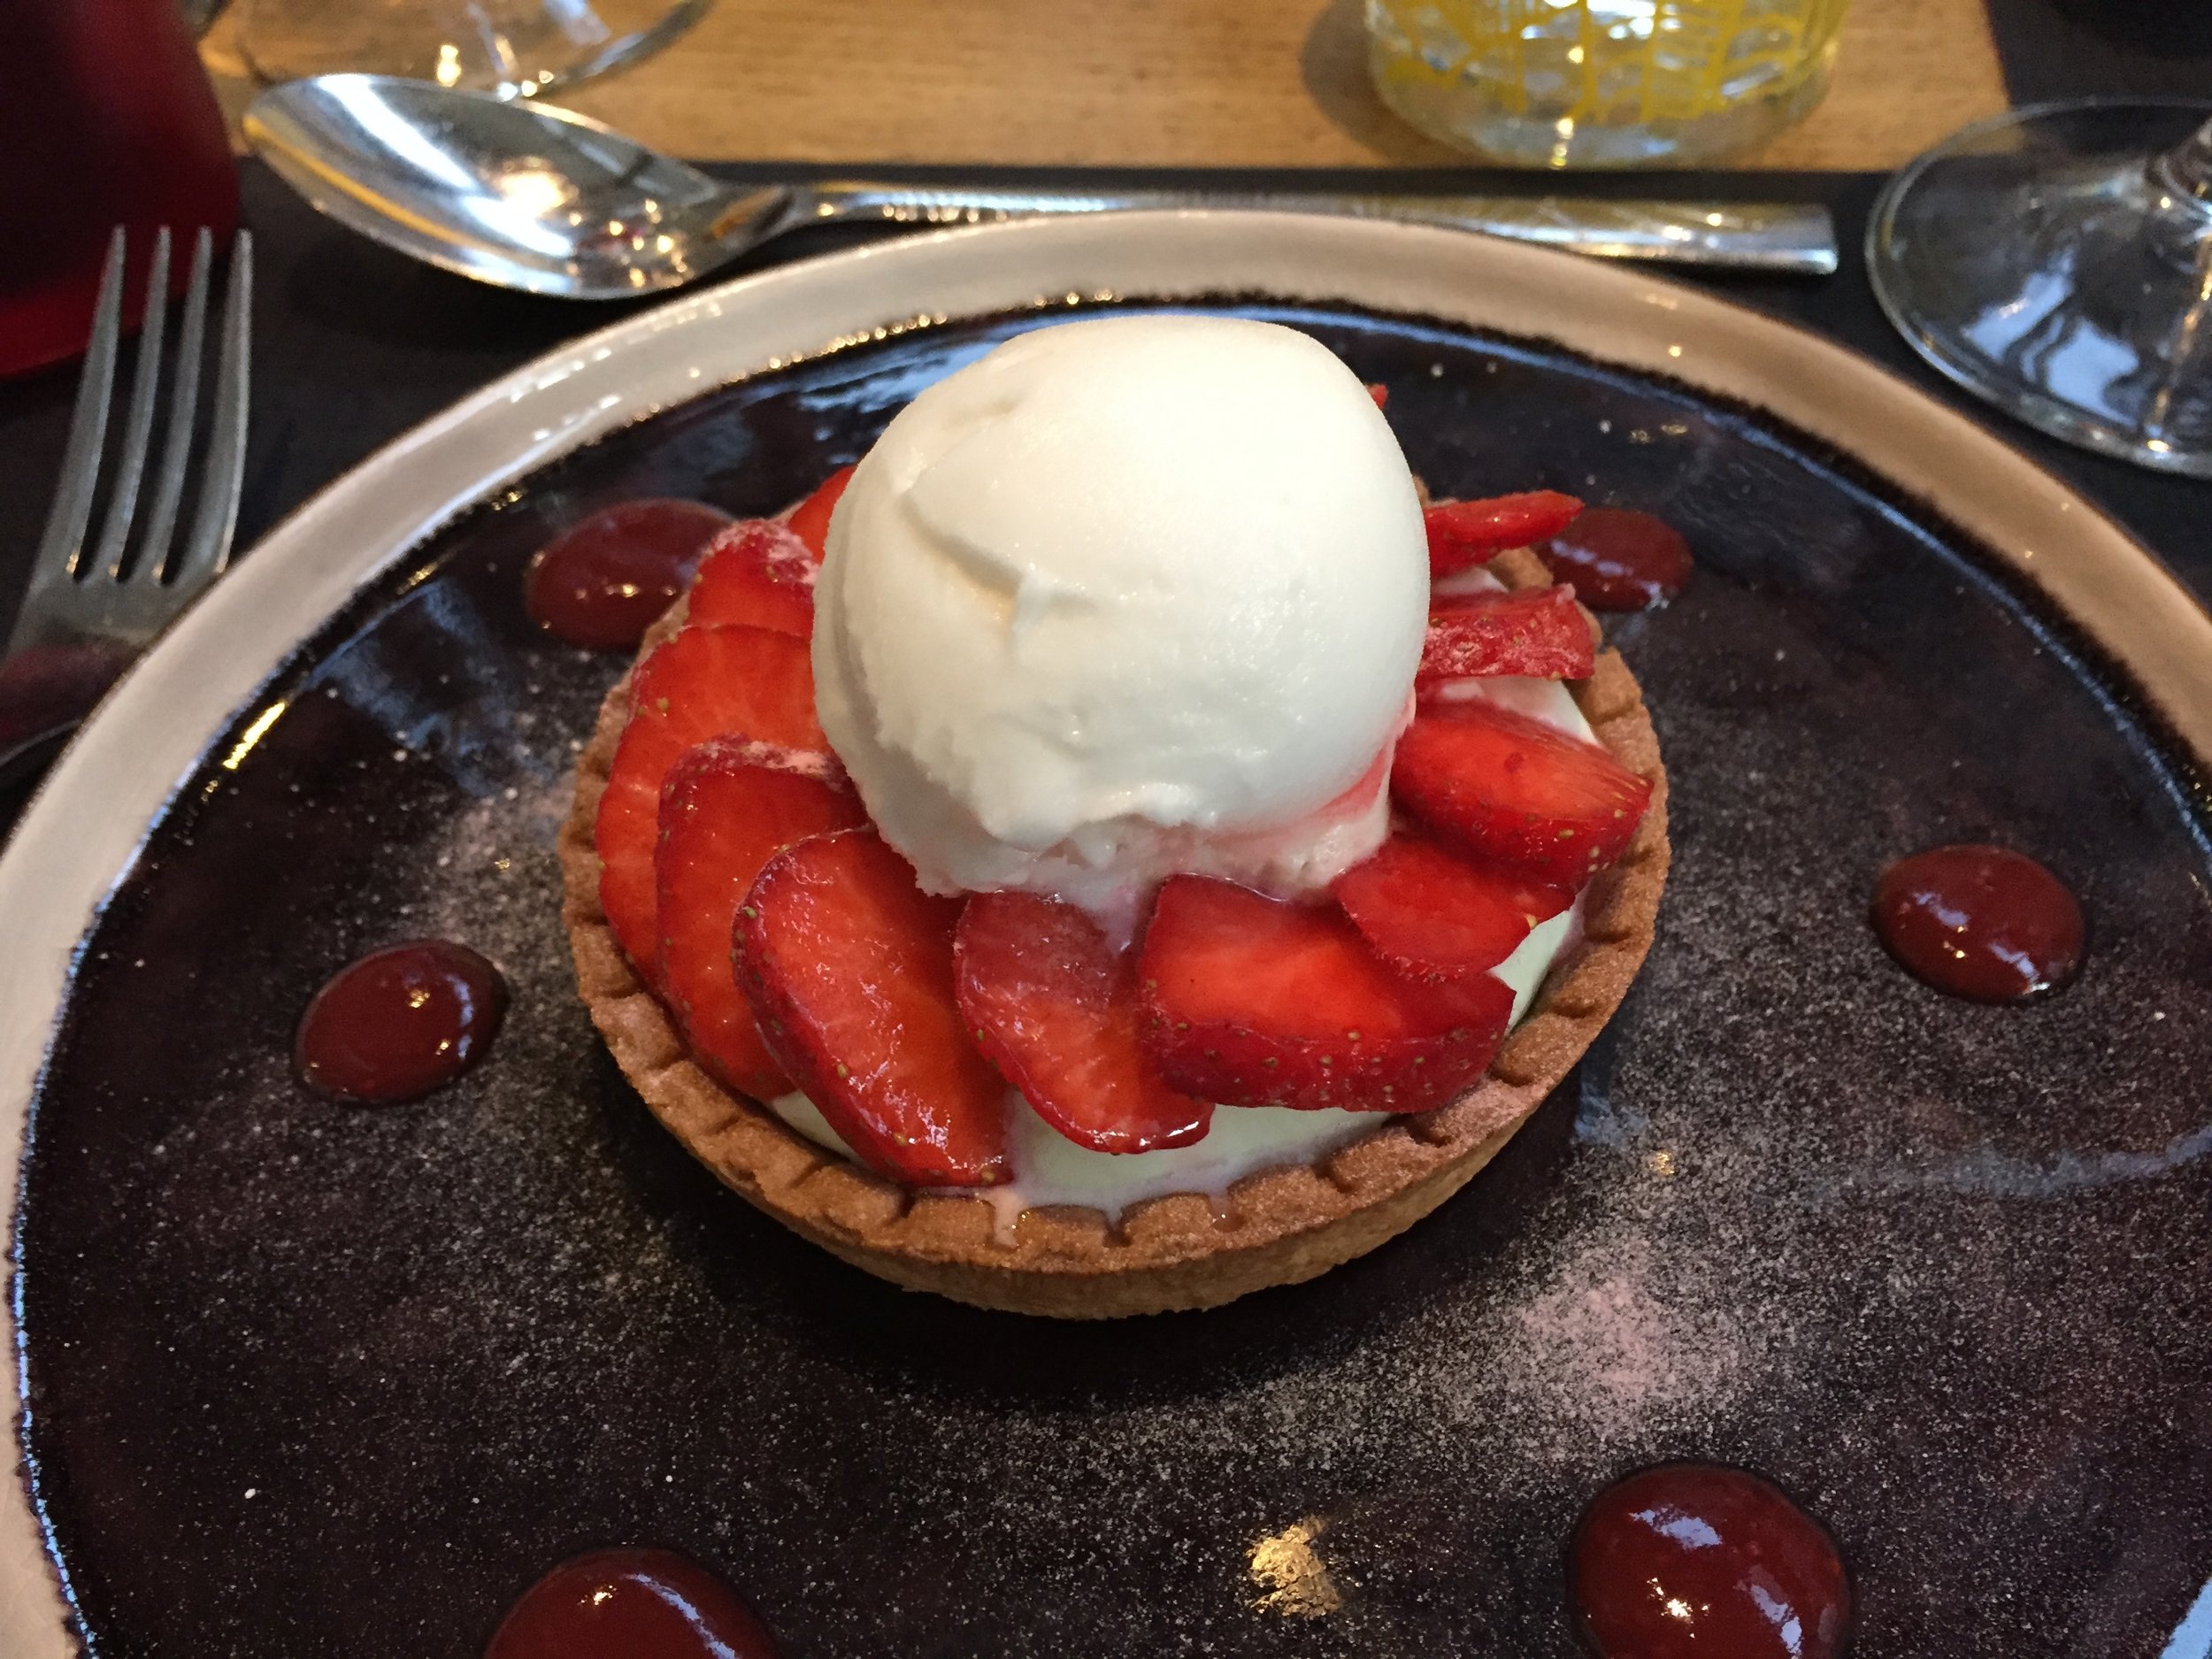
Served with vanilla ice cream (Steve believes everything is better that way), these were a tasty end to the meal. Très délicieuse!

Here’s to many more autumn baking adventures!!

IMG_3129.JPG

Provençal tomato tart

IMG_3180.JPG

Wow this was good! Steve and I enjoyed this freshly baked, slightly warm tomato tart along with grilled chicken and fresh green beans. A delicious late summer meal.

Since tomatoes are out in FORCE right now I decided to make this Provençal tart, ramping up the cheese to include both Swiss cave-aged gruyère and a crumbling type chevre from Pélussin France, located in the Loire department just south of Lyon. Once again, thanks to The Cheese Lady here in Grand Rapids MI for a great selection of cheeses.

IMG_3164.JPG

This tart is one of those things that you can play around with, changing up the herbs, the cheese, the amount of mustard, even the size and type of tomato. It’s a simple approach - a blind-baked pâte brisée crust, a schmear of Dijon mustard and a layer of grated cheese all topped with slices of garden fresh tomatoes seasoned with a little salt, pepper and your choice of herbs. I added some dabs of goat cheese on top just to give it that certain something. Then it all goes into the oven.

Let’s go through the steps OK?

First line the tart pan with tasty pâte brisée.

IMG_3165.JPG

Once lined and pricked all over with my trusty fork, I place the tart pan on a parchment lined sheet pan and freeze it for 15-20 minutes while heating the oven to 425ºF. Once firm, it makes it much easier to line it with a round of parchment and fill it with dried beans for blind baking.

IMG_3168.JPG

Now bake it on the lower rack for 10 minutes, turn the heat down to 400º, move it up to the middle rack and give it another 5 minutes. Take it out of the oven and remove the weights. The crust should be starting to set although the bottom will be a bit moist and doughy and will need a bit more baking to finish it off.

Pop it back into the oven without the weights and give it another 5-10 minutes until golden brown. I often decrease my oven temp to 375 for this step and, as usual, keep on eye on what’s happening in there.

IMG_3172.JPG

Decrease the oven temp to 350º. While the crust cools, thinly slice 2-3 fresh, ripe medium tomatoes, grate up a cup (about 4 ounces) of gruyère and have some Dijon mustard at the ready. I like to blend some regular Dijon with a nice coarse grainy mustard, 2-3 tablespoons total. Maille is a great brand and, if you’re in Paris, you can visit their wonderful shop right near Place de la Madeleine.

Spread a thin layer of mustard over the bottom of the cooled crust. I used 2 tablespoons since I like a more subtle mustard flavor, but you can certainly use more if you wish!

IMG_3173.JPG

Sprinkle the grated gruyère over it.

IMG_3174.JPG

Arrange your tomatoes in concentric circles, overlapping each slice. I also tucked in some halved orange and dark red cherry tomatoes for some additional color.

IMG_3175.JPG

It’s pretty traditional to finish off these tarts with salt, pepper, fresh herbs and a drizzle of olive oil before baking, but I went for an addition of crumbled goat’s cheese dotted over the tomatoes. Then some freshly grated black pepper, a pinch of two of salt, a sprinkling of herbes de provence and it’s ready to go into the oven.

IMG_3177.JPG

Bake it for about 20-25 minutes until the goat cheese is starting to brown, the tomatoes are starting to shrivel and the aroma is hitting your nostrils just so.

IMG_3178.JPG

The combo of nutty gruyère, warm fresh tomatoes, the tangy, creamy goat’s cheese and the perfect hint of mustard and herbs was absolutely delicious. Not only that, it’s très, très facile. You can do it!

This one’s a keeper, right Steve?

IMG_3180.JPG

Fruity-nutty-oat biscuits with cheese

IMG_2971.JPG

These delectable whole wheat shortbread-style cookies (biscuits for you Brits out there) have just the right hint of sweetness, chock full of toasted nuts, dried fruit and oats. You can read more about the recipe here. Since I wrote about these back in February, I've settled on three flavor variations as an accompaniment to cheese, either as an appetizer or as part of the post dinner cheese course. Cherry hazelnut, apricot pistachio and cranberry almond. Lovely.

IMG_2970.JPG

A few weeks back I paired these gems with a mellow, dreamy Saint Angel triple crème from The Cheese Lady here in Grand Rapids. While the cheese is exactly what it should be - buttery, smooth and oh-so-good - it was rather lost when spread on these wholesome biscuits. So I decided to try something a bit more bold and nutty for this episode in my baking-with and pairing-with cheese project.

So back to The Cheese Lady I went.

IMG_3035.JPG

This time I went with a couple of Spanish cheeses, one bleu from the Basque region and one 12 month aged Manchego, both of which just had to be given the chance to show their stuff.

IMG_3039.JPG

The nuttiness of the aged Manchego wasn't bad with the crunchy-little bit chewy-fruity-nutty cookies, but it was the bleu that really shined for me. Salty and pungent yet smooth and creamy - I'll take it! 

IMG_3040.JPG

Alas, while the Steve-meister loves cheese, especially bleus and Manchegos, he couldn't quite get on board with the cookie part (not a shortbread lover - sigh). He'd go for a crispy cracker instead - to each his/her own, right Mr. Steve?

Stay tuned for more cheese adventures!

IMG_3041.JPG

Blueberry & croissant bread pudding plus two summer ice creams

IMG_3114.JPG

This post is quite a mouthful (get it?) but here goes!

I've been experimenting in recent weeks, tweaking my tried and true croissant recipe in hopes of reaching the ultimate croissant perfection. Invariably I've had some croissants leftover, some of which were destined to become croissants aux amandes, one of Steve's (and many others by the way) favorite pastries. But that's not the only way to repurpose this lovely laminated goodie -  bread pudding here we come!

IMG_3102.JPG

Here I'm using a 3 qt Pyrex casserole dish, lightly buttered, layered with about 400 g/14 ounces of chunked up croissant pieces. It's actually better to use "old" croissants for this purpose, since the dough is able to soak up the custard much more efficiently.

IMG_3107.JPG

The custard is one I love to use for baked fruit tarts too. I wanted a filling quantity about twice the weight of the croissants and doubling my base recipe worked out perfectly. Love it.

I typically plan ahead, giving my croissant/custard mélange a good couple of hours to soak in the fridge before baking. Then I topped this one with about 3 cups of blueberries, tucking them down into the custard a bit, followed by a sprinkling of raw sugar for a little extra crunch.

IMG_3108.JPG

Bake at 350ºF for a good hour to an hour and twenty minutes - you want the custard nicely set and the croissant pieces toasty brown. Just be patient. Trust me.

IMG_3110.JPG

Destined for the dessert table at our Labor Day outing at cousin Jen's, I added a couple of complimentary summer ice creams that I must say were pretty fun to make. BTW - I LOVE making ice cream, in case I haven't told you heretofore. I've been using a classic custard type base from David Lebovitz for many years now and never find it wanting. Just omit the vanilla bean from the base recipe when you're creating your own flavor(s).

First up - roasted plum almond. Dairy infused with toasted almonds (which are then strained out) . . . . .  

IMG_3076.JPG

the finished chilled ice cream base blended with about a cup of roasted plum purée then processed. 

IMG_3082.JPG
IMG_3086.JPG

It just takes some planning, as is true of so many things in the kitchen, right?

The roasting fruit thing has been another of my summer experiments, and since I'm invariably contemplating ways to preserve our wonderful summer fruit bounty here in west Michigan, why not give it a try. The idea behind the roasting is to concentrate the flavor more.

It's quite simple really. Heat your oven to 400ºF (or 375º convection), prepare your fruit depending on size (e.g peaches sliced, plums or apricots halved and pitted and maybe quartered too, cherries pitted, berries left whole - just play with it). Place fruit on a parchment lined sheet pan and roast about 10 minutes. Give them a stir and roast another 5-10 minutes. The fruit should become softened, a bit caramelized and shrunken looking. Since I planned to purée mine, I didn't really care how shrunken they became.

My plums were a red-skinned, yellow-fleshed variety which I placed skin side down on the prepped sheet pan. You can roast your fruit au naturel or drizzle a little honey over it if you'd like.

As a side note, a pound of plums (~6 medium or 9 small), halved, pitted, roasted, puréed and strained should yield about 1.5 cups of purée. Of course, you don't have to do the roasting part - just leave that step out of the above, and the un-roasted purée yield should be a bit higher.

IMG_2927.JPG

Once roasted, the fruit will keep in a closed container in the fridge for a few days or frozen for several weeks. I froze mine and did the puréeing later - just thaw in the fridge overnight, purée, add a tablespoon of lemon juice, a pinch of salt and sweeten to taste. I generally start by adding sugar equal to 10% by weight of the purée and add more if it's still pretty tart. Then use it in whatever way you choose. Maybe swirled into a cake batter, blended into mascarpone cream, warmed and used as a sauce over a nice berry cake. You decide.

The second ice cream - sweet corn! 

IMG_3097.JPG

In this case, using the same base recipe mentioned above, scald the milk with half the sugar and a pinch of salt, temper it into the yolks which have been whisked well with the other half of the sugar, then whisk in 2.5 cups of fresh corn cut off the cobs plus the two cups of cream. Bring this all to a boil (the starch in the corn protects the yolks from curdling, just like making pastry cream with cornstarch!).

Then put it all in a decent blender (I have a Breville brand which is dyn-o-mite), purée and strain then chill thoroughly before processing. YUM.

And there you have it - blueberry & croissant bread pudding with sweet corn and roasted plum ice cream on a polka dot paper party plate. Happy summer!

IMG_3117.JPG

Classes at Nonna's Pantry

croissant.jpeg

It's official! I'm now offering small group hands-on pastry classes at Nonna's Pantry in Ada. Check out the fall schedule here.

I'm excited to have a space in which I can share my craft with beginners and avid bakers alike. Even though we're still in the throes of summer heat, humidity, showers and thunderstorms, fall is coming and it's baking season. Yay!!

I look forward to seeing some of you at Nonna's this fall. Meanwhile, happy baking to all.

Caprese gougères

IMG_3064.JPG

Tomatoes and basil here we come!! It's sum-sum-sum-sum-sum-sum-summertime, and we're deep into it. I've been dreaming of a caprese salad and now's the time.

Another visit to The Cheese Lady was in order to score some fresh mozzarella and a tasty grating cheese for some delicious gougères, essentially a cheesy version of profiteroles.

IMG_3049.JPG

Gruyère is the cheese that's often used in savory gougères but one can certainly waver and choose something equally as tasty. Since I was filling them with mozzarella, tomato and basil, I thought some mozzarella or similar cheese would be a decent addition to the pâte à choux, but I didn't really want a run-of-the-mill grated mozz from the supermarket.

The Cheese Lady to the rescue! A pecorino Toscano was suggested as a good stand in for mozzarella, so that's what I chose for my choux paste. Wanting a little something to grate on the choux tops, I went with a Comté.

You might notice on the package above that the label reads gruyère de Comté, prompting one to ask "What's the diff between that and gruyère, eh? From my very brief research, I learned that a classic gruyère is produced in Switzerland, while a gruyère de Comté comes from the Franche-Comté region (newly re-formed as Bourgogne-Franche-Comté in early 2016) of France on the Swiss border. And, just to add to the confusion, I'll throw one more name in there - the similar Emmental which is also produced in Switzerland but has holes, unlike gruyère. They're all good if you ask me.

So let's make some gougères already.

IMG_3050.JPG

Basic pâte à choux is made with milk, water, butter, a bit of salt and sugar, flour and egg. For a savory version like this I delete the sugar, add in some black pepper and mustard powder, as well as grated cheese. You could also add herbs if desired, like some dried thyme or basil. Just click here for the full recipe.

Once you've completed the process, just pipe or scoop 'em out onto parchment lined sheet pans. 

IMG_3051.JPG

In this case I topped them with some grated Comté before popping them in the 400ºF oven.

IMG_3053.JPG

It's generally recommended that you leave the oven door closed for the first 10 minutes of baking, otherwise the puffs can fall. I usually turn the temp down to 375ºF at that point and give them another 15-20 minutes to finish. Remember to pay attention to what's going on in there!

Ooooh - nice and browned and just begging to be filled and tasted.

IMG_3059.JPG

On of the beauties of making choux puffs is you can freeze them for later, either unbaked or baked. Cool! Just add 5 minutes or so to the baking time if baking right out of the freezer or, if using already baked puffs that have been frozen, re-crisp them in a 350º oven for 10 minutes or so before filling. The perfect do-ahead treat.

Time to make the caprese salad.

IMG_3074.JPG

Fresh mozzarella balls from The Cheese Lady plus fresh basil and campari tomatoes from the Fulton Farmer's Market are ready to be chopped and combined with a little olive oil, salt and pepper.

For around 40 puffs I used 8 ounces mozz, a generous cup of seeded and chopped tomatoes, about 1/2 cup chopped, packed fresh basil and 3 tablespoons extra virgin olive oil. Salt and pepper to taste.

IMG_3055.JPG

Et voilà!

IMG_3062.JPG

The puffs were crispy outside and creamy-cheesy inside with just the right amount of moisture for my liking.

Since I was making these for an afternoon event, I waited as long as possible before filling the puffs so as to avoid sogginess. I lit upon an idea and lightly toasted up some panko bread crumbs, stashing a few in the bottom of each puff. What genius!

IMG_3063.JPG
IMG_3065.JPG

Once they were all filled, I boxed them up and hit the road! Of course, I had made extras so I could sample a couple. Not bad at all, folks, although I did hanker for a more upfront cheesiness to the gougère and decided the pecorino Toscano was too mild. So next time - gruyère or Comté here we come!

IMG_3066.JPG

Tarte au fromage blanc

IMG_3027_1.jpg

Continuing on with my baking with cheese series, this tarte au fromage blanc is the latest adventure - and a delicious adventure it was. One of my favorite tart books is Les Folles Tartes by Christophe Felder, one I purchased back in early 2011 in Paris. I've been eyeing his recipe for this particular tarte for some time now, and what better way to pursue it than to include it in the cheese project. Love it.

Heather Zinn, the proprietor of our local GR Cheese Lady shop was kind enough to order a full fat version of this cheese for me from Bellweather Farms in Sonoma County CA. It's a European style fresh cow's milk cheese, not unlike a creamy goat cheese, with a bit of tang and salt and is also referred to as "fresh farmer's cheese".

IMG_2993.JPG

I wasn't sure what to expect but was pleasantly surprised at it's creaminess, spreadability and delicious dairy flavor straight out of the tub. Steve and I loved it on our favorite original Triscuit crackers, thinking it would only be enhanced by some herbs, a grind or two of black pepper and perhaps a little succulent fresh tomato. Yeah baby! 

I opted to use my standard pâte brisée which I blind baked first so as to avoid an under baked bottom crust once the filling was added and baked. This time I tried a new approach, one I gleaned from reading Thomas Keller's "Bouchon Bakery". It involves leaving an over hanging edge of dough around the tart ring, baking it as such and then eventually trimming off the excess dough after baking. The idea is to cut down on dough shrinkage during the bake. Pretty cool.

IMG_2997.JPG

Once the ring was lined, I popped it in the freezer on my parchment lined sheet pan for about 15-20 minutes while heating the oven. Then in goes a round of parchment and dried beans as weights and onto the bake. As you see below, I had a few cracks in the dough around the periphery but, when it came time to add the filling, I simply took some small pieces of raw dough and patched them. Okey-dokey.

IMG_2998.JPG

The filling is a straight forward blending of 400 g fromage blanc, 2 large egg yolks (2 whites comin' up!), a pinch of salt, 90 g cane sugar, 20 g flour, 100 g heavy cream, a teaspoon of vanilla extract, finished off by folding in the 2 whites that have been whisked until fluffy. I added my own zest of two lemons - it seemed so right with this cheese.

Have 50 g of cubed butter set aside to dot on the top of the filling before it all goes into the oven. (Notice my raw dough patches on the crust!)

IMG_3007.JPG

I decided to trim some of the dough over hang before the final bake - took my serrated knife and gently trimmed away.

IMG_3008.JPG

The cubed butter on top (seemed like a lot - I would reduce it next time!) . . . .

IMG_3010.JPG

a 45 minute bake at 375ºF . . . . et voilà!

IMG_3014.JPG

Pretty pouffy just out of the oven, but after a short time things calmed down and sunk, as a custard type filling is often wont to do. Kind of moonscape like, non?

Once fully cooled, I trimmed the flaky crust edges and eased this baby out of the tart ring. It can be served room temp, or in my case, it went into the fridge, covered, to chill and be served later.

IMG_3015.JPG

This was destined for dessert at cousin Jen and her husband Scott's lovely woodland home and, since we're deep into blueberry season, it only seemed right to whip up a quick blueberry sauce. A warm up in a saucepan of 2 cups blueberries, a couple of tablespoons of simple syrup, a teaspoon of cornstarch dissolved in a tablespoon of lemon juice and a pinch of salt. Once the juices release a bit, take half the blueberries, purée then strain and add the purée back into the remaining blueberries, cooking a few minutes to thicken. Easy and oh so good. Plus, I had some fresh raspberry purée in the fridge that was begging to be used.

IMG_3024_1.jpg

Some chose both the blueberry sauce and raspberry purée while others kept to a solo blueberry arrangement. All were topped with my homemade graham crumble for that just right added crunch.

IMG_3030_1.jpg
IMG_3027_1.jpg

Creamy, just right lemon-y, fruity, berry-y and graham crunchy in a flaky just right crust. OH. SO. GOOD.

Yes, I would make this again.

English cheddar scones

IMG_2976.JPG

Let's be clear. I love cheese. So why not use some delicious cheeses in my baking projects, eh? It's a win-win - I expand my knowledge about different cheeses AND I get to create some tasty goodies to boot!

We're fortunate to have The Cheese Lady here in Grand Rapids. It's just one of six Cheese Lady shops located in lower Michigan (read more about it here), and boy-oh-boy do they have a fantastic selection. It's a wonderful spot where the staff is knowledgeable, friendly and helpful, plus one can sample and purchase all manner of cheeses from around the world.  In addition there are well thought out displays of cheese accoutrements and assorted cool serving bowls, cheese boards, platters and utensils. You should check it out!

IMG_2939.JPG

Below is a shot of the cheese board to get you in the mood to go buy cheese! Yeah!!

IMG_2941.JPG

This post launches a series I plan to do over the next several months, primarily on baking with cheese but also the occasional post on pairing cheeses with baked goods. First up - cheddar scones.

IMG_2984.JPG

I chose an English cheddar, Barber vintage reserve, for this project. Did you know there's actually a town in England called Cheddar? If I did, it was certainly buried somewhere in my feeble brain. Just google "history of cheddar cheese" and you'll learn all about it. Bottom line - it's a cow's milk cheese and the good cheddars are REALLY good.

IMG_2936.JPG

I tweaked my scone recipe to give it a savory note - subbed in some whole wheat pastry flour for some of the all purpose, reduced the sugar, added a little dry mustard, freshly ground black pepper and a hint of cayenne to set off the just-right bite of the cheddar. 

IMG_2949.JPG

The key to scone making is to keep everything cold and work efficiently without overdoing it. Dry ingredients in the bowl, diced cold butter tossed in . . . . . 

IMG_2950.JPG

Sand the butter into the dry ingredients to achieve coarse crumbs with flattened pieces of butter still visible. Distribute the cheddar cheese around the edges of the bowl then pour in the cream/egg . . . .

IMG_2951.JPG

Toss it up with a fork to moisten everything. At this point I use my trusty bowl scraper and quickly blend everything together, then turn out onto the work surface for a quick knead into a rough and tumble rectangle. Don't worry if there are still a few dry crumbs. It will all work out in the end - trust me.

IMG_2953.JPG

The next step helps to achieve a bit of layering to the dough, kind of like making puff pastry. Visually divide the dough in three and fold one end of the dough to the middle . . .

IMG_2954.JPG

then fold the other third over onto the dough like a business letter. 

IMG_2955.JPG

Et voilà! You've done a three-fold!

Now either pat by hand or quickly but gently roll the dough into a rectangle again. I like the dough to be about an inch thick so I eyeball the size of the rectangle based on my desired thickness. These are closer to 1/2", a bit too thin - next time I'll pay more attention. 

While this recipe makes 8 "standard" (whoever decided what that is?) sized scones, I prefer mine on the smaller size, particularly for trial and tasting purposes. First I score lightly, then cut with my bench scraper into 16 triangles. (NOTE: Going forward I'll do 12, working toward the one inch thickness - that gives you a not-too-big-but-still-nice-sized-scone).

IMG_2956.JPG

Place 'em on a parchment lined sheet pan, brush with egg wash or milk then sprinkle additional grated cheese on top.

IMG_2958.JPG

Place the tray of scones in the freezer while you heat the oven to 425ºF. Bake for 5 minutes then decrease the temp to 400ºF and continue baking for another 10-15 minutes until nicely browned. I rotate my tray half way through and will ratchet the oven down to 375ºF if I feel they're browning too quickly. Remember - it's up to YOU to watch what's going on in there.

IMG_2961.JPG
IMG_2964.JPG

The end result was outside crispy, inside buttery-melty, light texture-y, cheddar cheese-y with a subtle hint of heat on the finish. Those who tasted them thought they were deelish with one taster's plea for more heat. Good to know. Yes, I will definitely make these again.

IMG_2978.JPG

Raspberry-currant cream berry tart

IMG_2925.JPG

Planning a dessert for the recent Bastille Day celebration with the local GR chapter of L'Alliance Française, my thoughts turned to tarts (of course!). I had fresh raspberries, blueberries and even currants from the Fulton Farmer's Market, and it was definitely time to incorporate those goodies into a delicious tart.

I've previously written about Breton dough (one of my faves), the most recent post being in early July using a céréales version to support some fresh pastry cream and strawberries. Besides the flavor and delicious texture of Breton dough, on the more practical side, it calls for egg yolks which I always see as the perfect opportunity to accumulate egg whites for financier batter or meringues. Love it.

My Breton dough was already made and in the fridge, as was a batch of raspberry currant cream that I had used the previous day for some petite fresh berry tartlettes. The plan - layers.

First I rolled the dough out to 1/4" thickness, trimmed the edges as needed and pressed it into my lightly buttered 4"x11" rectangular tart form. (Side note: this is the one tart dough I use that I butter the tart ring or form - otherwise it sticks). I wanted to build up an edge that would bake up around the filling and fruit, so I cut narrow strips of additional dough and placed them around the periphery. Then I spread a thin layer of raspberry jam on the dough within the borders. 

IMG_2908.JPG

Next up - a layer of raspberry currant cream. Now here is just one of the wonderful things about pastry cream - you can replace 75-80% of the whole milk in your favorite pastry cream recipe with fruit purée(s), proceed with the usual preparation and voilà - fruit cream! For this one I used equal weights of fresh raspberry and fresh red currant purées made with some of my farmers's market booty. So tart yet creamy and delicious.

I found it easiest to pipe thin stripes of the cream over the raspberry jam, so as not to mess it up by trying to gently spread it. Piping makes things so neat, doesn't it? 

IMG_2909.JPG

Then comes a nice sprinkle of berries - in my case raspberries and blueberries. Another cool trick is if you freeze your raspberries a few hours ahead, you can easily break them up into halves or smaller pieces while still frozen to distribute them over the cream. You try that with fresh raspberries and you'll have a juicy mess! And you can pop the tart right into the oven - no need to wait for thawing, just go for it.

IMG_2910.JPG

For the final touch I brushed the dough edges with a bit of cream, sprinkled on some raw sugar and added chopped pistachios over the whole kit-n-kaboodle, not only to provide a wonderful color contrast but also some added crunch for the tasting portion of the program.

IMG_2911.JPG

This one baked at 325ºF (convection) for about 25 minutes. I always check things half way through, rotate my sheet pan to provide even browning (yes, even in a convection oven!). You want the crust to be nicely browned and the cream to be set.

IMG_2918.JPG

Let it cool for 15-20 minutes, gently slide a knife or offset spatula around the edges to loosen the tart form and lift it right off.

IMG_2932.JPG

Part of a dessert buffet for the Bastille Day L'Alliance gathering, I sliced it into strips and added a dollop of lightly sweetened whipped cream to each portion. Oh my, I love this dough sooooo much! Light, buttery and a wonderful complement to the tart, fruity cream and berries. And, to top it all off, I had some extra components to make another petite blueberry tart for Steve and myself to enjoy the next day. Scrumptious.

IMG_2935.JPG

Swirly whirly Viennese butter cookies

IMG_2897.JPG

Creating a varied menu and testing out the possible goods for an afternoon tea or special occasion brunch, lunch or what-have-you is an ongoing project of mine (Yes, I'm getting there). As I research recipes and ideas, I invariably come across something I haven't made for a long time. This cookie is one of them.

Years ago I had a cookie press with the various discs that allowed one to create butter cookies in different shapes or designs, including a simple swirl . I've since moved on from the cookie press, but these whirled Viennese cookies remind me of those days of yore. It's a classic butter cookie made even more enticing by sandwiching with raspberry jam and buttercream.

Most of the recipes I've seen call for equal (or nearly so) weights of butter and flour along with some confectioner's sugar, cornstarch (or cornflour, as the Brits call it), vanilla and maybe a bit of baking powder and salt. As is the case with pretty much all recipes, the quantities of each ingredient vary a bit from recipe to recipe. They're all good if you ask me! 

I opted to use white rice flour instead of cornstarch, being curious about the final texture (Spoiler alert - good!).

IMG_2844.JPG

Here's the recipe I used for these:

  • 200 g / 1 stick plus 6 tablespoons butter, softened
  • 50 g / 1/2 cup confectioner's sugar
  • 1 teaspoon vanilla
  • 200 g / 1 1/2 cups all purpose flour
  • 30 g / 3 tablespoons white rice flour
  • 1/2 teaspoon baking powder
  • pinch salt
  • 1-2 tablespoons whole milk
  1. Heat the oven to 325ºF. Line two half sheet pans with parchment paper.
  2. Cream the soft butter and confectioner's sugar with the paddle on medium-high for several minutes until pale and light.
  3. Add the vanilla extract and blend in.
  4. Sift the flour, rice flour, baking powder and salt into the bowl; add 1 tablespoon milk and blend until smooth and well combined.
  5. Add the additional tablespoon of milk only if the mixture seems a bit stiff.
  6. Spoon the dough into a piping bag fitted with a large star tip and pipe whirls onto parchment lined baking sheets. Leave some space to allow for spreading, although in my experience they don't spread too much.
  7. Place in the freezer for 20-30 minutes before baking. This step sets the dough and makes it more likely your cookies will hold their shape nicely.
  8. Bake for about 10-12 minutes until the edges start becoming golden brown. Cool on wire racks.

Once cooled, pair up the cookies, overturn them, pipe a swirl of your favorite buttercream on one side and a smear of raspberry jam on the other. Sandwich 'em together and c'est fini!

IMG_2894.JPG

A little dust of powdered sugar before serving gives them just the right elegant touch.

IMG_2896.JPG

I find the powdered sugar/butter version of buttercream (which is found all too often on cupcakes, in layer cakes, on cookies) to be too sweet for my taste, so I prefer to make a Swiss meringue buttercream which is lighter and less sweet. It's a little more work, but, once you've done it, the next time will go so smoothly. It's worth the effort for me.

For this project I made my orange honey buttercream as follows:

  • 3 large egg whites
  • 140 g / scant 3/4 cup cane sugar
  • 185 g / 1 stick plus 5 tablespoons unsalted butter, cubed and at room temperature
  • 84 g / 4 tablespoons honey
  • pinch sea salt
  • zest of one orange
  1. Have a stand mixer with whisk attachment at the ready.
  2. Place an inch or so of water in a medium saucepan and bring to a boil.
  3. Have a thermometer on hand (a digital probe type works well or a standard candy type thermometer).
  4. Meanwhile, place the egg whites and sugar in a medium bowl that sits nicely in the top of your saucepan and whisk them together. Reduce the heat to a simmer and whisk until the sugar is dissolved, the mixture starts to thicken and whiten and the temperature reaches 150-155º F.
  5. Transfer the meringue directly to the bowl of the stand mixer and whisk on high until cooled and thickened to nice shiny stiff peaks.
  6. Gradually add the room temperature butter, a few pieces at a time, until incorporated and the buttercream is smooth and creamy.
  7. Blend in the honey, sea salt and orange zest. I usually do that with a hand held spatula and make sure everything is blended nicely. 
  8. Pipe or spread as desired. This keeps well in the fridge for several days and can also be frozen. Once chilled or frozen the cream should be brought to room temperature and may need a bit of rewhipping to soften and smooth it out again for use.

And how did these taste, you might ask? Delicious. Melt in your mouth cookie with a delightful texture from the rice flour, along with the hint-of-orange-creamy and tang-of-raspberry-fruity. These keep very nicely in the fridge for several days and can also be frozen.

Feel free to create your own combos of buttercream and jam for something just a little different. I know I will and why not, eh?

IMG_2895.JPG

Sablé Breton au céréales avec fraises et crème

IMG_2886.JPG

Multigrain Breton shortbread, smooth luscious pastry cream and fresh strawberries. Yup. That's it.

Summer is upon us with a vengeance, with heat and humidity spending time with us for some days to come. Great for those who are spending the July 4th week at the beach or campground, but not ideal for the bakers of the world. There are some mornings when one gets up that simply announce themselves as baking days but, alas, not right now.

The good news is that strawberry season is in full swing here in west Michigan, and in fact is already starting to wane. What a delicious, albeit short, time of year, making it so important to take advantage of it while we can. 

freshstrawb.JPG

I had made some sablé Breton dough the other day, adding a mixture of seeds and grains to it for a change of pace. The base recipe is a favorite of mine, kind of a cross between a tart dough and a buttery dense, yet light and airy cake. Bake it on the thin side and it's a crispy texture, but on the thicker side it's kind of like a soft-ish, chewy cookie. You just have to taste it to know what I mean.

IMG_2871.JPG

It's a straight forward preparation and can be accomplished by hand or with a mixer. First you whisk 3 large egg yolks with 140 g sugar for several minutes to blanch and thicken it. Then blend in 150 g soft, unsalted butter until homogeneous. Sift in 200 g flour (I used half whole wheat pastry flour and half all purpose flour) along with one teaspoon baking powder, add in 1/2 teaspoon fine sea salt and 70 g almond flour and mix it all together. Finally blend in 80 g mixed grains, wrap the dough in plastic wrap and chill one hour. (See my previous post about Breton dough here and the full recipe here).

All mixed up

All mixed up

For the grains I decided on King Arthur Flour's Harvest Grain Blend, a combo of oat groats, wheat flakes, rye flakes, sunflower seeds, sesame seeds, flaxseed, poppy seeds and hulled millet. I've already used this mix in a simple wheat sandwich bread as well as in my favorite buttermilk scone recipe - wonderful toothsome chew and crunch going on. I'm definitely in.

IMG_2885.JPG

On our recent spring time trip to Paris I visited Mora, that wonderful all-things-pastry shop near the Etienne Marcel line 4 metro stop. There I purchased my first perforated tart form, a relatively new iteration that comes in all shapes and sizes for the avid and/or professional tart maker. The idea is to expose more of the dough to the heat of the oven for even better browning. I like that.

IMG_2879.JPG

For this Breton dough project I wanted a simple flat base, no edges, so I just had to roll and shape a piece of dough about 1/4 inch thick to fit my form. Easy. The quantity of dough needed is up to you, something you have to gauge based on size of the form or pan you are using and thickness desired. Remember - thicker is softer and chewier while thinner is crisper.

In spite of the heat I proceeded to bake the dough during the earlier morning hours while the temps were still on the coolish side. This one baked at 325ºF, convection, for about 20 minutes (look for golden brown and a lovely aroma). 

I had already been imagining the pastry cream/strawberry garnish, so my pastry cream was made and chillin' in the fridge. I just had to gently wash, pat dry, hull and slice my fresh local strawberries from the Fulton Farmer's Market.

IMG_2884.JPG

I sliced my Breton base into strips, piped on simple rounds of crème pâtissiére and topped with the fresh berries. The result was a delightful combo of creamy, fruity and that nutty, seedy chewiness of the Breton dough. Not bad at all. 

I can imagine this multigrain Breton option as a lovely biscuit on a cheese board. Hmmmm. . . . now there's an idea.

IMG_2891.JPG

In the meantime have a wonderful Fourth of July week and stay cool everyone!

Baking with Michigan fruits the French way

strawberries2.png

Having just finished a presentation at the Gaines Township Branch, the FIRST in a series of NINE (count 'em - 9!) presentations offered through the Kent District Library (KDL) system, I'm here to promote the beauty of West Michigan fruit. Tis the season!

Summer in Michigan is something you simply have to experience. The lakes, the BIG lake, the orchards, the farmer's markets, the U-pick farms and the delicious bounty available to us here is amazing.

My KDL presentations offer a look into how one might use the bounty of Michigan's fruits in the French manner. I've enjoyed preparing for this and look forward to completing the series which will go through mid-August. It's fun!

I'm currently focusing on strawberries (now in season!) and cherries (coming soon!) and providing the attendees with a couple of sample treats to enjoy.

Strawberry tartelettes with lime cream

Strawberry tartelettes with lime cream

cherries.jpeg
Cherry financiers

Cherry financiers

I'll change things up a bit as the summer moves forward. Needless to say, it's all about understanding the classic bases of pastry and how you can use them to create your own delicious summer fruit-ful desserts and pastries! Sign up is required so check out your own local KDL branch and put it on your schedule!

Here's the upcoming schedule.
Saturday, June 23, 2018 - 2:00pm to 3:00pm, Grandville Branch
Saturday, June 30, 2018 - 10:00am to 11:00am, Krause Memorial Branch (Rockford)
Saturday, July 14, 2018 - 10:00am to 11:00am, Walker Branch
Saturday, July 28, 2018 - 2:00pm to 3:00pm, Comstock Park Branch
Saturday, August 4, 2018 - 10:00am to 11:00am, Kentwood (Richard L. Root) Branch
Tuesday, August 7, 2018 - 6:00pm to 7:00pm, Tyrone Township Branch (Kent City)
Saturday, August 11, 2018 - 10:00am to 11:00am, Byron Township Branch
Tuesday, August 14, 2018 - 2:00pm to 3:00pm, East Grand Rapids Branch

I look forward to seeing you soon!


Ficelle (a.k.a. skinny baguette)

IMG_2822.JPG

I thought I'd take a few moments on this cloudy, off again-on again rainy afternoon and share my latest bread baking adventure, compliments of Weekend Bakery.  I discovered the website some months ago while reviewing croissant methods (and theirs is right on par with mine - yes!!). Written by a couple in the Netherlands who bake at home during the weekends, it is a plethora of bread baking tips, techniques, recipes, videos and overall great information for all of you avid bread bakers out there. You can choose English or Dutch and you should definitely check it out!

Since I was preparing to teach my own bread baking class to Lisa and Jerry (AVID bread bakers for sure), I was perusing various posts and recipes and decided I needed a little test project to get me in the mood. Ficelle here we come.

The word is literally translated as string, and the bread is basically a thinner version of a baguette. This one happens to be made with a combo of bread flour and semolina, an ingredient I enjoy immensely in my pizza dough. Must be good, right?

The WB version is a sourdough ficelle using the so called hybrid method with a sourdough poolish which is then incorporated into the final dough which contains added instant yeast.  They are thoughtful in giving one the option to use all instant yeast, which is especially helpful for those of us who have yet to jump on the natural starter band wagon - maybe one of these days folks.

A poolish is a starter dough made with equal weights flour and water plus a small amount of yeast (or sourdough starter if you're going that route). For this recipe mix 200 g bread flour with 200 g water plus 1/4 teaspoon instant yeast OR 30 g active sourdough culture.

Below is the starter just after it's mixed. Generally the poolish is allowed to sit, covered, for some hours, either at room temperature or in the fridge depending on the time frame of your recipe. This one is a six hour, room temp wait, so it's easy to plan to accomplish it in one day.

IMG_2809.JPG

Here it is after a six hour preferment. Nice and light and bubbly. And you know what? It smells good too!

IMG_2810.JPG

For the final dough, in the bowl of your stand mixture fitted with the dough hook, combine the above poolish with 200 g bread flour, 100 g semolina, 110 g water, 8 g sea salt and 5 g instant yeast. Knead on low speed (2 on a Kitchenaid) for 7 minutes then cover it and let it rest for 30 minutes.

Turn the dough out onto a lightly floured work surface, do a full stretch and fold (top down, bottom up, right side over, left side over and ball it up) and let the dough rest another 30 minutes.

Rested and ready to divide

Rested and ready to divide

Heat your oven to 465ºF with a baking stone in place, or, if you're like me, place a half sheet pan in the oven during the pre-heat (that will serve as the hot surface on which I place my sheet pan containing my risen ficelle).

Divide the dough in four pieces, shape each one into a rough rectangle then cover and let 'em rest for about 10 minutes.

IMG_2812.JPG

Now shape each piece into a log as seen below. Please accept my apologies for the somewhat fuzzy images, but at least you can visualize the steps (I hope!). I attempted a short video of the shaping, but, not being quite up to snuff, that will have to wait for another time. It's all about learning, even the techno side!

Elongate the rectangle, fold over the top third, pressing along the edge of the dough with the heel of the palm. Turn the dough 180º.

IMG_2813.JPG

Fold over the top third toward the middle, again pressing along the edge of dough with the heel of the palm.

IMG_2814.JPG

Now fold the dough over itself to form a rough log, pinching the seam with the heel of the palm.

IMG_2815.JPG

Place your overlapping hands in the middle of the log and start rolling with gentle pressure, gradually elongating the dough as you move your hands outward toward each end. You should have a nice thin log with pointy ends.

IMG_2816.JPG

Once all four logs are shaped, arrange them on a sheet pan lined with parchment paper, cover with plastic wrap and let rest for 20 minutes.

IMG_2820.JPG

I scored these right down the center along the length of the bread then popped them into the heated oven onto my already heated sheet pan. I gave them a burst of steam by pouring hot water into the steam tray in my Kitchenaid oven.

These baked about 20 minutes and developed a nice golden brown crust. Yeah.

IMG_2823.JPG

Once cooled it was time for a taste. A lovely dense crumb and creamy interior with a nice crunch to the crust. Time well spent I'd say. This one is literally all in a day's work. You can do it too, especially with the help of Weekend Bakery.com!

IMG_2824.JPG

Fun with afternoon tea

IMG_2769.JPG

Having returned from our France/Netherlands trip about a week and a half ago, we're slowly getting back into the swing of things here in Grand Rapids, MI. It took awhile for our colds to finally say adieu, and I must say it's a wonderful feeling to have some energy back in one's step.

Before we left on our voyage, I was already planning the goodies for another afternoon tea event at Heron Woods/Heron Manor , an independent/assisted living facility just down the street from our home.

Kim, the activities director, is a powerhouse of ideas for fun events and gatherings for the residents there. This time the tea was to follow an interesting presentation on how women dressed in Victorian times. Kim and her volunteer assistant, Dave, had the tables set just so with nosegays of pink roses, a beautiful assortment of teacups provided by one of the residents, as well as napkins folded to resemble roses.

Kim set out 26 (one for each letter of the alphabet) different decorated and hand written cards, one at each place, that included an interesting tidbit about or having something to do with tea. My favorite was a quote from Eleanor Roosevelt -"women are like tea bags - they don't know their strength until they get into hot water". Hmmmm.

IMG_2762.JPG

The menu consisted of two savories and three sweets. I had a pretty clear idea in my head of how I wanted to execute the prep. It's great to have plenty of time to plan/prep/bake/garnish for an event like this, and, fortunately, my days were wide open leading up to the actual day.

Cheddar pecan financier

Cheddar pecan financier

The financier process was très facile: make my usual financier base batter a couple of days ahead, fridge it until ready to use, then fold in grated sharp cheddar cheese and chopped toasted pecans just before baking. I used my favorite square savarin flexi-molds and, after baking, filled the top well with a bit of grated cheese, a dollop of apricot jam and a shard of toasted pecan to give it that je ne sais quoi. Yum.

Cucumber crème fraiche éclairs

Cucumber crème fraiche éclairs

The éclairs were a blast to make. I used my favorite pâte à choux base, added in a bit of salt and pepper and a skosh of ground mustard, piped 'em out, topped 'em with a grated aged cheddar-like Dutch cheese we found at Kingma's market here in GR and baked these little cuties. So satisfying. And the beauty is they can be baked several days ahead, frozen, then crisped back up for about 10 minutes in a 325ºF oven before cooling and filling. How great is that!

Below you can see the assembly process. It's all about being organized. For these I made my own crème fraiche (1 cup heavy cream plus 2 tablespoons buttermilk, let sit at room temp for 8-24 hours until thickened, stir and refrigerate), added a bit of salt and pepper plus lemon zest/juice and finely chopped chives. It didn't thicken as much as I expected, BUT I whipped it up and it was fantastic. Pipe-able and easy to fill les petits choux.

IMG_2745.JPG

I sandwiched them with the crème fraiche, a cucumber slice and julienned carrots and topped 'em off with a spurt of crème and a sliver of chive.

IMG_2746.JPG
 
IMG_2747.JPG

Now for the sweets. First up - a new chocolate cake recipe that I brought home from Paris. Our friend Val gave it to me and attributes it to Hélène Darroze, the Michelin starred French chef with restaurants in Paris, London and Moscow. It's a definite keeper.

Here it is in a nutshell: melt 250 g chopped bittersweet chocolate (I like 62-64%) with 250 g unsalted butter; whisk in 250 g cane sugar and 70 g sifted all purpose flour; add 4 large eggs beaten en omelette. The recipe calls for a buttered and floured 9" cake pan, but, as is my wont, I love to bake cakes in petite flexi-molds. And, wouldn't you know it? I purchased a couple of mini-kouglof Silikomart flexis at Mora in Paris and was so ready to give them a spin. Perfect is the word. These baked about 18-20 minutes at 325ºF convection - just until looking dry and a bit cracked on the top. So fudge-y and delicious.

And guess what?! They can be baked ahead and frozen. Just pull them the night before you need them and let them thaw in the fridge over night. Now you're ready to garnish.

IMG_2753.JPG

I posted recently about another petite chocolate cake with whipped white chocolate ganache and sesame crunch - I added the same garnish to these babies. Go with a good thing I always say.

IMG_2757.JPG

Next up - strawberry mascarpone tartelette - pâte sucrée crust, whipped/lime zested mascarpone cream topped with fresh strawberries tossed in a bit of raspberry jam and, for the piéce de resistance, a sprinkling of pomegranate seeds for crunch and a bit of tang.

And here we go again - the shells can be blind baked and frozen several days ahead. Thaw overnight in the fridge and fill when ready. Love that planning and prepping!

IMG_2750.JPG
 
IMG_2752.JPG
 
IMG_2765.JPG

And last but not least - orange vanilla ricotta custards on an orange cornmeal shortbread base.

IMG_2758.JPG

The shortbread can be baked several days ahead and kept in a sealed container in the fridge or freezer. The custards can be baked in your favorite flexi-mold shape, cooled and then frozen until you're ready to pop them out of the molds and settle them onto the shortbread base. Add a dollop of caramel or jam on the cookie to hold the custard in place.

If you do the assembly just a couple of hours ahead of serving, they'll hold and thaw very nicely in the fridge and are the perfect creamy texture when it comes time to eat. Yeah, works for me!

I topped them with a small dollop of orange marmalade for just a bit of color.

IMG_2761.JPG

Everyone enjoyed the menu as well as the time to sit and chat with friends on a beautiful summer-like afternoon. 

If you're interested in goodies for your own afternoon tea, don't hesitate to hop on over to the contact page and send me a note. We can put our heads together to create just the right assortment for you!

Since this post is more about planning/prepping/assembling and not specifically about individual recipes, in addition to some links I’ve included in the text above, you can find most recipes on my recipe page.

Now go out there, have a delicious Memorial Day weekend and offer up a hearty welcome to summer!!

IMG_2763.JPG

A few classic French treats

IMG_2733.JPG

Yes, you guessed it - millefeuille! Caramelized puff pastry layered with vanilla crème pâtissiére, Americans refer to this particular delight as Napoleon. I did a brief internet search and couldn't find a quick answer as to WHY we refer to this as Napoleon, cuz the French don't. Oh well, it's good no matter what you call it!

Having just returned from a wonderful trip to France and the Netherlands, I wanted to share with you some of the goodies in which I indulged during our stay. I tried to make a point of tasting some of the classic French pastries to be had, whether in Paris, Lille or pretty much any large city or small village in the country. If there's a pâtisserie or salon de thè nearby, you should be good to go.

Although Steve and I were in Paris for almost two weeks, my most memorable classics were enjoyed in Lille, right near the Belgian border. The millefeuille you see above was at the Meert salon de thè, just down the street from niece Christina and her family's apartment in the heart of vieux-Lille.

I joined Christina and her children, Kiera and Liam, for a memorable mid-morning chocolat chaud et millefeuille. Christina had the millefeuille as well, along with the signature "M" inscribed cappucino, while Kiera went for her favorite religuese caramel and Liam devoured L'impérial, a layered chocolate hazelnut number topped with a gilded hazelnut (hey - it's France!).

IMG_2730.JPG
IMG_2732.JPG
IMG_2731.JPG

Later that same day Steve and I joined Christina and her husband Glen for dinner at a lovely restaurant on the ramparts of vieux-Lille. Delicious food, good company and lovely surroundings sums it up.

For dessert Glen had his "usual" dining out treat, the café gourmand. Basically coffee with a medley of small desserts, the selection here was quite the assortment!

IMG_2737.JPG

Christina and I went with the strawberry-pistachio tart served with a vin jaune sorbet - delicious! The crust was so crisp, the pistachio filling just right and the cool sorbet the perfect complement to the fresh berries.

IMG_2739.JPG

You might be wondering what the Steve-meister had? He went with dessert wine which is often his answer to restaurant desserts. From a guy who loves pastries? Go figure! He claims he won't eat any dessert that his wife hasn't made. How sweet is that!

How about we end on a more savory note, OK?. In northern France one of the specialties is the planche, a board of charcuterie, cheeses, olives, etc served with bread. For a couple of our lunches at G&C's apartment, they provided us with that particular repast. Nothing like fresh baguette, a medley of cheeses, some saucisson, fresh veggies and hummus, nuts - and let's not forget the wine. Yum!

IMG_2734.JPG
IMG_2736.JPG
IMG_2735.JPG

Thanks for everything Glen and Christina! And Kiera and Liam too!!

Baking bread in Paris

IMG_2677.JPG

Baking in Paris is always a treat, and this trip included a four day bread class for me at Le Cordon Bleu's new facility on Quai André Citroën. When I did the pastry diploma program in 2006, the school was located on rue Léon Delhomme not far from the line 12 Vaugirard metro stop. 

blogger-image--1618611748.jpg

A couple of years ago LCB moved to their new location, still in the 15th arr., and it's, in a word, impressive. Back in the fall of 2016 during our last trip to Paris, I visited the school and had a short tour of the place. This time I got a much closer look, at least of the kitchen we were using.

Boulangerie kitchen

Boulangerie kitchen

Our instructor for this four day extravaganza of bread production was Vincent Somoza, a knowledgeable and amiable teacher. Each day we arrived, the big white board on the wall contained all of the necessary info about the breads that were to be worked on that day like kneading times (pétrissage), first rise (pointage), dough weights for division, second rise (apprêt) and so on. You get the idea. 

IMG_2666.JPG

Our group of 14 was international, with bread enthusiasts, bakers and chefs hailing from Russia, Saudi Arabia, Kuwait, Lebanon, Japan, Taiwan, Paris and, last but not least, the USA (I being the sole American aside from our traductrice Grace, second from left below).

IMG_2708.JPG

There is simply too much information to try and share here, so I'll simply give a short pictorial of some of les pains we produced. Chef Vincent stashed the extra loaves in the freezer each day so they could be pulled out for the above grand finale photo on day 4.

To top it off, we could take home everything we made every day (usually at least two of everything)! Wow. Many of us chose to leave some behind for the staff, since it was more than most could handle, either to eat or to store for the short term.

Kougelhof

Kougelhof

For day 1, three of our bread doughs had been made for us the day before, one for kougelhof, the classic Alsatian brioche-like treat, and two for our country style bread/pain de campagne sur pâte fermentée and whole wheat bread/pain complet.

It's typical to make brioche type dough the day before, wrap it and give it a rest in the fridge overnight before shaping it the next morning. Since it's a buttery/eggy dough, the rest allows the butter to firm up and makes working with the dough easier. Our job was to divide our allotted 600 g of kougelhof dough into two 300 g pieces, ball them up, push a hole through the center and place them in well-buttered molds with almonds placed in the bottom. After a 1.5 hour rise and an hour bake, they were finished!

IMG_2667.JPG

Once cooled and un-molded, these beauties were given a dunk in clarified butter followed by simple syrup. To finish, a dusting of powdered sugar et voilà.

IMG_2669.JPG

The country style and whole wheat breads were made with fermented dough/pâte fermentée which had been made ahead for the class. This is a starter made with flour, water, salt and commercial type yeast, meant to enhance the flavor of the bread. (NOTE: French boulangers typically use fresh cake yeast, as we did for this class). 

Boulangeries usually have leftover dough scraps and will simply save those for the next day's incorporation into their final dough. In addition, the final dough is given a long, cool rise in the fridge overnight which allows for even more flavor development in the end.

For our fourth bread that day, we all mixed a straight (no pre-ferment, no long cool rise) baguette dough by hand and proceeded to knead it with the aggressive slap-and-fold technique. Lots of noise going on in that session! Once kneaded this dough received a much deserved 20 minute rest before we divided it in two and shaped our baguettes for a one hour proof and final 20 minute bake.

Day one breads: country style, whole wheat, kougelhof, baguette

Day one breads: country style, whole wheat, kougelhof, baguette

A couple of other preparations were begun for breads to be made over the next several days. Chef Vincent began the multi-day process of making a liquid levain (natural starter) that would go into several different breads, as well as a poolish (commercial yeast based starter) for baguette tradition destined for baking on day 3. He also started another poolish which involved soaking seeds and grains for pain nutritionnel aux graines for day 2. Lots going on!

The tone was set: dough preparation for each or subsequent days, dividing and shaping various doughs, feeding of the levain and, of course, proofing and baking lots of bread. We all worked on our boule et batârd shaping techniques and the different ways to score our loaves (so many designs, so little time!)

Day 2 breads: Rye, grain, milk bread baguette and more!

Day 2 breads: Rye, grain, milk bread baguette and more!

At the end of each day we also had a tasting of our breads, accompanied by fresh French beurre et confiture. As the French say miam, miam!

Day 2 tasting

Day 2 tasting

As were proceeded through each day, my primary disappointment was the fact that we weren't given the opportunity to actually scale or small batch mixer knead any of the dough. No "normal size" stand mixers that might be shared among two or three people were available. Being able to perform the entire process, assessing the dough more directly at each stage, would certainly have given us a greater learning experience.  

Even so, the kitchen was perfectly outfitted with state of the art steam ovens, multi-shelved fridge/freezers, proofing cabinets, lots of speed racks for product placement before and after baking, two large mixers, one a flat bottom meant specifically for bread dough and one a standard large rounded bowl, multi-function planetary mixer. Everything a boulangerie might need.

day 3 cheese bread

day 3 cheese bread

Day 3 brought us cheese bread, brioche Nanterre, baguette tradition and walnut-raisin milk bread, in addition to a round pain de mie style brioche log that was to become bostock (don't worry, I'll explain).

brioche for bostock

brioche for bostock

day 3 breads: walnut raisin, cheese, baguette tradition

day 3 breads: walnut raisin, cheese, baguette tradition

Another day 3 project was to make the détrempe for our croissant et pain au chocolat for the final day. Chef kneaded a LARGE batch in the mixer, after which it was divided into portions, wrapped and refrigerated for the next day.

détrempe, like stepping stones, for day 4

détrempe, like stepping stones, for day 4

On our final day we were all given our portion of détrempe along with le beurre for the beurrage. We proceeded through the steps, giving our dough 2 double turns, a rest in the freezer, then the final rolling and cutting of the triangles and rectangles. The dough felt wonderful, was easy to work with and the laminations superb. After a 2.5 hour proof, into the oven they went.

croissant

croissant

pain au chocolat

pain au chocolat

We assembled our bostock by slicing our logs into ~1.5" rounds, dunking them in orange syrup then topping with almond cream, dipping in sliced almonds and baking until the almond cream became nicely browned. Very much like my favorite croissant aux amandes but with brioche dough instead. A great way to use up leftover brioche!

bostock out of the oven

bostock out of the oven

On our last day we also made an interesting striped bread using a "milk" dough similar to previous days. Squid ink (messy!!) was mixed into half of the dough, then the light and dark doughs twisted together to give a zebra stripe look.

pain de mie zébré

pain de mie zébré

The zebra bread is usually used as a base for some type of seafood sandwich or appetizer, since the squid ink gives a hint of a taste of the sea. We were told it wasn't really meant for flavor but for creating the stripe effect. Hmmm - what other colors might one create? I'll have to think about that one.

Day 4 also brought pain de campagne sur levain naturel, a rustic bread made with a stiff levain that the prep team had started even before our first class. The dough was kneaded, and we divided and shaped the dough on day 3 so it could develop in the fridge overnight for baking on day 4. What a process! But delicious and well worth it. It's all about planning after all.

pain de campagne sur levain naturel

pain de campagne sur levain naturel

day 4: bostock, pain de mie zébré, croissant, pain au chocolat, pain de campagne

day 4: bostock, pain de mie zébré, croissant, pain au chocolat, pain de campagne

My favorite breads from the class were the rustic pain de campagne, the multigrain bread and the cheese bread - chunks of gruyère, oh my! Of course, good croissants are a given, and I continue to find it fascinating that everyone, no matter their country, is infatuated with that particular viennoiserie! The oohs and aahs that abound as these gems bake and are then devoured span all borders.

Next time around, if we're so lucky to return to Paris some day, I'll search out a class that offers more comprehensive hands-on experience. Particularly with bread dough, that's truly important. It was a great review for me in regards to the steps/timing involved in bread baking, using natural starters and, bien sür, the many delicious things one can create from flour, water, salt and yeast. Oh yeah!

All in all, a grand time, wonderful textures and aromas, lots of cool stuff, many interesting people from all over, plus I was able to practice my French! Not bad at all.

Petits gâteaux part 2 - toasted coconut lime

IMG_2642.JPG

Welcome to part 2 of petits gâteaux!

This toasted coconut cake is based on a pound cake recipe I've had for many years, even before pastry school days. I tweaked it in a few places to create a delightful, dense and flavorful cake made with ricotta, lime zest, diced dried pineapple, toasted coconut, a bit of whole wheat pastry flour plus the usual butter, eggs, sugar etc.

I baked these babies in another of my favorite flexi-molds from Silikomart - a rectangular ingot shape that just speaks to me.

Ready for the oven

Ready for the oven

All baked up and glazed

All baked up and glazed

Just out of the oven I brushed on a lime glaze then popped them back in for a few minutes to set the glaze.

Once cooled, I garnished the cakes with a basic cream cheese frosting, zinged with some lime zest, plus a sprinkle of toasted coconut and a julienned piece of dried pineapple.

IMG_2639.JPG

Time for the recipes!

TOASTED COCONUT LIME CAKE: makes one standard Bundt cake OR two medium loaf pans or multiple small cakes. I made a half recipe which yielded 19 "ingots". Components include cake, glaze and frosting plus garnishes.

  1. Get a few things ready: toast 70 g (plus a bit more for garnish) unsweetened shredded coconut and set aside. Zest three limes, reserving the zest of two for the cake and one for the frosting, then juice the limes to yield 45 ml juice (you can do a combo of pineapple and lime juices if you'd like) for the cake plus 30 ml juice for a glaze at the end. Finely chop about 1/4 cup dried sweet pineapple (I found mine at Trader Joe's) and cut a bit more in strips to use as top garnish.
  2. Heat the oven to 325 ºF. If using a Bundt pan or loaf pans, do the butter and flour thing. No need for that with silicone molds.
  3. In a medium bowl whisk together 272 g all purpose flour, 88 g whole wheat pastry flour and 1/4 teaspoon salt.
  4. In the bowl of a stand mixer fitted with the paddle attachment, cream 227 g unsalted butter with 170 g whole milk ricotta until smooth; add in 480 g granulated sugar and the two lime zests, then cream until light and fluffy. NOTE: I like to rub the lime zest into the sugar as I do my mise en place then just add the zested sugar when ready.
  5. Add 5 large eggs, one at a time, beating well and scraping the bowl after each addition.
  6. Blend in 1 teaspoon vanilla extract.
  7. Add lime juice alternating with the dry ingredients just until blended.
  8. Blend in the toasted coconut and diced dried pineapple.
  9. Fill prepared pan(s) or molds and bake. Bundt will take up to 1.25 hours, loaves more like 50-60 minutes and small cakes perhaps 20-25 minutes. Watch what's going on in there! A skewer inserted in the center should come out clean. Remove from the oven.
  10. While your cakes are baking, make a GLAZE by whisking together 3/4 cup powdered sugar and 2 tablespoons lime (or pineapple) juice. You want it thin for just that oh-so right light coating. Once the cakes are out of the oven, brush the glaze on the surface and pop them back in for a few minutes to set the glaze.
  11. Let cool in the pan or molds, then remove.

LIME CREAM CHEESE FROSTING: makes about 2 cups, plenty for your needs (I made a half recipe for my half cake recipe).

  1. Soften 227 g cream cheese and 113 g unsalted butter on low in the microwave. I you prefer not to use a microwave, place the cream cheese and butter in a bowl and place that in a second larger bowl with warm water - you want them soft, not melted.
  2. Add 170 g powdered sugar, 1/2 teaspoon vanilla, a splash of lime juice and the zest of 1 lime.
  3. Blend all until smooth. Spread or pipe as you desire on the top(s) of the cake(s).

For the pièce de résistance, sprinkle some toasted coconut on top along with a piece of slivered dried pineapple. Et voilà. You've done it!!

IMG_2642.JPG

Petits gâteaux part one - sesame crunch gâteau de Pâques

IMG_2641.JPG

For our recent Easter dinner at cousin Jennifer's lovely home in the woods on Clear Bottom Lake, I created a couple of bite size gâteaux for the occasion. I've been on a sesame kick lately, having discovered a terrific way to create sesame brittle, compliments of Yotam Ottolenghi and Helen Goh. More about that in a bit.

IMG_2614.JPG

Rather than cramming a lot of recipe info into one post, I'm doing a two-parter, one part for each little cake.

First up is gateau de Pâques, a classic chocolate biscuit for Easter that I've made a number of times and have never found wanting.

The French word biscuit generally refers to a cake in the sponge family that's made with eggs that are first separated, then the yolks and whites are beaten separately before combining various components at the end to make a light and tasty cake.  On the other hand, biscuit sec usually refers to a cookie.

In English the word biscuit has a completely different connotation. While the Brits call cookies biscuits (as the French do biscuit sec), we Americans think of shortcake à la buttermilk biscuits or biscuits and gravy. Language is so cool and fun to figure out, don't you think?!

IMG_2626.JPG

For this fun little cake I used one of my favorite square savarin fleximolds from Silikomart, which allows me to fill the "dent" with something good before garnishing with a swirl of another something good.

IMG_2633.JPG

And then adding another something even better!

IMG_2635.JPG

That sesame brittle is oh-so addicting - just ask Steve.

Let's do the recipes!

First the sesame brittle, so you'll have it ready to go for the garnish. And it keeps for a number of days.

IMG_2356.JPG

Sesame brittle (makes plenty!)

The beauty of this brittle method is you don't have to use a candy thermometer or worry about reaching a certain temperature. I LOVE that! Here’s the printable PDF for you.

  1.  Toast 125 g sesame seeds (mix of 1/3 black and 2/3 white or all white like I did) either in the oven at 325ºF for about 10 minutes until nicely brown, stirring occasionally, or in a skillet on medium-low on the stove top. Do what you're most comfortable with. Set aside. Increase the oven temp to 350ºF.

  2. Have two half sheet pans and four pieces of parchment at the ready. 

  3. In a medium saucepan put 100 g granulated sugar, 100 g light corn syrup, 50 g unsalted butter and 1/8 teaspoon salt. Stirring constantly on high heat, blend the mixture and bring to a boil. Remove from the heat and stir in the toasted sesame seeds.

  4. Put two pieces of parchment (or Silpat!) on a heat proof surface (I used two overturned half sheet pans) and pour half of the sesame mixture on each. Cover with the other parchment pieces and roll with a rolling pin until about 1/8 inch thick. 

  5. Slide the paper with the sesame caramel onto half sheet pans and remove the top layer of parchment. Peel it back gently and push down any caramel that might stick. Bake for about 20 minutes until nicely browned. Remove from oven, cool and break into shards.

  6. Stores nicely in single layers between pieces of parchment or waxed paper in a well sealed container. The first batch I made lasted a couple of weeks and served as garnish for a number of goodies!

IMG_2616.JPG

Gateau de Pâques (for one 8-9" cake or multiple small cakes) - find recipe PDF here

  1. Heat your oven to 350ºF and have your molds of choice at the ready. Butter and flour a 8-9" cake or springform pan OR you can use any shape multi-well silicone flexi-mold (no butter/flour needed) or mini-muffin tins lined with decorative papers. You decide.

  2. Melt 200 g dark chocolate (I used 61%) and 200 g unsalted butter gently over a bain marie. I like to do this over very low heat and once the melting has begun, I turn the heat off and let the residual warmth finish the melting process. Stir the mixture every once in awhile as it melts.

  3. Once you have that going, separate 4 cold eggs. NOTE: Eggs separate best when cold so do that at the beginning of your prep. The whites will be beaten separately and whip best when warm so it's all part of planning ahead!!

  4. In a large bowl whisk the 4 yolks with 150 g sugar until thickened and more pale. Blend in the melted chocolate/butter mixture.

  5. Blend in 100 g all purpose flour.

  6. In a clean bowl beat the 4 egg whites with a pinch of salt to soft peaks. Gently fold the whites into the the above mixture.

  7.  Pipe or scoop the mixture into your chosen molds and bake. Your baking time will vary depending on the size of your molds. An 8" cake may take about 30 minutes, whereas mini cakes may take about 10. Look for a more dry appearance to the surface of the batter without gooey centers. 

  8. Let cool and unmold. Garnish with ganache or whatever you'd like! I made a basic 1:1 dark chocolate ganache to fill the wells, then piped a swirl of whipped white chocolate ganache (1:1 cream to chocolate, chilled then whipped) on top and added some shards of sesame brittle. Whew!

IMG_2634.JPG

The texture of these cakes is light and oh so smooth. And the whipped white chocolate ganache and sesame brittle finished 'em off so deliciously. You gotta try these, I'm telling you now.

Stay tuned for Part 2: toasted coconut lime cakes!

Nutty rosemary and lemon/pistachio/sesame shortbread

IMG_2610.JPG

I LOVE shortbread! I think back to those childhood days of eating Lorna Doone cookies and how much I enjoyed their crumbly butteriness (was there really butter in those babies??). I've come a long way down the shortbread trail since then. Yes, I know I've gone on about this topic in the past, but good things deserve a little review every now and then, right?

Depending on what part of the world you hang out in, these cookies can be referred to as biscuits (thanks to the Brits), shortbread (more Scottish - think Walkers) or sablés (thanks to the French).

My approach follows the traditional Scottish method - a simple combo of sugar/butter/flour, and you're good to go. Typically along the lines of 1-2-3 dough, you weigh out 1 part sugar to 2 parts butter to 3 parts flour and mix 'em up. You can play around with the ratios (decrease the sugar and increase the butter a bit) to yield an even more buttery cookie.

I have two base recipes that I use regularly. One uses granulated cane sugar and one confectioner's sugar (gives 'em a slightly more tender texture?). You can play around with different sugars on your own and decide which gives you the texture you most enjoy.

And why do I use two different bases you might ask? Because I can and so can you!

Add in your favorite citrus zest, spices, chopped nuts, chopped chocolate, dried fruit - the possibilities go on and on.

There are two mixing methods: sanding and what I like to call blending (I think of this one as just short of creaming - you're not trying to aerate the dough, just blending everything together).

The first involves weighing your sugar and flour into a mixing bowl, dicing cold butter and sanding it into the dry ingredients to coarse crumbs. At that point you just press into a pan and bake it. You can take the mixing a step further, going past the coarse crumbs until the dough holds together, then wrap, chill and roll out later, cutting into any shape that suits your fancy.

Both methods result in a lovely crumbly/crispy/buttery cookie, although, with the sanding and press in method, the texture is a bit more crumbly and melt-in-your-mouth. I make mine both ways and enjoy them equally.

If you look at LOTS of shortbread cookies recipes, you may notice that many of the French sablés add egg (whole or yolk) to the dough as a binder. They're delicious too! 

Periodically I enjoy changing up my flavor offerings. This time I had pecans in the freezer and sesame seeds in the cupboard.

First up - rosemary pecan.

IMG_2492.JPG

Over the years I occasionally make rosemary roasted nuts, usually walnuts or pecans, that are absolutely delicious as an appetizer along with a cheese or two. For a savory cookie, I chop some of the already rosemary-ied nuts and add them into my dough. Yum. So delicious.

IMG_2609.JPG

Next - lemon pistachio sesame.

IMG_2545.JPG

This one adds in some toasted sesame seeds, lemon zest/juice and chopped unsalted raw pistachios. Once baked, I brush them with honey and pop them back into the oven for a few minutes to set the honey. Oh man are they good!

IMG_2538.JPG
IMG_2611.JPG

On to the base recipes (plus additions!)

Rosemary pecan:

  1. In a stand mixer with the paddle attachment blend 75 g granulated cane sugar with 200 g diced, room temperature unsalted butter. 
  2. Add 250 g all purpose flour and blend in just until the dough comes together. Note/tip: I've started replacing about 1/5 of my all purpose flour with white whole wheat for some added whole grain goodness. 
  3. For the rosemary pecan version, chop 75 g rosemary roasted pecans (recipe below) and add them into the dough. Wrap, chill for at least an hour before rolling out and cutting desired shapes.

How easy is that??!

Lemon pistachio sesame:

  1. In a stand mixer with the paddle attachment blend 75 g confectioner's sugar with 227 g diced, room temperature, unsalted butter (notice a slight bump in the butter content here).
  2. Add 1 teaspoon vanilla extract, the zest of two lemons plus 2 teaspoons freshly squeezed lemon juice and blend in.
  3. Add 260 g all purpose flour (or sub 1/5 of that as white whole wheat flour) and 1/2 teaspoon salt and mix just until it comes together.

Blend in 50 g toasted sesame seeds and 50 g chopped raw pistachios. Wrap and chill for an hour or so before rolling out and cutting desired shapes.

I bake my shortbread at 325ºF (convection) for about 15 minutes or until gently browned (watch what's happening in there!!). Don't forget - it's your job to learn your own oven. 

Now how about those roasted rosemary pecans, you might ask? Here's the recipe (you'll have PLENTY of nuts for your shortbread dough - feel free to halve the recipe OR, even better, make the full batch and have plenty for apps and snacks):

  1.  Heat oven to 325º F.
  2. In a microwave safe bowl melt 2 tablespoons unsalted butter. Add 2 tablespoons olive oil, 1/3 cup chopped fresh rosemary (or 2 tablespoons crumbled dried), 2 teaspoons kosher salt, 1 teaspoon paprika and 1/8 teaspoon cayenne.
  3. Place 4 cups nuts (walnuts, pecans or a mixture of the two) in a bowl and toss with the above mixture, coating the nuts evenly.
  4. Spread onto a 1/2 sheet pan and bake 15-20 minutes, stirring every 5 minutes or so, until browned and fragrant.
  5. Drain on paper towels, cool and serve at room temperature (or chop some up for your shortbread - yay!!).
  6. Store leftovers in an airtight container and enjoy for many days.
IMG_2493.JPG

Now get in that kitchen of yours and create your own version of delicious, crumbly, buttery shortbread. You can do it!

Tarte à l'orange et tarte au citron meringuée

orangetart

As winter closes its doors and spring is invited in, the taste of citrus is still very enticing to me. Lemons, limes, oranges (naval, blood, tangerine, mandarin, Valencia) and grapefruit remain quite abundant in the local supermarkets, just calling out to be used in so many different ways.

IMG_2515.JPG

Tarts are one of the mainstays of my baking (why do you think they call me The French Tarte, after all??), and there is nothing like a perfect citrus tart. Not only did I have a new version of a chocolate tart crust I wanted to try, complemented with an orange curd filling, but I was itching to do a slightly different version of the classic tarte au citron with some kind of meringue garnish - think lemon meringue pie but NOT!

The result of my plan: orange curd baked in a chocolate crust . . . .

IMG_2530.JPG

and my favorite lemon tart with crumbled crunchy raspberry white chocolate meringue as garnish.

IMG_2601.JPG

Let's start with the orange version, OK?

IMG_2558.JPG

The chocolate short dough for the tarte à l'orange is a variation on the one I've been using for years now. It has the addition of instant espresso powder to ramp up the chocolate taste, plus a slightly higher ratio of butter and cocoa powder compared to the flour.

Here's the process: in a medium bowl sift together 248 g all purpose flour, 42 g Dutch process cocoa powder and 1/2 teaspoon instant espresso powder. In a mixer bowl using the paddle attachment blend 179 g unsalted butter, 44 g light brown sugar, 44 g granulated sugar and 1/4 teaspoon vanilla extract. Add 43 g egg and 1 teaspoon heavy cream and blend in. Mix in the dry ingredients on low speed just until blended. Wrap and chill for an hour before rolling out or, if not using right away, freeze for up to 3 months. NOTE: makes plenty for 2 full size 9-10" tarts.

I blind baked the crust, let it cool and then spread a thin layer of melted chocolate over the bottom. That's just one of the ways to protect the bottom crust from "sogging" under the filling, particularly if held refrigerated over a day or three. Hmmm - looking pretty good!

IMG_2526.JPG

The orange curd is a pretty basic version made with the usual suspects - citrus juice and zest, eggs/yolks, sugar and butter. For this recipe, in a medium bowl whisk together 3 large egg yolks and 3 large eggs. In a medium saucepan bring to a simmer 3/4 cup (180 ml) orange juice (could be tangerine, Cara-Cara, navel), 1/4 cup (60 ml) lemon juice, grated zest of one orange and one lemon, 125 g sugar, 1/8 teaspoon salt and 170 g unsalted butter. Have 1/2 teaspoon vanilla extract and the zests of one more orange and one more lemon waiting on the side.

Temper the eggs with the juice/sugar/butter mixture then return the whole shebang to the pot and cook over medium heat, while whisking constantly, just until you see tiny bubbles developing around the edges of the pan, steam begins rising off and it begins to thicken. Now strain into a clean bowl and add in the vanilla and reserved zests.

Pour the warm curd into the prepared crust and bake in a 325º oven for about 10-15 minutes until the filling is just set and you see a hint of a jiggle in the center. Let cool on a wire rack. Carefully remove from the tart pan and serve, or cover and refrigerate for 1-2 days. NOTE: always BEST the day of!!

Side note: we noticed the second day that the citrus flavor was not nearly as bright and fresh - orange doesn't seem to hold up nearly as well as lemon.

IMG_2529.JPG

The crust had just the right chocolate flavor, the filling a lovely sense of citrus-osity and the combination was deelish served with lightly sweetened Chantilly cream (my go-to garnish) and chocolate shortbread crumbs. Yup.

And guess what!? Steve liked it!! Yippee.

IMG_2556.JPG

Next up - the lemon version. Since I've written about the tarte au citron à la Jacques Genin in a previous post, I'll simply focus on the meringue garnish that I opted for this time around.

IMG_2602.JPG

I went with a basic French meringue (2 parts sugar to 1 part egg whites by weight, a pinch of cream of tartar) whipped to medium stiff peaks. I then folded in some crushed freeze dried raspberries and some finely chopped white chocolate (use your judgement on how much you'd like to add). I doled out blobs of the meringue onto silpat lined sheet pans and baked them at 200ºF for about an hour and a half to dry and crisp them up. Once cool they crumbled very nicely into just the right shards to top my tarte au citron.

Destined for a family dinner while sister Mary and niece Mallory were visiting, I served slices with a sprinkle of fresh raspberries. I've gotta tell ya - this tart held up extremely well in the fridge over several days. It served as our dessert for two days in a row and did not disappoint. Of course I LOVE the tartness and bright, fresh flavor of this one, and the crunchy meringue bits on top of the cool luscious curd gave it that special something.

Everyone enjoyed their slice, and, even though Steve tends to be a chocolate kind 'a guy, he gave this one an A+. Two for two - not too shabby.

IMG_2604.JPG
 
IMG_2605.JPG

Happy spring and happy baking!