Focaccia

This one is a dandy folks! What a wonderful, luscious and tasty bread.

Let me go back a number of years and tell you about my discovery of Claudia Fleming’s book “The Last Course”, a wonderful and delicious ode to pastry and desserts. Back in 2007 to early 2010 I was the pastry chef at Gracie’s in Providence RI. Being a newbie in the pastry/restaurant world, I was always looking for inspiration for desserts. As it turns out, the Providence Public Library was just a couple of blocks away from Gracie’s, and I would occasionally wander over there after my day’s work to peruse the baking book stacks. Thrilled by the discovery of this particular book, I would often turn to Claudia’s recipes and glean ideas from her creations.

Imagine my delight when learning of Claudia’s second book “Delectable” published in 2022 and dedicated to her late husband Gerry Hayden who, as I understand it, was a very talented chef. For many years the two of them operated the North Fork Table and Inn on Long Island (now under new ownership), and Claudia baked focaccia for the restaurant every day. That kind of experience and expertise is invaluable.

One of the things I love about acquiring new baking books is reading the introduction and gaining an understanding of the author’s philosophy and approach - and, let’s not forget, the recipes aren’t bad either!

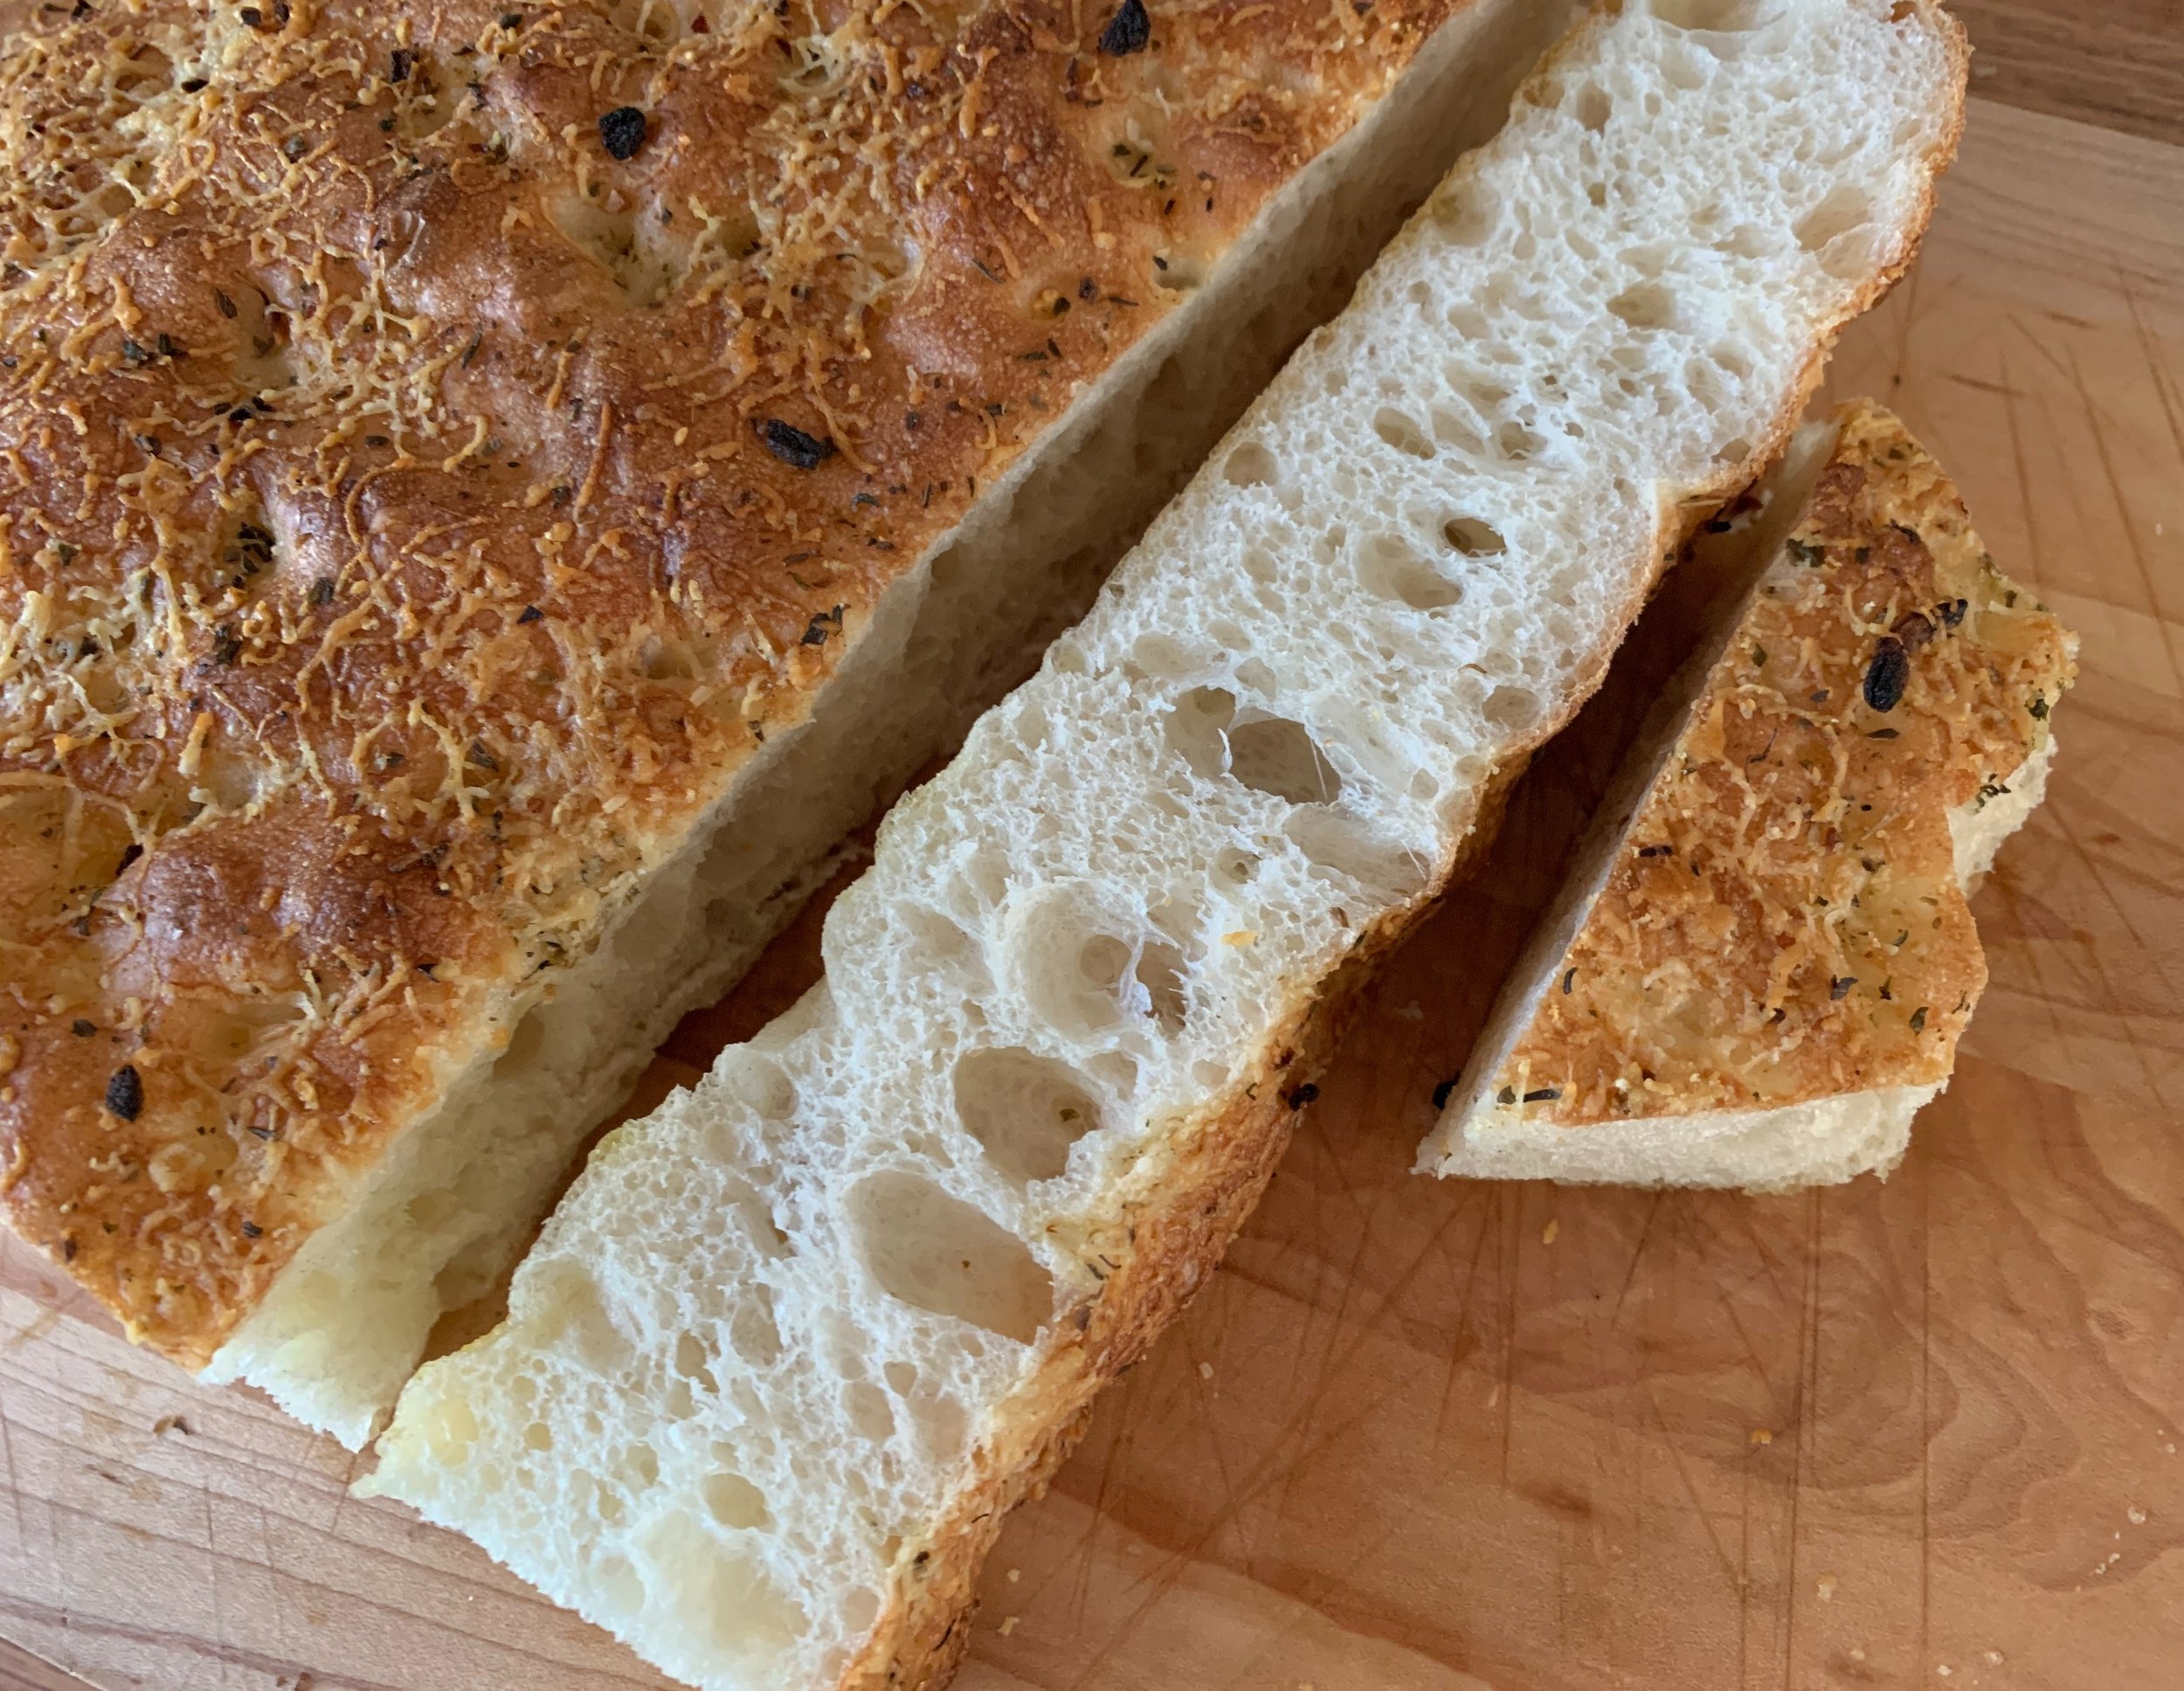
I’ve made this recipe a couple of times so far and you can be certain that it will remain a staple in my bread baking repertoire from here on out. I topped mine with a pizza seasoning herb mix we keep on hand along with grated parmesan cheese, but you can create your own version.

I’ve adapted the recipe with some tweaks in ingredient portions based on %hydration (76% here) and the weight of a cup of bread flour that I use. If you’re a recipe reader/comparer as I am, you soon realize the variables that can appear in measures vs. weights, particularly for flour. Some may indicate a cup of flour is 5 oz (140 g), some 4.5 oz (128 g) and some 4.25 oz (121 g). I’ve tested out what a cup of flour weighs for me - typically 127 to 130 g - so that’s my benchmark. I take weights over measures any day.

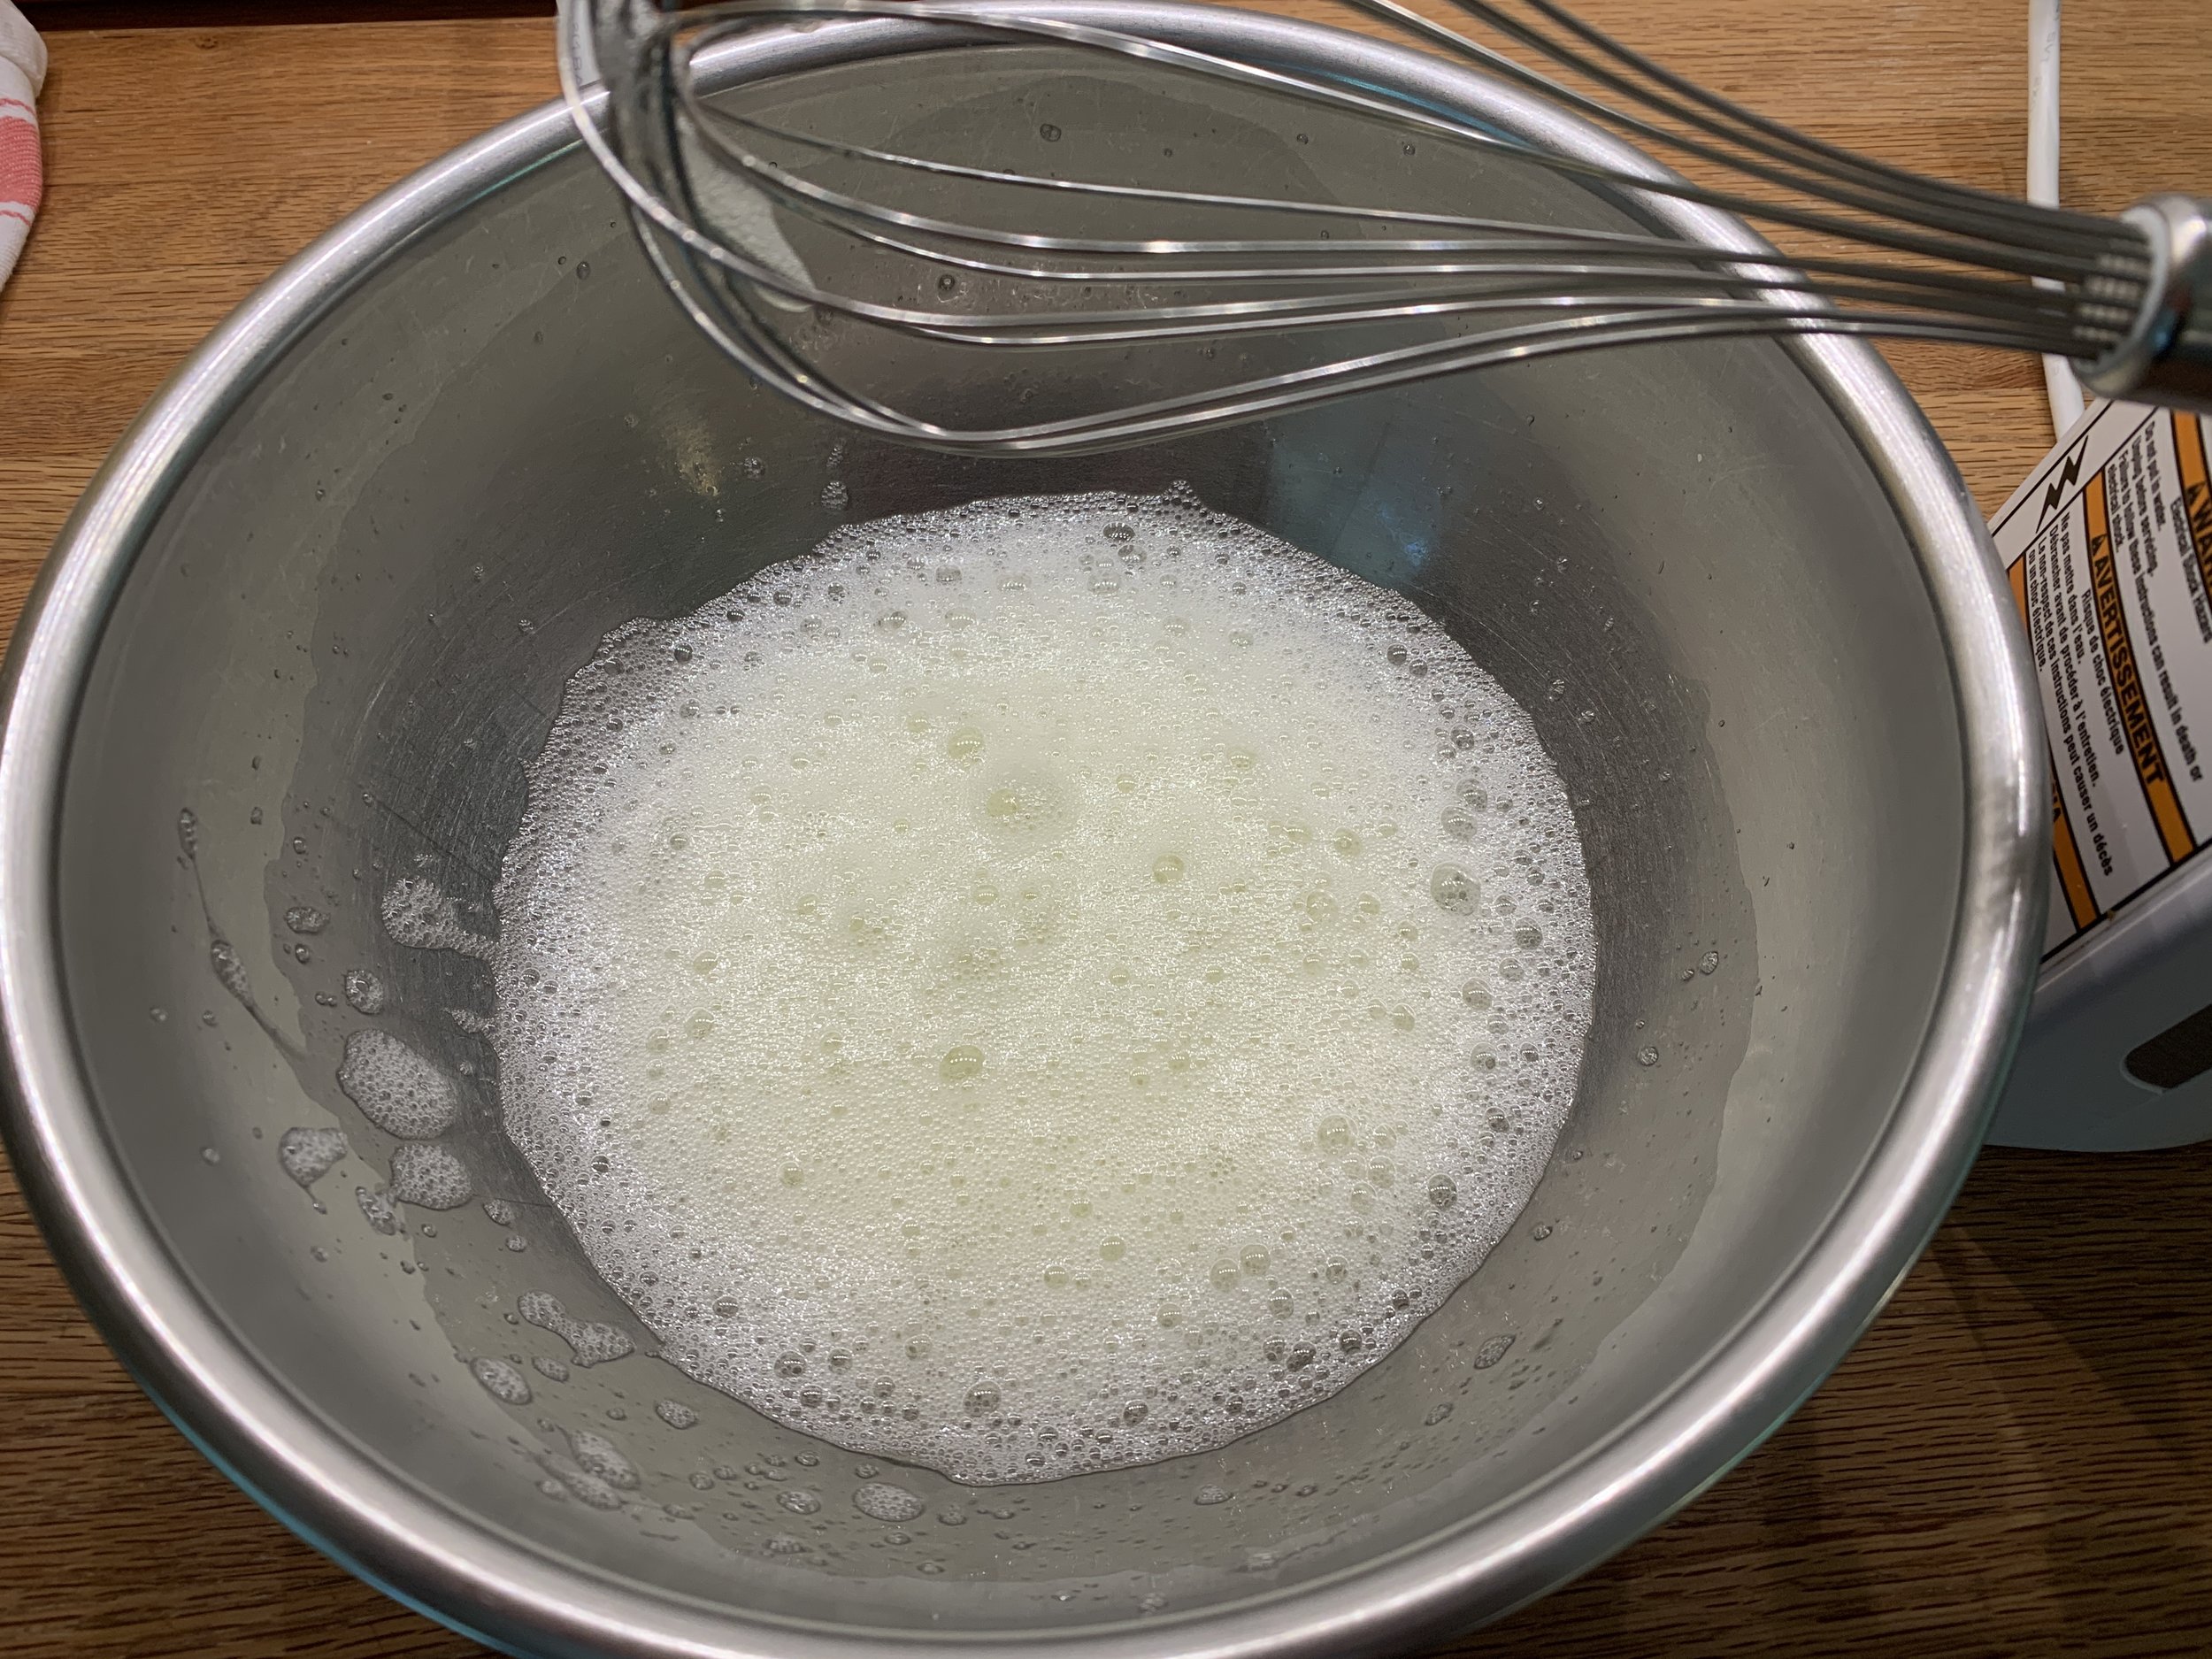
You need only the very basic ingredients for the dough (bread flour, water, dry yeast and salt), plus olive oil for the pan. Dissolve ~6 g / 2 teaspoons active dry yeast in 483 g / 2 cups room temperature water in the bowl of a stand mixer and let sit about 10 minutes until creamy. This step activates the yeast, however you can skip it if using instant yeast which can be mixed directly with the flour, water and salt.

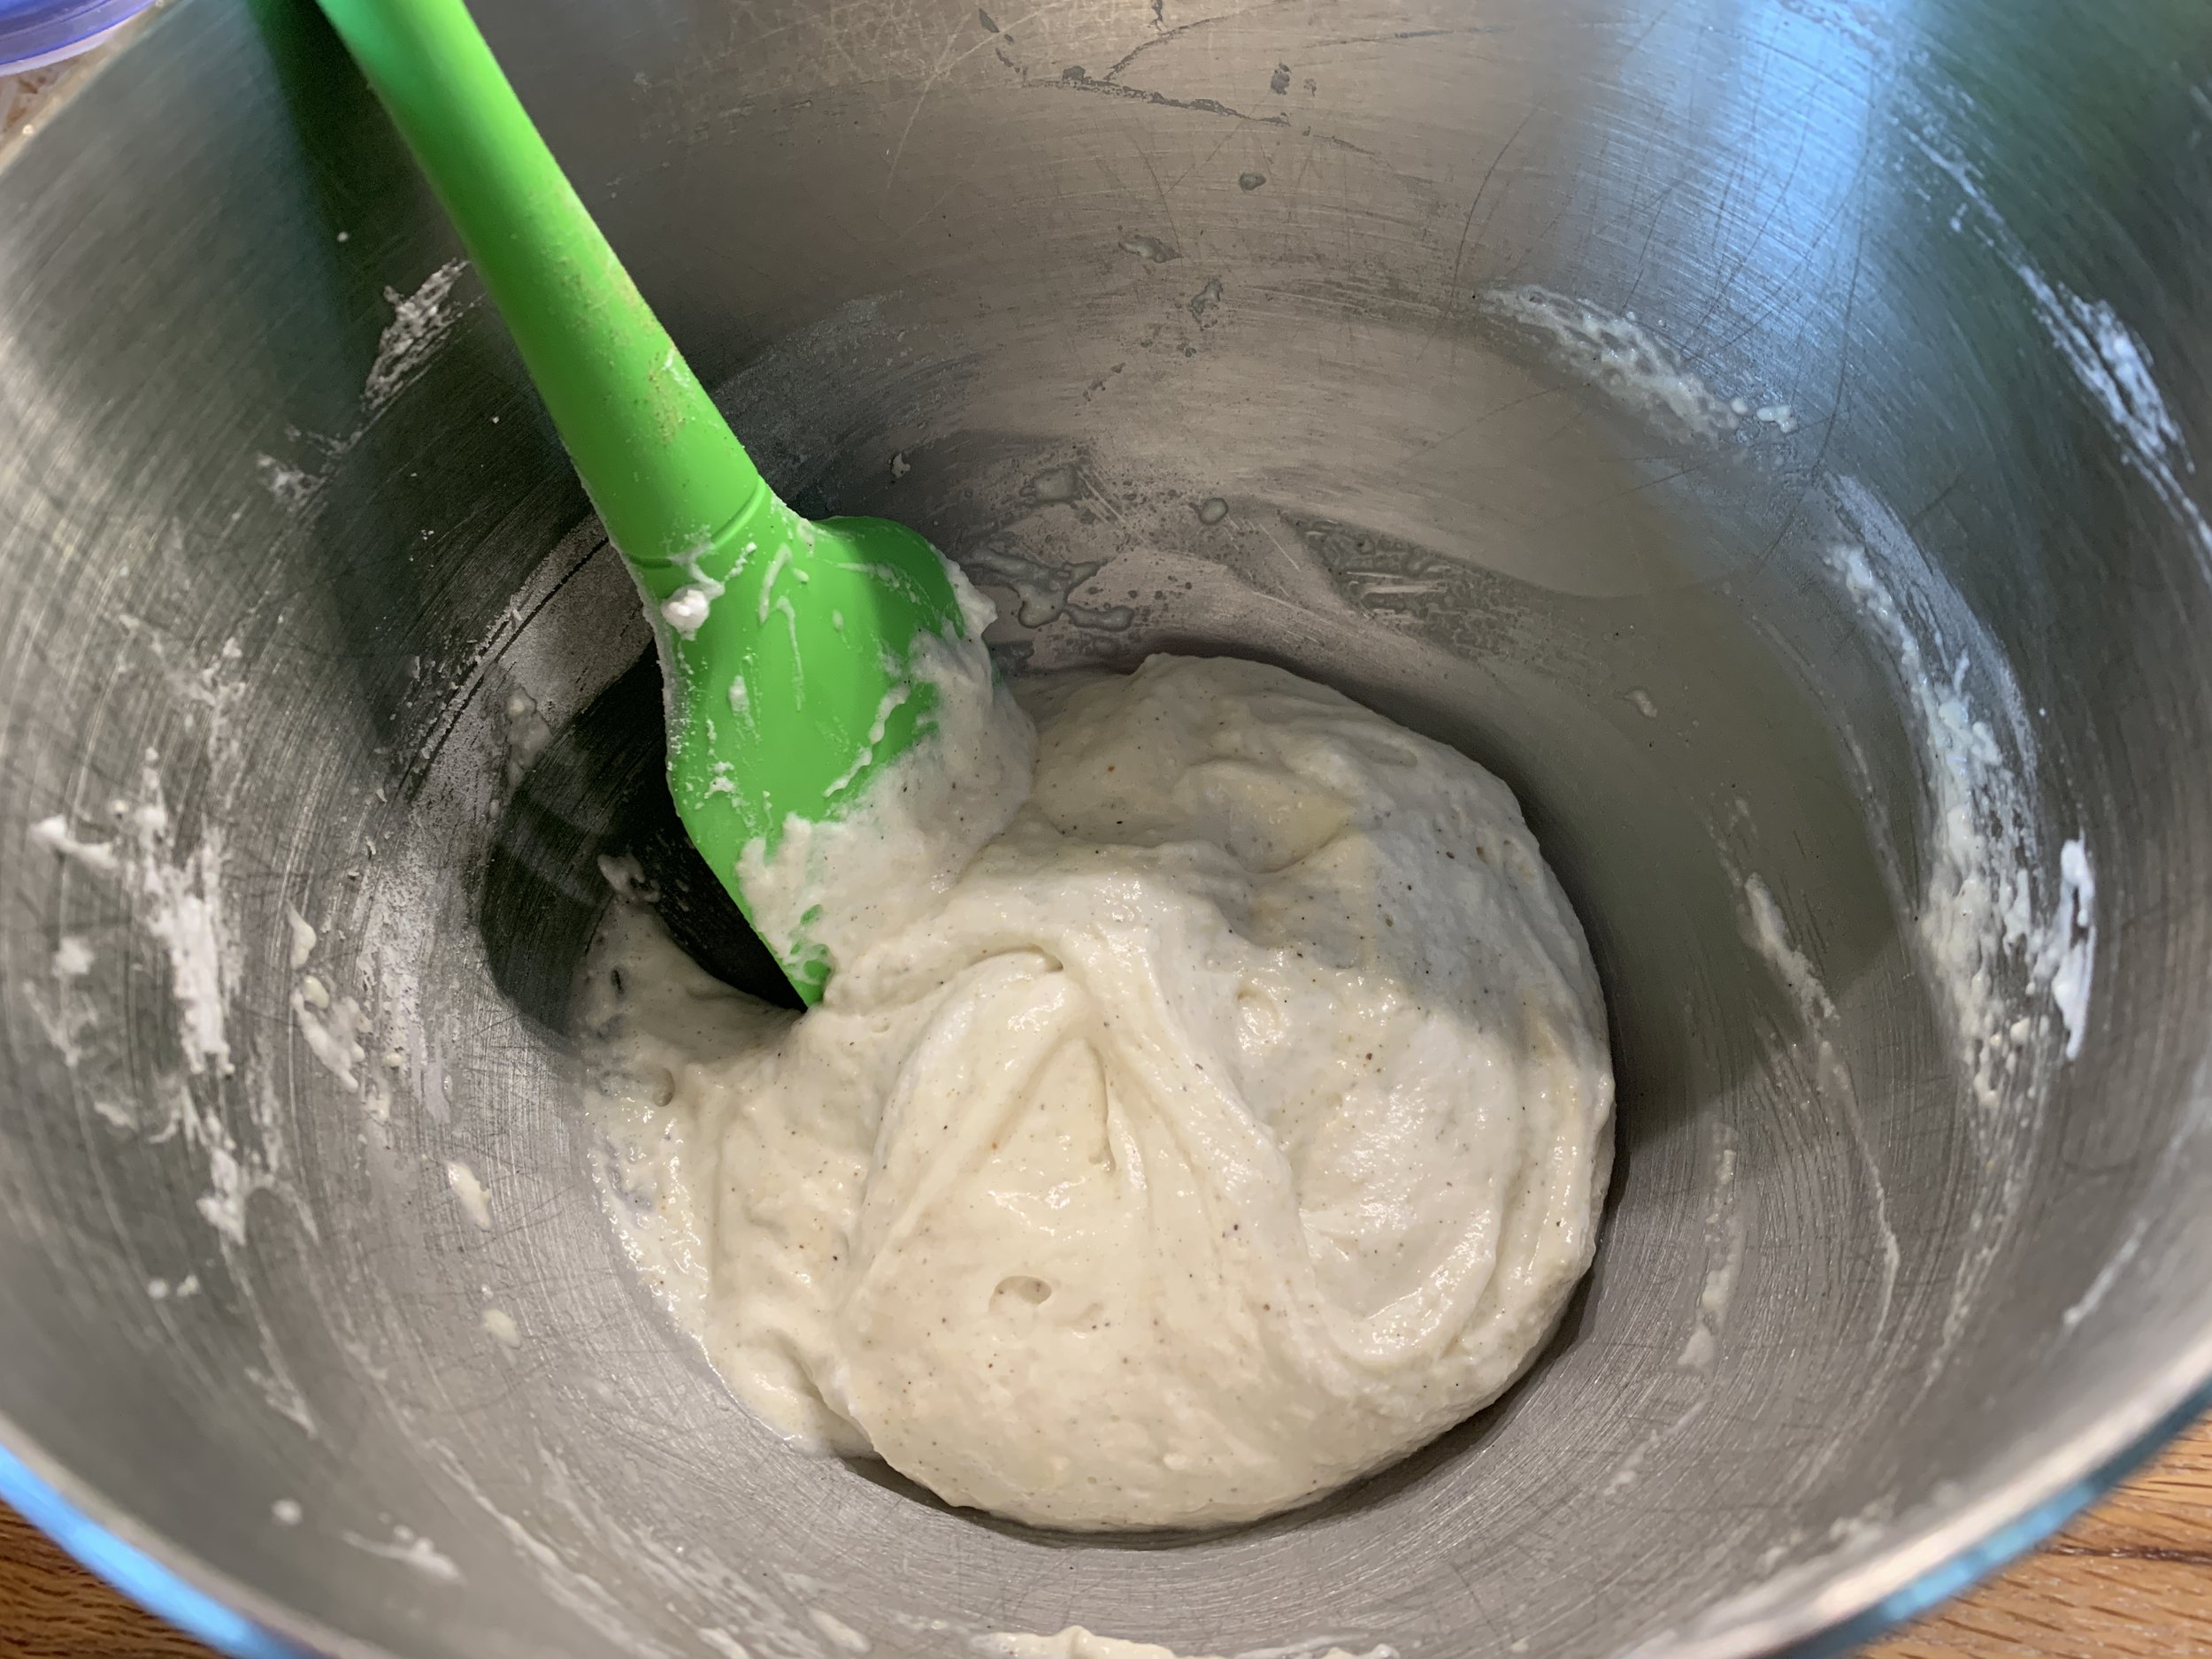
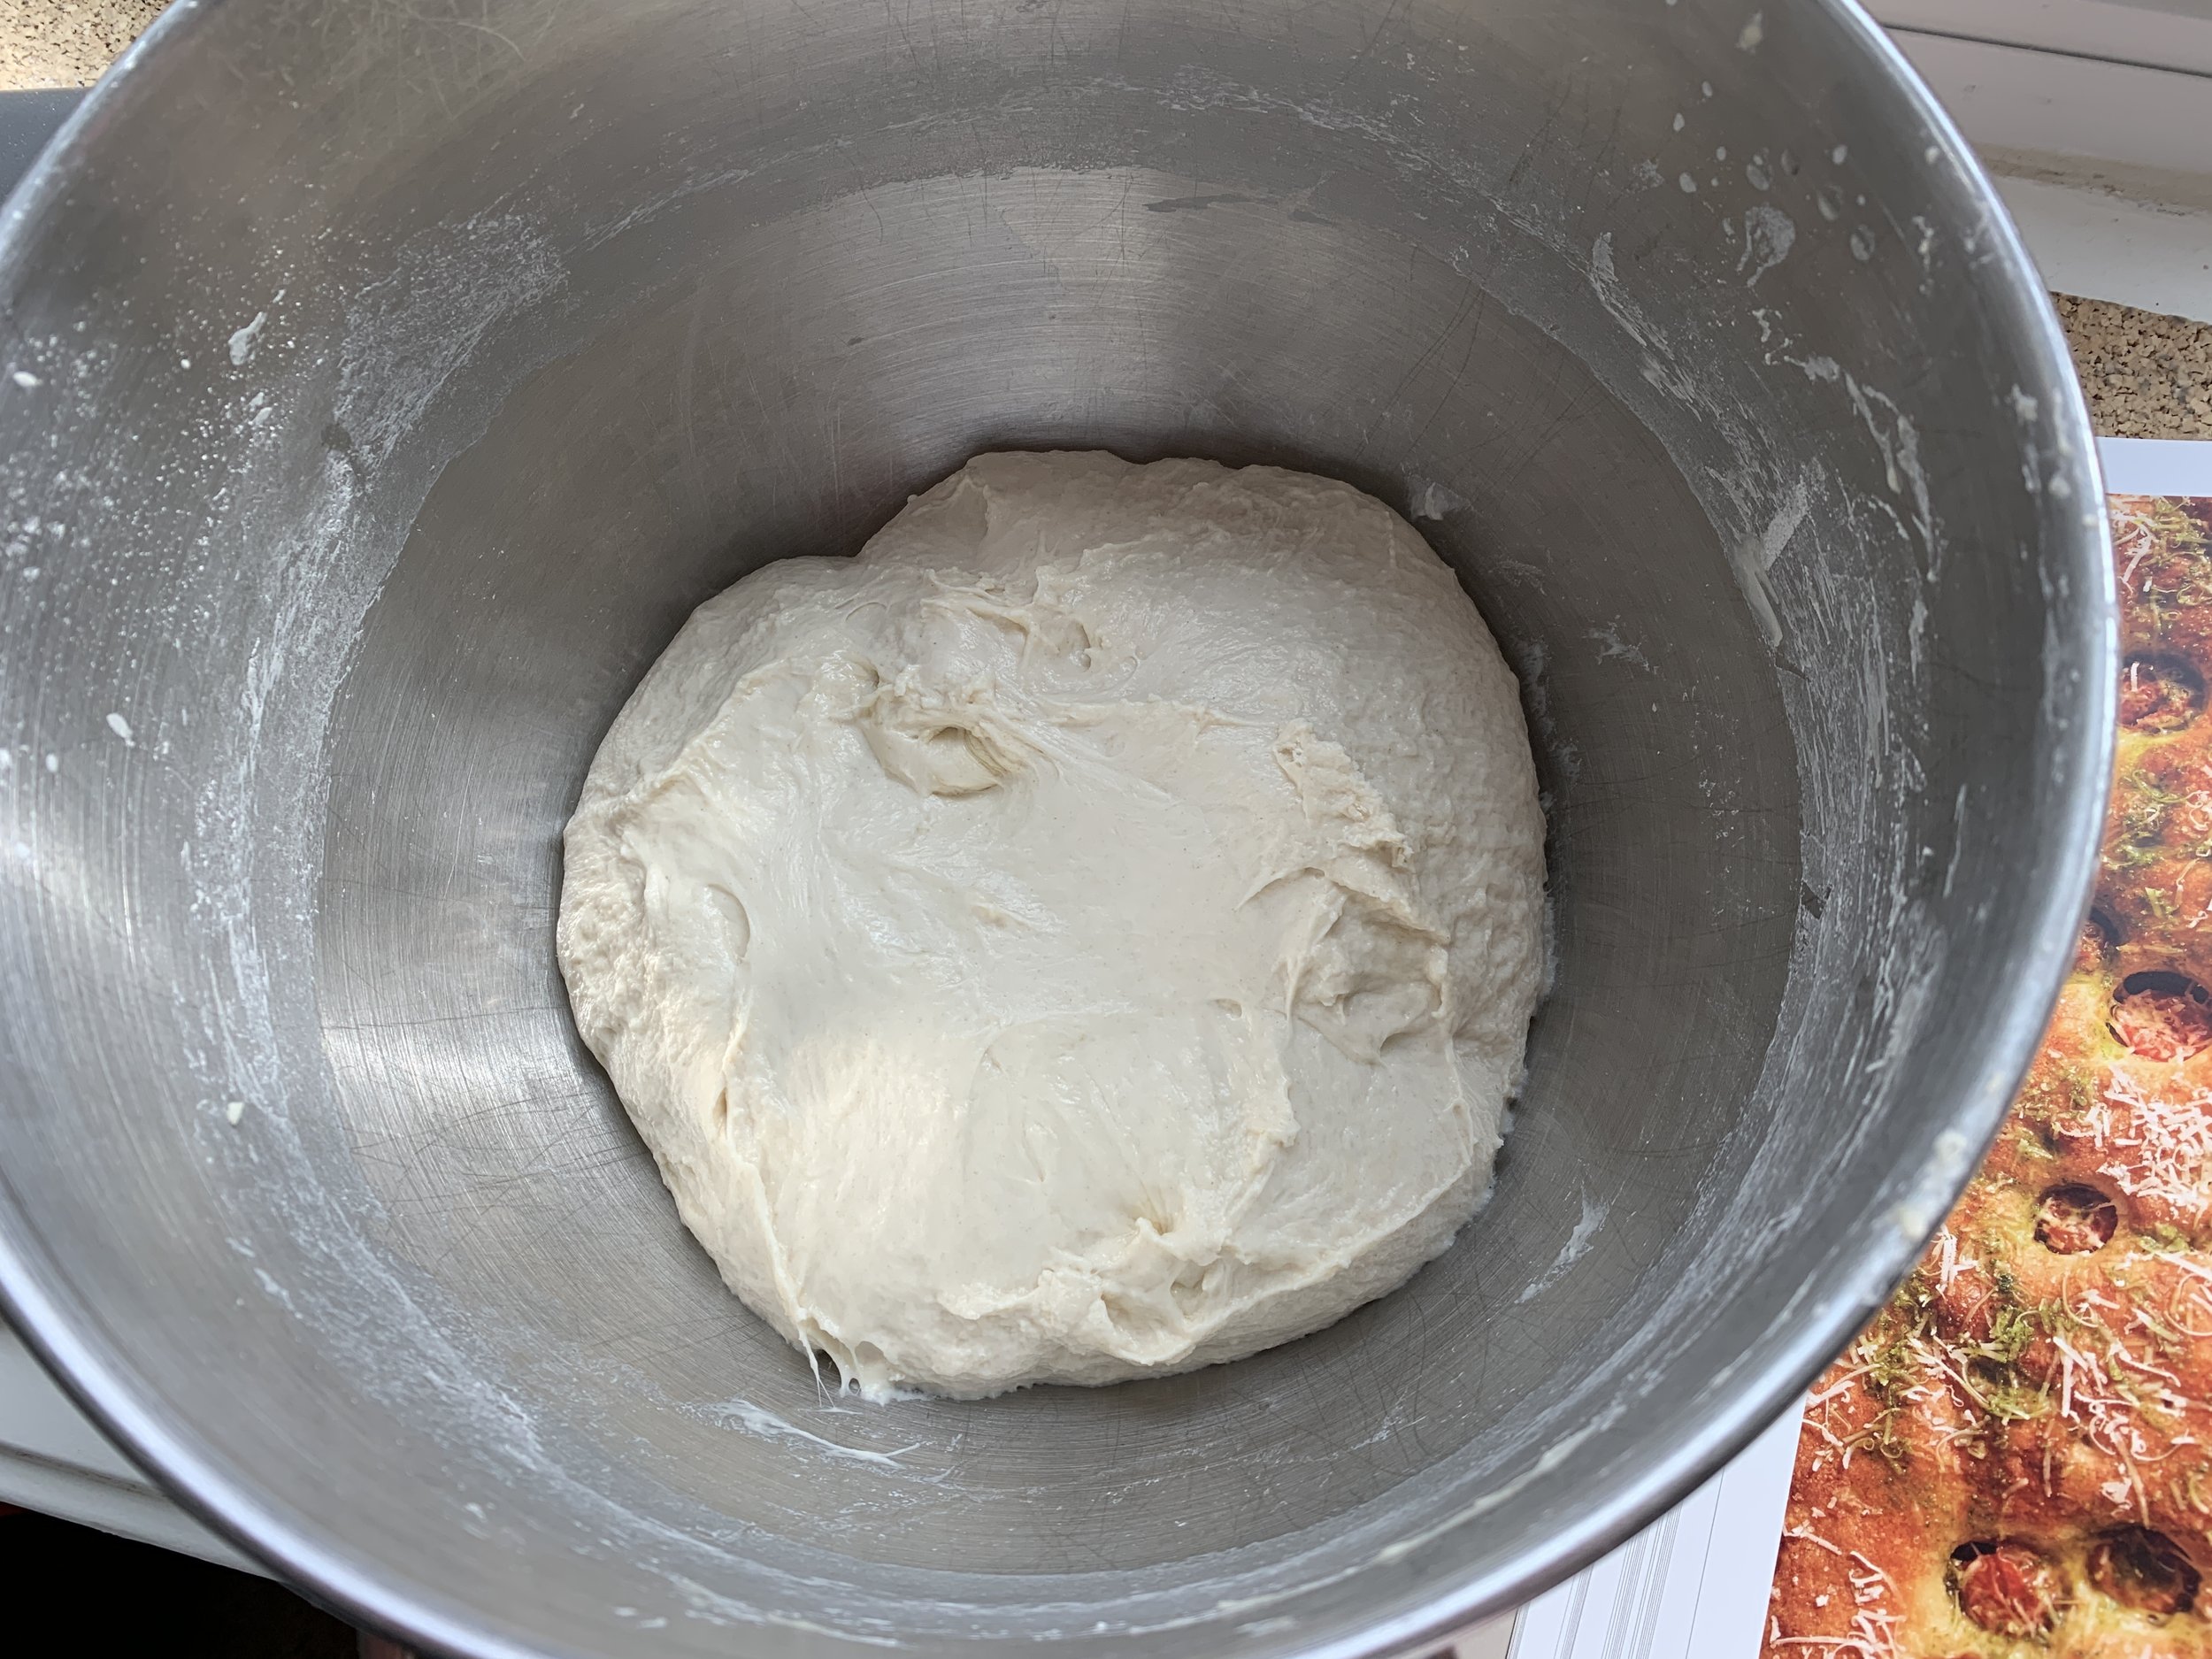
Add 635 g / 5 cups bread flour and 10 g kosher salt to the yeast/water mixture and mix first with the paddle until combined. Rest the dough for 30 minutes to hydrate. Here’s my dough after that rest.

After initial hydration

Now switch to the dough hook and knead on med-high speed for 20 minutes until smooth. My 8 quart Kitchenaid commercial mixer (with which I can also use my 6 qt bowl!) does a great job with it’s workhorse of a dough hook and powerful motor. It’s a beautiful thing.

8 qt mixer with attachments/6 qt bowl

After the 20 minute knead

Place the dough in a lightly olive-oiled bowl and do a folding of the dough to develop the structure by stretching and pulling up one edge of dough into the middle, then the opposite edge, then the other two edges one at a time. This forms a tighter ball of dough. Flip the dough over to coat with oil, cover with plastic wrap and let rise at warm room temperature for 1 to 2 hours until doubled. You can also do an overnight fridge rise if it better suits your schedule.

The first time I made this, I did a 4 hour fridge rise (must have had something unexpected come up?) which I followed by an additional hour at room temperature. It worked. For my second batch I followed the room temperature approach, completing the project over the course of several hours.

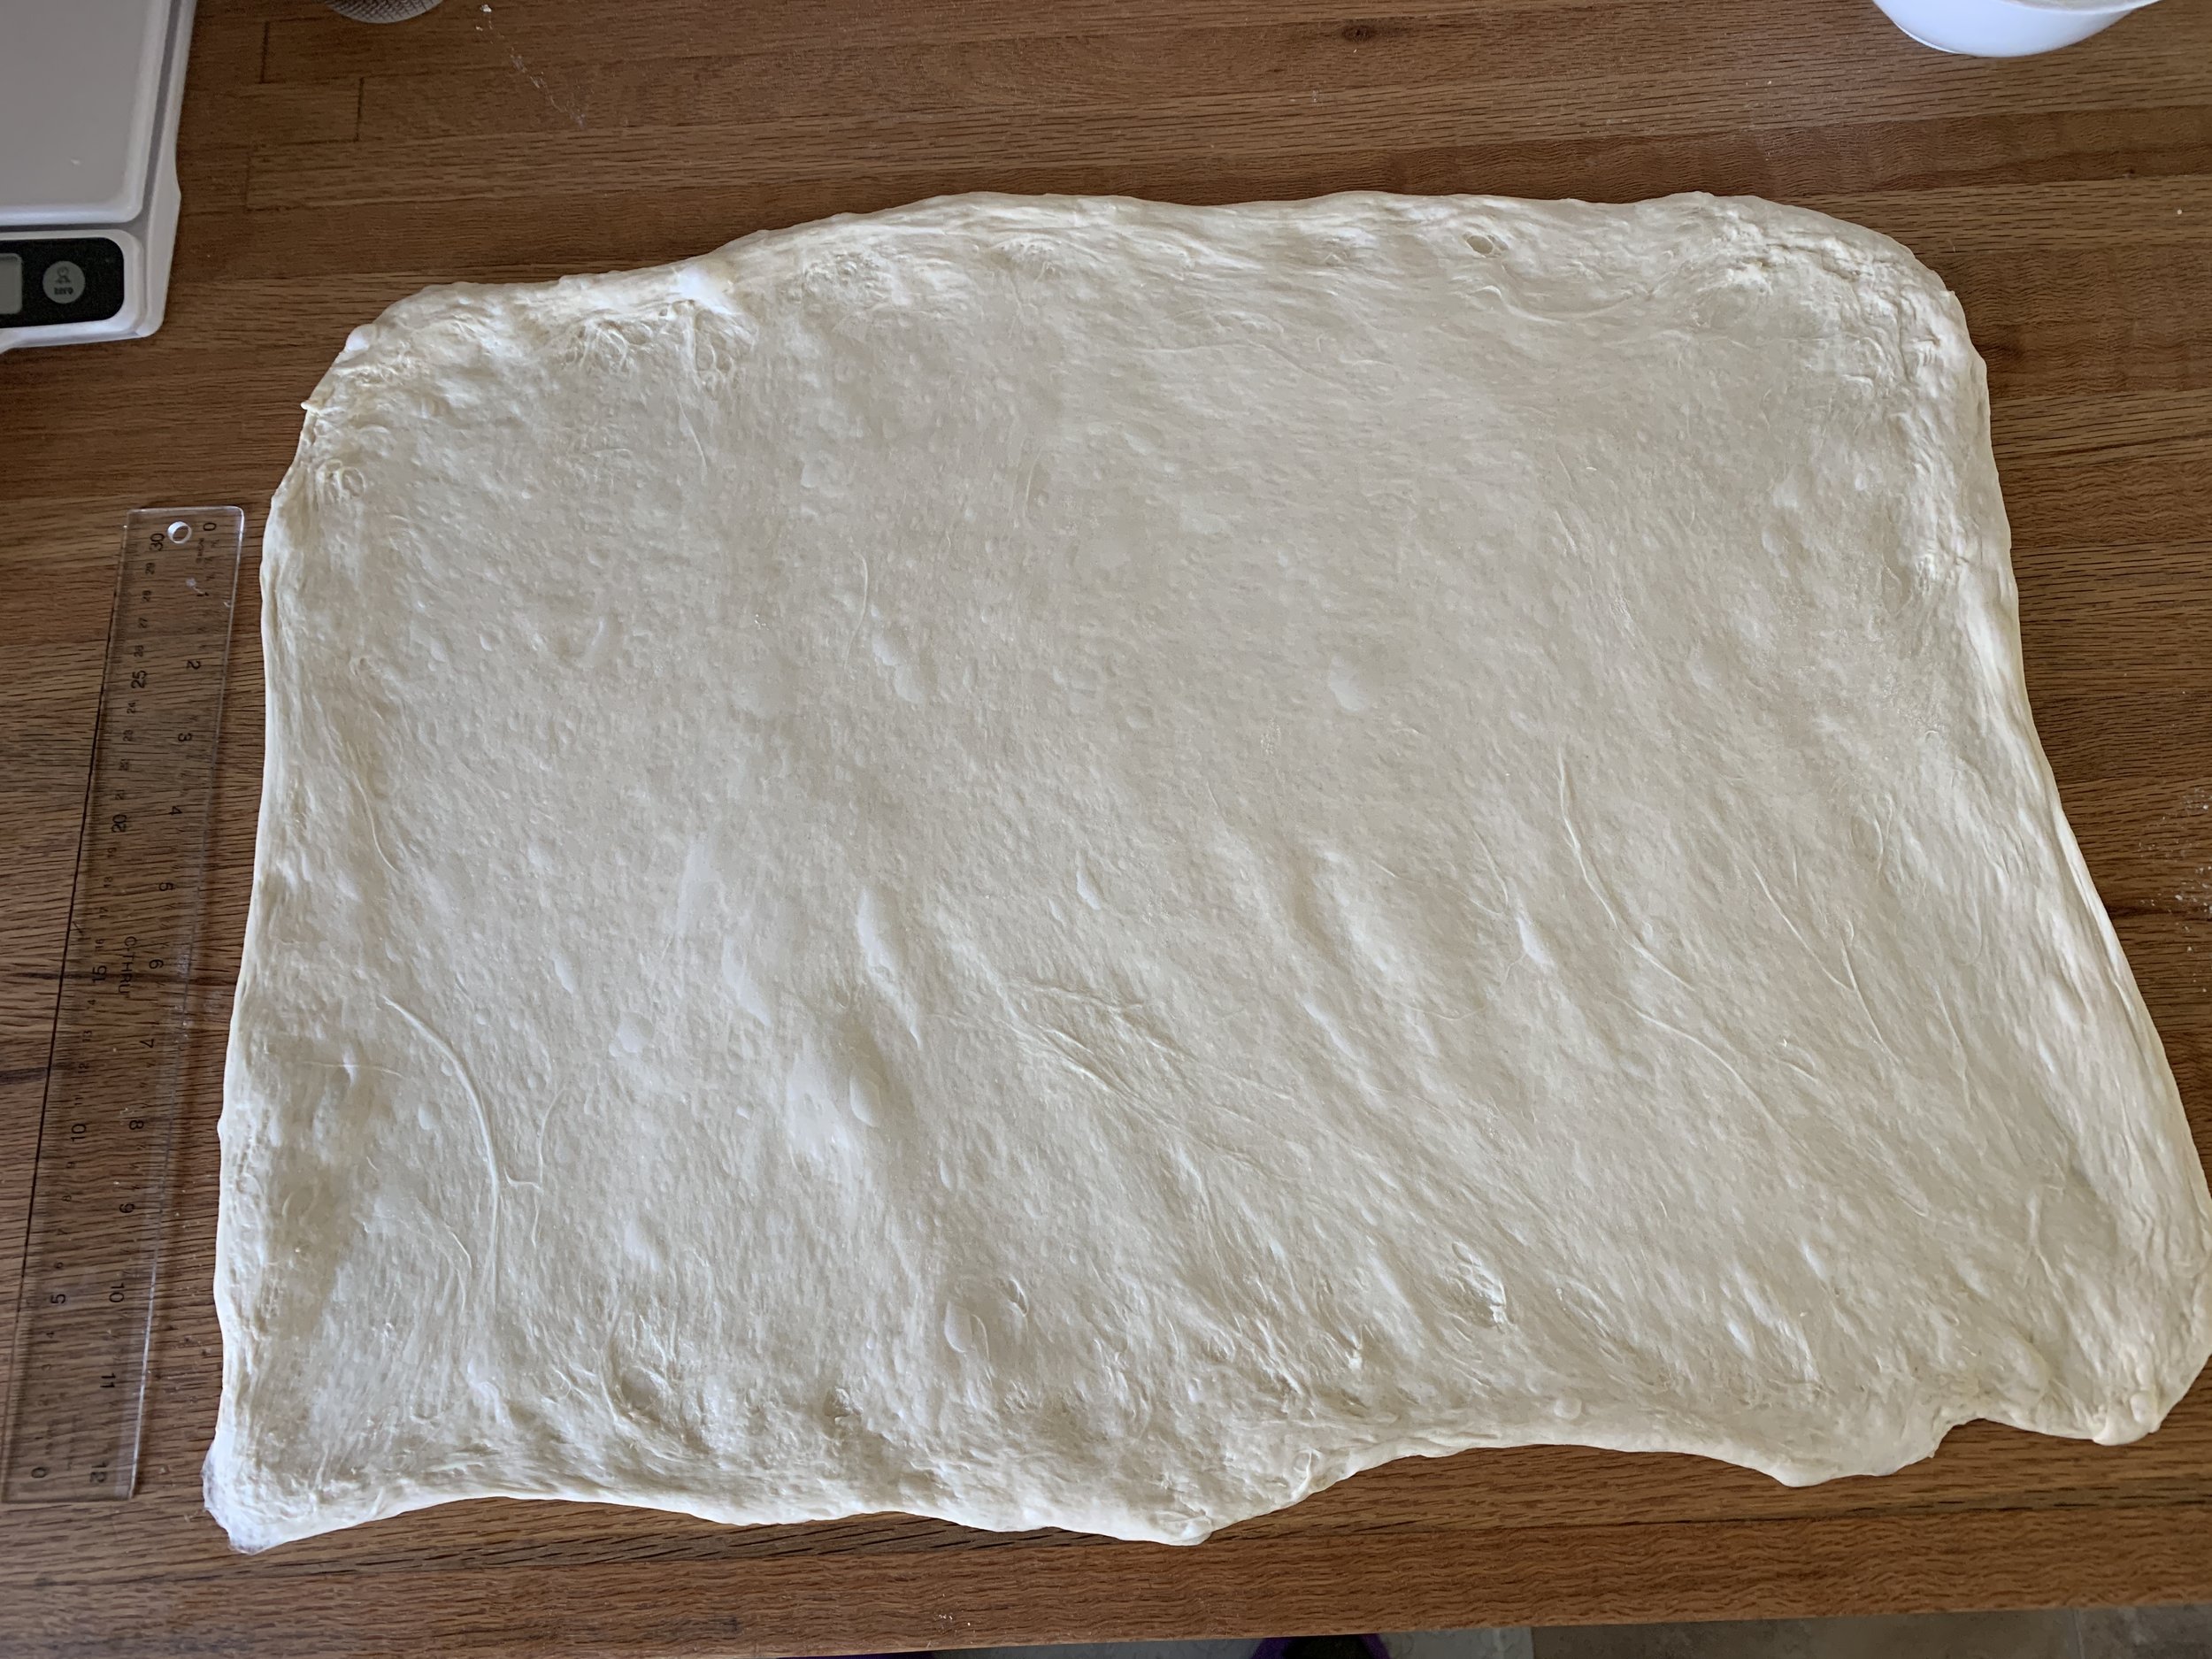
Turn the dough onto a lightly floured work surface, pat it into a square of sorts and stretch it out to about 16”x20”(ish).

Now fold it in thirds length wise (à la the letter or 3-fold we use for laminated dough).

Now fold in the short sides in thirds (another letter fold). Press out air pockets.

Dough package before panning

Pour 6 tablespoons extra virgin olive oil onto a half sheet pan, put the dough on the pan and turn to coat with oil. Let rest 10 minutes.

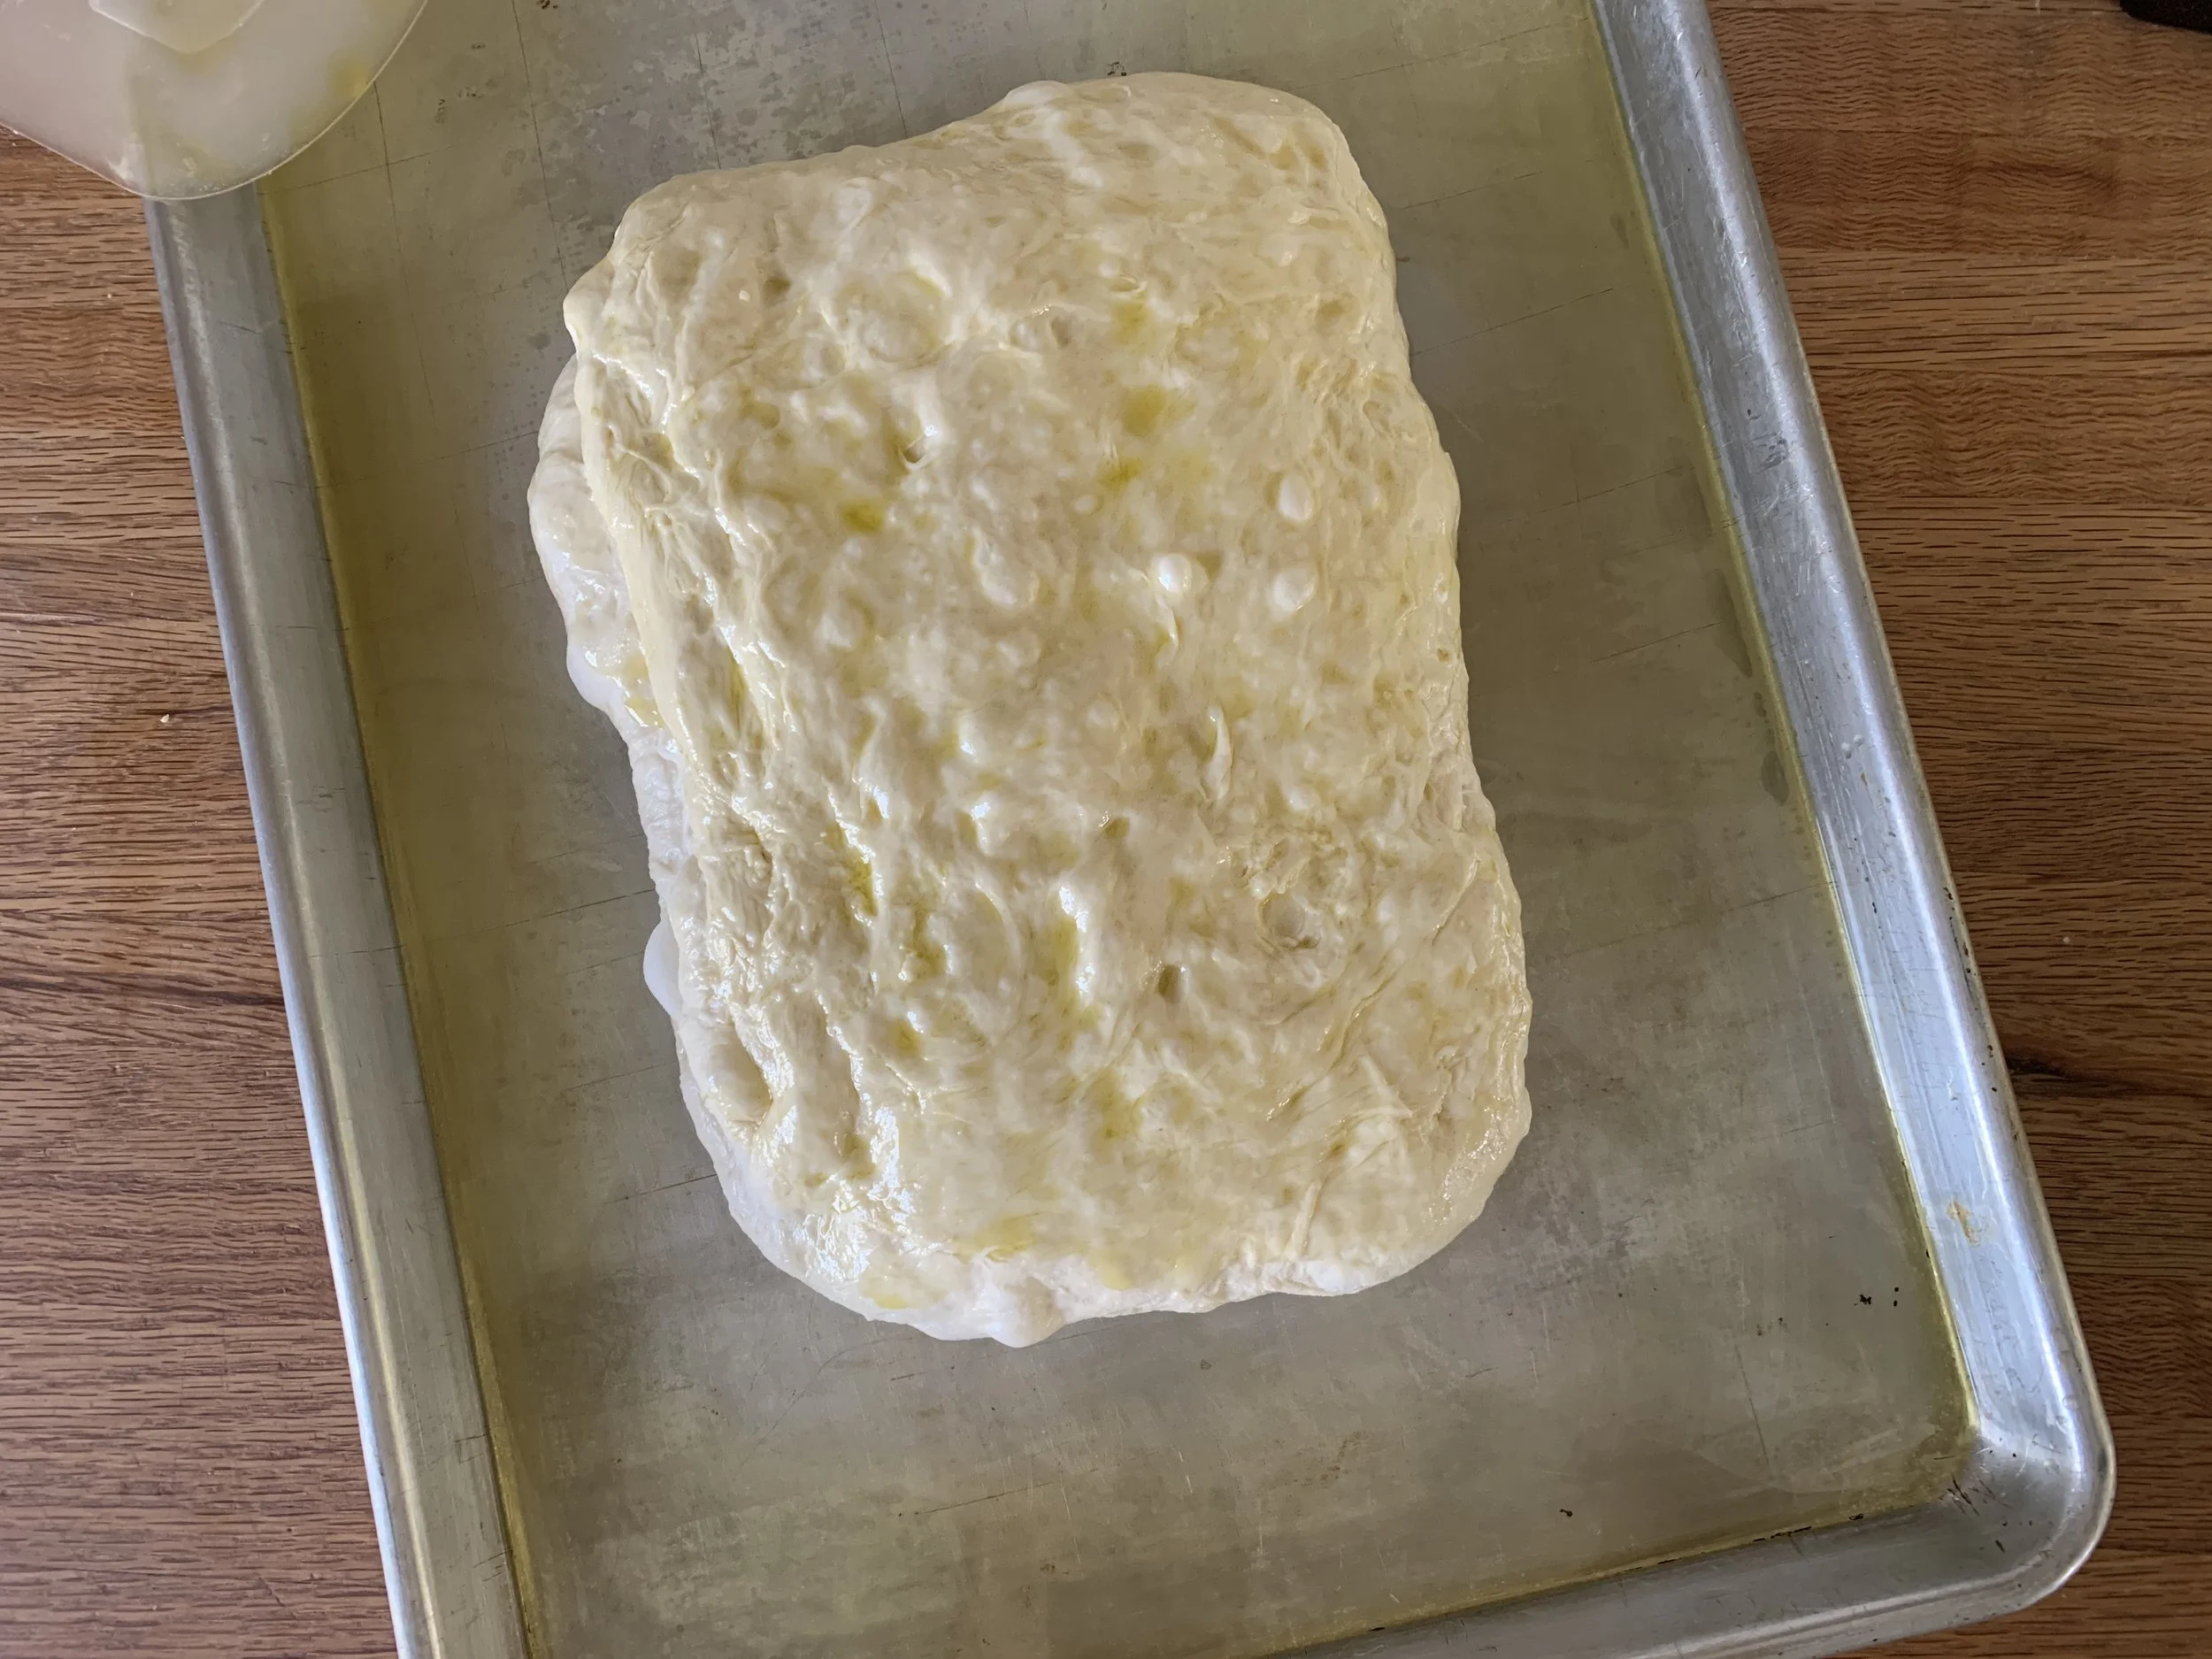
Stretch the dough to fit the pan as best you can. I did this in two steps, letting the dough rest 10-15 minutes in between. Dimple it all over, cover with plastic wrap and let it rise about 30-40 minutes. It will become more puffy.
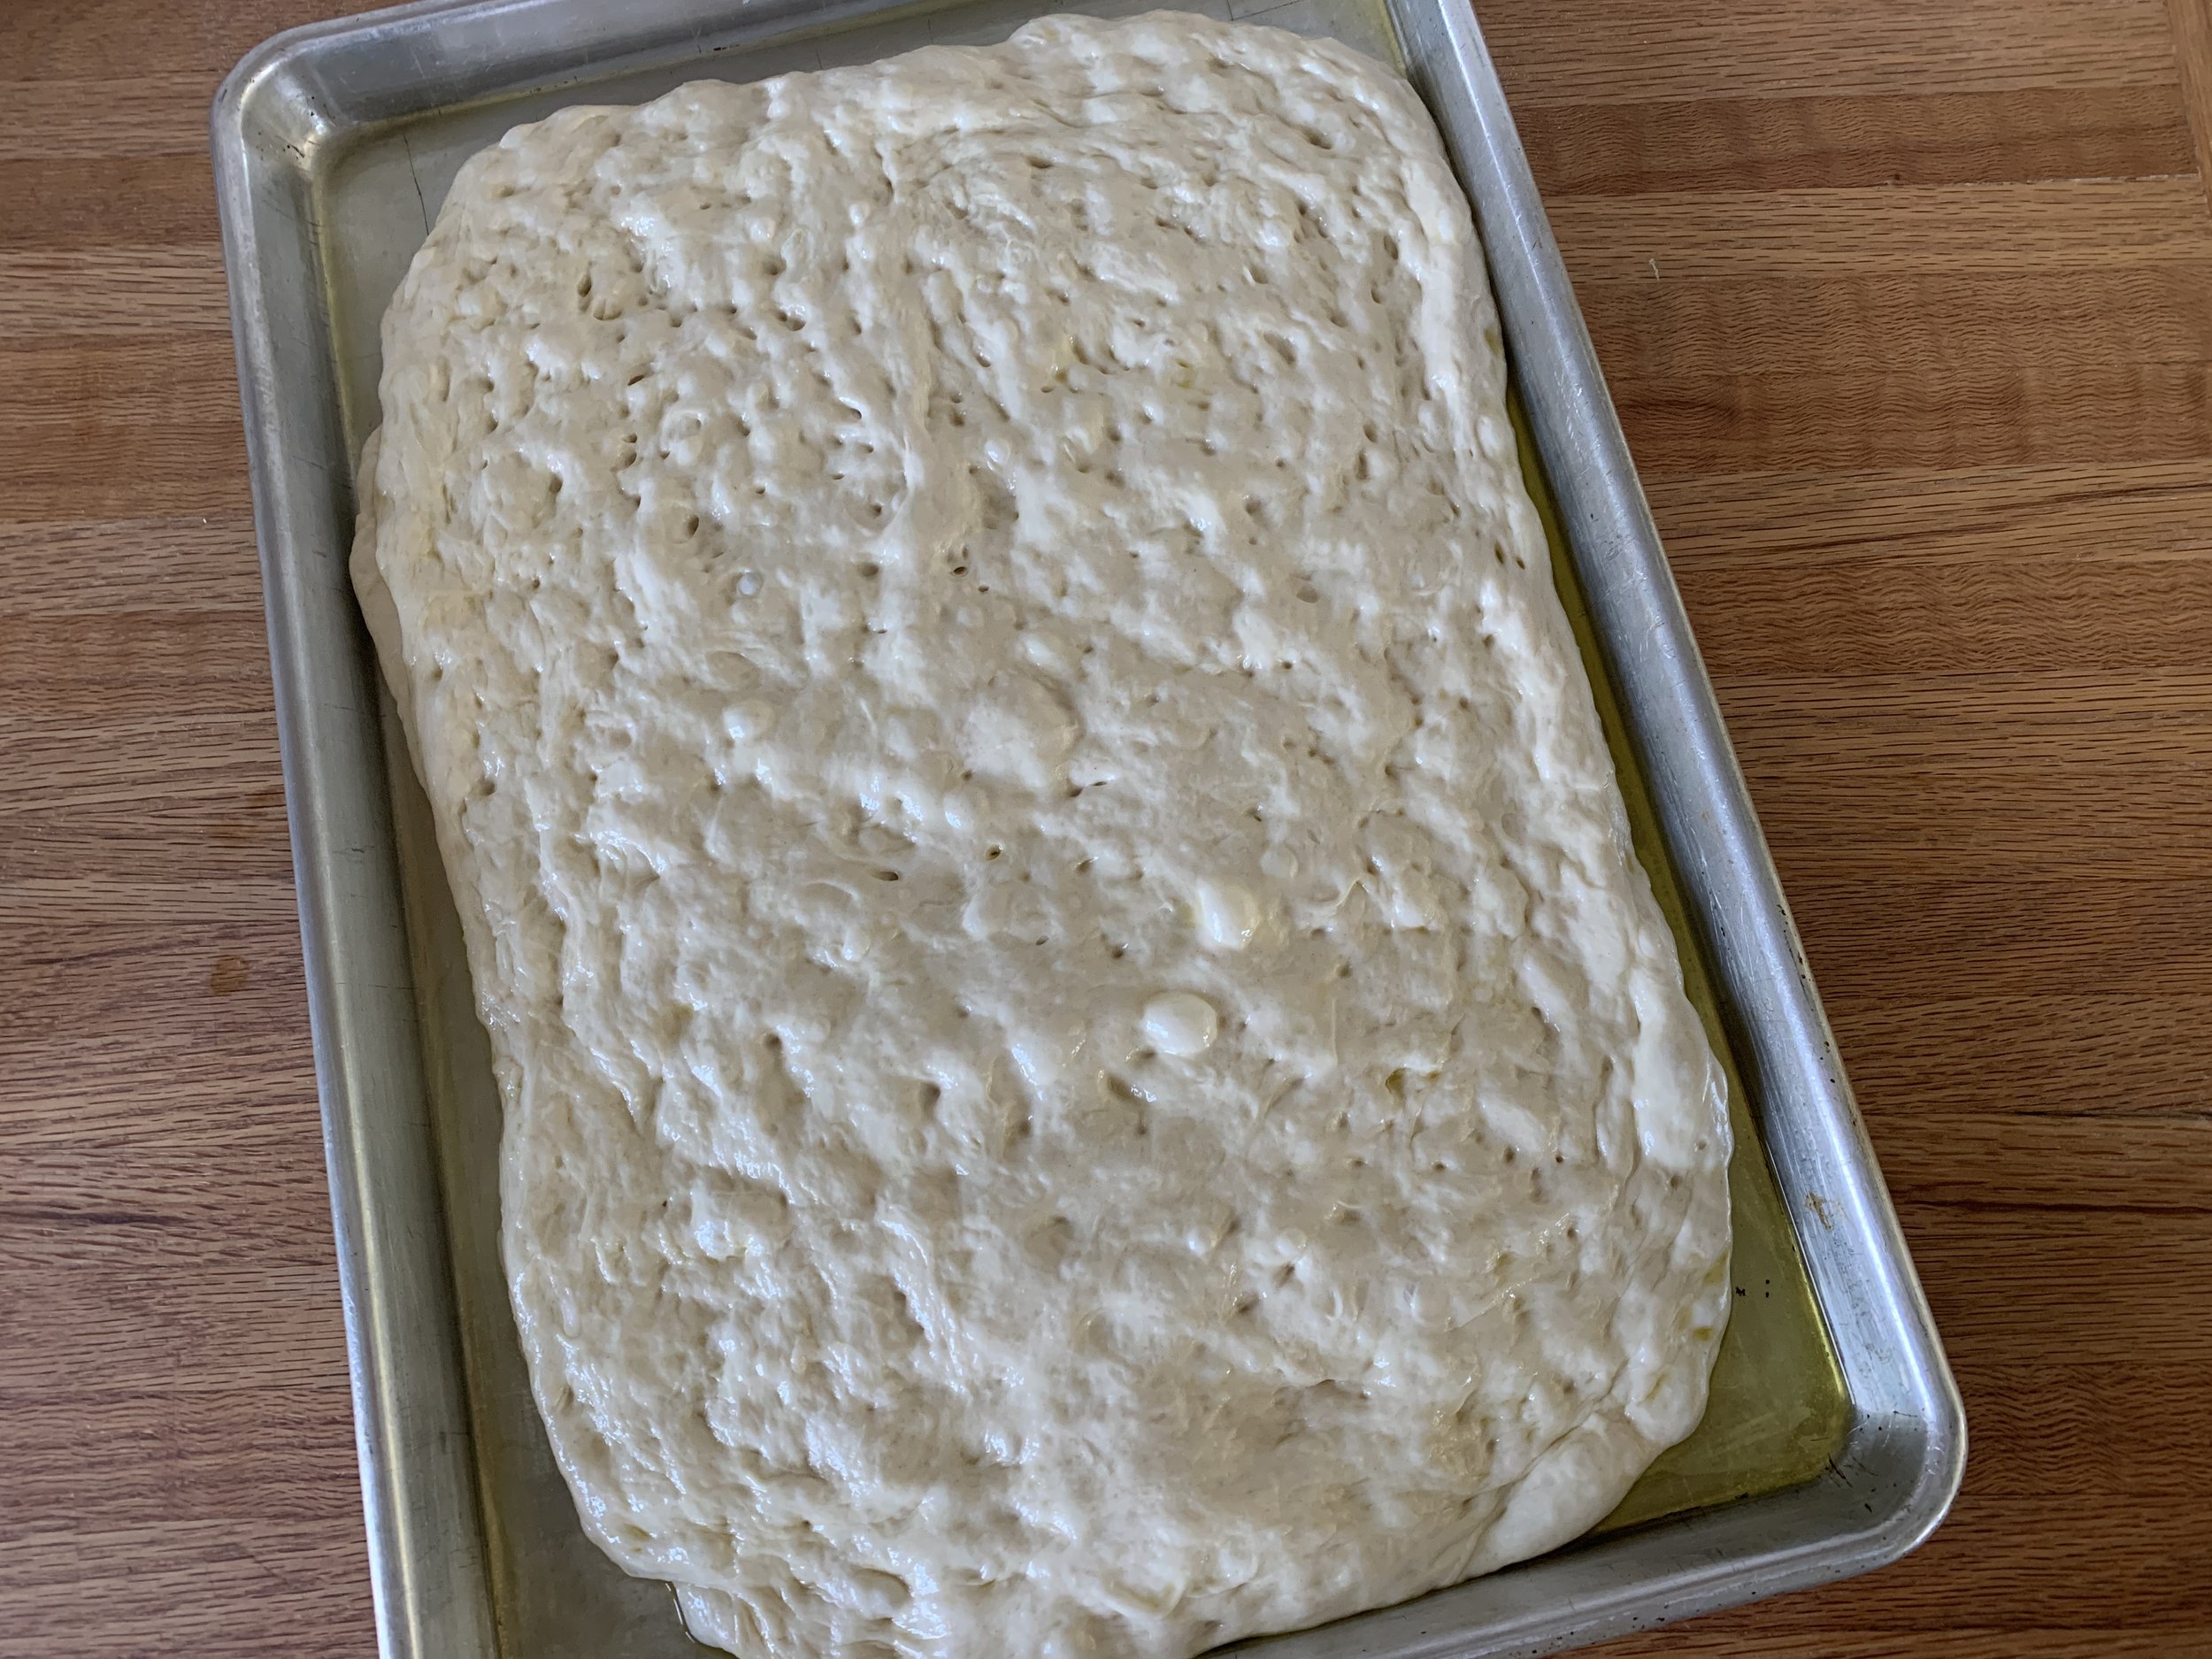
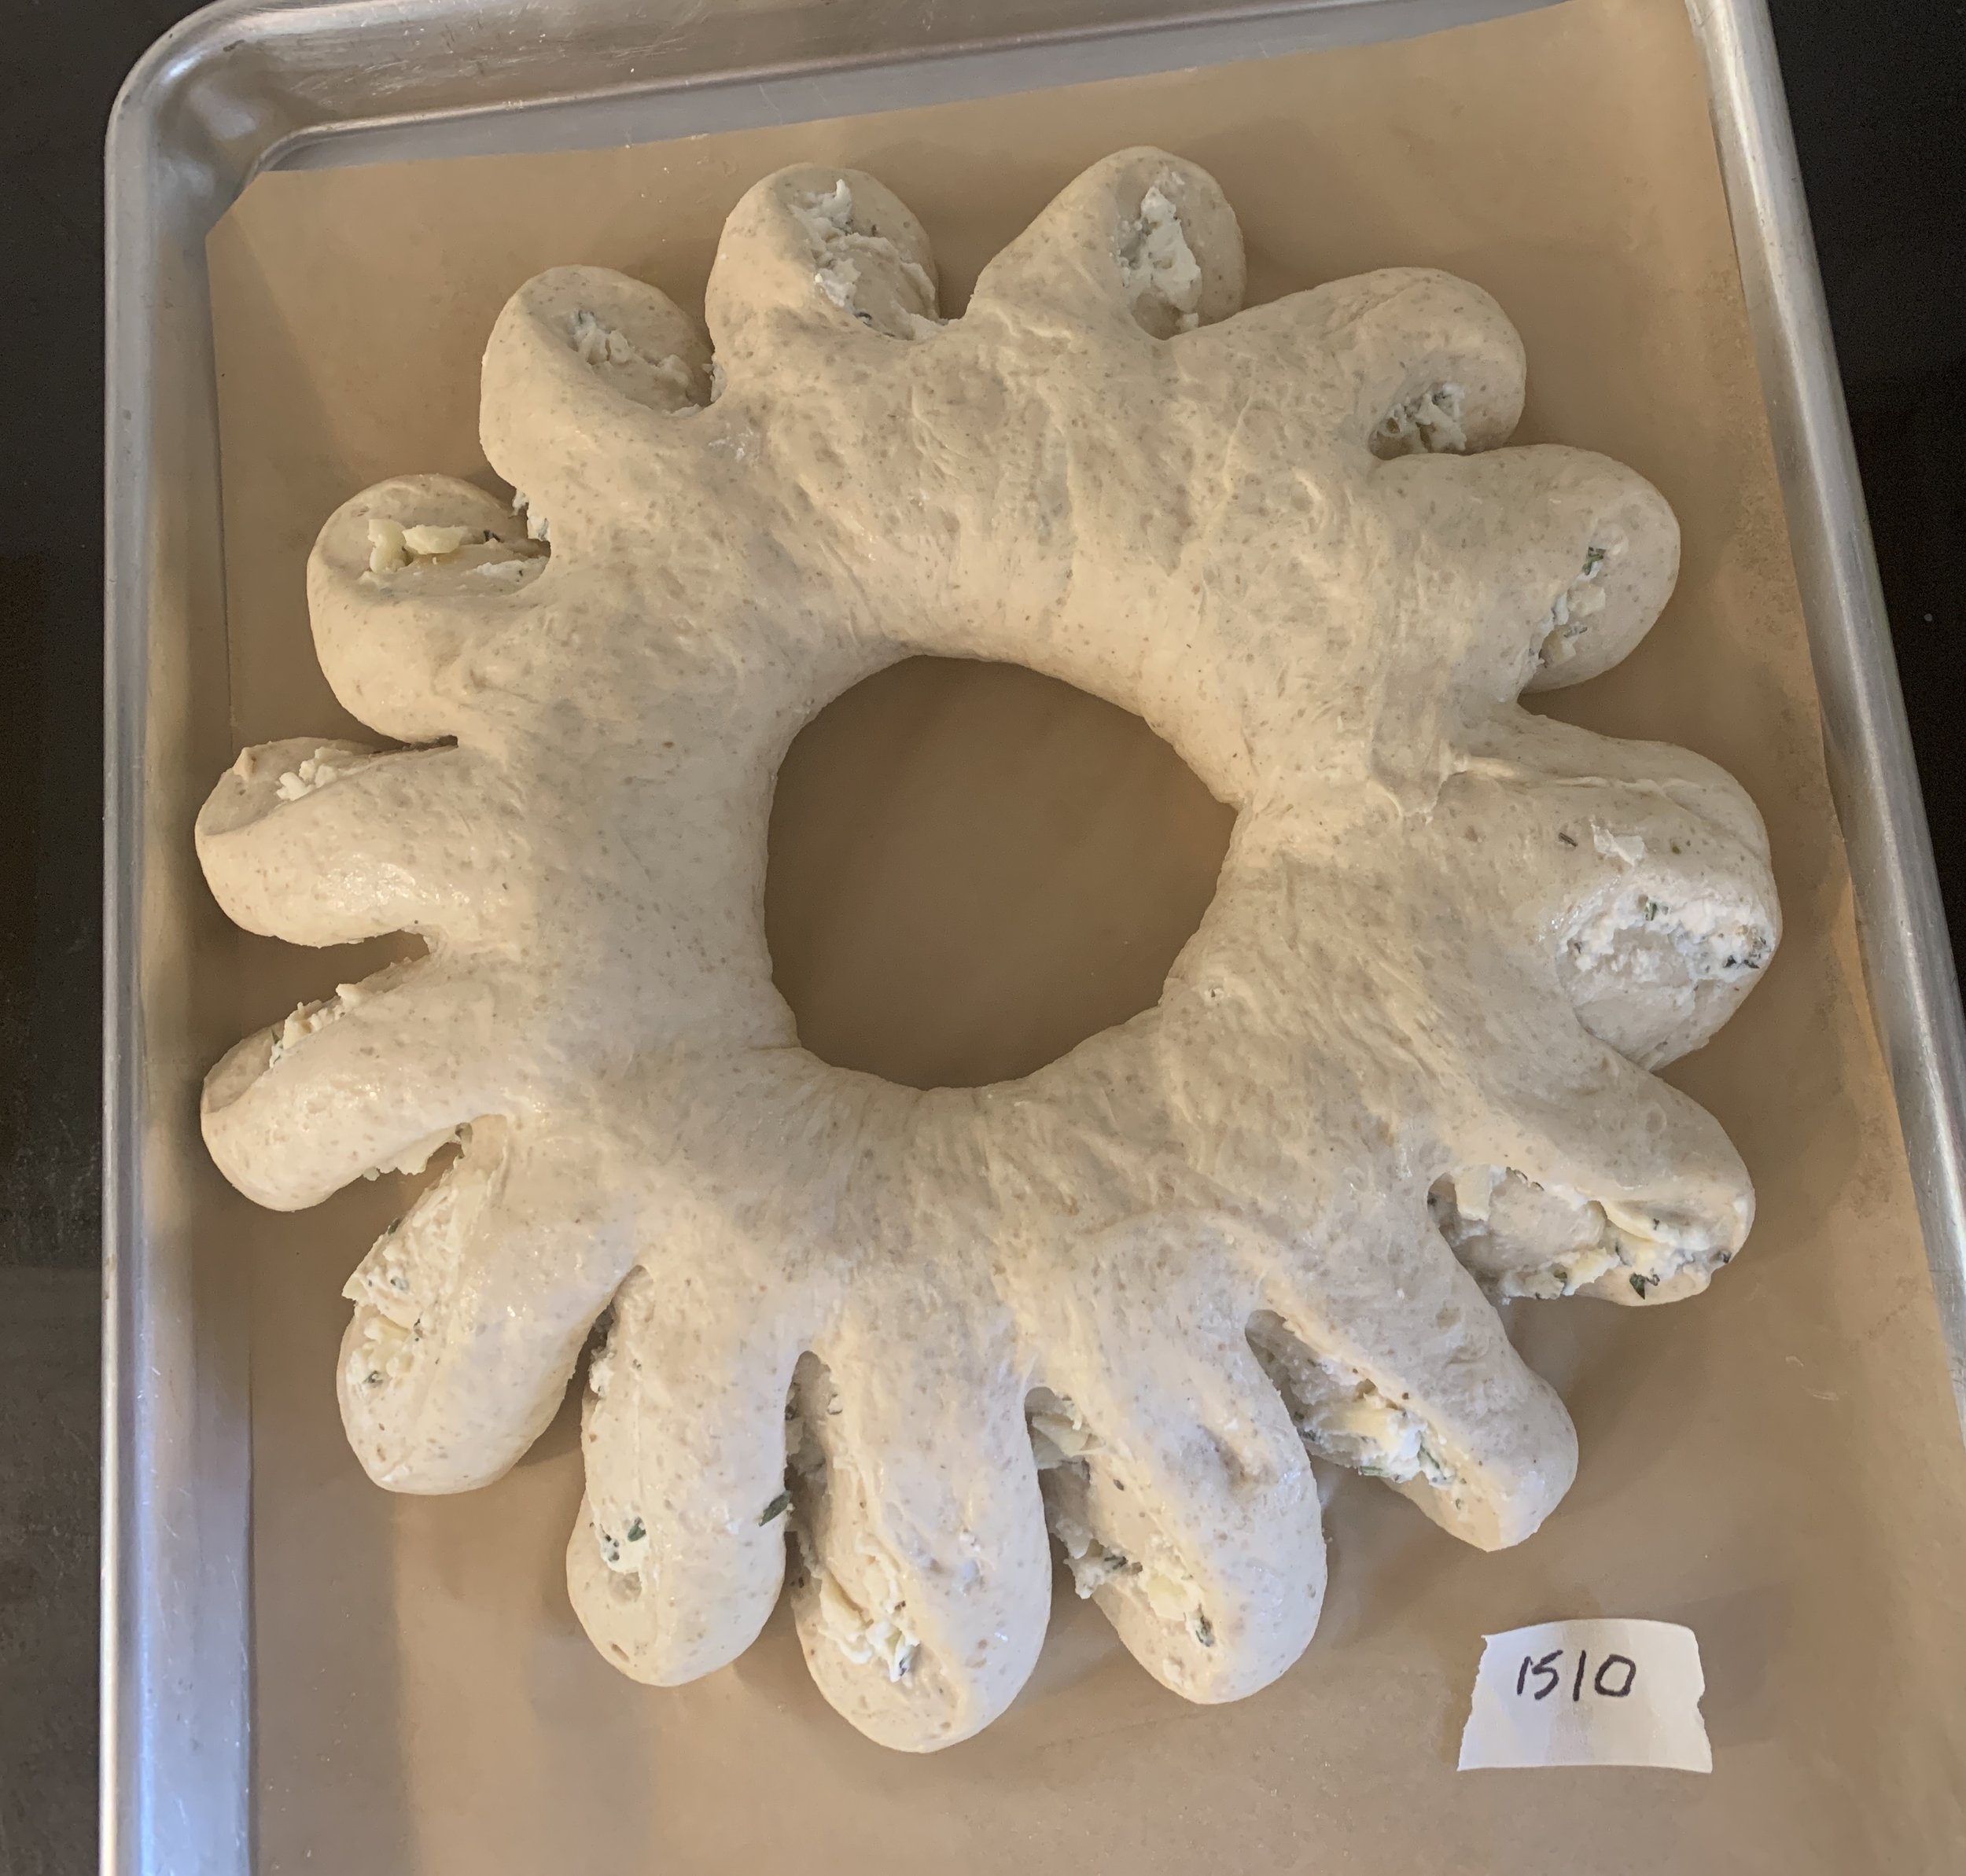
Before the rise

Heat the oven to 500F. When ready, top with herbs and grated cheese (or your chosen topping(s).

Bake 8 minutes, rotate the pan and bake an additional 7 minutes until beautifully browned.
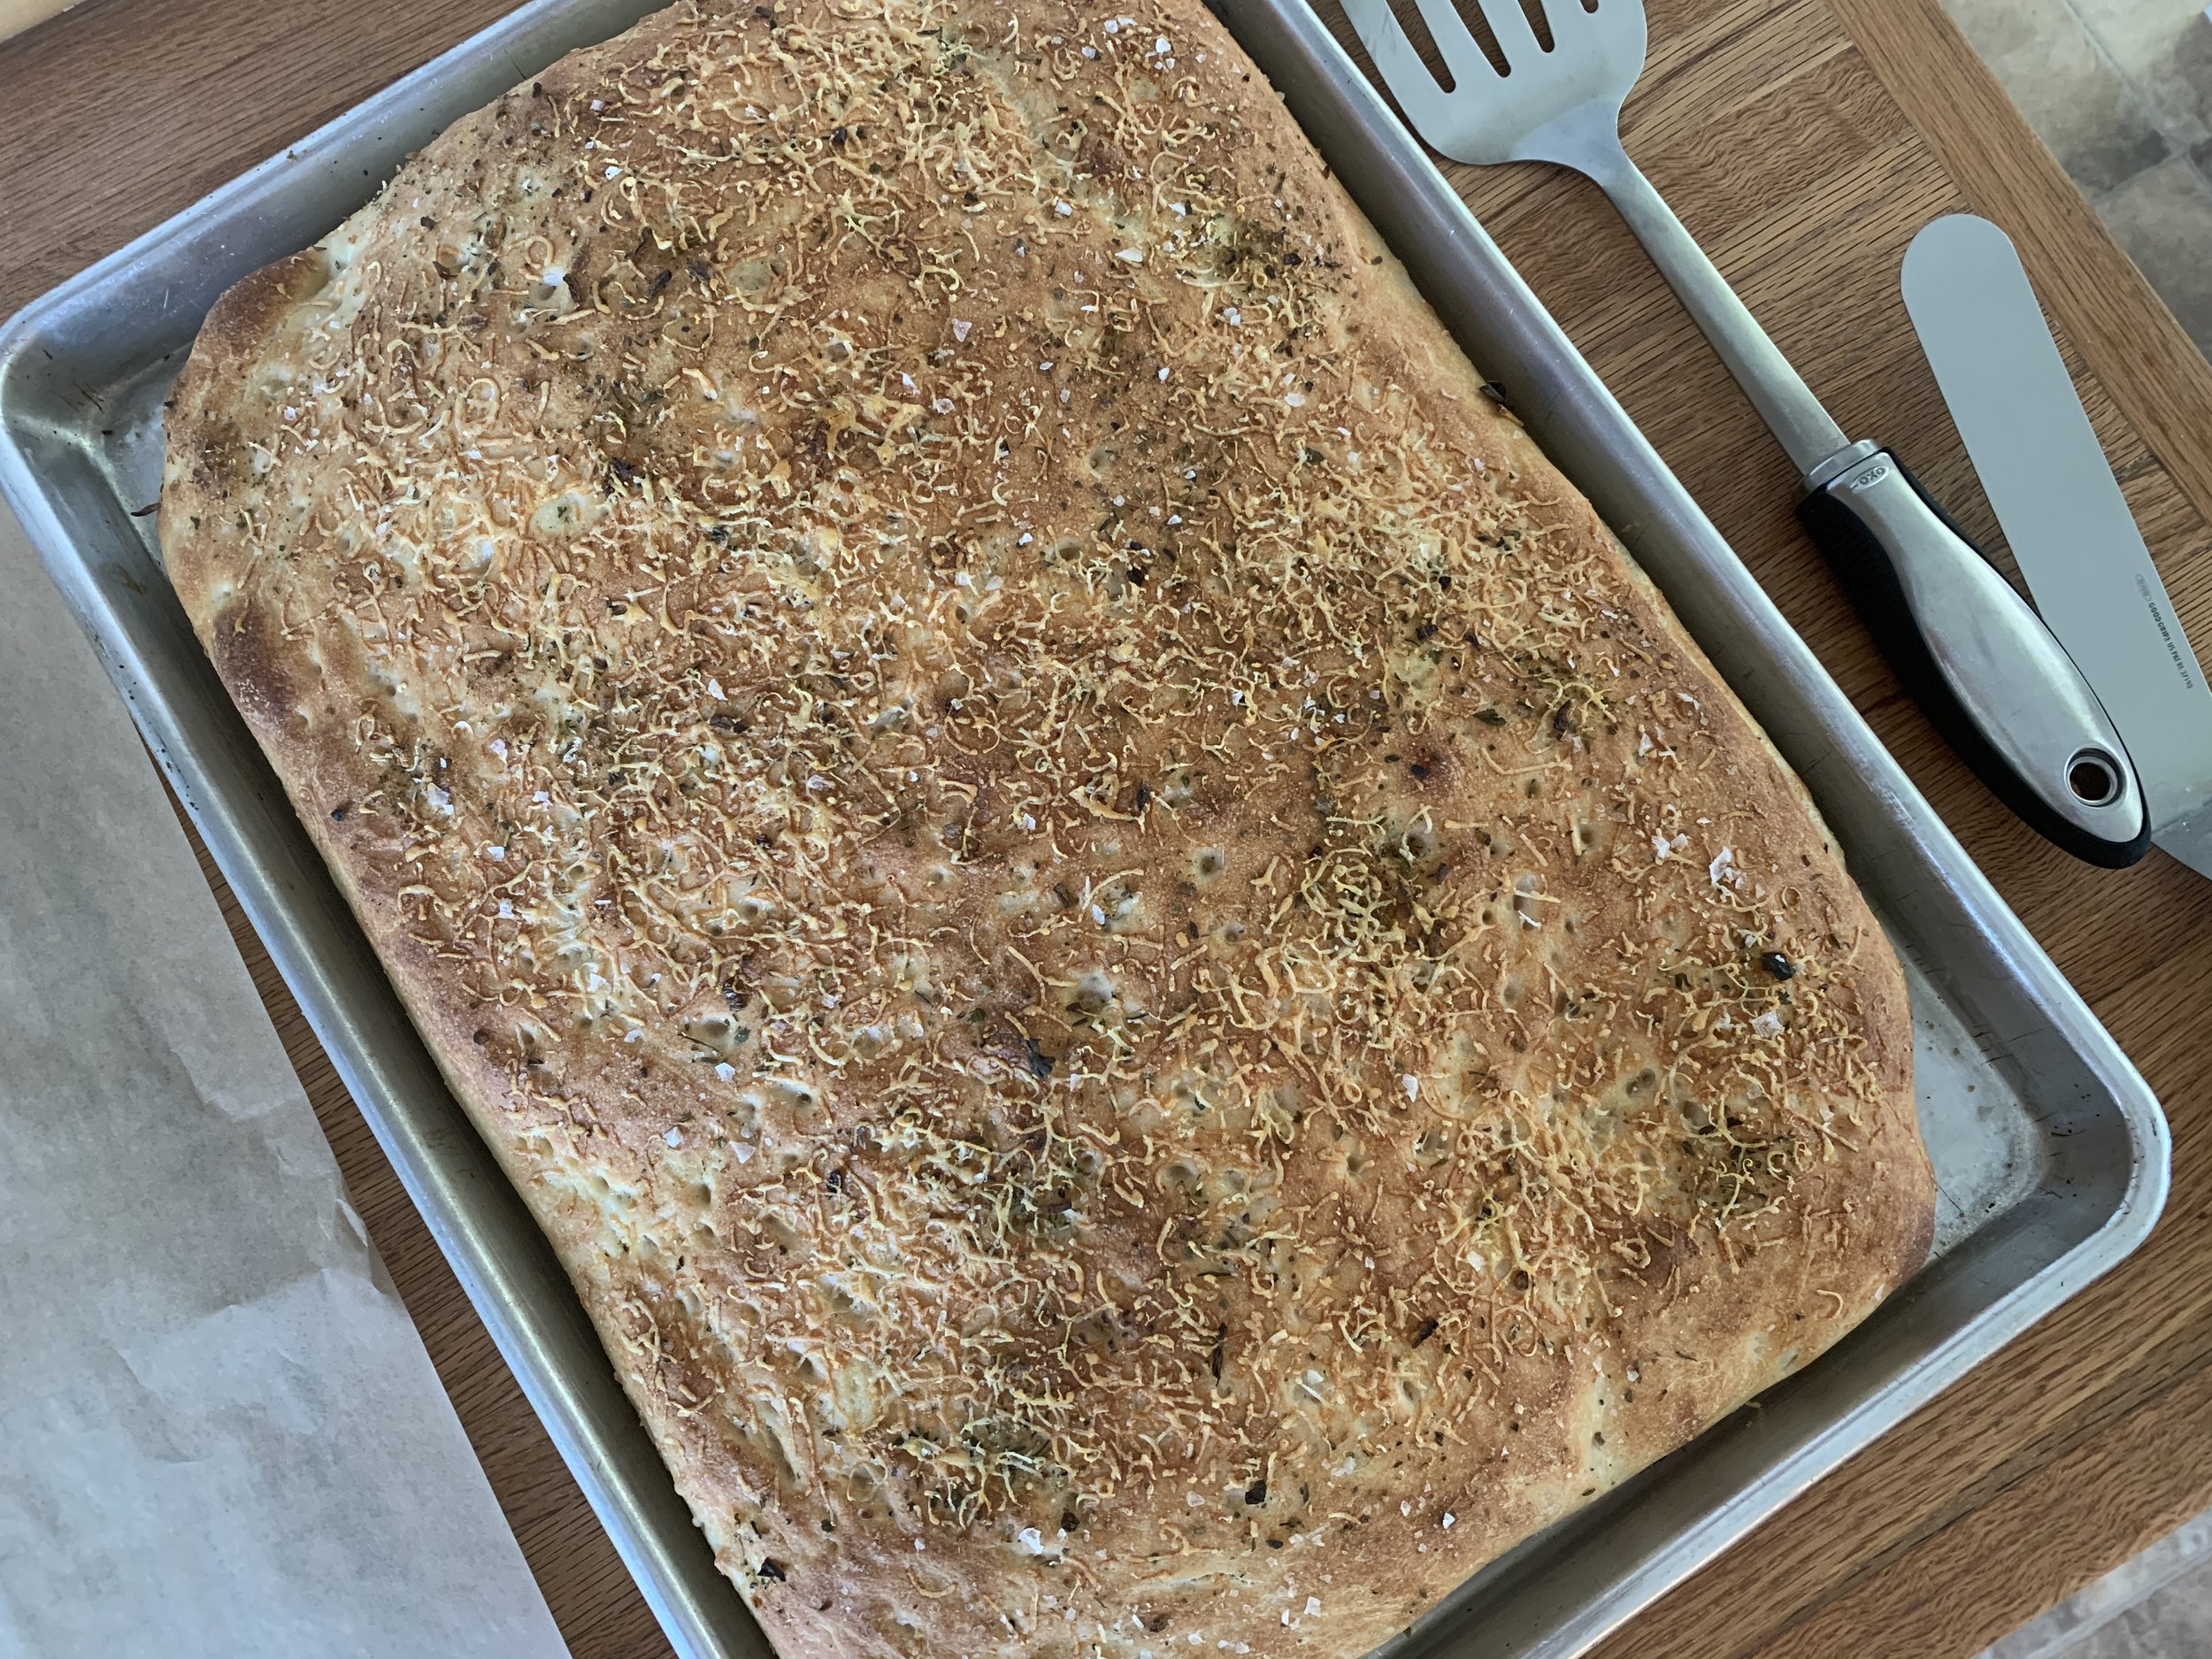
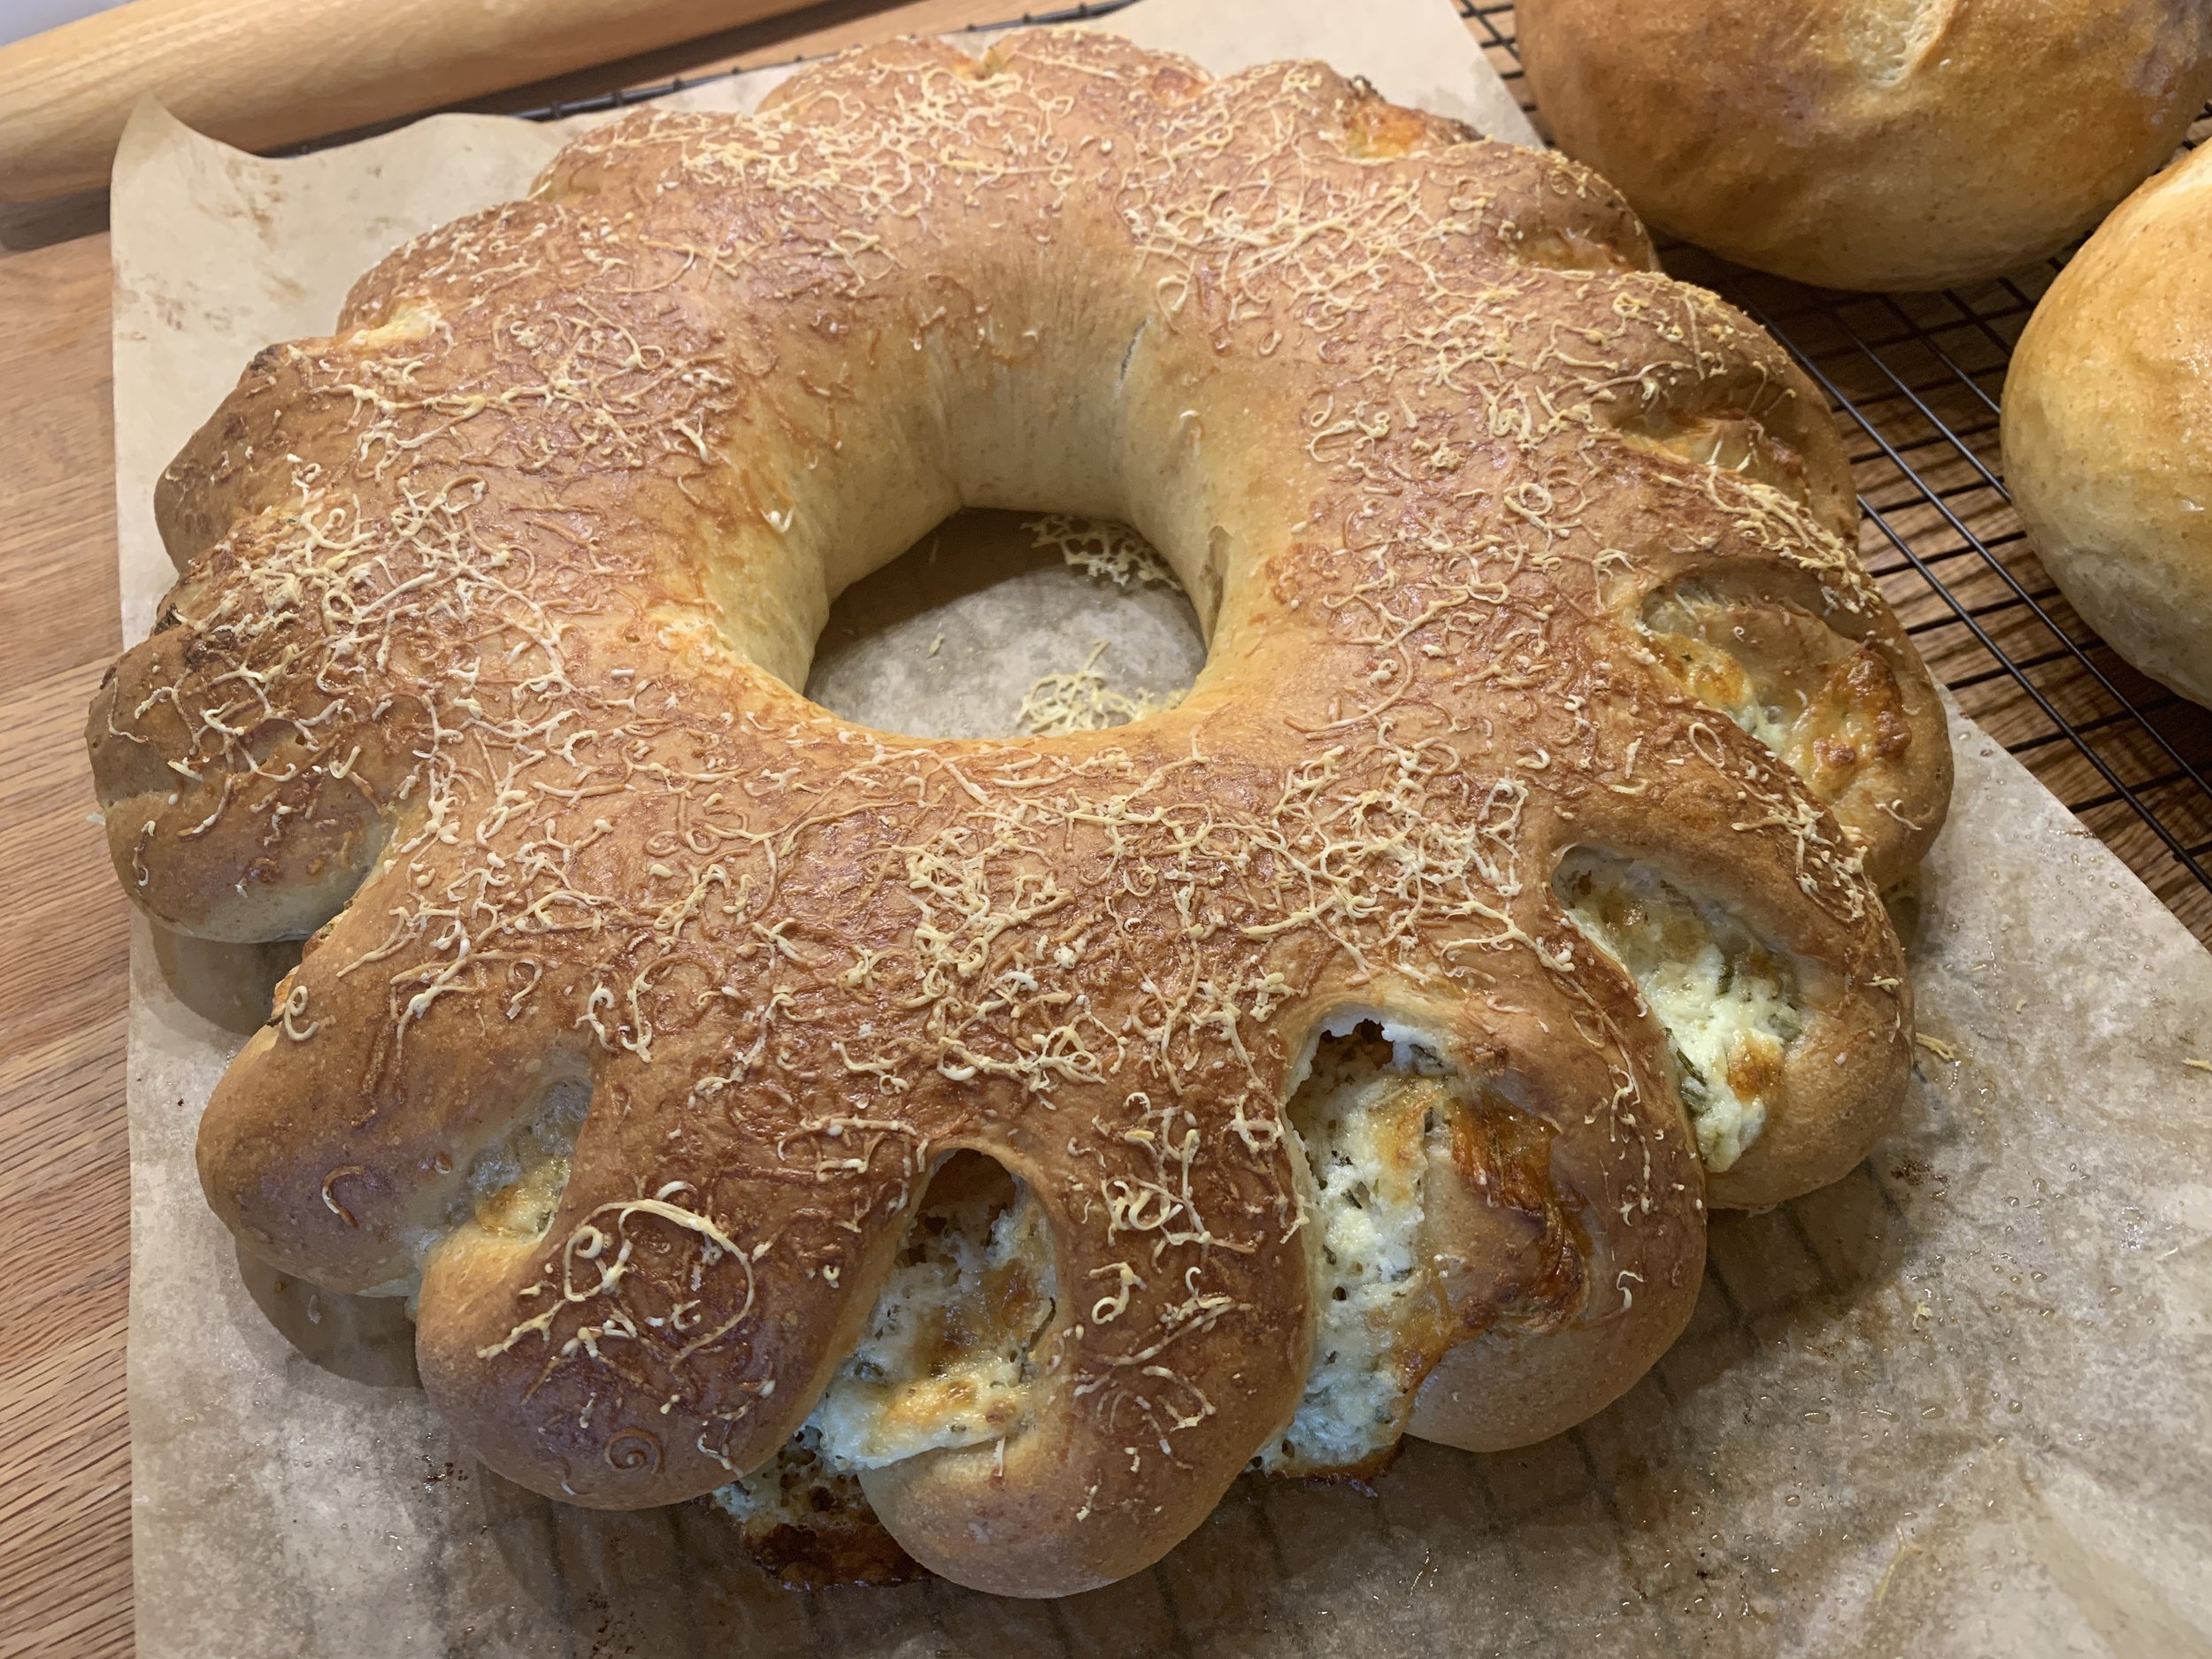
Mmmm, mmmm!

I slid the whole thing onto a cooling grid and gave it just a few minutes before Steve’s and my tastebuds just had to be put to work. Oh boy. Just the right chew and lightness of texture.

After our initial pre-dinner taste test, we enjoyed more with our evening pasta dish and then divided the remainder to wrap and freeze. It thaws and warms up beautifully in the oven and is great to split for sandwiches or open-faced baked with grated fontina and tomatoes on top or whatever your little heart may desire.

AbsoLUTEly delightful! Thanks Claudia.

Lemon lime toasted coconut tartelettes

Spring’s celebrations always bring out a wave of lemon, lime and coconut themed recipes, and I’m certainly one who hops on the band wagon tout de suite. I made these for Easter as well as for a spring pastry event right down the road - a big hit.

After our return from a late spring trip to New England and Nova Scotia, I was determined to write at least a bit about these, since, even with summer upon us, there’s always room for citrus.

So delicious!! Plan ahead friendly! Tart lemon lime filling baked in an already blind baked pâte brisée shell then garnished with whipped lemon mascarpone cream and toasted coconut. Yum. Yum. Yum.

I know I go on (and on and on) about the classic bases of pastry and these babies fit the bill big time. Using three of the top components on my A list, the result is a match made in heaven. I like to think of tart preparation as a build-your-own process in which you can change up your chosen dough, filling and garnishes to suit your tastes and occasion.

If you already have pâte brisée in your freezer, you’re one step ahead. If not, make the dough and chill it a few hours or overnight before rolling it out, lining your chosen rings/molds then blind baking the shells. TIP: wrap and freeze the dough up to a couple of months for even more plan ahead fun.

Check out this post for so much more on pâte brisée.

example of rings lined for blind baking

The lemon-lime curd is a favorite based on Yotam Ottolenghi’s recipe in “Sweet”, a book I highly recommend. It can be made several days ahead and holds well in the fridge - another win-win for planning. If I have leftover curd, I’ll add it to whipped mascarpone as I’ve done here. It’s also great added to Swiss meringue buttercream, ice cream base during processing or blended into crème pâtissiére to fill choux puffs.

If you prefer, you can make the filling while the shells are baking. I then typically fill the blind baked shells immediately with the warm curd then pop them into a 325ºF oven for about 10-15 minutes to set with a hint of a jiggle left. Cool at room temperature about 30 minutes then chill completely before adding your chosen garnish.

Some may wonder why I bake the filling since it’s already cooked. While not absolutely necessary, I find it makes for a more luscious, creamy mouth experience by taking that extra step.

Option - chill the curd separately then fill the baked/cooled shells, garnish and enjoy .

In the image below the two tartelettes at bottom left and right are examples of the option just mentioned. You can appreciate a looser texture than the others that have been baked which have a certain sheen and appear more set.

Before the final garnish

Whichever way you do it, the final task is the garnish - whipped mascarpone cream which I prep just ahead of use. In this case I used half of the base recipe, adding lime zest and 3-4 tablespoons (or to taste) of lemon-lime curd to the cream as I whipped.

Decorate the tarts with your favorite swirl pattern and top with a bit of lime zest and toasted coconut. You’ll be so happy.

One more thing - Steve and I can attest to the staying power of these lovelies in the fridge for 4-5 days. Whoopee!!

Enjoy and have fun with it!

Butter tarts in Nova Scotia

For those of you who follow this blog you may remember my post on making Canadian butter tarts back in July of 2021. Well I’m here to tell you that I’ve now enjoyed the real deal on a recent trip to Nova Scotia.

Steve and I met up with our British friends Richard and Pauline in Halifax from whence we drove to Cape Breton Island to explore the local beauty and culture. Lo and behold, on the Atlantic side of the Cabot Trail we came upon the Clucking Hen café and bakery - a perfect stop for a morning coffee and a pastry. And what to my wondering eyes did appear? Butter tarts, both raisin and pecan versions.

Steve abstained but Richard opted for the raisin version and Pauline and I went with the pecan. While butter tarts can be (and are!) quite sweet, this version was superb based on my limited experience. The crust was oh so buttery and flaky, a huge win in my book.

The filling was butterscotch-y with just the right balance from the pecan. Oh my!

Now that we’re back from our travels to New England and Nova Scotia, I have more posts up my sleeve - hmmm - how about focaccia or toasted coconut lime tarts? Sounds good to me.

Focaccia

Toasted coconut lime tarts

I admit that not all thoughts turn to baking this time of year but, even so, bake I must in some way, shape or form. Meanwhile, taking my morning walks and tuning into nature is oh so grand.

Be careful out there and have a grand summer!

Cheerful blooms along the walking path


Macaron musings

True confessions - I’ve had a love-hate relationship with French macarons over the past 17 years. When I first tasted these popular delights in Paris in 2006, I found them way too sweet for my taste. No thanks.

However, as is often the case in life, things changed. Having finished my pastry schooling in 2007, I began working at Gracie’s in Providence RI and was asked to start making these little cookies that were, still are and will probably continue to be, all the rage. I generally had the best results with my chocolate version filled with a basic chocolate ganache, but there were times, boy oh boy, when they came out mottled or too sticky or cracked or whatever. Frustration!

After leaving Gracie’s I taught some well received macaron classes in my shop at Hope Artiste Village in Pawtucket RI. Yet once I turned that business over in anticipation of our move to Michigan, I put macarons aside to focus on my true loves - tarts, puff, croissants, brioche, shortbread, choux and financiers/teacakes just to name a few. My heart simply wasn’t pining to make les macarons.

raspberrry white chocolate ganache filled

Fast forward a few years later - Steve and I had settled back in Grand Rapids and I started teaching pastry classes at the newly opened Sur La Table (sadly closed after the early months of the pandemic - bummer!). Wouldn’t you know one of the most popular class offerings was les macarons!! And so I taught many classes on these babies - sometimes they turned out beautifully and sometimes not so. The questions were always the same - what went wrong??

And so began another period of research, recipe comparisons, trials and macaron making. I even wrote a couple of blog posts about the different types of macarons out there, hoping to open peoples’ eyes to how easy some of the varieties are to make.

macarons de nancy

Yet the so called “jewels” of the pastry case remain on most budding and seasoned bakers’ minds.

chocolate all the way around!

After a number of tests and tweaking the weights of the confectioner’s and granulated sugars, I’ve finally landed on a recipe that’s been working well for me. I’ve always made macarons using the French meringue method as opposed to what I view as the more fussy Italian version, and I continue to be most comfortable with that approach.

Multitudes have written about macaron making, citing factors like low humidity, aged/room temperature egg whites, freshly opened almond flour and blitzing/sifting the almond flour/confectioner’s sugar as all being important to success. I take all of that into consideration for sure, but for me what stands out is the actual process - making the meringue, then the macaronage and finally the macaroner.

In a squeaky clean bowl (I give mine a quick wipe with vinegar or lemon juice) start whisking room temperature egg whites and a pinch of salt on low to medium-low speed until the mixture changes from a straw color to more white with foamy bubbles. Then gradually shower in the sugar over a couple of minutes - the egg whites accept the sugar more readily that way.

here’s where you start adding the sugar

The next important step is whisking the meringue to the proper stiffness (think bec d’oiseau or bird’s beak). Once the sugar is fully added to the whites, increase to medium speed, allowing some time to watch the lovely shiny, stiff meringue develop. It may be 3-4 minutes before you see some thickening and then a few minutes more to reach your goal. Remember always check sooner than later!

In days past I used to amp up the mixer to full speed right away, but I have since adopted this lower and slower approach - breath deeply.

Now the macaronage - with a spatula blend the dry ingredients into the meringue in three additions - it should look thick and a bit rough . . .

then work the mixture to the lava like stage (macaroner) during which it becomes smooth and glossy, ribboning off the bowl scraper or spatula. Here it’s important not to take it too far. Too loose and things will spread in a way that will make you unhappy.

Pipe evenly in circles of about 1.25”, leaving room for the mixture to settle. If you pipe too much, the mixture will spread more than you’d like. In other words, smaller footprint, less spreading, better result.

vanilla speckled

You’ll find fillings ranging from confitures (too sweet for me) to almond paste/butter/flavor mixtures to ganache but frankly, what I’ve really gotten into is Swiss meringue buttercreams paired with ganache to fill the macaron shells. So many choices. One of my faves is a chocolate ganache center ringed by roasted strawberry SMBC. Oh so good.

BTW - notice the plain shells below. I like my shells au naturel, preferring to avoid the use of artificial colorants. Not to worry - there are ways to work around that.

roasted strawberry SMBC/Ganache center

You can dress ‘em up with a dusting of strawberry powder for some color. Fruit powders are available from various online sources, but you can also find freeze dried strawberries and raspberries at Trader Joes. It works well to crush them through a fine strainer/sieve as you dust away.

A few other ways to add some color - use ground pistachios or hazelnuts in place of half of the almond flour for a a nice speckled look. Use espresso, cocoa or fruit powders like raspberry with the dry ingredients to add some color. Add in a bit of spice (cinnamon or coriander anyone?) or ground tea whisked in with the dry ingredients. Top the piped shells with finely chopped nuts, ground cocoa nibs, fine coconut or crushed gavotte crêpe crumbs before allowing the shells to dry before the bake.

pistachio speckled with apricot honey SMBC/raspberry coulis center

chocolate shells/white chocolate sesame pistachio ganache

I admit these next shells are kind of messy - it was harder then I expected to sprinkle some crushed gavotte crêpes evenly but what the heck, eh? Hmmm . . . I wonder if crushed corn or rice chex would work? Great with something blueberry me thinks.

gavotte crêpe topping

I do keep a few concentrated gel colors on hand mainly for class purposes, and on occasion I’ll use a schmear to fit the project. I recently made a batch with lemon-lime SMBC/ toasted coconut and did tinge the shells with a bit of yellow. Looks pretty nice- and tastes good too!

When using concentrated colors, go small - you can always add more. Here’s one instance where I got more heavy handed than I intended but the recipient of these strawberry macs reportedly said “These would make a dead man get up and speak French”.

more roasted strawberry smbc/ganache center

I’ve also taken to heart the importance of letting the filled macarons sit in the fridge for a day or two before enjoying (although many find that difficult!). It’s amazing what that cool rest can do for the texture of this little cookie.

I usually store the baked shells in the freezer, especially if they seem a bit sticky when attempting release from the Silpat. Once frozen they lift off nicely. Then I can fill them when I’m ready.

Even after filling, the freezer is my go to for storage where the texture continues to improve. You can move them into the fridge a day or two before enjoying or give them just a few minutes out of the freezer and enjoy right then and there. It works.

These days, as I look back, I’m a firm believer that attitude and being zen with it all makes a big difference. Ahhh . . . . the pastry gods can look favorably upon us.

It’s tulip time!

A trio of chocolate teacakes

Spring is here and chocolate is still on the table. What better way to enjoy it than with three delicious cakes topped with equally delicious garnishes. You can’t go wrong.

Using two favorite cake bases that have been in my repertoire for some time now, plus a new-for-me chocolate olive oil cake thanks to Melissa Clark, I created this trio for a spring family gathering. Each cake’s topping has its own flavor profile and involves ganache in some way.

I admit this is a lengthy post so here are the links to the recipe PDFs so you can go directly to them if you’d rather not scan through all the steps and photos of preparation: Chocolate olive oil cake; chocolate financier; Easter cake.

Mister Steve made a great observation in that regard - I include all this information not only for you but also for my own records. How cool to go back over the years and see how I described and carried out various baking projects.

I baked each recipe in a different silicone flexi-mold for a nice variation of shapes and looks - square savarin, mini-Kugelhopf and simple round mini-muffin. My chocolate of choice is Guittard’s 61% lever du soleil discs. When cocoa powder is called for I use Bensdorp Dutch process. Delicious stuff.

First up: chocolate financiers in the simple round muffin molds. Let me tell you there are tons of financier recipes out there. As a matter of fact, the one I used for years was the one we learned at Le Cordon Bleu Paris, always delicious, tried and true. As the years have gone by I’ve adjusted the ratios of ingredients and reduced the sugar content. The basics are butter, egg whites, almond flour, all purpose flour, cocoa powder for this chocolate version and sugar. You’ll see choices for granulated or confectioner’s from recipe to recipe - I typically go with confectioner’s.

The big difference in this chocolate recipe is melting the butter, not browning it, as is true for classic financiers.

In a medium-large bowl whisk confectioner’s sugar, almond flour, all purpose or whole wheat pastry flour and unsweetened cocoa powder together; in a smaller bowl lightly whisk the egg whites until frothing a bit; melt butter and let cool slightly.

Blend the whites into the dry ingredients in two additions then blend in the butter. Contact cover and fridge for a few hours or a couple of days.

When ready to bake, heat the oven to 375ºF and fill your chosen wells about 3/4 full.

Bake about 15 minutes, check for doneness (no center goo; set). Bake an additional 5 minutes if needed.

After a 10 minute cool down pop them out of the molds and set aside until ready to garnish. For these I used a small melon baller, scooped out the top center and filled that with a 1:1 ganache. A sprinkle of toasted coconut gave them the “almond joy” sense I was looking for.

Then a swirl of chocolate almond butter Swiss meringue buttercream, an additional sprinkle of toasted coconut and some candied sliced almonds - voila! NOTE: for 2/3 of the base SMBC recipe I added 227 g /8 oz dark chocolate, melted and cooled but still liquid and 1/2 cup of almond butter. So tasty!

The next cake is from a recipe I’ve had for many years but, for the life of me, I can’t recall where exactly I found it. It’s a gateau de Pâques or Easter cake, made with the basics - chocolate, butter, egg, sugar and flour.

The fussiest part is separating the yolks and whites, the whites being whipped separately to be gently folded in at the end. Remember - eggs separate best when cold!

Over a bain-marie melt the butter and chocolate gently - once things get melty, turn off the heat and let the melt continue over the still warm water. Chocolate loves that.

Separate the yolks and whites then whisk the yolks with the sugar for several minutes until thickened, pale and ribbon-y.

Blend in the chocolate butter mixture then sift the flour in and blend.

In a separate clean bowl whip the egg whites to soft peaks . . . . .

then blend them into the batter in three additions, folding gently.

Fill your chosen molds 3/4 full and bake at 325º about 20-25 minutes.

You want them set but note that a slightly shorter bake will give a more fudge-y result.

For the finish I filled the wells with a basic 1:1 ganache, let it set and then topped ‘em off with a swirl of caramel mascarpone cream and some sesame brittle. Yum.

Cake number three is a chocolate olive oil cake from Melissa Clark written for a 9” round cake. Oh so moist. I made this one twice, each time making 2/3 recipe using Earl Grey tea as the liquid. Liquid options include coffee, red wine, orange juice or water.

You create a paste by bringing already brewed tea to boil in a small saucepan, turn the heat off and whisk in Dutch-process cocoa powder, spices of choice (I used a mix of cinnamon, coriander and ginger) and salt. Let it cool.

Once the paste is made, the steps are basic cake simple - beat sugar, olive oil, eggs and vanilla for a few minutes, then add the tea-cocoa mixture followed by flour and baking soda.

Fill your chosen molds about 3/4 full and bake at 325ºF for about 20 minutes. My yield using 2/3 recipe was 19 lovely Kugelhopf treats.

These baked 8 minutes, rotated, another 8 minutes then an additional 4 to be sure they were set with a tester holding a scant few crumbs.

Let sit 10 minutes or so then gently turn out of the molds. Once cool, I filled the little top cavity with basic ganache and let that set.

These received a top dunk in Earl Grey lavender ganache which I had allowed to set enough so the ganache would coat nicely with some holding power on the top.

It’s made by infusing 3 teaspoons of loose Earl Grey tea plus 1/4 teaspoon dried culinary lavender buds in 160 g / 2/3 cup heavy cream then straining the infused cream into 130 g / 4.6 ounces melted chocolate. Blend it up until smooth, then blend in 18 g / 4 teaspoons unsalted butter. There you go.

This cake is deelish, so moist and delectable with the perfect hint of spice. I’m intrigued by the red wine or orange juice options for next time. Hmmmmm.

As for the ganache, the taste of lavender has never really grabbed me, but I’ll admit this Earl Grey ganache grew on me. I adore versions of herbes de provence that have lavender in the mix (not all do), but have always shied away from using lavender on its own.

A brief review reminded me that lavender is actually part of the mint family and I could sense that light minty floral flavor which was not at all overbearing. I much prefer my flavors on the mellow side. Just ask Steve.

Wow! That seemed to go on forever. I hope you give these three cakes a try and create your own garnishes and flavors.

Happy spring!

Chausson aux pommes - a classic

You know when you’ve made something so many times using the method you were taught because, well duh, that’s how we did it? That’s what chaussons aux pommes have been for me. Ever since my Paris pastry schooling and internships in 2006-2007 I’ve done the preparation/assembly the same way, the process unchanged throughout the years. Roll out the dough, cut circles of your desired size, let them rest a few minutes then roll out a bit more to an oval. Egg wash the lower edge, scoop prepped apples on the bottom half, fold the top over and seal the edges. ONE. BY. ONE.

Well low and behold, as I was planning to teach a recent puff pastry class here in Grand Rapids and reviewing one of my favorite books “Pastry, Savory and Sweet” by Michel Roux, I realized that through all these years I had NEVER noticed his method of creating chausson. Eureka!

Hint- think ravioli.

Let’s start at the beginning and work through the steps. I’ll assume you have your puff pastry already made or purchased. The next thing is to prep the apples. I love Granny Smith for this since the caramel-y tart apples go so well with the buttery, flaky puff. Yum.

If you’re wondering how many apples to prep, I find that a good sized Granny Smith will yield me three to four chaussons of medium-ish size (I tend to lean smaller in my pastries - just sayin’). I peel, core and small dice the apples and sauté them in butter and sugar until softened. My “rule” is to use about 10 g sugar and 10 g butter per medium apple soooooo . . . . . if I’m prepping 5 apples, I use 50 g (about 1/4 cup) sugar and 50 g (about 1/2 stick) unsalted butter. You can play around with the proportions to suit your taste.

Have some water on the side so when the apples start browning and sticking a bit and their liquid evaporates, you can splash a bit more water in to deglaze. Toward the end of sautéing I also add a big splash of boiled apple cider and a couple of big squirts of my home made caramel sauce, always at the ready in my fridge.

The apples should become golden brown and caramel-y and start sticking to the pan. Once they’re fork prick tender (but NOT mushy), I scrape them onto a paper towel lined sheet pan to cool and soak up any remaining moisture.

A side note: when sautéing the apples, I figure I might as well go for the “more is better” approach since they keep well in the fridge for several days. Plus you can assemble a bunch of chaussons and freeze them unbaked until you’re ready. Have some house guests coming soon? Pop a few onto a sheet pan and into the oven (no thawing needed) for some freshly baked morning treats.

Ready for assembly? Let’s go!

I usually get about 12 chaussons from a half batch (~600 g) of my puff. Save the scraps to roll out for palmiers or as the lining crust for quiche or flan Parisien or for blind baked mini tart shells that you can fill with lemon curd or ganache or coconut cream or . . . . . you decide.

On a lightly floured surface roll the dough out to a 16” across and 18” top to bottom rectangle, about 1/8” thick. Divide the dough into three strips of 6” by 16”. A pizza cutter works great here! You’ll create 4 chaussons from each strip.

In the image below I did a practice run using my spelt rough puff (had some in the freezer, don’t ya know). Without cutting the dough, mark it into four 4” sections.

Also mark (don’t cut!) the midline across the length of the piece. Now put a nice scoop of apples on each of the sections.

You can use water or milk or egg white or egg wash - just something wet to brush around the apples. Now fold the dough from top down, covering the apples, pushing out any air pockets and pressing down around the mounds to seal.

I tried two different forms to cut the dough - a 3.5” fluted tart pan and a 3.25” fluted cutter. The tart pan didn’t cut sharply enough but the fluted cutter did the trick.

Shoot! I didn’t get a pic of the cutter placement - set it so that a little over half of the cutter is over the dough and a little less than half is over the counter, straddling the folded edge.

Make slashes to create a leaf like pattern. Pssst . . . I’m using some regular puff below, having done my assembly in a couple of different sessions.

Brush them with egg wash or milk, sprinkle with vanilla sugar or coarse raw sugar and place them on a parchment lined sheet pan. Pop ‘em into the freezer to firm things up and stabilize the butter while you heat the oven to 425ºF.

Bake 10 minutes, rotate your pan and check on the browning. If browning too quickly, reduce temp to 400ºF and bake an additional 10-15 minutes until golden brown.


Mmmmmm . . . . these are tasty indeed!

Not only that, but spring is finally springing. Enjoy!

One great bread a few different ways

Sesame braid

Hi all. I gave you a sneak peek at this one awhile ago. My how time flies - seems like eons! I packed a lot into this post so get ready.

I LOVE this dough! It calls for an overnight preferment, a process that not only lends itself to planning ahead but also to a stellar end result.

This is my adaptation of scali bread from King Arthur Baking Company. I first came across it in the spring 2017 issue of SIFT magazine (now defunct -awwww!) and made it for the first time back in April of 2022. It’s said to be a staple in Boston’s North End, and, as is the case with the internet, I found a bunch of references/posts about it on line. Meatball sandwiches anyone?


Classically made as a three strand braid coated in sesame seeds, I started with KA’s base recipe for one braid but then doubled it and created my own recipe, subbing in some rye and white whole wheat flour. I’ve tried several different approaches - braid it, twist it, torpedo it, loaf it, herb it, cheese it, seed it - they’re all good!

Let’s take a look at the steps. Make the preferment the evening before. Please note - the dough/proofing images are for my recipe which would make TWO braids. I’m showing the shaping steps for ONE braid.

Give it 13-15 hours at room temperature after which it should be actively fermenting. It’s more stiff than let’s say a typical poolish which is equal weights flour and water.

Mix the preferment with the other dough ingredients and knead to a nice smooth end result.

Give it a 90 minute rise until nice and pouf-y.

That’s what I call a rise folks!

Proceed with your desired shaping. Here are the steps for one sesame coated braid using HALF of the above dough.

Deflate the dough gently, divide in three equal pieces (each should be about 230 g or so). On a lightly oiled surface roll each piece into a rough log and let rest 10-15 minutes.

Now roll each log out to a 10-12” length then brush each with egg white and coat thoroughly in sesame seeds.

Pinch top ends together and do a typical three strand braid. Tuck the ends under to neaten things up. I placed mine on parchment on an overturned sheet pan in preparation for sliding it onto my heated baking stone.

Cover with lightly oiled film wrap and let rise about 90 minutes until pouf-y.

Toward the end of the rise, heat the oven to 425ºF (400º convection) with your baking stone if using.

Bake 25-35 minutes until golden brown.

Cooled, sliced, buttered - oh so good!

Here are a few other things I made with my full batch recipe. Two basic loaves, one braided and one slashed before baking.

Butter basted braid and a simple loaf

Another full recipe went into making a couple versions of rolls and a cheesy braid.

For the rolls I used a tad less than half the recipe to make fifteen 45 g rolls - 8 as sesame knots and 7 as butter basted. The rest became the cheese loaf.

I formed eight “logs” that I rolled in sesame and knotted up and left the other seven as standard round rolls (with a top snip before baking).

shape, shape, shaping!

The rolls enjoyed a nice long rise of ~100 minutes.

REady to bake, Before the snip!

Oops! Forgot one snip!!

Sesame knots and butter basted dinner rolls

This cheesy braid is just like the sesame approach except I coated the ropes in grated cheese the quantity of which I eye-balled. I used sharp Cheddar but gruyère, emmental (or a mix of your faves can all work) and topped with more cheese. I’d use more next time. You could add herbs if you wish. Mmmm good.

Cheesy braid

Had enough yet?? Almost there, I promise.

I wanted to try a filled wreath, using half a recipe (~700 g) for that and dividing the rest into two for a couple of simple boules.

Ricotta herb wreath and two small boules

For the filling I mixed 3/4 cup whole milk ricotta, 1/4 cup cream cheese, a few pinches of dried oregano and herbes de provence plus ~2 tablespoons chopped fresh rosemary, one grated clove garlic and 4 ounces of grated sharp provolone which I ultimately thought too over powering - too much!. Live and learn, eh? Next time . . . . .

Roll the dough out to a rectangle of 8-ish by 16-ish inches.

Spread the ricotta filling over the dough and top it with the grated cheese. Press it down lightly.

Log roll it up and cut slits along one side every inch of so, half way through.

Form it into a wreath and pinch the ends together. Separate and twist the sections out a bit. Hmmm . . . looks like some sort of sea creature.

Cover lightly with oiled plastic wrap and let rise about 90 minutes.

Lightly brush top with egg white or water and grate more cheese on top - parmesan or locatelli work well.

Bake 25-30 minutes, let cool and enjoy.

Whew! The end. It’s a good dough to work with and so tasty no matter how you choose to bake it. Have fun!

Banana rye walnut chocolate chunk cakes

I learned something about bananas some years back. Once they’re ripe and you’re not ready to eat them right then and there, peel ’em, chunk them up and freeze them! You can then use them in smoothies, cakes or quick breads where they lend a special creaminess to the batter. Yum.

This recipe calls for 4 medium bananas which I figured came to about 480 g of banana mash (~120 g per banana). I’m sure you can give or take the amount without negatively affecting the final result so don’t fuss too much as to the exact quantity of said banana.

This is my take on banana rye bread from Brontë Aurell’s book “Brontë at Home - baking from the Scandi Kitchen”. I’ve made these babies a bunch of times and realized that I’ve never written about them. I’ve done variations subbing maple sugar (thanks sister Joyce!) for some of the brown sugar, subbing ground oats and/or whole wheat pastry flour for some of the all purpose flour, adding in chopped toasted nuts like hazelnuts or walnuts, adding chocolate chunks and topping with a nutty streusel. So moist. All good.

Here’s the recipe (including some of the variations I’ve made) and my mise for this version in the image below. It’s a pretty straight forward cake batter - mashed banana, yogurt, lemon juice and vanilla in a separate bowl; dry ingredients in another bowl; cream butter/sugar, add egg then add wet/dry alternating. Basic right?

In this case I’m also adding 170 g / 6 ounces chopped chocolate to the batter and topping with chopped walnuts and raw sugar for a bit of crunch.

You can bake these cakes in buttered/floured muffin tins but I prefer (and love) my Silikomart silicone flexi-molds - so many different shapes and sizes. This time I’m using the 8-well SF028, rather like a standard muffin size. The recipe yield is about 20 cakes using that particular mold. I also often use the 11-well SF022 which is a tad larger than a standard mini-muffin pan - I get about 33 cakes with that mold. NOTE - I have several of each mold.

I place the molds on a wire grid on a half sheet pan - that allows for better air circulation and more even baking.

You can find a large selection of Silikomart molds at bakedeco.com. By the way - I have no affiliate links with any companies - I simply like sharing the things I find useful and fun in the baking kitchen!

Heat the oven to 350ºF. Fill molds about 3/4 full. Sprinkle chopped walnuts and raw sugar on top.

Bake 20 minutes or so - always check about half way through. Your oven may take longer than mine. You want the center to feel set and just the barest hint of a moist crumb on a tester.

Let them rest about 10 minutes then gently turn them out onto a wire cooling rack. If you can’t wait, try one a bit warm when the chocolate will still be gooey, otherwise cool to room temp and enjoy.

These freeze well too. Even better!

Let me add my official Happy New Year to all of you. Time for new projects and, as always, staying active and keeping our collective chins up. OK.

Cheers to all!

As we get ready to say goodbye to 2022, another interesting year to be sure, here’s a quick note to say hi, wish you all good cheer and offer up a toast to many happy baking experiences to come.

It’s been weeks since I’ve posted. The time just goes! Family visits, teaching classes, baking cookies and cakes, simply moving from day to day as we continue to navigate through life - and now here it is Christmas Day. Wow.

Having finished up various holiday baking projects and staying hunkered down during our recent snow storm, yesterday I turned back to bread baking - English muffins and simple loaves for our larder. As they say, bread is the staff of life.

Peace to all and a Happy New Year!

Late autumn update

After a recent hard frost

Baking season is definitely here and autumn colors are gone for the most part. Holiday menus are already being planned and there’s more of an itch to get into the kitchen. For me it’s still about crisp fresh mornings, heavy frosts, bright blue skies with longer shadows and perhaps just a hint of the first snowflakes that might soon appear.

I’m in the throes of planning for a class on afternoon tea with treats the likes of scones, shortbread, financiers and madeleines. Oh boy!

Pumpkin scones

I’ve baked up some delightful autumn pastries for Kim and her peeps down the street.

Pumpkin pecan Danish

Cinnamon swirl buns

My bread project is slowly coming to a finale as I draft a post about the dough that has become my fave of late. Mmmmm!

Sesame knots and simple butter brushed rolls

The Fulton farmer’s market has wrapped up the spring/summer/autumn season.


Enjoy the days ahead everyone.

On an end note, let me share just a few more images of autumn’s last breaths.

Fairy hair?

A few weeks ago

Frosted growth along the walking path

I hope to be back soon with more baking goodness!

Brioche craquelin encore

A16C22CD-914E-4EB8-B6C4-7ABA09A66B09.jpg

I first wrote about Thomas Keller’s version of this pastry back in February of 2015 - many moons ago - and a lot has happened since, that’s for sure. I’ve been churning this through my mind for awhile and decided that autumn is a good time to write about it.

Some time back, earlier in the pandemic days, I received an email from a gentleman in NYC who was searching for tips on how to create a version of craquelin that he used to enjoy at one of François Payard’s pâtisseries (closed for several years now). He described it as having the perfect crunchy almond top that gave the orange scented brioche just the right je ne sais quoi.

Hurray! I had a project to research. Challenge accepted. I’ve puttered with it on and off and am finally getting around to setting pen to paper as it were.

1A19482D-29FC-4CAB-9436-C50E7DB45ED2.jpeg

I made two different versions in my quest to replicate his memory of this treat. The first made three full sized rounds in well buttered cake pans (I had two 9-inch and one 8-inch).

The process: using my freshly prepared base brioche dough, I mixed 100 g / 1/2 cup of brown sugar with a bunch of orange zest (probably 3 or 4 oranges - I eyeball it) . . . .

sprinkled half of it over the flattened dough . . . .

folded it in three as I attempted to work the filling into the dough, turned it 90 degrees, stretched it back out a bit, sprinkled the second half over it and folded it in thirds one more time.

Then into the fridge covered for an overnight rise.

Before the rise

Here it is the next morning.

I divided the dough into three pieces, about 400 g each ( a tad more for the two 9-inch and a tad less for the 8-inch), formed rounds and placed them in the prepped pans. Note the aluminum foil wrapped around the 9-inch pans. They have removable bottoms so I wanted to avoid any butter leakage during baking.

Cover with lightly buttered plastic wrap and let rise for 1.5 to 2 hours. Remember brioche is very enriched and requires a good rise for the hoped for fluffy and light end result.

Toward the end of the rise heat the oven to 350ºF.

After the rise

I used three topping variations just for comparison’s sake. Have some toasted sliced almonds at the ready. Make the crunchy sugar topping by blending 6 tablespoons granulated sugar with 1.5 teaspoons vanilla and 1 tablespoon water (this is enough for the three pans).

Drizzle about a third of the sugar mixture over each brioche. I left one without further adornment, topped one with sliced almonds and the third with both sliced almonds and some crushed raw sugar cubes.

Bake 35-40 minutes, rotating pans half way through, until nicely golden brown.

Sugar drizzled

Sugar drizzled with almonds

With added crushed raw sugar

Let sit about 10 minutes before un-molding and placing on racks to finish cooling.

I must say all were pretty tasty, but, being a sucker for crunchiness, I really enjoyed the sugar drizzle/almond/crushed sugar cube version.

The crumb was light and nicely flavored with the orange zest.

OK good! Now on to the second version for which I followed Joanne Chang’s approach from her book “Flour: Spectacular Recipes from Boston’s Flour Bakery + Cafe”.

I knew that Joanne had worked at Payard’s in NYC back in the beginning of her baking career, so what did I do? I sent her an email asking about the process they had used! She kindly directed me to her book (link above) which I found at our local library and delved into the steps.

A few differences: individual brioche, adding candied orange rind (like Keller does) with crushed raw sugar and a slightly different topping. I can do this.

Thin slice two oranges and poach the slices in simple syrup until softened and more translucent. Let them cool and drain on a wire rack then chop into small pieces. You can do this ahead and hold in the fridge for several days if need be.

I had about a cup of rind in the end. Crush raw sugar cubes to yield about 1/2 cup of rough pieces.

For a yield of nine ~ 80 g portions: using 720 g of cold brioche dough after its overnight fridge rise, roll the dough into an approximately 10” (25 cm) by 18” (45 cm) rectangle.

Distribute the chopped orange rind and crushed sugar over the top 2/3 of the dough.

Fold the bottom third up over the middle third.

Fold up again to cover the top third.

Cut nine slices, each about 1 3/4 inches (4.5 cm) wide. You can trim up the ends first if you like - I left mine au naturel.

Place spaced apart on a parchment lined cookie sheet, cover with lightly buttered plastic wrap and let rise about 1 1/2 to 2 hours.

Before the rise

Toward the end of that time frame heat the oven to 350ºF.

After the rise

Make a slurry by mixing one large egg, 50 g granulated sugar and 50 g sliced almonds in a medium bowl. Spoon the mixture over each brioche.


Bake about 30-35 minutes until golden brown. You know my mantra - always check sooner than later!!

Cool, dust with powdered sugar and enjoy!

Here’s a cross section - lovely pockets of orange flavor, nice crumb and pretty darn good crunchy top too!

Just goes to show you how you can create variations with your own favorite brioche or sweet bun dough. Have fun with it!

Beautiful colors are popping and fall is definitely in the air! Enjoy!!


Autumn update

Morning pastries

As we head into official autumn (calendar-wise), I wanted to share a few things I’ve been baking lately - scones for my mom’s assisted living facility; pastries for a neighbor’s morning gathering; French macaron trials for classes I’m teaching through our local school district’s adult enrichment program; late summer fruit torte - all good stuff!

Cinnamon oat crunch scones

Sometimes it’s nice to simply show you what I’ve been up to without all the steps and recipe details. I know we all like to experiment and see how things go. That’s me for sure. I’m always here to answer any questions you might have and share tips and techniques. All you have to do is ask.

Don’t forget to check out my recipe page for all kinds of base recipes to get your creative juices flowing. Or set up a class for yourself and a few friends.

One important baking project was spurred on by a neighborhood cookout to celebrate Carla and Jay’s recent marriage. Carla’s husband Daryl died suddenly 2 years ago and Jay’s wife had died 7 years ago. C and J met a year or so ago and realized that they should be together - and so they are. Congrats to Jay and Carla!!

I made my favorite financier cakes with a mini tiered/roasted strawberry butter-creamed affair surrounded by individual petite cakes and fresh Michigan blueberry garnish. Yummy!

For another neighbor’s morning pastry request I went with almond blueberry Danish, tart cherry feuillitées and orange pecan crumble pull-apart buns. Triple yum!

Almond cream blueberry Danish

Tart cherry filling in puff pastry, topped with oat crunch

Orange pecan crumble pull aparts

Here’s another one - I needed to use up some laminated dough in my freezer before it was too late. That yeast doesn’t last forever you know. Using half a batch of dough (the other half became another Danish-y cream thing), I rolled it out to about a 10”x10” rectangle, spread it with a mixture of 2 tablespoons (28 g) soft butter, 70 g brown sugar, a couple of ounces (~60 g) of toasted ground walnuts and 2 teaspoons espresso powder, rolled it into a log, then sliced ten 1-inch slices. I baked them in buttered/sugared individual 3-inch cake tins/ramekins and then rolled them in espresso sugar (mix espresso powder into granulated sugar to your liking) once out of the oven. Pretty tasty I’d say!

Espresso walnut buns

In preparation for some upcoming French macaron classes I’m teaching, I wanted to do a couple of test batches. I’ve been tweaking my recipe and hope to share it soon. I’ll admit that macaron making has been out of my baking life for awhile. Dough is my passion, but I feel challenged to jump back in and get it juuuuuuust right! So many variables.

These are a pistachio version with an apricot honey Swiss meringue buttercream filling and a central dot of reduced raspberry purée. Yup.

Another version with roasted strawberry buttercream and a center of dark chocolate ganache. Double yup.

Isn’t baking wonderful?!!

Oh - and one more. A peach blueberry version of Marian Burros’ classic plum torte.

Ready to bake

All baked up

Talk about delicious! We enjoyed this torte for dessert topped with vanilla ice cream at cousin Jen’s recently. Triple yup.

Autumn is all about spices, nuts, pears, pumpkins, apples, maple, chocolate, custards and more - get into that kitchen and bake up some goodness!

Bacon cheddar corn scones

So much sweet corn this year - gotta try something a little different. Why not savory scones!

Steve’s been buying up batches of ears, cutting the kernels off and freezing a lot of it, but he’s also grilled some ears and cut off the grilled kernels for adding to stir fries, frittatas, fried rice, corn chowder - you name it!

I went with a slight variant of my cheddar scone recipe and added grilled corn kernels and bacon bits to the mix. A small pinch of cayenne gives it the right hint of heat without being overwhelming (you can always add more if you’re into the heat factor). If you’d like to make these, here’s a PDF of the recipe fully written for this particular project.

Remember - cold butter and cold cream/egg, work quickly and efficiently to bring it all together.

Place dry ingredients into a large enough mixing bowl to accommodate your hands; work cold butter into the mix by flattening the butter between your fingertips and “flaking” the butter into the flour mixture. Leave visible pieces of butter which will help achieve a light and tender crumb.

Place grated cheese (I like a combo of gruyère and cheddar), corn kernels and bacon on top of the dry ingredients. Pour the cold cream/egg mixture into the center and toss it all with a fork to moisten. Bring everything together quickly with a bowl scraper then turn out onto a lightly floured work surface to gently knead a few times to incorporate any dry bits.

This recipe yields about 900 g of dough. I divide it in two, form each half into a 5”-ish round about 3/4 inch thick and cut into 8 wedges for a yield of 16. I happen to prefer the petite sizes, but if you’d like larger scones, cut each round into 6 wedges (yield 12) or even 4 (yield 8) for a pretty generous sized serving. It’s all up to you.

Once the scones are placed on a parchment lined sheet pan, brush with a little milk and sprinkle more cheese on top.


I pop the tray into the freezer and place a second sheet pan in the oven while heating to 400ºF.

Place the scone pan onto the heated sheet pan, bake 10 minutes, rotate trays and bake another 10 minutes until nicely browned. Reduce oven temp to 375ºF half way through if browning too quickly. If I’ve said it once, I’ve said it a thousand times - all ovens are different!

Enjoy slightly warm or cool fully before serving. Hint - a drizzle of honey adds a nice touch.

Crispy outside, moist and studded with goodness inside. You bet.

Work your own wonders with fresh sweet corn. Time’s a wasting!

Happy autumn!!

Peach melba crêpe cake

Happy September everyone! Autumn is my favorite season and the bounty of summer is still with us - peaches, blueberries, corn, tomatoes and more. Gotta love it.

On the heels of a savory crêpe making demo at a nearby independent living facility, my mind started thinking about a crêpe cake using late summer fruits - peaches and raspberries to be exact.

I was spurred along by both the memory of a chocolate crêpe cake I made back during our Providence days as well as dessert planning for a family meal at cousin Jen’s. Peach melba crêpe cake it is!

Many have written about the story of peach melba - classically vanilla ice cream, lightly poached peaches and raspberry sauce - a match made in many heavens if you ask me. It was created in the late 1800s by Auguste Escoffier in honor of the Australian soprano Nellie Melba. And the rest is history as they say.

As I planned my creation, along with the obvious crêpes, I went with peach caramel mascarpone cream and raspberry coulis for the assembly. Here’s the full recipe for the dessert - I’ll take you through the steps now. You can prepare the components ahead and assemble it all either the day before or the day of serving.

I did my crêpe cooking a couple of days ahead and held them wrapped in the fridge. I prefer these French pancakes nicely browned unlike some who claim they should be light in color. Nuh-uh - not me.

A friend had gifted me one of those cool wooden crêpe tools that help spread the batter out thinly with rounded (sorta) edges - it takes a bit of practice. It took a couple of tries to get the wrist motion just right, and it worked nicely on the non-stick pan I used. Actually I ended up trimming the thin pancakes to 8-inch rounds for stacking so I didn’t really care if my edges were goofy.

The peach purée can be made a couple of days ahead as well. Here I peeled, stoned and sliced 3 medium-ish Red Havens (the BEST Michigan peaches!), mixed with a couple of tablespoons sugar, a pinch of salt and a squeeze of lemon juice.

I blended it all up with my immersion blender then brought it to a boil over medium heat to dissolve the sugar. Simmer for 10-15 minutes to reduce by about half.

Reducing

Well on the way to concentrated flavor

The initial weight of the un-prepped peaches was about 500 g and in the end, after peeling, pitting, slicing, cooking and reducing, the purée yield was about 200 g.

In a similar vein, to create my raspberry coulis I puréed about 400 g raspberries, pressed the mix through a sieve to separate the seeds, leaving me with about 200 g of lovely-ness. Once I’ve puréed and strained fruit, I typically add about 10% by weight of sugar (in this case about 20 g), a pinch of salt and a squeeze of lemon juice.

Bring to a boil to dissolve the sugar then either cool and refrigerate for later or reduce it down a bit for flavor concentration.

My 8-inch open tart ring worked like a charm to trim all the crêpes to 8-inch rounds, and Steve and I snacked on the trimmings!

The mascarpone cream is a combo of 8 ounces mascarpone, a cup of heavy cream, 1/4 cup of caramel sauce and a teaspoon of vanilla extract. Whipped up to medium soft peaks, it’s a delicious layering and garnishing cream. I finished it off by blending in about 120 g of my peach purée. Yum.

Let’s assemble! One crêpe down on the plate, a layer of mascarpone spread over, a drizzle or dotting (artistic license here) of raspberry coulis and repeat, repeat, repeat . . . .

I had just enough cream for 18 layers of crêpes as well as a top coating.

Making progress

As you layer this kind of tower, it helps to use your flat palms to press gently on each crêpe layer (before you add the next spread of cream) to try and keep things even. Mine ultimately came out a bit tilted but it still tasted wonderful.

I used my handy small offset spatula to clean the sides up but you don’t really have to do that since this is a rather devil-may-care process for a rustic finish.

Once assembled, refrigerate it at least a couple of hours before serving. Alternatively you can have it ready a day or even two ahead of time.

Dessert time! A pool of raspberry coulis on the plate, a slice of cake topped by fresh peach chunks.

The group loved this! The tart raspberry sauce and just-sweet-enough juicy peaches gave a perfect balance to the creamy crêpe layers. Yes.

And the leftovers weren’t too shabby either!

As we move through September and beyond don’t forget to appreciate the beauty around you. There’s something about petite sweet peas poking out of the undergrowth that always makes me smile.

And you can’t beat this gorgeous contrast! Here’s to autumn!

Summer baking - peach blueberry cobbler and a bit more

Peach blueberry cobbler

Recently we had a lovely cool-in-the-50s day with a gentle/sometimes heavy soaking rain that lasted ALL day! Somewhat unusual for August, It was nonetheless much needed and I could tell the earth was so happy.

I puttered in the kitchen using up some fresh Michigan peaches that I hadn’t otherwise had time for and fresh blueberries from one of our great local markets.

A couple of years ago I had purchased Lindsey Shere’s “Chez Panisse Desserts” but have only tried a smattering of recipes, most notably the almond torte. I turned to and checked out the cobbler dough - biscuit like (no egg which I normally use to make my scones), it comes together in a bowl, by hand, with cold cubed unsalted butter and cold cream added to all purpose flour, baking powder, salt and a bit of sugar. You can create whatever shapes that delight you - I went for rough diamonds - or should I say diamonds in the rough?

Here’s my version of the cobbler dough: in a medium bowl blend 195 g/1.5 cups whole wheat pastry flour (Lindsey uses all purpose), 1/4 teaspoon fine sea salt, 2 1/4 teaspoons baking powder and 1.5 tablespoons sugar; blend in 85 g/6 tablespoons cold, cubed butter with your fingertips to create coarse crumbs but leaving some flattened pieces of butter visible in the mix; with a fork quickly mix in 3/4 cup of dairy consisting of half cold buttermilk and half cold heavy cream (Lindsey uses all heavy cream); bring together with a bowl scraper then turn out onto a piece of plastic wrap and bring in any remaining dry flour with your hands.

Fold the plastic wrap over the dough leaving enough space to lightly roll the dough between the plastic into a rectangle about 7”x10” and 1/3” thick. Chill until ready to use - that makes it easier to handle and to cut into your desired shapes.

SIDE NOTE: here’s a cobbler post a few years ago using another delicious topping dough.

Yum!

For this smallish sized cobbler I used about 4.5 to 5 cups of fruit - about 3.5 cups sliced peaches (peeled and de-stoned) and 1.5 cups blueberries - tossed with 3 tablespoons sugar and 1.5 tablespoon flour. Spread into a small Pyrex 7-ish by 10-ish casserole, I dotted a few bits of butter all over, placed my cobbler pieces on top, brushed them with milk and added a sprinkle of raw sugar.

Bake at 400ºF for 20-25 minutes until the fruit is bubbly and the topping golden brown. If you’re happy with the bubbly-ness of the fruit but need a bit more top browning, reduce the oven to 350ºF and give it another 5-10 minutes.

Serve warm, slightly warm or at room temperature and don’t forget either a dollop of whipped cream of a scoop of vanilla ice cream. Even a sprinkle of sliced, toasted almonds adds just that extra something. Creamy, crunchy, fruity and delicious.

Pretty tasty

Because it’s still blueberry season I had an itch to make Joanne Chang’s maple blueberry scones again too. Boy they’re good!!

I scoop them out in a more petite version than Joanne does. Lightly glazed, a cross between a scone and a muffin, the texture is wonderful. Best of all they hold up to a couple of days’ shelf life wrapped loosely in parchment paper at room temperature. A short 10 second microwave warm up is just the ticket before enjoying. They freeze well too!

Our neighbors were getting ready to drive their daughter up north to return to school so I gave them a fresh boxful for the road. Another neighbor is recovering from an injury so guess what - she was also a recipient.

Of course I did keep a couple on hand for morning coffee and savored every bite.

Summer marches on and I’m dreaming of cooler weather and autumn days bustling in the kitchen. Can’t wait!

Black-eyed Susans along the walking path

Cherry chocolate ganache teacakes

Hi all! It’s been a bit busy lately with some family birthday and anniversary celebrations which means any new baking projects and blogging have taken a back seat. Not to mention some pretty hot days here and there which haven’t inspired much kitchen activity.

I recently wrote about my cherry lime Breton version of a Gateau Basque in which I described roasting sweet cherries and puréeing some of them for cherry chocolate ganache (AND cherry Swiss meringue buttercream!). First let me just say - ganache is one of the best things ever!!

As I’m sure most of you know, ganache is a combo of heavy cream and chocolate, created using different ratios of those two ingredients depending on the final consistency you’d like. Place chopped chocolate (or feves, discs or wafers) in a heat proof bowl; bring the cream to a boil either on the stovetop or in the microwave; pour the cream over the chocolate and gently blend until smooth. I’ve been using Guittard’s Lever du Soleil 61% wafers as my house chocolate - love it for ganache, almond bark and whatever else might come along.

Here are a few ganache examples: a medium or 1:1 ganache is made with equal weights of cream and chocolate. Use it while it’s still warm to glaze a cake; let it set up a bit and pipe it into your French macarons; chill to firm and scoop it into truffles. So many possibilities.

Change up the ratio by using more cream, let’s say 2.5 cream to 1 chocolate by weight, for a softer ganache. Chill it and then whip it up just like whipped cream. What a great way to layer/garnish a delicate chocolate cake or top a layer of chopped toasted nuts and caramel on the bottom of a blind baked tart shell. Yum.

Go the other direction using more chocolate than cream for a firmer ganache. Get the picture?

Let’s get on to the project at hand.

I’ve made raspberry chocolate ganache in the past as a financier garnish and found it quite delightful. But frankly I don’t often think about making fruit ganache as a rule. This time I had in mind a tart cherry, brown sugar version of a favorite cake based on the recipe in Yotam Ottolenghi’s book “Sweet” and thought what the heck; why don’t I put a of dollop of ganache in the center before baking and see what happens!

When making fruit ganache, simply replace some of the cream with your chosen fruit purée (I used half cream/half purée). I wanted my ganache to be on the slightly firmer side of medium and came up with 180 g chocolate (in this case a third milk, cuz I wanted to use up what I had, and two thirds dark), 70 g heavy cream and 70 g roasted sweet cherry purée. This turned out to be plenty for the 16 cakes I baked, and the rest went into the fridge for another time. Hmmm . . . . maybe to sandwich macarons or my favorite chocolate shortbread cookies!

BTW - ganache keeps very well in the fridge for at least a couple of weeks and can also be frozen.

I approached it two ways. First: layer of batter/blob of ganache/topped with additional batter to cover the ganache. Second: batter/blob of ganache on top.

Bake at 375ºF for about 20 minutes until set and golden.

Here they are out of the oven.

Let them cool about 5-10 minutes in the molds then turn out onto a cooling rack. You can place them top or bottom side up - whichever speaks to you. I did some of each. You can see the batter/ganache/batter version below in the background, bottom side up, the ganache having settled on the bottom (which is now the top!)

The ganache on batter version is in the foreground, top side up - the chocolate behaved nicely and nestled right into the batter.

Once cooled I gave most a nice swirl of roasted sweet cherry Swiss meringue buttercream, handed a bunch out to neighbors and of course sampled a few ourselves over several days. I also froze some ungarnished to enjoy at a later date.

Steve has always been a bit leery of fruit and chocolate combos so these weren’t his fave, BUT I found them delightful with the ganache nestled in the tart cherry cake and the wonderful creaminess of the buttercream. So tasty!

Mmmm - creamy goodness

Take good care until next time.

Here’s a little trip memory - in the botanical garden in Copenhagen.

Sneak peek - sesame braid and more!

This is one delicious dough folks! First time around I did the sesame braid. Second time around I doubled the recipe and made two standard loaves - great for sandwiches and morning toast.

I have a couple additional versions up my sleeve and look forward to sharing them and the recipe with you in upcoming weeks. We’ve had some lovely Michigan summer days interspersed with heat and humidity so I’m planning my baking projects around the weather. Ahhh - summer.

Here’s a bit of nature for you - the light, the shadows - Steve says I could be an impressionist!

Summer whites - landscaped

Summer whites - natural

Teasel - intriguing to be sure!

Gateau Breton aux cerises et la crème de citron vert

Always looking for ways to use my favorite Breton dough, this one is a take on Gateau Basque, the classic butter cake from the Basque region in southern France/northern Spain. It’s typically baked with pastry cream and/or fruit (cherries, apricots, prunes are options) inside. It turns out that many regions of France have their own version of butter cake, Brittany being one of them, so I opted to use the Breton dough for this project. The Basque dough recipe I use from my Le Cordon Bleu days is indeed very similar to a gateau Breton so why not switch it up a bit.

Since it’s cherry season here in western Michigan and I had some lime juice in my freezer, I opted for a roasted sweet cherry/lime curd combo for my gateau.

For about a pound of pitted and halved Bing cherries, I sprinkled them with a couple tablespoons dark brown sugar, stirred ‘em up, spread them out on a silicone mat lined half sheet pan and gave them a low and slow roast in a 275ºF oven for about an hour or so, stirring them around every 10-15 minutes. I didn’t (forgot to!) do an after roasting final weight for the batch but I can tell you I used about 105 g intact cherry pieces for my 7” size gateau and pureed the remainder (yield a tad over 3/4 cup) to use in both a batch of Swiss meringue buttercream as well as a cherry chocolate ganache (more on that later).

Ooooh!

I had made a batch of lime curd (just sub lime juice for the lemon) the day before, using about 240 g for this gateau and freezing the rest for another as-yet-to-be-determined project. Hmmm - how about lime curd toasted coconut ice cream or lime curd Swiss meringue buttercream? We’ll just see about that.

I already had my Breton dough made as a result of a tart class I recently taught and figured out that a 7” cake pan would be perfect for the 515 g of dough I had on hand.

Let’s assemble this baby, eh? Start your oven heating to 350ºF.

Butter the bottom and sides of the pan well, line the bottom with a round of parchment and butter it too. Press 275 g of dough evenly into the bottom.

Next create a narrow rim to build up the edges using 60 g of dough.

Next pipe in or spread a layer of lime curd (about 190 g) over the bottom keeping it inside the rim.

Now nestle the cherries over that, leaving yourself a rim of curd uncovered by the fruit.

Dollop the remaining curd over the cherries.

Top with 180 g dough, sealing the edges. Remember this is pretty rustic so don’t fuss too much about it.

Lightly brush the top with egg wash or milk for a bit of sheen and some in-oven enhanced browning. With the tip of a paring knife create a cross hatch pattern (or whatever pattern you want) - I went for diamonds.

Bake at 350ºF for 20 minutes then decrease the temp to 325º and bake an additional 25-30 minutes. I rotate my pan about half way through. You’re looking for a nicely golden brown crust.

Remember every oven is different so use your judgement. It’s not easy to assess the interior of this kind of gateau but remember the curd and cherries have already been “cooked” as it were, so you don’t have to worry about a raw center. The cream/curd tends to kind of meld into the dough too.

Ooooh - that’s looks great!

Let it cool in the pan about 10 minutes then, using a small offset spatula, run it just inside the edge of the pan to loosen things. Hold an overturned cooling rack across the top of the pan, lift pan and rack together and flip ‘em over. You should be able to lift the pan right off the gateau.

Now flip it back right side up the same way. Et voilà!

Let it cool, slice and enjoy at room temperature with perhaps a dollop of crème Chantilly, some additional cherries if you have them and some toasted sliced almonds. We sampled it au naturel and gave it a thumbs up.

It stores covered in the fridge for several days. We enjoyed a small slice here and there with afternoon coffee or as a small after dinner treat. Not bad.

On a final note, check this out!! On my daily walks I occasionally swing through a nearby township park and discovered this interesting natural sculpture in the wooded edge. The first time I noticed it was last October right around Halloween - how cool! I call it the tree witch and thought you might like to see it.

Keep on keepin’ on folks. Enjoy summer - it’s not over yet!

Afternoon tea at Hôtel de Crillon

We’ve been back home in Michigan for a few weeks now, and I want to share one last adventure from our European travels. I’ve been mulling over how to describe this one since it didn’t quite live up to our expectations, particularly after the generally stellar teas we enjoyed in the UK in autumn of 2019. Well here goes!

We had planned to meet an old friend for afternoon tea while in Paris, and, after a bit of research, we settled on Hôtel de Crillon, a 5 star spot right on Place de la Concorde that reopened several years ago after undergoing a 4 year renovation. With all the hype and the reputation of the place we were pumped to experience it. I recall during my pastry school days that the hotel was a very sought after spot for students to snag their place as a stagiaire - a real feather-in-one’s-cap kind of deal on the pastry chef resumé.

There’s a lovely lounge area soon after entering with luscious purple flowers and cushiony seating, but we were slated for Le Jardin d’Hiver, an outdoor terrace/courtyard venue for lunch and afternoon tea which lacked much luster or natural beauty - some greenery here and there and otherwise a white theme. Perhaps some might consider it calming, although we thought it pretty tame after the interior sumptuousness.

Entry lounge area

We had a quiet corner where we could catch up on the last few years (6!!) since we had seen Diane. After a lot of chatting (and staff periodically milling about wondering when we might order) we finally put in our requests for tea (me), coffee (Steve) and hot chocolate (Diane) to accompany our tiered tea assortments.

Two classic French cookies, langues du chats and lunettes with raspberry jam, came next. I gave them a thumbs up - crispy and flavorful, just as lovely shortbread type cookies should be.

We each received our own tiered server and could choose EITHER brioche or scones (the EITHER made very clear by the wait staff) which came perched above the sweets and savories. Heaven forbid we could have chosen one of each. Diane and I chose the scone pair (plain and fig/cranberry) and Steve went with the brioche (vanilla cream and strawberry/rhubarb). Truth be told, he’s not a big scone fan and he ordered the brioche simply so I could try it. Isn’t he wonderful?

Scones and sweets

Let’s check out the savories - the menu included focaccia/grilled veggies/olive cream; lobster roll on brioche with lime; goat cheese and pea toast (English muffin like) with radish. We all agreed the pea toast took first place but felt the lobster roll lacked any level of pizazz and the focaccia was one dimensional.

Savories

Before moving on to the sweets, I sampled the fig/cranberry scone which was flavorful but more cake-like than the light, fluffy crumbly scones I prefer. I then stole one of Steve’s brioche (vanilla cream) and found it absolutely superb and what would in the end be my favorite for the day. A hidden stash of vanilla cream in the bottom was perfect with the buttery, light brioche and its crisp exterior. Alas the other brioche (strawberry rhubarb) went uneaten since Steve and Diane showed no interest and I had to save room for other things. Awwww.

Steve’s brioche

The sweets plate

The sweets offerings included a lovely fresh strawberry and orange blossom tart which was tasty indeed (save for the slightly less than crisply fresh crust). Can you imagine slicing and arranging those strawberries just so? It’s a lot of work believe you me.

We were disappointed in the rhubarb dill number - while the cream cheese mousse base was good, the rhubarb dill concoction simply didn’t do it for us.

The third sweet, milk chocolate mousse with pink grapefruit jelly, was odd and quite jiggly. Oh well, ya gotta try some new things right?

In the end it was more about chatting and enjoying each other’s company. The icing on the cake, as it were, was receiving the news through a message from Diane’s husband back home that the COVID testing requirement to get back into the USA had been lifted! She was slated to fly home the same day we were and all of us couldn’t have been happier with the news.

Now we’re back to life as usual, whatever that really means. Since being home, I’ve taught a summer tart class through our local school system and look ahead to occasional pastry activities on the horizon. We’re back in a very casual at home mode for the most part and wondering when all the turmoil around the world will wane. It’s anybody’s guess.

Meanwhile my annuals are potted up, I’m back to regular walks and swims and working on staying calm.

Enjoy summer!

Gelato on Ile Saint-Louis and au revoir Paris

While Berthillon usually gets all the hype when it comes to ice cream in Paris, we discovered Amorino’s gelateria on rue Saint-Louis en l’ile some years ago. It had been a LONG time since we enjoyed their naturally made creamy goodness so on a lovely early summer day with just the right feel in the air it was time. Gelato here we come!

Believe it or not, this was our first strolling-around-let’s-get ice cream/gelato experience on this entire trip, save for some lemon sorbet I had enjoyed with a meal in Stockholm (and I kind of remember a small bit of ice cream with one of the rare desserts we ordered somewhere along the line). Steve, being the ice cream maven, was more than ready.

Amorino has a number of locations around Paris and beyond, so it’s easy to find no matter where you are in the city.

Classic cups

We each went for the smallish “classic” cup size. They allow you to choose as many flavors as you want, all of which go into this cup (or cone if that’s your thing). You can add a macaron on top if you like. We chose three flavors each, sans macaron: I had fruit de la passion, noix de coco et pistache; Steve chose stracciatella (chocolate chip - his favorite from our Italy days), caramel and inimitable, a chocolate hazelnut wonder. Mmmmm!

Lots of flavors to choose from

We sat in the shade at a small table with bar type stools and thoroughly enjoyed our treats. Gotta love it!

Our last few days in Paris gave us a great visual of the moon as it was approaching full status. Below it’s just over half full in the waning evening light after the sun has gone down.

A half moon lit sky

On our last night it was approaching full - I was up about 1 am and shot this one.

Getting close!

News flash - we are now home in Michigan after a wonderful adventure for the past 2 months. We couldn’t even begin to comprehend how much we’d be able to see and experience, both in places we had never visited as well as Paris, familiar as an old shoe.

We’re settling back in and looking forward to a quiet summer of calm, simplicity and of course a little bit of baking here and there - and let’s not forget homemade ice cream. Steve will be so happy.

Take care until next time.