Saint Angel tart

IMG_0201.jpg

Along the lines of the tarte au fromage blanc that I made during the summer of 2018 as part of my baking with cheese series, this Claudia Fleming inspired tart is reminiscent of a soufflé, using a pastry cream base to which is added triple crème cheese and a lightly whipped meringue. Yum!

In preparation for this project I returned to our favorite cheese shop, The Cheese Lady, here in Grand Rapids. Steve and I never turn down an opportunity to drop by to chat, taste and buy (and they sell some great wines to boot). Love it!

After tasting a few triple crème options I went for Saint Angel, a creamy cow’s milk cheese from the D’Affinois group. It has a lovely, slightly nutty taste with just a hint of salt - perfect for a tart just like this one.

IMG_0181.JPG

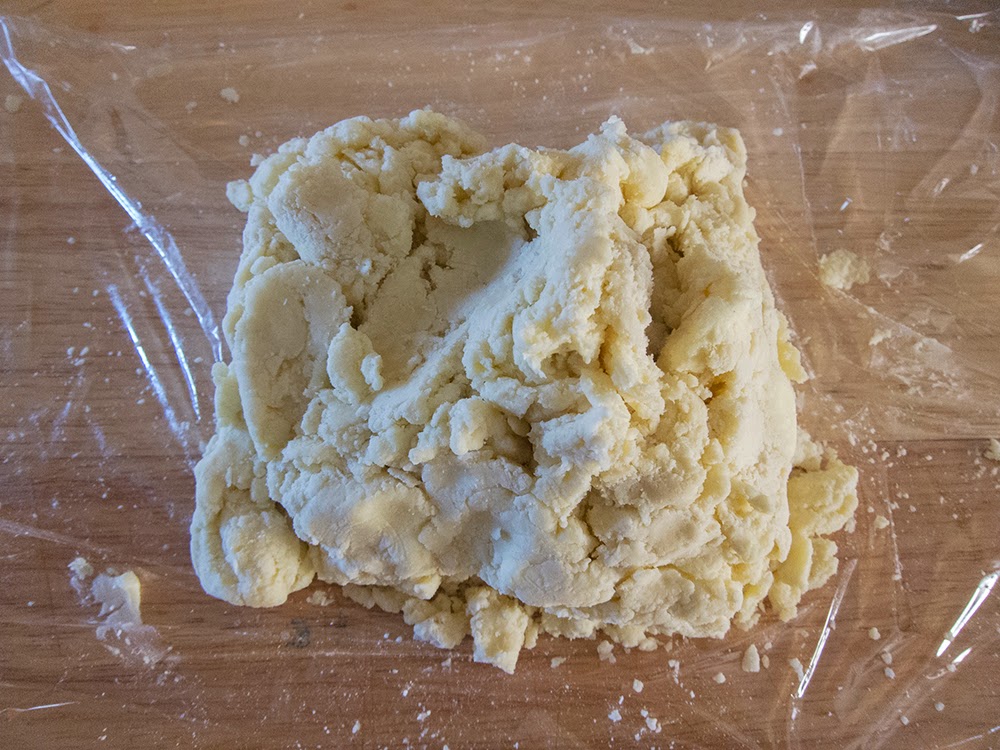
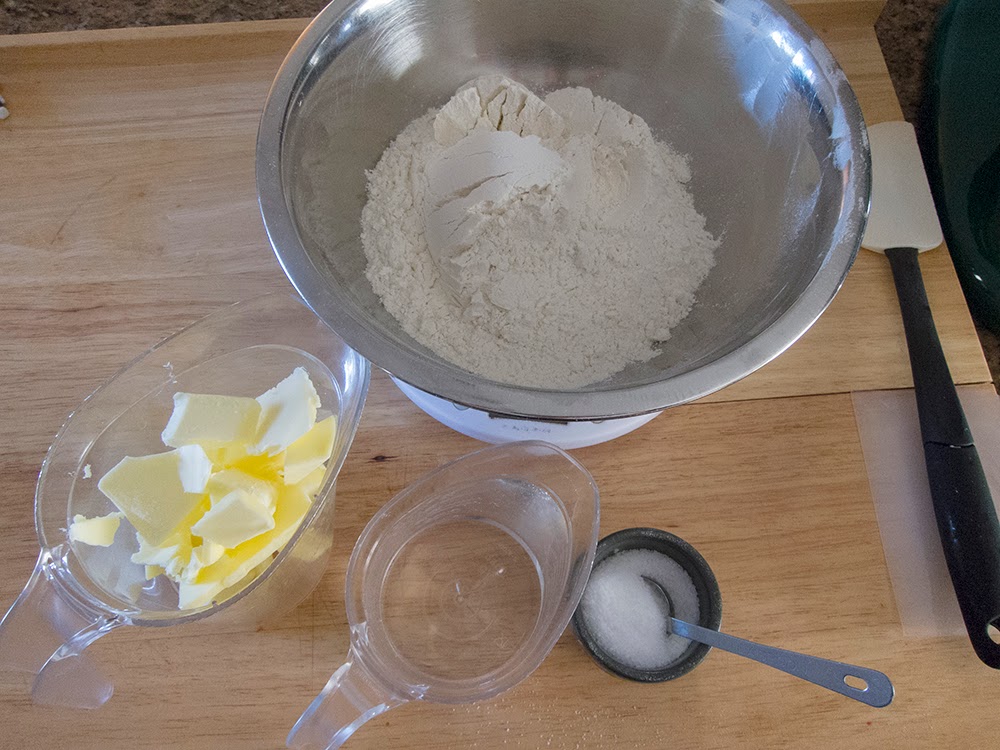
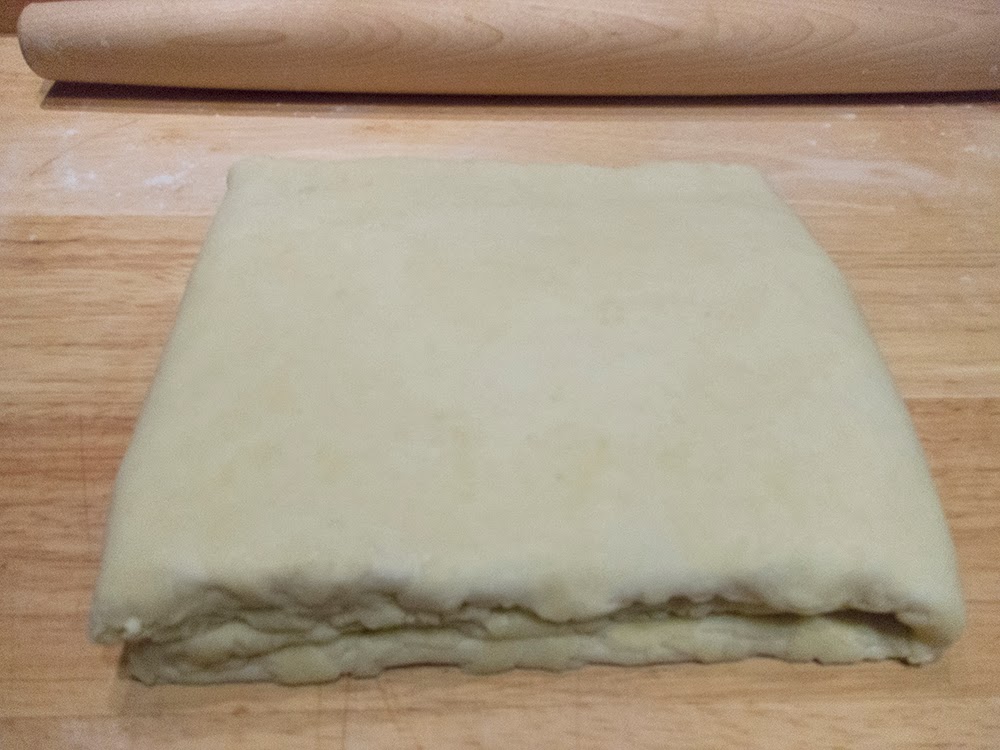
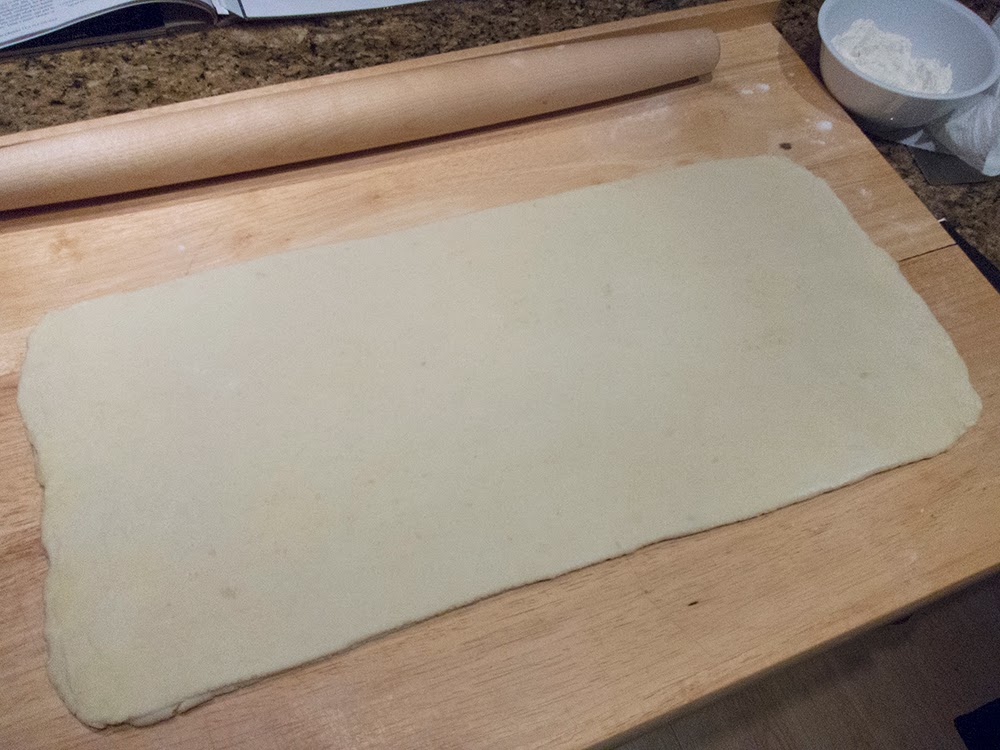
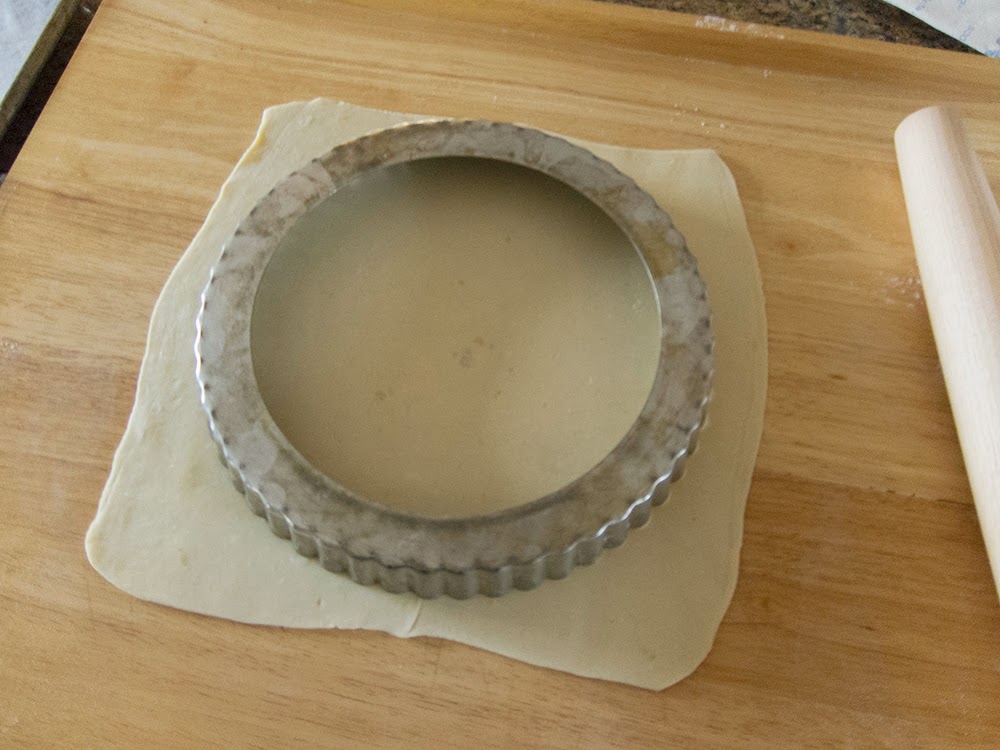
I used my favorite pâte sucrée d’amandes with the addition of ~ 60 g of toasted and coarsely chopped hazelnuts (following Claudia’s lead) for the crust. Below is the lined tart ring before blind baking.

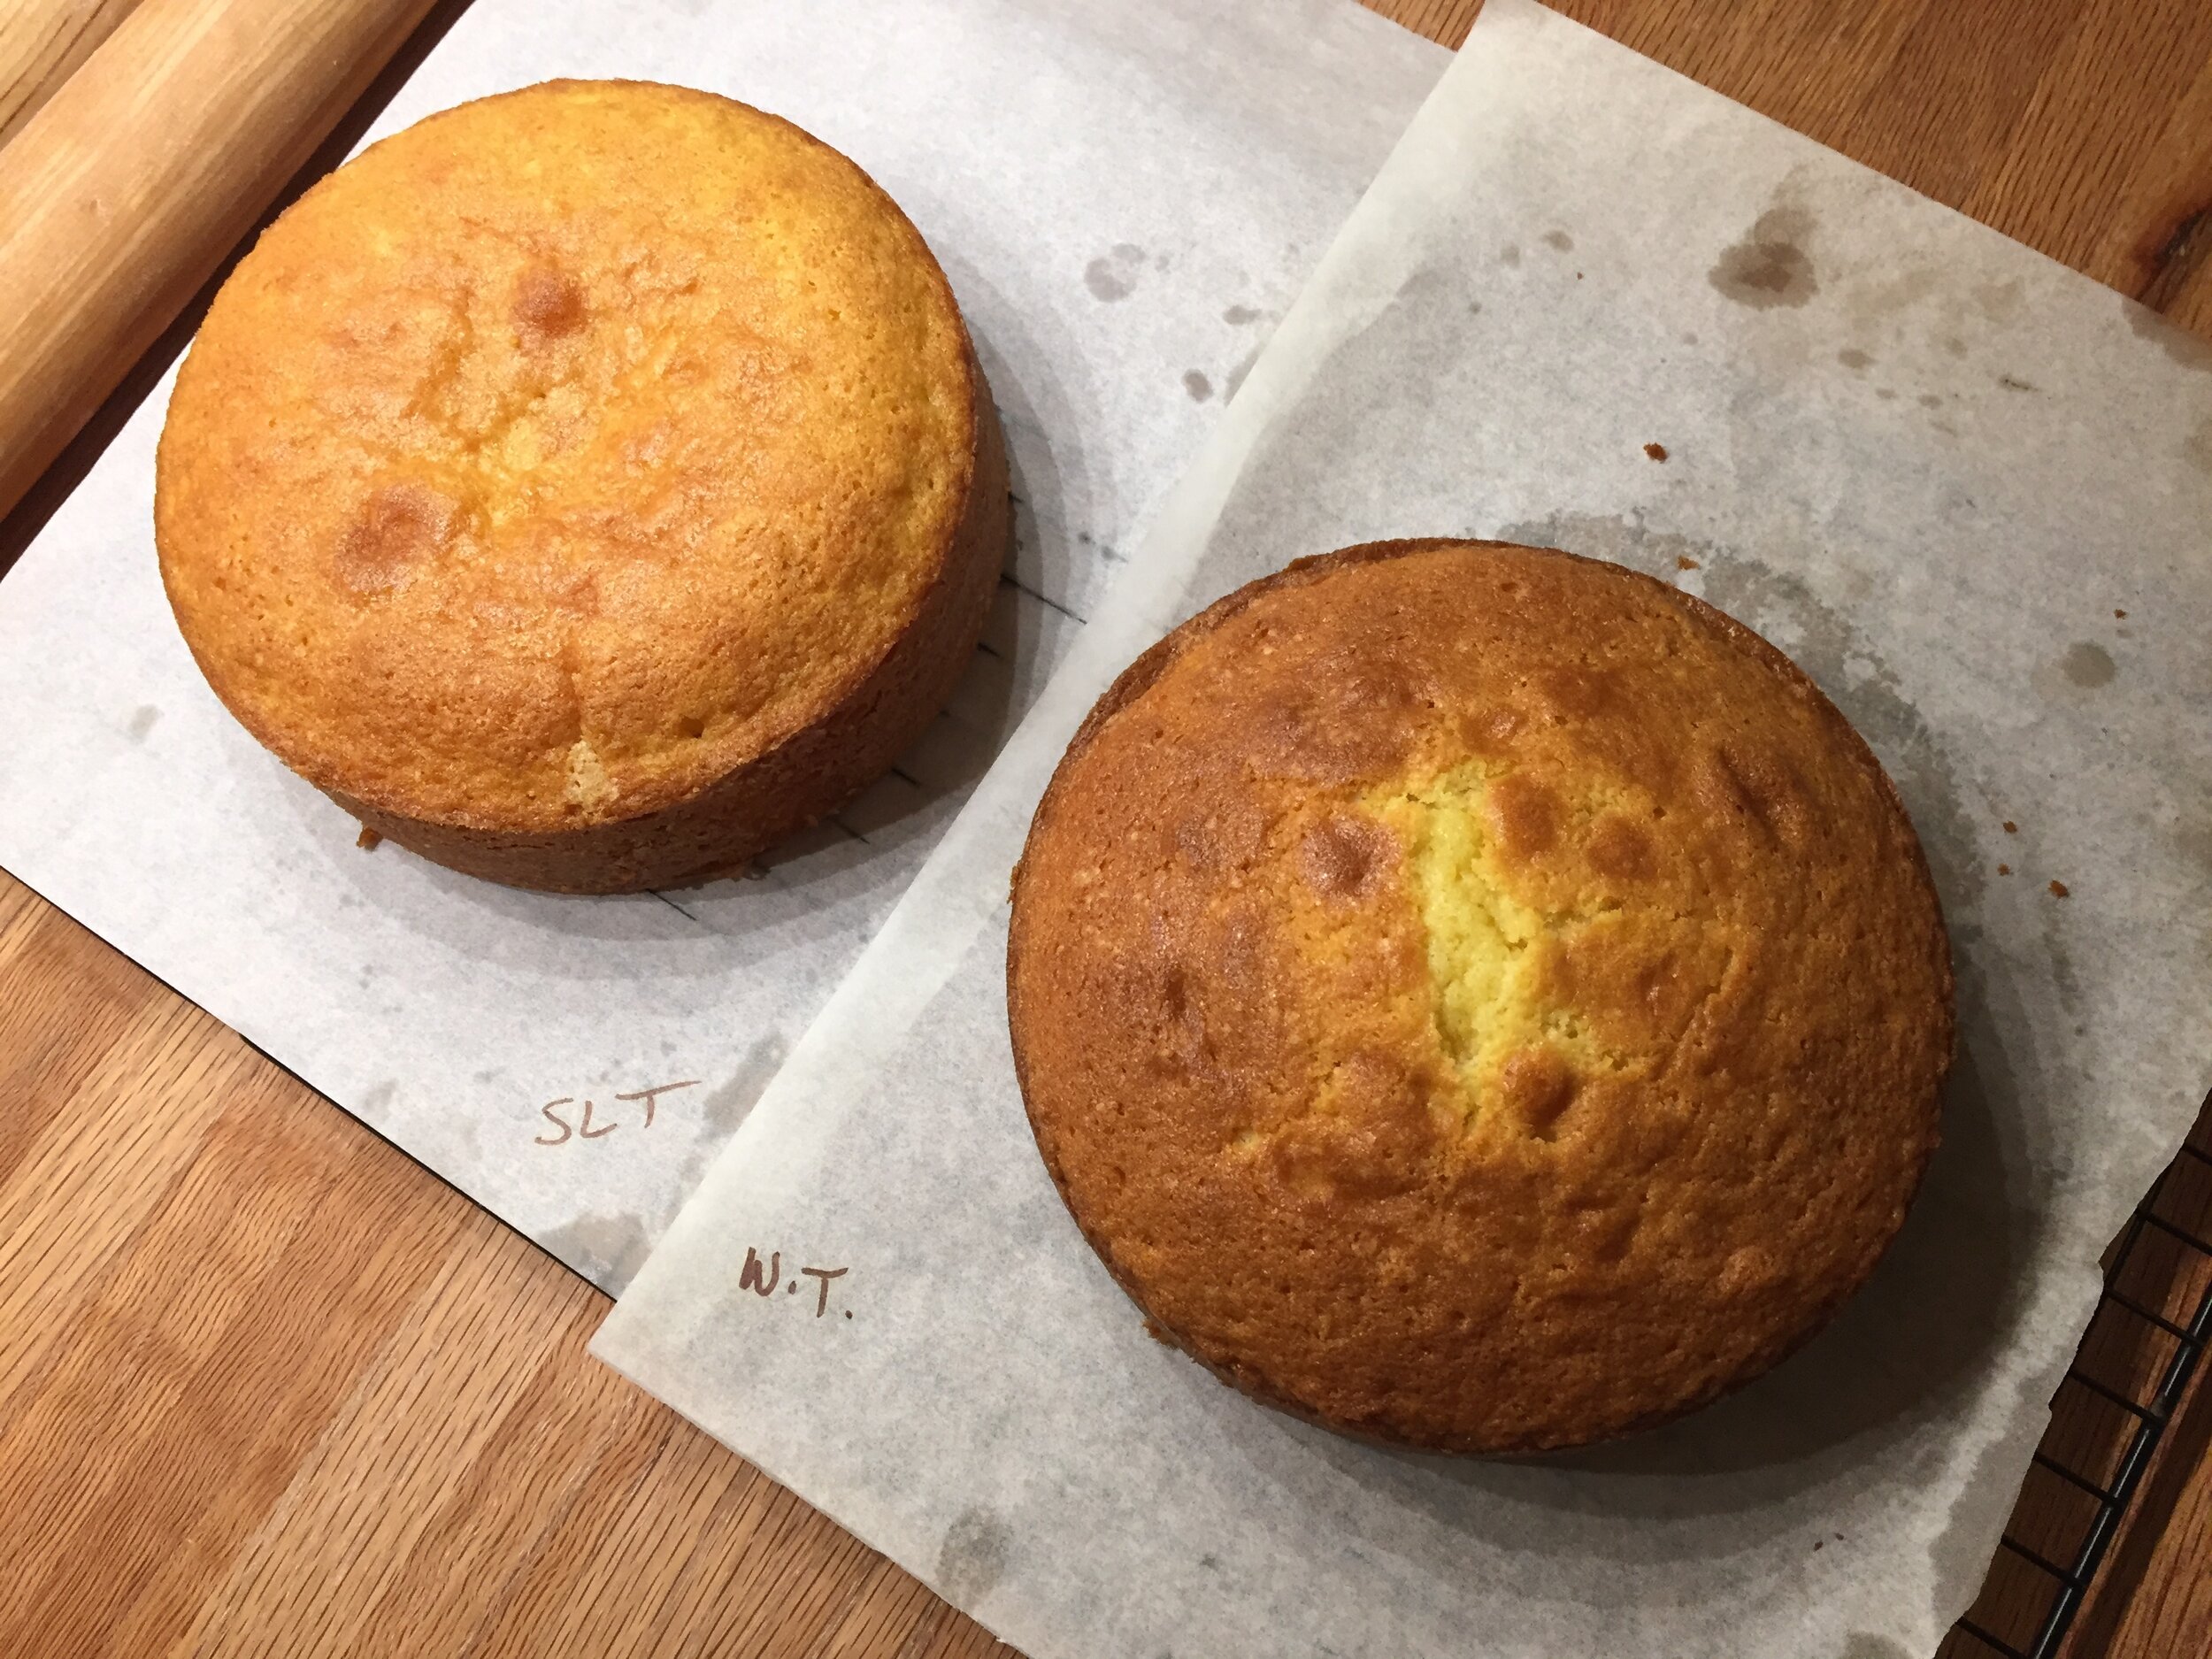
By the way, the base dough recipe makes enough for two 9-inch tarts so I simply wrapped and froze the portion I didn’t use. Nothing wrong with that!

IMG_0182.jpg

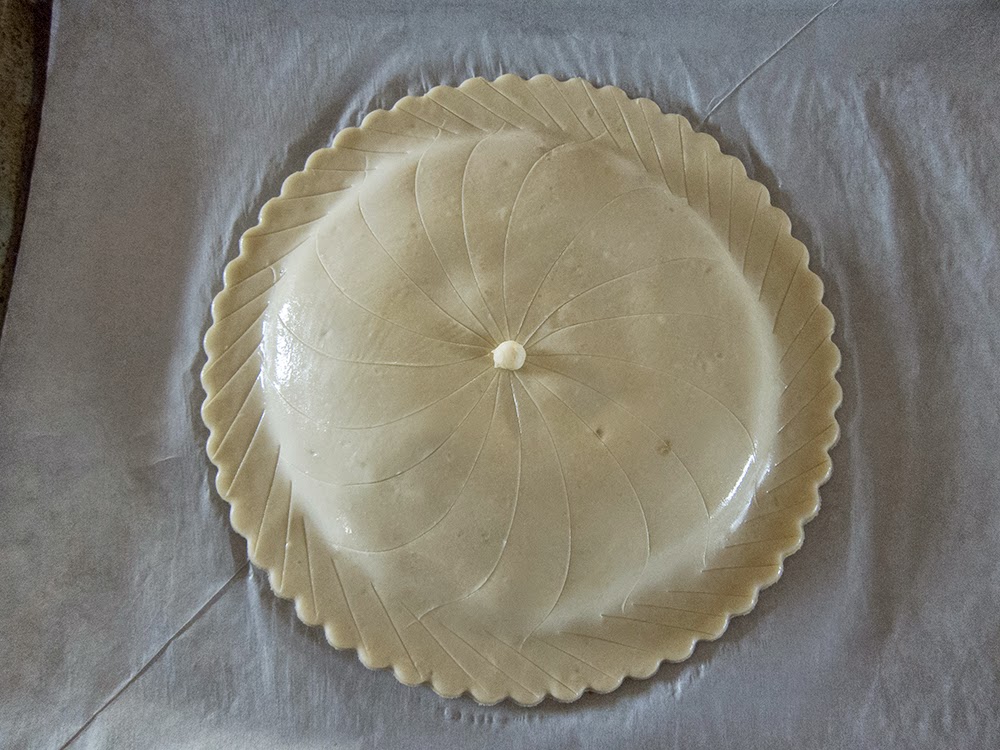
The tart shell can be blind baked at 325ºF and set aside for several hours before filling or even frozen a few days ahead to give your project a jump start before the day you wish to serve it.

With your blind baked shell at the ready, heat your oven to 350ºF.

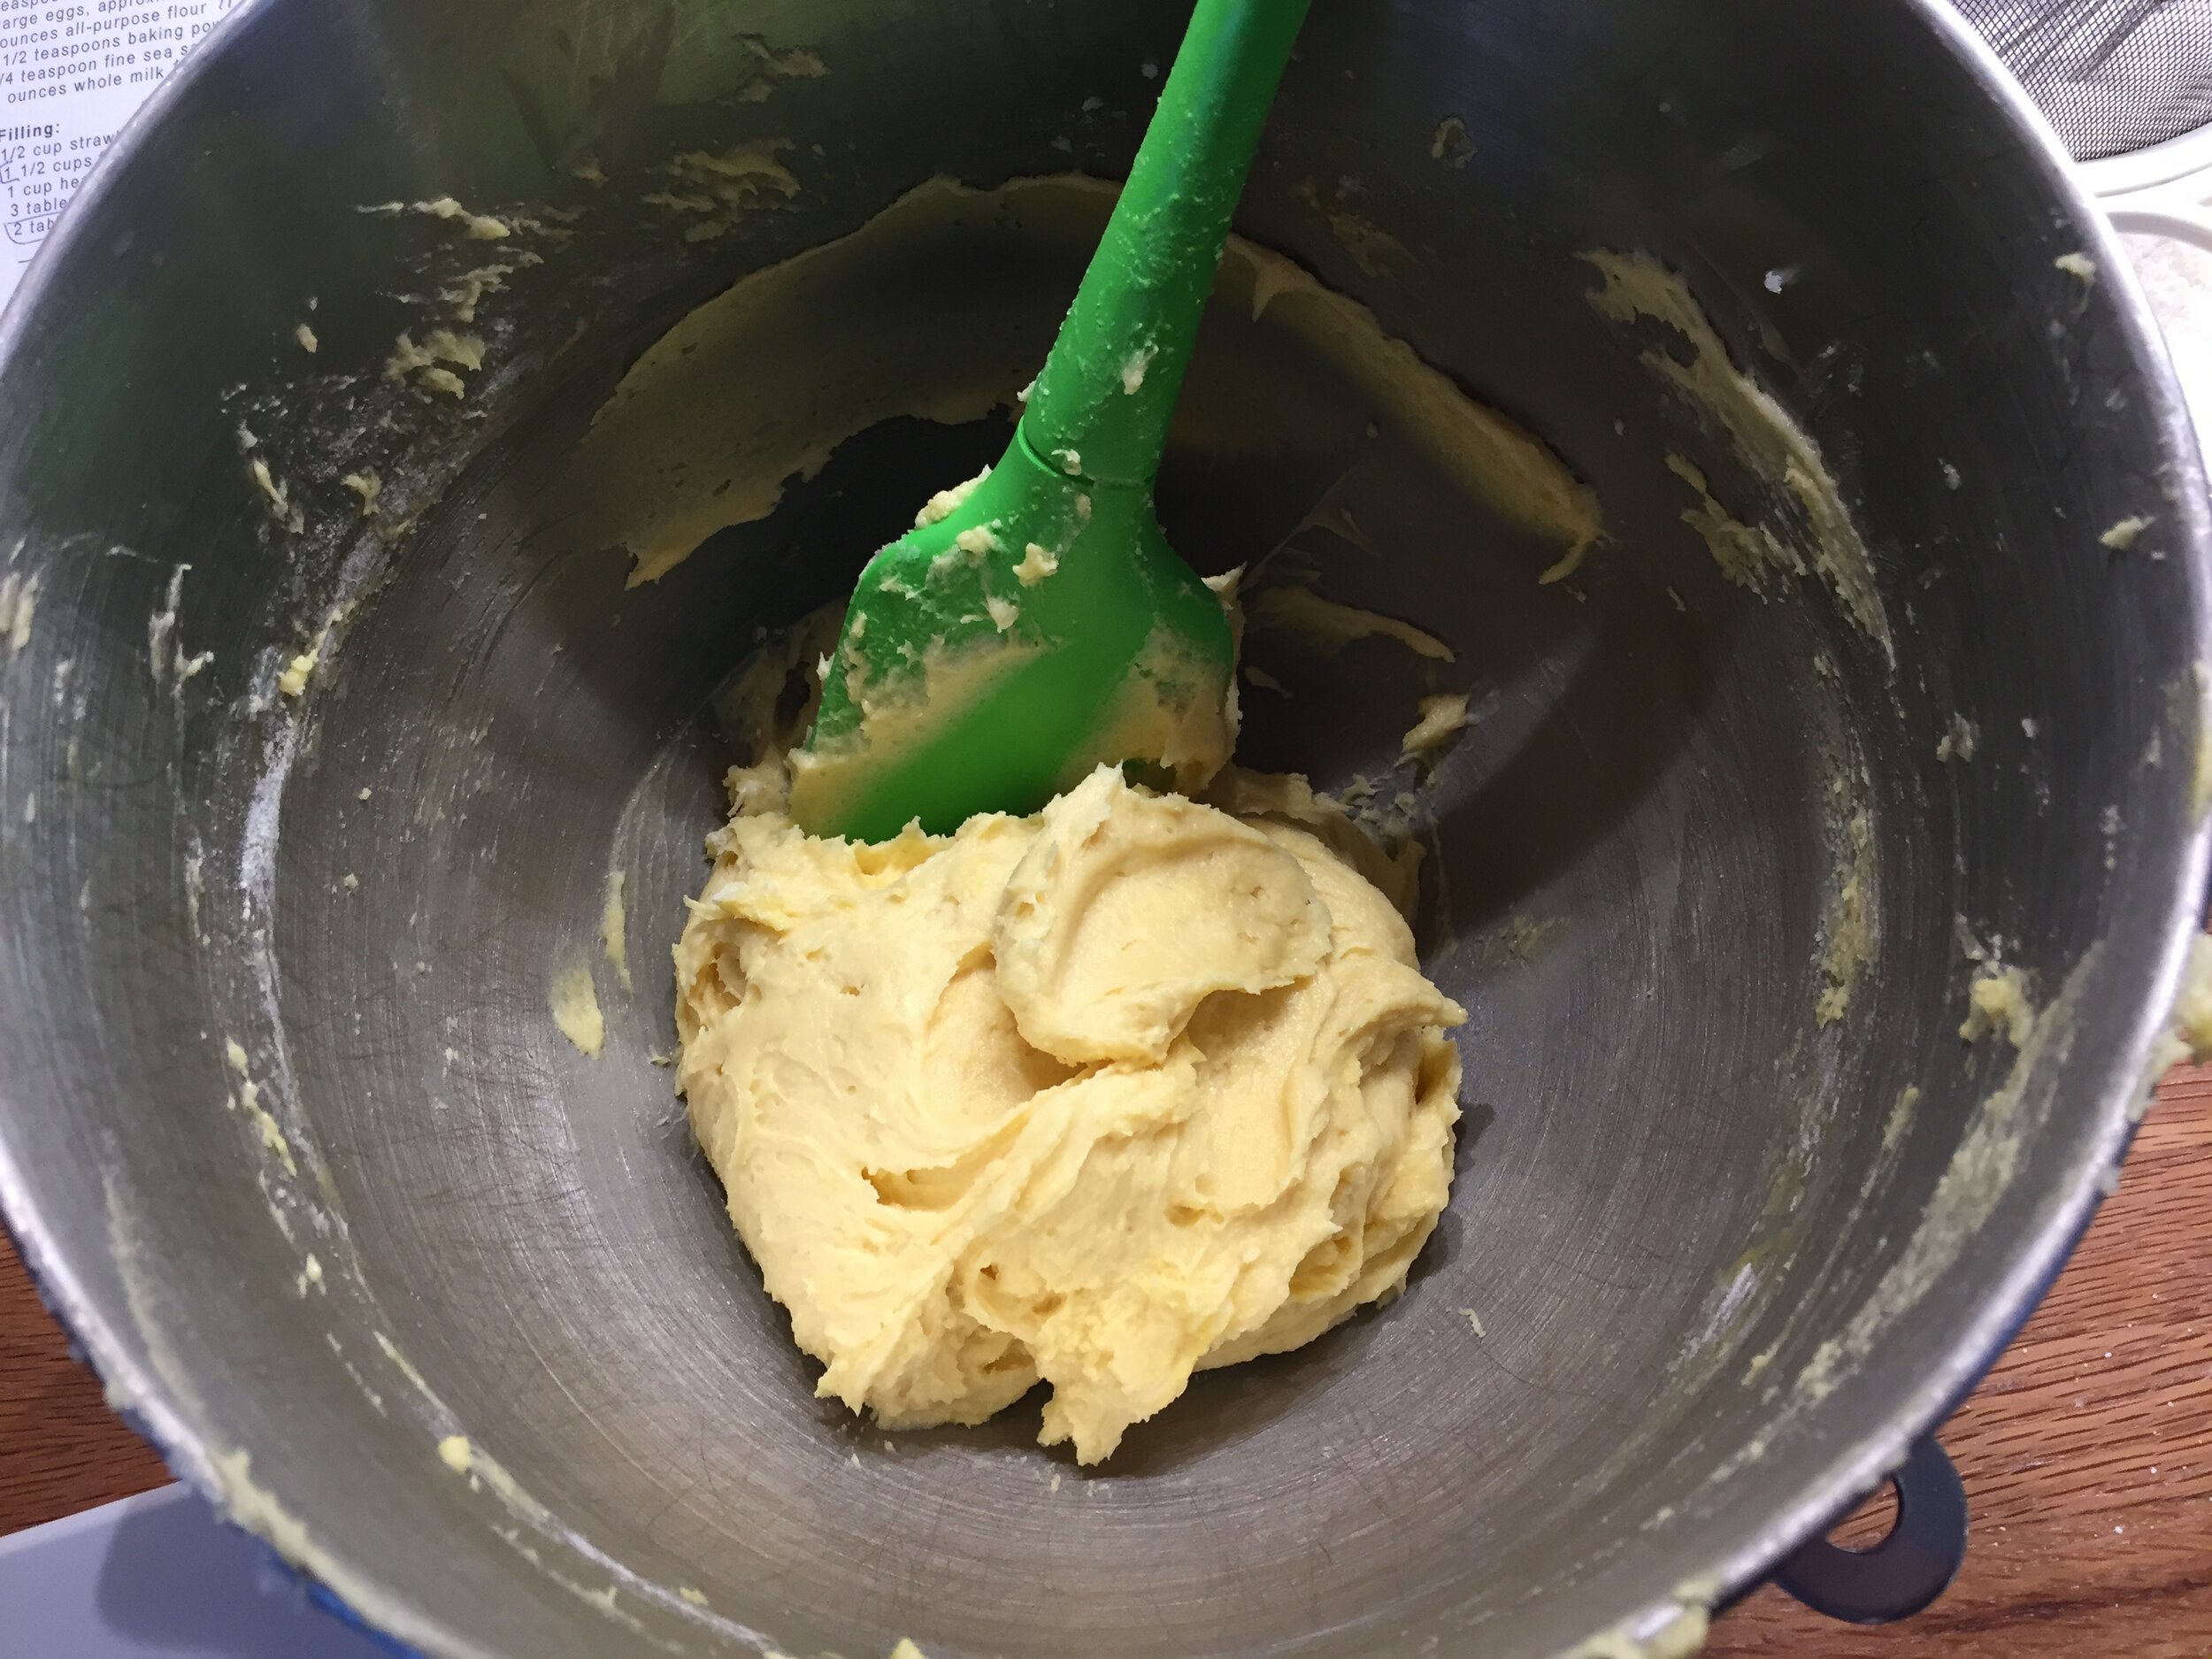
For the filling I prepared a HALF recipe of my basic crème pâtissière using 3 large eggs, divided - yolks for the crème and whites placed into the bowl of a stand mixer and set aside. Once the crème has cooked and thickened, blend in 283 g/10 ounces Saint Angel cheese (rind removed and cut into pieces), then strain into a large bowl and set aside.

IMG_0193.jpg

Using the whisk attachment, whip the 3 egg whites on medium-low speed until foamy then slowly shower in 150 g/3/4 cup granulated cane sugar. Once all of the sugar is added, whip on high speed until medium stiff peaks form.

Gently fold a third of the beaten whites into the triple crème mixture, then fold that mixture back into the remaining meringue in two additions.

IMG_0195.jpg

Transfer the filling into the baked tart shell . . . .

IMG_0196.jpg

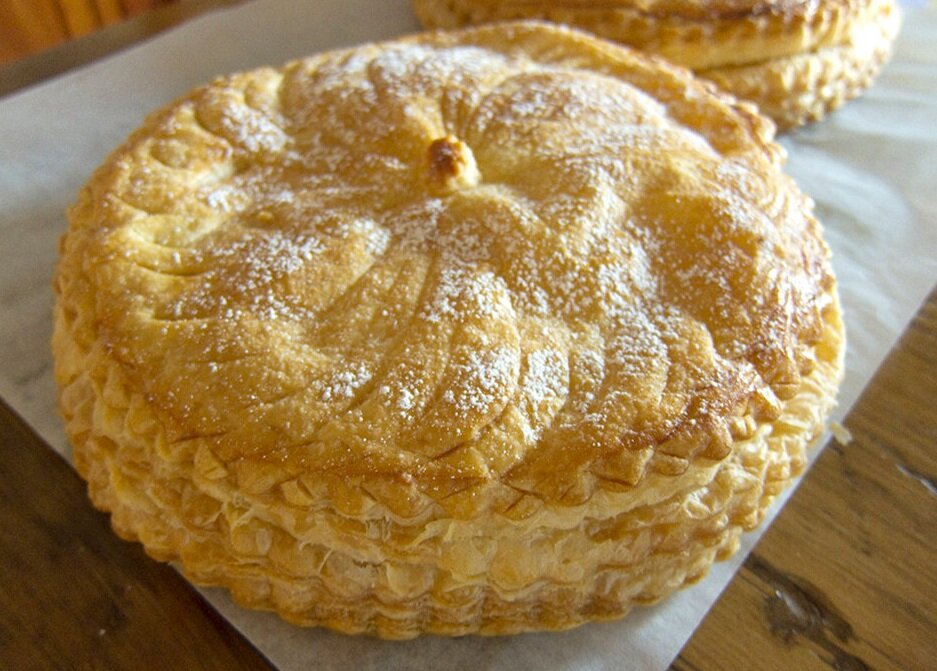
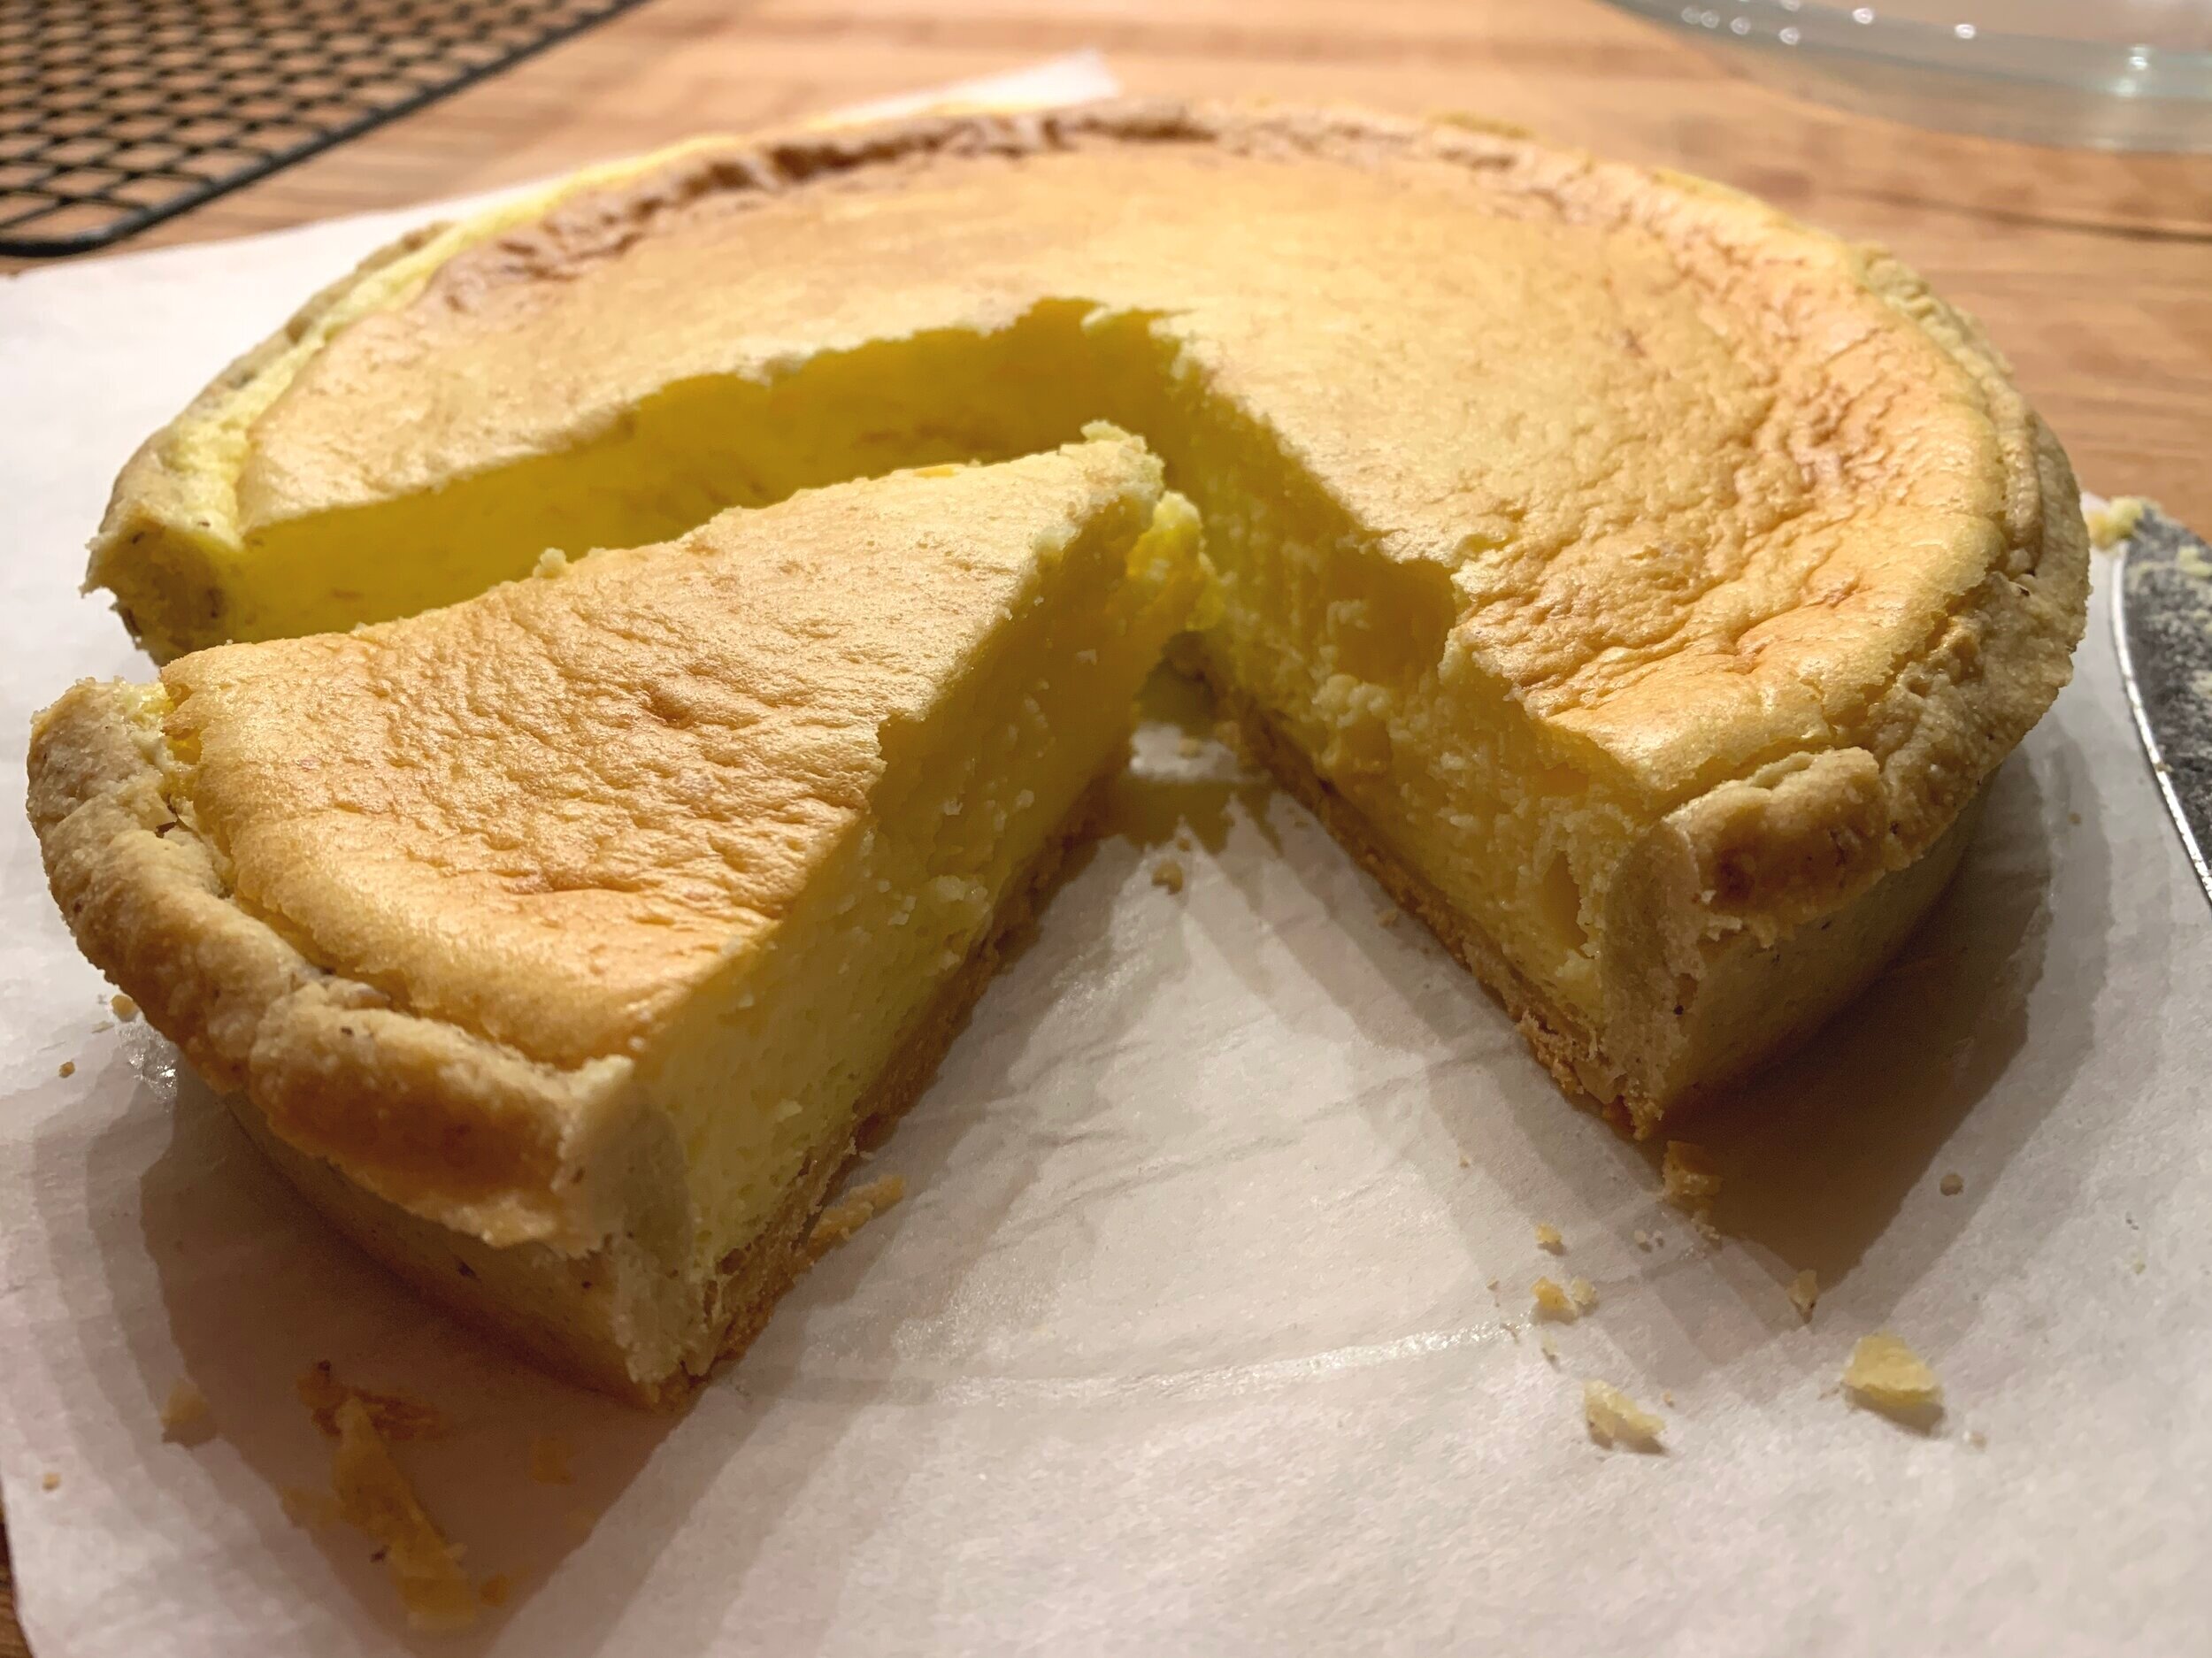
and bake for 20-25 minutes until puffed and golden.

IMG_0200.JPG

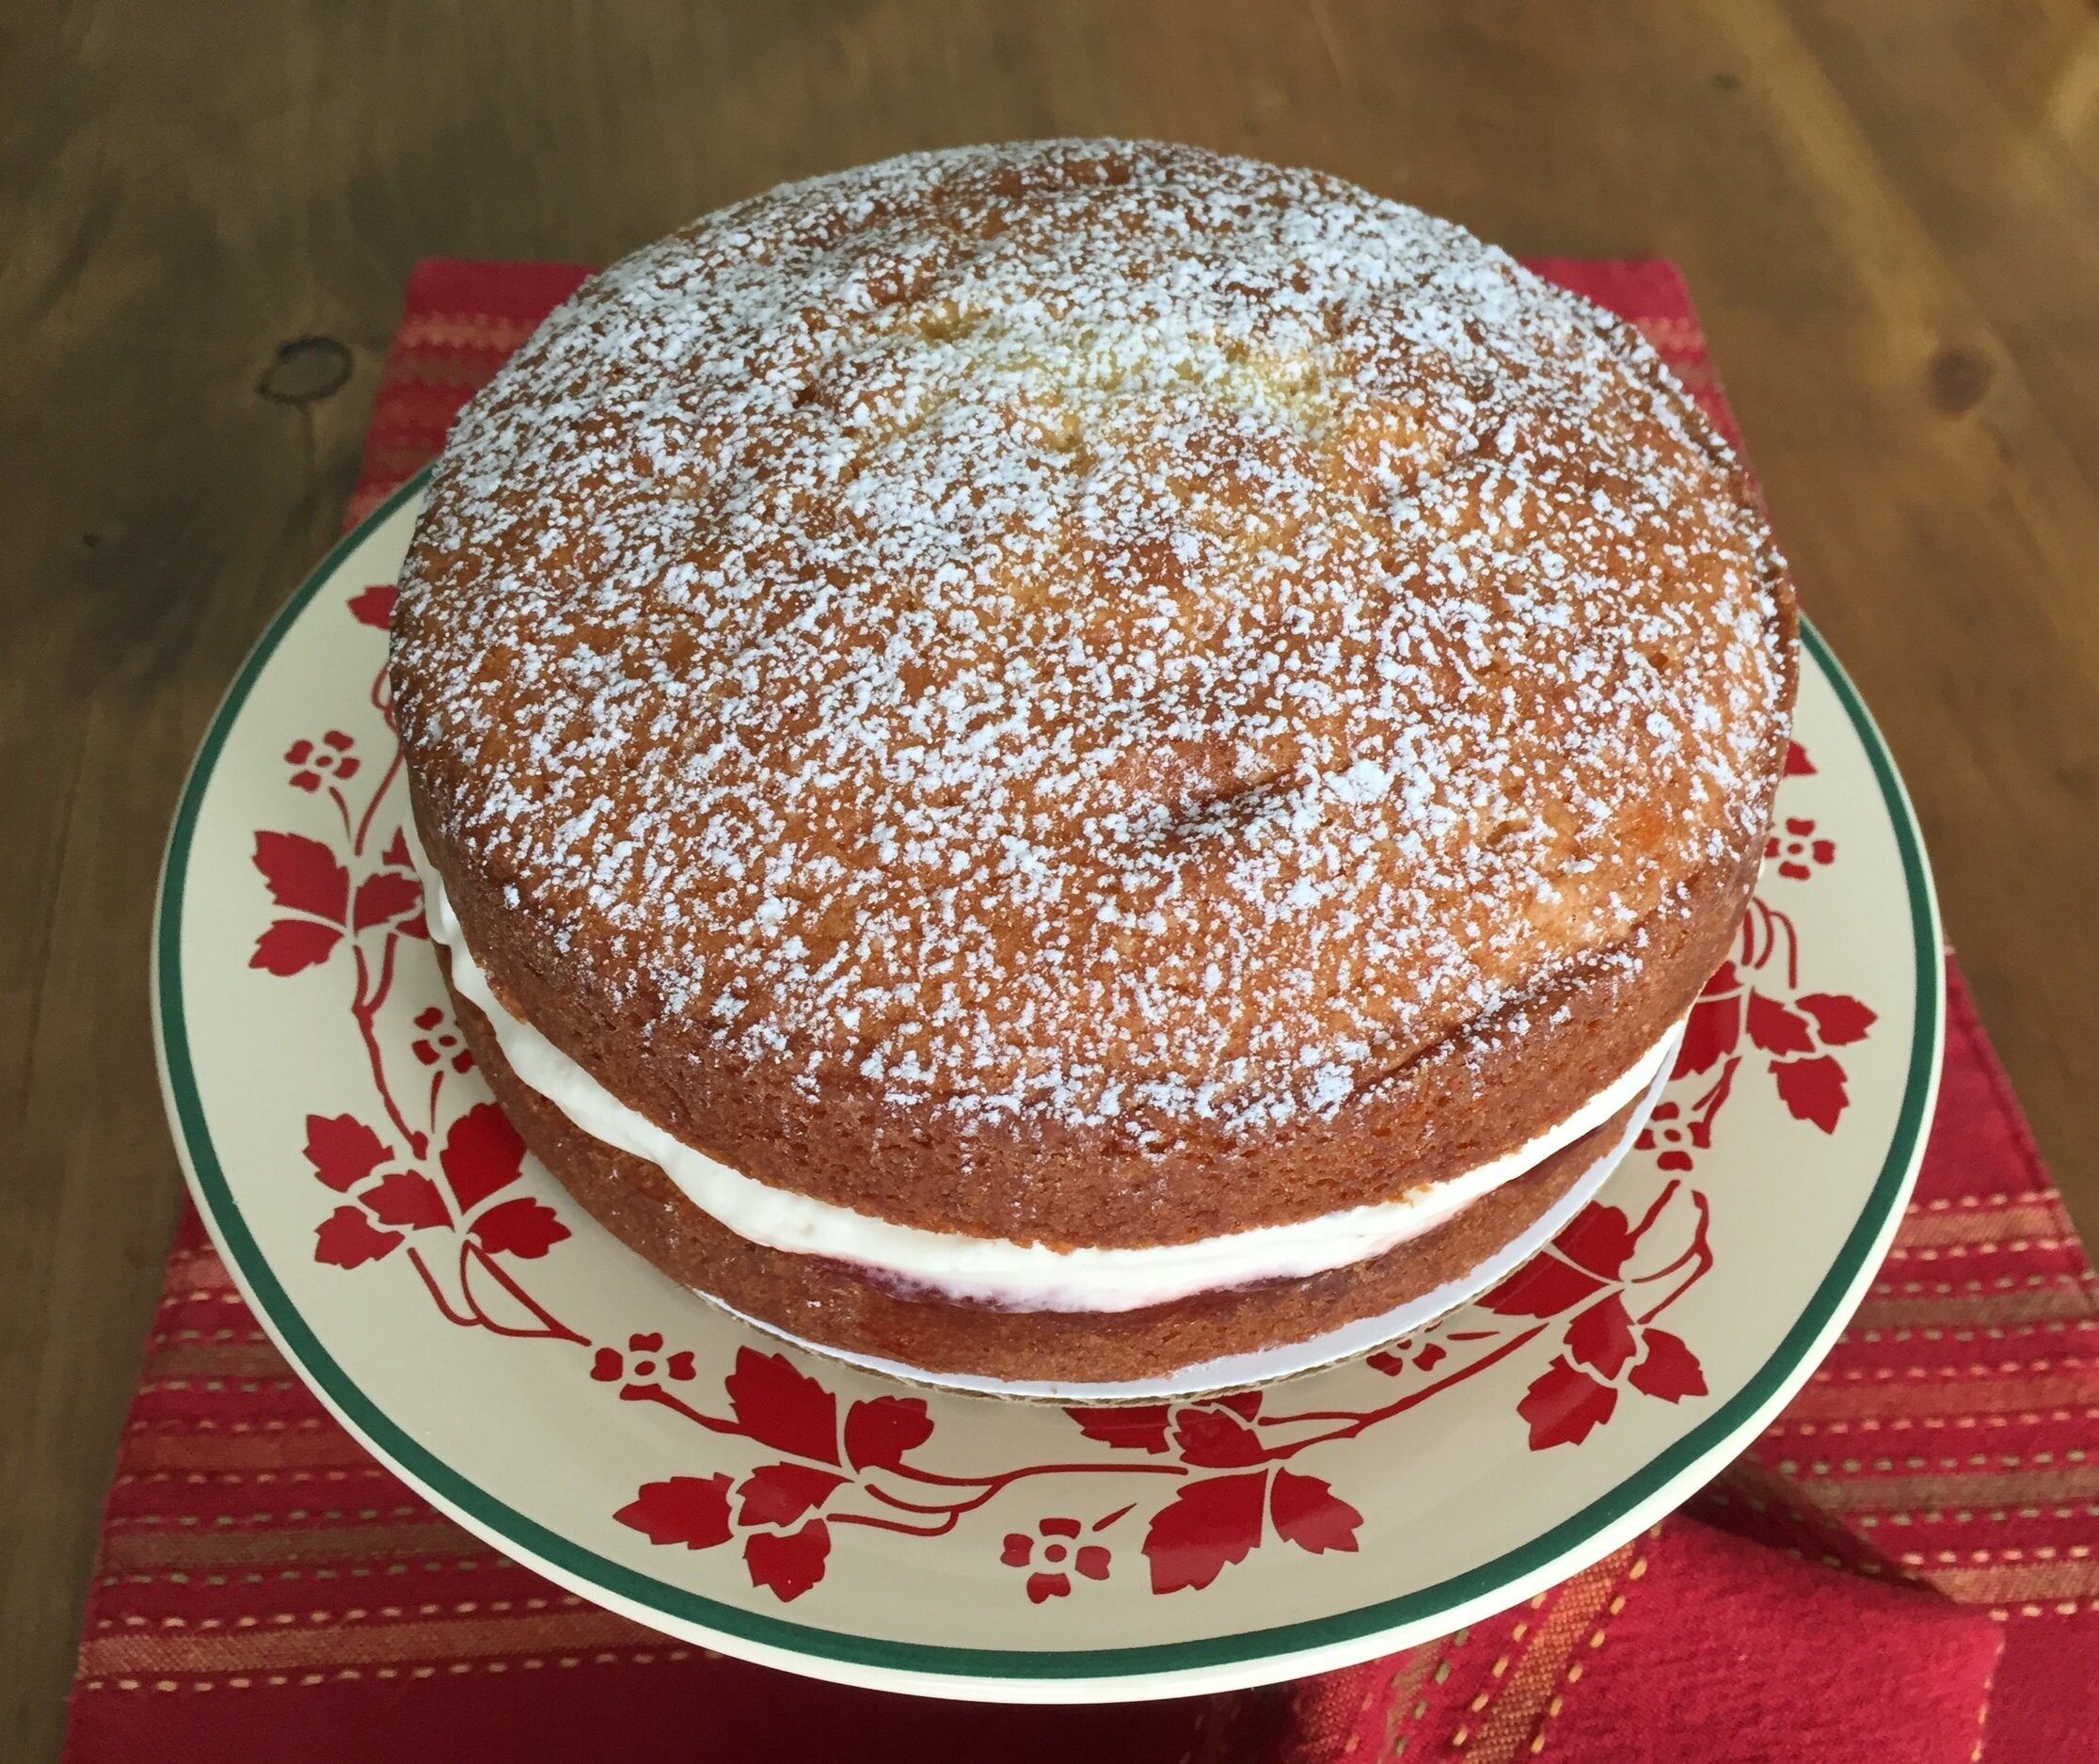
You can certainly plan to serve this soon after baking, yet knowing full well that it would collapse, I opted for letting it do just that, cool down and then give it a try.

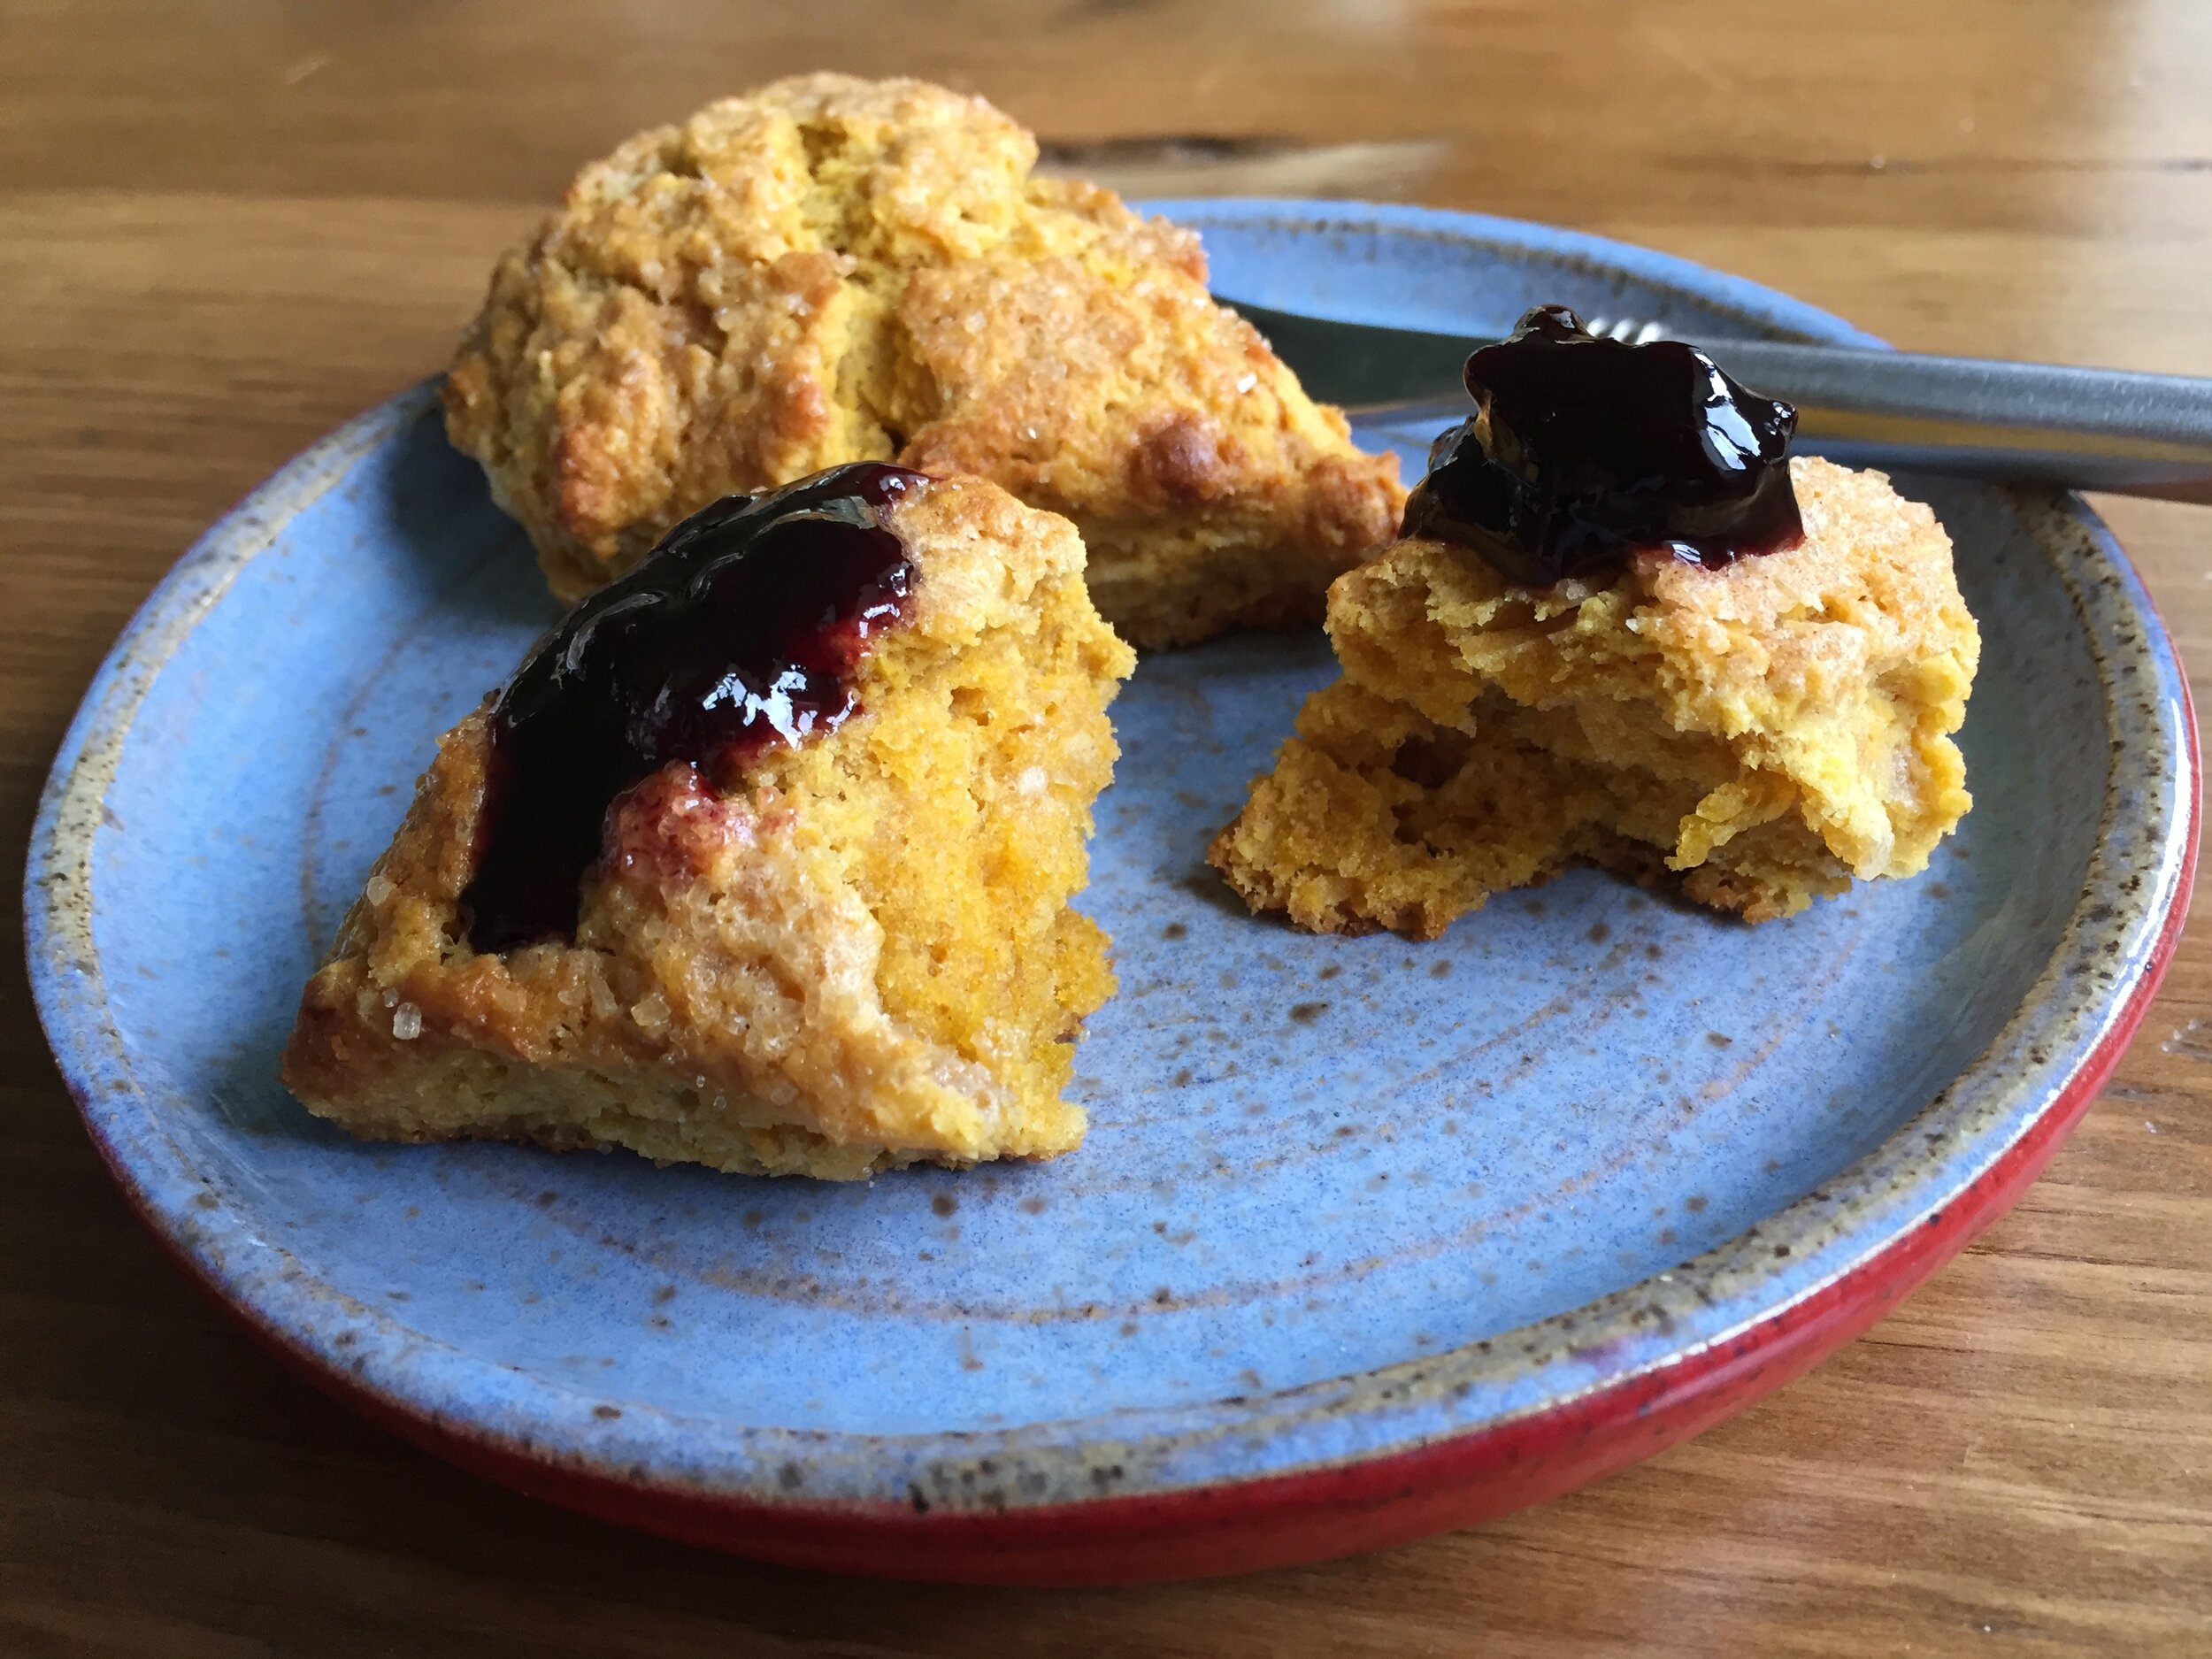
Delicious, light, creamy, a hint of salt and a sublime taste treat indeed.

IMG_0203.jpg

Thinking about accompaniments to a good triple crème cheese, I tried a dollop of cherry jam on top - not bad although Steve wasn’t a big fan. Otherwise toasted nuts, a drizzle of honey, roasted fruits/fruit compotes, berry sauces or coulis would be deelish too! Give it your own spin.

Good news! The tart held up well in the fridge (covered) for the next couple of days. Hurray!

Here’s to everyones health, safety and getting through the uncertainties in today’s world. Take care all of you.

Apple pie tart

IMG_0032.JPG

It’s a pie! No wait, it’s a tart! What?? Frankly, it kinda looks like some kind of coral reef creature.

For a recent supper at cousin Jen’s, I was in the mood to make something apple. Besides that, I had sprung for a bottle of boiled cider from King Arthur Flour and was so ready to try it out. It’s made in Springfield VT, a state which Steve and I called home for nearly 12 very enjoyable years.

IMG_0022.JPG

If you’re a regular reader of this blog, you’ve most likely realized by now that I LOVE reading baking and pastry books, comparing recipes and techniques and continuing to gain knowledge about this craft. They give me much pleasure and inspiration to boot! Some of my faves are FOOD 52’s “Genius Desserts” and anything by Rose Levy Beranbaum. They are chock full to overflowing with cool stuff.

As I approached this apple project I reviewed apple pie recipes (again!) from “Tartine”, “Art of the Pie”, “The Baking Bible” as well as “Genuis Desserts”. GD’s is essentially a review of RLB’s recipe for fruit pies, creating a filling with concentrated flavor by cooking down the juices. I’m IN!

In my fall 2018 post on a couple of apple/pear/berry tarts, I followed Tartine’s method of cooking the apples in butter and sugar first then draining off the liquid and cooking that down. They were deelish! The Genius Desserts/Rose LB approach is a bit different - macerating but not cooking the fruit, then reducing down the drained off liquid to a lovely caramel.

Here goes! This go-around I used a combo of Granny Smith and Jonagolds. Years ago I used to think peeling and coring apples was such a chore, but it’s amazing how one can get into a rhythm and actually make a bit of sport out of it, racing against the clock to see how fast you might finish. It’s so satisfying!

IMG_4383.jpg

Once the 2.5 pounds of apples for a 9-inch tart are peeled and cored, slice them up into ~1/4 inch slices and toss them in a large bowl with 50 g light brown sugar (or dark if you prefer), 50 g granulated sugar, a tablespoon freshly squeezed lemon juice, 1/4 teaspoon fine sea salt, some freshly grated nutmeg and 1/2 teaspoon cinnamon. Cover and allow to sit a room temperature for at least 30 minutes and up to three hours to juice ‘em up.

In the meantime take your favorite pâte brisée, roll it out about 1/8” thick and line your chosen tart pan or pie plate. I chose an open 220 mm tart ring this time, and since I planned a lattice top I made sure I had a 2-crust quantity of dough on hand. Cover the dough with plastic wrap and hold in the fridge until ready to fill.

IMG_0018.JPG

I rolled out the dough for my lattice as well, cut my strips and held them in the fridge until ready for final assembly. I thought I’d be creative and cut curvy pieces, but, when it came time to create my lattice, the strips didn’t really feel like staying very curvy until I coaxed them into submission. I made the best of it and it worked out just fine and dandy.

IMG_0024.jpg

Ready to finish the filling! Transfer the apple mixture to a colander set over a bowl and let drain to release anywhere from 1/2 - 1 cup liquid. Sounding good already.

Pour the juice into a small saucepan along with 2 tablespoons unsalted butter and bring to a boil. Cook until caramelized and reduced to about 1/3 cup. Then I added a tablespoon or so of boiled cider to intensify the apple flavor.

Transfer the drained apples back into the large bowl and mix them with 1 tablespoon plus 1 teaspoon of cornstarch.

IMG_0026.jpg

Place a baking stone or empty sheet pan on the bottom rack of your oven and heat to to 425ºF.

In the meantime blend the reduced apple caramel liquid into the apples and transfer it all into the lined tart ring. Create the lattice, trim, tuck and crimp or flute the edges. Brush with milk and sprinkle with raw sugar. Hold in the freezer while the oven heats.

IMG_0029.jpg

Bake approximately 50-55 minutes. If your crust edges are browning too quickly, place an aluminum foil ring over them. Watch for bubbling juices and tender fruit when poked with a small, sharp knife. My pie-tart baked about an hour before I was happy with the bubbles and texture. Looking pretty tasty!

IMG_0031.JPG

One problem with this baby is that a small section of the crust bottom and edge seemed to collect a lot of juice and didn’t bake through. It was also an interesting challenge to get it out of the tart ring. I ended up cutting a cardboard round slightly smaller in diameter, slid it under the pie/tart and lifted it up and out of the ring. Whew. Maybe a solid pie plate or lovely fluted ceramic pie dish next time, eh?

No matter - it was delicious, the boiled cider adding just the right tang and deep apple flavor. A classic, particularly topped with a scoop of vanilla ice cream.

IMG_0033.JPG

Always remember - there’s more than one way to skin a cat!

Now can’t you just imagine the hint of spring just around the corner? It won’t be long folks. Happy baking!

Rye buns

IMG_4527.jpg

These buns are a true delight! Based on a recipe from “Brontë at Home: baking from the Scandi Kitchen” by Brontë Aurell, they come together like a dream, are great for any type of sandwich, have a lightness about them yet are sturdy enough to hold up to the juiciest grilled burger (which Steve’s tend to be!).

We’ve discovered that they’re great with most any sandwich you can dream up - one of our favorites is thinly sliced dried beef from our local Kingma’s market (no not the stuff you buy in packages in the cold meat section) with crisp lettuce and a schmear of mayo - yum! And a bit of cheddar never hurt either!!

IMG_0120.JPG

Here’s an interesting bit of trivia: in Aurell’s book she mentions these buns are especially good for Biff Lindström. Now what in the world is that I ask? Biff is the Swedish word for beef and, as it turns out, there’s a Swedish specialty named after one Henrik Lindström, a prominent industrialist back in the 1800s. It’s a fried burger made with ground beef, egg, onion, pickled beetroot and a bit of its juice, capers, seasonings (salt and pepper) and optional chopped chives. Hmmm . . . . not being a beet fan, I’m not sure I’ll go for that one, but you might like it - you never know!

Even though they’re called rye buns and contain dark rye flour, these buns have only the teensiest hint of rye flavor. That’s neither good nor bad, just a simple observation.

For this project I used Bob’s Red Mill, a line of wonderful flours readily available at local markets around here. While I’m a big fan of King Arthur Flour’s range of products and can buy the standards (i.e. all purpose, bread, whole wheat, white whole wheat, self rising and even the sprouted wheat) at the grocery store, their specialty flours have to be ordered from the company which obviously requires some planning ahead. Cue Bob’s - yes!

IMG_0039.JPG

The range of rye flours available go from white/light rye, medium rye, dark rye and pumpernickel. Here’s a great overview of rye from King Arthur Flour. Since rye flour doesn’t contain as much gluten as its wheat flour counterparts, for a better rise and lighter texture it’s best to combine it with all purpose. Using all rye flour makes for a dense loaf, plus the larger percentage of rye you use in your bread, the slower the rise.

No matter - this recipe works. You can accomplish it in a morning or afternoon and have fresh buns for supper. What’s not to like. Here’s the link to the recipe in PDF form.

I use instant yeast as my go to dried yeast. It doesn’t require jump starting in tepid liquid like active dry does, however, if you’re proceeding with the recipe to complete that day, it’s doesn’t hurt to give the instant yeast a little bath in the warm liquid - gets it going just a tad faster.

IMG_0063.jpg

In the bowl of a stand mixer fitted with the dough hook, mix 10 g / ~3 teaspoons instant yeast with 160 ml (2/3 cup) EACH of tepid water and whole milk. Let stand 10-15 minutes to become frothy. Add 50 g (1/4 cup) light brown sugar and mix until dissolved.

Have 200 g (1.5 cups) dark rye flour and 390 g (3 cups) of white bread flour at the ready, as well as 1.5 teaspoons salt, 1 large egg, 84 g (6 tablespoons) softened unsalted butter.

On low speed add the rye flour to the yeast/milk mixture along with the salt, then the egg and butter. Increase speed to medium low and start adding the bread flour. You may not need all of it. Continue to mix for about 5 minutes.

IMG_0068.jpg

You’re looking for a slightly sticky dough that’s pulling away from the sides of the bowl. FYI - I did end up using all of the bread flour.

IMG_0064.jpg

Place dough in a lightly oiled bowl, cover with plastic wrap and let rise in a warm place about an hour until doubled.

Before the first rise

Before the first rise

After the rise

After the rise

Turn the dough out on a lightly floured work surface, gently knead to form a log that you will then divide into your chosen sizes.

IMG_0079.jpg

Note: the recipe yield will vary depending on the size you wish to make. For example, if making 9 buns (as the base recipe suggests), each one comes in at a hefty 122 g (4.25 ounces) which is a bit too generous methinks. For my first batch I chose 85 g (3 ounces) which gave me a yield of 13 buns, but since Mr. Steve prefers his burger buns a little larger, my second go-around yielded 11 buns at ~100g each.

Into the slider thing? Make them even smaller!

IMG_0080.jpg
IMG_0082.jpg

Shape each piece into a nice boule, place on a parchment lined sheet pan, cover with a damp towel or a lightly oiled piece of plastic wrap and give them a second rise for about 1/2 hour.

Meanwhile heat your oven to 350ºF. Brush lightly with egg wash and sprinkle sesame seeds (white or black or both) on top (or any seed mixture you like).

IMG_4524.jpg

Ms. Aurell suggests moisture in the oven during baking. Place the sheet pan of buns onto the middle rack and place a shallow heat proof pan with a cup or so of hot water onto the bottom rack. Bake about 13-15 minutes until golden and sound hollow when tapped on the bottom.

Great buns!!

IMG_4526.jpg

So far we’ve had grilled burgers on these babies twice and a couple of different sandwiches. Definitely a keeper. Give ‘em a try - you won’t be sorry.

IMG_0122.JPG

Happy Valentine's weekend!

IMG_0128.jpg

Take your basic favorite choux paste, pipe it into lovely hearts . . .

IMG_0047.jpg

topped with central smaller hearts of lime scented crunchy dough . . .

fullsizeoutput_256.jpeg

bake ‘em with all the love you can muster . . .

fullsizeoutput_253.jpeg

then top with red fruits Swiss meringue buttercream, a dollop of Chantilly and a fresh raspberry. Enjoy!

Wishing all of you a wonderful weekend and lots of fun creating your own special treats for those you love.

IMG_0128.jpg

Victoria sponge

IMG_4556.jpg

Sur La Table is currently offering a “Great British Baking” class on the winter/early spring calendar and I’m on the docket to teach these British specialties.

In addition to sticky toffee pudding and sausage rolls, the classic Victoria sponge cake is on the menu, so why not trial SLT’s recipe along side another one by British chef Will Torrent - just for fun of course!

Chef Torrent has written a number of books, one of which I purchased a year or so ago. It’s chock full of goodies for one of my most enjoyable past times - afternoon tea. His recipe for Victoria sponge is a tad different due to the replacement of about a quarter of the all purpose flour with cornstarch, the result being a lighter texture.

IMG_4534.jpg

I also reviewed a number of other Victoria sponge recipes and found that some call for self-rising flour (or self-raising as the Brits say) which is a softer flour with baking powder and salt already in the mix. Some call for cake flour, another softer flour without any leavening additions. Many simply use all purpose flour. As always, there’s more than one way to skin a cat!

I’m sure many of you know the substitution if you don’t happen to have cake flour in your pantry - place 2 tablespoons cornstarch in a one cup measure, top it off with all purpose flour to yield one cup. Sift it together and voilà! Cake flour.

The base recipe for Vic-sponge is similar to pound cake: equal weights butter, sugar, and flour, plus eggs (usually a bit less by weight), baking powder, salt and vanilla. Many also have a small amount of milk blended in at the end - some give a specific amount, some a range of anywhere from 1-4 tablespoons (depending on the amount of batter/size of the cake). The milk is intended to “slacken” the mixture making it less stiff for spreading evenly in the pan.

This recipe is for a six inch double layer cake. The batter can be baked in ONE buttered/parchment lined/buttered again/floured pan and then sliced into two layers once cooled OR in TWO prepared six inch-ers which takes out the layer slicing step. Just remember the two shallower layers won’t need quite as long to bake.

Note: double the recipe for an 8” cake, either baked in one pan sliced into two layers or two pans with shallower layers ready to assemble.

IMG_4531.JPG

All ingredients should be at room temperature. The differences between the SLT and Torrent recipes are a tad more baking powder in SLT’s and the replacement of about a quarter of the flour with cornstarch in Torrent’s.

Here you go:

Heat your oven to 350ºF. Butter the bottom of your cake pan(s), place a round of parchment down, butter parchment and sides of pan(s) and dust with flour.

Break 2 large (~ 100 g) eggs into a small bowl and lightly beat them. In the bowl of a stand mixer fitted with the paddle attachment, cream 113 g softened unsalted butter with 113 g granulated sugar on medium high for 3-5 minutes until light and fluffy. Scrape down the bowl. Reduce speed to medium low and add 1 teaspoon vanilla extract (or vanilla bean paste) and the lightly beaten egg in three additions, blending fully and scraping down after each addition. On low speed add 113 g all purpose flour (88 g ap + 25 g cornstarch in Torrent’s version), 1.5 teaspoons baking powder (1 tsp in Torrent’s) and 1/4 teaspoon fine sea salt and mix just until combined.

I like to take my bowl right off the mixer and finish things up by hand with a spatula - it helps to get down into the bottom to be sure everything is blended in. Then fold in 1-2 tablespoons whole milk as needed to slacken the mixture. I went with the smaller quantity and both batters came out with a bit of heft, yet nice and smooth and easy to work with.

IMG_4532.JPG

Transfer batter to the prepared pan and smooth the top . Below is SLT’s - they both looked pretty much the same going into the oven.

IMG_4533.jpg

Bake about 25 minutes until springy to touch in the center and a cake tester comes out clean.

Torrent’s rose into a dome while SLT’s stayed flat with just a bit of a dent in the center. Not to worry.

IMG_4542.JPG

Once cooled, slice into two layers. A little tighter crumb on Torrent’s perhaps.

IMG_4547.jpg

Spread a layer of strawberry (or jam of your choice) on the bottom and then spread a layer of lightly sweetened whipped cream over the jam. Sandwich ‘em up!

IMG_4548.jpg
IMG_4549.JPG

Dust with powdered sugar and you’re good to go!

When slicing you’ll invariably get some cream and jam ooze but it certainly doesn’t affect the flavor. On the right below is Torrent’s more domed version. They both have a nice crumb and golden color.

IMG_4561.jpg

And guess what! They both taste great. What a lovely combo of jam, cream and vanilla cake. Steve and I noted that Torrent’s texture was a bit lighter but not really a huge difference at all.

Store covered in the fridge and enjoy a slice for several days to come. Not bad.

IMG_4562.JPG

Until next time. Stay warm and think spring!

IMG_4555.JPG

Pâte feuilletée inversée and galette des rois

IMG_1089.jpg

Happy New Year everyone! I’m re-sharing this post I published FIVE years ago to celebrate Epiphany, galette des rois and a look at making reverse puff pastry, one of my favorite versions of pâte feuilletée.

Galette des rois or king's cake, is that very popular, scrumptious, almond-and-pastry-cream-filled puff pastry treat.  During the month of January in France most pâtisserie windows are laden with these "cakes" in various sizes, from the individual to the more traditional 9-10" size.  And they even sell them with a lovely golden paper crown!

Back in early 2007 I began my stage  in Paris two days before Epiphany, and the crew at Pascal Pinaud's had already assembled and frozen many unbaked galettes (ahhhhh the beauty of the freezer).  I don't recall how many were baked every day, but, suffice it to say, those babies were flying out the door - and it didn't stop for weeks to come.

Traditionally the galette is baked with a fève (literal translation: broad bean) inside, and the person who gets the slice which holds this "treat" is crowned king for the day.  Over the years the whole fève thing has evolved into a mini industry of small porcelain or ceramic figures that have become collector's items.

On one of my Parisian sojourns to Mora (a wonderful pastry supply shop with plenty of cool stuff to get your baking juices flowing) I purchased a set of 12 or so of these ceramic figures - mine were little marionettes.  I still had a couple of them left (along with a miniature olive oil bottle that I had saved from my own galette eating experience) and was looking forward to choosing one for my current project.  Imagine my disappointment when I found them in their storage spot (which I thought was safe!) all broken.  What a bummer.  But, thankfully, I had an intact sphinx that would just have to do.

2020 update note: I have since purchased additional sets of fèves at Mora and still have a number on hand just waiting to be popped into their own galettes.

Since my freezer stash of puff pastry was gone, I was inspired to make a batch of pâte feuilletée inversée or what I call reverse puff pastry.  When I was first introduced to this version in pastry school, I found it non user friendly and wondered why anyone would make it.  Buuuutttt. . . . now I have a completely different view.

Some time ago I tried the recipe from Dorie Greenspan's book "Paris Sweets" (one of my top all time fave pastry books!) and, while I found the process a bit frustrating, I loved the result!  It puffs beautifully and has a lovely texture to boot.  I've fined tuned my process to make it easier and have become a true convert to this method for pâte feuilletée.  

So here we go . . .

As is true for classic puff pastry there are two components - the butter part and the dough part - but here the butter portion is on the outside, rather than being enveloped by the dough portion.

The ingredients are simple.  What I'll call dough #1 is 400 gm of butter blended with 175 gm of flour.

The butter should be room temp - beat it with the paddle and then add the flour . . . .

Mix it until clumps form . . . .

Turn it out onto plastic film wrap . . . .

and form a block about 6" in diameter.  I use the plastic to help me form the dough into a square.

What I'll call dough #2 consists of 113 gm butter (melted first, then cooled slightly), 180 ml water,  2 teaspoons salt, 1/4 teaspoon vinegar and 390 gm flour.

Just a side note about the vinegar - I've seen puff recipes with and without it, so I did a little online review and found that it helps to tenderize the dough and also keeps it from oxidizing or turning gray. It is said to strengthen the gluten, making the dough stretchier and less likely to tear during rolling.

Mix the water, salt and vinegar and set aside.  Blend the melted, cooled butter with the flour to moisten it . . . .

Slowly pour in the water mixture, blending with the paddle on low . . . .

until the dough comes together and cleans the sides of the bowl.

Turn it out onto plastic wrap . . .

and form a square about 4-5" in diameter.

Both doughs should be chilled for a couple of hours or even over night if you need that time in your schedule.

Now the two doughs have to be formed into a package, and this is where the process gets a bit sticky (and I mean literally!).

I pull the doughs out of the fridge a good 20-30 minutes ahead so they will be somewhat malleable and easier to roll.  Since dough #1 is primarily butter it's important to work efficiently and with enough flour on your surface to avoid sticking.  I really struggled with this step for awhile, but I finally figured out that if I kept the dough between 2 sheets of film wrap, periodically lifting the film and flouring the dough surface a bit, I could roll to my heart's content.

Once I've rolled dough #1 into a rectangle I place dough #2 on one end to check for sizing.

Then I simply lift the still-plastic-wrapped #1 and fold it over to see if I have enough length to properly encase dough #2.  No butter sticking to the rolling board!

If needed I'll roll #1 a little longer and then unwrap #2, rolling it so it will fit nicely on one half of the outside dough.

 The outer dough is folded over the inner, edges pinched together, and the whole thing is wrapped and chilled for an hour or so before beginning the folds.

The dough is rough around the edges and not at all pretty at this stage, but just wait for the transformation!

After a 30-60 minute chill I roll the dough, still between plastic wrap since the outer butter is still a bit sticky, to a rectangle that is about 3 times long as it is wide. No precise measurements are necessary - just eyeball it.  Remove the top plastic . . . .

and do a "double turn", which I prefer to call a "four fold" or “book fold”, since I'm folding the dough ends into the center and then onto themselves like a book, thus creating four layers.

The completed fold . . .

Now chill the dough for another 30-60 minutes.  At this stage I see the beginning transformation from a somewhat marbled, rough, irregularly edged slab into a more uniform, smooth, supple dough. I ditch the plastic wrap for the next step, since the buttery stickiness has decreased considerably. Don’t forget to turn the dough 90 degrees to get ready for the next fold.

Now do another four fold just like the one above . . . .

and wrap and chill the dough for another 30-60 minutes.

Roll the dough into a rectangle. . . .

and now do a "single turn" or what I refer to as a "three fold" or “letter fold” since I'm folding the dough into thirds.

By this point the dough has achieved a beautiful light color, an oh-so-smooth feel, is easy to work and is simply lovely!  Oh how I love the feel of cool, smooth dough.

The dough should be chilled again before rolling it out for its final use, or it can be frozen at this point as well.  Many sources suggest that, if you plan to freeze your dough, you complete the two "double turns" or "four folds" but do the final "single turn" or "three fold" once you've thawed the dough and are ready to use it.  I tend to do all the steps and then freeze - works for me!

Whew - now that the dough is finished, let's make a galette des rois!

The rest is pretty simple: two rounds of puff pastry (I use about 175 gm of puff for the bottom and about 250 gm for the top) filled with frangipane and a fève of course and baked to golden perfection.

The filling for a 9"galette is a combination of about 250 gm of crème d'amandes (63 gm soft butter; blend in 63 gm sugar; blend in 63 gm almond flour; blend in 1 egg and a splash of vanilla; blend in 10 gm flour) and about 50 gm of pastry cream (just choose a basic recipe and go for it - use leftovers to fill eclairs or make a fresh fruit tart!).  An option is to add a tablespoon or so of rum or orange liqueur, although I prefer an almond or hazelnut liqueur if I'm going to add one.

You can make your filling a day or so ahead if you wish, then you'll be at the ready when you want to assemble and bake.

I roll out both top and bottom puff using a 9" fluted tart form to gauge the size. I hold the top layer covered in the fridge until I'm ready for it.  Don't cut the dough round yet - that happens AFTER its assembled.

Still using my fluted tart pan as a guide I pipe my almond cream in a nice coil, mounding it in the center and leaving an inch or so around the periphery.

Remove the tart pan, position the fève . . .

and now egg wash the periphery.  Gently place the top layer of puff over the cream and press firmly around the edges to seal.  Then I use my tart pan to cut the scalloped round - push down firmly and gently pull away the edges.  All right - scraps!

Lift off the tart pan, make a nice flat edge around the dome of cream and poke a little steam hole in the center.

Brush some egg wash over the surface and score decorative lines, kind of like a pinwheel, on the domed part.  Then do some linear slashes in the opposite direction along the flat edge.  I also add a little button of puff on the steam vent.

Whenever I bake anything with puff pastry, I pop the assembled goods in the freezer for 10 minutes or so before baking to stabilize the butter/dough layers.  The contrast between the cold galette and the hot oven increases the steam produced by the moisture in the butter, thereby causing the puff to puff.  Yeah!

I heat my convection oven to 450º, give the galette 5 minutes at that temp and then reduce to 425º.  After another 10-15 minutes, as I observe the baking process, I often slowly ratchet down the oven temp toward 350º over the total 30-40 minute baking time to achieve a nicely browned and fully baked end result.

Galette des rois is lovely for dessert, and to cap off the flaky, buttery, almond-creamy goodness, I garnish with lightly sweetened whipped cream, Cara-cara orange segments (love that pinkish-orange color), a drizzle of caramel and some toasted, sliced almonds.  Yes indeed!

Here’s to a fantastic baking year ahead! Happy New Year to all.

A merry season to all

Caramel almond moelleux chocolat

Caramel almond moelleux chocolat

Blogging has taken a back seat due to December’s whirlwind of activities from teaching and baking to selling my 92 year old mom’s condo and moving her into a new apartment. Whew!

As was true during my days working in emergency medicine, baking continues to serve as a respite for my heart and soul. The feel of the dough, the lovely aromas wafting from the kitchen and the taste of that oh-so special treat - you can’t beat it!

To help say adieu to 2019, I’d like to share a few of the goodies I’ve been baking of late.

Pecan twirls, almond croissant, ham and cheese spirals

Pecan twirls, almond croissant, ham and cheese spirals

Orange financier with salted caramel buttercream

Orange financier with salted caramel buttercream

Pumpkin pecan crunch brioche

Pumpkin pecan crunch brioche

White chocolate raspberry crispy rice almond bark (now that’s a mouthful!)

White chocolate raspberry crispy rice almond bark (now that’s a mouthful!)

Sending warm holiday greetings to all and may the upcoming year bring you many good things.

The Queen of Hearts she made some tarts . . . .

IMG_4426.JPG

Mind you, I’m not equating myself with the Queen of Hearts from Alice in Wonderland (described as a foul tempered monarch), however I do love making tartes - and I can promise that Steve did NOT steal any of them!!

Above is a collection of fresh fruit tartes I created for a recent Alice-themed fund raising event here in Grand Rapids. The chess board seemed like just the right backdrop for these luscious treats.

We have blueberry/lemon, raspberry cream, strawberry/lime mascarpone and blackberry citrus/Earl Grey ganache. Delightful!!

When creating your own fruit tartes remember to start with your favorite pâte sucrée, blind baked, then fill with classic crème pâtissiére or a fruity whipped mascarpone or your own version of a citrus or tea infused ganache (white chocolate works well with fresh berries). It’s lots of fun to mix and match to your heart’s content. Hop on over to the recipes page to find some of my favorite base recipes.

IMG_4418.jpg

Here are just a few of the other tartes I’ve done in recent months (including some late summer reminiscing!).

Fresh blueberry

Fresh blueberry

Peach custard

Peach custard

Apple blackberry

Apple blackberry

Classic pear almond

Classic pear almond

As we are ever fast approaching Thanksgiving and the whirlwind of the holiday season, I wish all of you many “all is calm, all is bright” nights.

Happy tarte baking!

Pumpkin scones

IMG_4437.JPG

When one has some pumpkin on hand for a certain project, invariably there is always some left. What to do with It? Make pumpkin scones, of course.

Before I proceed, check out the plate above - the result of my first ever pottery wheel session with a local Grand Rapids potter, Kate Lewis. She does the pottery for one of our favorite restaurants, Sovengard and offers one-on-one wheel sessions for anyone with an interest in the craft. It was great fun - I shaped 3 plates, a cup and 2 bowls, one of which was pretty wonky but will serve nicely as a snack or nut bowl for those oh-so low key occasions. I chose the glaze colors and she did the rest. Et voila!

IMG_4185.JPG

For this treat I tweaked my base recipe, making a number of changes resulting in this recipe with added spices, pumpkin purée and a butter bump up. As with all scone and biscuit recipes, keeping the butter, cream and egg cold and working quickly, efficiently and with purpose without overworking the dough is très important.

The steps are the same as my typical classic recipe, adding the spices in with the dry ingredients and the pumpkin purée in with the cream and egg.

For baking I suggest doubling the sheet pan to protect the bottoms from darkening too much. It worked out well with these - lovely crisp outside, moist and tender crumb inside and a subtle taste of pumpkin and spice. One could certainly opt for a maple syrup/confectioner’s sugar glaze once cooled, although I went with a brushing of cream and a sprinkle of raw sugar before baking to achieve that wonderful exterior crunch.

IMG_4430.jpg


IMG_4431.JPG

For my taste test I dolloped on some blackberry jam (although most any jam will do).

IMG_4435.JPG

Too bad the Steve-meister doesn’t like pumpkin. I brought some over to Mom for her enjoyment and popped a few in my own freezer for future breakfast treats for visitors. One can never be too prepared, particularly with the holidays fast upon us.

IMG_4437.JPG

Have fun creating your own treat with leftover pumpkin! So much to bake and so little time! Don’t ya just love that plate!!

Cinnamon knots

IMG_4395.jpg

Having been inspired by my recent purchase of Richard Bertinet’s latest book “Crumb”, I felt it was time to make some cinnamon knots with my own take on his approach to this tasty treat. Warming spices, brown sugar, butter, tender slightly sweet dough . . . aaahhh. Perfect for autumn which has finally arrived in its full glory. Too bad that once the the brilliant reds and oranges are making us smile, we get the winds and rains of late October and early November to blow them all down. It’s nature’s way.

For this project I utilized a basic cinnamon roll type sweet dough using a recipe I discovered on Ambitious Kitchen.com (minus the cream cheese frosting). Once the dough is mixed and undergoes the first rise, I roll it out into a 14”x15” rectangle and spread it with softened butter which is topped with light and dark brown sugars and cinnamon. With the 15” longer edge parallel to the edge of my worktop I fold the dough up onto itself and cut 1” wide strips.

Now it gets a little messy. Leaving the folded edge end intact, cut the dough the length of the strip and twist the two portions around each other. Then form knots. As you can see, the dry stuff fell everywhere, but I simply scooped it onto the shaped knots. Next time - mix the dry with the butter and spread away so it all holds together!

IMG_4389.jpg

Once all the knots are shaped, place them on a parchment lined sheet pan (cover loosely with plastic wrap) and give them a 30 minute rise while heating the oven to 350ºF.

IMG_4393.jpg

Bake for about 20 minutes until golden brown.

I opted for a light drizzle of a milk/confectioner’s sugar/vanilla extract glaze to give them a certain je ne sais quoi.

IMG_4395.jpg

These were wonderfully tender, buttery and cinnamon-y - the perfect treat for a blustery autumn day. I served them at a morning coffee gathering down the street, and they were a hit!

I’ve been very intrigued of late with various twists, coils, spirals, knots or whatever shape one might imagine when creating what I’ll refer to as a “sweet roll” for lack of a better term. As the holiday season approaches I hope to add some new crowns, festive twists and star shapes to my sweet dough baking projects.

It’s all about learning and experimenting!

The Bertinet Kitchen Cookery School, Bath England

IMG_4341.JPG
IMG_4349.JPG

Wow! It’s already been a bit over two weeks since we returned from our UK trip. Without further ado I simply have to share our cookery school experience with you.

Richard Bertinet is a Frenchman from Brittany who has lived in England since 1988. In 2005 he not only opened his cooking school in Bath but also published his first book “Dough” which garnered a number of awards from the likes of James Beard, Julia Child, IACP and The Guild of Food Writers. Not bad, eh?

I discovered him in recent months while searching online for baking and pastry books, a pastime which I find quite enjoyable. He has recently published his 6th book “Crumb” which he described to me as an update and refreshing of many of the bread recipes in “Dough”. I bought a copy bien sür.

IMG_4409.jpg

When I learned that Richard has a baking school in Bath (an hour and a half train ride from London), Steve and I decided we had to include a visit there in our itinerary. I emailed the school and received a very welcoming response from Richard’s wife Jo who invited us to stop in for one of the bread classes. And so we did.

We arrived around 2 pm, the class having kicked off at 10 that morning. The 12 students had made their dough for the various breads (breadsticks, focaccia, fougasse and mini loaves), the dough had proofed nicely and it was time for shaping and baking.

Shaped fougasse

Shaped fougasse

Richard working on focaccia

Richard working on focaccia

It was truly enjoyable to see Richard interact with the class, having fun yet pointing out in an obviously knowledgeable and clear manner how things should be done. I picked up a couple of tips and techniques too. Love it!

The kitchen staff that day, Jen and Daisy, were kind, helpful and very tolerant of our presence. We did our best to stay out of the way but were also able to walk around the room and watch the students doing their thing.

IMG_4347.JPG

Once all the breads were out of the oven, a long communal table was set up for a group lunch to which we were kindly invited. Wine, charcuterie, platters of tomatoes/mozzarella/basil, fresh bread of course, cheeses and the star of the show for many - pork rillettes, a slow cooked shredded pork in fat and seasonings, typically smeared on bread. To each his/her own I say!

IMG_4368.JPG

If you’re planning a trip to England, Steve and I definitely recommend a visit to Bath. The Jane Austen center, the Roman Baths and the Abbey are just a few of the sites to visit. And if you love baking and cooking - need I say more? You know what to do.

Coming up - cinnamon knots, inspired by “Crumb”. Stay tuned!

IMG_4396.jpg

Sweet and savory croissant twirls

IMG_4165.jpg

Time for more croissant dough fun! Love it!!

Sweet and savory coming your way. Some months back I posted on this very topic using my whole wheat version of croissant dough. Classic croissant and spirals were the forms I went for then and now its time for - twirls!

There are so many shapes to be made from croissant dough, and, once you’ve mastered the base recipe and the nuances of lamination, there’s (almost) no limit to what you can create using different twists and turns. Twists + swirls = twirls!

First up - a savory version using my whole wheat croissant dough only this time I chopped fresh herbs (basil, thyme, rosemary) and added them right to the butter block before proceeding with the beurrage et tourage. Hence an herbed whole wheat dough was born.

I buttered standard muffin tins and coated the wells with finely grated cheddar.

IMG_4144.JPG

After rolling the dough out to 12” x 18” I spread the top half of the dough with a mixture of 60 g (2 large) egg whites, 50 g toasted bread crumbs, 1 teaspoon dry mustard and pinches of black and cayenne peppers. Then a good sprinkle of 5 ounces grated cheddar cheese (Barber’s vintage reserve and Prairie Breeze are two of my faves).

IMG_4145.jpg

Then the bottom half gets folded up over the top.

IMG_4146.jpg

Cut into one inch strips, twist and coil into twirls.

IMG_4148.JPG

Tuck into the prepared muffin tins, sprinkle a little extra cheese on top, cover loosely with plastic wrap and let rise in a warm space about 45 minutes. Meanwhile heat your oven to 375ºF.

IMG_4149.jpg

These bake about 20-25 minutes until golden.

IMG_4159.jpg

Pop ‘em out of the pan and let cool on a wire rack.

Taste time was a delightful treat of cheesy herby layers with just a hint of sweetness.

IMG_4163.jpg

For the sweet version I went for a coffee walnut theme. Using my basic non-herbed croissant dough, the steps are the same as outlined for the savory version. This time my filling is made with 3 large egg whites, 100 grams dark brown sugar, 80 g ground walnuts and 100 g coarsely chopped toasted walnuts, a tablespoon almond flour (for a bit more binding of the mixture) plus orange zest from one medium orange.

I prepped my individual cake pans with butter and espresso sugar (grind 1 tablespoon espresso powder with 200 g raw sugar).

IMG_4152.JPG

Roll out the dough, spread the top half with the coffee walnut filling and a light brush of egg white plus chopped nuts on the bottom half . . .

IMG_4153.jpg

. . . fold it up, cut strips, twist and swirl. While shaping keep a bit of a stretch on the dough as you go. The filling here is more gooey than the savory version - just forge ahead even though it seems as though stuff is oozing out. It’s OK!

IMG_4154.jpg

Tuck ‘em in the prepped pans, cover and let rise about 45 minutes. Heat that oven of yours to 375ºF and bake away!

IMG_4155.jpg

Once out of the oven, gently lift them from the pans and place on a cooling rack. I brushed them with some simple syrup for a nice sheen. Alternatively roll them in espresso sugar while still warm, let cool and enjoy.

IMG_4168.jpg

Coffee and walnut go so well together, and the coffee essence here was just right. The orange didn’t come through very strongly so I’d add more zest next time (you can never have too much zest!).

It’s great fun to dream up other ways to use croissant dough. I’m keeping my thinking cap on and so should you. Happy baking and happy autumn!

IMG_2049.JPG

Afternoon tea in the United Kingdom

IMG_4277.JPG

Steve and I recently returned from a wonderful trip to the United Kingdom, during which we spent some quality time with friends Richard and Pauline, visited a number of historic sites and enjoyed many travel experiences and foods. Check out Steve’s blog to read about our other adventures.

Leading up to our departure, afternoon tea was on my radar, prompting us to reserve spots for three, count' ‘em three, tea venues - The Balmoral Hotel in Edinburgh, The Dorchester in London and The Pump Room in Bath. We also had a spur-of-the-moment lunch in the tea room aboard The Royal Yacht Britannia.

Get ready for it - here we go!

IMG_4256.JPG

The Balmoral in Edinburgh was first. We were pleasantly greeted by the staff and seated in the Palm Court along with a number of others who came to enjoy this traditionally British pastime.

IMG_4259.JPG

We started with glasses of Ruinart champagne as we perused the menu and made our tea choices. Interestingly they were still offering the summer menu even though it was late September, and let me tell you, it worked!

Hmmm . . . . I wonder what the autumn and winter menus are like.

IMG_4273.jpg
IMG_4265.JPG

We were treated to a dazzling display of tea pouring, and when we asked our server how long it took her to master the technique, she reported just a few practice sessions before she was raring to go.

The amuse bouche of leek and potato soup was creamy and tasty, soon to be followed by our savouries and sandwiches.

IMG_4264.JPG
IMG_4268.jpg

We had planned to try haggis at least once on the trip and this turned out to be the one and only time. On the top tier above - a small dollop of haggis tucked into a nice round of puff pastry was pretty darn good and paired nicely with the marjoram and sweet corn tartelette along side. Well prepared, nicely presented and, in a word, delicious.

The other sandwiches were classic afternoon tea offerings of The Balmoral’s take on cucumber, egg salad, coronation chicken, ham and smoked salmon. The small brioche roll with the egg salad was particularly delightful, although Steve and I must admit we’re not big smoked salmon fans so that one went by the wayside.

After a satisfactory post sandwich break our plain and fruit scones arrived accompanied by clotted cream and strawberry jam. Now I’m the first to tell you I love a good scone but these were too cake-y and dense for my taste (although the cream and jam helped!).

The desserts were definitely the piéce de resistance for me - spot on textures and flavors, particularly the praline cream on the crunchy topped choux and the buttery, crisp tart crust with the combo of cherry/pistachio/milk chocolate. The pumpkin spice version of opera was moist, creamy and nicely layered, but alas Steve doesn’t like pumpkin so he did not indulge. Poor Steve.

IMG_4278.jpg

We received some final treats as parting gifts - strawberry sorbet cones, tins of tea and a box holding chocolate and pâte de fruit. Not a bad way to round out the afternoon!

IMG_4282.jpg

Needless to say, we left satiated and wondering if we would even want dinner later on.

The next day we opted for the “Hop on, Hop off” city bus tour to get a lay of the land in and around Edinburgh. One of our goals was to visit the Royal Yacht Britannia which has been docked in Edinburgh since it was decommissioned in 1997. We took the self guided audio tour, making an unplanned stop for lunch in the tea room on the ship.

britannia.jpg
IMG_4286.JPG
IMG_4288.jpg

I chose the cream tea special for one and Steve went for the mature cheddar sandwich (he did of course join me in a glass of the sparkling rosé). Note that cream tea, as it’s been explained to me, is typically tea with scones, clotted cream and jam so this luncheon version strayed a bit from that, offering a more hearty approach. Notice my sandwich came with either scone or cake, not both. In the end I chose the egg salad on wholemeal bread and a slice of lemon drizzle cake (one of the many popular cakes in Britain, very much like our glazed pound cake). Very tasty and quite a switch from the petite versions we had enjoyed at the Balmoral. We thought it a pretty perfect lunch in a very pleasant setting.

IMG_4291.JPG
IMG_4293.JPG
White piano display in the Britannia’s tea room

White piano display in the Britannia’s tea room

We had a pause in our afternoon tea adventures until several days later when we arrived at The Dorchester in London to experience another mid-day repast. Rather unassuming from the outside (save for the Rolls Royces and Bentleys parked out front), the interior was a floral extravaganza within the portion of the hotel called The Promenade. Cushioned seating and tables lined the sides of the space and more seating ran down the middle. And the flowers - what a feast for the eyes!

IMG_4298.JPG
Looking down The Promenade

Looking down The Promenade

IMG_4302.JPG

While the tea menu was very similar to that at The Balmoral, the setting was definitely more sumptuous. We were seated along one side and soon had our glass of Veuve Cliquot Yellow Label Brut to sip and enjoy while we made our tea choices.

IMG_4380.jpg

The primary difference in the sandwich selection was the addition of a beef pastrami version to go along with The Dorchester’s take on the classic egg salad, smoked salmon, cucumber and Coronation chicken. We both thought the tastes and textures topped those of The Balmoral (the smoked salmon not withstanding). Plus they brought us a second round to boot!

See that glass carafe in the background? That’s a tea leaf “flower” steeping in hot water which would eventually serve as a palate cleanser after our sandwich course. Hmmmm . . . . interesting.

IMG_4305.JPG

We were also served a pre-scone treat that hadn’t been listed on the menu - a mango pineapple number, quite delicious indeed.

IMG_4307.JPG

The scones were pretty much identical to The Balmoral’s, earning only a small bite of each - too cake-y and dense for me.

IMG_4308.JPG

Finally - dessert!

IMG_4310.JPG

The Balmoral beats The Dorchester in this category. The chocolate mousse cube was lovely but the mandarin and nut tart didn’t even come close to the caramel nut tart that yours truly (if I may be so humble) makes! Raisins and some kind of gelée stuff in the mix just didn’t work for us. The yuzu tonka bean mousse on a jasmine biscuit was quite odd both in texture and flavor, and the caramelised apple and quince delice on a shortbread round too jelly like.

Nonetheless we did enjoy this experience in a beautiful setting in the heart of London.

We left The Dorchester and headed to Paddington station to catch our train to Bath in Somerset County where the following day it was time for lunch at The Pump Room in the heart of town.

IMG_4316.JPG

Reportedly one of the places at which Jane Austen hung out, the Pump Room has been around since the late 1700s. Adjacent to the Roman Baths, it is indeed a popular place.

Even though we had reservations, the staff seemed a tad distracted and disorganized at first. Once we were seated we had three different servers approach our table as though none of them were aware of what the others were doing. Oh well. It all smoothed out in the end.

IMG_4317.JPG

We had a variety of choices from the lunch and afternoon tea menus. Steve chose the fish cakes from the luncheon menu, but for me, having experienced two very classic afternoon teas already (Balmoral and Dorchester), it was time for something a little different.

While many of us think of a posh, classic tea experience when we hear the term “high tea”, in reality it has traditionally been more of a country style, rural “meat tea” at the end of an arduous work day out in the fields. Some say the “high” part of it comes from being seated at a higher table than the usual low lounging chairs from which an afternoon tea might be enjoyed. There you have it.

My high tea was intended to highlight the local apples of Somerset - perfect for this time of year. As you see on the menu below, one had a choice between cider and “apple rambler”. We learned that when the Brits say cider, they mean hard cider (as do the French). The apple rambler was a simple apple juice, more akin to American apple cider. When in Rome . . . . .

Since Steve and I ordered a couple of Kir Royales, I kept my apple choice on the juice side of the equation.

IMG_4319.JPG
IMG_4324.JPG

Served on a rustic wooden board, it certainly spoke of being out in the English countryside.

IMG_4321.jpg

This was a most interesting repast. I had heard about Scotch eggs not too long ago, and friend Pauline had explained what they are just a few days before our arrival in Bath - essentially a softish boiled egg wrapped and fried in a breaded meat layer. This one was served with piccalilli, a mix of pickled, finely chopped veggies like cauliflower, celery, carrot, tomato, onion, sweet peppers and gherkins to name a few. The recipe varies from region to region and usually includes some mustard and a variety of seasonings depending on who’s making it. Whoever set up my board put the piccalilli next to the chicken fennel sausage roll instead of the Scotch egg. Oh my!

IMG_4325.JPG

I typically shy away from both fried and pickled foods, but I must say this egg and piccalilli combo was a unique and delicious experience. After all, part of traveling is to learn about and enjoy regional cuisines and customs, eh?

The chicken fennel roll was done up in a flaky puff pastry, had just the right fennel-y twist and paired well with the mellow onion chutney.

IMG_4327.jpg

Last but not least, the apple cake was served with a light clotted type cream and apple jam. The cake was moist with a light crumb and just the right hint of spices - definitely an autumn treat and a perfect ending to my Somerset high tea.

IMG_4330.jpg

Aside from all of these adventures on the tea trail there were many opportunities for a cuppa any time we felt the need. And we barely scratched the surface of all of the afternoon tea experiences available throughout the realm. It’s Great Britain after all!

You should go sometime. Cheers!


Oranais aux pêches

IMG_4229.JPG

Kinda looks like a double yolked fried egg, eh?

As we step ever so eagerly into prime baking season and autumn flavors like apples, pears, nuts, caramel, coffee, chocolate and pumpkin, here’s a farewell nod to the delicious summer fruits of west Michigan. Desirous of doing something a bit different, I opted for my own peach version of oranais.

So what is oranais you might ask? A traditional pastry made with either puff pastry or croissant dough, it’s created with a combination of pastry cream and apricot halves. It may go by a different name in various parts of France, e.g. lunette aux abricots, croissant aux abricots (en Bretagne) or abricotine (sud de la France).

My research revealed that it reportedly originated in Algeria in and around the port city of Oran - hence the name oranais. Did you know that Algeria is fourth in apricot production in the world? And let’s not forget that Algeria was once governed by France so there’s still a huge French influence there, both culturally and culinarily (is that even a word?). By the way, here’s a little historical tidbit for you - Algeria gained it’s independence from France on July 5, 1962.

During our various trips-to and stays-in Paris over the years, oranais is always on Steve’s radar - he loves those sunny beauties!! Frankly they’re not often found in the many pastry shops around town so one has to keep an eye out for a good one. At Le Cordon Bleu Paris we made them with croissant dough, and those that we’ve found in Parisian pâtisseries have been made that way as well. However my online research found that many recipes call for puff pastry.

I decided to give it a go with both. Oh boy!

Since puff is not yeasted it’s more straight forward in its handling - no worries about the dough bubbling and puffing up during the rolling, cutting and shaping. I rolled my puff to about 6-7 mm (~1/4”) thick and cut 80 mm (3 inch) squares.

IMG_4203.jpg

The rolling out, cutting and assembly process is the same for both puff and croissant dough. Using a classic pastry cream, pipe a line diagonally across the square, place two rounds of fresh peach near opposite corners and bring the other two opposite corners up and over, sealing with egg wash. Sort of like a chubby bowtie.

IMG_4220.jpg
IMG_4221.jpg

Remember - puff doesn’t have to rise before baking, whereas with the croissant dough version, give it a 45-50 minute (give or take) rise. I topped the shaped/risen croissant version of oranais with an additional blob of pastry cream and some peach jam in the hopes of keeping the corners together during their time in the oven.

IMG_4225.JPG

Bake at 400ºF for about 20-25 minutes until the pastry is golden brown.

Puff result

Puff result

Croissant dough version result

Croissant dough version result

Once out of the oven brush with a vanilla simple syrup or some apricot glaze and let cool.

During the bake there was definitely more slipping and sliding of the pastry cream and peach in the croissant dough version. I had to keep pushing the peach rounds back onto the dough in my attempts at keeping things together.

As for the taste test (the best part, especially for Mr. Steve), we actually preferred the puff version. The flaky pastry and creamy, peachy combo was oh so delicious.

Of course, the croissant version was pretty good as well. After all, anything made with croissant dough is usually a winner.

Bottom line - going forward I’ll be making my oranais with puff. Yes indeed!

Blueberry tart with peach ice cream

IMG_4202.jpg

Even though autumn is creeping up on us, we’re still enjoying blueberry season, and it’s time for a straight forward blueberry tart. This one is based on the “Double Blueberry Tart” recipe in Food52’s “Genius Desserts” - a book I purchased a couple of months ago and find so enjoyable and illuminating. Not only does it offer so many great recipes but also tips and tricks from a number of talented baking and pastry professionals.

What better to pair with the tart but peach ice cream made with our delicious local west Michigan grown peaches. A match made in heaven.

For my crust I made an oat/whole wheat version of a basic pâte brisée using the food processor method. This makes plenty for two 9” tarts.

I rolled out my chilled dough and lined my 240 mm open tart ring. I can do this ahead and hold it in the freezer for a day or two before filling and baking. Love planning ahead!

IMG_4188.jpg

The idea here is to have a jammy baked berry filling that is ultimately topped with fresh blueberries. Double whammy delight!

Heat the oven to 400ºF.

I learned this tip from my mom years ago - sprinkle a mix of equal parts flour and sugar on the bottom of the unbaked crust. It helps protect it from soggy-ness. Gotta love it.

Stir together 75 g turbinado or blond cane sugar (I use Moreno), 2 tablespoons all purpose flour, a few grates of fresh nutmeg, a large pinch of cinnamon and 1/2 teaspoon coriander. Place a scant 3 cups fresh blueberries into the lined tart shell and sprinkle the sugar mixture over them. Dot with butter.

IMG_4233.jpg

Bake for about an hour until the crust is nicely browned and the berries bubbly. Ooooh - like blueberry jam!

IMG_4191.JPG

Once the tart has fully cooled, the only thing left to do is top it with 2 cups fresh blueberries and dust with confectioner’s sugar shortly before serving. Whoo-hoo!

IMG_4197.JPG

Slice it up, top with a scoop of your favorite ice cream (peach in this case) and enjoy this crispy, buttery delectable crust filled with oh-so wonderful Michigan blueberries. You can’t beat it folks!

IMG_4202.JPG


Chocolate caramel cream cheese trifle

IMG_4071.JPG

Here’s a quick look at making a simple trifle. It’s a great way to use up left over components or you can start with freshly made goodies as well. These were put together for a family gathering - transportable and self contained.

Typically a trifle consists of cake cubes (pound, genoise, classic layer or pretty much any kind of cake you’d like to use), an imbibing syrup or fruit sauce to moisten the cake, a creamy layer like pastry cream, whipped mascarpone, lemon curd or chocolate mousse, fruits of choice, or in my case, no fruit at all. I like to include some kind of crunch in the form of cookie crumbs, chopped toasted nuts, crushed nut brittle or caramelized puffed rice for something just a little different. Make your trifle in any size you’d like - a large bowl or individual cups or ramekins. A classic trifle bowl is clear glass and deep so as to show off the layers but anything works!

Remember that Reine de Saba post I wrote awhile back? Well it turns out I had some of the cake in the freezer plus some whipped-cream-lightened cream cheese pastry cream on hand from another project. Since I always have homemade caramel sauce in my fridge and chocolate crunchy crumbs in my freezer, I thought why not create a lovely layered trifle for an easy summer dessert?

The one thing I did make fresh was the caramelized puffed rice - a simple process of stirring together 50 g sugar, 50 g light corn syrup, 25 g unsalted butter and a pinch of salt in a medium saucepan, bringing it to a boil and then stirring in 62 g puffed rice.

Spread the mixture out on a Silpat lined sheet pan and bake in a 375ºF oven for 20 minutes until golden brown. Let it cool then break into shards. Makes plenty!

I used Arrowhead Mills puffed rice (ingredient: puffed brown rice - no sugar, no salt, no fat) and find it perfect for this. Once caramelized, it reminds me of an ever so lightly sweetened version of Sugar Crisp cereal which I used to love as a kid, only much better! I even added some to my morning shredded wheat and berries for that little extra something. Not a bad way to start the day.

Below you see my cream cheese pastry cream, chocolate crunchy cookie crumbs, caramel and slices of Reine de Saba waiting to be crumbled up.

IMG_4068.jpg

In go the chunks of chocolate cake, chocolate crunchy crumbs, a drizzle of caramel and a swirl of pastry cream . . . .

IMG_4069.jpg

. . . . . followed by more cake chunks, crumbs, caramel and a final pastry cream swirl. I added a final dollop of lightened sweetened whipped cream, then into the fridge until ready to serve. These can be assembled several hours ahead or even up to a day (although the chocolate cookie crumbs might get a tad soggy in that case).

I added the caramelized puffed rice on top just before serving to preserve the light crunch.

IMG_4070.jpg

What a pleasing combo of creamy, chocolate-y, crunchy and lightly sweet - not bad at all.

When making your own trifle, particularly when using an imbibing syrup or fruity sauce, it’s fine (and even recommended) to assemble the evening before or the morning of - that gives plenty of time for cake to soften and flavors meld for a delicious finale to your day.

Have fun with it!

Lemon ricotta blueberry tarts

IMG_4129.JPG

It’s definitely blueberry season here in West Michigan - love it! We’ve been deep into it for the past few weeks and they’re still coming. Of course I simply had to create something with these luscious orbs so I turned to some of my favorite base recipes.

IMG_4139.JPG

I love choosing my components and flavor profiles while giving myself plenty of time to make each part, assembling the final result when I’m ready to serve and enjoy. The freezer plays an important roll here folks and is one of the most useful tools in the baking and pastry armamentarium. Hip hip hooray for freezers!

I recently purchased a set of 80 mm square perforated tartlet forms that came with a 6-well silicone mold to create fillings that fit oh so nicely in or atop the tart shell. They’re made by my favorite Italian silicone flexi-mold maker Silikomart. What a cool way to create a composed tart - right up my alley. And let’s not forget - soooo many possibilities.

Of course I’ve been itching to try them out and what better way than creating a blueberry lemon flavor combo to help celebrate our summer’s berry bounty.

IMG_4118.jpg

Perforated tart forms have been available for some years now, the idea being that the tart crust will brown ever so golden-ly since the dough is exposed to more oven heat via the numerous little holes.

For this project I started with a version of pâte sucrée based on a Claudia Fleming recipe from her book “The Last Course”. It’s very reminiscent of a honey graham cracker: cream 227 g (2 sticks/8 ounces) unsalted softened butter with 50 g granulated sugar and 50 g dark brown sugar until smooth; add 84 g (1/4 cup) honey and beat until well blended; in a separate bowl mix together 195 g (1.5 cups) all purpose flour, 125 g (1 cup) whole wheat pastry flour, 1 teaspoon salt, a pinch of cinnamon and some freshly grated nutmeg; add the dry ingredients to the butter/sugar/honey mixture in two additions and blend just until the dough comes together. Wrap in plastic wrap and chill at least an hour before rolling out.

NOTE: this makes more than needed for the six square tarts; the extra dough will be OK wrapped in the fridge for a couple of days (if you have another use for it soon) or in the freezer for several months. If frozen, thaw overnight in the fridge before using.

I lined my square tart forms, blind baked them and filled them with my favorite lemon tart filling á la Jacques Genin, pouring the still warm mixture into the baked shells (note: the baked shells don’t have to cool all the way before adding the lemon filling). Bake at 300ºF for about 10-15 minutes until the filling is set (look for just a hint of jiggle in the center). Let cool and store covered in the fridge for a day if you’re planning on serving them soon or freeze for several days or up to 1-2 weeks. If frozen, you can top with the ricotta custards right out of the freezer (more on that coming up!).

IMG_4121.jpg

It’s all about the components - work on them step-by-step then put it all together for the pièce de resistance!

Now for the lemon ricotta filling (makes plenty for six 80 mm square tarts plus a number of additional flexi-mold shapes of your choice - I did a bunch of ingots which are just waiting in my freezer for the next creation!).

IMG_4122.jpg

Blend 2 cups whole milk ricotta with 150 g (3/4 cup) granulated sugar, 1 tablespoon cornstarch, 1 teaspoon lemon zest (or lemon/lime zest combo), 1 teaspoon vanilla and 3 large eggs. In this case I also blended in 1/4 cup of leftover lemon tart filling to add a bit more tang.

Heat the oven to 325ºF. Fill your chosen flexi-molds and place the mold(s) on a sheet pan. Carefully pour hot water around the base of the molds so as to create a shallow water bath around the molds. Bake about 20 minutes until set.

Remove from the oven, gently lift the flexi-mold(s) and place on a wire grid to cool. Once cool, place the molds in the freezer to firm up, at least 4 hours or overnight.

When ready to assemble, pop the frozen ricotta custards out of the molds and place on top of the lemon filled tarts.

IMG_4123.jpg
IMG_4124.jpg

Once this step is complete, place the assembled tarts in the fridge for several hours to allow the ricotta custards to thaw. The custards will hold their shape in the fridge and be ready for the blueberry topping for serving. Yes!

IMG_4128.jpg

For the blueberry topping: place 2 cups fresh blueberries, 50 g sugar, 2 tablespoons water and the zest of a lemon in a saucepan over medium heat until the berries pop (4-5 minutes). Cook another few minutes to jam-ify a bit, transfer to a clean bowl, stir in a splash of lemon juice and chill. When ready to garnish your tarts, stir in an additional 1 cup fresh blueberries and spoon the topping over the chilled lemon tarts. You’ll have plenty - the leftovers will keep in the fridge in a covered container for 2-3 days (hmmm . . how about on top of your favorite vanilla or berry or peach ice cream?). Sounds deelish.

Et voilà! You are ready to enjoy a delicious summer treat. The combo of the honeyed whole wheat crust, tart and tangy citrus filling, smooth ricotta custard and luscious berries is absolutely stunning!

And yes - Steve gave it a thumbs up!

IMG_4130.JPG

Ooooo - next time how about chocolate pâte sucrée, dark chocolate ganache filling, topped with an orange hazelnut custard and garnished with crunchy hazelnut praline? Sounds like a great autumn/winter project to me!

Les macarons (part 2)

IMG_4114.jpg

Welcome to part 2 of les macarons!

As we continue to look at some of the other versions of les macarons, next up are those of Montmorillon located in the Viennes department in the region of Nouvelle-Aquitaine (previously Aquitaine, Limousin and Poitou-Charente) in central-western France. They are a complete change-up from the classic macaron lisse - rather than the smooth, somewhat glossy, gently rounded cookie with the frilly pied, these are craggy, rustic mounds typically piped in a swirl using a star or channeled type of tip. They sport no particular garnish or sandwich filling and are meant to be enjoyed in their simple glory.

I actually did two different batches of these, the first using a narrower open star type tip with this result - kinda sea urchin like, eh?

IMG_3936.JPG

The process is straight forward, starting with toasting 150 g blanched almond flour for 10-15 minutes in a 300ºF oven (à la Mercotte). Cool the almond flour then blend 100 g granulated sugar with it. Neither processing nor sifting for this one folks!

Then whip 70 g egg whites (a bit over 2 large whites) with 25 g sugar to stiff peaks, add a few drops of almond extract and fold the dry ingredients into the whipped whites. Not bad at all.

Pipe the mixture onto Silpat lined sheet pan(s) using a more narrow open star tip or wider large star tip. Depending on your piped size, you should get a least a couple of dozen cookies out of the recipe. You can easily double the recipe for more!

Let them rest at room temperature for 2 hours.

IMG_4077.jpg

Heat the oven to 375ºF. As soon as you place your pans in the oven reduce the temperature to 350ºF. Bake for 3 minutes then reduce again to 320ºF and bake an additional 15-17 minutes until lightly browned.

IMG_4082.JPG

What a wonderful chew with a great almond flavor and freezing made them even better (which is true of pretty much all macarons if you ask me!).

Eat them au naturel or dip them in some dark chocolate (which, according to Mister Steve, never hurts anything). Yum.

Next up - macaron craquelé au chocolat.

IMG_4003.jpg

Another of Stephane Glacier’s recipes, this chocolate number varies from the classic Mercotte version with the amount of confectioner’s sugar reduced by about a third and the almond flour by half. The egg white/granulated sugar ratio remains the same. In addition there’s a bit of all purpose flour and unsweetened cocoa powder in the mix. All of this makes for a softer, lighter cookie with less chew.

Note: For gluten free baking it shouldn’t be a problem to omit the all purpose flour. You can easily double the amounts below to increase your yield from one half sheet pan to two. Depending on the size you pipe, you should get about 30 sandwiches from a doubled recipe.

Here’s the process (single recipe). Whisk together 75 g confectioner’s sugar, 63 g almond flour, 1/2 tablespoon all purpose flour and 1/2 tablespoon unsweetened cocoa powder.

In a clean mixing bowl using the whisk attachment whip 90 g (about 3 large) room temperature egg whites and a pinch of salt on medium-low until white and foamy. Shower in 25 g granulated sugar and, once incorporated, increase speed to high and whip to stiff peaks.

Fold the dry ingredients into the whipped egg whites in three additions then work the mixture with a spatula or bowl scraper until supple and smooth (think about flowing lava!).

Pipe rounds onto Silpat lined sheet pans and let rest at room temperature for 20 minutes.

IMG_3978.JPG

Meanwhile heat the oven to 335ºF.

Dust with a mix of 1 tablespoon powdered sugar and 1 tablespoon unsweetened cocoa powder and bake about 12 minutes. Cool.

Before the oven

Before the oven

Out of the oven

Out of the oven

While these pictures make things look like dirty snow and it’s difficult to see the surfaces, the after oven cookies are drier with some cracks on top. Notice that these do not form the pied!

For the filling I made a simple chocolate ganache with the addition of some honey. Glacier points out that the honey adds a certain unctuousness to the ganache - he’s absolutely right!

Have 130 g chopped chocolate (60-64% recommended) ready in a heat proof bowl. In a small saucepan bring 150 ml heavy cream and 1 tablespoon honey to a boil, pour it over the chocolate and blend until smooth. Cool it to proper piping consistency.

Match up your macarons size-wise, pipe a dollop of ganache on one half and sandwich ‘em up.

IMG_4001.JPG

These offer a lovely soft texture that marries so nicely with the smooth ganache. And don’t forget - they get even better in the freezer!

IMG_4006.jpg

I’ve only scratched the surface of the macaron world. There are so many variations out there, so do some investigating and testing of your own and have fun! That’s what it’s all about.

Les macarons (part 1)

Raspberry white chocolate macarons à la Mercotte

Raspberry white chocolate macarons à la Mercotte

With all of the hoopla surrounding what folks around the globe recognize as French macarons, those jewel like almond meringue sandwich cookies that are available in oh so many flavors, I felt it was time to look at the process as well as some of the lesser known versions of macarons that have been around certain regions of France for a long time. In addition to my recipe review and web research, I also have to thank Stéphane Glacier for his book, un amour de macaron, as well as Mercotte’s site for reams of info on these treats that don’t show any sign of losing their popularity.

We have macaron de Nancy (a.k.a Lorrain), macaron de Montmorillon (along with a museum) and macaron craquelé just to name a few. Some are a simple single almond cookie without any garnish or sandwich filling while others follow along the lines of the Parisian-style version à la La Durée et Pierre Hermé (known as macaron lisse or smooth).

Macarons de Nancy

Macarons de Nancy

Macarons de Montmorillon version one

Macarons de Montmorillon version one

Macarons de Montmorillon version two

Macarons de Montmorillon version two

Macarons craquelé au chocolat

Macarons craquelé au chocolat

While all of these lovelies are made with basically the same three ingredients (almond flour, sugar and egg whites), the ratios are all slightly different and yield textures ranging from chewy to soft/melt-in-your-mouth, some a bit more dry and some more moist. As I went back and revisited my notes on macaron recipes from pastry school, professional development classes and pastry textbooks, I was reminded again of not only the varying ratios but also different approaches to the process. Sheesh! It becomes rather dizzying after awhile.

I’ve been teaching French macaron classes at Sur La Table in recent months but hadn’t actually made a batch at home for ages (dough is my true love!). I had a bunch of saved egg whites stashed in my fridge as a result of recent egg yolk based custard/pastry cream preparations. I normally use them for my favorite financier tea cake batter, but now it’s macaron time in spades!!

Raspberry white chocolate macarons

Raspberry white chocolate macarons

First up - Mercotte’s recipe which falls into the lisse (or we’ll call it the classic) category. It’s very similar to Le Cordon Bleu’s recipe as well as the one I brought home from a Le Notre class some years ago. A few differences - Mercotte toasts and cools the almond flour first; she places her pan of piped macarons on an empty sheet pan already heated in the oven, whereas Le Notre bakes on room temperature doubled pans; she doesn’t let her piped macarons rest before baking. Say what??

First: Heat the oven to 300ºF. Spread 120 g almond flour on a sheet pan and toast it for 10 minutes. Let it cool then mix it with 220 g confectioners sugar, pulse the combo in a food processor then sift it. Set aside. Leave the oven at 300ºF and place an empty sheet pan in to heat up.

Second: Place 90 g room temperature aged egg whites (I often let mine sit in the fridge for a week or so) along with a couple drops of lemon juice and a pinch of salt in a mixing bowl, whip it until white and foamy, add 25 g granulated sugar and whip to firm peaks.

Third: Fold the dry ingredients into the whites in 3 additions, blending with a bowl scraper or spatula to achieve a lava-like, smooth and glossy mixture that ribbons when you lift and let it fall into the bowl. An option is to add 1/4 to 1/2 teaspoon of powdered coloring of choice. I opted for a couple of teaspoons of raspberry powder, mostly to add a bit of flavor enhancement as opposed to color.

Fourth: Using a 10 mm round tip, pipe them out onto a Silpat lined sheet pan. More raspberry dust for me!

Fifth: Rest at room temperature about 30 minutes (see following notes!) then bake for about 13 minutes.

Here’s where Mercotte veers from the common path of letting the macs sit for awhile to develop a skin - she doesn’t do it!

IMG_3949.JPG

Since I had a couple of sheet pans to bake I decided to pop the first one in without the wait and give the other one a 30 minute or so rest. Lo and behold the rested batch baked more evenly, held their shape better and formed a more precise pied.

Although it may be a little difficult to appreciate, the first image below shows the no-rest batch - a little more spread, not quite the rise and a bit flatter and rougher pied.

No rest batch

No rest batch

This next image is the rested batch which puffed a little higher, held the pied shape better and just seemed to be a nicer bake overall. I think I’ll take the rested approach.

IMG_3952.JPG

I sandwiched these babies with a raspberry white chocolate ganache made with 140 g Guittard white chocolate discs blended with 77 g heavy cream and 63 g raspberry purée that I gelée’d just a touch.

Note to self: dust with raspberry powder AFTER the bake, otherwise the raspberry dust darkens in the oven. Still tastes good though.

IMG_3955.JPG

What I loved about these was their wonderful light chew, nice texture, delicious raspberry flavor and a not-over-the-top sweetness. Truth be told, that’s one of the things that has turned me off from some macarons I’ve had over the years - just TOO sweet for me!

Macarons de Nancy

Macarons de Nancy

Now it’s on to Nancy, the former capital of the duchy of Lorraine in what is now known as the Grand-Est region (previously Alsace, Champagne-Ardenne and Lorraine). They’ve been making macarons there for a looooong time, since the French revolution in the late 18th century. The most well known are Macarons des Soeurs, reportedly created by two nuns, Sisters Marguerite and Marie-Elisabeth. The “real” recipe is still a closely guarded secret, or so they say.

The base recipes I discovered on line and in Glacier’s book are lower in sugar than the lisse version above. They bake flat, have a cracked top with a hint of shine and are deliciously chewy and not too sweet. I like them - a lot.

First: Heat oven to 480ºF - whoa! Line a half sheet pan with silpat.

Second: Sift 100 g blanched almond flour, 100 g confectioner’s sugar and 9 g vanilla sugar and blend together. Set aside.

Third: Whip two room temperature egg whites to soft and supple peaks and blend them into the dry ingredients. Add a few drops of vanilla extract.

Fourth: Pipe rounds onto prepared sheet pan. Brush tops lightly with water and dust with confectioner’s sugar.

Fifth: Place pan in hot oven and immediately turn the temperature down to 300ºF. Bake 15-20 minutes until tops are golden.

It’s that fourth step and into the HOT oven that gives these their top shine and crackle - crispy outside and a lovely chewiness inside makes these so simply wonderful! Enjoy them as is or sandwich ‘em up with your favorite ganache or jammy buttercream. You won’t be sorry, believe you me.

IMG_3934.JPG

Stay tuned for part 2 starring macarons de Montmorillon and macarons craquelé! Can’t wait.

Gâteau Nantais

IMG_4100.JPG

Always on the look out for regional French baked goods, this one came to my attention some months ago thanks to a link to a Washington Post piece (from which the recipe comes) sent by my friend MBT. I’ve had it on my to do list ever since and finally got around to purchasing a bottle of rum, an ingredient that typically doesn’t grab my attention nor my taste buds!. Buuuuutt - desirous of keeping to the classic recipe I simply had to include the rum n’est-ce pas?

The preparation is oh-so straight forward but give yourself a day or two ahead of serving since it’s recommended that you let this rum soaked/glazed cake sit for a day for the flavors to infuse. And be sure you have SALTED butter on hand, an absolute when baking anything even remotely associated with Brittany. While present day Nantes is located in the Pays de la Loire region, it was once the capital of Brittany and home to les Ducs de Bretagne. Those Bretons do love their butter.

There are three components: rum simple syrup, almond sponge cake and confectioner’s sugar glaze.

Make the syrup: Heat 75 g granulated sugar with 155 ml water over low-medium heat in a small saucepan. Stir occasionally to dissolve the sugar then increase to high and bring to a boil. Remove from the heat, cool then add 3 tablespoons dark rum. This can be made several days ahead and held in the fridge. The recipe makes plenty for one cake and any leftover will keep in the fridge for weeks as any simple syrup will.

Make the cake: Heat the oven to 350ºF. Butter an 8” springform pan, line the bottom with a round of parchment then butter the parchment.
Place 125 g salted butter and 150 g granulated sugar in the bowl of a stand mixer (or use an electric handheld mixer) and beat with the paddle on medium low until creamy. Add 125 g almond flour and beat to incorporate. In a separate bowl lightly beat 3 large eggs and add them to the batter in three or four additions, blending well after each addition. Add 40 g all purpose flour and 3 tablespoons of rum and beat on medium to create a smooth batter.
Spread the batter evenly in the prepared pan.

IMG_4088.JPG

Bake 40-45 minutes until set in the center and beginning to pull away from the sides of the pan.

IMG_4090.JPG

Once out of the oven, loosen the pan, turn the cake out onto a cooling rack, remove the bottom parchment than flip right side up onto another cooling rack set over a sheet pan. Brush the warm cake generously with about half of the rum syrup.

IMG_4091.jpg

Once the cake has cooled completely give it another decent brushing of rum syrup.

For the glaze: mix 100 g confectioner’s sugar with 1 tablespoon rum and add small amounts of water until you have a glaze that will drizzle and spread smoothly. You can spread it on top only, as I did, or let it drip down the sides - it’s up to you.

IMG_4095.JPG

Now it’s ready to cover and let sit for a day. Steve and I behaved ourselves and waited the requisite time frame before diving in for a taste.

IMG_4099.JPG
IMG_4100.JPG
IMG_4101.JPG

To our delight, the rum essence was not at all overpowering and the cake offered a pleasing density, moistness and all around lovely taste. My one regret is that I didn’t avoid the top-of-the-cake grid marks from the cooling rack but that certainly didn’t detract from the overall enjoyment. One small slice is all it takes to comprehend le gâteau Nantais. Now we just have to visit Nantes and enjoy a slice! Maybe we’ll see you there?

IMG_4103.JPG