Not your mother's (or grandmother's) cherry pie: free form cherry puff pastry tart

6B3CBB64-6FEB-4983-A3D7-B1EAF59FB71B.jpg

Yum yum yum. On the heels of the mille-feuille that I recently posted on, I came up with a free form cherry tart for cousin Melissa’s husband Jeff’s 60th birthday. I had rough puff and my last bag of Michigan sour cherries from summer 2020 in the freezer. What better way to use them than to create a spur-of-the-moment dessert!

DD3DF47B-861A-4C0A-9E9E-2A2FCA615452.jpeg

I let my generous 2 cups of cherries (~350 g) thaw at room temperature for an hour or two then put them in a medium saucepan along with 100 g / 1/2 cup cane sugar and a pinch of salt. I opted for a few grates of fresh nutmeg, 1/2 teaspoon ground coriander too. Heat on low, with occasional stirring, until the cherries release some juice and the sugar dissolves. Blend a tablespoon lemon juice with 2 tablespoons cornstarch and stir it into the cherry/sugar mix. Bring to a boil then cook for several minutes until thickened. Add a splash of vanilla or almond extract if you like and let it cool. You can prep the cherry filling a day or 2 ahead and hold it in the fridge until baking time. Just look at these jewels!

1DE3C61D-E679-4FD4-9798-AA0F452092A9.jpg

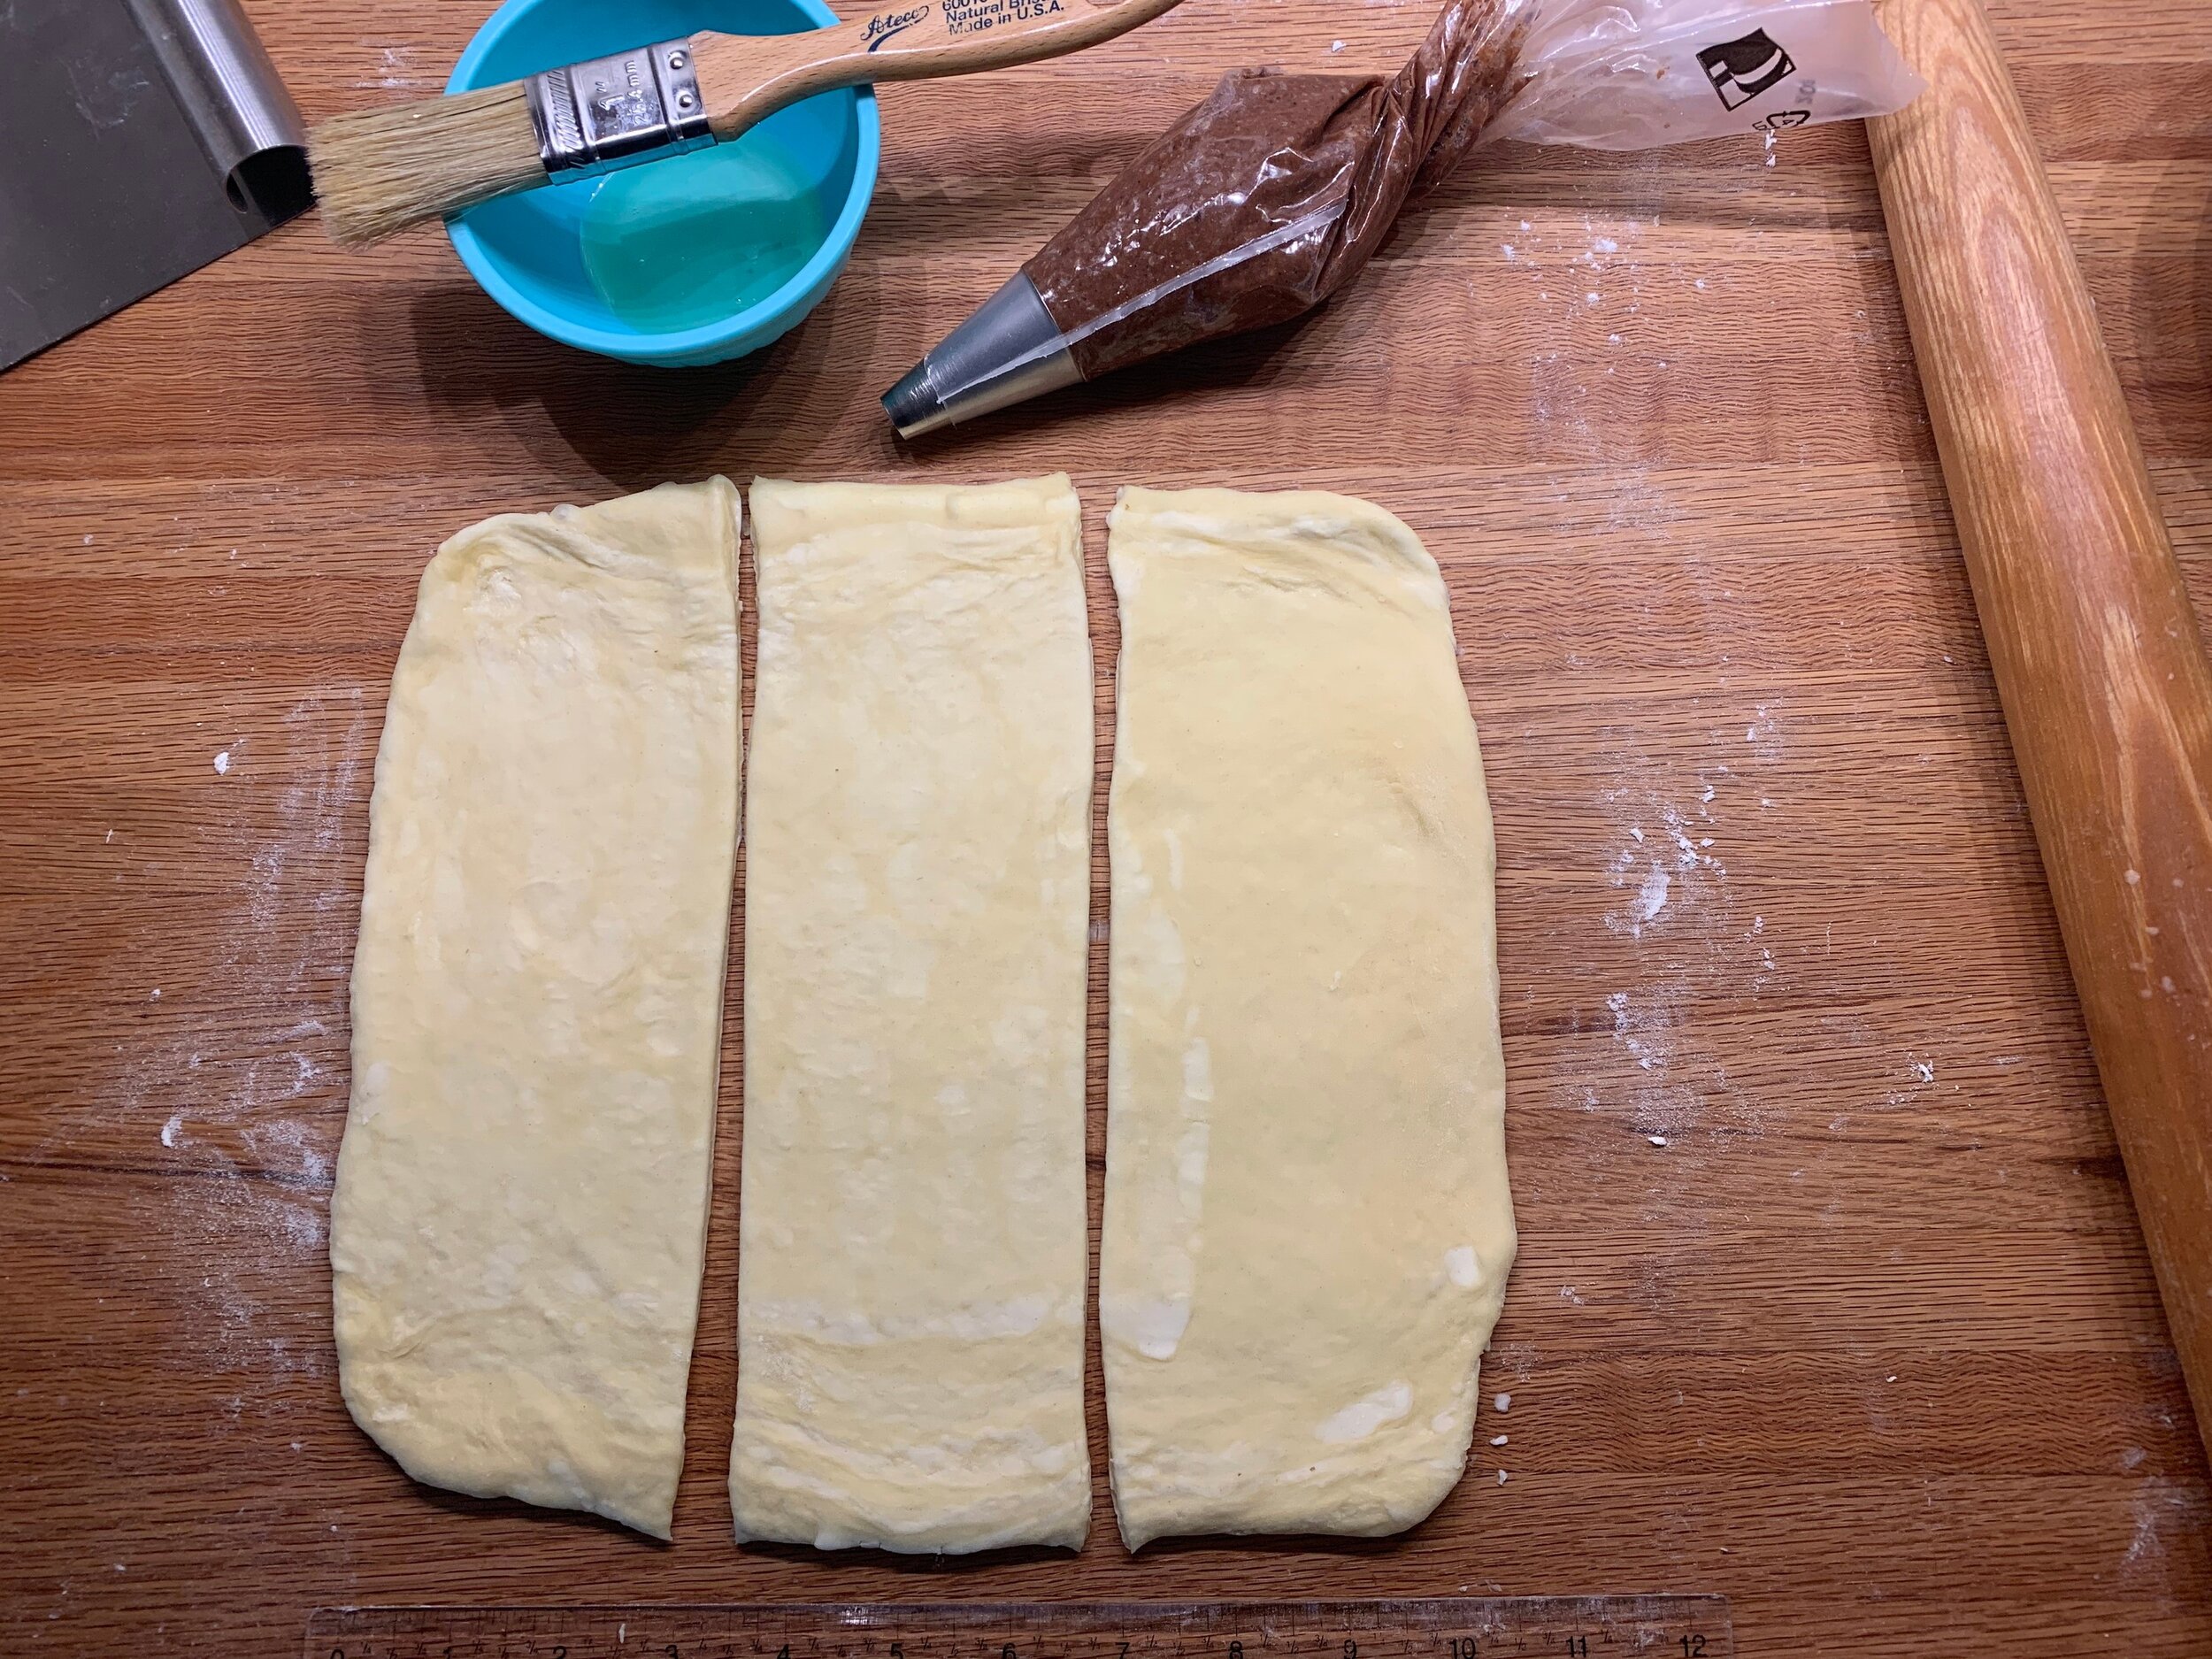
The beauty of a free form tart is being able to make any size or shape your little heart desires. For this one I used about 300 g of puff, rolled it out to a 6-ish by 13-ish rectangle and put it on a parchment lined sheet pan. I then cut ~1/2” wide strips from each border and “glued” them around the edges with a brush of egg white. I had some scraps from which I cut small diamonds and spaced those along the edges too. Those touches give a bit of a border for the end result.

You can go even more decoratively as I did for this small savory tart some years back. Make it your own!

freeformpufftart.jpg

Brush the puff with egg white or wash, add a sprinkle of vanilla sugar over the dough and freeze the puff while heating your oven (helps keep down shrinkage), then bake fully at 400ºF for about 20-25 minutes until golden toasty brown (reduce oven heat as needed). I overturn a wire grid across the sheet pan to keep the rise even.

Reduce the oven temp to 325ºF. Let the pastry cool 5-10 minutes (so you don’t burn your fingers), gently push down the puffed center and layer the already cooked filling over the dough. I had just enough cherries for a single layer. Return to the oven for about 20-25 minutes to warm and set the filling a bit more.

7103DB85-40AA-481E-B885-9E3668DFBDF7.jpg

I had frozen a bunch of leftover baked puff scraps from the mille-feuille project so I crushed/cut a bunch of those up to use as a rustic topping.

1DE3C61D-E679-4FD4-9798-AA0F452092A9.jpg
2B8D7701-73E1-4F60-BB09-6E01F7C8D341.jpg
A49EF8C4-C587-4C4B-A458-1B2BC8B62A78.jpeg

A drizzle of caramel to top it off plus a dusting of powdered sugar before serving. Ohhh . . . . the tartness of the cherries with just the right hint of sweetness and spice. Love it!

It’s great au naturel but a scoop of vanilla ice cream wouldn’t hurt a thing. Your choice.

6B3CBB64-6FEB-4983-A3D7-B1EAF59FB71B.jpg

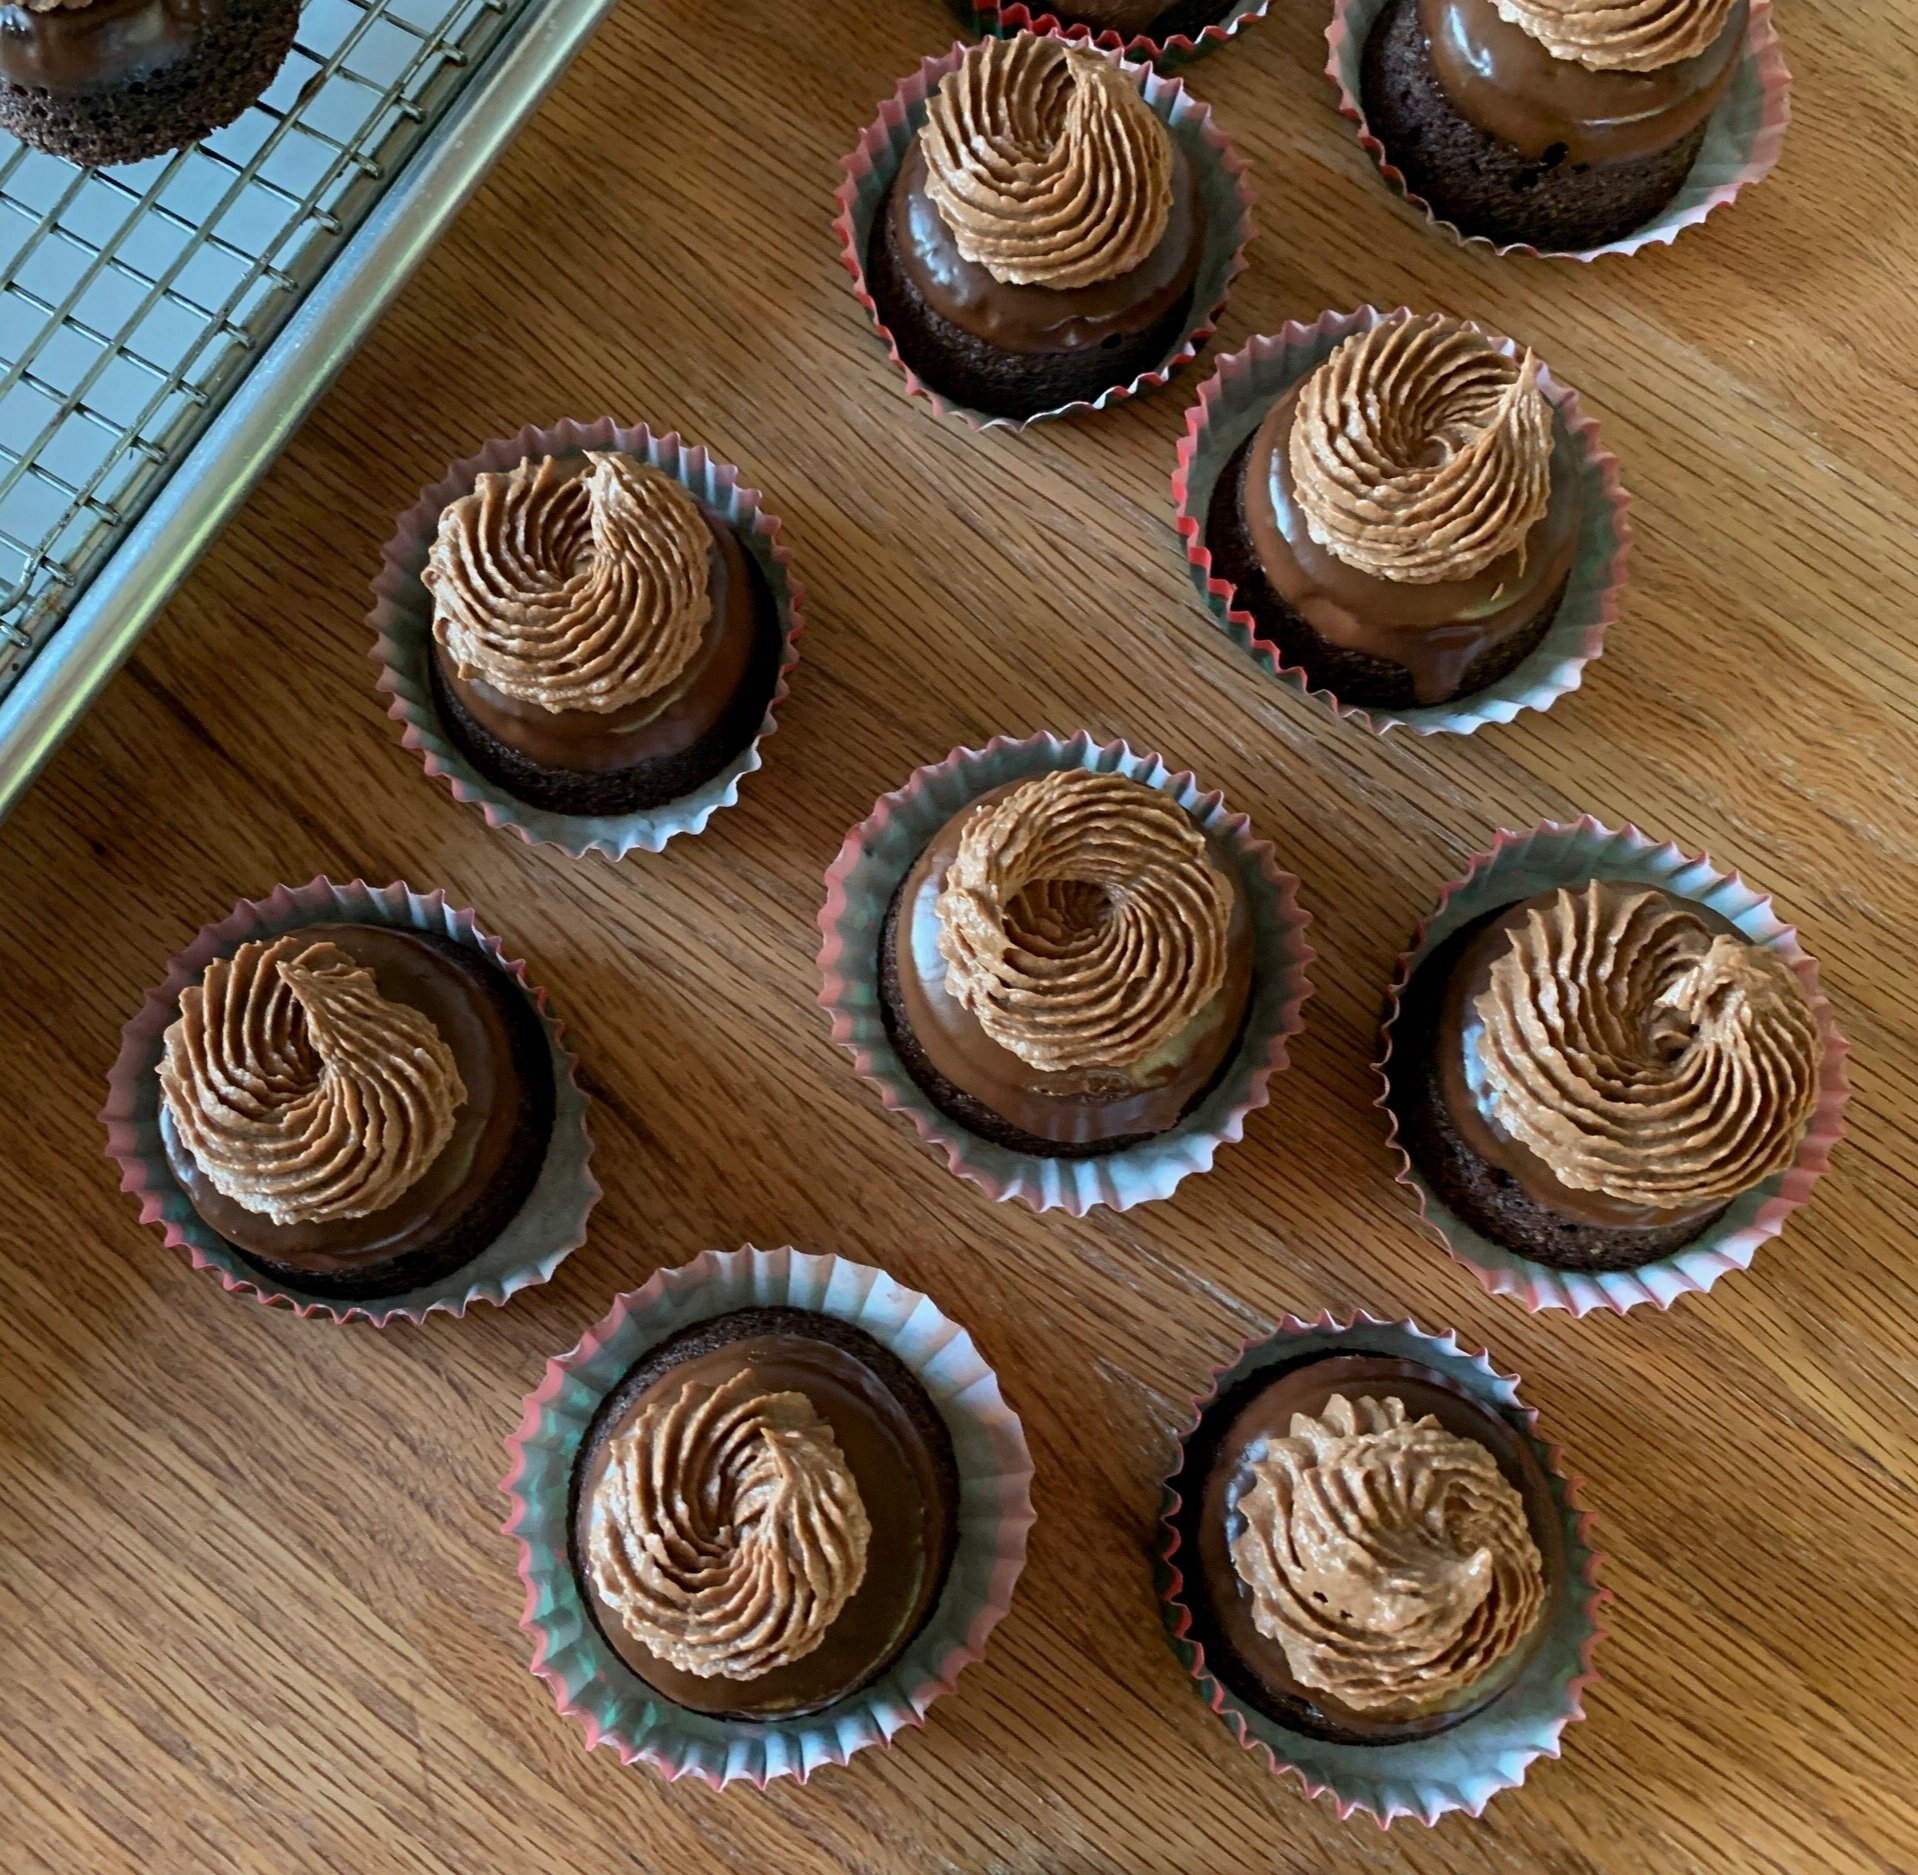
I saved some of the cherry syrup from the filling and used it to make a batch of cherry Swiss meringue buttercream which is currently residing in my freezer. Hmmm . . . I wonder what I’ll create with that! Time will tell.

Keep moving, stay safe, everything in moderation and enjoy spring wherever you are.

Danish almond braids

1977E852-2388-46B1-BCCB-834C943537D7.jpg
637069C3-6987-4CE8-8AD2-538066C5AE95.jpg

It’s time for more Danish dough fun!

After I posted on Danish Kringle last spring, I knew I would return to this laminated dough and the wonderful things that can be made with it. I’ve been spending more time with Beatrice Ojakangas’ book “The Great Scandinavian Baking Book” (let’s call it TGSBB) and continue to be amazed at the array of dough and almond filling recipes she presents. Whoa.

I made two versions for this project so as to compare recipes from Ojakangas (BO) and one from Melissa Weller’s (MW) recently published book “A Good Bake”. She refers to it as her “laminated babka dough”. Their recipes are similar to mine although with variations in the amounts of sugar, egg and butter as well as how much butter is used in both the dough and the butter block. So many options in the baking world!

Here’s one of my favorite ways to compare recipes - hand written columns to show you just a few of the differences one might discover when researching different Danish (or any!) recipes. You see my recipe vs. the other two as well as the adjustments I made to those two noted in (parentheses). You can use the same mixing/kneading approach for all three - just look here. Each recipe is enough for two braids.

1433E2FC-9297-4D97-A7C1-1E21B8F690DC.jpg
Almond braid No. 1 (BO)

Almond braid No. 1 (BO)

Almond braid No. 2 (MW)

Almond braid No. 2 (MW)

Before we delve into the braid steps let’s talk briefly about almond paste. In my recent post on Bakewell tart, I mentioned frangipane and almond cream as commonly used fillings for baked fruit/jam/almond tarts. But almond paste is a biggie when it comes to making fillings for many pastries, particularly in Scandinavia and The Netherlands.

You may see the terms almond paste and marzipan mentioned in various recipes, some of which use the terms interchangeably. Technically they aren’t the same. Typically paste is at least equal parts ground almonds and sugar, with higher quality pastes (my preference) having an even higher percentage of almonds (e.g 66% almonds to 34% sugar). Marzipan is more often used for modeling and molding, available in an array of colors (or create your own), and is generally higher in sugar (e.g. 33% almonds to 67% sugar).

BB30E044-98A9-42A6-9710-D57D9BC6DE10.jpg

I’ve been using Mandelin premium almond paste for a while now (they have several “levels” of paste which are well described on their site). I’ve also been buying my blanched almond flour and sliced almonds from them too. Great stuff.

For the almond filling (enough for two braids) cream 56 g soft unsalted butter with 100 g confectioners sugar; blend in 1 teaspoon almond extract (I reduce that to 1/4 teaspoon since my premium almond paste has some bitter almond extract in it already), 100 g almond flour (or finely ground almonds), 85 g almond paste and 1 large egg white until smooth.

The process of forming this braid (not a real braid, truth be told) is what I find so pleasing - it speaks to my simple artistic bent and is so satisfying once completed. The braid in the following images is with MW’s dough.

Start with about 600 g of your finished laminated Danish dough and roll it out to a rectangle of about 9”x 15”. Have your filling ready to go.

D7296593-FACB-43D7-A6A1-CAE6DFCC2AF4.jpg

As seen in the image above, make light marks (don’t cut!) along the length to create three sections then cut the two outer sections at 45º angles about every inch or so. I find using 2 bench scrapers works well so you can match the cuts up as you work your way down. Cool!

The almond filling goes right down the center. Remember you’re using a half recipe per braid. Here’s a tip - place the filling in a rough log shape in plastic wrap, use a rolling pin to lightly compress and shape it to the size of the dough center, keeping it in the plastic. Then gently turn it out of the wrap right onto the dough center. That way you don’t have to spread the filling directly on the dough and risk some smooshing of the laminated layers beneath. Call me crazy!

F2230CBE-E750-4489-A176-D2666EC11B13.jpg

Now start folding the strips across the center, alternating sides, to create a faux braid until you reach the bottom. Tuck the ends under.

Almost there!

Almost there!

Got it!

Got it!

Place the shaped pastry on a parchment lined sheet pan. Cover lightly with plastic wrap and let proof about 60 minutes until puffy. It won’t double but you should appreciate more prominence of the layers.

Just for comparison here’s an image of my first go at this with my version of BO’s recipe. I used a fluted pastry wheel to cut the sides to give it that certain je ne sais quoi, but my fold over pieces weren’t all quite long enough as I reached the end. That experience helped me pay closer attention to my cuts/strip lengths for the MW version.

CFA98446-E585-4D22-8BAE-7434B2CA31E7.jpg

While proofing, heat the oven to 350ºF (Weller’s version). I generally leave my baking stone on the bottom rack of my oven. Even if I’m not baking directly on it, I feel it helps keep the oven temp more even.

Egg wash, sprinkle sliced almonds and raw sugar or crushed raw sugar cubes on top, place on a second sheet pan (helps to protect the bottom from burning) then onto the center rack and bake about 30-40 minutes until nicely browned.

1E56797E-EB12-406F-8AD5-1B8BF089CC4C.jpg
657E865F-C24A-4DAD-BEC2-C0DDBA508643.jpg

For BO’s version heat the oven to 400ºF and bake about 15-20 minutes. Below is the baked version of BO’s - you can see how the fold over pieces pulled away, particularly at one end, exposing the filling. Still tasted good!

Let’s taste! Slicing into BO’s version, there’s a hint of doughiness to the bottom layers. The almond filling is deelish, although, in spite of the lovely flaky, golden and crisp exterior, Steve and I thought the pastry seemed a bit on the dry side and needed a touch more salt to punch up the flavor. The laminated layers are clearly seen (this one went through two 4-folds).

BO version

BO version

For MW’s version there was no doughiness at all to the bottom, and the top laminated layers look pretty good (this one went through only two 3-folds). The flavor of the pastry married with the almond-y filling is wonderful!! A big thumbs up.

MW version

MW version

Based on this project, I’ve tweaked my base recipe (NOTE the links above are for this tweaked recipe): hike up the sugar to 90 g, increase the butter in the dough to 113 g and make my butter block 227 g for a total butter of 340 g all told. I’ll stick with two 4-folds for my laminating for now but will most likely play with that too from batch to batch. The almond filling is a keeper for sure!

In the meantime stay healthy, remain prudent and enjoy spring! Aaahh, so beautiful.

EA093B08-6F52-4531-BC98-08910A35B795.jpg


Mille-feuille aux fraises

B6313D36-DA81-4EFE-813D-0CE12676FA61.jpg

It’s great fun to revisit a classic every now and then. It takes me back to 2006-7 to those pastry school/stage days in Paris. Chef Pascal of Pâtisserie Pascal Pinaud in the 5th arr. would offer a lemon-raspberry version only on Sundays as a special weekend treat. It’s best eaten soon after being assembled so it’s not one of those goodies that can linger in the pastry case for a few days. You want that puff flaky and fresh!!

Mille-feuille (often referred to as vanilla slice in Britain and Napoleon in the US) is truly one of those classics. Crispy, buttery, flaky pâte feuilletée layered with vanilla crème pâtissière is the usual combo but one has the option to change up the cream flavor or switch to something like a light whipped ganache or whipped mascarpone cream and add fresh fruit into the mix. Think chocolate raspberry or coconut mango and you’re off to the races to create your own version.

My project came about as the result of a request for a strawberry vanilla option for a small birthday gathering. Being pleased to accept, I opted for a crème légère au vanille (essentially pastry cream with a bit of gelatin to set and whipped cream to lighten). I had puff pastry in my freezer and kept a keen eye out at various markets around town for decent looking strawberries as the day approached.

731C61B7-B211-4B6F-B684-1E569ACD0841.jpg

If you aren’t up for making your own puff (rough or quick puff can also be used here), you can find decent all butter versions in most frozen food sections of well stocked grocery stores. Dufour is a popular brand.

The beauty of creating this dessert is the make-ahead-ability of the components. I baked my puff and cut my ~2”x4” rectangles 1-2 days ahead, then held them layered between parchment paper in the freezer until the day of assembly. I made the cream a day ahead as well. On assembly day it’s a matter of prepping fruit and having your puff layers and cream at the ready. It’s all about being organized. Not bad at all!

A few tips when working with puff: always work cool; roll the dough out close to your desired size then give the dough a “lift and fluff” to help it relax. Cover with plastic wrap and give it a 10 minute rest (at room temp if your kitchen is cool otherwise in the fridge) before a final roll out to desired size. Then place on a parchment lined sheet pan and pop into the freezer while you heat your oven. That helps relax the dough and reduce the amount of shrinkage that might occur during the bake.

palmierrollout.jpg

For mille-feuille I recommend baking puff in larger sheets and then cut to your desired sizes - that compensates for some shrinkage of the dough during baking and gives you the ability to cut neat edges. That also gives you the option to cut longer strips to stack that will then be cut into individual portions vs. cutting individual rectangles like I did.

I used about a pound / 454 g of puff rolled a scant 1/4” thick for a half sheet pan, baked two of those and had plenty for some test cases and tasting. Yup.

B8F1816D-482A-4A61-96CC-99FF074106BB.jpeg

I typically bake my puff at 425ºF to start. Most recipes you might see for millefeuille instruct you to place a layer of parchment paper or foil on the chilled rolled out puff and top it with another sheet pan or two to weight it and prevent it from rising too much in the oven. I’ve even added a couple of loaf pans on top to add to the weight, but . . . . . . . . .

I’m here to tell you that even with those measures, the puff will puff anyway! Since I want it nicely browned, I weigh it down for the first 10-15 minutes, pull off the extra sheet pan and parchment (or foil) and continue to bake with a wire cooling grid overturned across the sheet pan to allow the puff to bake/puff more evenly. It needs at least another 10-15 minutes to reach a beautiful golden brown-ess (which is difficult to achieve when it’s covered with foil). Don’t forget to keep an eye on it and turn the oven down as needed.

Once cool I gently press it down to flatten as I cut my rectangles. It works!

Then it’s a simple matter of matching up three pieces that seem to stack nicely together and identifying the one you prefer to be the top. In my case, since I decided to dust the tops, their surface appearance didn’t really matter. Some will coat their chosen top pieces with confectioner’s sugar and pop ‘em under the broiler to caramelize for a nice sheen.

I went for simple piped rounds of pastry cream and dusted them with freeze dried strawberry powder to add an additional hint of strawberry flavor.

14CE98F6-72A1-473F-BFBE-70DB0C349F82.jpeg

I was fortunate to find fairly decent strawberries at one our our local grocers, sliced ‘em up and coated them with a bit of strawberry jam for another flavor booster.

Let the layering begin. Puff/cream/strawberries/puff/cream/strawberries/puff. That’s it.

14CE98F6-72A1-473F-BFBE-70DB0C349F82.jpeg

For the top layer pieces I made a simple template so I could dust them with confectioner’s sugar then lines of strawberry powder. I buy freeze dried strawberries at Trader Joe’s and crush/sift them over whatever I want to dust.

B2B1F227-45AB-4210-8C45-0A105C9EDAB6.jpeg
2DDA6611-30B3-448B-8BEF-9CAC0DD76AD7.jpeg

Of course I made some test portions so Steve and I could give them a try. Yum! I even let one sit in the fridge for a day just to see how it would handle that down time. Not bad at all!!! The puff still had some crispy flakiness and the flavor remained delicious.

BCD5A579-484E-4A7E-B9F1-EBD5D99A2726.jpeg

Now that spring is pretty much here, start thinking about your own version of millefeuille. So many options. You can do it!

Meanwhile, Steve and I look forward to our second vaccine dose in a handful of days and . . . . . . my tulips are coming up!!! Yay!!

4CED9D9E-1D4E-41AB-AA89-1FDAA9962D7B.jpeg

Cherry almond Bakewell tartelettes

C2BBB01E-CAE0-4B10-9E6D-82D4F8E19828.jpeg

Let me just say that there’s nothing like the satisfaction of making a stellar tart. Just the right well baked, crisp and golden crust, the beautiful marriage of fruit with almond cream and a tempting garnish of toasted nuts. Mmmmmm!

Anything with almonds (or nuts in general) is a winner in my book. There are various almond based fillings that one may come across in the baking and pastry world, particularly in Scandinavia, Britain and Northern Europe. Many regions of the globe have their own love affair with almonds and the goods you can create with them.

The terms frangipane and almond cream (crème de amandes en Français) are often used interchangeably but, depending on where you are, they might mean slightly different things. In my Parisian schooling we were taught that frangipane is actually a blend of crème d’amandes and crème pâtissière (used for example in galettes des roi), whereas the term in Britain and Italy (and I’m sure many other countries) refers to what the French call crème d’amandes on its own.

Both will work nicely when making fruit or jam almond tarts, although more typically it’s crème d’amandes that fills the bill (or the tart shell - ha!).

51349C67-2871-4013-9C81-A033CD1B148D.jpg

Of course there are beaucoup des tartes one might create - anything from chocolate ganache to zesty, pucker-y lemon-lime as well as the classic almond cream/fruit combos that one sees in most pâtisseries In Paris and beyond. Think pear, fig/raspberry, plum (the mirabelle is a favorite), cherry, apricot or essentially any fruit or combo thereof you might imagine. So many tarts, so little time!

I usually bake tarts, whether large or small, in smooth edged open tart rings. The absence of a metal base allows for more thorough baking of the crust which is better exposed to the oven heat. Plus I like the simplicity of the straight sided, smooth finished tart. It speaks to me.

Buuuut . . . . . If I’m in the mood for a fluted edge, I have the option of removable bottom tart forms vs. solid bottom versions, in which case, depending on the filling, blind baking may come into play. While I love small brioche type tins for tarts, a well baked bottom can be elusive unless you blind bake first then fill and bake to finish.

News flash! I’ve had a Eureka moment in preparation for this post - the oven stone - yay! Prior to this recent discovery, my tendency was to use the open rings or remove the bottom of the fluted pans so as to be sure that my bottom crust baked thoroughly. My experience has shown, particularly with the almond fruit type tarts, that led to a successful bake. Can’t have a soggy bottom now, can we.

B69559DC-5F46-42AF-8535-619F7A0D9C21.jpg

The Bakewell tart is generally associated with England and the town of Bakewell in Derbyshire. Many say it’s a variation on the Bakewell pudding which has more of a jam/custard filling baked in puff pastry or a bottom sponge type cake. The tart version is typically made with an all butter short crust (as the Brits would say) and a jam/almond cream filling. Many recipes use raspberry jam but I decided on cherry from my favorite jam maker Bonne Maman.

I intentionally approached this one to see how well my pâte sucrée would bake in both closed bottom brioche tins and open tart rings. For my first go, I lined my forms and assembled the tarts with a dollop of jam in the bottom and almond cream piped over it. Don’t overfill since the almond cream does puff up during baking.

I baked them on my heated baking stone on which I had also heated a second sheet pan, thinking this would give even better heat transference. Ahhhh . . . . not so.

58D0F830-9B1E-495A-9108-D063FBE9016D.jpg

After a 20-25 minute bake at 325ºF (convection), the almond cream was set and lightly golden and the crust edges looked browned.

B33CA05E-65EB-49D5-8CF6-732E2FE7AACF.jpg

The bottom crust of the open ringed tarts was nicely browned, however, the solid bottom brioche tin tart bottoms were not baked all the way through (take my word for it). Fortunately I removed them from the tins and popped them back into the oven, baking another 5-10 minutes for well baked bottoms.

A confectioner’s sugar glaze, a ring of lightly candied sliced almonds and some tart dried cherry bits in the center finished them off.

EB4F7AED-280E-4804-998E-65589D847E05.jpeg

I have one word for you - delicious. While I thought the glaze was too sweet for our tastes (I admit I put it on a bit too thick), this is one stellar tart. Just the right marriage of jam and almond goodness; and the crunch of the candied almonds gives it that wonderful textural contrast.

6D4446FE-681A-4B01-B31B-7EF12A0458AD.jpg

But wait! Not quite finished. My results pushed me to give it one more go. This time I blind baked both an open ringed crust and a closed bottom brioche tin crust. Once cooled, I panned those up with non-blind baked versions. The assembly and baking were the same with one exception - I ditched the second baking sheet and put my sheet pan directly on the heated baking stone.

Here are the results. The blind baked crusts on the left are a bit browner but the other two look pretty darn good too.

CF47BCB7-D018-408D-A5B7-B1A81A6E1EA3.jpeg

And check out the bottoms! Not bad at all - no barely baked bottoms here.

5E76E66D-4C2A-4AEE-B444-EBC613289D8F.jpeg

This time I lightened up my glaze, giving two of the tarts just a light brushing. For a bit of visual comparison the other two got a light dusting of powdered sugar. I stuck the candied almonds around the edges with a bit of glaze et voilà! Steve and I liked these just as much as the first batch.

The lesson: no need for a second sheet pan heated on the stone - it actually seems to have reduced the heat transference, leaving my brioche tin crusts under baked.

The second batch benefited from the consistent heat coming from the baking stone allowing for excellent browning even without first blind baking. Yippee!

One quick note: in general, when baking a tart with a very loose or liquid-y filling, I typically blind bake first. The oven stone may change that perhaps?? We’ll see.

1B975BAF-2A2D-4232-A2B4-F9C3BA078AC9.jpg

I’ll leave you with a final wintry scene looking out our front door. That’s our metal sculpture, Clarence the praying mantis, peeking out of the snow.

Be safe, remain steady and let’s make it to spring in good shape!

4233F6A0-C443-4480-A2F9-3D67A18E20C6.jpeg

More fun with croissant dough - berry flan buns and bourbon glazed pecan spirals

FF561A7A-8D28-41AD-A160-D35006742333.jpeg

I typically have croissant dough in my freezer just waiting to be formed into something delicious. As it turns out, I had a couple of batches that needed to be used for fear that they would soon be over-the-hill soooooo . . . . .

I baked one batch as standard croissants destined for the ever popular twice baked croissant aux amandes.

Freshly baked all butter croissant

Freshly baked all butter croissant

Twice baked croissant aux amandes

Twice baked croissant aux amandes

I divided the other batch in half with two goals in mind - flan buns and pecan spirals. First up - Kouign-amann style berry flan buns. Many of you know about this caramel-y, layered Breton specialty that continues to be very popular in the US. There are specific recipes for K-a dough that differ somewhat from croissant dough, buuuuuuut - you can use croissant dough too! As a matter of fact, it was Chef Xavier Cotte at Le Cordon Bleu Paris who demo’ed Kouign-amann to our class using croissant dough all those years ago. What a treat that was.

Did you realize that Kouign-amann was the subject of the very first post I wrote for this blog back in the fall of 2014! Wow, how time flies.

While I use muffin tins, individual cake pans and ring molds to bake the various twists, spirals and twirls that I make with croissant dough, I love making these in buttered and sugared ring molds. I find they brown much better in the open rings. These are 80 mm (3 inches) in diameter and 2.54 cm (1 inch) high, taller than the usual open tart rings I use for tart making. They’re perfect for this use as well as for other pastries like the aforementioned spirals, twists or twirls.

062F9859-37EA-4ED3-BB29-091018B79E5C.jpeg

For a half batch of dough I go for a yield of 9 pastries, rolling the dough out (on a sugared rather than floured surface) to a 12” x 12” square, then cutting nine 4” x 4” pieces. Do your best to keep the corners square, although a little curve never hurt a thing. As you roll, flip the dough from front to back, sprinkling more sugar on as you go. Don’t be shy.

4E2C31FD-0CC5-494A-8187-4FE24A094B5A.jpg
428A26EA-F78E-44B2-8CA2-AB18C838998B.jpg

Now simply fold the corners of each piece up, kind of pleating the sides, and set the dough into the buttered/sugared rings. Easy-peasy!

48832A33-7C53-4030-92D3-7E24059F3CB5.jpg

Cover lightly with plastic wrap and give them a 45-60 minute rise - you should see more definition of layers and a general pouffy-ness. Meanwhile heat the oven to 375ºF.

You can bake these au naturel, but here I piped a blob of pastry cream into the center (hence the “flan” label), added some blueberries/raspberries and topped with another blob of cream and a sprinkle of raw sugar. I usually have berries in the freezer and add them frozen to avoid the mushiness and wateriness that happens if they’re thawed first (don’t do it!). It’s also helpful that frozen raspberries are easy to break up into smaller pieces for placement in a smallish space.

Sheesh! I forgot to grab a pic after assembly so shot a quick one after going into the oven. Kind of a cool perspective.

6F8D5FC4-F4F9-40D2-822E-ABB033EA9A5F.jpg

Bake about 20-25 minutes until the pastry is golden and the cream set. Once out of the oven I leave them on the sheet pan but gently lift off the rings - they come off much more easily when still warm, before the caramel-y sugar cools.

A4699DAA-6168-491C-98E8-9B680E42D70E.jpeg

They’re deelish still slightly warm, but you can also finish cooling them on a wire rack and enjoy the same day.

You can freeze them too. If you do, plan for a treat with morning coffee by heating your oven to 325ºF, take them right out of the freezer, place on a parchment lined sheet pan and thaw/warm for about 15 minutes. If they’re still a bit cool inside, give them another 5 minutes or so. You be the judge.

B62027F8-23B0-4337-9D5D-1BCFF963DB58.jpg

Next up - crackly glazed pecan spirals.

21872DD6-8FC4-4F6B-9033-1AA771EE47F3.jpg

I’ve previously posted a version similar to this using laminated brioche dough, but here I’m using a slightly different filling and opted for a bourbon butter glaze like the one I used on pound cake a while back. I won’t spend a lot of time on this but just want to share it with you.

For a half batch of croissant dough I’m going for 8 or 9 pastries - just depends on how things roll out.

For the filling blend 28 g/ 2 tablespoons soft unsalted butter with 70 g brown sugar (light or dark, either way). Add a generous teaspoon of spices if you wish - cinnamon or a mixture of your favorites like coriander, cardamom, cinnamon and ginger.

Roll the dough to about a 10”x10” square, spread the filling over it, top it with finely chopped pecans (eyeball it) or your own favorite nut, then roll it up into a log. Cut ~3 cm slices and place them in the center of buttered and sugared rings. You might notice below that I have wrapped two shallower rings together with foil. Since my flan buns were occupying my higher rings, I created my own!

F3180075-E06A-4F70-8A63-246E7946C2B1.jpg

Cover lightly with plastic wrap and let rise about an hour. I hope you can appreciate in the image below the increase in fullness of the dough compared to above.

8D130DE2-1E89-4A52-9903-EA13286C8B88.jpeg

Bake at 375ºF for about 20-25 minutes until golden brown, which gives you time to make your glaze.

Here you go: heat 2 tablespoons bourbon with 28 g / 2 tablespoons unsalted butter to melt, then stir in 50 g / 1/4 cup granulated sugar, stirring to dissolve. Once the sugar is dissolved bring to a boil for one minute. Remove from the heat and blend the mixture with 50 g / 1/2 cup confectioner’s sugar and 2 tablespoons of crème fraiche.

Once out of the oven, remove the rings (sooner than later is always best).

B41B7A9B-D1A4-45D3-82F4-EFF1890CD356.jpg

Brush the glaze generously over the spirals. Now pop the tray back in the oven for about 2-3 minutes. The heat makes the glaze crackle and bubble up, although you can certainly omit this step if you prefer a smooth glazed look.

0E139C82-A5CE-44DA-B5B8-C79F64CB4342.jpeg

Smooth or crackled, they’re tasty either way.

Have fun creating your own treats using croissant dough. You can do it!

F2A51C92-04B4-41F8-AE24-EE72EF47C3CA.jpg

FOOD52 - Genius Desserts

F3C184D0-F03B-49A5-B1E4-CBB975B389EA.jpg

The last thing I want to do is flood inboxes, BUT I just had to make an apology and correction to my cocoa powder post that just published. As I reviewed the post in my own inbox I realized my error right away. I’ve righted my wrong in the post’s content, but for those of you who receive the posts in your email inbox, please take note!

I referred to the above book as “Dessert Genius” rather than its accurate title “Genius Desserts”. What tricks our minds can play on us sometimes, eh?.

This book is fantastic, not only for all of the great recipes, but it’s such fun to read and contemplate the many pearls of baking wisdom within. I highly recommend it.

So kudos to Kristen Miglore, FOOD 52, Ten Speed Press and all the baking geniuses out there. Hurrah!

Happy Baking!

Flourless cocoa walnut cookies from “Genius Desserts”

Flourless cocoa walnut cookies from “Genius Desserts”

Baking with Dutch process cocoa powder

Ganache dipped, Swiss meringue swirled cocoa cakes

Ganache dipped, Swiss meringue swirled cocoa cakes

Dutch process cocoa powder is one of my standby ingredients, always on hand and at the ready. I’ve been using it for years, not only for my standard brownies that are perennially available for the Steve-meister for his regular evening treat, but for MOST recipes calling for unsweetened cocoa powder. Such wonderful flavor.

NOTE: I say “most” because there are some guidelines for using natural vs Dutch processed that have to do with acid/alkali and using chemical leaveners (baking soda, baking powder). Here’s a great summary for you from Serious Eats (a great resource by the way!).

Dutch process you ask? It’s all thanks to Dutch chemist and chocolatier Conrad van Houten (1801-1887) who figured out how to alkalize the acids in cocoa powder to create a more mellow taste experience. I’ve been using Bensdorf high fat Dutch process cocoa powder for some years now (I am of Dutch heritage after all!) and find the end results so tasty. It’s available through a variety of sources which you can easily find online.

Many say that the decision to use natural cocoa powder vs Dutch process is purely personal and indeed a matter of taste. While the natural version may offer a more enhanced and complex chocolate flavor, the “dutched” version is smoother and, in my estimation, more delicious.

French Tarte “O”s

French Tarte “O”s

As I review the things I generally bake with cocoa powder (brownies, financier, shortbread, meringues, fudge cookies, flourless sponge and more), I realize that, at least in my current armamentarium, the only one that contains a chemical leavener is Bouchon’s version of that popular chocolate sandwich cookie lining grocery store shelves. I did a bit of research to try and figure out why one would add baking soda to a shortbread cookie since they don’t typically rise like, let’s say, a classic chocolate chip cookie. From the scientific standpoint, the alkaline baking soda seems to contribute to a more even bake, tenderness and even enhances color and flavor.

OK - enough science. Let’s look at some more ways to use Dutch process cocoa powder. along with a couple of straight forward recipes for you.

Cocoa cakes

Cocoa cakes

This tasty babies are from Yotam Ottolenghi and Helen Goh’s book “Sweet”. Not unlike financier, the batter is made with similar ingredients but doesn’t involve browning the butter which one would normally do for financier. They are a dream to put together and bake so nicely in individual silicone molds from very mini to larger “muffin” sizes, depending on your mood.

This Silikomart mold (SF022) is one of my favorite ones for simple small cakes - just the right size to enjoy a few bites without feeling you’ve overdone it. Remember - everything in moderations folks!

The wells each hold about 48 g/1.7 ounces (if full) - I get about 15 cakes out of the recipe below. You can easily double the recipe for more!

3FD69FD3-253A-4E5B-99BD-9274B99024E7.jpg

Heat the oven to 375ºF. If not using silicone molds, buttered mini or regular muffin tins work well. Yield will vary depending on the mold/pan you use.

Melt 140 g/5 ounces unsalted butter (I use a pyrex glass cup on medium power in the micro) and have it at the ready.

In a separate bowl, sift together 40 g all purpose flour, 40 g almond flour and 50 g Dutch process cocoa powder.

Place 120 g (4 large) egg whites in the bowl of a stand mixer fitted with the whisk attachment along with 160 g granulated cane sugar and beat on medium-high for a couple of minutes until thickened and glossy.

Continue on the same speed and drizzle the melted butter down the side of the bowl, beating until combined. Scrape down the sides.

On low speed blend in the dry ingredients. I usually take the bowl off the mixer and finish the blending by hand - you want to make sure none of the dry stuff is sitting on the bottom.

Fill molds about 3/4 full (you can scoop but I prefer piping for more equal portions and less muss) and bake about 15 minutes or until center looks set and springs back when touched. Baking time varies depending on mold size.

Let cool in molds about 10 minutes then turn out onto wire rack to finish cooling.

Once cooled I dipped the tops in ganache (seen above), popped them in the fridge to set the ganache, then gave them a nice swirl of dark chocolate Swiss meringue buttercream. Yum. Steve loves these!

2FB91D89-DB9C-4230-881F-948D02AD6A07.jpg

Next up - flourless walnut fudge cookies, a François Payard recipe from FOOD52’s “Genius Desserts”. This is an eye opener folks. Plus you can change up the nut choice as you wish - pistachio, pecan, macadamia and more. Nuts and chocolate are a marriage made in heaven if you ask me.

FBD11C1C-0A02-47B6-BF33-0DD79A7E4C0D.jpeg

Heat your oven to 350ºF. Line two 1/2 sheet pans with parchment or silicone mats. Place 4 large egg whites in a bowl and allow to come to room temperature (place the bowl in a slightly larger bowl of warm water to speed it up).

Toast 275 g / ~2.75 cups walnuts or nuts of choice on a parchment lined sheet pan for about 10 minutes. You’ll smell the aroma and you’ll know. Let them cool, then chop ‘em up.

Mix together 350 g confectioners sugar, 70 g Dutch process cocoa powder, 1/4 teaspoon salt and the chopped nuts in the bowl of a stand mixer with the paddle. Give a quick low speed mix to combine then add the egg whites and a tablespoon vanilla extract with the mixer running. Mix on medium about 3 minutes to thicken.

I prefer smaller cookies so I used my tablespoon scoop to portion the dough out. Place pans into the oven then reduce the temp to 325ºF and bake about 15 minutes until tops lightly crack. Rotate your pans half way through the bake.

Slide cookies with the parchment onto cooling racks. Remove from parchment once cooled (tip - if sticking, lift parchment up and gently peel it off cookies from the bottom OR brush a little water on the undersurface of the parchment and the moisture makes for easier release.)

B01478A5-C16E-4379-A9E3-C88F73F88F86.jpg

Mmmmmm - what a delightful chew, wonderful nutty flavor and all around tasty experience. Thanks to François Payard and FOOD52!

To wrap it up, I want to share one more way I’ve used Dutch process cocoa in recent weeks. I often speak of twice baked croissant aux amandes, one of Steve’s and my favorite treats (and a lot of other people too, let me tell you).

I made a chocolate hazelnut version by replacing the almond flour in my basic crème d’amandes with hazelnut flour, left the all purpose flour out and added a hefty tablespoon of Dutch process you-know-what.

It goes like this: take croissants a day or two old; slice them as though you’re going to make a sandwich; dip the whole thing in vanilla simple syrup to moisten and give it a squeeze (don’t worry, it’s great fun!) to get rid of excess.

Now open the croissant, pipe a line of hazelnut-cocoa cream, throw a few chunks of chopped chocolate (something in the 60-ish % ballpark) on the cream, then close the sandwich and pipe another line of cream on top. You can add a sprinkling of chopped hazelnuts too.

I usually assemble my twice baked croissants and hold them in the freezer until baking. Heat the oven to 325ºF (I use convection) and put them in right outta the freezer. Bake about 20-25 minutes - you want the cream nicely golden and set. Cool and enjoy. A nice dusting of confectioners sugar gives them that certain je ne sais quoi.

A0397812-0A1D-4DE1-BAB4-CF31411DD0DA.jpg

Our taste test was so enjoyable! The inside had just the right amount of chocolate to accompany the hazelnut cream. Of course we tried one while still slightly warm which only enhanced the experience. Yum. Yum. Yum. And just as good the next day. Yes!

294398A8-0ADC-4030-8F16-A50BF53D9750.jpeg

Have fun creating your own chocolate goodies. Until next time - stay safe, stay healthy and get vaccinated when you can!

A New Year's Day planche

400067E4-F7BA-43EE-9278-05E66B88100A.jpg

Happy New Year everyone!

Steve and I celebrated our quiet, at-home New Year’s Day with an early afternoon repast of a classic planche (literally translated as plank) - basically a wooden board on which one places cheeses, meats, olives, nuts or whatever you decide you’d like to have. What’s wrong with that, eh?

Of course we couldn’t help but reminisce about the first of our two trips to Lille, France in recent years to visit niece Christina, husband Glen and children Kiera and Liam. They inspired us with une planche at their home back then, and this year we shipped a few goodies to their current home in upstate NY to give their own planche a kickstart for the Christmas holiday.

Why not do one of our own to start the New Year on just the right note!

Our three cheese choices came from our favorite cheese vendor here in Grand Rapids MI - The Cheese Lady. Such a wonderful array of cheeses with a great selection from many countries. We opted for “Ewephoria”, a firm, aged sheep’s milk Dutch gouda; taleggio, one of our favorite Italian soft cheeses; Stilton, the classic blue from England.

We added some thin sliced ham and mustard seed salami as our meat options, along with sweet and savory toasted pecans (recipe coming below), an olive assortment (for Steve), coarse ground mustard, delicious olive oil crackers from Italy (also a Cheese Lady purchase) and my homemade baguette. Prosecco joined the ranks for our toast to 2021.

Cornichons are a classic addition to a planche but neither one of us cares for them so sayonara to that. One could also add different spreads or dips along with fresh veggies; chutneys, jams or quince paste; even a little pot of honey to give a drizzle of sweetness to any cheese.

85CB4346-6807-4630-BCEC-492CD09D8173.jpeg

What an enjoyable way to spend a portion of our day. We lifted our glasses to 2021 and plunged in.

Steve went with his own combos, and for my first treat I paired baguette with coarse mustard, taleggio and ham . . . . . .

01F3E12C-A50D-4BD4-A35A-55ECF00236D4.jpeg

and then moved to a simple chunk of Ewephoria with the mustard seed salami on baguette, a schmear of Stilton on olive oil cracker and some of the deelish pecans.

C7483149-0BE3-46BB-82A3-360941C7A501.jpeg

From there I mixed and matched my way to feeling very satisfied. Good stuff.

Here’s a bit more on the nuts with a recipe for you below.

53A0639B-7FA7-4FB3-945A-3AFF445BF71A.jpg

These are mmmm good . . . . just the right touches of savory and sweet in my book. Try ‘em - I think you’ll like ‘em, especially if you’re a nut fanatic like I am. You can use a mixture of almonds, walnuts and pecans or just go with one nut - you choose.

A full recipe calls for 4 cups of nuts but, unless we’re having a group over (like essentially never during this pandemic), I usually cut it back to 2 cups. That’s plenty for the two of us to enjoy nibbles over the course of a few days.

NOTE: always start with raw/unsalted nuts. Once you’ve mixed them with the other ingredients you’ll be toasting them in the oven. Even when I’m chopping nuts for cookies or cakes or streusel or whatever, I give them a 10-15 minute 300ºF toasting to bring out the flavor and aroma, then cool and chop.

Heat your oven to 325ºF. Line a sheet pan with parchment paper.

For 2 cups of raw, unsalted nuts: have your nuts measured and set aside; in a heat proof container or saucepan melt one tablespoon unsalted butter (I do it in a 4 cup Pyrex cup in the microwave); blend in one tablespoon olive oil, one tablespoon brown sugar, one tablespoon dried rosemary (I crush it a bit before adding), 3/4 teaspoon kosher salt (once you make them and feel you’d like a bit more, increase to 1 teaspoon the next time), 1/2 teaspoon paprika (I use sweet but if you like smoked, you know what to do), 1/4 teaspoon ground coriander, 1/4 teaspoon cumin and a pinch of cayenne (or more to taste). Stir in the 2 cups of nuts to coat evenly.

Spread out on parchment and bake for 15-20 minutes, stirring a couple of times, until fragrant and browned (if you toast nuts frequently, you just know). Transfer to paper towel to cool. Store covered at room temperature for several days.

Remember that pecans tend to brown more quickly than almonds or walnuts so, if I’m using solely pecans, I pay closer attention and even drop the oven temp a bit. You don’t want those babies to burn, no sirree!

Of course you can ramp up the spices to your own taste, sub in your own favorite spices or herbs and use maple syrup instead of brown sugar. Lots of wiggle room here.

You don’t have to wait for a holiday to enjoy your own version of une planche - you can do it!

400067E4-F7BA-43EE-9278-05E66B88100A.jpg

To health and safety in 2021. Cheers and warmest wishes to all of you from Steve and myself.

CA92FB55-CEF6-466D-997B-02EB87CA6246.jpeg

In the holiday cookie kitchen - pocky and a few more!

A08BB8CE-0FEB-4EC4-8893-94C3210672F4.jpg

This is the time of year when many bakers and pastry chefs turn to cookies. What is it about Christmas cookies anyway? I certainly remember decorating the traditional sugar cookies that many moms made during our childhoods. Since then there have been so many variants thrown at us during this lead up to the December holiday time, including magazines devoted solely to holiday cookie baking. Snowballs, rugelach, pfefferneuse, ricciarelli, gingersnaps, thumbprints just to name a few - cookies from all corners of the planet. Pretty amazing.

Pocky is a new one for me. I came across small boxes of these traditional Japanese stick biscuit cookies in the checkout line at a local craft store. Who knew? Coincidentally I became aware of a recipe for the homemade version of these intriguing cookie sticks through NYT’s holiday cookie recipes. I had to give ‘em a try.

The dough is easy to put together - you can do it by hand or in a food processor or in a mixer - you decide. I used the stand mixer approach.

Combine 160 g/1.25 cups all purpose flour, 45 g/3 tablespoons cane sugar, 1/2 teaspoon baking powder and 1/4 teaspoon salt in the bowl of a stand mixer; add 56 g/2 ounces cold diced unsalted butter and mix on low several minutes to coarse crumbs (or sand in by hand); add 45 ml/3 tablespoons whole milk mixed with 1/4 teaspoon vanilla extract and mix on low to bring the dough together.

Place the dough on a lightly floured surface and roll it out to form a 5.5”x8” rectangle about 1/4” thick. Wrap in plastic and chill at least an hour or up to several days.

When ready to proceed, heat the oven to 350ºF.

Cut the chilled dough into 1/4 inch thick strips about 5.5” long.

32211C97-0C4F-4EFD-96FF-2CAD93BE5F6B.jpg

With the palms of your hands roll each strip out to about 7-8 inches long. For me it took a bit of time to get a feel for how this dough wanted to behave. Bottom line - use decisive, firm pressure to keep the dough compacted while rolling it out, doing your best to keep the pieces straight. Pop your pans into the freezer for 10 minutes or so before baking.

A5DF55A1-0C8D-4A80-93DD-0FC365744838.jpg

Bake about 15 minutes until golden brown. Cool on wire racks.

951CB125-F7EF-4EE3-81E5-6A8734D0DD67.jpeg

Some of mine were a little curvy but in general these baked up into rustic looking sticks with a certain charm. They taste to me like the animal crackers we used to eat as kids or some kind of teething biscuit - the Brits might call them a digestive biscuit. The flavor is good - simple and straight forward.

I’ve never tasted the Japanese massed produced version, but I’ve looked at the ingredients and have to say - nuh uh.

For decorating I went with microwave melted, tempered white chocolate, raspberry dust and chopped lightly toasted pistachios . . . . .

AA7558B8-D8E8-49F9-B37E-86DA7508F640.jpeg

and dark chocolate with chopped pecans.

CEFB0711-4C06-4F9A-8223-9D70E27DD0EE.jpg
B7ADAAEA-1BF0-4DCE-9B92-CB553FB59E0E.jpeg

Let’s just say that making pocky is something good for a day when you have little else to do and don’t feel rushed. Puttering with chocolates, nuts or whatever you decide to use to make your own version is good for the creative spirit. Calm and patience - that’s it.

7DAA6FBC-CDA4-42DE-AF07-FA47077E4831.jpg

Next up - white chocolate chai buttons using one of my favorite base shortbread recipes. Blend 75 g cane sugar with 200 g room temperature unsalted butter; blend in 250 g all purpose flour, a tablespoon chai spice mix and 56 g/2 ounces finely chopped white chocolate until the dough comes together. Wrap and chill before rolling/cutting shapes of choice or portioning out with a scoop.

For a more nutty/caramel-y taste change the dough up a bit by subbing in dark brown sugar or coarsely ground raw sugar for the cane and sub 50-60 g of whole wheat pastry flour (one of my FAVE ingredients!) for that amount of all purpose. You’ll like the result.

I made my chai mix with a teaspoon each of cinnamon, ginger, cardamom and coriander plus a few grates of fresh nutmeg and some grinds of black pepper. There are different DIY chai mixes out there - some might also contain allspice or star anise or cloves. When making your mix, ramp up the quantities to 3 or 4 times the base so you’ll have plenty on hand for next time. Plus you can add it to other things like cakes, butter creams, ice cream base or your own chai beverage.

Heat the oven to 325ºF. Scoop out tablespoon sized rounds and bake on parchment lined sheet pans for about 20-25 minutes until nicely browned. Some of my cookies spread at the edges just a tad so I cleaned them up with a round cutter while still warm just out of the oven. I like things to be neat - it’s how I operate.

823ECF90-130E-48CF-A12D-6EBF8670A647.jpg

Once cooled give them a drizzle of white chocolate and let set.

300C201D-177A-46B8-9E93-3A84D22DD829.jpeg

Here’s a sampling of some of the other cookie treats I’ve been making this month. I’m pretty sure many of you have your favorite holiday recipes plus there are sooooo many to be found out there in books, magazines and online. Pretty overwhelming actually.

These are always a favorite - almond thumbprints!

53760CC9-B471-49D8-8F2A-B76558A17E84.jpeg

For gift boxes for a nearby independent/assisted living facility I made cinnamon sugar kids . . . . .

7AF1C822-1348-436A-AAC9-167B3EAB95CB.jpeg

and cocoa trees with a bit of raw sugar crunch and a sprinkling of granulated sugar for that oh so natural woodsy look.

0ADA9DFD-2638-4524-9378-F7164E4F89F2.jpeg

Lots of cute packages for the residents!

0916A85C-92FE-4B51-9C7F-F85E72AF28D5.jpg

Here’s another boxed assortment I put together for the assisted living residence where my mom lives. I like to drop treats off there every now and then to say thanks to the staff, particularly with all they have to do to keep everyone safe during the pandemic. My hat’s off to all of them.

In addition to thumbprints, chai buttons and pocky I added my classic shortbread flavor assortment (to the left of the pocky) of vanilla bean, sea salt caramel, butter pecan and tart cherry. In the forefront are chocolate dipped Earl Grey shortbread made with ground Earl Grey tea, all purpose and hazelnut flour and added orange zest. Chocolate and orange is such a great combo.

E69AB16B-1FDD-4DE4-A7D4-5C2580ED9D52.jpg

Even though Christmas is arriving soon, I may have a few more cookies up my sleeve for this holiday time. Perhaps more gift boxes to hand out to folks for the New Year. Why not!

I’ll leave you with this floral image. We received this orchid from cousin Jen and extended family nearly two years ago after my Uncle John died. It is now blooming for the FIFTH time since then. This time it’s the most prolific with 10 flowers and continues going strong after four months in it’s current bloom. It gives me peace and joy.

May you feel the same as we look ahead to a new year of stability and health for our world.

B2FE7B5B-9C66-4244-83C9-7CEA673DF5B1.jpg

Caramel apple (or pear) streusel cakes

0724C3FB-64B0-4148-846A-A1D300905C13.jpeg

Isn’t it great when you come across a recipe to which you add your own touches, make many times over and never seem to tire of? This is one of those.

This recipe is my take on an apple sour cream cake from Genius Kitchen, a recipe I came across a couple of years ago. It’s not unlike a blueberry muffin recipe I used to make in days of yore. I’ve made it as the apple version a number of times and it’s always a pleaser but then I thought - hey, how about pear?? Why sure!

4D86E29B-E1E3-40AF-8469-A15C7064620D.jpeg

Heat the oven to 350ºF. Grease a 9x13 pan OR line muffin tins with papers OR have ready small silicone molds of choice. As some of you know, I’m a huge fan of smaller portions so the latter two options appeal to me.

For the base recipe, prep 2 cups apples or ripe pears (about 2 large) by peeling, coring and chopping them. I often have Fujis around for general eating so I’ll use those but I also like Jonamacs, Jonagolds, Galas or Golden Delicious for this type of baking. Bosc is my go to pear.

In a separate medium bowl blend 260 g/2 cups all purpose flour (you can replace 20-25% of that with whole wheat pastry flour or spelt) with one teaspoon baking soda, one teaspoon baking powder and 1/4 teaspoon salt. You can add cinnamon or spices as well, although I usually save my spice for the streusel.

In the bowl of a stand mixer fitted with the paddle, cream 113 g/4 ounces unsalted, room temperature butter with 175 g sugar (I like a mix of 75 g dark brown sugar and 100 g granulated cane sugar or ground raw sugar) for 2-3 minutes. Scrape down the bowl and add 1 teaspoon vanilla, 2 teaspoons boiled cider (optional) and 2 large eggs. Blend and beat well to lighten the mixture.

Add the dry ingredients in three additions, alternating with one cup sour cream (or crème fraiche or full fat yogurt), beginning and ending with the dry ingredients and mixing just until combined. Stir in the chopped apples or pears.

You have the option for a streusel topping by mixing 1/2 cup toasted and chopped nuts of choice (pecans, walnuts, almonds or hazelnuts are all good in my book!) with a teaspoon of cinnamon or spice mix of choice, 1/2 cup light or dark brown sugar and 2 teaspoons melted unsalted butter - once blended, sprinkle it over the cakes.

Portion the batter into your chosen pan or mold. I made two different sizes in my flexis.

Bake about 20-25 minutes (for small cakes) or 35-40 minutes if making a 9x13 size.

6A7CD1CE-B5D1-4E67-BCB3-0BDB7D6D9A3F.jpeg

Give them a 5-10 minute cool before gently removing them from the molds, then set them on a wire grid to cool. I often drizzle some caramel on top once out of the oven.

5A1590E9-FBE5-4FAC-B869-940596789070.jpg

You can leave off the streusel if you plan to garnish the small cakes with your favorite Swiss meringue buttercream like caramel apple cider or a simple whipped caramel mascarpone cream. Yum. Truth be told, I’ve combined a streusel and buttercream garnish and love the combo of the light creamy SMBC with the bit of crunch in the streusel. Yup.

Happy baking. Stay safe, stay healthy and be at peace.

Giving thanks for daily bread: Semolina rye 2 ways

B0A379E3-8A65-4BAD-99F5-D090C98D69C3.jpg

This one was fun to work on. I adapted a King Arthur Baking Company direct dough recipe, created a poolish version and tried it a couple of different ways - boules and standard sandwich loaves. Don’t you just love dough? And bread? And pastries? And . . . . . . . ! It’s all fantastic!!

I’ve written about poolish most recently in my baguette post. It’s in the category of pre-ferments or dough starters and is made up of equal weights flour and water. Fermented for some hours before being added to the final dough, it kick starts the fermentation process, adding more structure, flavor and a longer shelf life to the end result. All great reasons to do it! It just takes a bit of planning ahead.

I turned to Rose Levy Beranbaum’s book “The Bread Bible” for guidelines to convert a direct dough recipe to a poolish method. Generally you’ll weigh 1/3 to 1/2 the amount of the total water in the recipe (in my case 540 g x 0.33 = 180) and 22-33% the amount of the total flour (826 g x 0.22 = 180 give or take a gram) to create your poolish. Mix 180 g cool water, 180 g bread flour plus a pinch of instant yeast, cover and let sit overnight.

Note: as you can see, RLB gives a range within which you can work to create the poolish . I chose the lower ends of the spectrum.

Here’s the result after an overnight room temperature ferment.

91233A40-091E-46EC-9134-F6A283220B5E.jpg

Here’s my full recipe. I love writing recipes out by hand - something I got used to during my stage in Paris in 2007. It’s a great way to place the mixing steps along side of the ingredients which for me makes it more user friendly. Notes can easily be added in the margins as well.

0E0FEECF-AB27-4B11-94E5-4860BF20EA0C.jpg

I’m a big fan of King Arthur’s all purpose and bread flours, and I turn to Bob’s Red Mill for other specialty flours, in this case semolina and dark rye.

699A4916-0BAB-440E-AAFD-712315B70F95.jpeg

When ready to mix the final dough, weigh out the remaining dough ingredients. Add the warm water to the poolish and mix to loosen. Place the bread, rye and semolina flours and the instant yeast in the bowl of a stand mixer fitted with the dough hook, then add the poolish/water to it. At this point I give it an initial blend with a spatula to get things started. Then let the mixer do the work!

79404B96-C4D1-4E8F-AEFC-82724B650D86.jpg

Mix on low speed and add the sugar, olive oil and salt. Once the majority of the flour has been blended in, increase speed to 2-4 and knead for 7-8 minutes to a smooth, slightly sticky dough.

5C9FA152-774E-4BC7-B97A-163672719556.jpeg

Since the dough is a bit sticky, lightly wet your hands and bowl scraper to help you form a ball. Cover with lightly oiled plastic wrap and let rise 60 minutes.

After the first rise

After the first rise

My first round with the full recipe was to make boules. Many months ago I had snagged a great deal on a 2 1/4 quart Le Creuset lidded enameled cast iron saucepan at Sur La Table (now sadly closed here in Grand Rapids), and I wanted to make a cast iron pot loaf as well as a couple of on-the-baking-stone boules.

9996A523-B6C0-4063-AD3C-D83931EA2888.jpg

Divide the dough into three ~479 g portions and shape three boules. Place one on a piece of floured parchment cut as seen below to allow for easy lifting and placing into the pot. Cover lightly with oiled plastic wrap and let rise one hour.

Now’s the perfect time to heat the oven to 450ºF with the empty covered pot inside. You want the pot nice and hot! I also keep my baking stone on the bottom rack so that heats up for the next two loaves too.

All risen!

All risen!

Set the other two on a parchment lined overturned sheet pan, cover and let rise one hour.

Note: Since I planned to bake in two batches, I popped these two into the fridge at the end of the rise so as to avoid over proofing while my pot bread was baking.

Risen!

Risen!

When ready to bake the first loaf, very carefully remove the heated pot from the oven, lift the boule by the parchment and lower it into the hot pot. Don’t burn yourself!!

185E773C-9735-40D9-8783-6351C16CDAB3.jpg

I opted to snip the top with scissors rather than score it - my pattern came out somewhat catty-wompus - hmmmmm, what exactly was I going for here? Looks like a strange Halloween pumpkin. I realized after the fact that I forgot to snip across each slash like an X to create little ears that would open up during baking. Oh distraction!! At least it didn’t negatively affect the end result!

4AFDB0E1-E126-4E32-A604-7D18ADBEBA73.jpeg

Brush it with egg wash or a little milk and bake covered for about 20 minutes . . . . .

C3CCB502-554A-4C7F-A9EB-DB8F315CA118.jpg

then uncovered for an additional 10-15 minutes until nicely browned.

Voilà

Voilà

Lift it out and let cool on a rack. Don’t you think the scissors snips actually lend it a certain carefree character?

7905D48F-6843-439C-934C-9004B09B4950.jpeg

For the other two boules, turn the oven down to 400ºF, egg wash, score and slide them, with the parchment, off the sheet pan onto the baking stone which has been heating up all along. I squirt 3-4 ounces of hot water into the metal pan in the bottom of my oven to give a burst of steam, then close the door and let the baking begin.

1879FF45-3E0D-45ED-B46A-92CA0B3E0452.jpg

Give them 10 minutes at 400ºF then turn down to 375ºF for another 20 minutes or so until nicely browned. Cool on a rack (keep your pot bread company!).

971A3650-03D0-4BDA-8A61-46C1C627342F.jpeg

My second session with the full recipe was geared to making standard sandwich loaves. Steve and I love having good bread around for toast or sandwiches and this one fits the bill. The primary difference here is dividing the first risen dough into two portions about 715 g each, shaping loaves and tucking them into oiled medium loaf pans.

E74468D7-B160-49AA-AC37-D099F4736F25.jpeg

Cover with lightly oiled plastic wrap and let rise about an hour until the dough is nicely mounding above the rims. Meanwhile heat the oven to 375ºF.

87AD36D0-C3E5-4698-A4DA-FF5525B3F940.jpeg

Score . . . .

D9E72207-C162-458C-9ED5-BD6BBC9DB5F5.jpeg

and bake 30- 40 minutes until nicely browned and a digital thermometer in the center reads 190ºF.

While scoring isn’t strictly necessary here, it allows for a more uniform oven rise to the bread.

52039F65-21AE-4F30-A422-D903F860681E.jpeg

Remove from the pans and let cool on a rack.

734FC5C9-46D5-4A56-AF66-FDC10BCDCA6E.jpeg

I am so happy with this bread! Both the boules and the loaves have a nice chew to the crust, a tight crumb and the texture holds up well to a hearty sandwich. And let’s not forget morning toast with a fried egg on top or your favorite nut butter and jam. Yes.

4D9FF201-8697-4027-B6C5-BCA8E9DF6CD3.jpeg
6E9BBEDE-D58E-4DD2-9D55-4DA50817D31A.jpeg

Here’s a big cheer for dough and bread making - Hip hip hooray!

Let’s give thanks for safety and health as we look forward to next year and new beginnings. Meanwhile, think about a bit of holiday spirit, cut some local greens and twigs and tuck them into pots. You’ll be happy you did.

Happy Thanksgiving to all!

F1C4D47E-9971-4554-A5AD-5F98FDC81C4F_1_201_a.jpeg


Crème fraiche pound cake à la Melissa Clark

Rum crème fraiche version

Rum crème fraiche version

After my last post on baguette this one was a piece of cake. Hah! Get it?

Here’s another great contribution to the baking world from NYT food writer Melissa Clark. This one caught my eye partly because of the rum (which I’m starting to appreciate more and more) and crème fraiche (which I’m finally making myself!) in the ingredient list, but also because I’ve made my share of tasty pound cakes over the years and am always up for a new one. If you love pound cake, you MUST try this one.

Pound cake is typically butter, sugar, egg and flour in fairly equal weights, sometimes with cream cheese or sour cream added in. As Melissa notes, pound cake recipes don’t often contain any leavening like baking powder, but it’s the creaming of the butter and sugar to aerate and the eggs to add substance and binding to create the signature texture of these traditional cakes.

I made this recipe twice, the second time swapping the rum for a smooth Kentucky peach bourbon that we recently received from cousin Harve. Just had to try it don’t ya know. I added some orange zest to the batter and used a bourbon butter variant of the crème fraiche glaze, topping it with chopped toasted pecans. Mmmm good.

Bourbon glazed orange pecan version

Bourbon glazed orange pecan version

I’ve become very attached to my mom’s old Mirro brand loaf pan that is a bit longer and narrower than a standard loaf. I love the way the cake comes out in a sleek and less stodgy sort of way. Prep the pan, including the edges, by buttering and sugaring it.

IMG_1457.jpg

Bake at 350ºF for about an hour until golden and a tester comes out clean.

Mmmmm . . . .  doesn’t that look delicious!

Mmmmm . . . . doesn’t that look delicious!

The main take home point that Melissa makes is the fact that if you vary the amount of baking powder you add to the batter, you’ll achieve either a lighter (more baking powder) or more dense and creamy texture (less baking powder).

For my first go I used the higher amount of baking powder (1 teaspoon) as well as the rum, crème fraiche (she gives sour cream as an option) and vanilla called for in the recipe. Check out the sliced image - looks like a lovely pound cake to these eyes! And it was deeeeeelicious! Light yet dense if that makes any sense at all. I also loved the slight crunch in the crème fraiche rum glaze - and our neighbors enjoyed it too.

88D6D819-A006-4D45-952E-26CCBF9C74FB.jpeg

For my second go I used the lower amount of baking powder (1/2 teaspoon) and swapped Kentucky peach bourbon for the rum. I zipped some orange zest into the batter while I was at it. Another lovely crumb experience to be sure.

For the bourbon butter glaze: heat 60 ml/1/4 cup bourbon and 49 g/3.5 tablespoons unsalted butter to melt the butter, then add in 100 g/1/2 cup granulated sugar, stir to dissolve and boil one minute. When the cake comes out of the oven, poke holes in the top with a toothpick, brush on about 1/4 of the glaze, wait 5 minutes then brush on another 1/4 of the glaze. Reserve the remaining glaze.

Once the cake has cooled, run a small offset spatula around the edges and pop it out of the pan. Blend the reserved bourbon butter glaze with 50 g/1/2 cup confectioner’s sugar and two tablespoons crème fraiche and pour it over the top and sides of the cake. In my case I added the pecans as the pièce de resistance but you can leave them off if you prefer.

IMG_1470.jpg

Both of these cakes are buttery, luscious and dense as pound cake should be. Could I tell a lot of difference between the two? Not really, but both were superb in flavor and texture. Go either way with the baking powder and you’ll be happy no matter which one you choose. Thanks Melissa!

Remain calm and stay safe. We’re already deep into the first week of November and even though many of the leaves are now off the trees, here’s a mini photo album of what I’ve been enjoying during my walks this past month. I love autumn.


Baguette

IMG_0707.jpg

NOTE: I did a quick update of this post on 06/14/24 to include a link to the recipe PDF for King Arthur baguettes. You can also find the link on the recipe page under BREADS AND BUNS.

This is a long one folks - sometimes it’s just how I roll!!

Well it’s about time. Do you know I’ve never made baguette at home just for the two of us? The closest I’ve come was ficelle which is essentially a skinny baguette, and that was tasty indeed! Even though I’ve made many versions while attending various bread classes over the years and have also taught my own bread class to folks, I don’t know what took me so long to make this classic French bread for our own larder. Perhaps it’s the fact that I finally bought a baking stone some months back and felt it was time to put it to the baguette test.

What makes a good baguette you might ask? They say it should have a creamy, open crumb with a crust that crackles as it comes out of the oven. Yes indeed!

FA79284F-7EA6-403C-BDC8-8992C08F6AE8.jpeg

It’s taken me awhile to get this post together. I started the project back in April early in the pandemic with nothin’ but time on my hands. I chose three different recipes: King Arthur Flour, Le Cordon Bleu Paris and another from Paris boulanger/chef Benjamin Turquier of 134 RDT on rue de Turenne in the 3rd arr.

I had made both the KAF (now King Arthur Baking Company) and LCB versions in classes I attended at those establishments in recent years and since then to classes I’ve taught to others. The RDT recipe came from a France Magazine article that I saved from several years ago and has been sitting on my to-do pile ever since.

During my stage at Pâtisserie Pascal Pinaud in Paris, I can’t help but remember the early attempts at shaping baguette - not a pretty picture. It takes a while to develop a feel for the dough, rolling with just the right amount of pressure to elongate and keep it even with tapered ends.

0BCD1CB1-DA0B-4AC7-B842-2FEC287A2B9F.jpg

And the scoring? Oh my - that’s something I’m still learning! Just the right touch and don’t over think it - efficient, purposeful, a light hand, don’t drag and NO hesitation - those are the keys in my book. (Psssst . . . the texture of the dough makes a big difference - softer means more difficult to score, firmer means easier.) You may be able to tell the difference in the next two photos - the first shows a softer, more wrinkly dough and in the second the dough looks more firm and smooth.

KAF dough: hmmmm . . . not so good with too much drag and hesitation on the top loaf

KAF dough: hmmmm . . . not so good with too much drag and hesitation on the top loaf

LCB dough: much better - less drag, more purpose!

LCB dough: much better - less drag, more purpose!

On to the process!

This isn’t intended to be an in depth bread primer, but I hope it gives you a decent look at how baguettes are created. We’ll look at the steps and I’ll make a few comparisons amongst the three recipes. Spoiler alert - they’re ALL delicious!

When comparing recipes, especially for breads, it helps to sketch out the timelines for proper planning. Don’t get hung up on the nitty gritty details below, but you can see that the process can vary anywhere from 1 to 3 days. That made it much easier for me to accomplish the baking in a staggered fashion. Nice. I like that.

81D33DD8-4552-4811-89A1-A76F20F6A46C.jpg

Here’s a quick summary of the typical basic steps of bread making: Weigh ingredients. Mix. Knead. First proof. Pre-shape. Rest. Shape. Second proof. Score (sometimes). Bake. Cool. Enjoy!

Bear with me here - technical stuff coming up.

Now remember, a basic lean bread dough consists of flour, water, yeast and salt. I’m sure a number of you are familiar with baker’s percentages which uses the weight of flour in a recipe as the 100% ingredient. A typical straight bread dough made by the direct method (no preferments or long fermentations) will contain about 60% of the flour weight as water, 3% as fresh yeast (~1.5% dry yeast) and 1.5-2% as salt. Example: 500 g flour/300g water/7-8 g instant yeast/8-10 g salt.

So basically you can take any weight of flour you’d like and figure out the quantities of the other ingredients - pretty cool, eh?

Adjust the hydration factor upward and you’ll experience the different feel and ways of handling a wetter dough. The KAF recipe uses 72% hydration and thus is the wettest and stickiest of all three. It can be a challenge the first time you work with it so it bears repeating a few times to get the feel. With higher hydration dough you’ll often see the “stretch and fold” technique used to develop the dough’s structure. A tip: when working with wet dough, rather than dusting with flour, oil or wet your hands to reduce sticking. I’ve played around with hydrations of 68% and 70% too.

The LCB dough hydration is 64% and the one I found the easiest to handle while the RDT comes in at 70% and is less sticky than KAF.

Both KAF and LCB involve making a poolish which combines equal weights water and flour with a small amount of yeast and allowed to ferment at room temperature (or fridge) for a period of time. The amount of yeast added depends on how long you wish your poolish to ferment - shorter time/more yeast, longer ferment/less yeast.

The RDT recipe doesn’t use the poolish approach but utilizes a step referred to as autolyse - flour and water are mixed then allowed to sit for 30 minutes or so to hydrate the flour. Then add yeast, knead, add salt, knead and rest 20-30 minutes before refrigeration of 10-48 hours. Longer fridge, more flavor development.

As is usual in the culinary and pastry worlds, there are so many sources out there explaining the nuances that it can become overwhelming. If you’re starting to deep dive into bread making, I highly recommend a couple of good bread tomes like Jeffrey Hamelman’s “Bread”, Rose Levy Beranbaum’s “The Bread Bible” and any of Peter Reinhart’s books. The list goes on and on and on . . . . . So much to learn.

Let’s focus more in depth on the recipe from Le Cordon Bleu which is a 3 day process and we’ll look at the basic steps too. Sound good?

1A6C57C4-BD54-4E40-BD7D-8266BABD616C.jpg

When starting with a poolish and planning a long fermentation, as with this LCB recipe, you’ll see the very small percentage of yeast used. The total flour in the full recipe is 1500 g yet the total instant yeast used is only about 5 g total which comes in at a paltry 0.3%. Buuuuuutttt . . . . . it’s the longer time that this dough ferments that makes all the difference. Give the yeast enough time to work and it WILL perform.

For this project I made half of the above LCB recipe since many home mixers are too small for the full quantity (the flour alone is about 11 cups total and the water almost a liter!). Note: my Kitchenaid 6 quart mixer managed the half recipe just fine.

In addition my oven (and home ovens in general) isn’t structured to bake 7 or 8 baguettes at one time on a stone. My baking stone is about 14” x 16” with 20” on the diagonal, and I use a piece of parchment on an overturned half sheet pan (12”x18”) as my peel. That limits the length I can make my baguette - best not to go longer than 16” - as well as the number of loaves I can fit on the peel and stone.

Even though this is a three day deal, the hands-on time is minimal compared to the resting and fermentation that occurs, so it’s easy to carve out a small niche in your schedule to get the process started.

For the half recipe: on day one make the poolish by mixing 250 g bread flour with 250 g cold water and a pinch of instant yeast. Whisk it 1-2 minutes, cover and refrigerate for 24 hours. Below is a good example of a developed poolish - poofy, bubbly and fragrant.

B9500B7D-42F4-4F46-8FA6-AE429583D3A6.jpg

On day 2 mise out 500 g bread flour, 232 g water, 14 g salt and 2 g (just a tad over 1/2 teaspoon) instant yeast then, in the bowl of a stand mixer fitted with the dough hook, combine these ingredients with the poolish. Knead on low speed for 10 minutes. Cover and rest 30 minutes then do a complete fold set (stretch and pull the dough up over itself from top, then bottom, then left, then right) then turn over, ball up, cover and refrigerate for 24 hours.

Day 3 - here’s the dough ready to divide and shape.

767B8525-545E-43C9-8D93-427937918A9A.jpg

I opted for 3 baguettes, each weighing about 408 g, knowing that I could make them an appropriate length for my oven/baking stone. In French boulangeries a baguette may be anywhere from 26 to 39 inches long - whoa - and the diameter is typically about 2.5 inches/6 cm. My baguettes turned out pretty chubby so next time I’ll do four loaves instead of three to achieve a slimmer result.

First shape the divided dough into rough boules and let them rest , covered, for 20 minutes.

2E1482C9-A0E2-4075-84F1-7DA7EDFF30D9.jpeg

Then one by one, flatten into a rectangle and shape a preliminary torpedo (lots of online resources on how to do that!). Give them a 10 minute rest then, starting with the first one you pre-shaped, place your palms in the center and gently but with steady pressure, roll as you move your hands outward to elongate and taper the ends. One down, two to go.

F51BFDE3-C367-4404-9741-46C67E3BD23B.jpg

Place the shaped baguettes on a floured tea towel or linen couche with a few inches between each, then pull the fabric up between the loaves to support them and avoid them sticking to each other.

6E72185B-12EB-4BAA-9B81-440037E87A88.jpg

Cover with another tea towel and let them proof 30-45 minutes. Meanwhile, heat your oven/baking stone to 480ºF (250ºC).

Now for a little bit of a tricky part. You have to gently roll your proofed baguettes onto a narrow wooden board (one by one) and then roll them back onto a floured or cornmeal dusted peel (I use a parchment topped overturned half sheet pan as my peel). Then score them and from there you slide them onto the baking stone (parchment and all if using my method). Whew! A bit unnerving at first but, just like scoring, be purposeful and without hesitation in your movements.

I happen to have a handcrafted wooden cheese board made by an acquaintance of ours - it’s about 15 inches long and was just the ticket for helping me perform this maneuver. I’ve also heard of folks cutting a piece of sturdy cardboard and covering it with some cheese cloth in lieu of a board. Sounds like a great idea!

Snug the board up along side a baguette, lift the towel gently from underneath and roll the baguette onto the board. (NOTE: the next two images are actually the KAF version - I use them here simply to show the board steps.)

ED6C160C-6F78-4925-94EF-C3D01A96C9C9.jpg

Once on the board, simply roll it off onto your peel or sheet pan. Be mindful of the space available to you!

Man oh man - maybe one day I’ll get into the whole video aspect of this stuff!!

Ready to roll off the board

Ready to roll off the board

Now score . . . . . . . . .

7B31BE59-5F42-4959-8B25-40B1BA616CD7.jpg

and slide the baguettes with parchment off the sheet pan and onto the stone with a decisive move. Bake with steam about 25 minutes.

NOTE: If you don’t have a baking stone, transferring board or peel, simply heat your oven with an empty half sheet pan on the lower rack to serve as your “stone”. Place your shaped baguette on a separate parchment lined sheet pan (no couche needed) to proof, covered lightly with a flour sack type towel (be sure there’s enough room between the loaves), then score and pop the sheet pan directly onto the heated pan in the oven. Voilà - no transferring necessary.

NOTE #2: I have a tray that slides onto the lower rack of my oven into which I can pour or squirt water as soon as I’ve placed the loaves onto the stone. That gives me my burst of steam which helps to create a crackling crust. You can also put an oven safe metal tray of some sort on the floor of your oven and pour a cup or so of hot water in it just as you place your baguettes in the oven. Close the door immediately to give that burst of steam.

Pull the loaves out onto a cooling grid and listen for the signature crackle - yes, it’s there. Hooray!!

As you can easily see my loaves baked a bit differently with the top one looking like a humpback whale. A sign of the need to be more purposeful with shaping to tighten the dough up.

My scoring was certainly variable, the middle loaf looking the best.

1FCDF0C5-0092-4FC6-A7B1-0F64650379B3.jpeg

Once cooled, either tear off a piece or slice it up and enjoy with your favorite cheese or jam or whatever floats your boat.

I jotted notes on each recipe. LCB: “great crackle; dough easiest to work with and most springy and elastic of all; nice crust and chew although perhaps a bit more doughy than the other two; wonderful flavor; next time shape more narrow and longer - would do four 312 g loaves rather than three 408 g.

F3111BC6-1DCE-49EB-B604-D4501D049033.jpeg

Here’s the KAF final result. Check out the difference in scoring between the top and bottom loaves.

C8A5E0F9-9997-413F-BCC5-276AA38182F6.jpg

My notes on KAF: highest hydration and stickiest dough thus hardest to work with (this one takes practice folks!); wonderful crackle and crust; deliciously creamy with open spaces.

37D8B886-F7F5-40EF-86D6-710D376D26DE.jpeg

Here’s RDT’s result. Pretty good scoring, eh? You can see the top one is shorter - another instance of not putting the proper pressure on when elongating. Still tasted great!

02247224-56E8-4473-8AC6-E8C040F704D7.jpg

My notes on RDT: 70% hydration; less sticky; scored easily; less crust crackle and not as crusty; delicious flavor, good chew and nicely creamy.

B06F14B3-0DC4-44F7-8167-B2557A3D8A83.jpg

My overall favorite is the LCB recipe primarily for its ease of preparation/handling, plenty of fermentation and flavor development time in the fridge and its wonderful crust and flavor. The half recipe makes about 1250 g of dough from which I made three 408 g baguettes. OPT: four 312 g for a slimmer end result.

In second place is KAF’s recipe which mixes a poolish of 150 g all purpose flour, 150 g cool water and a pinch of instant yeast, then is covered and ferments for 15 hours at room temperature. When ready, the poolish is combined with 311 g all purpose flour, 180 g cool water, 5 g instant yeast and 7 g salt and mixed into a shaggy mass. This is the one that takes some practice working with a sticky dough. The base recipe makes about 803 g of dough from which I made two 400 g baguettes. OPT: three 268 g for a slimmer result.

The RDT half recipe makes about 862 g of dough from which I made three 284 g loaves. Since I’ve come to prefer the poolish approach for this kind of bread, I won’t go any further with this one. Now it’s off the to-do pile.

On one final note, I did another batch of the KAF recipe a month or so ago - upped it to 1.5x the recipe (which, BTW, brings it very close to the LCB half recipe aside from the hydration difference), made two 400 g baguettes and eight 50 g crusty rolls. Boy oh boy they were good! I’m still fine tuning the handling of the sticky dough, but next time may drop the hydration down a couple of percentage points just to see how it goes. Why not, eh?

Bottom line on size - going forward I’ll aim for 280-310 g per baguette. That just seems right to me. Why not play around with dough weights for minis or rolls too. Sure thing.

BB4AF680-7B11-4156-B91C-13AA33D62E29.jpeg

Thanks for reading and slogging through all of this. It barely even begins to scratch the surface of the world of baguette. I’m sure I’ve forgotten to include some important tidbits and please don’t hesitate to raise any questions or make any comments about your own experiences with this classic French bread.

Meanwhile stay safe, bake some bread and enjoy the last colors of autumn.

DF3DD905-282A-4E48-9E67-D872F0DBAAAA.jpeg


Adieu Sur La Table Grand Rapids

IMG_1485.jpeg

A chapter has come to an end, not only for me but for many who enjoyed what this place had to offer.

Sur La Table Breton South here in Grand Rapids MI has closed permanently. Once the virus hit, Sur La Table stores across the country were closed for a solid three+ months. Some went under the axe, although Breton South survived the first cut and opened for retail in early July. But Chapter 11 bankruptcy and sale of the company led to more closures including Breton. Classes never resumed and now the space is available for the next business that might want to set up shop. Who knows, eh?

It was a great place to teach pastry classes. The kitchen well appointed, sunny and light with plenty of room to do what needed to be done. I met lots of interesting people (both co-workers and students), learned a lot myself and enjoyed being busy with prepping, setting up and instructing all types of folks with all levels of interest and experience. Good stuff.

Morning buns

Morning buns

Macarons

Macarons

Rustic Dutch oven bread

Rustic Dutch oven bread

New York style bagels

New York style bagels

Thanks for the memories.

On to the next chapter, whatever that may be. Meanwhile my new mantra is “I walk, I bake, I blog, I dream”.

Enjoy autumn and may you find your own new adventures.

168A4DD5-1F5E-43E1-9606-B8F9F32B9A7B.jpg

Black and blue almond butter buckle

IMG_1356.jpg

Many years ago (14!) when I was in the middle of my year of pastry school, I discovered a recipe in Bon Appétit for an almond-plum buckle, named for the finely ground almonds that are part of the batter as well as the plum slices pressed on top before baking. I made it a couple of times back then, once with plums/blueberries/strawberries and once with cherries/blueberries. They were a big hit for the folks who were the fortunate recipients, including Steve and myself of course.

I’ve since made it periodically over the years but it’s been awhile for sure. Every now and then it comes back into my memory banks, and I must bake it again, particularly when we’re still in the throes of summer fruits season yet moving into autumn as well.

A buckle is basically a single layer cake in which the batter is topped with fruit and often a streusel topping and then baked. The fruit sinks somewhat and the batter rises around it thus referring to the buckling of the cake under the fruit.

IMG_1359.jpg

There’s a lot written about this group of baked fruit desserts including crisps, slumps (or grunts), buckles, brown bettys and cobblers, but I’m not here today to describe how they compare in their preparation. I simply wish to share my own tweaked recipe based on the 14 year old one from BA. (Yay! I found it online so I could link you to it.)

As always, I did some basic cake recipe comparisons and made my changes based on a couple of other tasty cakes I’ve made over recent months. There’s a lot of similarity from recipe to recipe, often involving 2 sticks butter, 1 cup sugar, 2-4 eggs, vanilla, 2 cups flour, baking powder, baking soda, salt, perhaps a spice of choice or some citrus zest, some dairy like sour cream/yogurt/crème fraiche/whole milk/buttermilk, maybe some fruit involved and you’re good to go.

IMG_1354.JPG

Here’s my recipe outlined below as well as this downloadable PDF.

Ingredients:
70 g/3/4 cup almond flour
195 g/1.5 cup all purpose flour (option to sub in whole wheat pastry flour for about a fourth of the all purpose)
1 teaspoon baking powder
1/2 teaspoon baking soda
1/4 teaspoon fine sea salt
OPT 1/2-1 teaspoon cinnamon or spice mix of choice
100 g/7 tablespoons unsalted butter at room temperature
70 g/1/3 cup almond butter
175 g/1 cup minus 2 tablespoons granulated sugar
2 large eggs, room temperature
1 teaspoon vanilla extract
1/4 teaspoon almond extract
1/2 cup crème fraiche, room temperature
1.5 cups total of mixed blueberries and blackberries (this is mainly an eyeball it decision - you want fruit sprinkled just so over the cake so that there are spots for the cake to rise up around the fruit).

The steps:
1.
Heat the oven to 350ºF. Butter a 9” springform pan and place a round of parchment in the bottom.
2.
In a medium bowl whisk together almond flour, all purpose flour, baking powder, baking soda, salt and spices if using.
3. In the bowl of a stand mixer fitted with the paddle cream the butter and almond butter to blend.
4. Add granulated sugar and cream on medium high until light and fluffy, 3-4 minutes.
5. Add 2 eggs, one at a time, blending well after each. Blend in 1 teaspoon vanilla extract and 1/4 teaspoon almond extract.
6. Blend in flour mixture alternating with the crème fraiche just until combined.
7. Spread batter in prepared pan, smoothing the top with an offset spatula. Sprinkle fruit evenly over the top. Sprinkle with raw sugar if desired.
8. Bake about 50 minutes until a tester in center comes out clean. Cool 20 minutes, remove from pan and finish cooling.

Ready for the oven!

Ready for the oven!

The primary differences from the BA recipe are using blanched almond flour instead of finely grinding natural almonds; a reduction of butter from 227 g/8 ounces to a total of 170 g/6 ounces of unsalted butter (100 g) and almond butter (70 g) combined plus the addition of 1/2 cup crème fraiche; reduction of sugar by 2 tablespoons (~30 g). That’s pretty much it in a nutshell.

I used frozen berries for this one - if you do that, be sure to allow for 5-10 minutes more baking time to allow the center to be fully baked (nothing worse than a gooey center) and be careful not to overload the cake with fruit. I sprinkled both vanilla sugar and raw sugar on top before baking, but cinnamon sugar is an option too.

If you’d prefer a streusel topping, the easiest approach is equal weights flour, sugar, cold cubed butter sanded together to coarse crumbs to top the fruit. For this size cake 60 g of each is plenty. Remember - you can double, triple or quadruple the amounts and have a good freezer unbaked streusel stash on hand to top your favorite crisp, financier/tea cake or baked fruit tart.

The buckle served as a dessert for a Labor Day cookout at cousin Jen’s, topped with whipped cream and a few fresh berries.

IMG_1362.JPG
IMG_1366.JPG

Simple and delicious is always good.

Stay well, remain calm and keep baking. It helps.

The flowering crab I photographed last spring + some wild grapes

The flowering crab I photographed last spring + some wild grapes


Afternoon tea at The Grand Hotel, Mackinac Island

IMG_1417.jpg

Last week Steve and I were fortunate to be able to take our first real get-outta-town outing since mid-March and the beginning of social restrictions. It felt good to hit the road, making a stop in the small farming community of McBain (just east of Cadillac) for a visit with cousin Harv and his wife Ev. Always a treat.

Heading north to Mackinac City it felt good to clear our minds, admire the early autumn colors popping up, the sparkling lake waters and simply cruise. Our ultimate destination - Mackinac Island, a well known landmark here in the Midwest, sitting in the Straits of Mackinac between Lakes Michigan and Huron.

To get there one must take a boat from either Mackinac City or St. Ignace (across the bridge in the Upper Peninsula). We departed Mackinac City on the Starline, the trip providing a great view of the Mackinac Bridge . . . .

IMG_1385.jpg

as well as the island with the Grand Hotel clearly visible.

IMG_1388.jpg

Not only is the island home to the well known hotel but also a number of inns/B&Bs, grand homes on the bluffs and its famous fudge shops, horse drawn carriages/taxis, LOTS of bicycles and best of all - NO CARS!

Main Street looking west from our lodging at Harbour View Inn

Main Street looking west from our lodging at Harbour View Inn

There is also a stunning natural beauty to the place - along the lake shore and throughout the forested island. Flowers are in abundance fronting many homes/lodgings/walkways, and the clip-clop of horse hooves provides a certain sense of calm. You should go sometime if you can.

Looking through Arch Rock - gorgeous hues, rocky shores and clear water!

Looking through Arch Rock - gorgeous hues, rocky shores and clear water!

Walking through the woods (most of the island is state park)

Walking through the woods (most of the island is state park)

IMG_1396.JPG
IMG_1418.jpg

I knew as we were planning this mini-vacation that going to afternoon tea at The Grand Hotel would be on my to-do list. It’s been over 25 years since Steve and I were last on the island, and I had fond memories of the tea experience back then. Little did I know all these years later that I would have attended pastry school in Italy and France and developed my own interest in afternoon tea to boot!

Tea is served in the large open sitting room just inside the grand porch. The decor is as we remembered - still striking with reds, greens and a clear geranium theme (the Grand’s signature flower). The hotel has been there since 1887 and, even though I don’t know what the original decor was like, I have to wonder how often they have to re-carpet and re-upholster everything. Whew - what a job!

IMG_1410.JPG

As is true of any establishment we entered while on this little adventure, masks are required. Once seated we removed them to enjoy our food and drink. There were quite a number of folks both inside and out on the porch, all properly distanced from those not in their own party.

We ordered one tiered tea tray (for me) and both of us opted for a glass of sparkling wine. What made this especially lovely was the harpist who played beautifully for the entire hour and a half, providing a true feeling of serenity (something that’s been difficult to grasp for many over the last 6 months).

IMG_1404.jpg

The offerings were classic, and I appreciated the small portions - finger sandwiches on white bread (ham/cheese, cucumber, prosciutto), mini lemon scones with clotted cream and an assortment of French style pastries (eclair, fruit tart, macaron) plus mini cheesecake, chocolate dipped strawberry and some sort of cake ball??

The flavors were fair to decent, some of the textures lacking (dense scone, soggy tart shell), and we couldn’t help but reminisce about the tea experiences we had a year ago in the UK. Buuuuutttt . . . . . we took the time to sit back, relax, listen to melodious harp music and remove ourselves from the cares of the world for just a short while. Special indeed.

IMG_1414.JPG

Butter pecan ice cream

IMG_1341.jpg

Happy Labor Day weekend to all of you!

I recently made a batch of butter pecan ice cream and thought I’d say a quick hello and share it with you. So good!

But before I do I’d like to share this link with you. I recently received an email from Heather Langford of Gold Coast Ice Cream in San Diego USA. She writes about ALL things ice cream. I’m talking ingredients, ice cream makers, utensils, recipes - and that’s just the tip of the iceberg. If you love making and eating ice cream (and who doesn’t), you should check it out.

Heather has also written a guide to ice cream making that’s straight forward and easy to understand.

For this butter pecan treat I use my standard base recipe with these changes: browning 70 g/5 tablespoons of unsalted butter starts the process; use dark brown sugar (same amount 150 g) instead of granulated; a cup of lightly buttered and toasted pecans are mixed in at the end of ice cream processing.

IMG_1337.jpg

Here’s a quick review of the steps and the recipe PDF:

Have your egg yolks ready in a medium bowl and place one cup of cream in another bowl over an ice bath with a strainer at the ready.

Start by browning the 70 g butter in a medium saucepan, the same one you’ll cook the custard base in.

Once the butter is browned, blend in the brown sugar and a pinch of salt on medium heat to get the sugar melting.

Add the cup each of cream and whole milk and continue to heat to completely dissolve the sugar.

Temper the warm dairy into the yolks, return all to the heat and cook to the anglaise stage, stirring all the while.

Strain into the cold cream over the ice bath, blend in a teaspoon vanilla extract, let cool then refrigerate for up to three days before processing.

IMG_1344.jpg

You’ll have plenty of time to prep the buttered pecans. Heat the oven to 350ºF. Blend one cup pecans with one tablespoon melted butter and a pinch of salt, spread out on a parchment lined sheet pan and toast about 10 minutes. Cool. Roughly chop and blend into your churned ice cream base. Hold in your freezer until it’s time to enjoy! Yay!

A delicious treat, as ice cream always is.

Take care of yourselves.

IMG_1341.jpg


Brioche feuilletée revisited - chocolate hazelnut braid

IMG_0825.jpg

I would never have imagined that the most viewed post on this blog would be Brioche feuilletée, written back in November, 2016. I launched that project by tweaking the brioche recipe from a Le Notre Paris class I attended in September of that year. Reducing the butter in the base dough, adding a butter block and putting it through three 3-folds yielded a lovely laminated result.

Since then, as is my wont, I’ve reviewed a number of additional brioche recipes and techniques from the likes of Dorie Greenspan and Jeffrey Hamelman (of King Arthur Flour fame) and developed a new version of the base dough in November, 2018. The dough can be used for any brioche option you wish - Nanterre, brioche à tête, coffee cake, cinnamon buns or brioche rolls topped with pastry cream/jam/fruit. Lots of choices.

In this recipe PDF I go into more details about brioche, adjusting the recipe to yield either a leaner or an even richer dough plus some options for laminating the dough. So many possibilities.

It helps me to assess a brioche recipe by looking at the butter to flour ratio. A medium brioche dough typically contains butter that is about 50% the weight of the flour. Brioche can run from lean (where the butter may be as low as 25% of the flour) or rich where the butter can be all the way up to 100% of the flour.

The full batch of the base brioche dough (before adding any butter block/laminations) yields about 1300 g (2.8 lbs) of dough. So you can make the full batch and then separate out the 600 g for this braided two loaf project. Wrap and freeze the remaining dough for later or use it for other projects you might have up your sleeve.

Using Hamelman’s guidelines for these braided delights, I laminated 600 g of the base dough with an additional 120 g/4.25 ounces of butter which, by my calculations gave the final result a butter to flour ratio of 1:1. Now THAT’S a rich brioche! Remember - this makes TWO braids.

IMG_0829.jpg

Let’s do a quick review on laminating the dough - it never hurts, since the more you do it, the more it becomes second nature.

Roll the dough out to a 6”x12” rectangle. Have a 6” butter block ready - it should be cool and malleable.

IMG_0796.jpg

Place the butter on half of the dough . . . . . .

IMG_0797.jpg

then fold the dough over the butter, pinching the edges closed to fully envelope the dough. This is the beurrage.

IMG_0798.jpg

If your kitchen is pretty warm or your dough and butter seem warm and starting to squish, wrap it up and refrigerate for 30 minutes before proceeding. Now roll the dough out to about 18” long and 6” wide, always with the short side parallel to the work surface and rolling to and from yourself (not sideways) to achieve the length. Do a 4-fold (book fold) by bringing each short end into the middle with edges meeting . . . . . .

IMG_0799.jpg

then fold it on itself.

IMG_0800.jpg

Wrap and chill the dough for 30 minutes to allow it to relax then proceed with a 3-fold (business letter fold). Before rolling remember to turn the dough 90 degrees so the “spine” or fold is on your left then roll out to approximately 18”x6” again, rolling to/from yourself. Don’t get hung up on exact measurements - you’re going for about three times length to width.

IMG_0807.jpg

Visualizing the dough in thirds, fold one end up . . . . . .

IMG_0808.jpg

and the other down over it. Congrats! Your laminated dough is complete.

IMG_0809.jpg

Now wrap it snugly and refrigerate for a good 1-2 hours to let it relax and firm up before rolling it out for your intended purpose.

For this braid project I divided the dough in half - look at those buttery layers!

IMG_0814.JPG

Each half of the laminated version weighs about 360 g (before filling) and is good for a medium loaf pan size braid.

I created a chocolate hazelnut filling by taking 200 g of a hazelnut remonce mixture I had left from this hazelnut/almond couronne project and adding 50 g / ~2 ounces of Nocciola crema and a bit of egg white and simple syrup to loosen it a bit for piping.

IMG_0803.JPG
IMG_0802.JPG

Butter two medium (8”x4”) loaf pans and have the filling ready in a piping bag.

On a lightly floured surface roll one half of the dough into a 10”x10” square and divide it in three strips.

IMG_0815.jpg

Egg wash (I used egg white since I had some on hand) along one long edge of each strip then pipe a line of filling along the opposite edge.

IMG_0816.jpg

Roll each strip up into a log and press the edge to seal.

IMG_0817.jpg

With seam sides down do a classic three strand braid.

IMG_0818.jpg

As you come to the end of the braid, just tuck the ends under then pop it into a buttered loaf pan.

IMG_0819.jpg

Repeat the steps with the second half of the dough.

Cover the pans with buttered plastic wrap and let rise for a good 1.5 hours. Toward the end of that proofing time heat the oven to 375ºF.

IMG_0821.JPG

Brush the loaves with egg wash and bake about 35 minutes until nicely golden.

IMG_0823.jpg

Remove them from the pans and, if you’d like to gussy them up a bit, brush with either some simple syrup or apricot glaze for a bit of shine and even go another step and drizzle on a confectioner’s sugar/milk/vanilla glaze. I left mine au naturel.

IMG_0825.jpg

Once cooled, I sliced into one of these babies. Oooooh - buttery with just the right swirl of choco-hazelnut and pretty darn delicious to boot. Nothing like a good brioche, eh?

IMG_0831.JPG

I love the feel of dough, the shaping, the proofing, the baking, the aromas and, of course, the tasting! Dough reigns!!

Maple glazed blueberry drop scones

IMG_1295.JPG

I originally included this blueberry drop scone review in my recent “Puttering in the kitchen in August” post but, after consideration and Steve’s helpful encouragement, I’ve broken it out into it’s own post. Enjoy my discoveries on these tasty treats!

IMG_1298.JPG

I’ve now made these scones THREE times since discovering Dorie Greenspan’s NYT article on Joanne Chang’s recipe. Print it out for your own to-do list!

The term drop scones refers to scooping and dropping the balls of dough on the sheet pan as opposed to forming a dough round or rectangle and cutting more uniform triangle shapes for baking as seen below. Both work depending on your vision.

IMG_0881.JPG

Upon first taste test I found them delightful - just a hint of crispy to the outside and more cake like, tender and moist on the inside than my usual scones. The more I ate them, the more they grew on me.

I’m usually not big on cute-sy combo names like cruffins or cronuts, but for these the word “scuffins” definitely comes to mind - a term someone somewhere coined some years back - a cross between a scone and muffin. Oh well, call them what you’d like - they’re good no matter the label. Try them out yourself and see what you think.

IMG_1296.JPG

This recipe involves a slightly different mixing method than the one I’ve come to rely on over the years. Here’s what I discovered about the process (having the recipe on hand as you read through this is helpful). You need to plan ahead - the dough is wrapped and refrigerated for at least 1 and up to 24 hours to allow the flour to fully absorb the moisture before scooping and baking. While the recipe calls for 8 large scones, I made mine smaller using a generous 1/4 cup size scoop with a yield of 16-18 scones.

Chilled dough ready to scoop - check out those butter pieces!

Chilled dough ready to scoop - check out those butter pieces!

First batch: I pretty much followed Joanne’s recipe, using Vermont Creamery’s crème fraiche but since I didn’t have any buttermilk in the house I made the faux version by adding lemon juice to whole milk. I added the first half of the butter into the dry ingredients using the mixer with the paddle to break up the butter pieces (as she suggests), but when it came time to add the second half of the butter, I gave the mixer a rest and used my by-hand method of flaking the butter into the mix by literally flattening the butter pieces with my fingertips and leaving visible pieces in the dough.

The liquid ingredients are all blended together along with fresh blueberries and then added to the flour/butter mixture. Here again I preferred doing this by hand using a spatula and bowl scraper to quickly and gently blend everything, picking up the dry ingredients until a cohesive dough ball forms. I typically don’t add fresh fruit to scones since the fruit can become mushy and macerated during mixing, but the fresh blueberries held up well with a gentle touch.

I refrigerated the dough for four hours and then baked them. Glaze them right out of the oven, cool a bit and enjoy warm or room temperature. Nice!

First batch

First batch

I continued the by-hand approach for the next two batches as well. It speaks to me. Remember our two hands are some of the best tools we have!

Second batch: no crème fraiche on hand so this time I used Siggi’s Icelandic “touch of honey” whole milk yogurt and actual buttermilk. Once I had the dough mixed and gave it a few hours of refrigeration, I scooped out the dough balls onto a parchment lined sheet pan and froze them. It was a couple of days before I baked them (directly from freezer to oven) and they didn’t bake as evenly as the first batch. I also found they browned more on the bottom and were less tender and delightful. Perhaps you can appreciate their “rough and tumble” look below.

Full disclosure - I messed up the baking powder amount and attempted a fix so accuracy is in question. Even though they rose OK they weren’t as fluffy as batch one. Yikes - not my usual M.O.

True confession time - a few weeks back I tried some roasted tomato, ricotta, herb scones and realized after I had them in the oven that I FORGOT to add the baking powder. Whoa! How many times have I made that base scone recipe?? Just goes to show you how distraction and lack of focus can sneak right in there these days.

Second batch

Second batch

Third batch: I made my own crème fraiche - yay! Here’s the deal: heat a cup of heavy cream to about 95ºF (easy in a glass Pyrex measuring cup in the microwave), stir in a teaspoon of buttermilk, cover loosely and let sit at room temperature for 24 hours. Mine was thickening nicely by then and into the fridge it went. I used it for the scones on day 4 of it’s maturation - nice and tangy. I again used a squeeze of lemon juice in whole milk as my buttermilk. I reduced the whole wheat flour by 20 g and increased the all purpose by 20 g (I just felt like it).

BTW - For all three batches I used white whole wheat flour for the whole wheat portion. In the future I’ll try whole wheat pastry flour (if I can ever get my hands on some again!) for an even more tender result.

This time I kept the dough refrigerated for a full 24 hours before scooping and baking. The end result was much like the first batch. Mmmmm good.

IMG_1295.JPG

What I learned: mix by hand, refrigerate the dough 4-24 hours then scoop the chilled dough and bake soon after. Use the right quantity of baking powder. Duh. Thumbs up on the crème fraiche and buttermilk combo. Maybe don’t freeze them unbaked but I’m not necessarily giving up on that approach. That second batch was the outlier due to a questionable baking powder amount and maybe even the oven temp when baking directly from the freezer.

I encourage you to give these a try. You’ll like them.

Autumn is coming . . .