Orange cake

One of my favorite baking books is “Genius Desserts” written by the FOOD52 folks. I’ve mentioned it on and off in recent years and highly recommend it. I had tagged this cake as one to try - it’s billed as “whole orange cake”, the recipe published years ago in Sunset magazine. From a quick internet search I discovered that Sunset was first published in 1898!! Guess what - it’s still being published and the recipe is on their website.

Not long after I had added it to my baking agenda, lo and behold, over the next week or two, it popped up in my life, seemingly by happenstance. First I came across the same recipe in the NYT and then heard about the experience of making it from a woman attending a baking demo I was giving at a nearby assisted living facility. Kismet I say.

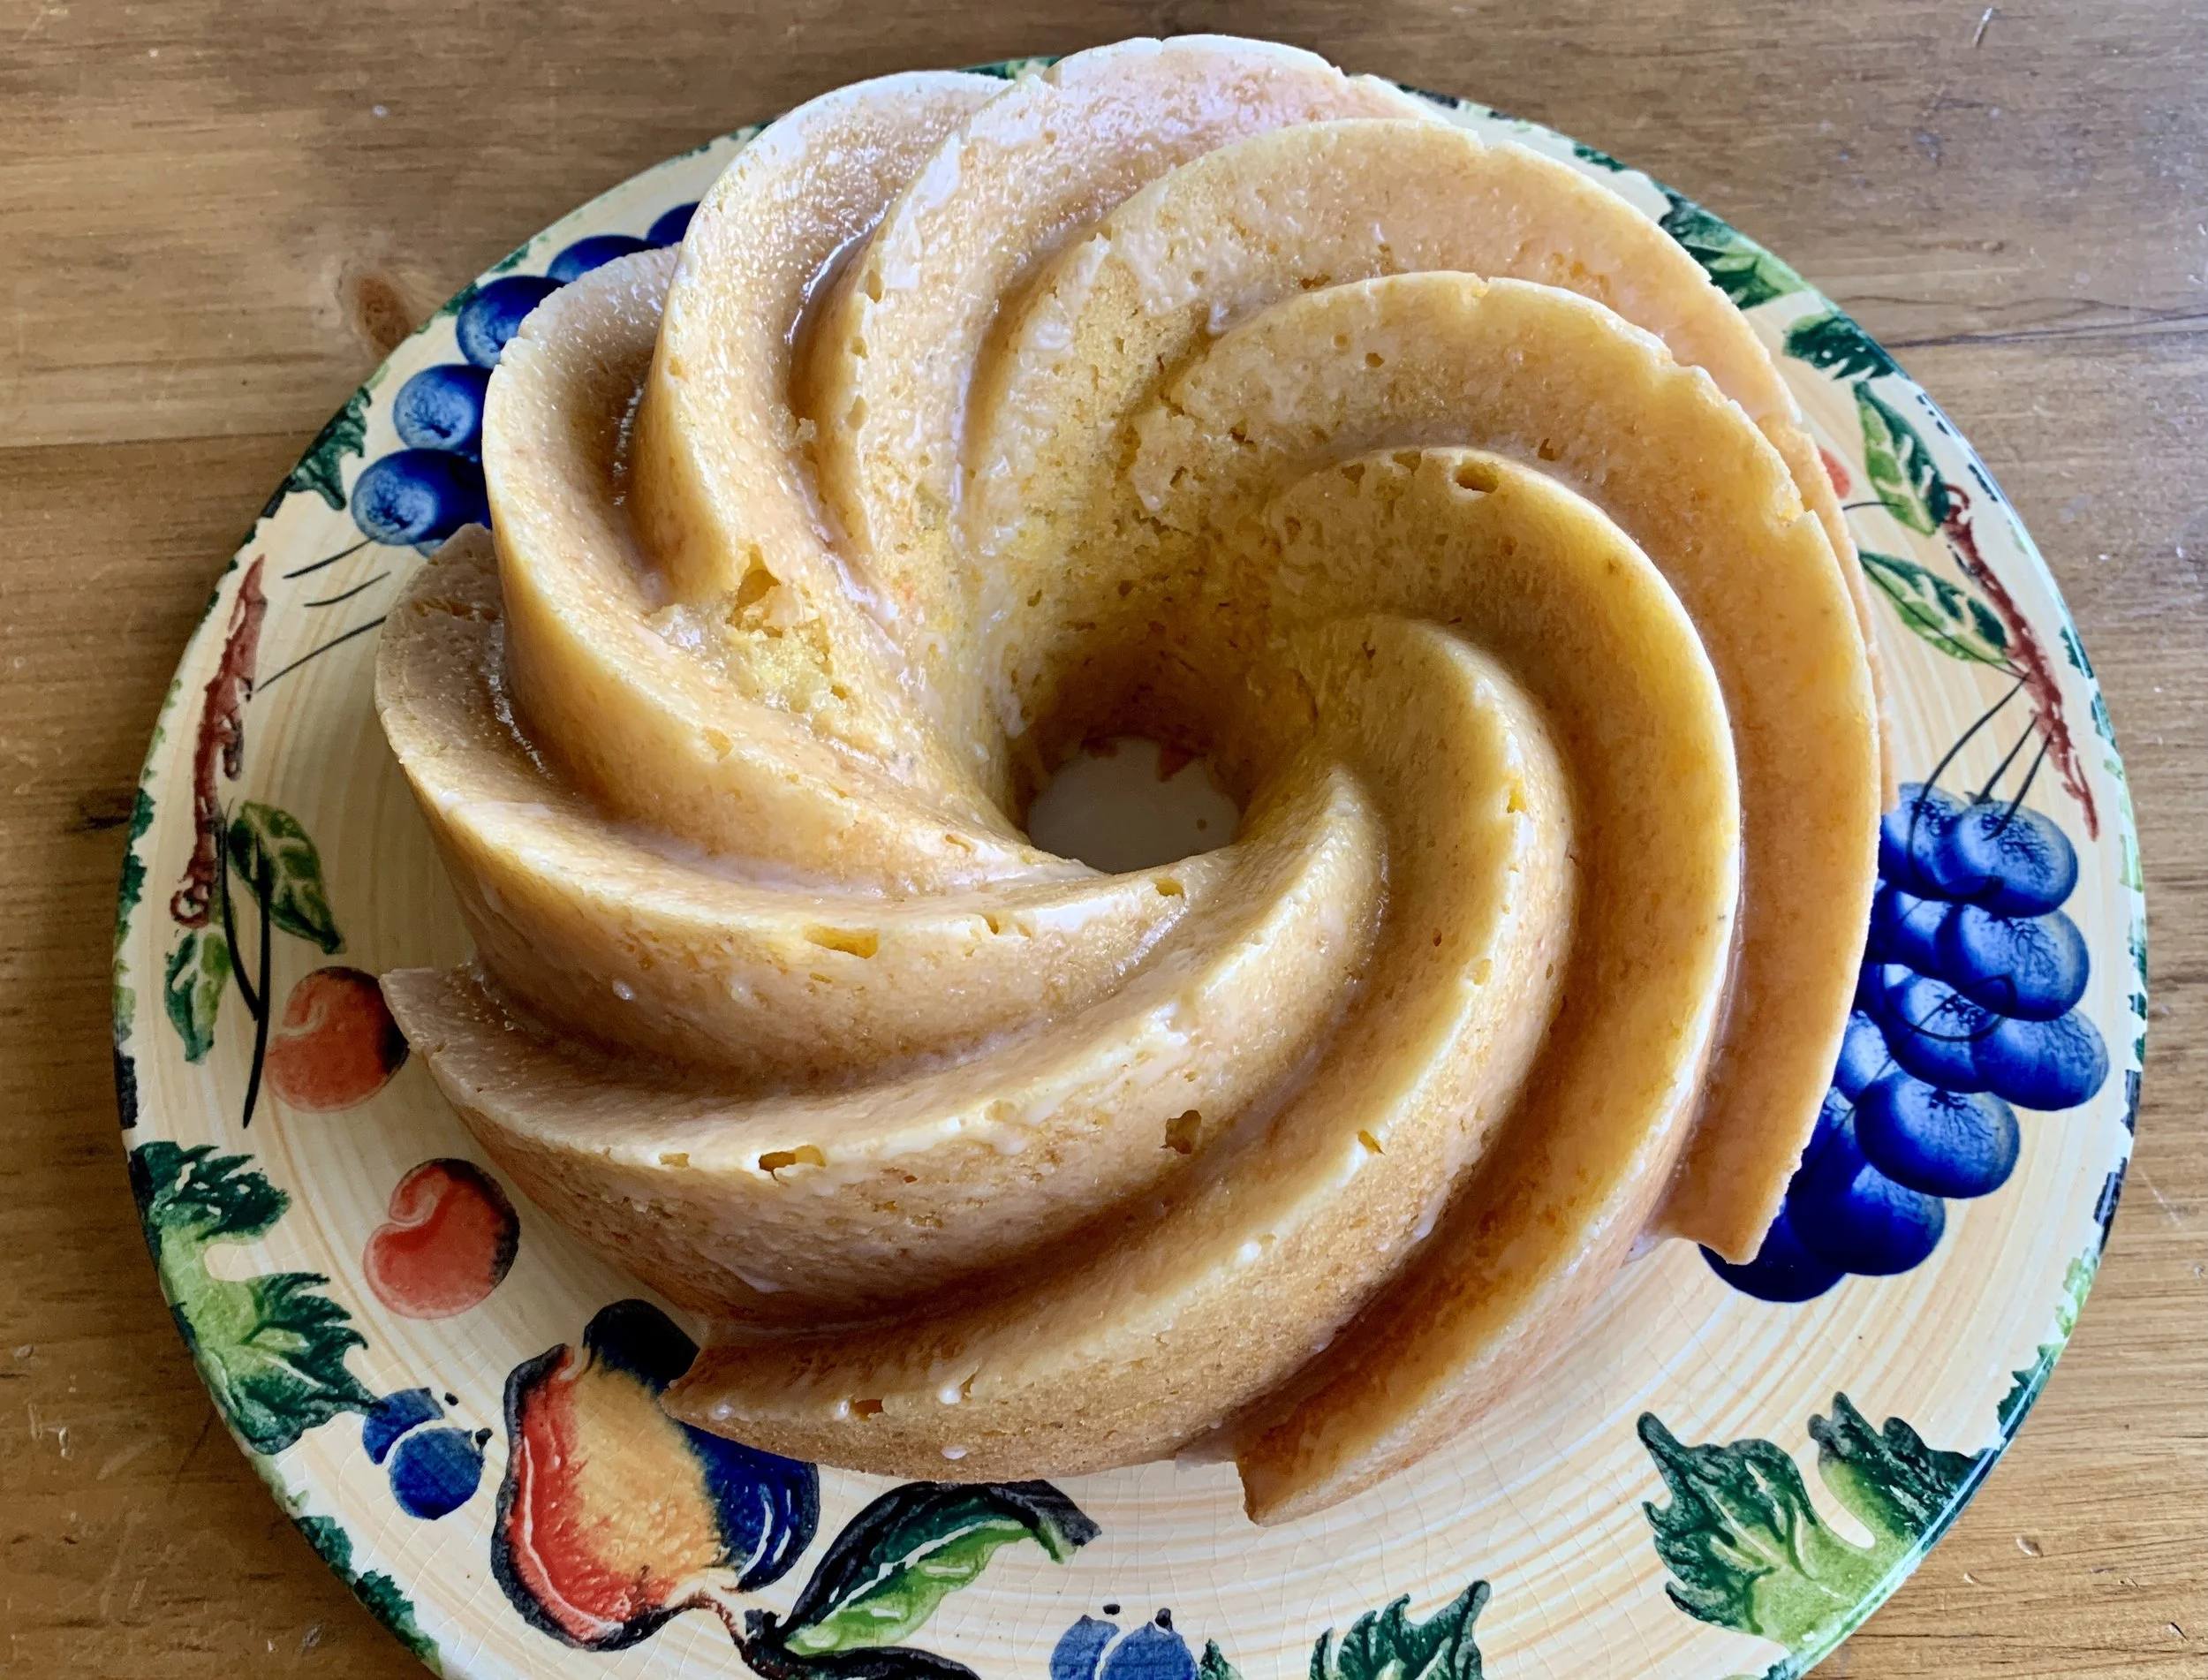
I’ll admit that what really drew me to baking this was the swirly Nordic Ware pan that I’ve had my eye on for awhile now. I kept telling myself “Susan - you don’t need another pan”, but I ordered it anyway. In my defense, the well-worn traditional style bundt pan that I used to have so many years ago is long gone and I had no urge to replace it. After all, I tend to prefer petite teacakes - love those financiers! - rather than large slices.

Buuuuttt . . . . Nordic Ware has been producing some very cool designs over the years and this one caught my eye - so classy without being too ornate. Something about those swirls.

10 Cup Heritage Bundt

While there are some whole orange cake recipes out there that require boiling whole oranges, this one calls for 2 oranges (about a pound), ends cut off but otherwise left unpeeled, then chunked up, seeded and pulsed in a food processor to a somewhat coarse purée. You can do that part ahead and hold it in the fridge until ready to make the batter.

I’ll go through the steps and link you to the recipe here. It is readily available on a number of sites and is certainly not unique to me. Who knows the countless number of folks who have made and enjoyed this cake over the years! Oh! You might notice my navel and cara-cara oranges in the photo below - seemed like a good combo.


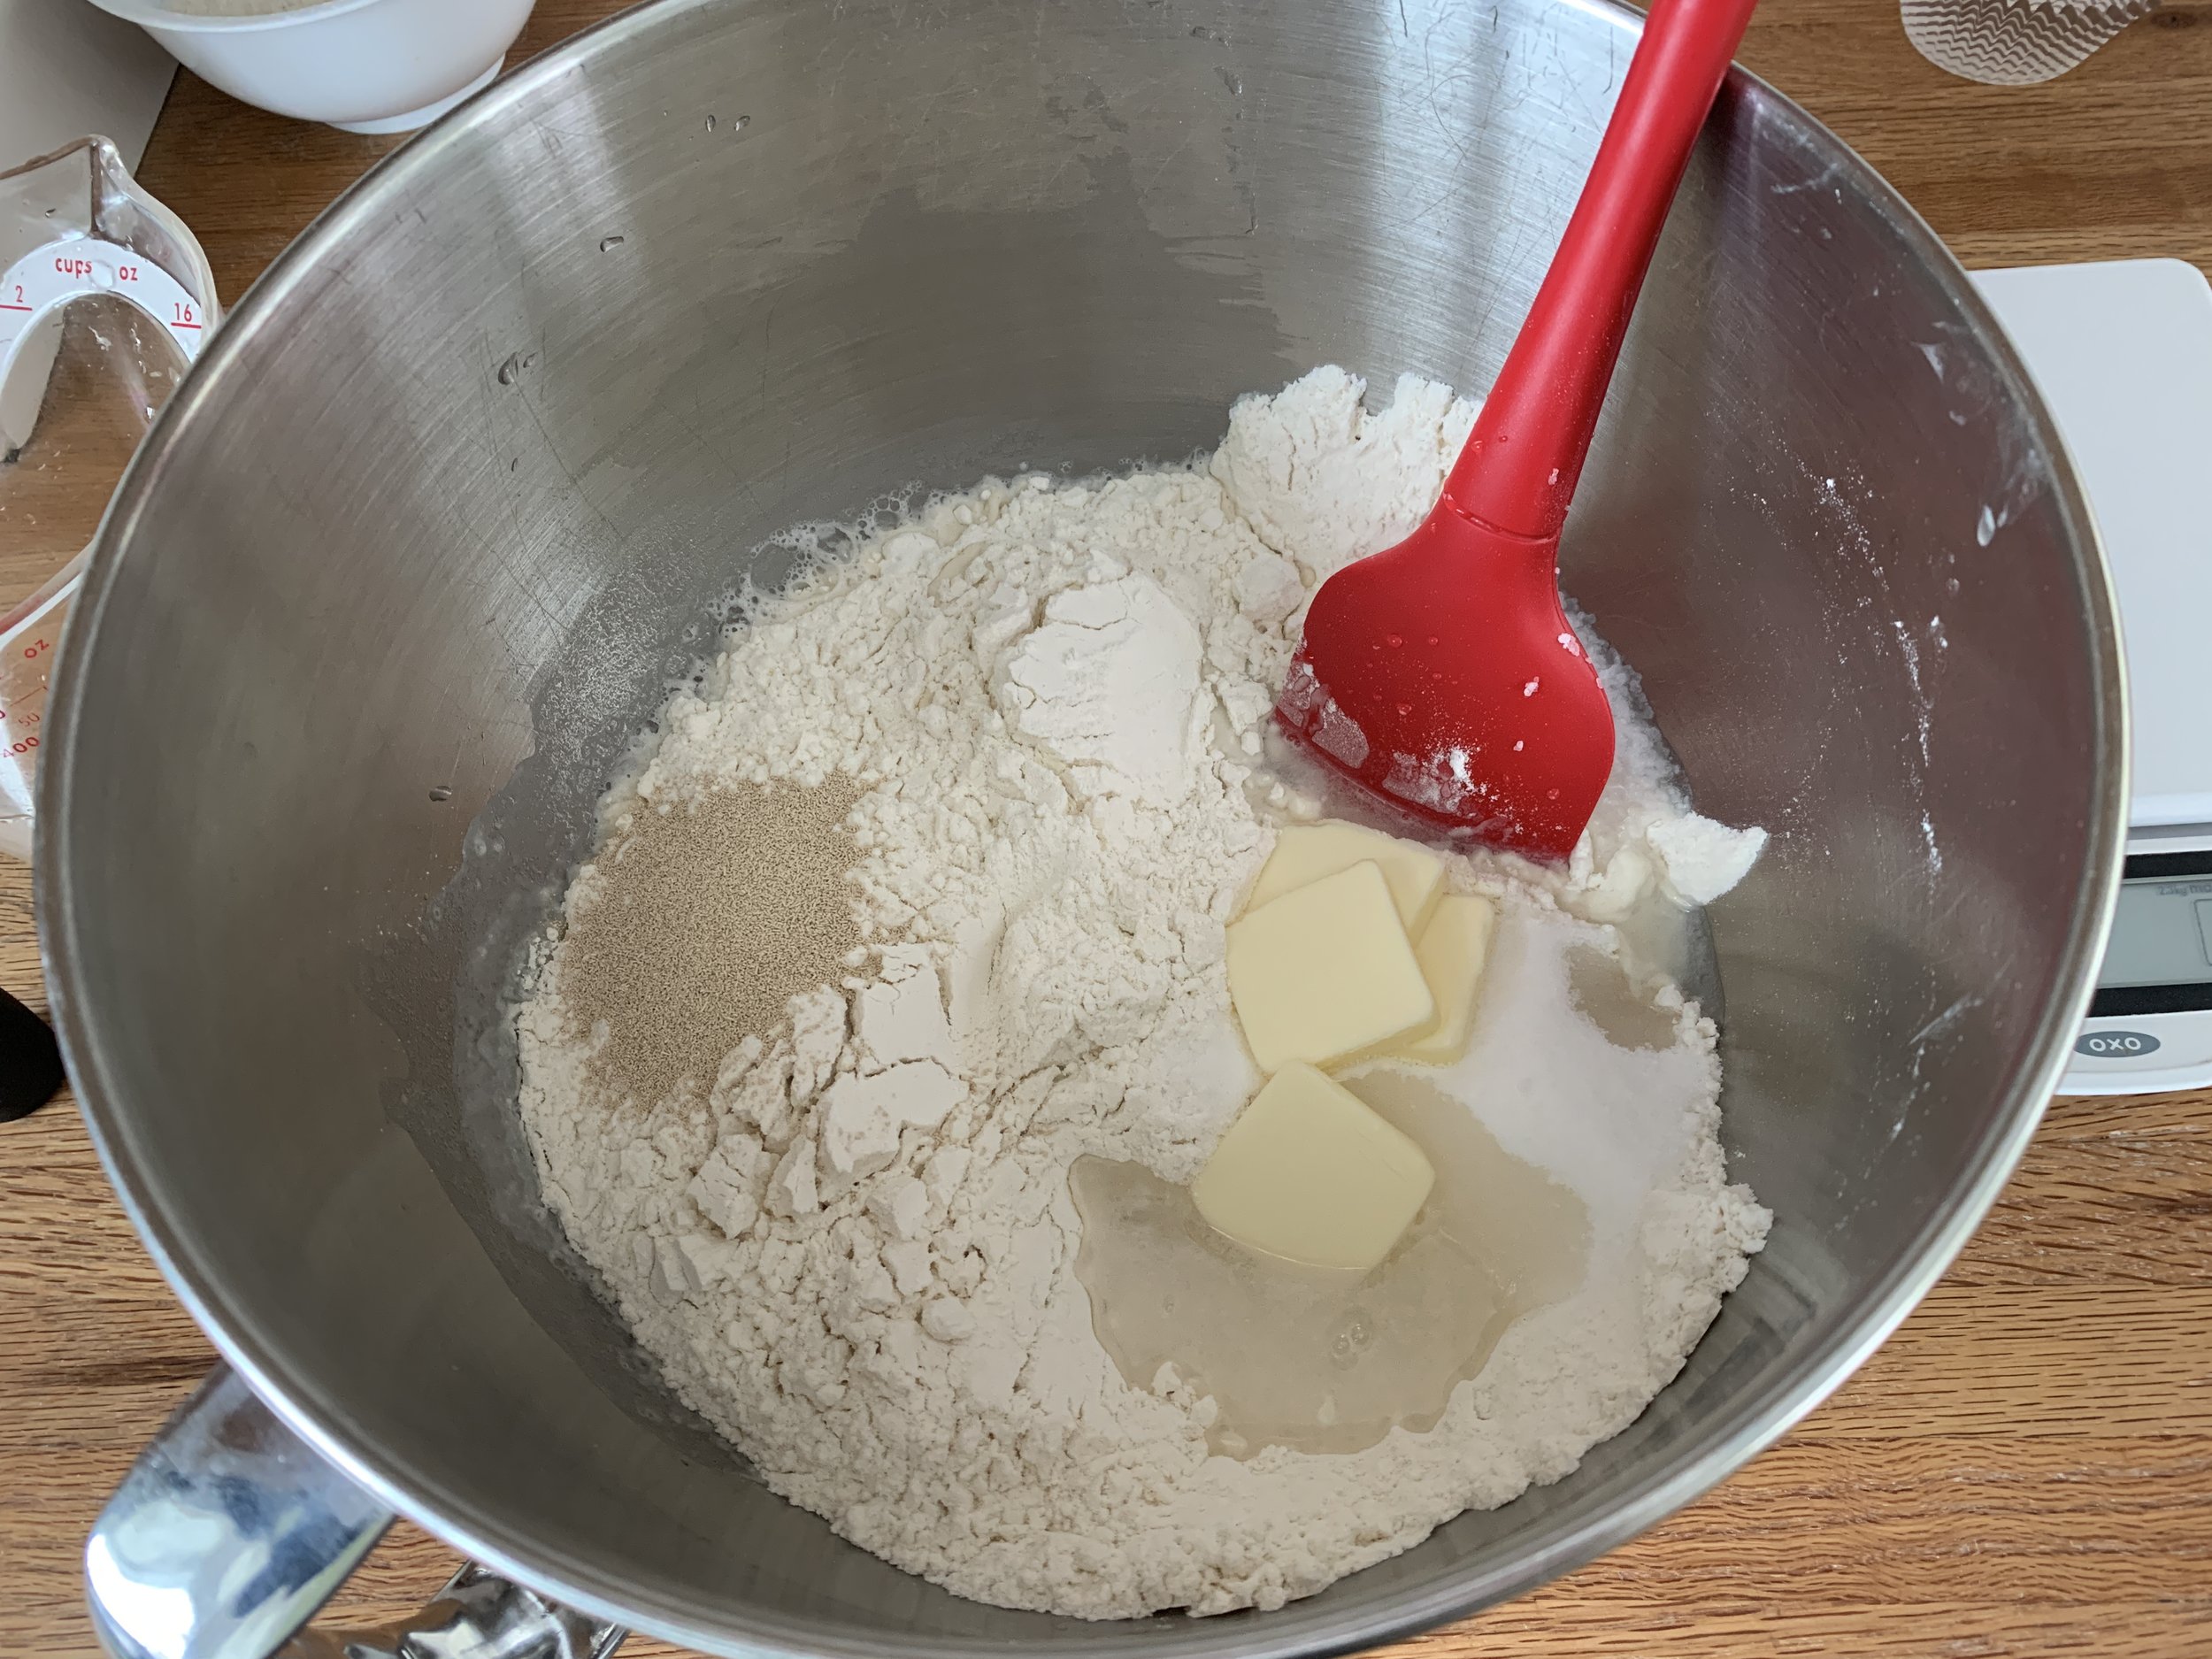
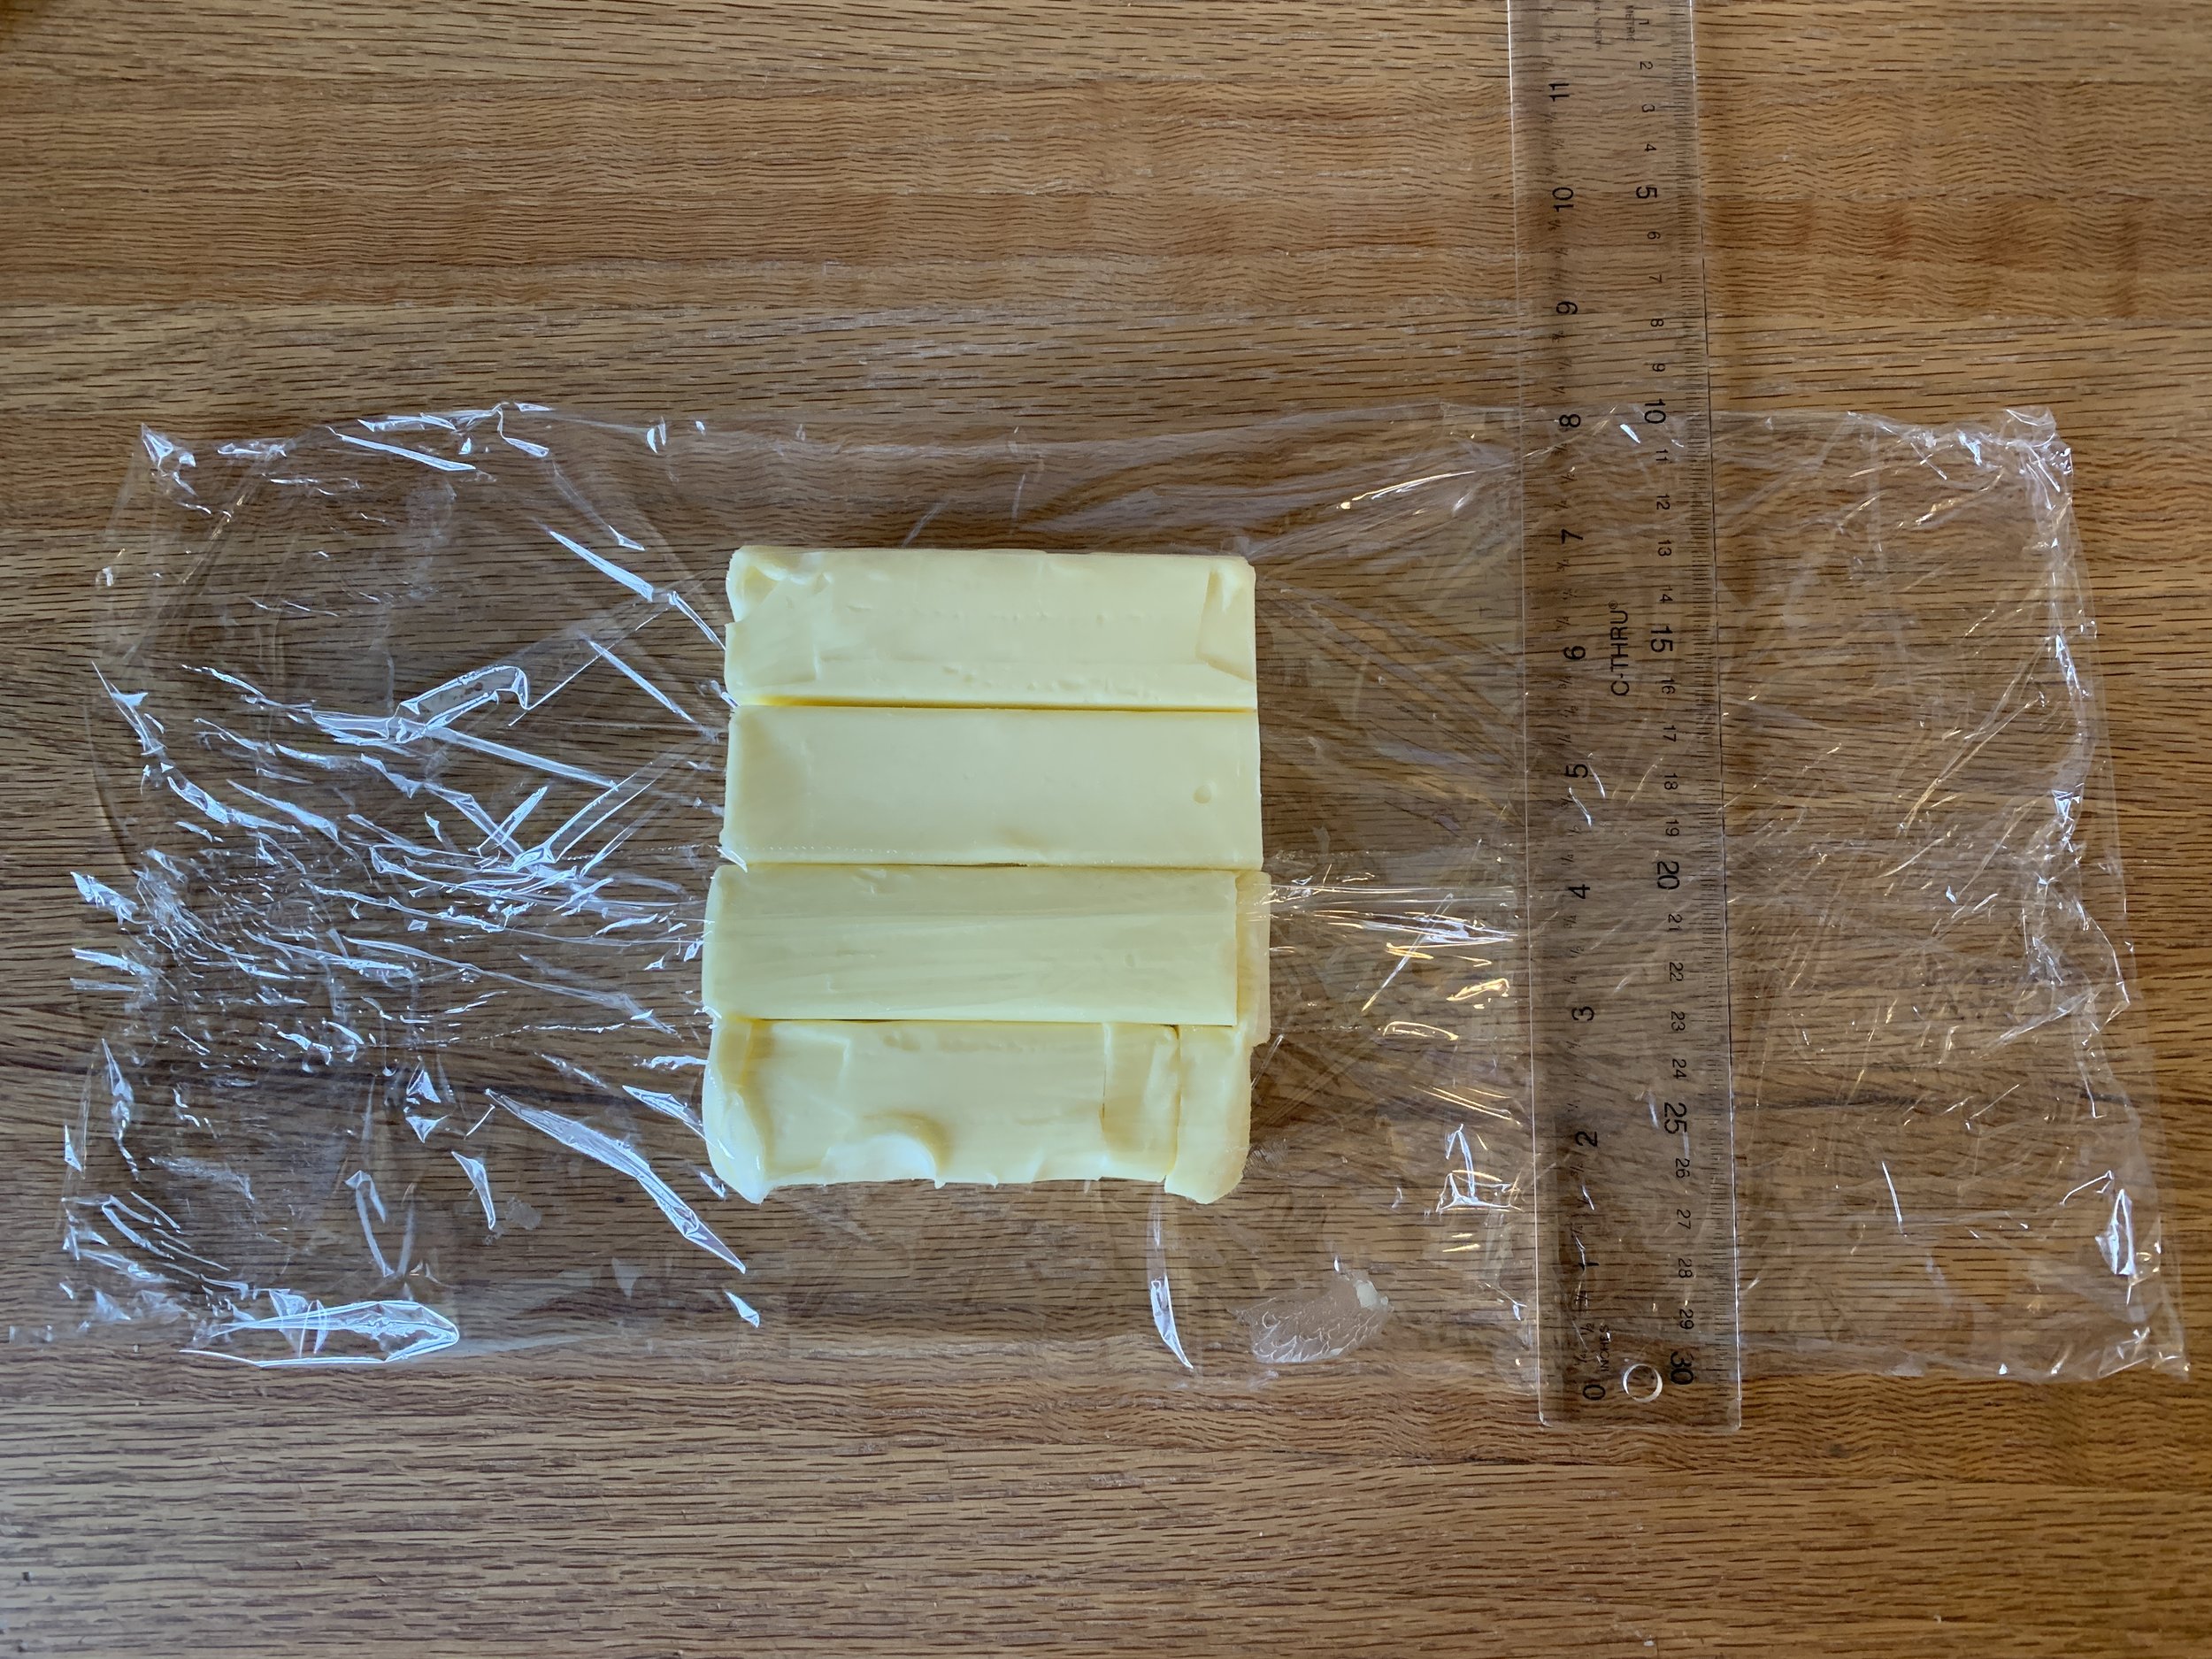
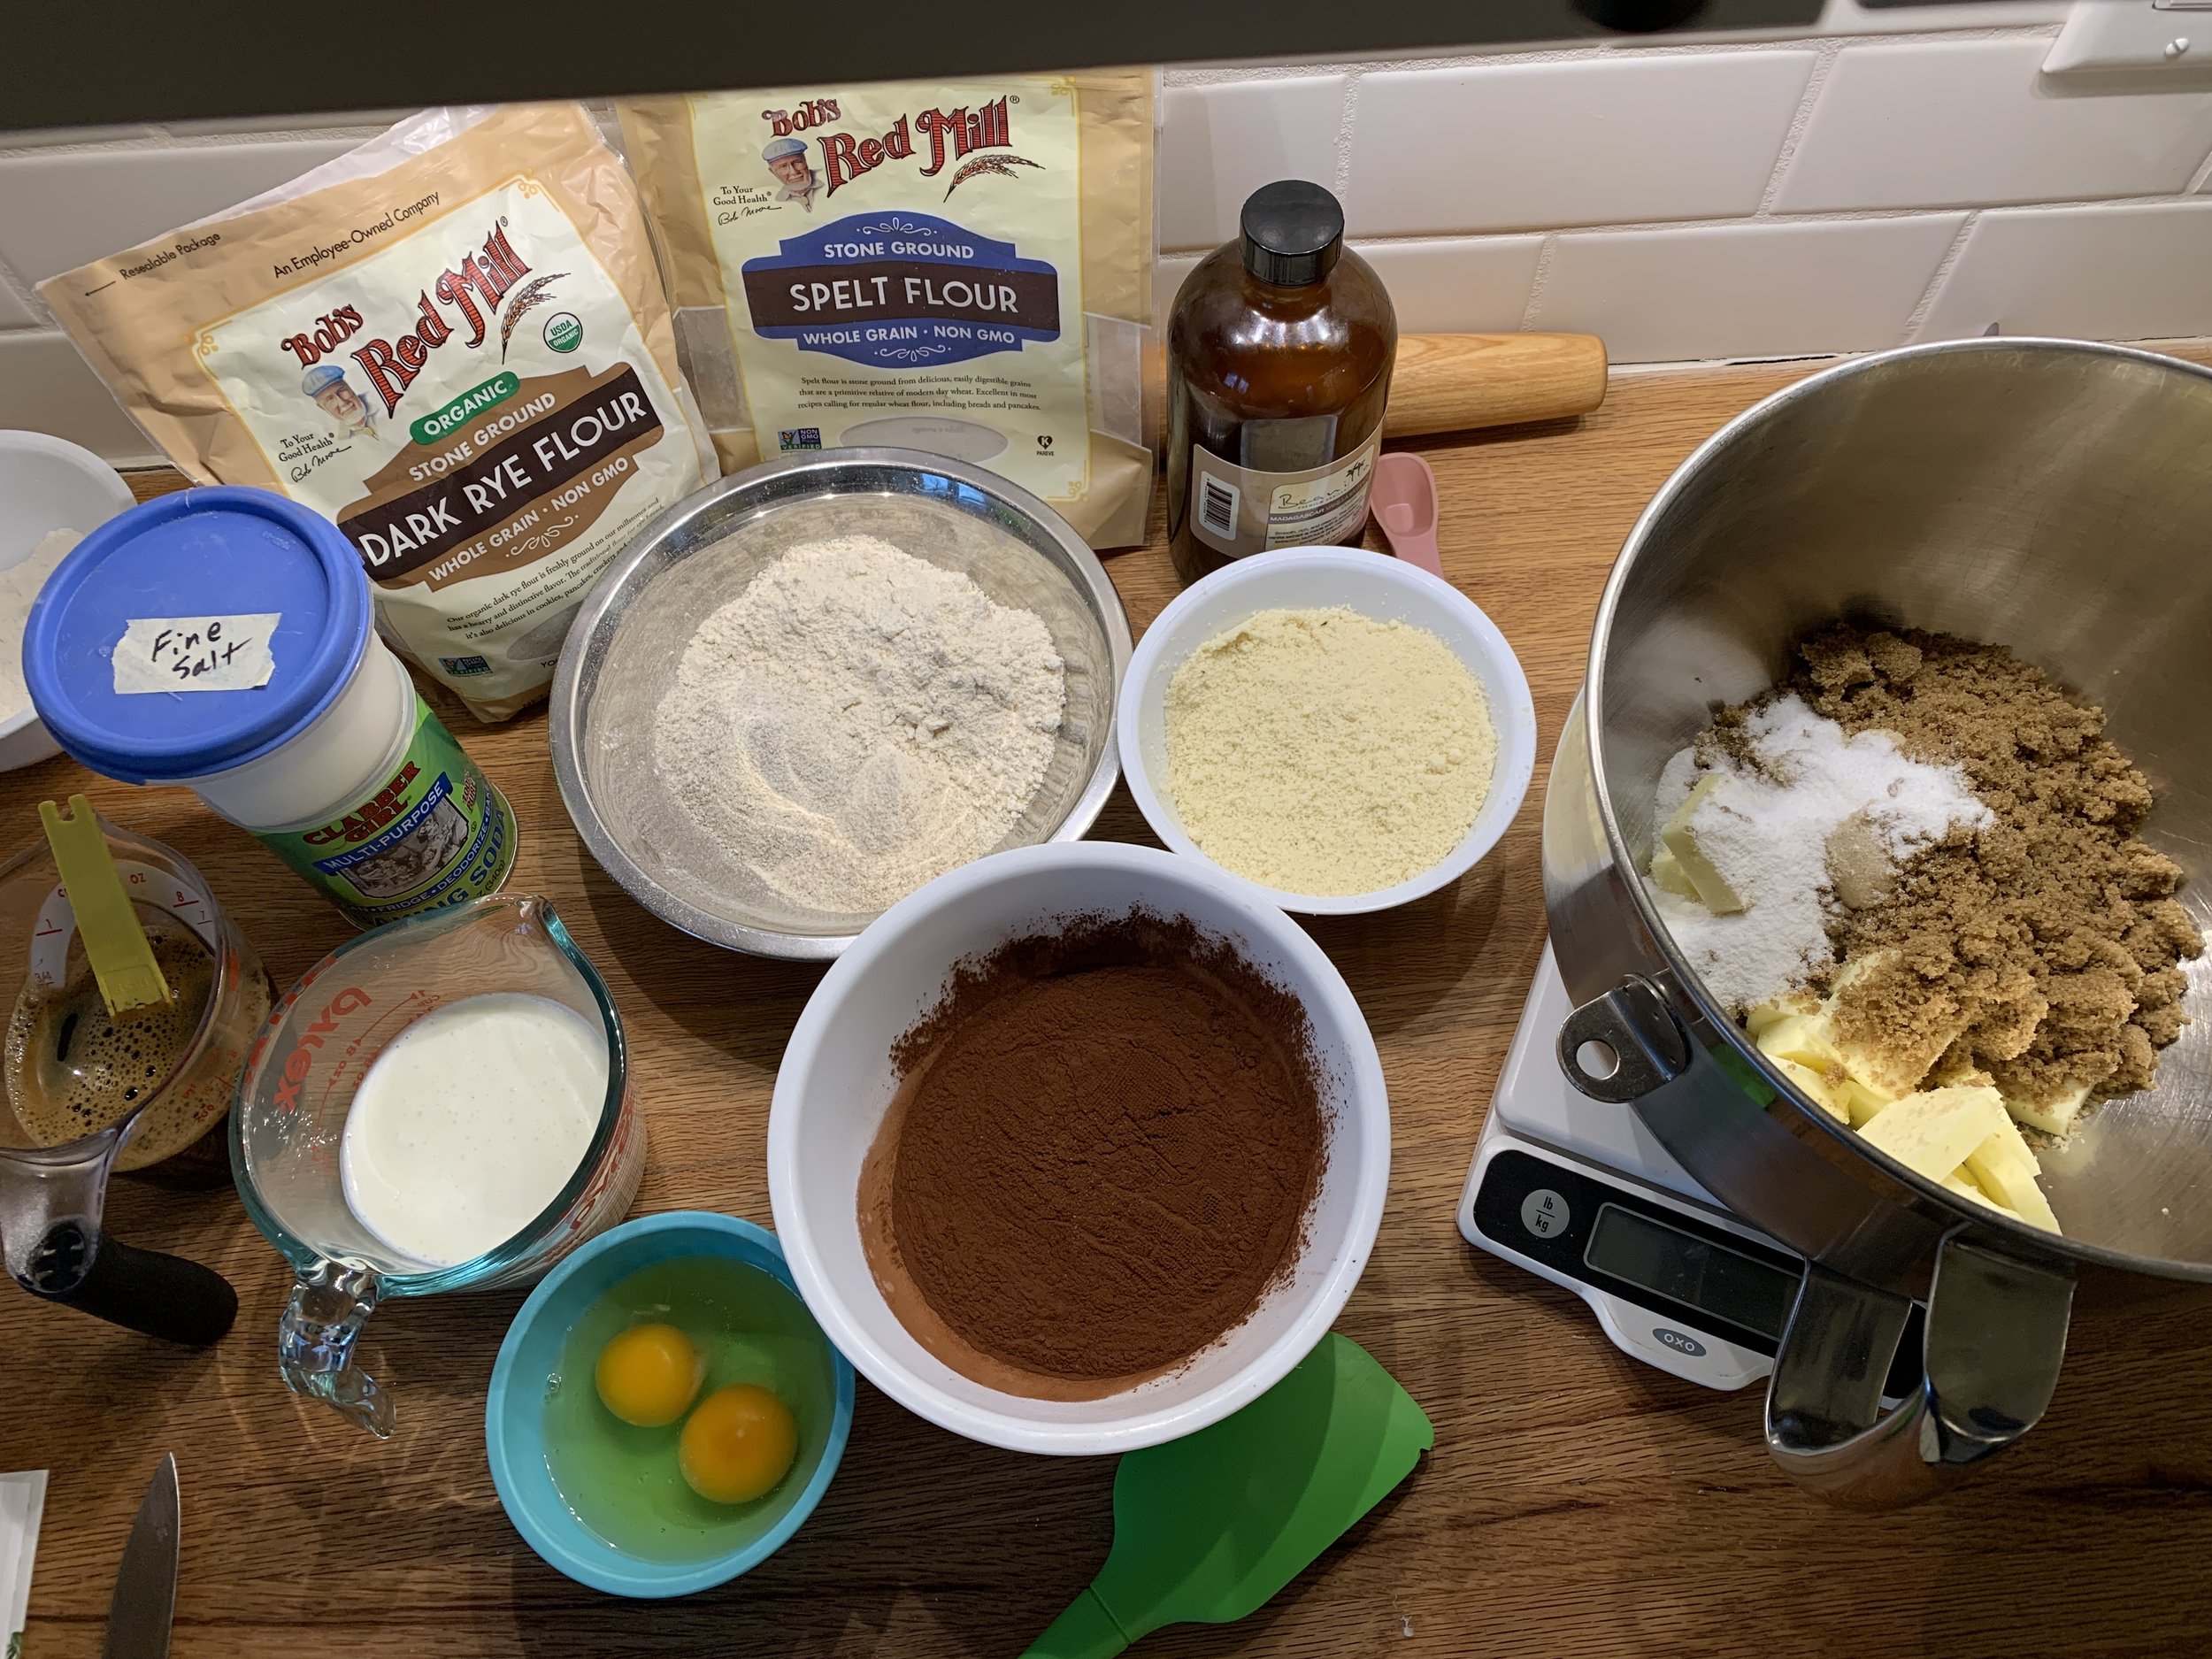
As you plan your project, the do-aheads are: butter and flour the pan (or use pan spray), purée the oranges (you’ll portion out 355 g / 1 1/2 cups for the batter and compost or dispose of the rest), have 3 large eggs at room temp and 227 g / 2 sticks unsalted butter at soft room temp. When ready to make the batter, mise out 250 g / 1 1/4 cups sugar, 320 g / 2 1/2 cups all purpose flour, 2 teaspoons baking powder, 1/4 teaspoon baking soda and 1/4 teaspoon fine salt.

You’ll be glazing the cake after baking - whisk together 150 g / 1 1/2 cups confectioner’s sugar and 35 g fresh squeezed OJ. You can always do this during the bake.

Here’s how my purée looked - remember I used a combo of navel and cara-cara.


Heat the oven to 325ºF. Cream the butter and sugar for 3-5 minutes until lightened and fluffy. Add the eggs one at a time, blending each fully before adding the next. Blend in the orange purée. Looked a bit like orange cottage cheese.

Hmmmm . . . . interesting look

Add flour, baking powder, baking soda and salt and blend until incorporated and smooth.

Everything blended!

Scrape the batter into the prepared pan and smooth the top.

Ready to bake

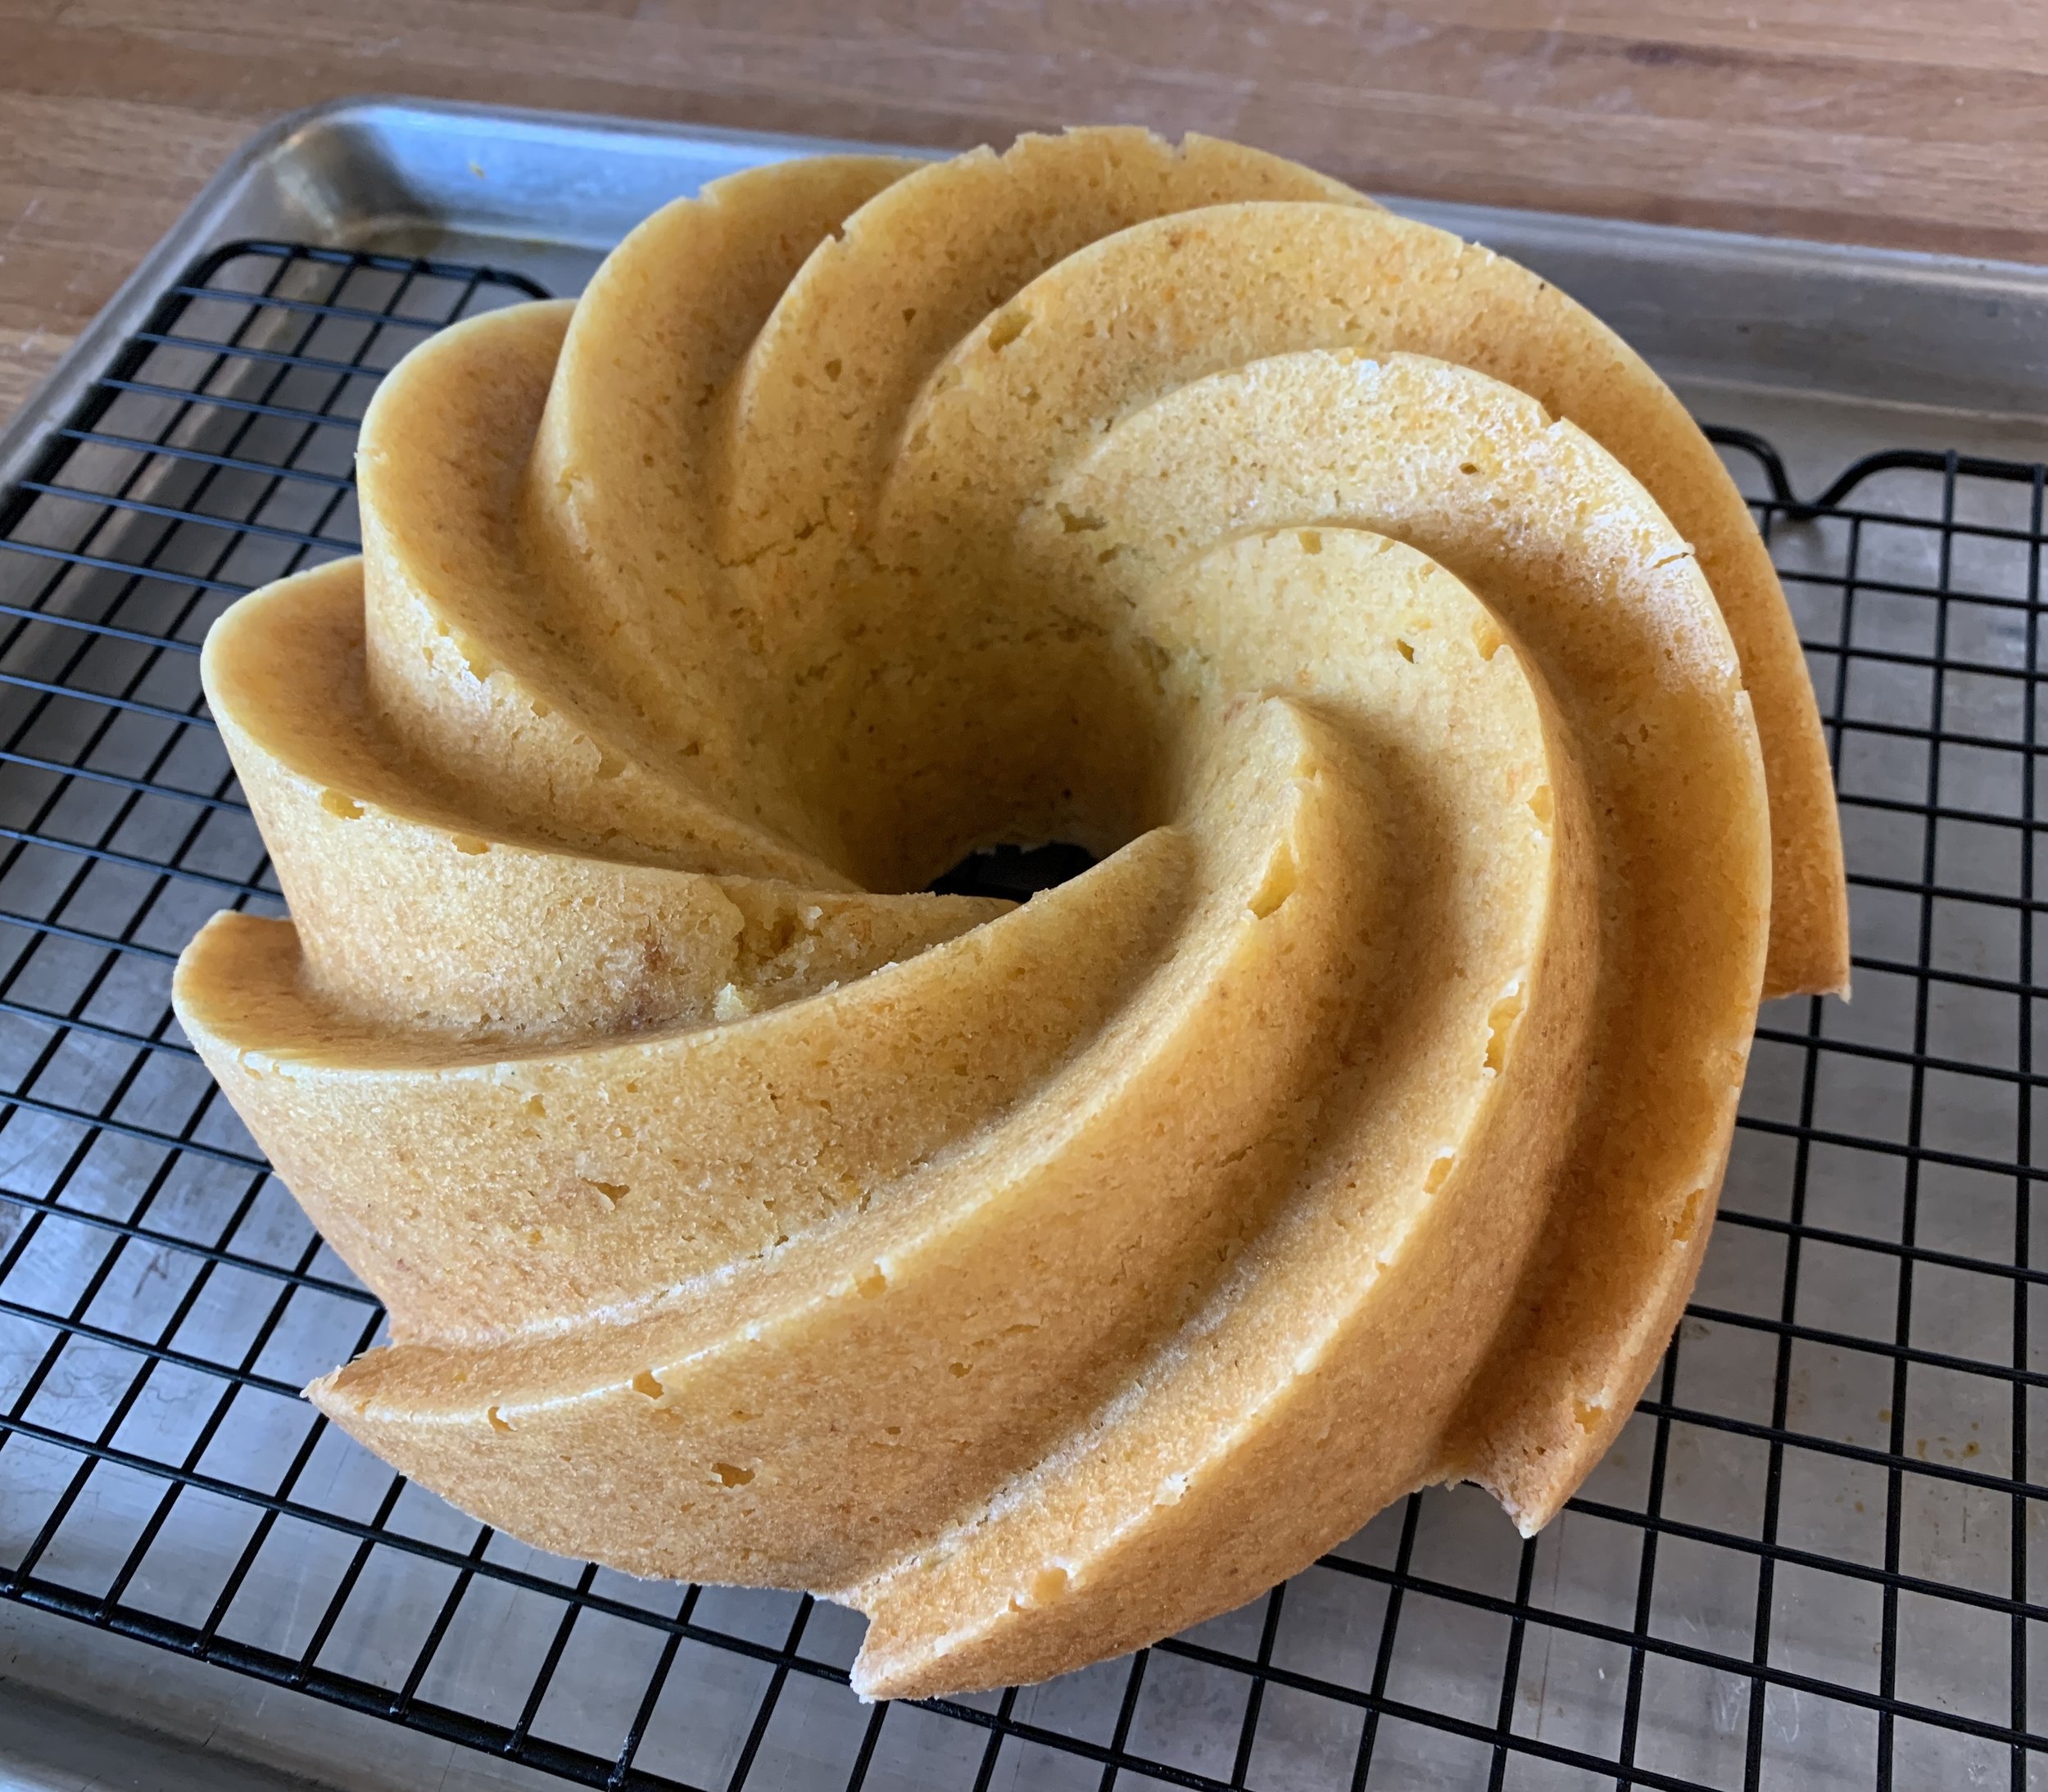
Bake about 55 minutes - you want a golden top, firm to the touch and a tester with just a few crumbs clinging. Let cool in the pan about 10 minutes then turn out onto a grid over a pan and cool completely.

One note here - I made sure to butter and flour all the crevices thoroughly even though the pan is billed as non-stick. This cake released from the pan beautifully. One of the frustrations I used to have with the old bundt-form pan I had years ago (a lighter weight knock off) was getting the cake out of the pan without leaving some pieces here and there. Grrrrr . . . . but not any more!

Hmmm . . . maybe I should do a test without buttering the pan - makes me nervous but gotta try it.


Spoon and brush the glaze over the top, into the crevices. I prefer my glaze on the thinner side - gauge the way you like it by starting with less OJ to confectioner’s sugar for a thicker consistency or add additional OJ or even a bit of water for a thinner glaze. Once glazed I pop it back into the oven for 3 minutes or so to set the glaze.

All glazed up

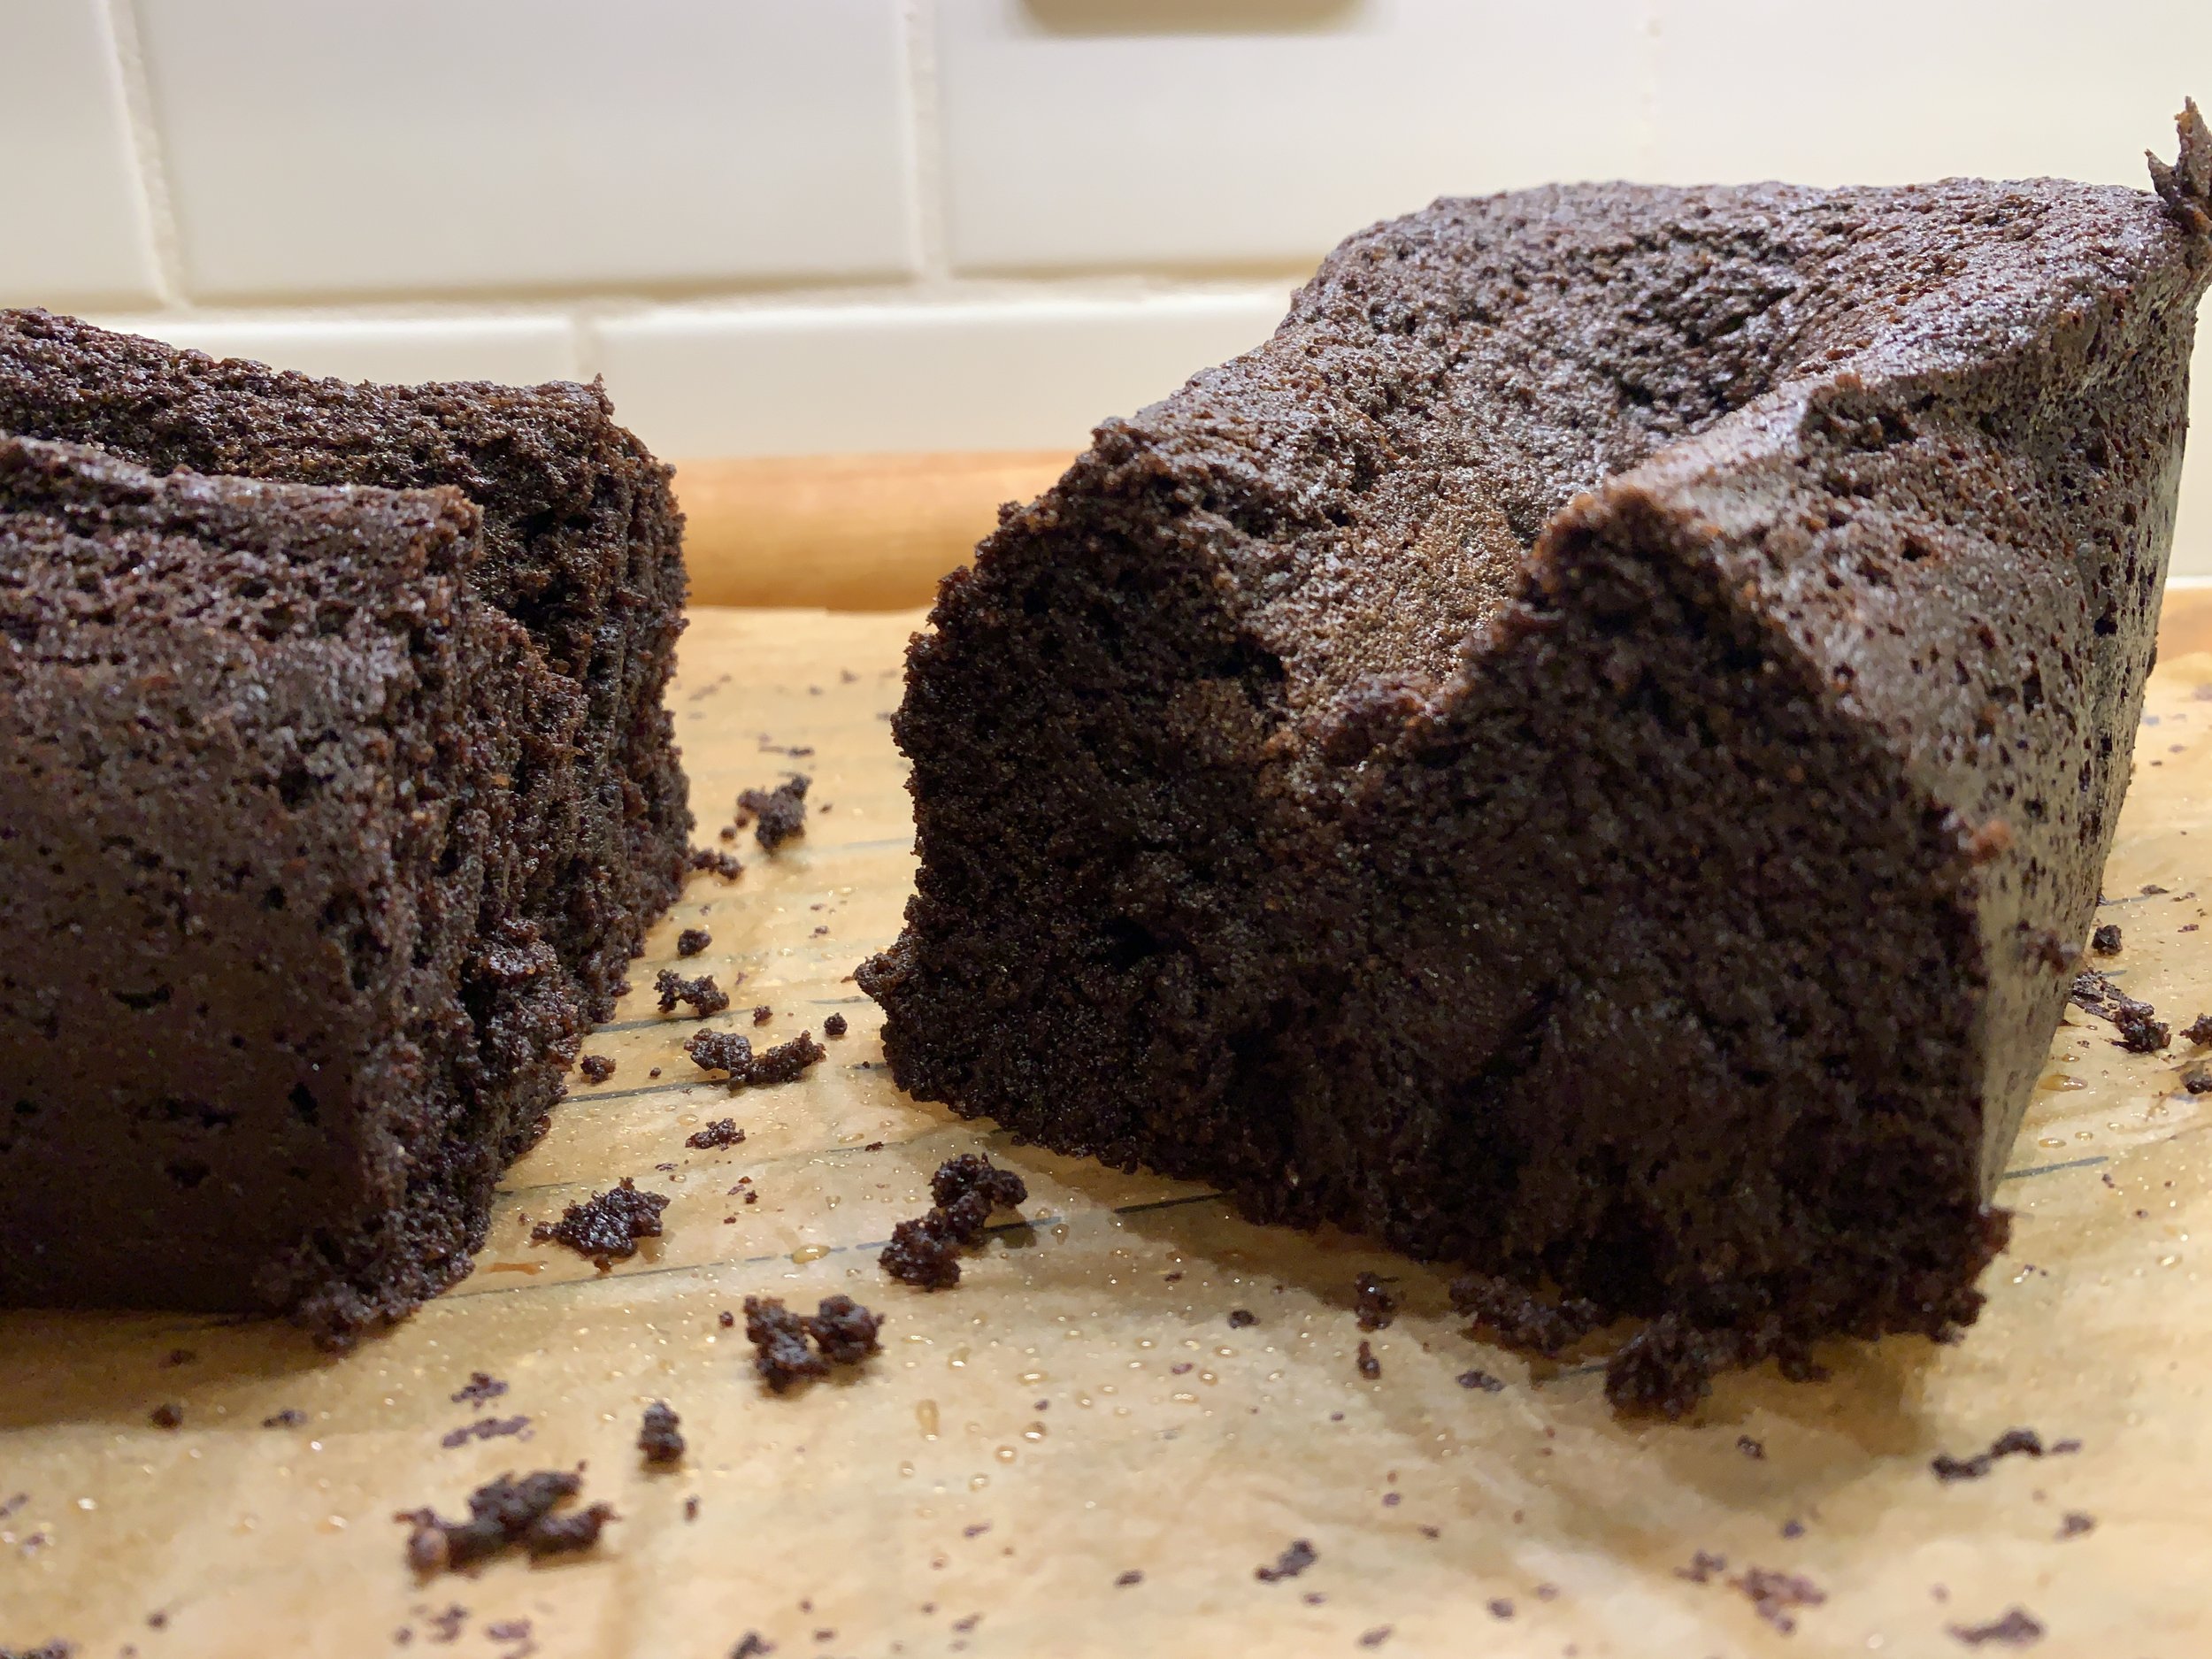
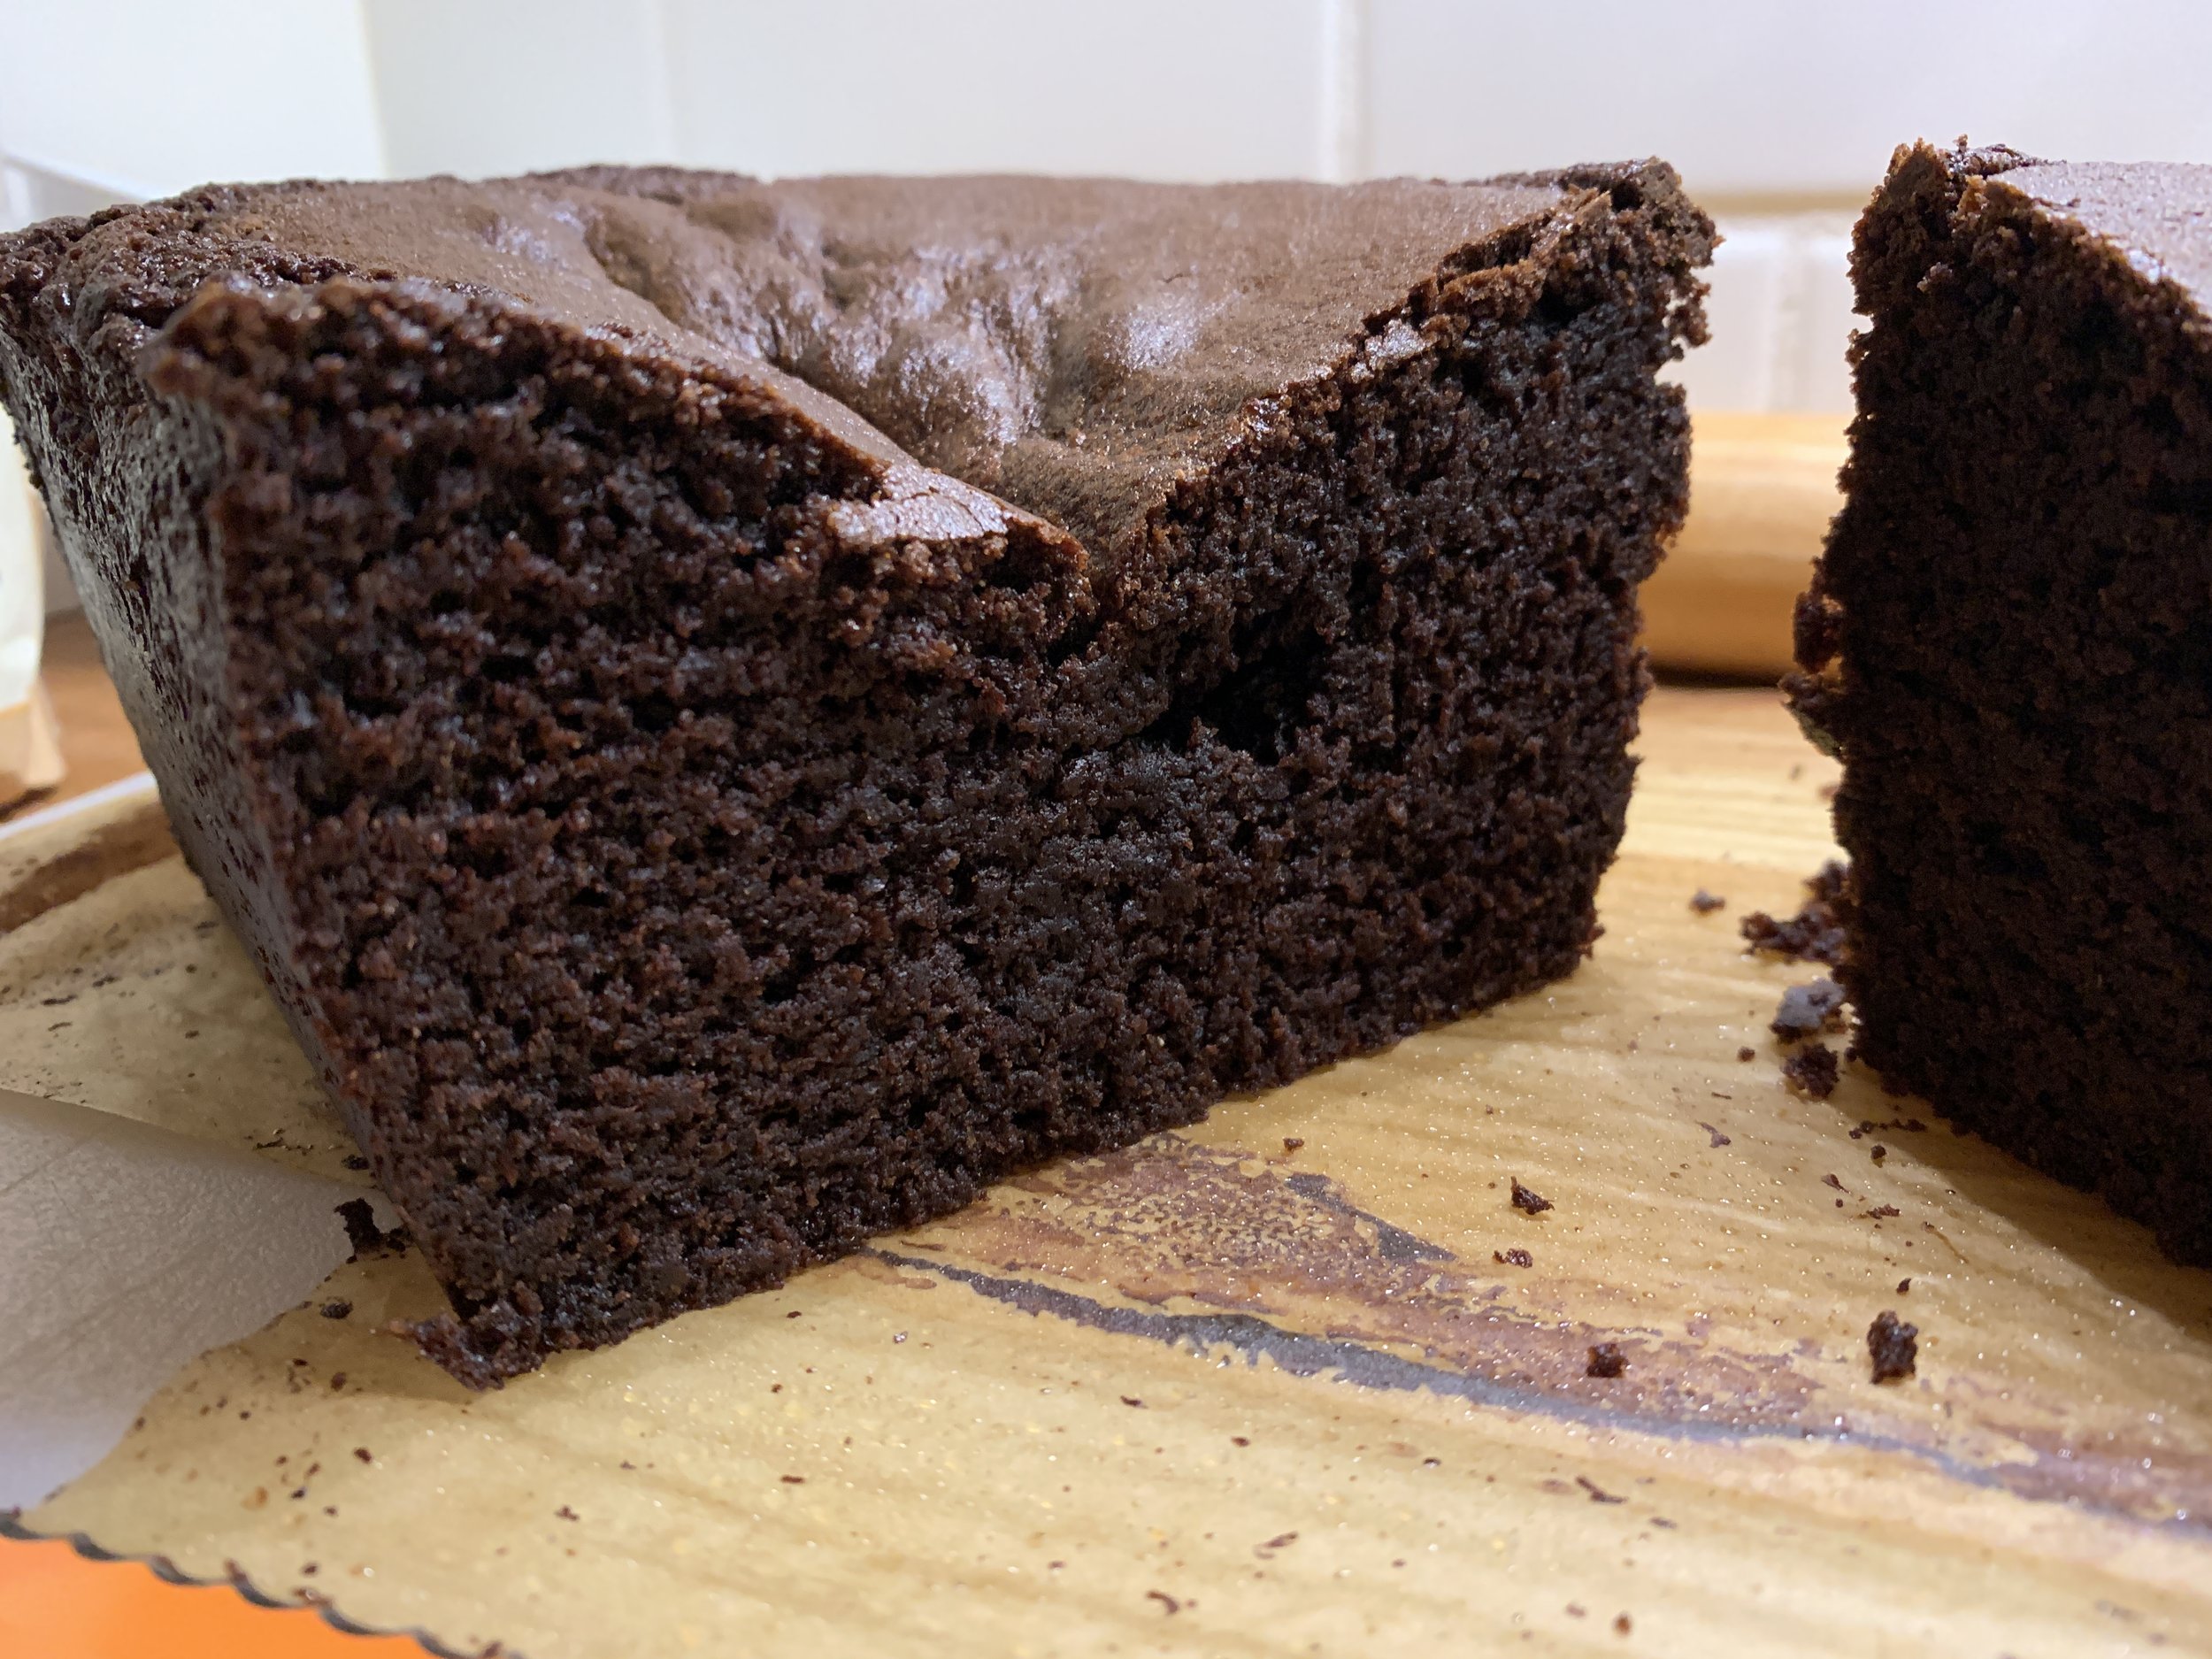
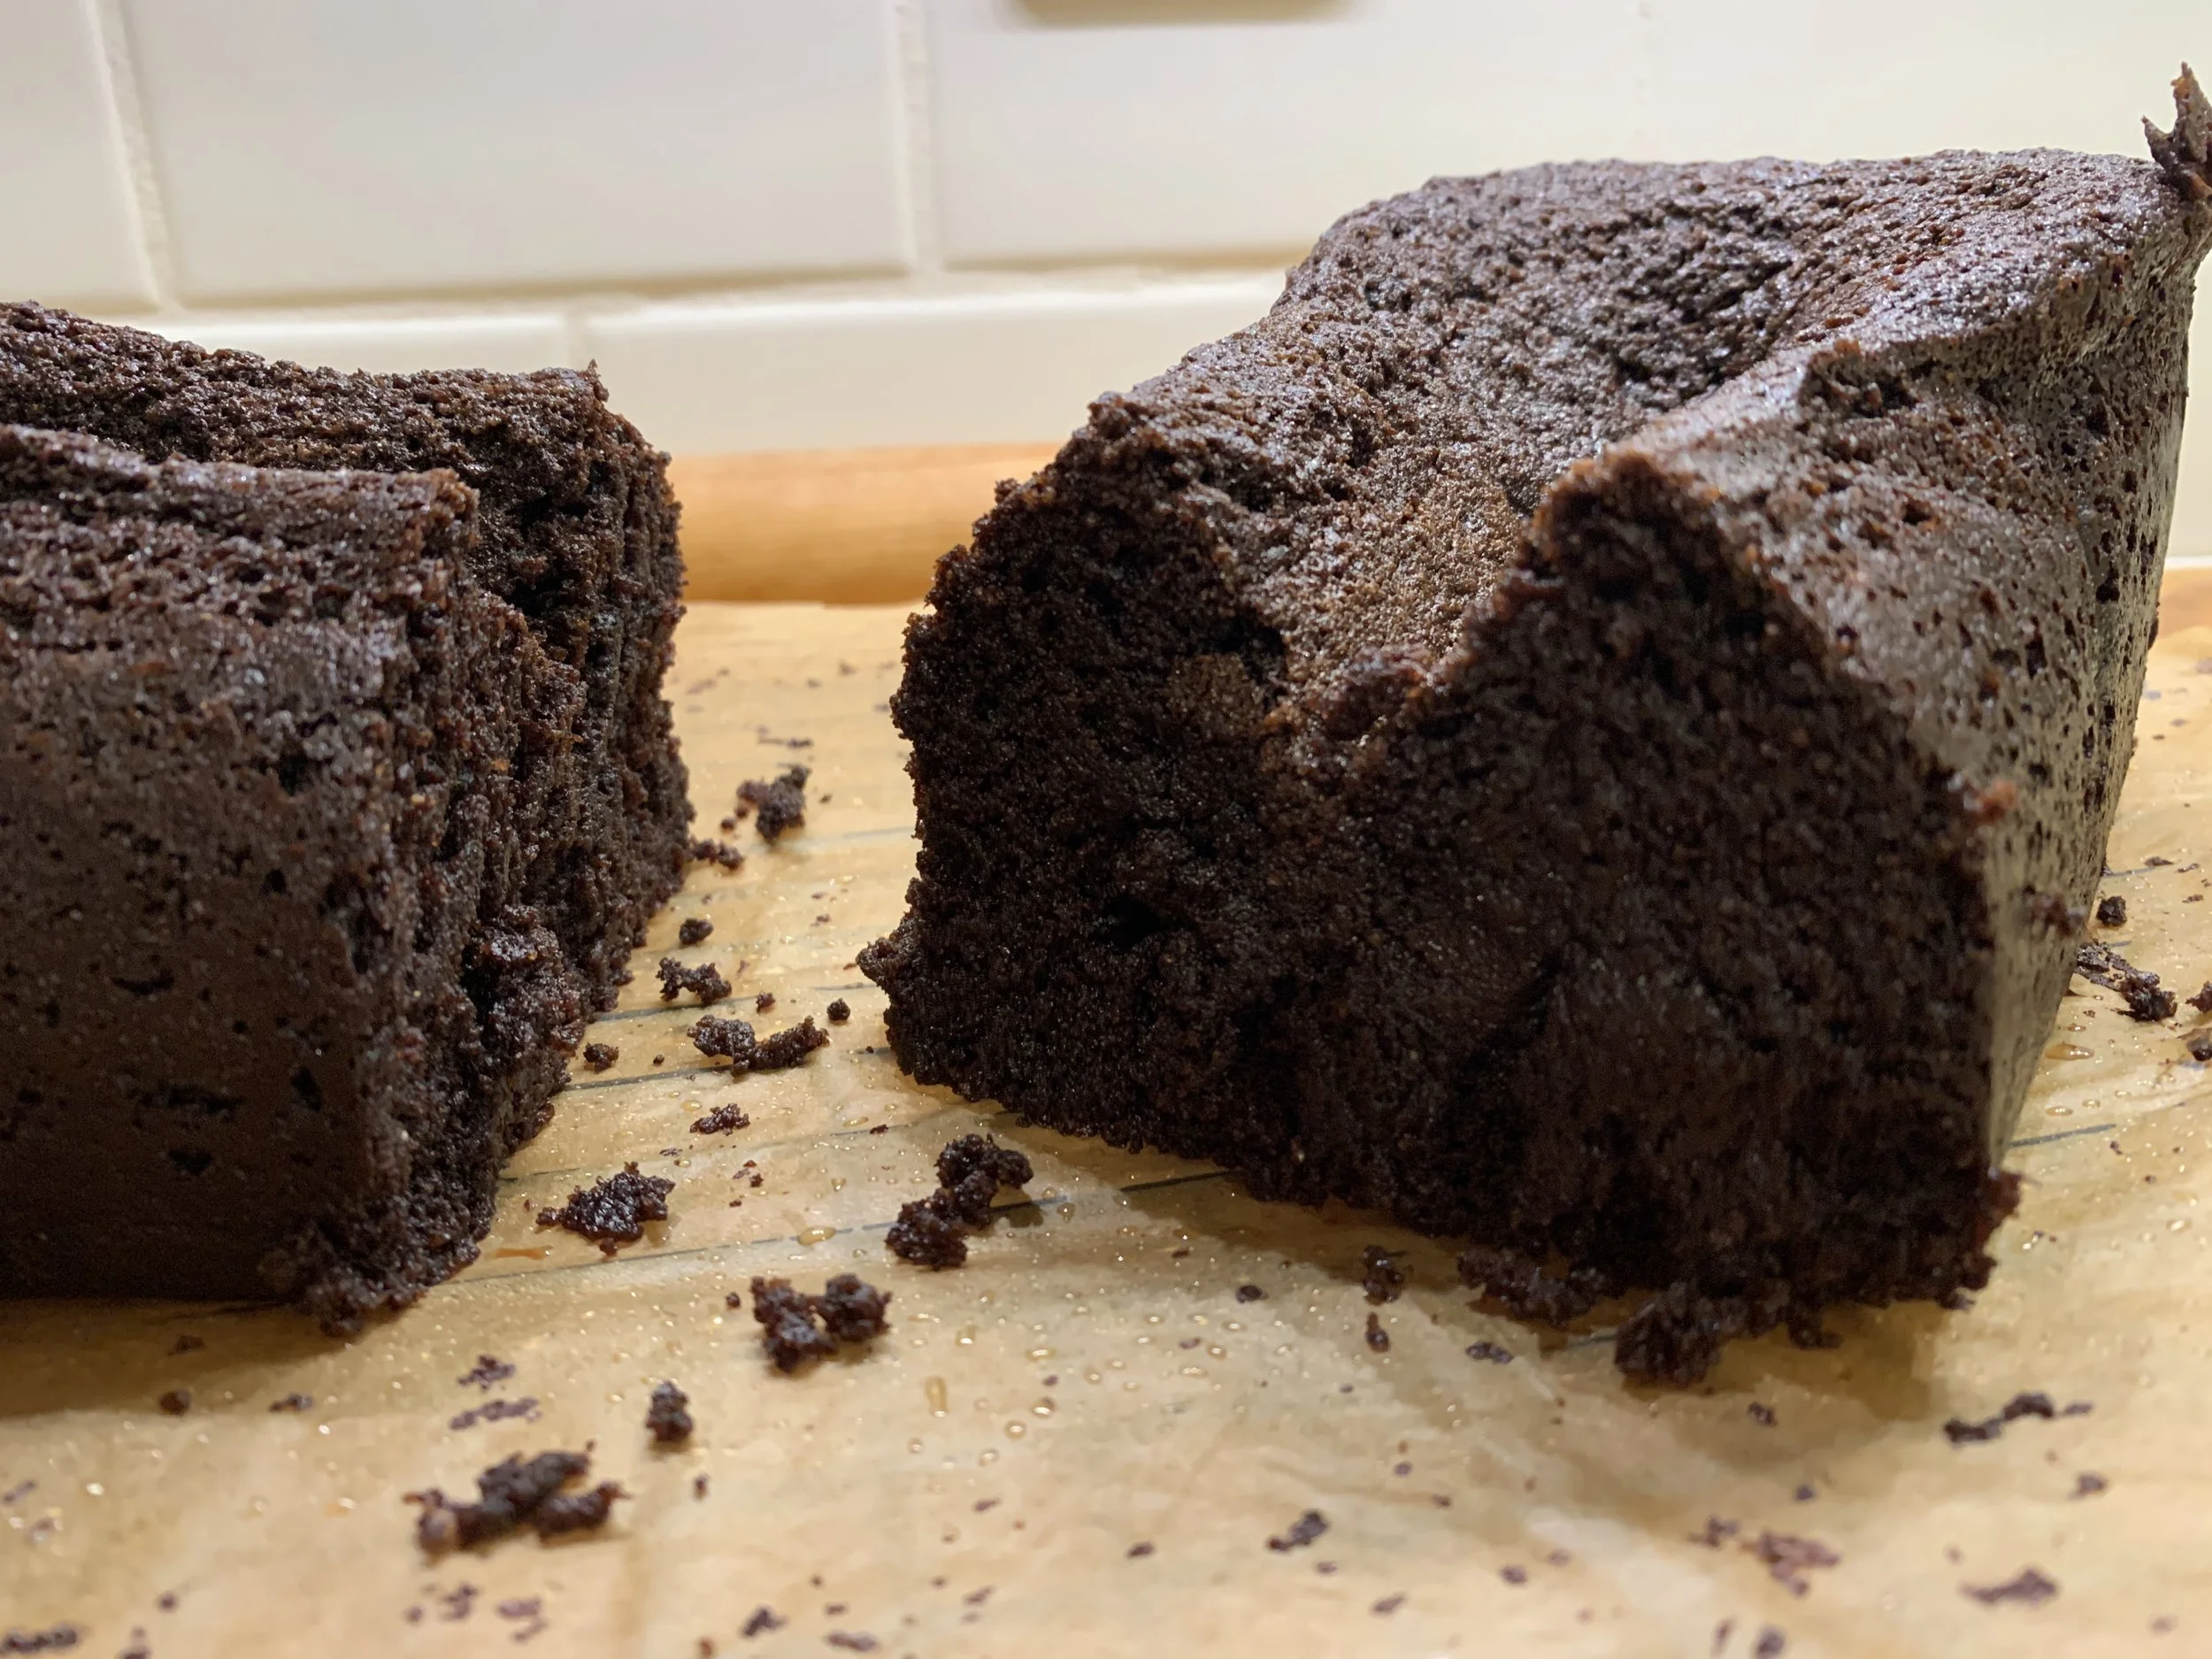
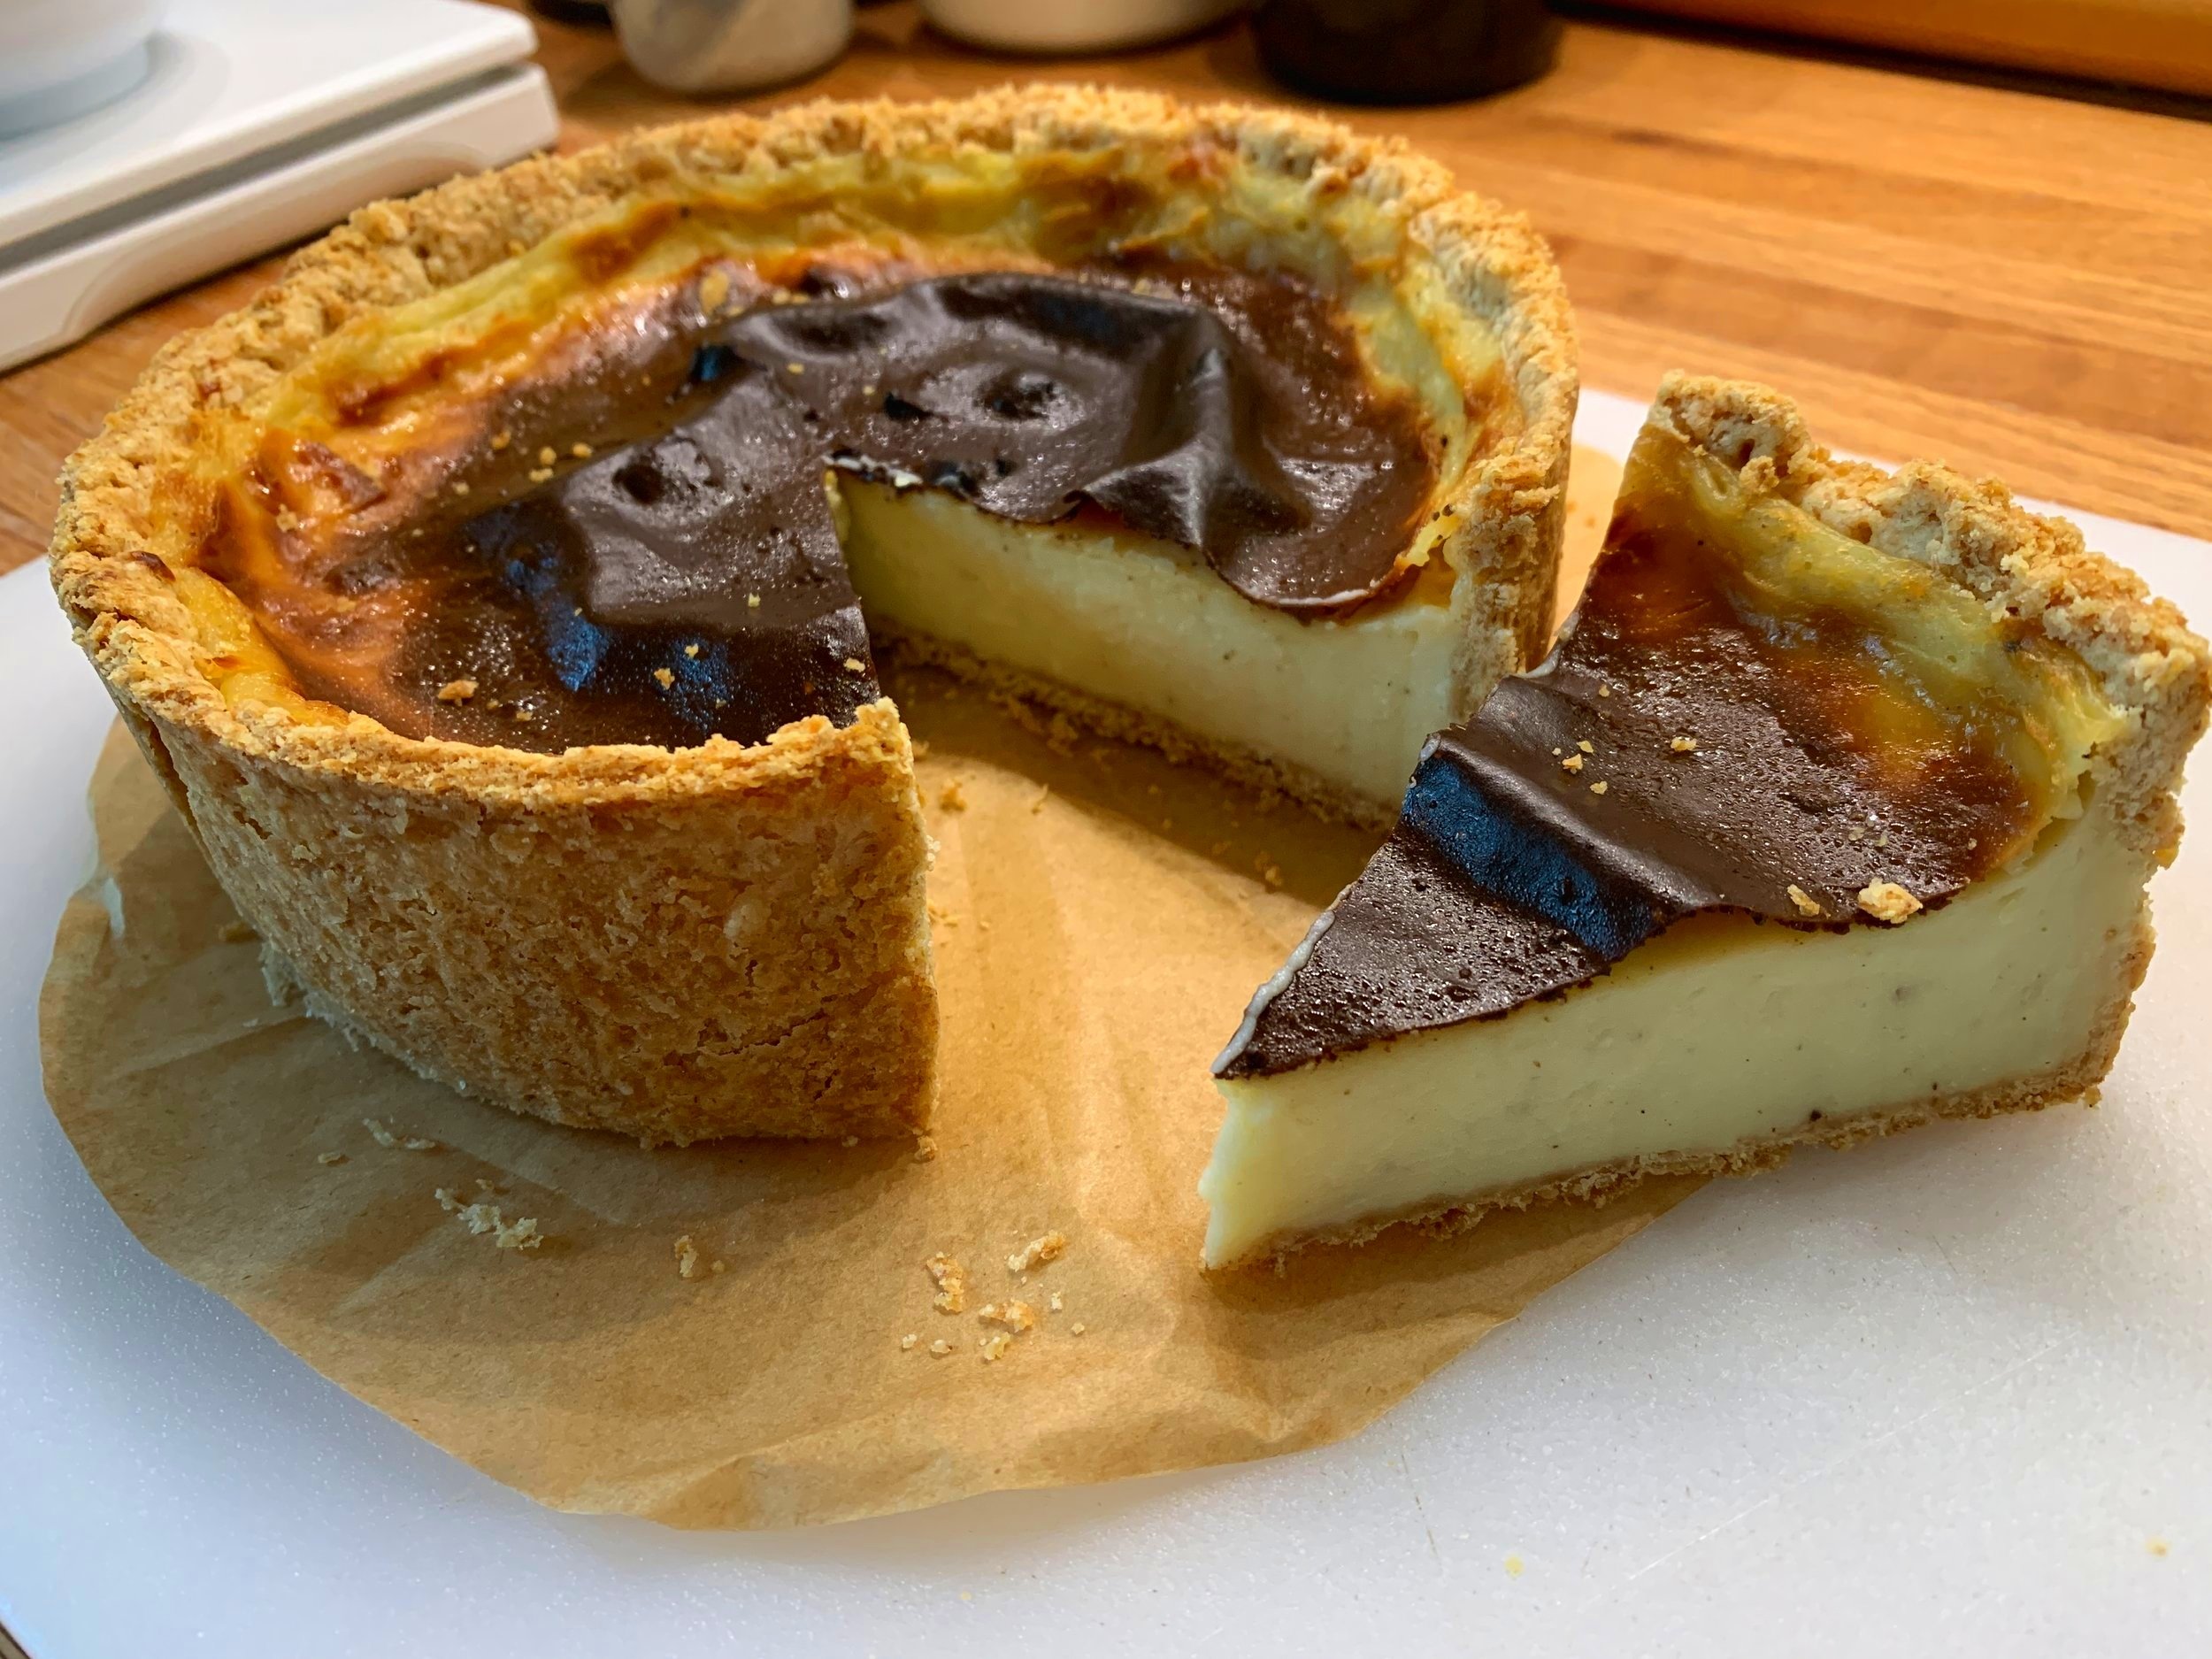
Delicious, moist and tender with just the right amount of orange flavor and a hint of sweetness - a perfect balance.


Steve and I enjoyed a slice with a small scoop of vanilla ice cream and some strawberries. Yum. A slice with morning coffee was good too, and the remaining slices went into the freezer for future enjoyment. Yes I would make this again.


I’ll be back with you as the weeks go by. Enjoy!

Paris

Paris - the name says it all. Many of us have been put under it’s spell. We often ask ourselves “what is it about this place?” The answer often eludes us, but we know how we feel when we’re there.

When we travel, we like to think of it as BEING in a place. It’s not a vacation but an adventure in learning and experiencing what that place has to offer. How does day to day living compare to what we’re used to at home? Appreciating the social fabric, how the locals spend their time, eat, work, relax, and relate to each other. That’s what Paris has become for us - it draws us back. Sure it has issues as all places do - homelessness, strife, inequality, citizens wanting change - but there’s a feeling that’s indescribable.

If nothing else, it’s a feast for the eyes and the soul. From histoire to les musées to les monuments to les fleurs, les jardins and les marchés to les arts en general; to the food, les bistros et brasseries, les pâtisseries et boulangeries; to exploring and finally to the simple act of being flaneurs - strolling down previously undiscovered streets, stopping at a café for a coffee or a glass of wine and some people watching.

Strolling in Le Jardin des Plantes

Tulips - Le Jardin des Plantes

I’m writing this after our return to Grand Rapids. It’s good to be back home in a familiar space and the regularity of day to day life.

Steve and I had an interesting reaction as we arrived in Paris this time. We knew, of course, that we were only going to be there for three full days, but, after many nights in hotels, eating out all the time (other than our short stay with friends Richard and Pauline), not having much room in our hotel lodgings to feel like we could relax, sit, enjoy - the minute we arrived at the AirBnB we had rented, we felt like we were home.

The first night’s sky

Paris at this time of year brings beautiful fresh fraises which we took advantage of for our breakfasts in the apartment - yogurt, fresh berries, fresh brewed coffee, toast with delicious French beurre et fromage, le jus d’orange. So good.

Seasonal fruit - les fraises sont arrivées!

Believe it or not, we didn’t enter even one pâtisserie or boulangerie this time around. We certainly enjoyed some window viewing (lèche-vitrine) with so many tasty looking goodies on display, but our primary indulgence came on our first afternoon out and about.

We decided to treat ourselves to a favorite spot on Place Des Vosges. Carette is an elegant cafè that has been around a long time, serving brunch/lunch, afternoon tea/coffee, hot chocolate, pastries, cakes and more. Outdoor seating is available under the portico but we opted to sit inside.

I ordered le fraisier, the classic sponge/mousseline/strawberry layered number that’s so popular during spring. It’s one of the recipes I learned/made during the basic pastry course at Le Cordon Bleu oh those many years ago.

Steve, being a sucker for anything made with choux paste, chose a classic èclair au chocolat. Our coffees were accompanied by a tasty shortbread cookie - right up my alley!

The spread

Fraisier

Not feeling at all rushed to do/see things on this short visit, we enjoyed leisurely mornings and spending afternoons with old (and new!) friends.

We happened to be in Paris over the May Day (1 May - Labor Day)) holiday when many are out enjoying a day off, hanging out in street-side cafés et bistros, handing out bouquets of muguet des bois (lily of the valley) or strolling in the cemeteries. Demonstrations and marches are also de riguer with the focus on workers rights.

Back in 2006 during my pastry schooling days, Steve spent a lot of time in Paris’ cemeteries, photographing and blogging about his discoveries. Marie, a native French teacher-of-English living and working in Paris, contacted him through his blog and they became die hard buddies through their mutual interest and fascination of all things cemetery (particularly Parisian ones!). We met up with Marie at Pére Lachaise, enjoying lunch at a nearby café followed by wandering the avenues et chemins past so much sculpture, history, greenery and flowers - spring had sprung!

photo courtesy of Steve Soper

Strolling in Pére Lachaise - photo courtesy of Steve Soper

Photo courtesy of Steve Soper

The following day we had an agenda. First (after some morning relaxation) - a visit to my favorite store carrying a vast array of baking and pastry needs - Mora. I had a few things in mind such as piping tips and silicone molds that would be easy to pack. Mission accomplished!

Ready to shop! Photo courtesy of Steve Soper

We then sidled over to nearby Detou, another foodie shopping destination full of ingredients the likes of chocolates, nuts, flours, dried fruits, pastes, vanilla and SO much more. And all at much better prices than we might find at home. We did succumb to purchasing a bag of toasted Marcona almonds and one of cashews “for the road”. I would have liked an extra small suitcase to fill with almond and pistachio flours, whole raw pistachios and hazelnuts, Valrhona chocolates and on and on. . . . .

We lost track of time and had to hurry over via metro and by foot to meet up with Jill, that new friend I mentioned earlier. For a bit of back story - some time ago I came upon a blog entitled “Paris Breakfasts” written by American watercolorist Carol Gillott. Through her blog I learned about Jill Colonna, author of the blog “Mad About Macarons” (as well as the book of the same name) and the book “Teatime in Paris”. I subscribed to Jill’s monthly newsletter, enjoying her recipes and her take on what’s going on in Paris, both seasonally and in general.

Jill is Scottish, married to a Corsican Frenchman, living in Paris and very connected to the food world in general. We had emailed a bit back and forth and by luck we were able to find a window of time that we might meet in person. We met in the Marais at Mariage Frères for pots of Earl Grey tea and lively conversation. Cool.

At Mariage frères

Our next stop - Les Antiquaires, a bistro just down the street from Musée d’Orsay where we had 6 pm timed tickets to see the currently running Impressionist exhibition. Again by luck, we found a time window to meet up with friend Val from my LCB pastry school days. Val was my classmate during the basic pastry part of the program and was my savior in the translation department. Having lived and worked in Las Vegas for 5 years some time ago, she speaks English like an American. Thanks Val!

Steve and VAl

And so our Paris time came to an end. Flights home went smoothly and we’re working our way back into some sort of daily rhythm. My walks offer such calm. I leave you with some favorites along the walking path.

Lilacs

Viburnum

Beautiful irises

Happy baking! Until next time.

Desserts in Bordeaux and a bit beyond


Warning! Lots of dessert talk coming up. Trust me, I rarely eat dessert at home.

After spending 10 days in Catalonia, off to Bordeaux we went to meet up with our British friends Richard and Pauline. From the pastry standpoint, canelés are the iconic Bordelaise treat and the company Baillardran the most recognized name for these caramelized mini flans.

I make canelés on occasion and am thinking it’s time to do that again, particularly after tasting them in Bordeaux. Here’s a post I wrote on them quite awhile back. On this trip I learned from our French friend Marie (who attended university in Bordeaux) that one can choose canelés on a scale of 1 to 3: 1 being less baked/lighter in color and thus a less caramel-y, crispy exterior and 3 being most baked with a darker caramel crust of sorts. The interiors will be more soft and custardy with 1 and less so with 3. Get it? This was also confirmed by French friend Valerie who prefers the darker caramelized exterior. To each her own.

I had no idea that canelés are used to create more elaborate desserts. But why not, eh? Below are three different versions of ostensibly the same canelé profiterole dessert experienced at three different eateries - quite a contrast I think.

The first was for Steve and Richard at our hotel - an interesting approach with canelés split in half, topped with ice cream and accompanied by Chantilly and chocolate sauce. They enjoyed it. I wondered about calling them profiteroles . . . when in Rome.

First night’s version

The next evening at Le Bistro de Musée Richard and Steve opted for a similar dessert, this one more polished, with a more professional presentation and tasty to boot.

Second night’s version

I however made the mistake (retrospectively) of ordering a similarly described dessert the following evening at Chai Maestro which in my estimation was over the top portion wise. Fortunately Richard was there to finish what I could not.

Third night’s version

My favorite dessert in Bordeaux was at Le Bistro de Musée. I first experienced a Café Gourmand in Belgium during a trip to visit niece Christina and her family in Lille, France in 2016. Curiously enough, we met up with Richard and Pauline on that trip as well, visiting some of the WWI battlefields in Belgium and northern France.

Cafe gourmand at Markt 38 in Poperinge Belgium, 2016

On another visit to Lille in spring of 2018, we dined with Glen and Christina at a lovely restaurant in the city. Christina and I enjoyed delicious strawberry-pistachio tartelettes served with a vin jaune sorbet. Glen went with the café gourmand - a very broad selection of petite treats.

Café gourmand in Lille, spring 2018

The café gourmand I had in Bordeaux was on a smaller scale than many - right up my alley. Crème brulée (one of my faves), panna cotta/raspberry sauce and a moist apple cake. Perfect!

Café gourmand in Bordeaux, 2024

Training from Bordeaux to Agen and then by car to R&P’s home in Mouchan (near Condom in the Gers département de Gascogne), we spent a couple of days enjoying and appreciating their hospitality. Our visit was short but lovely after spending many nights in hotels.

We happened to be there on a Sunday, a day when many French enjoy a proper Sunday lunch out. We went to an auberge/chambre d’hôte out in the beautiful Gascon countryside where we were presented with the formule for the day. Water/wine already at the table, aperitif, amuse bouche, three courses (starter, plat principal and dessert), coffee and digestif all included (all for 31 euros, about $33). The food - absolutely scrumptious with a depth of flavor hard to be beat. It left us well satisfied without feeling stuffed to the gills.

Here’s where I made an interesting decision. Since I typically don’t order dessert (and rarely eat it at home), I spent a little time debating about ordering one at all. I went for the assiette gourmand, described to me by the staff as small (note I said small) portions of each of the five desserts on the menu. I love tasting, what can I say!

The image below shows you what I was faced with. As an aside, I noted that our table received some interesting looks from other diners (and even the staff) when the dessert was delivered as if to say “is she really going to eat all of that?”.

Ice cream and Chantilly cream played a large role in this assortment, as you can see below. From the left going clockwise: crêpe de noisette wrapped around ice cream, topped with chocolate sauce; apple croustade (my portion seemed to be from a corner of the pan without too much apple); profiterole (ahem - more ice cream); gratinée framboise - custard topped with raspberries and a sprinkle of sugar then run under the broiler. In the center - ice cream, rum sauce, Chantilly cream and some crunchy bits.

Whoa! Are you serious?

Yes, I did taste each one, preferring the gratinée and the apple crostade in terms of textures and flavors. Custard, fruit, flaky pastry - you bet. And yes, I did leave a fair amount on the plate (Richard didn’t even finish it off)! I’ll be more thoughtful if faced with the same decision in the future. Live and learn.

Country side near the Auberge (photo courtesy of Steve Soper)

Up next - Paris!

Pastries and more in Catalonia

Girona specialty - custard filled sugar buns

Hi! I’m writing this during our travel adventure to France and Spain. After flying to Paris and staying for a night, we hopped on the high speed train and headed to Catalonia.

For more details on our trip, check out Steve’s blog too!

We have never visited this part of the world, and I must admit I didn’t quite know what to expect. Not only have we found ancient cathedrals, Roman ruins, the gorgeous aquas and deep blues of the Mediterranean, but plenty of friendly folk ready to help and explain new things. Beautiful flora too!


Our first stop - Girona (about 6.5 hours from Paris by high speed train).

As usual, I/we seek out the local pastries to experience their flavor, texture and uniqueness. In the parts of Europe we’ve enjoyed over the years, we always find the classics like croissants, pain au chocolat, tortes, sablés, choux puffs, turnovers and more. Let’s not forget that the bases of pastry are pretty much the same in many parts of the world. The differences exist in how a particular town/region/country decides to create their own versions.

One of the perks of our lodgings - breakfast included!! I’ll tell you European breakfasts are the best! Tables laden with bread, meats, cheeses, eggs, yogurt, fresh fruit, juices, cereals, granola, an array of pastries and readily available coffee choices the likes of latte, cappuccino, espresso and variations thereof.

Just one part of the breakfast at Hotel Ultonia in Girona

We soon learned about the Girona specialty xuixo (shu-sho) - a custard filled laminated pastry that reminded us of one of our favorite treats in Florence years ago - bomboloni. Similar to what some know as a Berliner or Bismarck or the Jewish sufganiyah or sufganiyot, think yeast raised dough, light and airy, quickly fried and sugar coated, filled with custard or jam/jelly.

Xuixo

I fondly recall childhood memories of eating a similar treat from our small west Michigan town’s bakery. Some of our favorites were what we referred to as jelly donuts along with glazed loaves of raisin bread, lemon filled “sticks”, lovely sweet bun type dough in a long rectangle with lemon filling down the center. Although my tastes have changed over the years, leaning away from overly sweet stuff, an occasional reminder of some of these long ago treats isn’t all bad.

We spent time in Girona, Tarragona and Barcelona and found similar treats at our breakfast buffets. After some “healthy” starters such as whole grain bread, egg, cheese, granola and/or yogurt with fruit, I usually treated myself to a trio of petite goodies, varying my choices each time. Of course these had to be accompanied by the requisite cappuccino.

Girona: raisin swirl, apple cake, chocolate croissant

Tarragona’s lodgings had an even more extensive spread than Girona’s, offering a revolving number of choices for our three breakfasts there.

As an aside, we did lots of walking this trip which justified a bit of indulgence here and there.

Tarragona pastry offerings

This particular morning I sampled walnut braided pastry, palmier and coconut tarte.

Coconut tarte, walnut braid, palmier

Another involved a generous slice of apple torte which I found too sweet and opted not to eat the whole thing. A moist slice of marble cake and a simple, plain sweet bun pastry (referred to as ensaïmada) dusted with powder sugar rounded out the trio.

A quick internet search told me that ensaïmada is a light, airy yeasted bun traditionally from Mallorca, Balearic Islands, Spain. It’s made as a typical sweet bun might be with bread flour, water, sugar, egg and yeast but uses pork lard as opposed to butter (which you can substitute if you prefer). It involves a short poolish type preferment, a first bulk rise that can be done in the fridge overnight for flavor enhancement and ease of shaping the following day. Maybe I’ll try it.

Apple torte, marble cake, ensaïmada

So as not to bore you with pastry photos, here are a few images from Tarragona, a beautiful seaside town southwest of Barcelona.

Inside the large indoor market, Mercat Central

Typical hot climate vegetation

Dipping my toes into the mediterranean

From Tarragona we traveled to Barcelona for the end of our Spanish adventure. We enjoyed a number of sites, some tasty (and not so tasty) food and nothing too unique in the pastry world after Girona and Tarragona. We took advantage of a metro pass which got us on busses as well. A modern, well designed, clean and user friendly system. Gotta love it.

View of barcelona’s harbor and the Med

Orange trees abound

Lavender - ahhh the aroma

You’ll think this odd perhaps but one of the most satisfying things in Barcelona was doing laundry! We discovered a small laundromat right around the corner from our hotel, all automated, instructions well signed and easy to operate - didn’t even have to put detergent in - it was dispensed automatically. It held three washers, three dryers, well timed and efficient. Total cost 7 euros, total time about 55 minutes.

Sometimes its the day to day stuff that can lift us up on a dreary, rainy day.

A laundromat from heaven

Coming up - Bordeaux and Paris tidbits.

Challah

This is just one of the many times of year when these lovely shiny loaves appear. Steeped in Jewish tradition, served on the Sabbath and for holidays, this egg bread is also enjoyed by folks from many different backgrounds and parts of the globe. A very similar bread is also popular around Easter, often enriched with butter added to the dough (and maybe dyed Easter eggs tucked on top).

I embarked on this project after receiving a request from a friend for a pair of loaves as part of an egg related scavenger hunt she was planning for a group. Sounds like fun!

I’ve made challah on occasion over the years but have never posted on the topic. While there are tons of recipe variations and reams of information about its history and preparation, I barely skimmed the surface in deciding how to approach this. All purpose or bread flour? How many eggs? Whole or yolks? Honey vs sugar? Three or four (or six!) strand braid?

Particularly when I’m baking for an order, I want to be sure that the end result will be tasty. Of course that means a trial or two. I was inspired to do a test between a King Arthur recipe that I’d made in years past (to excellent reviews) and a recipe from a new book I purchased recently entitled “Breadsong: How Baking Changed Our Lives”. I’ve paged through the book’s recipes and am truly enjoying the story written dually by Brits Kitty Tait and her father Al Tait. It’s their story of Kitty’s journey through some difficult times in her young life with bread baking ultimately becoming her salvation. They now own/run “The Orange Bakery” in Watlington, Oxfordshire UK. Cool story.

test bakes

I won’t focus on recipe details yet, but, suffice it to say, both half loaf trials turned out OK. Kitty’s adds some butter to the dough but the recipes are otherwise quite similar. Both used two eggs for the full recipe unlike the one I ultimately went with.

Perhaps I over baked them a bit since they were a tad dry. With a fine, light crumb, both are excellent spread with a bit of butter/jam, especially toasted. I recommend either for bread pudding or French toast, easy and delicious ways to revive and repurpose.

After a bit more review, I went with an adaptation of the recipe I ultimately turned to - Jeffrey Hamelman’s challah in his book “Bread: A Bakers Book of Techniques and Recipes”. This one uses more egg than many recipes I reviewed along with the usual suspects - flour, vegetable oil, water, honey, salt, yeast.


Let’s get started! I’ll go through the steps, listing ingredients in gram weights but remember you can go to the recipe PDF for equivalent measures and read through it at your leisure.

First have all your ingredients mised out: 600 g all purpose flour, 300 g bread flour, 160 g honey, 2 large eggs plus 5 (or perhaps 6) yolks, 85 g vegetable oil like canola (EVOO is tasty!), 300 g water (tepid/coolish), 17 g instant yeast, 13 g kosher salt.

Place all ingredients in the bowl of a stand mixer fitted with the dough hook. My 6 quart Kitchenaid bowl works well for this. I may have mentioned this in the past but I have an 8 quart commercial Kitchenaid stand mixer. The beauty of it is that not only is the mixer’s motor more heavy duty than a 6 quart, the attachments are much more work-horse like, solid and heavy. And! - they work with my 6 quart bowl that fits on the 8 quart stand! The six quart is my go to size for most bread, croissant or large batches of shortbread or tart doughs. Love it.

All in!

I give it a stir up with a spatula to gets things moistened.

iinitial blend

Then blend with the dough hook on low speed (stir on a Kitchenaid) for several minutes to incorporate the ingredients.


Now knead on speed 2 for about 6 minutes to develop the gluten. The dough should ball up and pull away from the sides of the bowl.


Give the dough a couple of quick kneads by hand and round it up, then place in a lightly oiled bowl for the first proof.


Let rise in a warm place for 1.5 - 2 hours, gently de-gassing at 1 hour. OPTION: after the first de-gassing, refrigerate the dough for several hours or overnight, de-gassing a couple of more times during the first few hours. The dough is easier to work with/shape when cool, plus you can create your own time table to mesh with your schedule.

For my project I de-gassed at hour one, then refrigerated the dough for an hour and a half (due to my schedule that day!). Then another de-gas and a 45 minute room temperature rise before shaping. Here are the visuals.


nice fridge rise!

dough is feeling good!


Place the risen dough on your work surface - you don’t need much flour at all for the dividing/shaping/braiding. Use a bit if needed, but the dough handles well without being sticky.

For two 3-strand braids, divide the dough in half then each half into three equal pieces. Do a rough, stubby torpedo pre-shape of each piece and let rest 20 minutes covered lightly with plastic. I made two 750 g braids and used the rest of the dough for a mini two strand twist so I could do a taste test.


After the rest, roll each piece into a 14”-ish rope. Set up three pieces for your first braid.


One way to braid is to start in the middle, braid toward one end then flip it and finish braiding from the center to the other end.

first half complete


Tuck the ends under to clean things up

Once both loaves are braided, place them on a parchment lined sheet pan, lightly cover with a cotton towel and cover that with plastic wrap. This protects the dough from drying out but also reduces moisture accumulation between the braids by eliminating direct contact with the plastic wrap on the dough surface.

Let rise for two hours. Toward the end of the rise heat the oven to 375ºF.


These are looking great after the two hours. Thoroughly egg wash the surfaces.

You can see my mini twist on the right, sprinkled with poppy and sesame seeds.


Bake about 30 minutes until golden brown. Cool on grids.


Serve when ready. The challah loaves freeze well - remove from the freezer a couple of hours or so ahead to thaw at room temperature.

Here’s a look at my mini twist. I tried it with a schmear of butter and sandwiched it with a bit of ham and cheese. Good crumb, tender and tasty!


The report from those who received the full sized loaves was a thumb’s up. Good deal!


Just a final bit of nature for you. Happy spring!

cherry blossoms in le jardin des plantes, paris

Kouign-amann: Part 2


OK. Here we are in part 2 of my Kouign-amann review. Part 1 covered shaping two versions of individual pastries. This time it’s the full sized cake version, more traditional in Brittany for slicing and enjoying at breakfast or afternoon tea. Inspired by one of King Arthur Baking Company’s “Bake of the Week” recipes back in January, 2022, I’ve had it in my “I’m-going-to-try-this” pile ever since. My how time flies!

I ended up making two versions of this cake: the first (thanks to Andrew Janjigian and the above mentioned KA Baking Co) utilized a unique approach to the sugar/butter incorporation. I thought it rather messy and the end result not as flaky, lofty or tasty as that made with my usual recipe. If you’d like to give it a try, just click the link on Andrew’s name and you can learn about his approach/recipe. There are always different ways to do things!

my result with andrew janjigian’s version

For the second using my base recipe (enough for two full sized cakes), I used half of the dough for a single cake and the rest went toward cute small spirals that are absolutely delicious!! I simply couldn’t help it. They’re stashed in my freezer as we speak.

my result with my recipe


yummy spirals

Let’s create a full sized kouign-amann! We’re proceeding with the nearly completed dough, already put through three 3-folds rolling with flour. Now it’s ready for the last sugar-rolled 3-fold.

First prep an 8” cake pan by buttering the bottom and sides then lining with a round of parchment large enough to leave an edge above the pan’s rim. This makes it easier to lift out after baking. Then butter and sugar the parchment. You can do this ahead and set it aside.

pan all prepped

Roll the dough out length wise using sugar on the rolling surface as well as on top.

ready for last three fold with sugar

Once you complete the last fold, let the dough rest at room temperature (NOT in the fridge) lightly wrapped in parchment for 20-30 minutes and then proceed with shaping/proofing/baking.

Remember I’ve made a full recipe so I divide the dough in half, using one half for one cake. You can make two cakes if you want, but I took a different route.

Roll a half portion into a rough-ish 8-9” square (still rolling in sugar) and fold the corners into the center.

corners in, ready to flip over

Turn the dough over onto the sugar dusted work surface so the corners/seams are down and roll out again (using sugar) to an approximately 8” squarish round. Don’t be too fussy about the shape - I figured it would spread out and bake into the confines of the pan, so I just went with it.


Lift the dough into the pan and tuck it in as best you can. Cut straight lines diagonally across the surface to create a diamond pattern and sprinkle with sugar.

ready to rise

Cover with lightly oiled plastic wrap or a damp towel and let proof 45-60 minutes. Meanwhile heat the oven to 400ºF (convection).

I used the other half of my dough to create a dozen spirals, rolling the dough out to about 10”x10”, cutting one-ish inch wide strips, rolling ‘em up and tucking into doubled paper baking cups rather than muffin tins. The paper cups give each a boundary so they don’t bake up against each other. My hope was they would bake more uniformly golden this way (I was right!).


just formed, ready to rise

My rise ended up at about 50 minutes. Time to bake!


I gave them 20 minutes, turned the temp down to 375ºF and rotated the trays. The spirals were well baked in another 3-4 minutes so out they came. I gave the cake an additional 10 minutes and then covered it with foil for another 10 minutes to avoid over browning. There were still some paler dough sections in the center that I wanted a bit more done.

If I’ve said it once, I’ve said it a thousand times: all ovens are different and it’s up to you to check on how things are going in there. You can do it. Let your recipe be your guide but your eyes, nose and touch be part of it too.

Oooh! Swirls and whirls of caramelized goodness. Reminds me of some of the rocks we saw in the southwest’s national parks last autumn.


Lift the cake out of the pan by grasping the paper edges and set it on a wire cooling grid.


Let it cool a bit and then . . . . . the key for me when testing out any baked laminated pastry is the initial slice to check out the layers. Fingers crossed!


While my initial concern at first inspection was for a doughy under-bake, these layers came out with a certain creaminess that compliments the caramelized exterior - flaky, light and oh so delicious.

Of course, Steve and I had to have our requisite taste test, a decadent pairing of a slightly warm slice with homemade vanilla ice cream. Swoon!

The spirals baked nicely too and turned out just the right size for a delightful morning treat. I peeled them out of the papers pretty soon after baking so as to avoid caramel-y sticking.


love these - like a petite seashell!

Always itching to test out the staying power of baked goods, a few days later I pulled a few of the spirals out of the freezer for a morning oven warm up for family guests. Delicious. There were two left which we wrapped in parchment and dared to leave out at room temp until the next morning. Another short warm up and they were still great. Good deal!

I had some of my first Janjigian test slices in the freezer along with some of the K-amann slices made with my recipe so Steve and I did another test a couple of weeks later. After a thaw/warm up of about 15 minutes in a 325º oven, we found the first version (seen on the right below) greasy, tough and not very tasty. The second was flaky with a nice texture and all around better flavor.

Mine on left

On a final note, here’s a bit about cleaning the work surface after the sugar rolling. It gets pretty messy. I prefer butcher block (my fave for all things dough) but other surfaces like Corian, granite, stainless are all much easier to clean. I do have a large polycarbonate type cutting board that I can use too, but I opted for the wood this time.

ready for cleaning

NOTE: This is about the only situation in which I rinse my rolling pin quickly under warm water to get the gooey sugar off. Pat it dry and let it sit out on a counter to dry fully. Otherwise after usual dough rolling in flour I simple rub any dough particles and flour off the pin until the next time.

For the sugary surface I use my bench or bowl scraper to push off all the loose debris into a waste basket. Then rub the surface with pieces of lemon, sprinkle with kosher salt and even a little flour to help soak up the moisture and let sit for awhile.


Rub it around to give the surface a gentle scouring, then scrape all the stuff off with a bowl scraper, wipe with a damp cloth and let air dry. The butcher block likes a mineral-oiling once in awhile too, which I might do every few months.

Lemon TIP: when I’ve zested lemons for whatever purpose, I then juice them, pour the juice into ice cube trays and freeze. The cubes are great when you need a tablespoon or two of juice for a cooking or baking project.

I then chop up the zested lemons into chunks and bag them up for the freezer. Throw a few into the garbage disposal every once in awhile to freshen things up or use a few chunks for the above cleaning process.

I think I’ve said enough folks! Happy spring and happy baking!!

just one bluebird of happiness!

Kouign-amann: Part one


Wowza! I can’t believe it will be 10 years this autumn since I launched this blog. In September of 2014 my very first published post was on Kouign-amann (literally translated as butter cake), that tasty caramelized traditional Breton pastry.

This 2-part post provides a fresh look at making three different versions of these treats. Part one - muffin-like with turned in corners (header photo) and spirals (below). Part 2 - full sized 9” cakes (not really cake at all, just layers of buttery goodness baked in a pan).

spirals all baked up

A bit of back story: during my pastry school days in 2006 I recall my fascination upon seeing Chef Xavier Cotte at Le Cordon Bleu Paris demonstrate the creation of this delicious buttery, caramel-y pastry (and my delight in tasting it!).

A few years later, in early 2011, as Steve and I were celebrating the New Year in Brittany with our British friends Richard and Pauline, we discovered one of Georges Larnicol’s shops where many flavors of petite kouignettes were on display. We picked up a few but were disappointed in their texture and flavor. It seems they were probably sitting in the case longer than they should have been. Even a brief warm up in the oven did little to revive them. Bummer.

When I opened my French Tarte pastry studio in Pawtucket RI in May of 2012, my focus was baking French classics like croissant, croissant aux amandes, pain au chocolat, financiers, tartes, profiteroles, sablês and more. It was a trip back to Paris a year later that brought me to Alain Ducasse’s Paris école de cuisine for a chocolate themed class. Our conversation turned to laminated dough and, when I learned that the class’s chef for the day, Geoffrey Franck, had just taught a Kouign-amann class, I asked for his recipe. Et voilà - he was kind enough to share it with me! I tweaked it just a bit and began baking these babies for my shop. Here’s the recipe I use.

Putting up the shingle


Kouign-amann

I moved out of the Pawtucket teaching and retail space in the spring of 2014 as Steve and I prepared to move back to Michigan. I was eager to stay active in the baking and pastry world and so began the blog. When I launched it in 2014, I had my sights set on working my way through the recipes in Philippe Conticini’s La Pâtisserie des Rêves, but, alas, I soon discovered a number of inconsistencies from recipe to recipe. I moved on to other baking adventures, many of which are chronicled in this very blog.

So here we are in 2024. Writing a new/updated post on the subject has been whirling around in my head for awhile now. I’ll review the steps, look at three ways to shape/bake K-amanns and offer some tips along the way based on things I’ve learned about the process.

Lots of stuff coming up so take your time or just browse as you wish.

I’ll start with individual pastries, either as spirals (kouignettes) or muffin-like with corners turned in. These are popular all over the USA and certainly in France and beyond. The 9” cake version (coming up in part 2) is a more traditional way to enjoy it by the slice when in Brittany. A quick web search confirmed that Georges Larnicol’s kouignettes remain popular, with many locations in Brittany as well as shops in Paris, Nancy and Bordeaux.

Individual kouign-amann, just shaped

As is true of most any recipe topic you review, you’ll find a multitude of variations in ingredient proportions, mixing/kneading times, rising and resting times, numbers and types of folds for laminated dough and on and on. You just gotta do it and make it your own.

Let’s start this thing! Don’t forget the recipe here. There you’ll see standard measures as well as gram weights (my preference).

Place 350 ml tepid water in the bowl of a stand mixer. Add 50 g bread flour, 500 g all purpose flour, 50 g sugar, 20 g soft butter in pieces, 12 g salt, 5 g instant yeast. Give it a stir up with a spatula to get things moistened.


Using the dough hook, mix on stir for a minute then on speed 2 for three minutes (Kitchenaid settings) to achieve a soft dough.


Just after mixing


Cover the bowl and let it rest at room temperature for an hour. The dough should appear more pouf-y. It may look like a subtle change in the photos but rest assured the dough has risen and is softer and more lovely in texture after the hour repose.


Ball the dough up and wrap it in plastic wrap, giving yourself some leeway to allow you to push the dough out into an 8” rough square within the confines of the plastic wrap.


Refrigerate the dough for at least 2 hours or up to overnight. I usually make the dough in the late afternoon then fridge it and plan to finish things off the next morning.

You can prepare the butter block ahead and hold it in the fridge until ready.

For the block: weigh out the butter (in this case 400 g), lay it out on a piece of plastic wrap to form a 5-6” square of butter (cut chunks as needed), wrap it up, leaving some leeway around the edges to provide a 7-8” final size. Let it sit at room temp to soften then tap with a rolling pin and smush it around within the plastic to get rid of seams (you want the butter block pretty uniform).

ready for smushing and shaping

Keeping it in the plastic allows you to manipulate it without getting your hands all buttery. I roll and push it around to work at getting rid of seams.


Push, flatten and then unwrap to regroup.


Rewrap leaving room to roll the butter out to a square about 7-8-ish”. Then roll it out, all the while keeping it in the plastic. Chill until ready to use.


Bottom line - the best way to create a smooth butter block is soften your butter enough so that you can easily form it within your parchment or plastic wrap into a uniform block without seams. Then chill it until you’re ready to proceed with the beurrage and folds.

If you have access to solid pounds of butter (no sticks!), even better. During my stage at Pascal Pinaud’s pâtisserie in the 5th arr. we cut slabs of butter off very large blocks when making large batches of croissants. Then during my Providence/Pawtucket days I used Cabot full pounds, both when pastry chef-ing at Gracie’s and in my French Tarte business. It’s much easier to portion out what you need and have no seams! Yay!!

When ready for the beurrage, take the butter out of the fridge about 20 minutes ahead to allow it to warm enough to make it malleable yet cool. You want it to bend, not crack.

NICE!

There are at least a couple of ways to perform the beurrage (envelop the butter in the dough). Below is an image using felt templates - it’s a good way to show the participants in my classes how it can be done.

Either form the dough into a square with the butter centered at an angle or roll out a rectangle and center the butter on it.

Get it?


Then fold the corners of the square over the butter OR fold the ends of the rectangle over the butter. The end result is essentially the same. A dough/butter package!


Here’s what I did.

Dough and butter components

Roll the dough out to two times the length of the butter block. Keep the butter wrapped and set it in place to be sure you’re happy with the size/position before unwrapping it. Looks good.


Unwrap the butter and set in place.


Fold the bottom up . . . . .


. . . and the top down to cover the butter. Pinch all the seams closed.


Turn the dough over seam-side down with the pinched ends at top and bottom. Press down with your rolling pin along the length to get the elongation under way and “set” the package. Always rolling to and from yourself, roll the dough out to about three times length to width. We all roll with different pressure so I periodically flip the dough lengthwise (top becomes bottom and bottom becomes top) to keep the thickness of the dough as even as possible.

And remember to lift and fluff the dough, re-flouring lightly as needed to prevent sticking. If the dough becomes too warm and soft, wrap it and chill in the freezer for 10 minutes or fridge for 15-20 minutes to firm things up.


As you roll the dough out, pay attention to the edges. The butter won’t always get out to the very edge so it’s recommended that you trim those edges to expose the butter. This makes for more precise laminations. Create scrape buns with the extra dough.

Doughy edge

Here’s the cut edge showing the exposed butter.


Time to start the folds. Here are some choices: three 3-folds (letter folds) with flour then a final 3-fold rolling in sugar (my choice). Or two 3-folds with flour and two 3-folds with sugar. Or one 4-fold (book fold) and one 3-fold with flour and a final 3-fold with sugar. You can play around with it.

Here’s the start of the first 3-fold. Visualize the dough in thirds. Notice my scraps - you’ll see those later in a squiggle bun I made. Just as for the beurrage, bottom up . . . .


. . . . top down.

First three fold complete


After each fold rotate the dough 90 degrees so the spine of the book is on your left. If your kitchen is cool and your dough is behaving you can go right ahead with the second 3-fold. Otherwise chill the dough for 45-60 minutes before proceeding with the next fold.

No matter what fold approach I’ve chosen, I label the package with types of folds I’m planning, then cross off after each fold. That’s particularly helpful if doing several batches of dough - easier to keep track of it all.

After my second 3-fold I wrapped the dough, froze it for an hour or so to retard the fermentation then put it in the fridge overnight with plans to finish the process the next morning. That timing worked for me this time but it can all be done in a day too.

The next morning I completed my third 3-fold with flour then wrapped/chilled the dough while I prepped my pans.

I’m using 3” individual Fat Daddio cake pans for my muffin-like/corners-in version and a standard muffin tin for my spirals. Butter and sugar them. NOTE: I didn’t do the two center muffin wells at first, since I thought I’d get 10 spirals from my dough, but I prepped them after my yield was indeed a dozen.


When ready for your last fold, have 200 g granulated sugar on hand. Sprinkle sugar on your work surface, place the dough down, sprinkle more sugar on top then roll it out lengthwise


Ready for final 3-fold

At each step sprinkle more sugar on. Once again, bottom up and top down.


At this point lightly wrap the dough in parchment and let it rest for 20 minutes or so. The best tip I received on this was from the previously mentioned Chef Franck who cautioned a room temperature rest rather than a refrigerated rest. Sitting in the fridge gets the sugar melting and boy can it get messy!

OK. Now it’s time to roll the dough out for cutting and shaping. I needed a piece of dough about 7” x 10.5 inches to give me six 3.5” squares for my Fat Daddio pans. The rest went to spirals.

I rolled the dough lengthwise, keeping the width at 7-ish”. Using the lower half or so of the dough, I marked out and cut my squares.


Fold the corners of each square into the middle starting with two opposite corners and finishing with the other two. Push the center down firmly with your fingertip. Place each in the prepared pans.


Roll the remaining dough out to about 8” high and 12” wide and cut twelve 1”strips. Roll each one up into a spiral and place them in the prepared muffin tin.


Notice my squiggle bun sitting amidst the pans on the right below. I rolled the scraps in vanilla sugar and rather randomly braided and coiled them.


At the start of the rise.

Cover pans with plastic wrap or a damp kitchen towel and give them a 60 minute rise.


AFter the rise

During the second half of the rise heat your oven to 375ºF.

Bake 20-25 minutes until golden brown and caramelized.


Taking great care not to burn yourself, turn out the baked buns onto a wire grid. Use an offset spatula to loosen the edges. If you wait too long, the caramel hardens and removal from the molds is difficult.

Notice below that some of the spirals aren’t as well baked as the others. I popped them back into the oven for 5-10 minutes to get them nicely browned.


Here’s the finished batch of both versions. Notice the scrap bun tucked in there.


After a short cool down (they’re deelish a bit warm!), Steve and I did a taste test. Yes!

Crisp exterior, caramel just right, light, airy yet buttery interior layers. We’ll take it!


Traditionally in Brittany you’ll see Kouign-amann served as a full 8-9” cake for breakfast or afternoon tea. Stay tuned for Part 2 - the full size version!


Mid-winter update

First and foremost I simply had to share this recent sunset that we viewed right from our living room windows. It’s been awhile since we’ve seen one this stunning here in west Michigan. It was a beauty and pictures don’t even do it justice.

Things are purring along here in GR with recent temps in the 50s and low 60s. Hard to believe it’s still February. Steve and I are going to fitness classes regularly which provide a wonderful boost to one’s physical and emotional well being.

I’m working on a Kouign-amann post which is becoming pretty exhaustive in scope. I’ll probably end up doing it as a two-parter. Watch for it in the next couple of weeks.

Kouign-amann Spirals

Otherwise January was pretty quiet, a time to take care of household stuff, get reorganized for the new year, take each day as it comes. My baking focused on some staples for our larder - scali (my fave bread for awhile now), focaccia and pizza dough.

Nephew Jon visited early in February so it was a simple caramel apple tarte with homemade vanilla ice cream for dessert.


It felt good to make croissants and pain au chocolat again after a several month hiatus in that department. These were requested by friend Kim, the activities director for an assisted living facility down the road.

Of course I made a few extra so Steve and I could have a little treat.


These are cherry almond scrap buns made with trimmings from the croissant dough.


Here’s a preview of the full sized kouign-amann cake I’ll be writing about.

Oh those buttery layers

Stay tuned for Kouign-amann!

Meanwhile, please enjoy a few more images - ahhhh . . . . the beauty of nature!


Cocoa spelt cake

As promised in my recent season greetings post, I’m delving more deeply into this cake that comes from Aleksandra Crapanzano’s book “Gâteau”. Made with spelt and almond flours, Dutch process cocoa, Greek yogurt and brewed espresso along with the usual sugar, butter, egg, baking soda, salt, its intriguing blend of flavors got my attention. Plus, this was the chance to use up some ingredients on hand after all the autumn and holiday baking projects.

Let’s pause a moment. You’re probably wondering “How many chocolate cake recipes does one really need?” (particularly when there are literally TONS of them out there). I already have a number of delicious versions in my repertoire, but it’s also about the discovery and trying something a little bit new, isn’t it.

My first attempt, all puckered up and sunken. Ouch!

My first attempt was NOT a resounding success although it tasted pretty darn good. I even served it for a Christmas dessert with an orange mascarpone custard (which I ultimately thought too heavy for the cake), topped with hazelnut crumble and ganache drizzle. Just a little whipped cream next time perhaps?

Hmmmmm . . . . lets call this one rustic

After that first attempt this project ended up as more of a tutorial on pan sizes and capacities than on the actual recipe! Bear with me - numbers and math coming up - I understand if your eyes glaze over! Just scroll on down to the ingredients image for more on actually making/baking the batter.

For frequent cake bakers (or even not so frequent), the general rule as to how much batter goes into different size pans or molds is typically 2/3 to 3/4 full. To determine your pan’s capacity, place it on a zeroed scale, fill it with water and record the gram weight completely FULL. Then add up the weight of your recipe ingredients, divide that by the full pan weight and you’ll figure out pretty quickly if the batter will work in your chosen pan.

Aleksandra’s recipe calls for a 9 x 5 loaf pan which is typically touted as having a capacity of 1900 g or 8 cups. Over the years I’ve used the slightly smaller 8 1/2 x 4 1/2 pan (holds about 1400 g / 6 cups) or my longer, narrower tea loaf pan (about 5.5 cups) for things like basic recipes for quick breads, pound cakes etc with good results. BUT what I hadn’t done this time was to figure it out FIRST!

In this case the total ingredient weight for the batter comes to about 1310 g (5.5 cups); divided by 1575 g capacity of my tea loaf pan = 0.83 (~7/8!). WAY over the fill-to-2/3-to-3/4 rule for that particular pan.

What I did do the first go around was blithely plunge ahead, make the batter, fill the pan and realize it was WAY too full! So much so that I had to scoop some batter out early in the bake to reduce overflow. I should know better.

The First BAtch

Life is full of lessons, eh?

Anyhoo - always determined, I went through two more rounds of baking this batter, one with a larger loaf pan and one with my favorite muffin size silicone molds.

I got my hands on a pan that was billed as 9 x 5 x 2 1/2” deep but was barely 2 1/4”. I did my water fill/weighing test and found the capacity to be 1600 g, very close to my tea loaf pan - far too small for this batter.

Shallow 9 x 5 pan


Next up - a 9 x 5 x 2.75 USA brand loaf pan which weighed in (water filled) at about 1787 g. Hmmm . . . . this might work after all. That comes to about 0.72 filled, just in between that 2/3 to 3/4 fill guideline.

I went for it! While a 5 quart mixer works, I had learned from the first attempt that the amount of batter was a bit much for mine, so I switched to my 6 quart for further batches. Much easier to work with.

Let’s make this! Here’s the printable recipe PDF for you. You’ll note some ingredient variation options.

As always, read the recipe and do your mise en place with particular attention to ingredients that should be at room temperature (butter and eggs in this case).

A.C.’s recipe calls for Greek yogurt although for my first, not so great batch, I used crème frâiche; then Greek yogurt for the second loaf and full fat buttermilk for the tea cakes. It doesn’t seem to matter which you use - all good!

You can also alter the amount of spelt flour by creating a blend of spelt, medium rye and whole wheat pastry flour. Or replace the almond flour with a different nut flour like hazelnut or pistachio - they go so well with chocolate and coffee flavors.

The process is much like many cakes - cream butter and sugar, add eggs and vanilla, alternate dry and wet ingredients and, in this case, warm espresso is blended in at the very end.

Following are images of the steps.

Creamed butter and sugar

Even when eggs are at room temperature, it’s not unusual for the mixture to have a bit of a curdled look once the eggs are added. You should be able to appreciate that below. Don’t worry - it’s not an issue.

Eggs and Vanilla added


Dry and wet all blended in

Warm espresso goes in last - I will say it made me a bit nervous to add 3/4 cup of warm liquid but, with blending, it turned into a smooth and creamy mixture. Ahhhh. . . .

Final batter

Heat oven to 350ºF. I’m using the 9 x 5 USA pan below. Butter the bottom and sides of the pan (helps the parchment stay in place), line with parchment, lightly butter again and dust with cocoa powder (eliminates the chance of a white flour-y residue on the outside of the finished cake). You could also dust with raw sugar for a lovely hint of exterior crunch :-)).

You might think this buttering/lining thing is over kill, but I’ve had a few frustrating experiences with cakes not releasing from pans, so I tend to err on the side of caution. Having the parchment allows you to grab it and lift the cake out easily when the time comes.


I filled the pan, weighing the batter as I went. The final amount was a bit less than my calculated 1310 g based on ingredient weights, but let’s remember that egg weights will vary a bit and not every little scrap of batter ends up in the pan. Not enough to fuss about.

This should work!

Bake time is recommended as 50 minutes, rotating the pan about half way through. At my half point rotation things were looking OK with a still pretty jiggly center, and it looked like some edge overflow was about to happen. In another 10-15 minutes, this is what I found. Oh NO! Foiled again.


I scraped away the ooze and cleaned the edge up a bit. It took a good 20 minutes longer before I was happy that the cake had set and my tester came out clean. I even popped my digital probe into the oven and found my oven temps were pretty much on track.

Lesson learned (again) - recipe bake times are guidelines, every oven is different and always check sooner than later!!

Here it is! Sunken but not quite as much as the first loaf.

All baked up

It lifted neatly out of the pan and, once cooled, sliced easily to reveal a dense crumb and moist center.


In spite of these trials and tribulations, this cake is absolutely delicious! For my third attempt I went for small cakes, my avowed favorites when it comes to cakes of almost any kind.

Here I’m using an 8 well muffin style Silikomart mold SF028. Full capacity is 85 g / 3 ounces; if filling 2/3 to 3/4 full, you can figure 56 to 64 g per well (average it at 60 g - it’s easier). Take ~1300 g batch weight, divide by 60 g and you should have a yield of about 21 cakes.

Place silicone molds on a wire grid set into a half sheet pan. Pipe batter into wells, about 2/3 full. As opposed to scooping and spooning, piping is a much neater and easier way to dispense similar quantities of batter into the wells.

Here are some of the tea cakes, going in and coming out.

Ready for the oven


These bake around 20-25 minutes. You’re looking for tops to be dry with some cracking and a tester coming out clean.

All baked up

Let them cool in the molds about 10-15 minutes then gently turn out onto a wire rack. I decided to put some up and some down for you - different looks. If you’re going to dip them in ganache, I like the flatter bottom side up for a smoother finish, but either way works if you’re covering with a nice swirl of Swiss meringue buttercream or whipped mascarpone.

REady for dressing up!

For some I went with a spread of ganache on top followed by a swirl of caramel mascarpone cream and shared them with the neighbors for the New Year.


For New Year’s Eve Steve and I enjoyed a comparison bowl, each with a small piece of the second sunken loaf and half of a small ungarnished tea cake topped with vanilla ice cream, caramel drizzle and a favorite crumble. Both delicious but the small cakes edged out the slices with a slightly less dense texture and a lighter crumb.


What have I learned from all this?? I still love baking. Recipes/baking times are guidelines, ovens are not the same and everyone’s experience will be a little different. Even when you pay attention, things may not turn out as you think. Perhaps half the batter in a 8 x 4 pan would be perfect - maybe I’ll try it some day.

If I could be a fly on the wall in Ms. Crapanzano’s kitchen, maybe I’d learn a trick or two. Perhaps a 10” x 5” loaf pan is the solution? Or just bake small.

But the BEST thing is that this cake is delicious no matter how you cut it! Going forward I’ll stick with my individual tea cake versions since I can divide the batter into as many molds as it will give me. The cakes freeze well. They’re great with ice cream or whipped cream, a drizzle of caramel and/or ganache and a crunchy topping like crumble or toasted chopped nuts.

You can’t beat that. Happy baking!

Oh - and winter has finally arrived in west Michigan!


Have a cheery, peaceful and happy holiday season!

Holiday shortbread all boxed up

It’s been a busy time these past few weeks and blogging has taken a back seat. BUT . . . . I’ve tried a couple of new cakes from Aleksandra Crapanzano’s book “Gâteau” which I hope to share with you in the upcoming weeks.

One is a classic French apple rum-scented cake which I’ve made several times now. The first time around was for a demo I did back in October at a nearby assisted living facility during which I made two 6” smaller cakes. The time frame required a shorter bake than for a full 9” cake and it worked out just fine. The residents LOVED it!

six inch french apple cakes

I’ve also made both standard “muffin” sizes (seen below at another assisted living gig) and petite teacake versions topped with whipped caramel mascarpone and oat crumble. Yum!


The other day I made a chocolate, spelt, crème frâiche, coffee enhanced loaf that I will definitely try again. The recipe calls for a 9”x5” loaf pan, but I used my mom’s Mirro pan that’s longer and more narrow than a standard loaf. I’ve done that a number of times with other cake recipes that call for a standard loaf but this time the batter was WAY too much for the pan, spilling over the ends like lava. I ended up scooping some of the batter out early on in the bake and then let it finish. Boy did I have my doubts.

Not a pretty picture - sunken right down the middle like a trough. All puckered up! Just goes to show ya that things don’t always end up as you might hope.


But wouldn’t you know it - it’s delicious! Deep cocoa flavor, moist crumb with just the right level of coffee flavor.


I’ll let you know how the Christmas dessert I hope to serve comes out. Slices and/or chunks of this cake with a vanilla/orange scented ricotta custard, some chocolate ganache and something crunchy to set it off. Maybe a nutty crumble or chopped candied hazelnuts or walnuts. Mmmmmm . . . sounds good!

Cheers and good wishes to all! Catch you later.

My vermont memories window display (No white christmas here!)

Afternoon tea at London House, Chicago

Street level entry hallway

Steve and I were able to squeeze in an overnight to Chicago right before Thanksgiving. Seeing some family, visiting the Art Institute and enjoying the city buzz were on the agenda, as was an afternoon tea at London House.

Located at the confluence of Michigan Avenue and Wacker Drive, the entrance was at street level while the tea event was on the second (“lobby”) floor. While it was a bit clunky finding the space due to an odd elevator system, the setting was lovely and comfortable, the staff attentive and pleasant and the menu intriguing and robust with its offerings of pastries, savories and sweets.

When asked if we were celebrating a particular occasion, I offered up our 40th anniversary. That happened to be back in August, but we see it as a cause for celebration all year long. Wouldn’t you??

The menu

We were served two glasses of bubbly on the house and made our choice of tea - lots of options. I went with a green tea almondine, a pleasant almond scented light tea. Steve opted for a fruity berry hibiscus number - hmmmmm . . . . not typical for him. Truth be told, we’re generally coffee drinkers, but, when in Rome . . . . .

Green tea almondine

Shortly after the tea was served, we received our basket of baked goods - two flavors of scones (triple chocolate and orange cranberry), eggnog cakes and Grinch cookies (green of course).


Steve’s favorite was the chocolate scone - so moist and cocoa-ful (I think I made that word up). The portions were more than generous, so much so that I thought the scones would be better as petite versions, leaving room for the rest to come.

We put the Grinch cookies aside - they were big and not at all enticing to us. Give me a petite shortbread cookie any day.


The savories (6!) and sweets (5!) came out together on an elegant, narrow three tiered stand. We had a lot of work to do!


The menu was creative although perhaps trying a bit too hard. On a positive note the truffle mushroom toast points (especially the fried crispy prosciutto!), the feta/spinach/artichoke spanakopita and the goat cheese/pesto/tomato on Ritz cracker were flavorful, but the textures of the sushi salmon crepe and the vegan “crab” cake (essentially chewy mushrooms) were not particularly enjoyable. Steve did like the duck spring roll with hoisin, but then he’s a sucker for Asian cuisine. You go Steve!

Savories

The sweets were presented in a cute holiday style with donuts hanging from the tier and treats dressed up as Christmas trees and wrapped gifts on the top shelf. There were also candy cane macarons and Rudolph domes with antlers and all.

Sweet treats

Steve and I agreed that the Rudolph dome was the best of the bunch - a smooth caramel mousse with a pear confit center set on a crisp speculoos cookie. The other choices were average at best, particularly the gingerbread donut which was redolent of frying oil and too chewy in texture.

I can’t help but wonder where and by whom the Christmas trees and wrapped gift sweets were created. Seemed like mass production to me. Or perhaps there were elves back in the kitchen doing all that decorating?

Bottom line - if you’re looking for a couple of hours of quiet enjoyment in a light filled and holiday decorated room, you’re on the right track. Just don’t expect the cuisine to send you over the top.

Happy holidays!

Chocolate ganache tarte

The holidays are here and, as each day brings its own tasks to be tackled or projects to delight us, I want to send all of you my wishes for a very peaceful season.

And what better time to talk about chocolate!!

This ganache tarte is one of my all time faves. The more I consider all of the goodies I’ve created and written about over the years and the things I so enjoy making, the more I realize that the simplest things are usually the best. This delicious treat has been often requested and frequently made, but, believe it or not, even though I’ve perhaps referred to it in various iterations over the years, I’ve never given it top billing. So here goes.

During my Providence/Pawtucket days I made 80 mm individual versions for my retail space, keeping ‘em clean with a sprinkle of chocolate crunchy crumbs and a dusting of confectioner’s sugar. Plain and delicious. Then it’s up to the buyer to leave it au naturel and eat it out of hand or dress it up for serving - dollop on some whipped cream and a few fresh raspberries (for you fruit and chocolate lovers) or top with crunchy candied nuts or some sesame brittle.

Individual ganache tartes

The process utilizes some of the basics in tarte making - cooled blind baked shell; ganache filling poured in and cooled; garnish as you wish; serve and enjoy. Pretty straight forward. You can use either a pâte sucrée au chocolat or a standard pâte sucrée.

As an aside, I’m not intending to overwhelm but to explore options with you for creating your own version of a delicious ganache tarte!

As for planning ahead, be sure you make your chosen dough either the day before or early enough to allow an hour or two for the dough to chill in the fridge before rolling it out. An even better plan-ahead step is to make a double or triple batch of dough a week or two ahead, divide it into approximately 260-280 gram / 9-10 ounce portions and hold them in the freezer well wrapped. The dough keeps for months. Just thaw it in the fridge overnight before using.

You’ll fully blind bake the tarte shell first. When you’re ready, roll out the dough (generally about 260-280 grams / 9-10 ounces for a 9”) and line a 9” tart ring or fluted pan. Place it on a parchment lined sheet pan, prick the bottom all over with a fork and pop it into the freezer for 15-20 minutes to firm it up.

I often do various sizes for different venues. Roll with it (hah! - get it?). You’ll learn to figure out how much filling will work for certain sized tartes. I gauge a double batch of filling should fill the rings below (not including the little brioche tins).

So many choices!

My favorite 65 mm rings - perfect!

7 inch and 5.5 inch rings

You can actually do the lining step a day or two ahead and hold it in the freezer until baking day. No need to thaw it - just line with a round of parchment, fill with weights or dried beans. Bake at 350ºF for 12-15 minutes, then lift out the weights and parchment and bake an additional 5-8 minutes to fully bake/dry the bottom. Cool completely before filling.

Fully blind baked shell

As if there weren’t enough options for this tarte shell, here’s one more way to help with the plan-ahead process. You can freeze the fully baked shell too! There have been times that I’ve had a baked shell in my freezer for several weeks before I decided it was time to fill and enjoy it. So many possibilities!

The ganache filling is as simple as ganache can be. Place 227 g / 8 ounces of chopped dark chocolate or discs/feves in a medium heat proof bowl along with 28 g / 2 tablespoons unsalted butter. Heat 360 g / 1.5 cups heavy cream to boiling then pour the hot cream over the chocolate/butter. Let it sit a minute then gently blend with a whisk or spatula until smooth. Don’t be aggressive with the mixing - you don’t want to aerate it. Blend in 30 ml / 2 tablespoons brewed espresso - I often make a mix of 1/4 cup hot water with a half tablespoon espresso powder as a substitute for the brewed and use 30 ml of that.

Once the ganache is made, pour it directly into the blind baked shell.

Let it sit out at room temperature uncovered for an hour or so to let the heat dissipate before placing it into the fridge (again uncovered) to fully set. If you put it in the fridge right away, you’ll get condensation on the surface - not attractive, believe you me. Plus chocolate doesn’t like that.

Once chilled, garnish away! Crunchy chocolate crumbs, a light confectioner’s sugar dust, whipped cream and voila! It keeps covered in the fridge over several days so don’t feel like you have to eat it all right away!

An option for you nut lovers out there is to spread some toasted chopped nuts of choice coated in caramel on the bottom and pour the ganache over them. You can do fewer nuts and more ganache or more nuts and less ganache. Below are images of a few different sizes I experimented with for Thanksgiving a few years ago.

Pecans and caramel nestled in

Ganache poured over, ready to set

As for how you’d like to garnish your tarte, keep it simple by dolloping some Chantilly cream on each slice and adding some fresh raspberries. The pecan/caramel version below received a layer of chocolate crunchy crumbs, a dusting of confectioner’s sugar and a simple trio of toasted pecans. Yum.

For petite tartelettes, top the already set ganache with a lighter whipped version of chilled 2.5 parts cream to 1 part chocolate ganache and add a simple chocolate disc as decor.

Check out my ganache tips for more fun with ganache.

Petit fours tartelettes

Nothing like a day late and a dollar short. These images are from late October but I had to share a bit of seasonal beauty with you. They say snow’s a comin’!

Bejeweled burning bush

Late season color after a first snowfall - October 31, 2023

Here’s to comforting and grateful days, keeping our spirits and hearts bright, staying active and healthy and hoping for calm around the world. Cheers and, as always, happy baking!

Flan Parisien


OK! It’s time to get down to brass tacks. October is flying by, and I want to share one of my favorite baked goods ever. Being a huge lover of all things custard (think cooked vanilla pudding with melty chocolate chips as a child), my focus here is on le flan Parisien, essentially a custard baked in a crust. Yum.

Ever popular, flan has made its mark as a favorite le gouter after school snack for many French kiddos and is a staple in many pâtisseries across the country. There are many versions of flan across the globe - Mexico and Spain to name just two.

And let’s not forget the many classic custard based desserts that you’ll find world wide. Some of my favorites are crème brulée, pot de crème and my favorite ice cream base, crème anglaise, which I (and many!) consider the mother of custard sauces.

LIme coconut, raspberry/strawberry, chocolate almond, peach ice creams

I do digress. Sorry ice cream! I have to get back on track, but I couldn’t resist bringing you into the picture.

A custard is essentially a blend of dairy, egg and sugar with the occasional added thickener like cornstarch and/or flour, as is the case with crème pâtissière. You’ll see MANY variations in custard recipes using only milk, only cream, a blend of milk and cream, some yolks, some whole eggs - you get the idea. It would take me an entire post to try and explain the differences. Suffice it to say - all or mostly cream and all yolks in a custard make for a more unctuous mouth feel and richer taste. Switch in some whole milk for some of the cream and some whole eggs for yolks and you’ll experience a lighter, airier custard.

During my stage at Pâtisserie Pascal Pinaud in Paris’ 5th arrondisement, the house flan was made with puff pastry scraps for the crust and a simple crème pâtissière filling using whole eggs rather than yolks. Chef Pascal would line a 10-11 inch (25-28 cm) open ring with puff, hold it in the freezer and then I (oui moi!) would make the crème pâtissière that would be poured directly from the hot saucepan into the unbaked frozen shell. Into the oven it went. Always a hit.

At The French Tarte, my small shop in Pawtucket RI (2012-2014) , I occasionally made a version from Phillipe Conticini’s Pâtisserie des Rêves. His offered a unique approach whereby the custard filling was cooked, cooled then placed into unbaked puff lined rings and into the freezer for a couple of hours before baking. Right out of the freezer, directly into the oven! I looked back at my notes from July 25, 2013, having done a comparison between frozen and not - frozen won out for its creamier texture. Who knew.

I had already created my own flan custard base a few years back after doing a comparison of several recipes I had tried over the years. It incorporates whole milk, cream, eggs, yolks, sugar, cornstarch, vanilla bean. It was tasty back then so I went with it for this project. Plus, I hadn’t made a flan in forever!! Here’s a link to the full recipe with dough/custard/baking temps etc.

My goal here was not so much to revisit the custard portion BUT to compare using puff pastry scraps and my favorite pâte brisée for the shells. Blind baked or not and filling them with hot/cooled/frozen in the shell versions of the custard filling. While not a very scientific or well controlled experiment, it gave me the answers I sought. NOTE: once my rings are lined, I place them in the freezer for 20-30 minutes before proceeding. Remember - cold dough into hot oven, flakier result.

I used my 80 mm (3”) diameter, 2.5 cm (1”) high open tart rings, lining three with puff pastry scraps and three with pâte brisêe. I blind baked one each of brisée and puff and left the rest unbaked.

Ready for Baking

As I suspected it would, the puff puffed up in spite of the weights, resulting in a pudgy crust.


I then proceeded to make a batch of my flan custard, filling both a blind baked and an unbaked pâte brisée shell with HOT cream and then right into the oven.

Look for the nicely browned (in some cases almost black) top and just a hint of jiggle in the otherwise set custard. Both crusts baked up brown and crisp, blind baked or not. Good to know.

pâte brisée/hot cream just out of the oven

The flans do deflate while cooling as seen below.

I allowed the remaining flan cream to cool about 30 minutes and filled a blind baked puff and an unbaked puff with the cooled cream.

Ready for the oven

Not a pretty picture since the unbaked puff puffed, essentially pushed the filling out and over the edges. Yikes! The blind baked one didn’t fare too well either. Too much filling on my part, although it did settle down once cooled.

rather a mess

Last but not least I filled my remaining two unbaked shells (one brisée and one puff) with cooled custard and froze them for a couple of hours before baking. I was a bit short on filling, but they were still good for the testing phase.


Taste test time! The first image is of the three puff crusted flans. You can see the inner layer of puff isn’t fully baked, even in the blind baked one. The custard was a winner in all versions, whether hot, cooled or frozen.

Here’s a closer view of the puff versions. Can’t have that doughy layer, no sirree!

The brisée versions all baked up beautifully. The crust so nice and crisp, browned and buttery and the custard silky smooth with a lightness that seemed just right.


Here’s a closer look at the brisée crusts.


The final analysis? Pâte brisée, hot custard and no need to blind bake. Straight forward indeed.

I simply had to do one final version using a 16 cm open ring. Once more - here’s my recipe. As seen below, I did the let-the-raw-dough-hang-over-the-edge-of-the-ring approach, something I’ve seen in a couple of different pastry books. Once the whole thing is baked and cooled, you carefully cut away the excess dough to create a clean edge. It worked OK but I wouldn’t bother with it in the future.

Over hanging dough approach

Place lined ring/sheet pan in the freezer while preparing the custard. Fill shell with hot cream and bake.

Ready for the oven

All Baked up

Crust trimmed

Once cooled, trim off the excess crust (snack on it!), lift off the ring and cool the flan in the fridge overnight. This holds well refrigerated over 3-4 days, and I’ll admit that Steve and I each enjoyed a daily slice during that time. A keeper.


Have fun making your own flan Parisien!

Before I go, let me share this photo of a beautiful double rainbow seen out of our west windows this morning. The rising sun in the east was hitting the trees/oncoming rain clouds to the west to give us a vision of nature’s finest. Until next time - happy baking!

It’s baking season!

Zion lodge and the afternoon light

Yes, it’s officially autumn as of 2:50 am today, September 23! My absolute fave time of year, and baking is on the agenda. Even though It’s time to polish up my recipes and game plans for a number of classes and demo presentations on the fall calendar, there are other things I can’t ignore. Every now and then it’s fair game to veer off course a bit, eh?

If you’ve followed this blog for awhile, you know my penchant for sharing the beauty of nature. I love baking, but I also love walking and seeing the flora changing from season to season, whether in someone’s garden I happen to pass or out along the paths where wildflowers grow.

Roadside asters near the grand canyon

Back in 2020 Steve and I were planning a trip to Zion, Bryce and the Grand Canyon but had to postpone due to COVID. Well guess what - we just returned from that SW trip as a prelude to launching into fall activities. What grandeur and spectacular beauty. Pictures can certainly give you a hint, but you really have to see it in person to soak it all in.

OK - I admit this post isn’t really about autumn baking (although I’ll mention a couple favorites toward the end) but about experiencing just some of the different trees and flora of the SW. Prickly pear, juniper, scrub oak, desert holly, all of which tolerate dry conditions and are much more rugged and tough than plants in the midwest.

Prickly pear cactus

Juniper Berries

Desert Holly I think

Another oft seen bloom, particularly in Zion, was datura, a large white trumpet flower. Turns out this one is highly poisonous, belonging to the nightshade family, also referred to as jimsonweed, moonflower and thornapple. Whoa!

Datura - watch out!

Zion was my favorite - you gotta go!

So what are you thinking about baking this fall? Apples, pears and berries are all fair game.

Go as simple as a pâte brisée lined open tart ring, load in apple slices tossed in a squeeze of lemon juice and just a bit of sugar and flour, bake until golden then drizzle some cider caramel over the top. Add a scoop of vanilla ice cream and you’re good to go.

Don’t forget pumpkin, nuts, chocolate. How about a delish pumpkin financier?

Pumpkin financier

Or a buttery, crumbly pumpkin scone? And that’s just scratching the surface.

Pumpkin scone

Scroll through my blog for more ideas and have a blast with your own autumn baking. I know I will.

Lovely dahlia at nearby meijer gardens

Michigan peaches and some delicious teacakes

It’s August in west Michigan and you know what that means. Peaches!! Red Haven is one variety that has “ruled” the Michigan peach kingdom (in the minds of many) for years. One of my favorite childhood memories is that of my oft chosen August birthday dessert - pound cake, peaches and ice cream. Oh my.

For the eight years that we’ve been back in Michigan this blog once again gives me the chance to extol the virtues of this oh-so-summery fruit. A number of states brag about their peaches, and I’m here to tell you that Michigan peaches stand up to the rest of ‘em pretty darn well. Right now we’re deep into the season, not only with peaches but with blueberries, raspberries and more.

My current favorite breakfast or late morning “lunch” is plain yogurt (I go for Chobani plain whole milk) with a squirt of local maple syrup, sliced fresh peaches, blueberries and my favorite nutty granola. So delicious.

So many ways to bake with and/or use peaches - what to choose? Perhaps fresh peach ice cream or jalousie or peaches and cream Breton tart or rustic summer fruits galette? Why sure.

But . . . . this time let’s focus on petite peach teacakes, OK?

These were inspired by a Zoë François recipe for plum cake that I came across recently. Here’s my version for my favorite petite teacake size. Basic steps, delicious and moist. Can’t beat that!


A few plan ahead tips for the recipe - butter, eggs and milk at room temperature except for some small diced butter kept cold for the topping.

Cake Ingredients at the ready

Topping ingredients

Below is a quick run down on the steps and here’s the recipe PDF for your perusal.

Flours, baking powder, salt and spices whisked in a separate bowl. In the bowl of a stand mixer with paddle, cream room temp butter and sugar for a couple of minutes; blend in room temp eggs (2) one at a time, scraping down after each, then add vanilla.

For you frequent cake bakers, you know the drill. Starting with the flour mixture, blend in 1/3 of it, then 1/2 the milk, 1/3 flour mix, 1/2 milk and final 1/3 flour mix. Those additions should be done on low speed, just until incorporated. I like to finish the last 1/3 flour addition using a spatula - avoids over mixing. And it’s so satisfying to finish it off gently and with purpose, making sure all the dry stuff from the bottom of the bowl is blended in.

Last third coming at ya!

Blended oh so nice and smooth

I find it easiest to pipe the batter into the silicone wells rather than scooping it into the small cavities - less mess. I had my peaches peeled, pitted and cut up, letting the moisture soak up a bit on paper towel before popping them on top of the batter. I think I used about a peach and a half for this batch (ate the other half of course).


Bake at 375ºF for about 10 minutes, then pull the tray out and sprinkle the spice/sugar topping mix on each.

Partially baked and Lightly sprinkled

Dot a few cold butter pieces on each cake and a bit more spice sprinkle.


Continue baking about another 10 minutes until golden and a skewer inserted in the center comes out clean.


Oh so light and delicious with the perfect marriage of spices and peach. Enjoy these freshly baked or freeze for later. Next time I’m planning a nice swirl of caramel mascarpone cream and a bit of oat crumble to dress them up for an upcoming afternoon spread of delights. Yes.

Truth be told I’m ready for autumn, my FAVE time of year. Enjoy!

For the love of baking

Assorted goodies for a neighbor’s birthday party

Many of us pursue baking simply for the love of it - I know I do. Believe me, I know how fortunate I was back in 2006 to attend pastry school in both Florence and Paris. As a new career and later-in-life endeavor, it was exciting, emotionally charged, exhausting at times and well worth it.

Though I’m both “home schooled” and professionally trained, it’s not a search for fame or fortune that keeps me in the kitchen. Trying new things, reading about how others approach their craft, tweaking a recipe to create a different flavor combination all help to keep me coming back for more.

I find the process - planning, prepping and baking all the way to tasting and sharing - so calming and rhythmic. Even cleaning up, when all is said and done, is its own rite. Everything washed/dried, organized and stored in it’s own place, ready for the next baking adventure.

Just a few frequently used tools


Apricot blueberry danish


Cooling challah


Fresh berry tarte


Caramel knots

The remaining content is taken from a post I first published on March 14, 2022 in the early weeks of Russia’s invasion of Ukraine. I posted it right on the heels of another post, and I suspect many of you who tend to follow this blog may have missed it.

“If pastry could change the world” still captures what baking means for me and so many others. Enjoy!

Valentine feuilletés

If everything could remind us of love . . . . .


If we could all share fresh bread, cheese and wine . . . . .


If a simple and delicious apple tart could make each day better . . . . .


If a bright, flashy, chewy macaron could shout “Be Happy”! . . . . .


If croissants could bring us together as one, multi-layered as we are . . . . .


If a buttery scone could make us giggle with delight . . . . . .


If creamy profiteroles could smooth out all the kinks amongst us . . . . .


If a shortbread sandwich cookie could hug each and every one . . . .

If caramelized Kouign-amann could roll us up in a big warm embrace . . . . .

Don’t you think the world would be a better place?

Here’s to all the bakers out there everywhere. Cheers!!

Summer beauty

Hazel-chocolate spirals plus croissant squiggles

Back on our stage once again - it’s time for more fun with croissant dough! Some weeks back I came across an article about the various ways that many baking and pastry folks are shaping their laminated dough - eye opening to say the least. I wanted to give one of those shapes a try in addition to making some spirals for a group event.

First let’s review the classic spiral process (here’s one version), using one of my favorite fillings - hazelnut remonce topped with chopped chocolate for a match made in heaven.

A quick sidebar: I first made remonce about 3 years ago based on Brontë Aurell’s recipe - 100 g each of almond paste (preferably 50% almond/50% sugar), sugar and butter. As I thought about that mix, I realized it’s essentially 50 g almond, 150 g sugar and 100 g butter. After my lovely class experience in Copenhagen in May of 2022 where we made remonce with 100 g each almond flour, sugar and butter - essentially créme d’amande without any egg or flour - I tweaked the almond paste version to 100 g almond paste, 50 g almond flour, 50 g sugar and 100 g butter for a more almond, less sweet version than Aurell’s. Add 300 g of toasted, ground hazelnuts to the mix for the hazel version. Did you follow that?? It’s all in the details.

As many of you know, the spiral is what we all use for cinnamon rolls - roll out a rectangle of dough, spread or sprinkle your filling on, roll it up into a log, slice, pan up, proof, bake and enjoy! There are tons of filling options, either sweet or savory, so use your imagination and go for it.

I’m using a half batch of croissant dough here - roll to about an 8” x 12” rectangle (20 cm x 30 cm).

Ready for the filling

Spread 227 g / 8 ounces hazelnut remonce filling over the dough and sprinkle with 50 g chopped chocolate. I use Guittard 61%.

Ready to cut

Cut ten 3 cm wide strips, roll ‘em up and place each in a standard sized baking paper. PSST - this is a new approach for me. Rather than tucking them in a pan cheek-by-jowl or setting them openly onto a sheet pan without any ring or form, the papers give them just enough of a boundary to allow for rising/spreading and baking very nicely. Yes!

Rolling, rolling, rolling


Cover lightly with buttered plastic wrap and let rise 1.5 to 2 hours. Not to confuse you, but I cut two additional strips from the half batch of dough I was using for the squiggle test (coming up) to give me an even dozen as you see below.


Toward the end of the rise heat the oven to 400ºF. Bake 10 minutes, rotate the pan and check the browning. If browning too quickly, reduce temp to 375ºF and bake an additional 10-15 minutes until nicely browned.


For a little shine I brush them with some simple syrup and then give ‘em a sprinkle of coriander sugar. Yum.


Time for the new shape! Squiggles. They remind me of fleur-de-lis.


Using a half batch of dough, I rolled it out to an 8” x 12” rectangle, this time with the short side parallel to the edge of the counter. I have only six 80-mm square tart forms so six pastries resulted from this experiment.

Butter and sugar the tart forms which serve as the boundary for the dough to keep it in check, so to speak, as it proofs and bakes. Cut six 30 cm (12”) long and ~ 2.5 cm (1”) wide strips. My cutting eye was a bit off and a couple came out a bit narrower - going forward I’d cut them all a tad wider, ~3 cm each.


Shape each strip into a squiggle (I had practiced with a strip of paper first and figured out the curves I was going for), tuck each into a prepped form at an angle as seen below and sprinkle with some coriander sugar.


Cover lightly with buttered plastic wrap and let rise about 1.5 hours.


Bake at 375ºF about 20 minutes until nicely browned. I also gave these the simple syrup, coriander sugar treatment.


All in all, a fun time in the baking kitchen! I hope you’re having fun too!!

Summer marches on.

Focaccia

This one is a dandy folks! What a wonderful, luscious and tasty bread.

Let me go back a number of years and tell you about my discovery of Claudia Fleming’s book “The Last Course”, a wonderful and delicious ode to pastry and desserts. Back in 2007 to early 2010 I was the pastry chef at Gracie’s in Providence RI. Being a newbie in the pastry/restaurant world, I was always looking for inspiration for desserts. As it turns out, the Providence Public Library was just a couple of blocks away from Gracie’s, and I would occasionally wander over there after my day’s work to peruse the baking book stacks. Thrilled by the discovery of this particular book, I would often turn to Claudia’s recipes and glean ideas from her creations.

Imagine my delight when learning of Claudia’s second book “Delectable” published in 2022 and dedicated to her late husband Gerry Hayden who, as I understand it, was a very talented chef. For many years the two of them operated the North Fork Table and Inn on Long Island (now under new ownership), and Claudia baked focaccia for the restaurant every day. That kind of experience and expertise is invaluable.

One of the things I love about acquiring new baking books is reading the introduction and gaining an understanding of the author’s philosophy and approach - and, let’s not forget, the recipes aren’t bad either!

I’ve made this recipe a couple of times so far and you can be certain that it will remain a staple in my bread baking repertoire from here on out. I topped mine with a pizza seasoning herb mix we keep on hand along with grated parmesan cheese, but you can create your own version.

I’ve adapted the recipe with some tweaks in ingredient portions based on %hydration (76% here) and the weight of a cup of bread flour that I use. If you’re a recipe reader/comparer as I am, you soon realize the variables that can appear in measures vs. weights, particularly for flour. Some may indicate a cup of flour is 5 oz (140 g), some 4.5 oz (128 g) and some 4.25 oz (121 g). I’ve tested out what a cup of flour weighs for me - typically 127 to 130 g - so that’s my benchmark. I take weights over measures any day.

You need only the very basic ingredients for the dough (bread flour, water, dry yeast and salt), plus olive oil for the pan. Dissolve ~6 g / 2 teaspoons active dry yeast in 483 g / 2 cups room temperature water in the bowl of a stand mixer and let sit about 10 minutes until creamy. This step activates the yeast, however you can skip it if using instant yeast which can be mixed directly with the flour, water and salt.

Add 635 g / 5 cups bread flour and 10 g kosher salt to the yeast/water mixture and mix first with the paddle until combined. Rest the dough for 30 minutes to hydrate. Here’s my dough after that rest.

After initial hydration

Now switch to the dough hook and knead on med-high speed for 20 minutes until smooth. My 8 quart Kitchenaid commercial mixer (with which I can also use my 6 qt bowl!) does a great job with it’s workhorse of a dough hook and powerful motor. It’s a beautiful thing.

8 qt mixer with attachments/6 qt bowl

After the 20 minute knead

Place the dough in a lightly olive-oiled bowl and do a folding of the dough to develop the structure by stretching and pulling up one edge of dough into the middle, then the opposite edge, then the other two edges one at a time. This forms a tighter ball of dough. Flip the dough over to coat with oil, cover with plastic wrap and let rise at warm room temperature for 1 to 2 hours until doubled. You can also do an overnight fridge rise if it better suits your schedule.

The first time I made this, I did a 4 hour fridge rise (must have had something unexpected come up?) which I followed by an additional hour at room temperature. It worked. For my second batch I followed the room temperature approach, completing the project over the course of several hours.

Turn the dough onto a lightly floured work surface, pat it into a square of sorts and stretch it out to about 16”x20”(ish).

Now fold it in thirds length wise (à la the letter or 3-fold we use for laminated dough).

Now fold in the short sides in thirds (another letter fold). Press out air pockets.

Dough package before panning

Pour 6 tablespoons extra virgin olive oil onto a half sheet pan, put the dough on the pan and turn to coat with oil. Let rest 10 minutes.

Stretch the dough to fit the pan as best you can. I did this in two steps, letting the dough rest 10-15 minutes in between. Dimple it all over, cover with plastic wrap and let it rise about 30-40 minutes. It will become more puffy.

Before the rise

Heat the oven to 500F. When ready, top with herbs and grated cheese (or your chosen topping(s).

Bake 8 minutes, rotate the pan and bake an additional 7 minutes until beautifully browned.

Mmmm, mmmm!

I slid the whole thing onto a cooling grid and gave it just a few minutes before Steve’s and my tastebuds just had to be put to work. Oh boy. Just the right chew and lightness of texture.

After our initial pre-dinner taste test, we enjoyed more with our evening pasta dish and then divided the remainder to wrap and freeze. It thaws and warms up beautifully in the oven and is great to split for sandwiches or open-faced baked with grated fontina and tomatoes on top or whatever your little heart may desire.

AbsoLUTEly delightful! Thanks Claudia.

Lemon lime toasted coconut tartelettes

Spring’s celebrations always bring out a wave of lemon, lime and coconut themed recipes, and I’m certainly one who hops on the band wagon tout de suite. I made these for Easter as well as for a spring pastry event right down the road - a big hit.

After our return from a late spring trip to New England and Nova Scotia, I was determined to write at least a bit about these, since, even with summer upon us, there’s always room for citrus.

So delicious!! Plan ahead friendly! Tart lemon lime filling baked in an already blind baked pâte brisée shell then garnished with whipped lemon mascarpone cream and toasted coconut. Yum. Yum. Yum.

I know I go on (and on and on) about the classic bases of pastry and these babies fit the bill big time. Using three of the top components on my A list, the result is a match made in heaven. I like to think of tart preparation as a build-your-own process in which you can change up your chosen dough, filling and garnishes to suit your tastes and occasion.

If you already have pâte brisée in your freezer, you’re one step ahead. If not, make the dough and chill it a few hours or overnight before rolling it out, lining your chosen rings/molds then blind baking the shells. TIP: wrap and freeze the dough up to a couple of months for even more plan ahead fun.

Check out this post for so much more on pâte brisée.

example of rings lined for blind baking

The lemon-lime curd is a favorite based on Yotam Ottolenghi’s recipe in “Sweet”, a book I highly recommend. It can be made several days ahead and holds well in the fridge - another win-win for planning. If I have leftover curd, I’ll add it to whipped mascarpone as I’ve done here. It’s also great added to Swiss meringue buttercream, ice cream base during processing or blended into crème pâtissiére to fill choux puffs.

If you prefer, you can make the filling while the shells are baking. I then typically fill the blind baked shells immediately with the warm curd then pop them into a 325ºF oven for about 10-15 minutes to set with a hint of a jiggle left. Cool at room temperature about 30 minutes then chill completely before adding your chosen garnish.

Some may wonder why I bake the filling since it’s already cooked. While not absolutely necessary, I find it makes for a more luscious, creamy mouth experience by taking that extra step.

Option - chill the curd separately then fill the baked/cooled shells, garnish and enjoy .

In the image below the two tartelettes at bottom left and right are examples of the option just mentioned. You can appreciate a looser texture than the others that have been baked which have a certain sheen and appear more set.

Before the final garnish

Whichever way you do it, the final task is the garnish - whipped mascarpone cream which I prep just ahead of use. In this case I used half of the base recipe, adding lime zest and 3-4 tablespoons (or to taste) of lemon-lime curd to the cream as I whipped.

Decorate the tarts with your favorite swirl pattern and top with a bit of lime zest and toasted coconut. You’ll be so happy.

One more thing - Steve and I can attest to the staying power of these lovelies in the fridge for 4-5 days. Whoopee!!

Enjoy and have fun with it!

Butter tarts in Nova Scotia

For those of you who follow this blog you may remember my post on making Canadian butter tarts back in July of 2021. Well I’m here to tell you that I’ve now enjoyed the real deal on a recent trip to Nova Scotia.

Steve and I met up with our British friends Richard and Pauline in Halifax from whence we drove to Cape Breton Island to explore the local beauty and culture. Lo and behold, on the Atlantic side of the Cabot Trail we came upon the Clucking Hen café and bakery - a perfect stop for a morning coffee and a pastry. And what to my wondering eyes did appear? Butter tarts, both raisin and pecan versions.

Steve abstained but Richard opted for the raisin version and Pauline and I went with the pecan. While butter tarts can be (and are!) quite sweet, this version was superb based on my limited experience. The crust was oh so buttery and flaky, a huge win in my book.

The filling was butterscotch-y with just the right balance from the pecan. Oh my!

Now that we’re back from our travels to New England and Nova Scotia, I have more posts up my sleeve - hmmm - how about focaccia or toasted coconut lime tarts? Sounds good to me.

Focaccia

Toasted coconut lime tarts

I admit that not all thoughts turn to baking this time of year but, even so, bake I must in some way, shape or form. Meanwhile, taking my morning walks and tuning into nature is oh so grand.

Be careful out there and have a grand summer!

Cheerful blooms along the walking path