Chocolate pot de crème fudgesicle

IMG_1046.JPG

Just think about this - one delicious base and two ways to use it - classic pots de crème and a creamy, frozen, reminiscent-of-childhood treat. What a great way to create a luscious chocolate-y summer dessert duo with a minimum of oven work involved. Even better, to make it more enticing, it’s a make ahead project too!

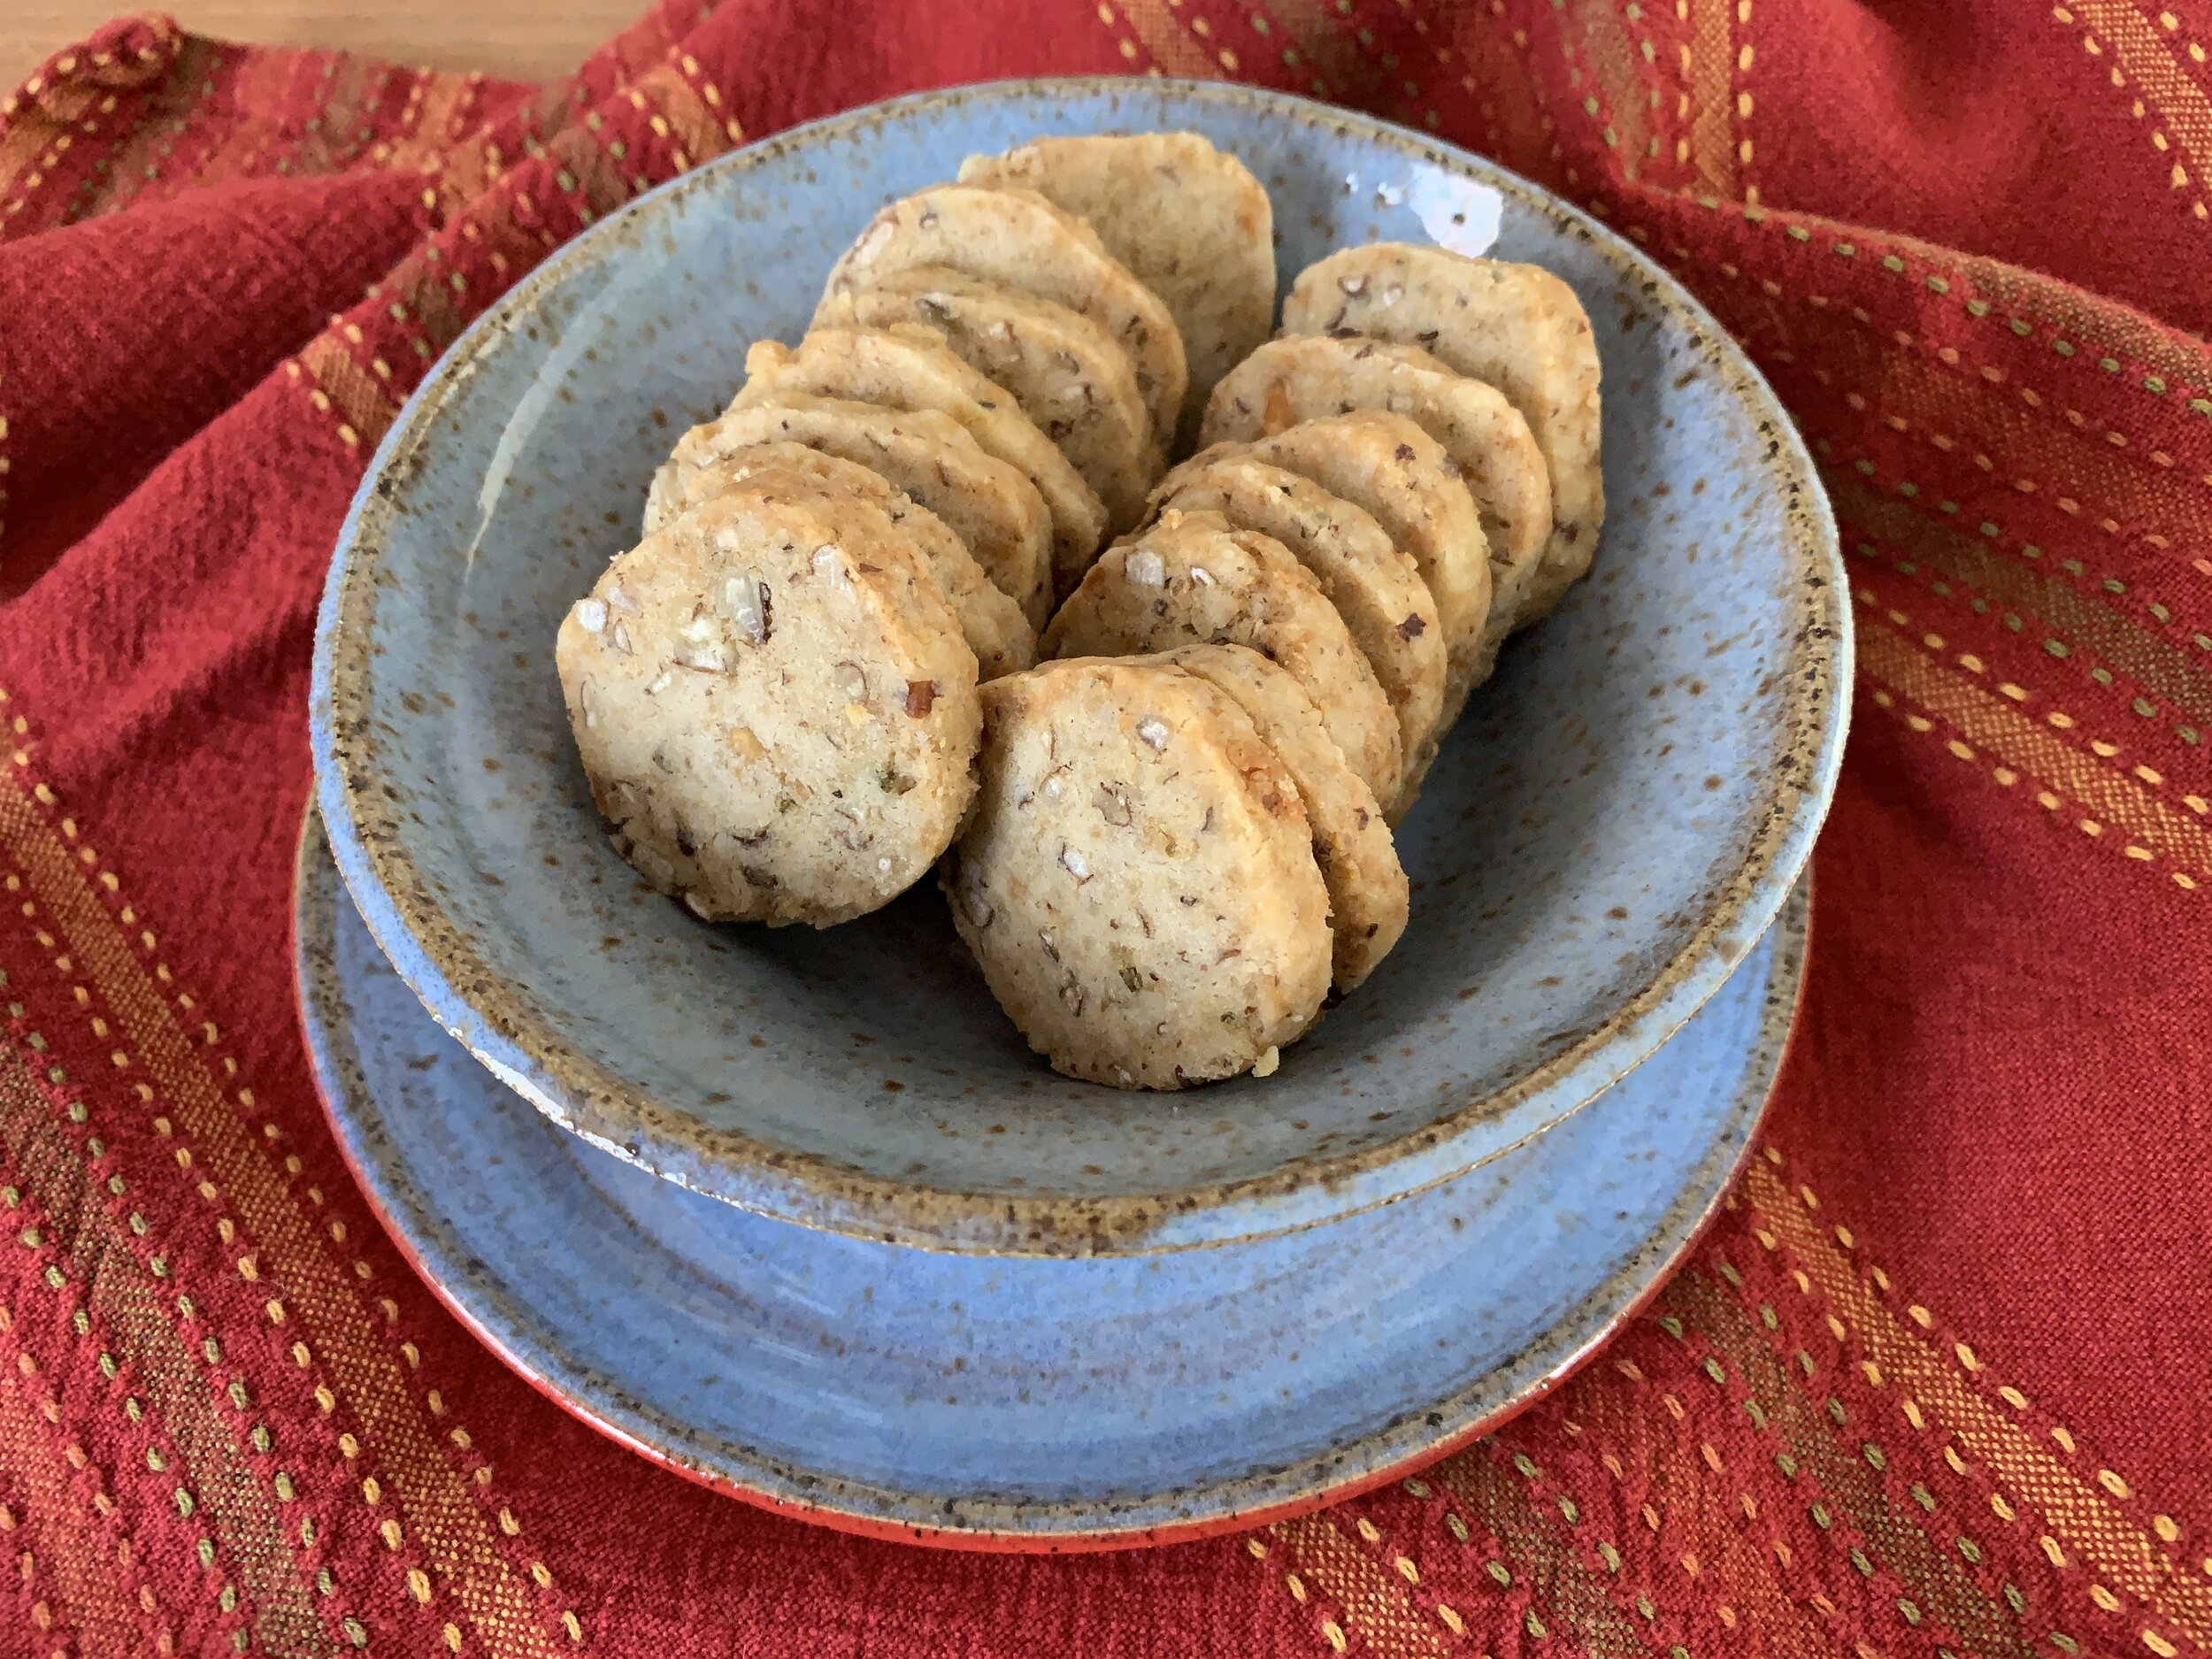
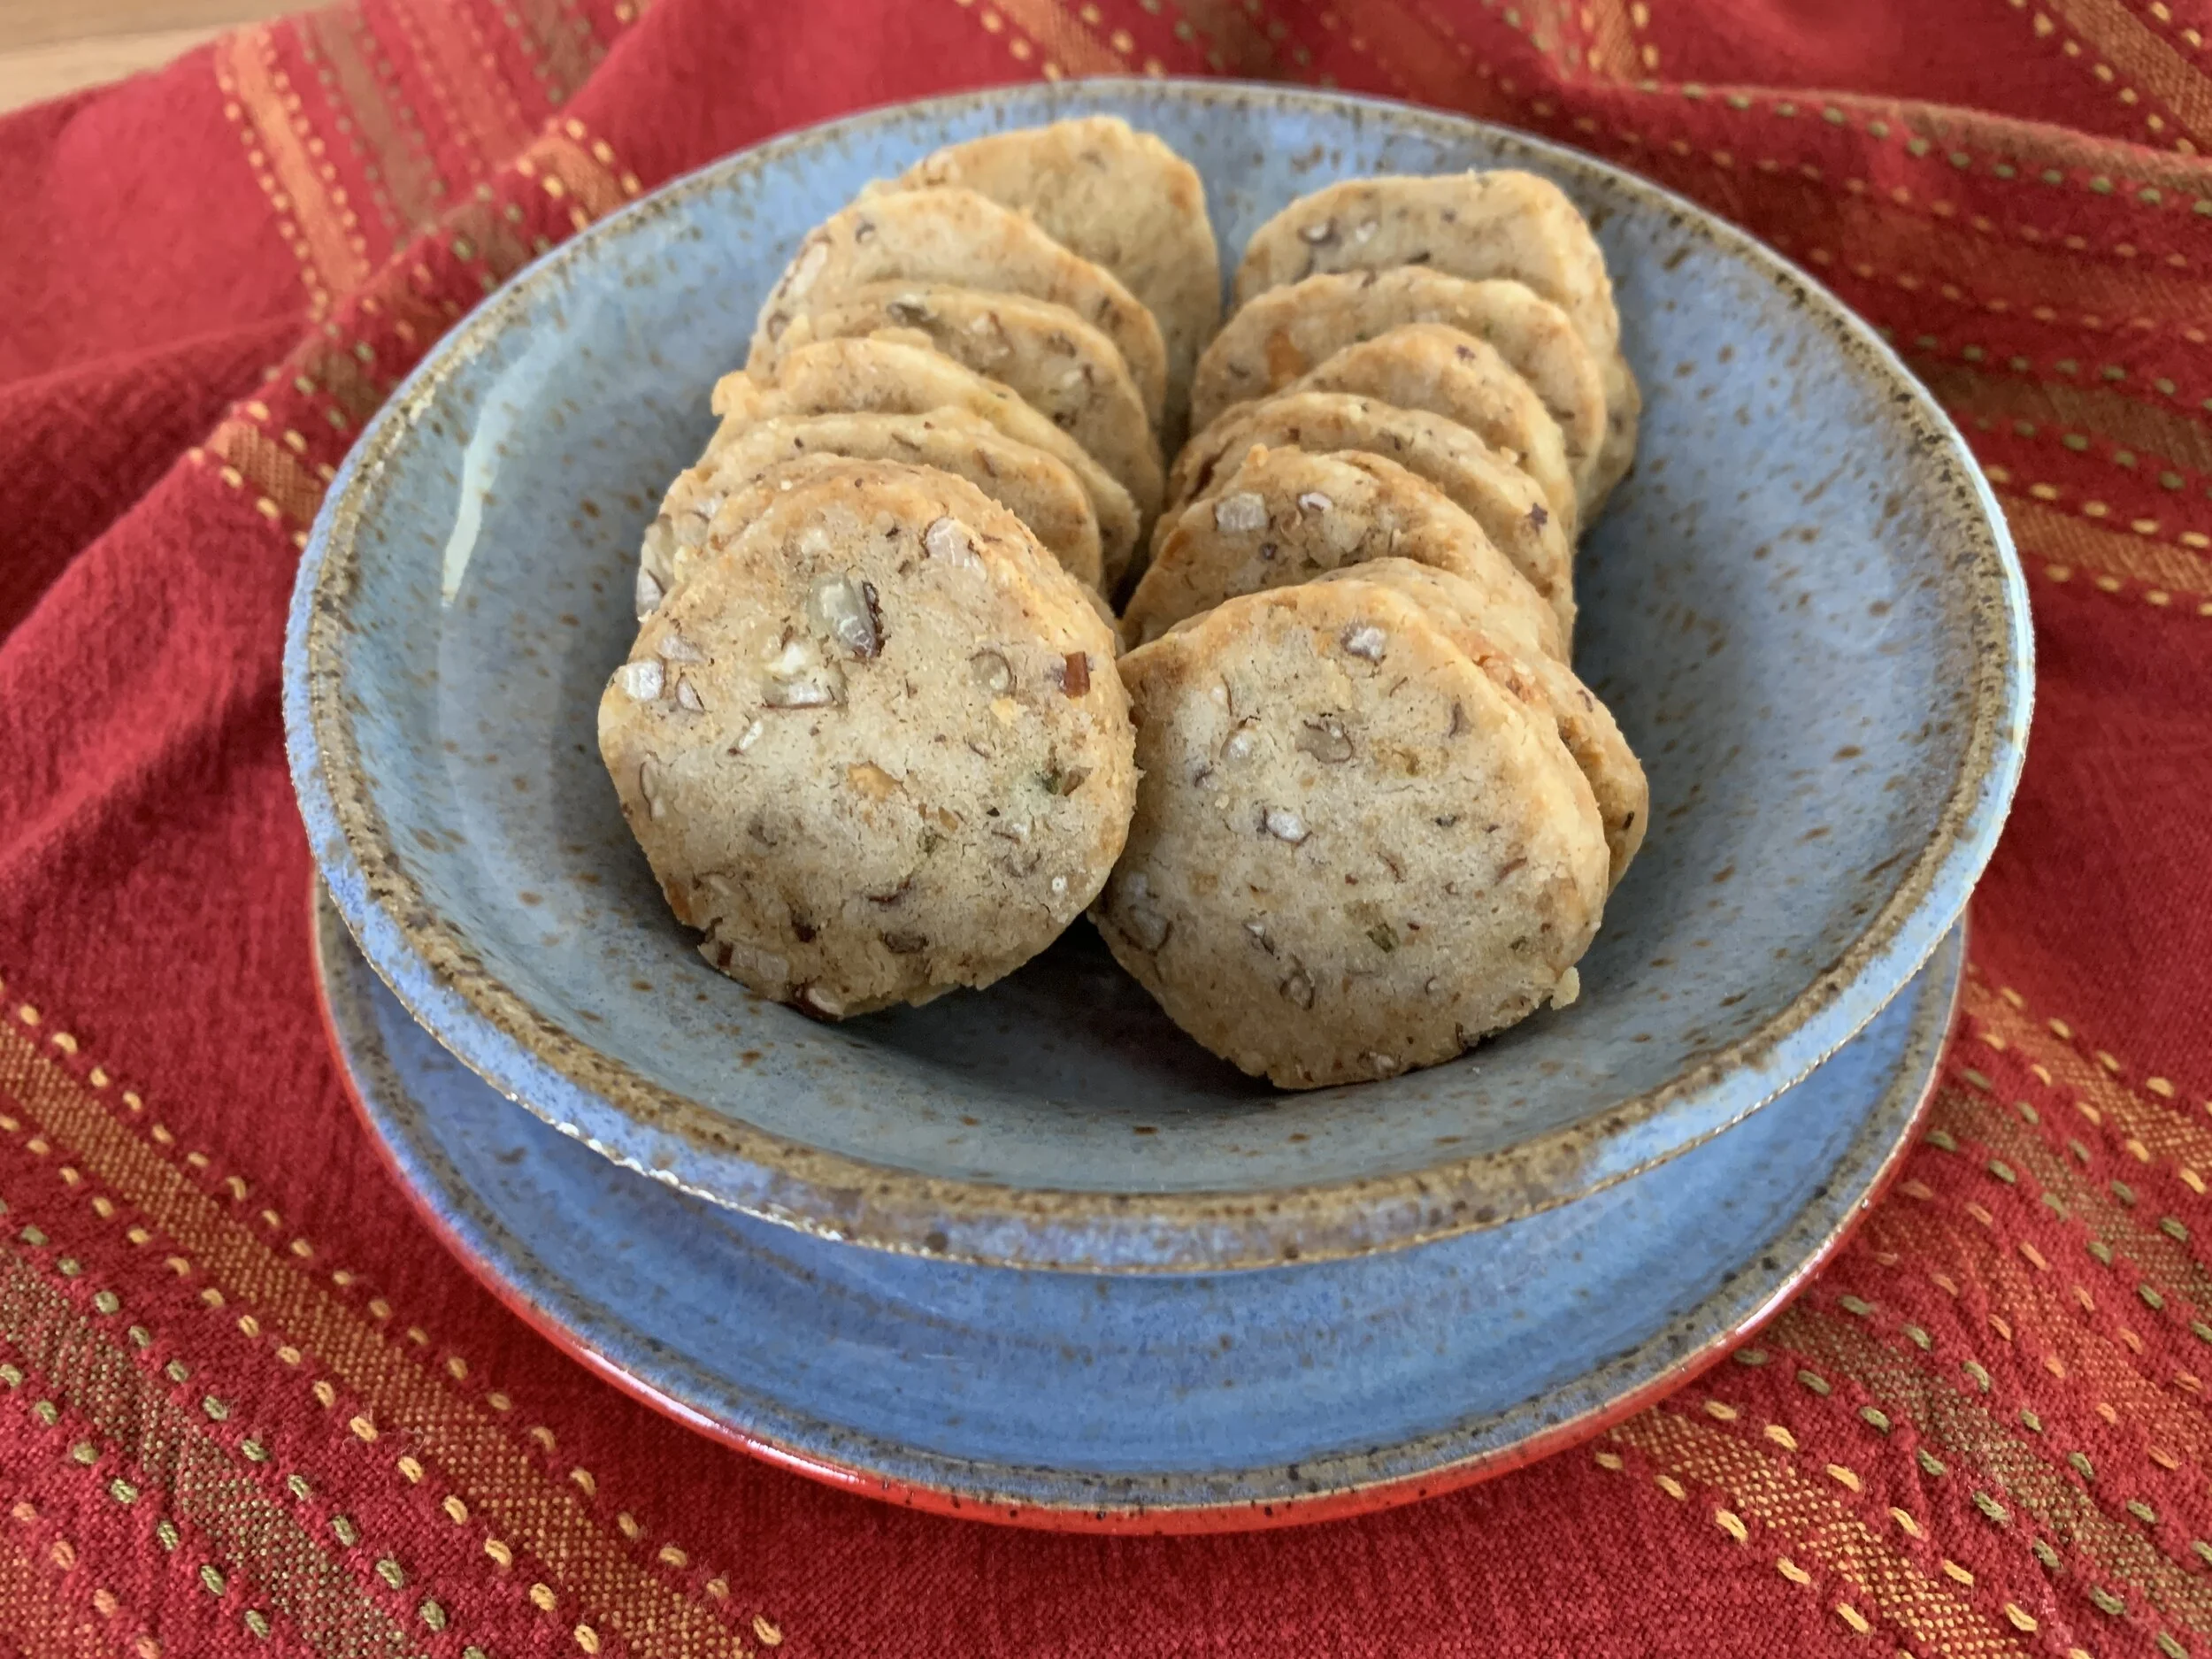
This takes me back to Gracie’s days. At the restaurant I used to make these chocolate pots de crème in small brown espresso cups topped with a dollop of lightly sweetened Chantilly cream and served with a baton of delicious vanilla shortbread. Just enough to satisfy an after dinner sweet tooth with rich, cool and creamy luxury.

Then one day I discovered that I could take any leftover custard base I had in the fridge, pour it into silicone molds and freeze it. After all, the mixture is essentially crème anglaise (dairy, yolks and sugar), the same base used to make ice cream. So why not!

The perks of silicone molds are not only the many, many shapes and sizes out there but also their oven safeness and their freeze-ability and flexibility. Once frozen, simply push the treats out onto a plate or into a bowl when ready to serve.

The grey cube shape here (thanks Chef Joe) is an Elastomoule made by the French company De Buyer. The majority of my silicone molds are the Italian brand Silikomart which I typically buy through Kerekes, a NYC based company with a great selection of all things pastry plus great customer service.

IMG_1051.jpg

The first time I sampled one of these, my taste buds took me back to the fudge-sicles of childhood (without the stick!) but with a creamier, richer smoothness that blew them out of the water! Since with this approach the custard is what’s referred to as “still” frozen rather than churned in an ice cream maker, it isn’t aerated and thus has a denser texture. Mmmmm!

IMG_1049.JPG

Before going on to the recipe, here’s a quick back story. In 2009 I had the good fortune to spend some time in Paris pursuing professional development courses at Le Cordon Bleu and language study at L’Alliance Français. Needless to say, I was regularly out and about on the metro as well as being a flâneuse, strolling along les rues. I used to love going to les grand magasins, the big department stores like Galeries Lafayette and Bon Marché to browse all manner of things. A feast for the eyes!

On one visit to Galeries Lafayette I came upon these crinkled, colorful little espresso cups from Revol the French porcelain company (they still make these “crumpled cups” in three sizes!!). Easy to pack and a perfect addition to the different sizes and shapes of ramekins I so easily fall for. I’m a sucker for baked custards so why not have some cool oven safe receptacles in which to bake them.

IMG_1053.jpg

The full base recipe fills 8 to 10 four-ounce ramekins. Obviously your yield will vary depending on what you’re filling. Smaller portions, greater yield.

For this project I made 2/3 of a recipe (4 yolks) with a yield of six of my cute Revol cups and ~ten 42 g/1.5 oz frozen cubes. I love small portions.

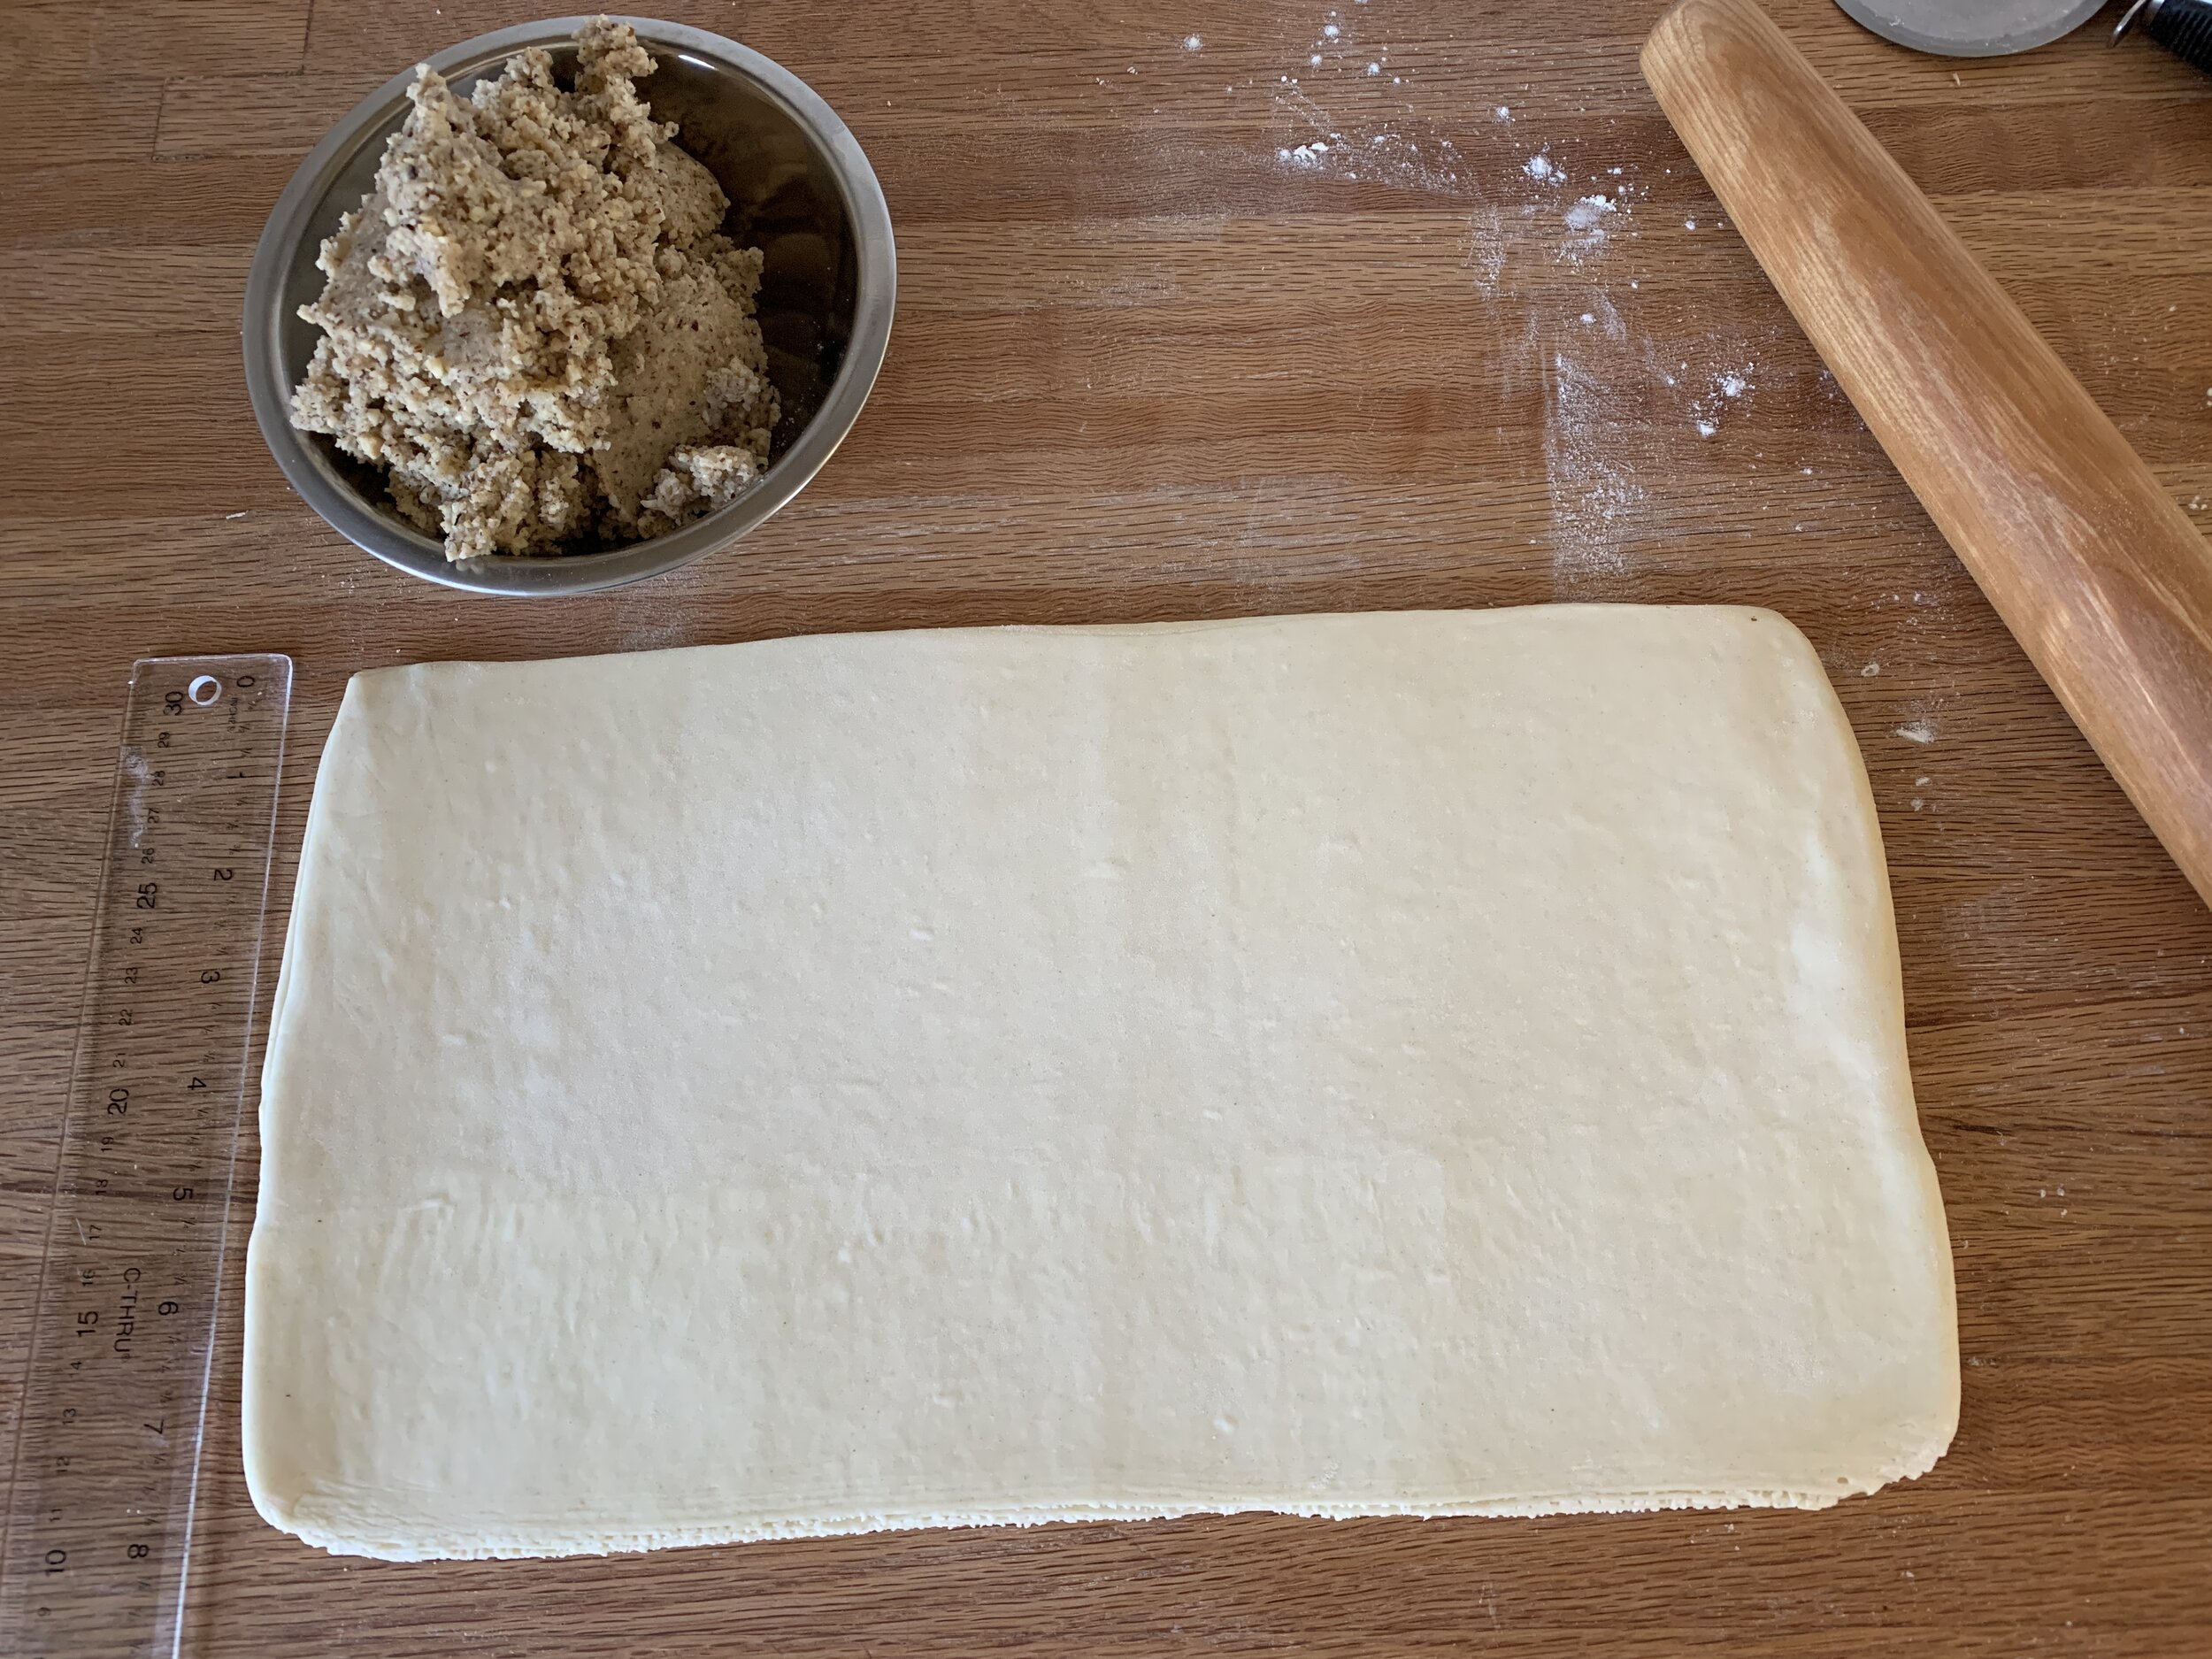
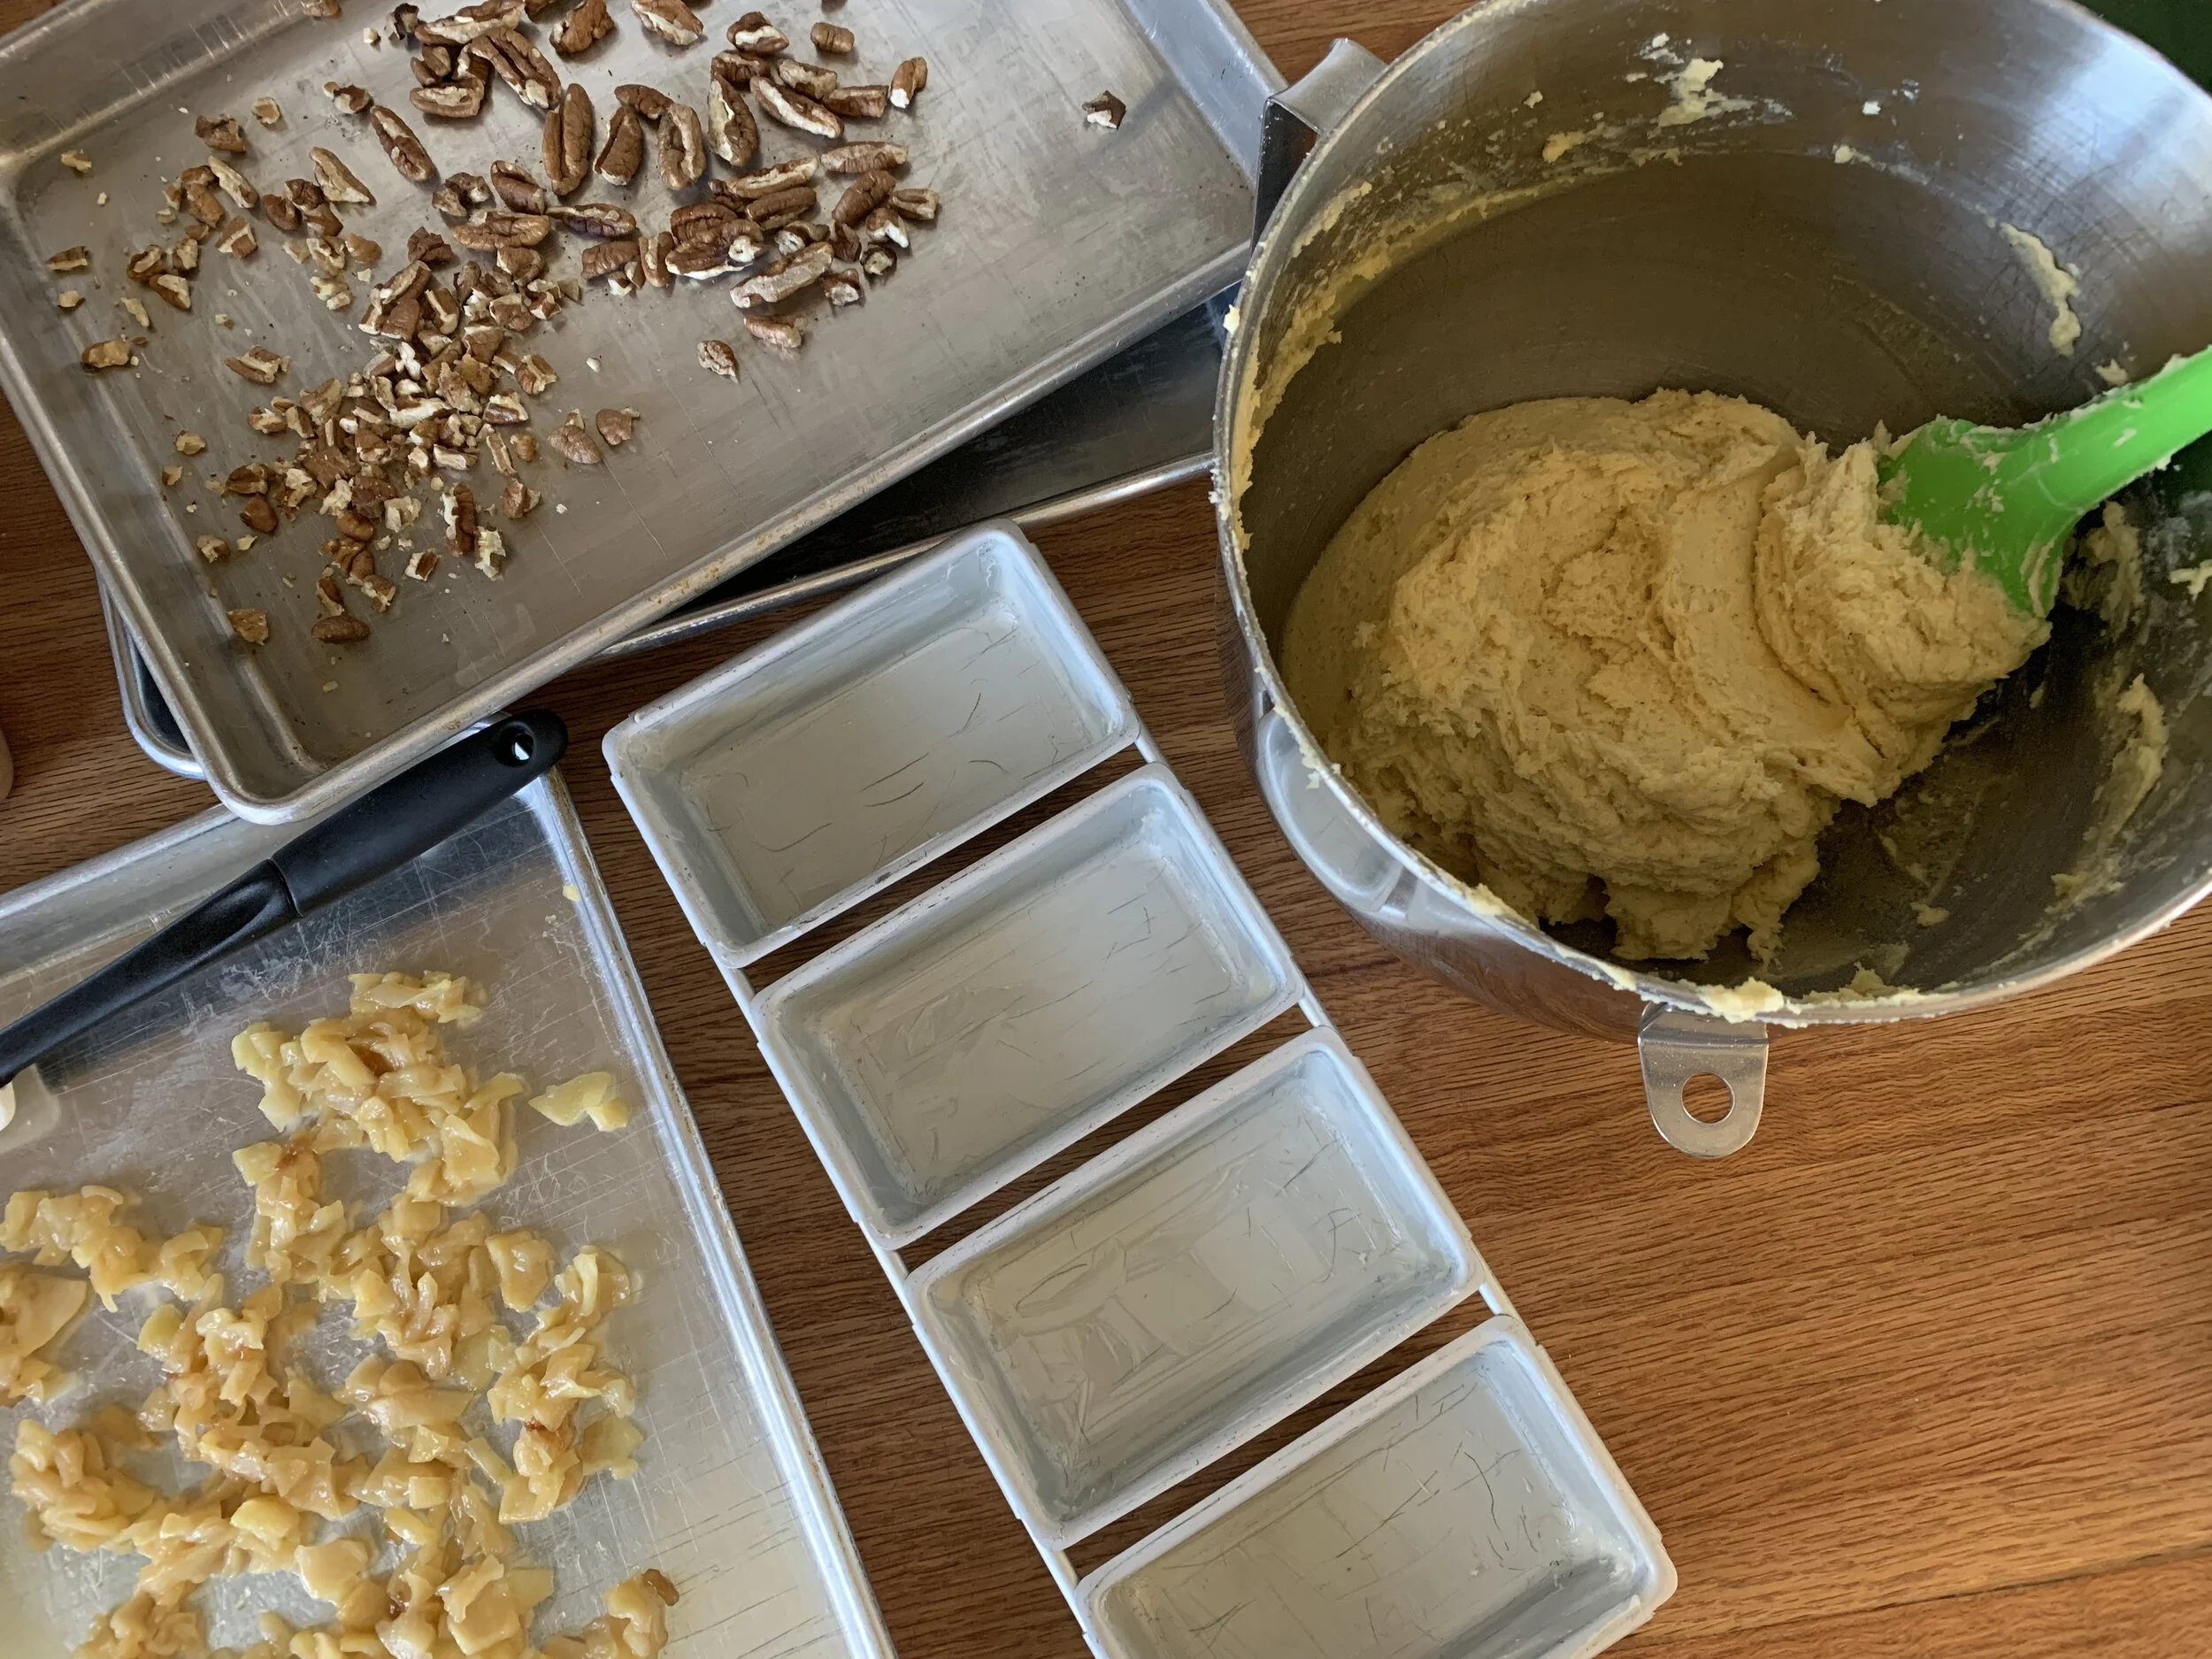
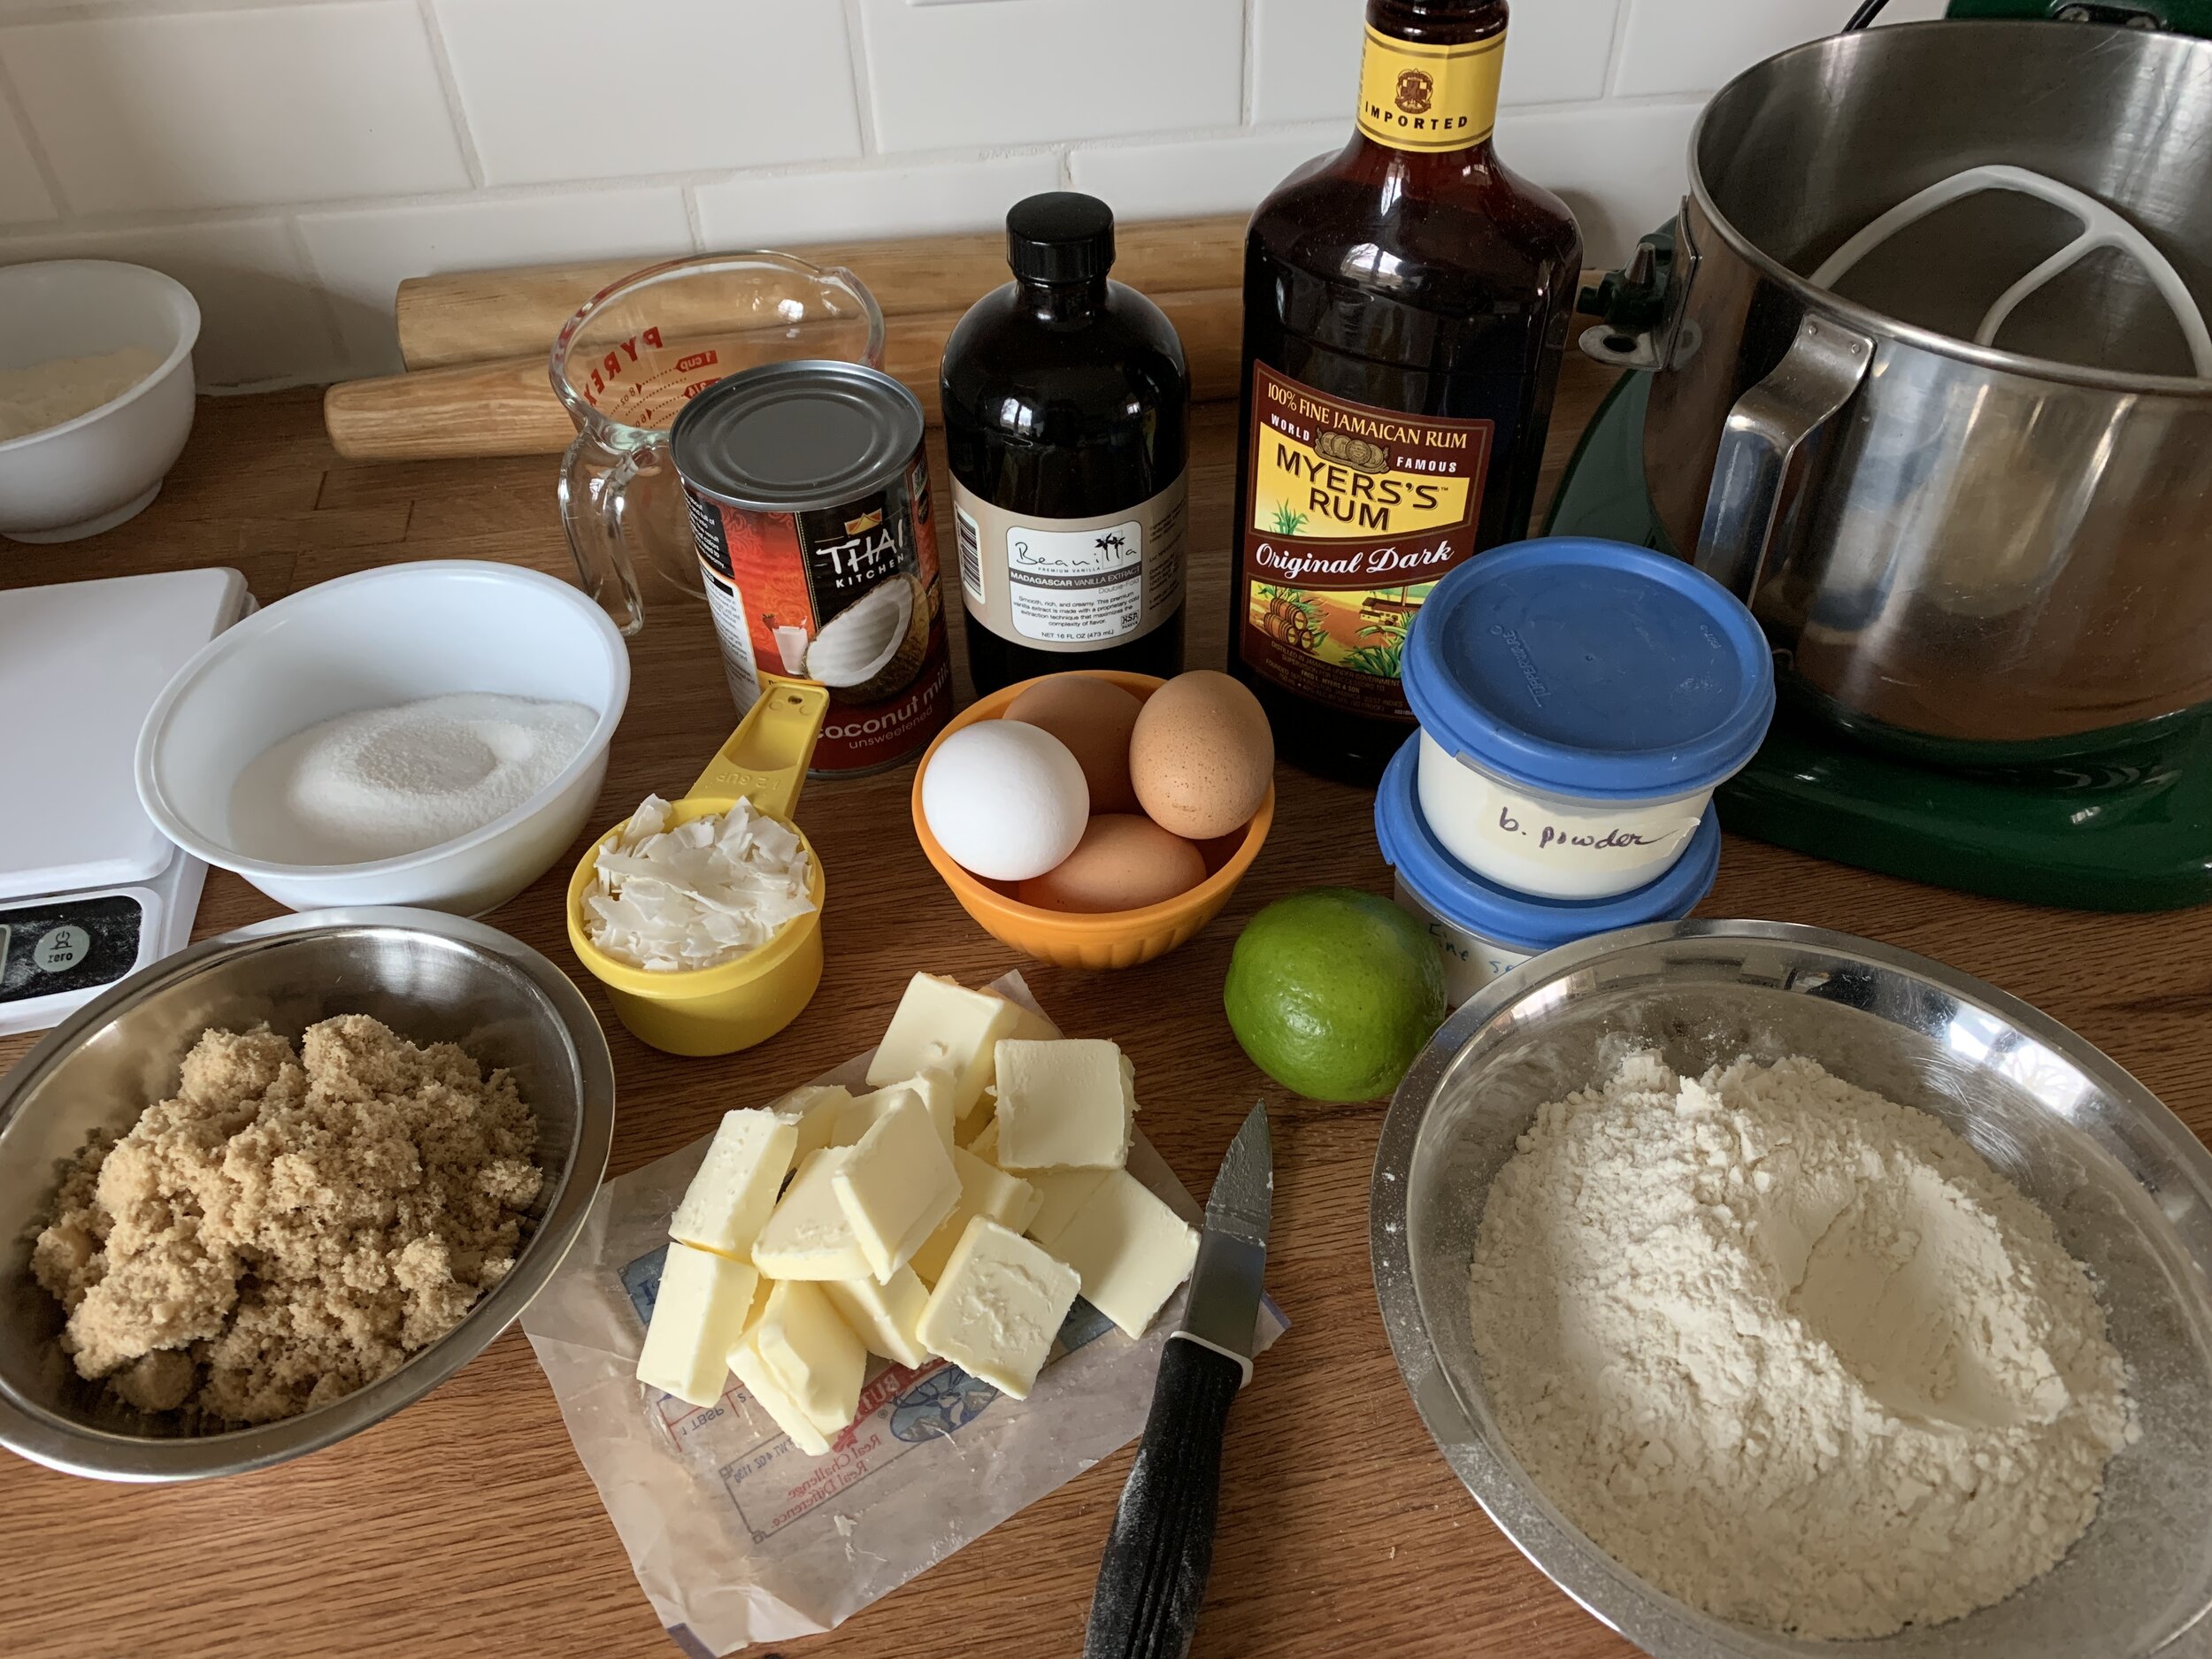
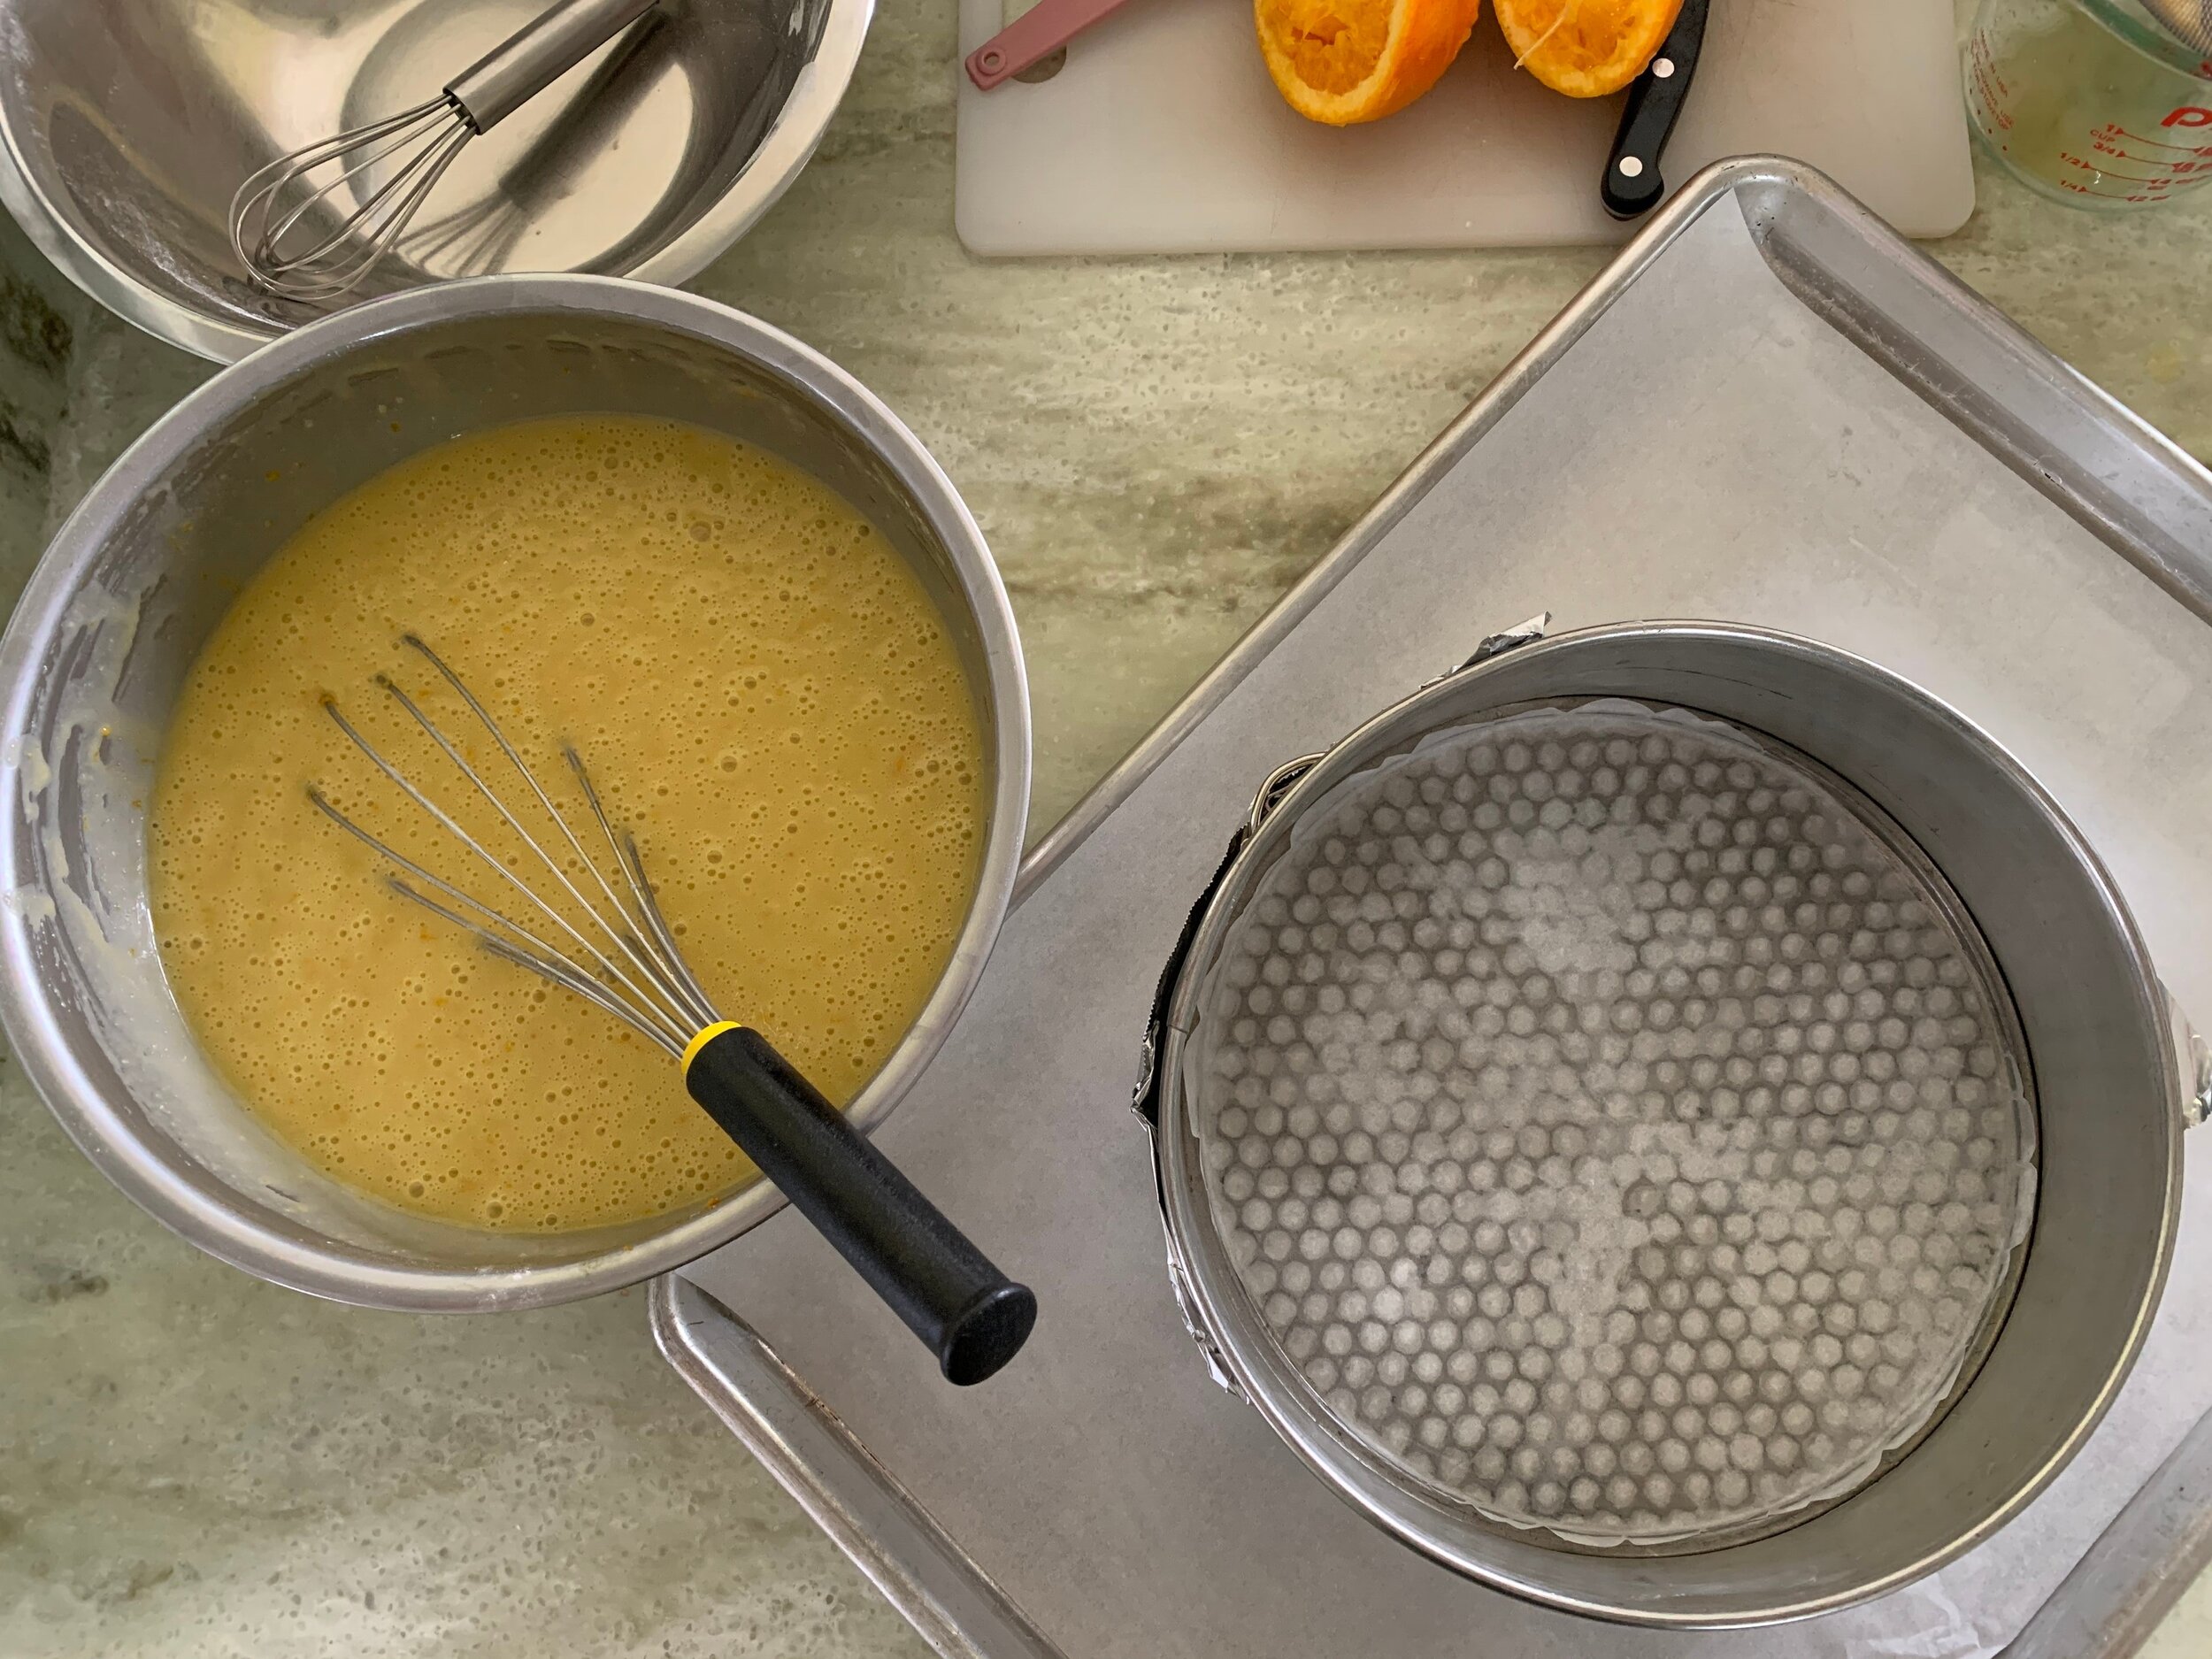
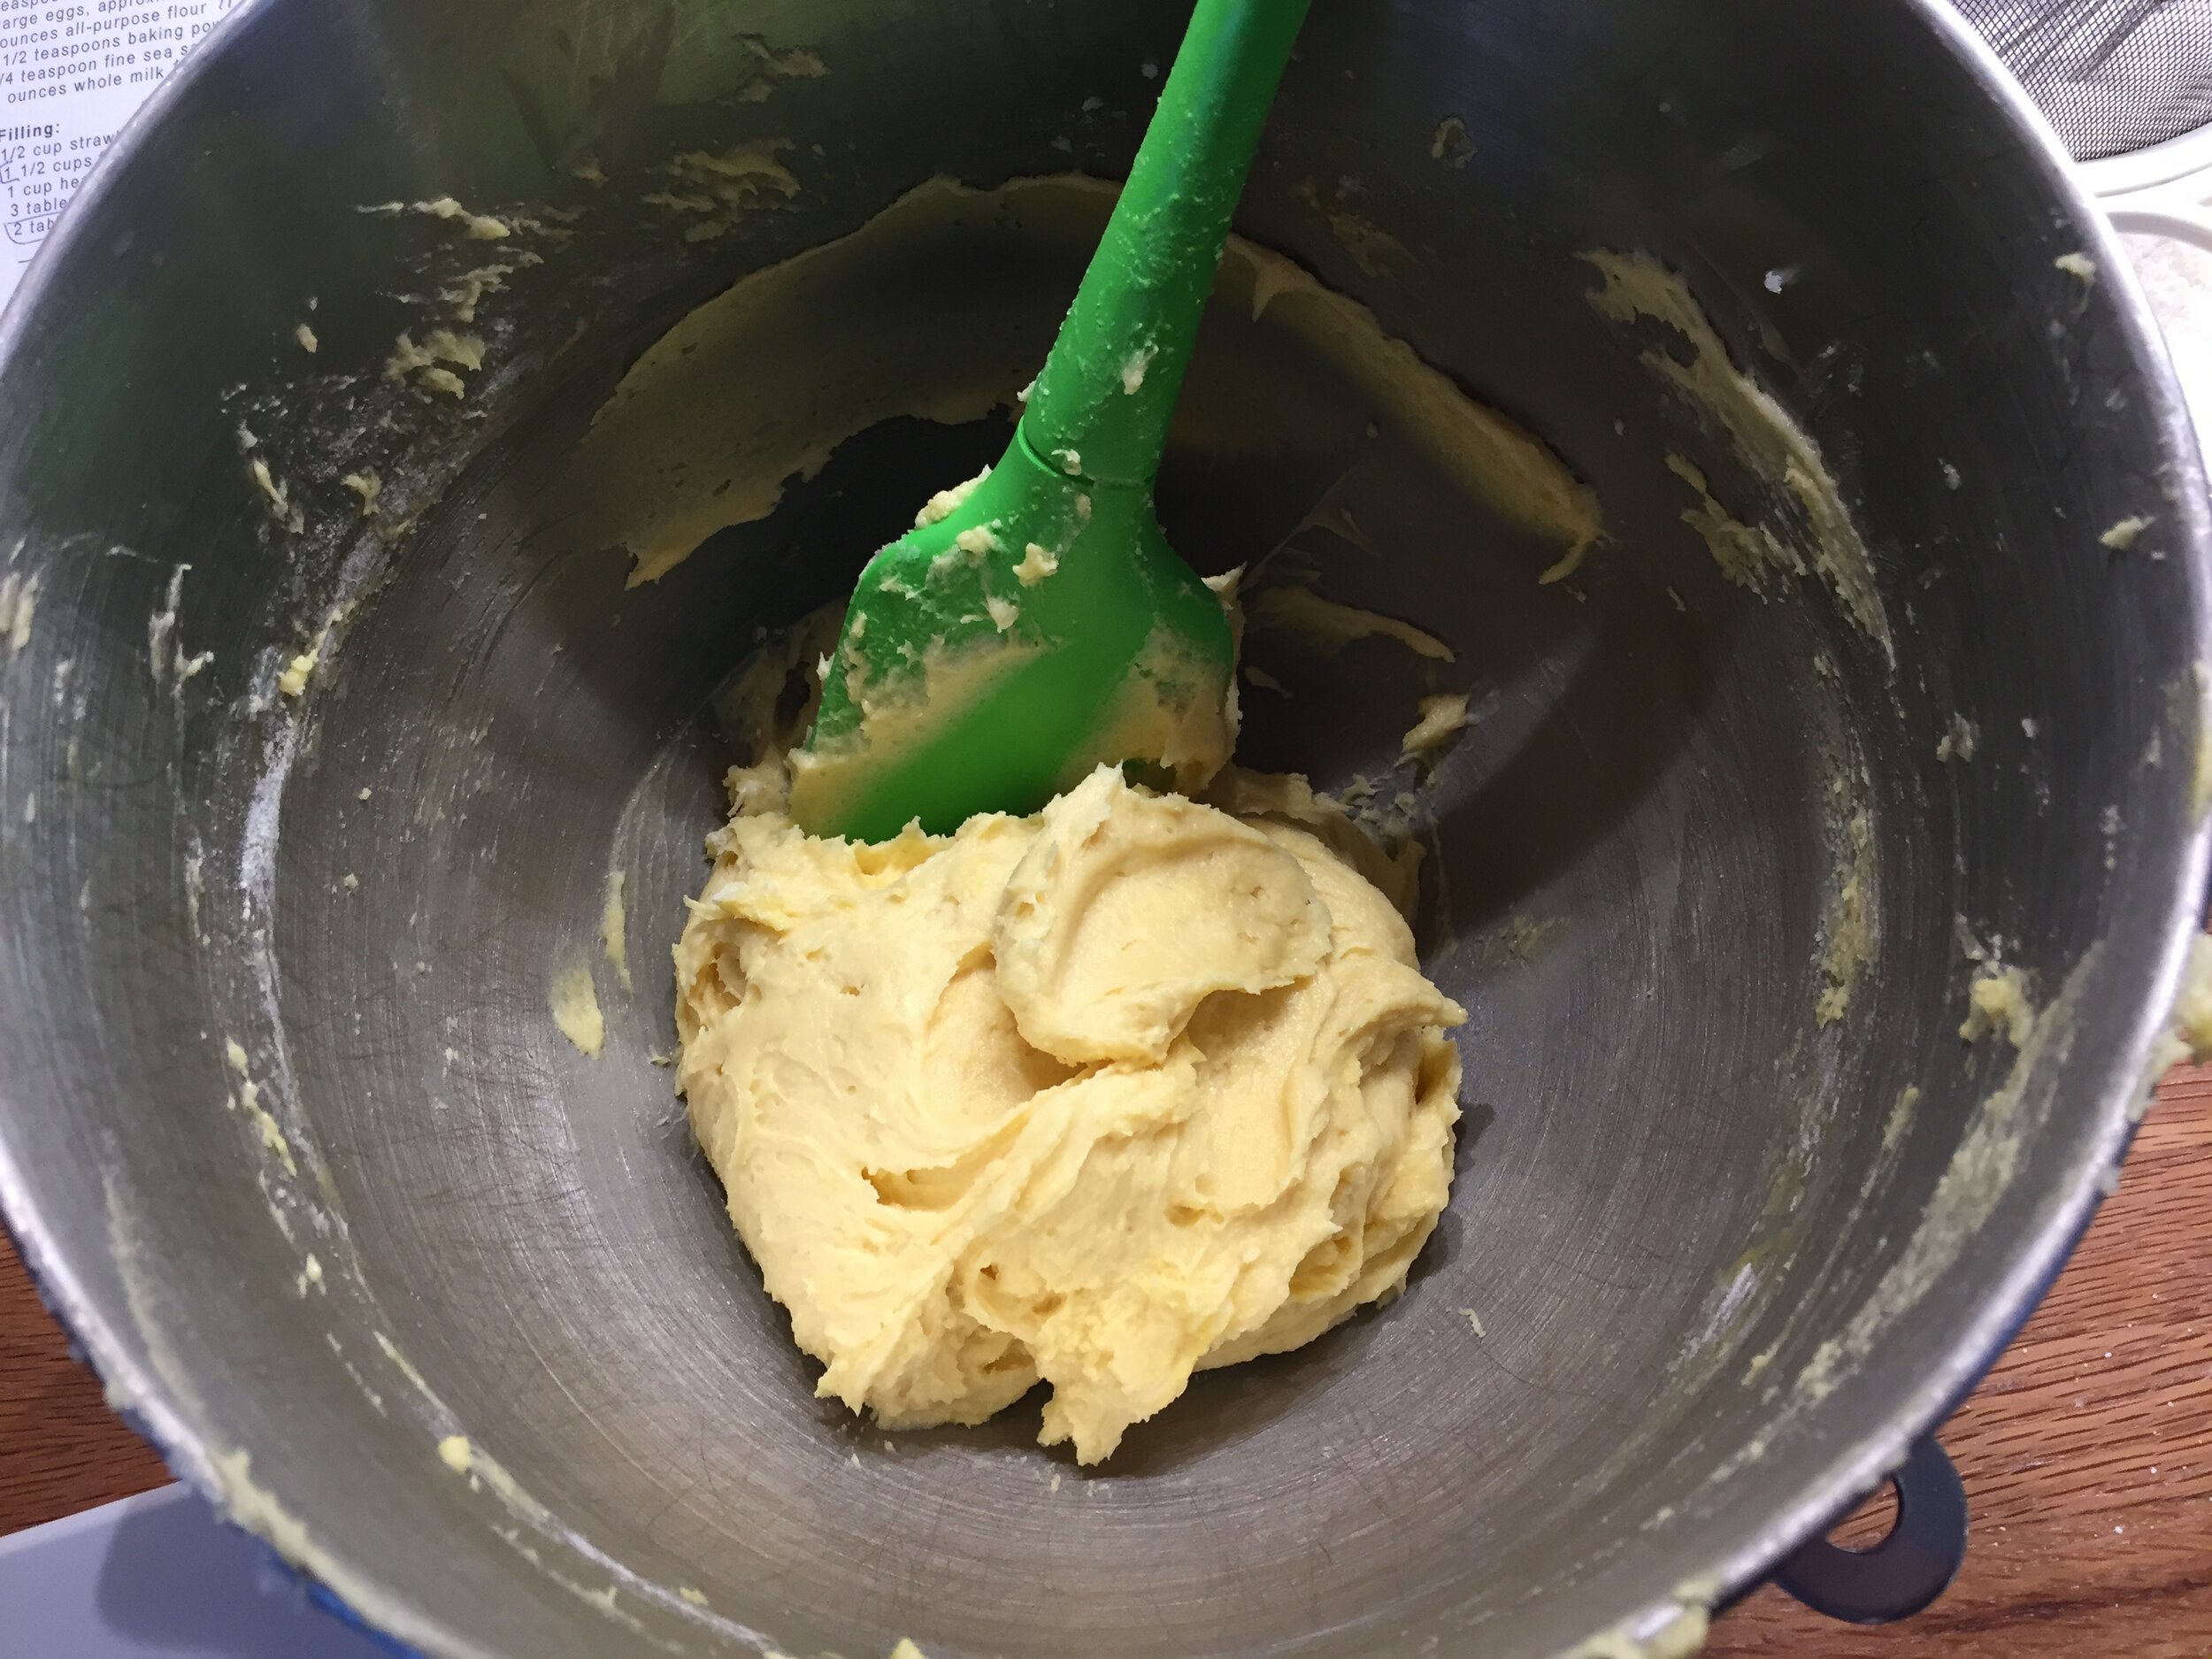
Don’t let the image below confuse you - just pretend there are 6 yolks in that bowl! The recipe quantities given are for the FULL recipe using 6 yolks.

IMG_1016.jpg

Finally - here we go.

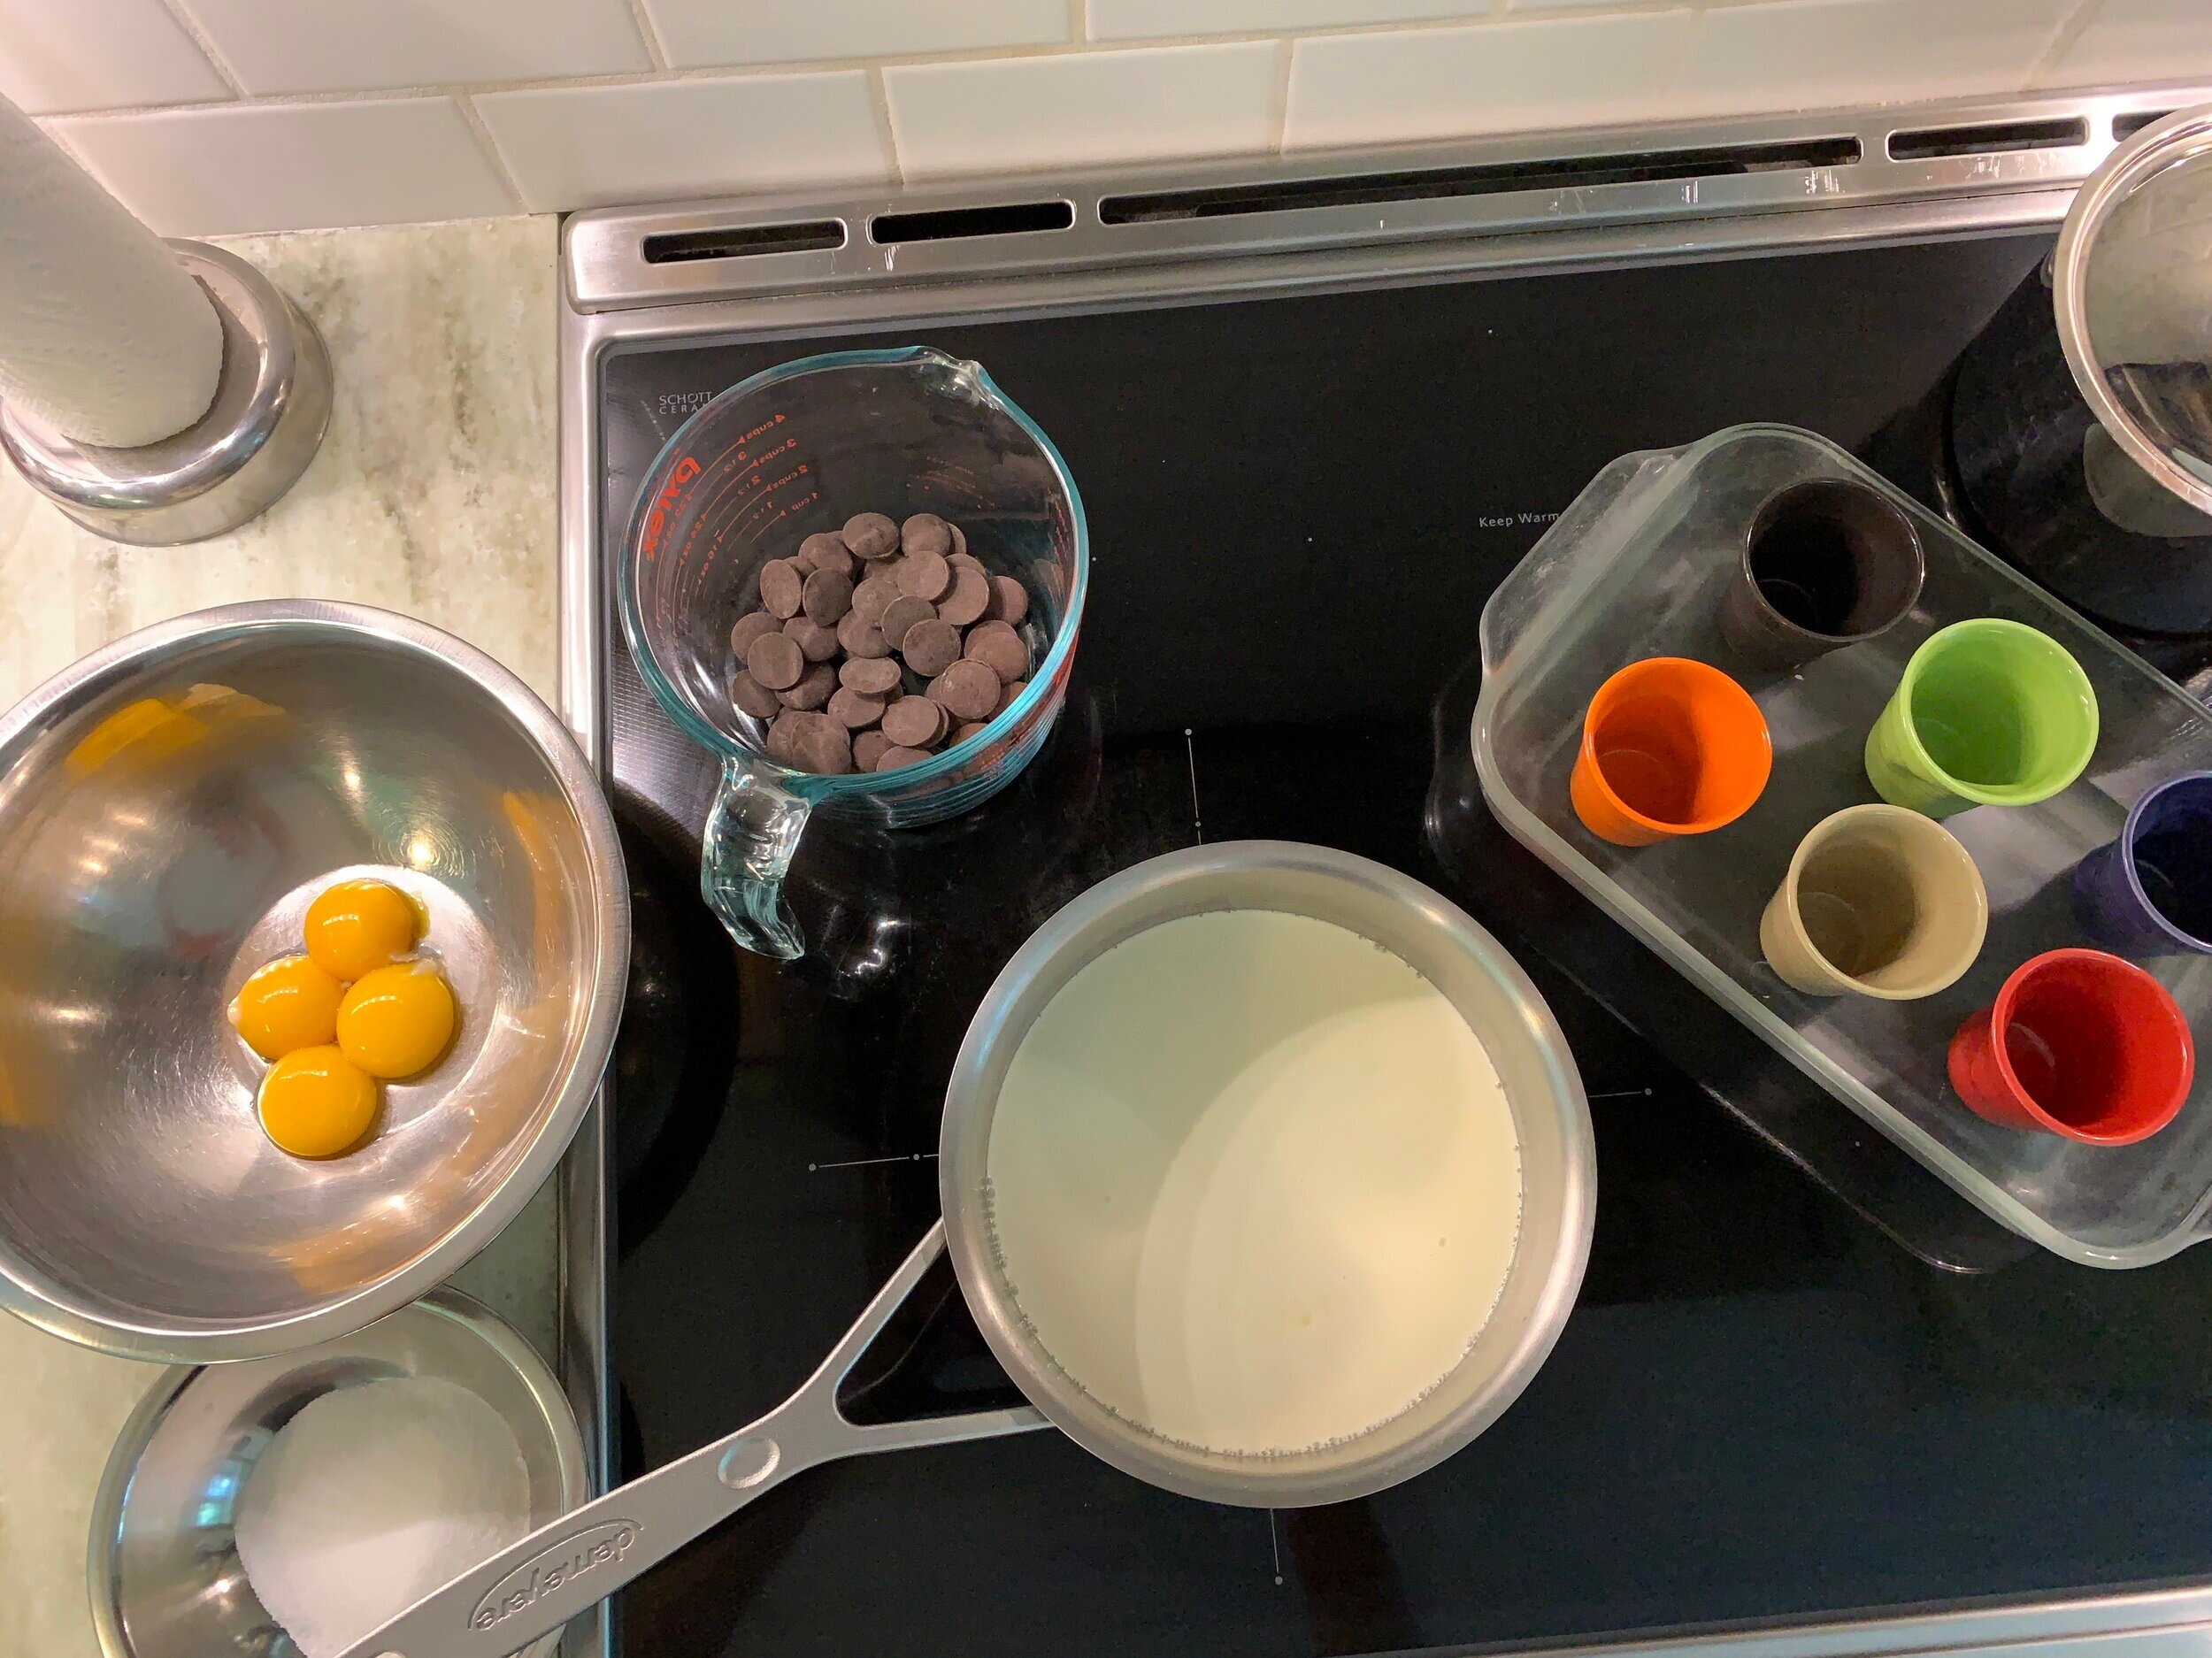
Place 113 g / 4 ounces chopped dark chocolate (I like a 60-66% range) in a bowl or a glass Pyrex measuring cup. Heat 4 cups heavy cream and a pinch of salt in a saucepan, bring it to a boil over medium heat then pour it over the chocolate and blend until melted. Note: You can reduce the fat content somewhat by using 2.5 cups cream and 1.5 cups whole milk if you’d like.

In a separate bowl whisk (with gusto!) 6 large egg yolks with 100 g / 1/2 cup granulated sugar to thicken and lighten them, a minute or two. Temper the hot chocolate mixture into the egg yolks and return all to the saucepan.

Cook over medium heat while stirring (I go back and forth between a silicone spatula and whisk) until beginning to thicken.

When making crème anglaise you don’t want the mixture to boil. You’re shooting for a temp of 180- 185ºF (82-85ºC). If you don’t have a thermometer, there are several signs to help you. You should feel a bit more drag as you stir the mixture. Look for tiny bubbles forming around the edge of the pan and steam coming off the surface. Coat your spatula with the mixture and run your finger through it - it should hold the track and not run. The more you do it, the more you just know.

Strain the mixture and fill whatever ramekins you’re using for pots de crème, leaving about 1/4 to 3/8 inch space at the top. Place ramekins in an oven safe dish and fill the dish with hot water to a level about 1/2 way up the ramekins’ sides. Cover loosely with foil and place in a 300ºF oven. Bake about 30-40 minutes until almost completely set but with a jiggle in the center. I always check at about 20 minutes then every 5-8 minutes or so until I’m happy with the jiggle status. They will set more as they cool and chill.

I filled my 6 Revol espresso cups which hold about 2 ounces. The rest of the base went into the fridge to chill before transferring to silicone molds and the freezer.

IMG_1019.JPG

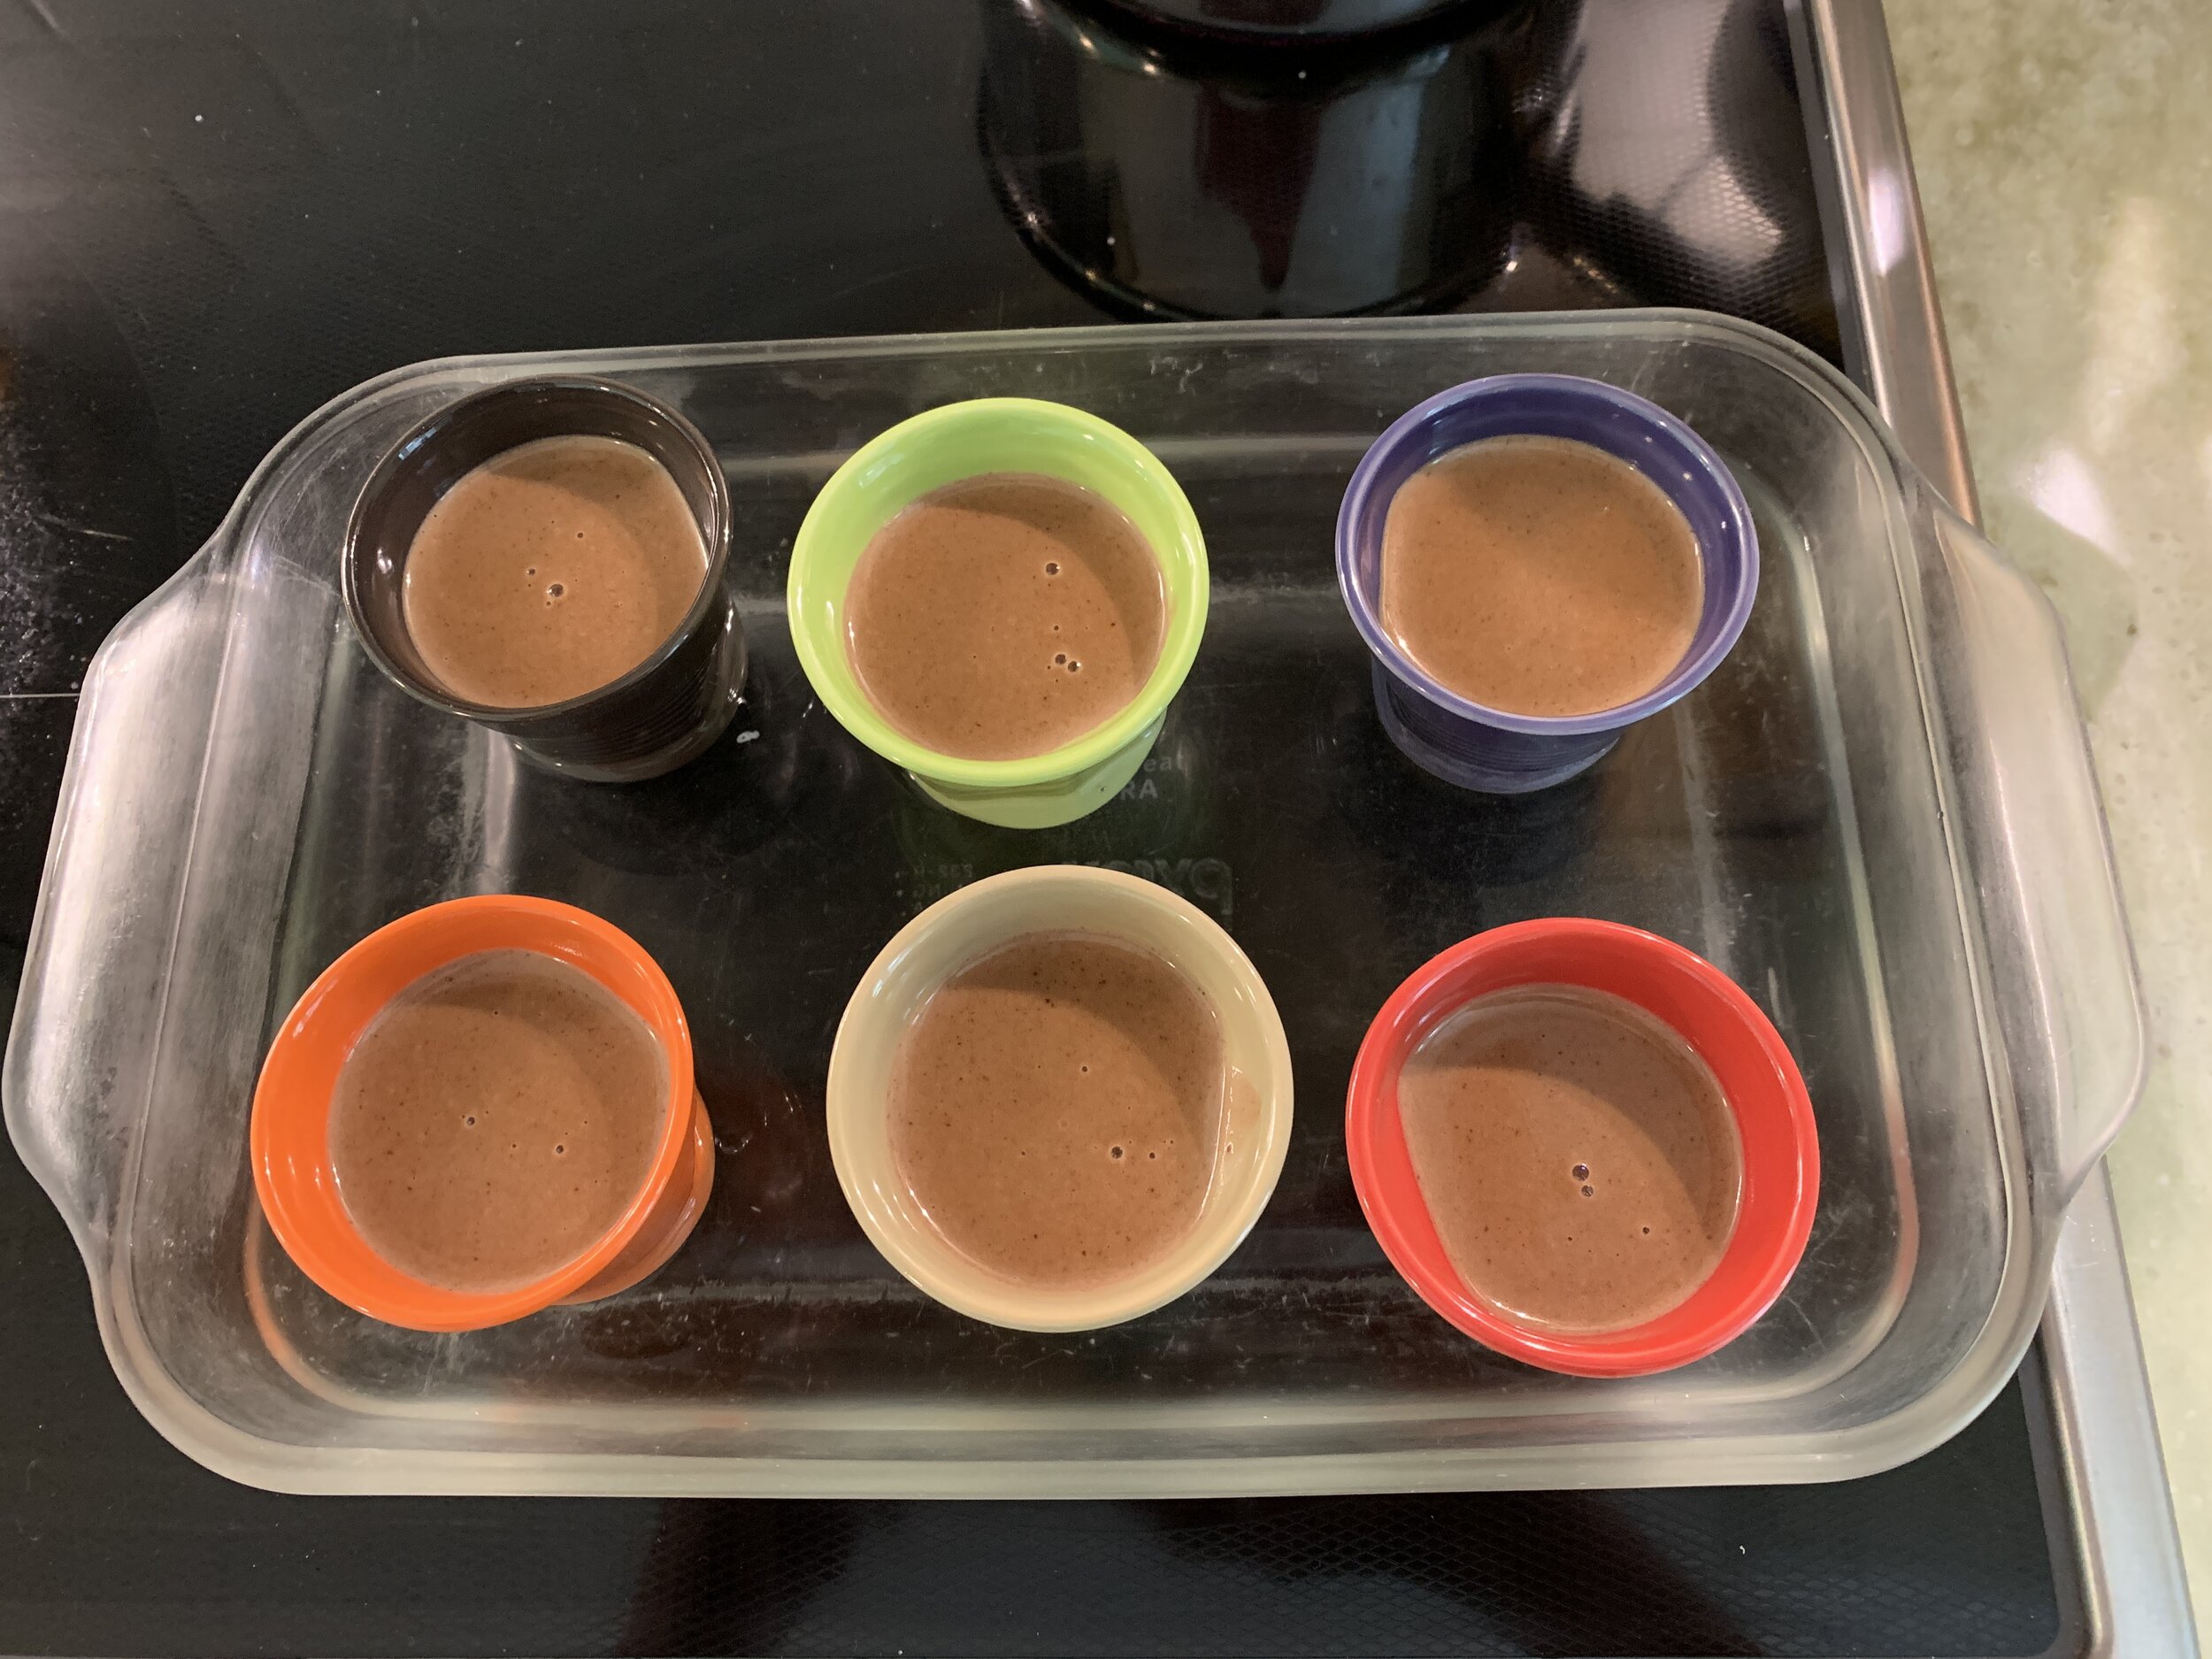
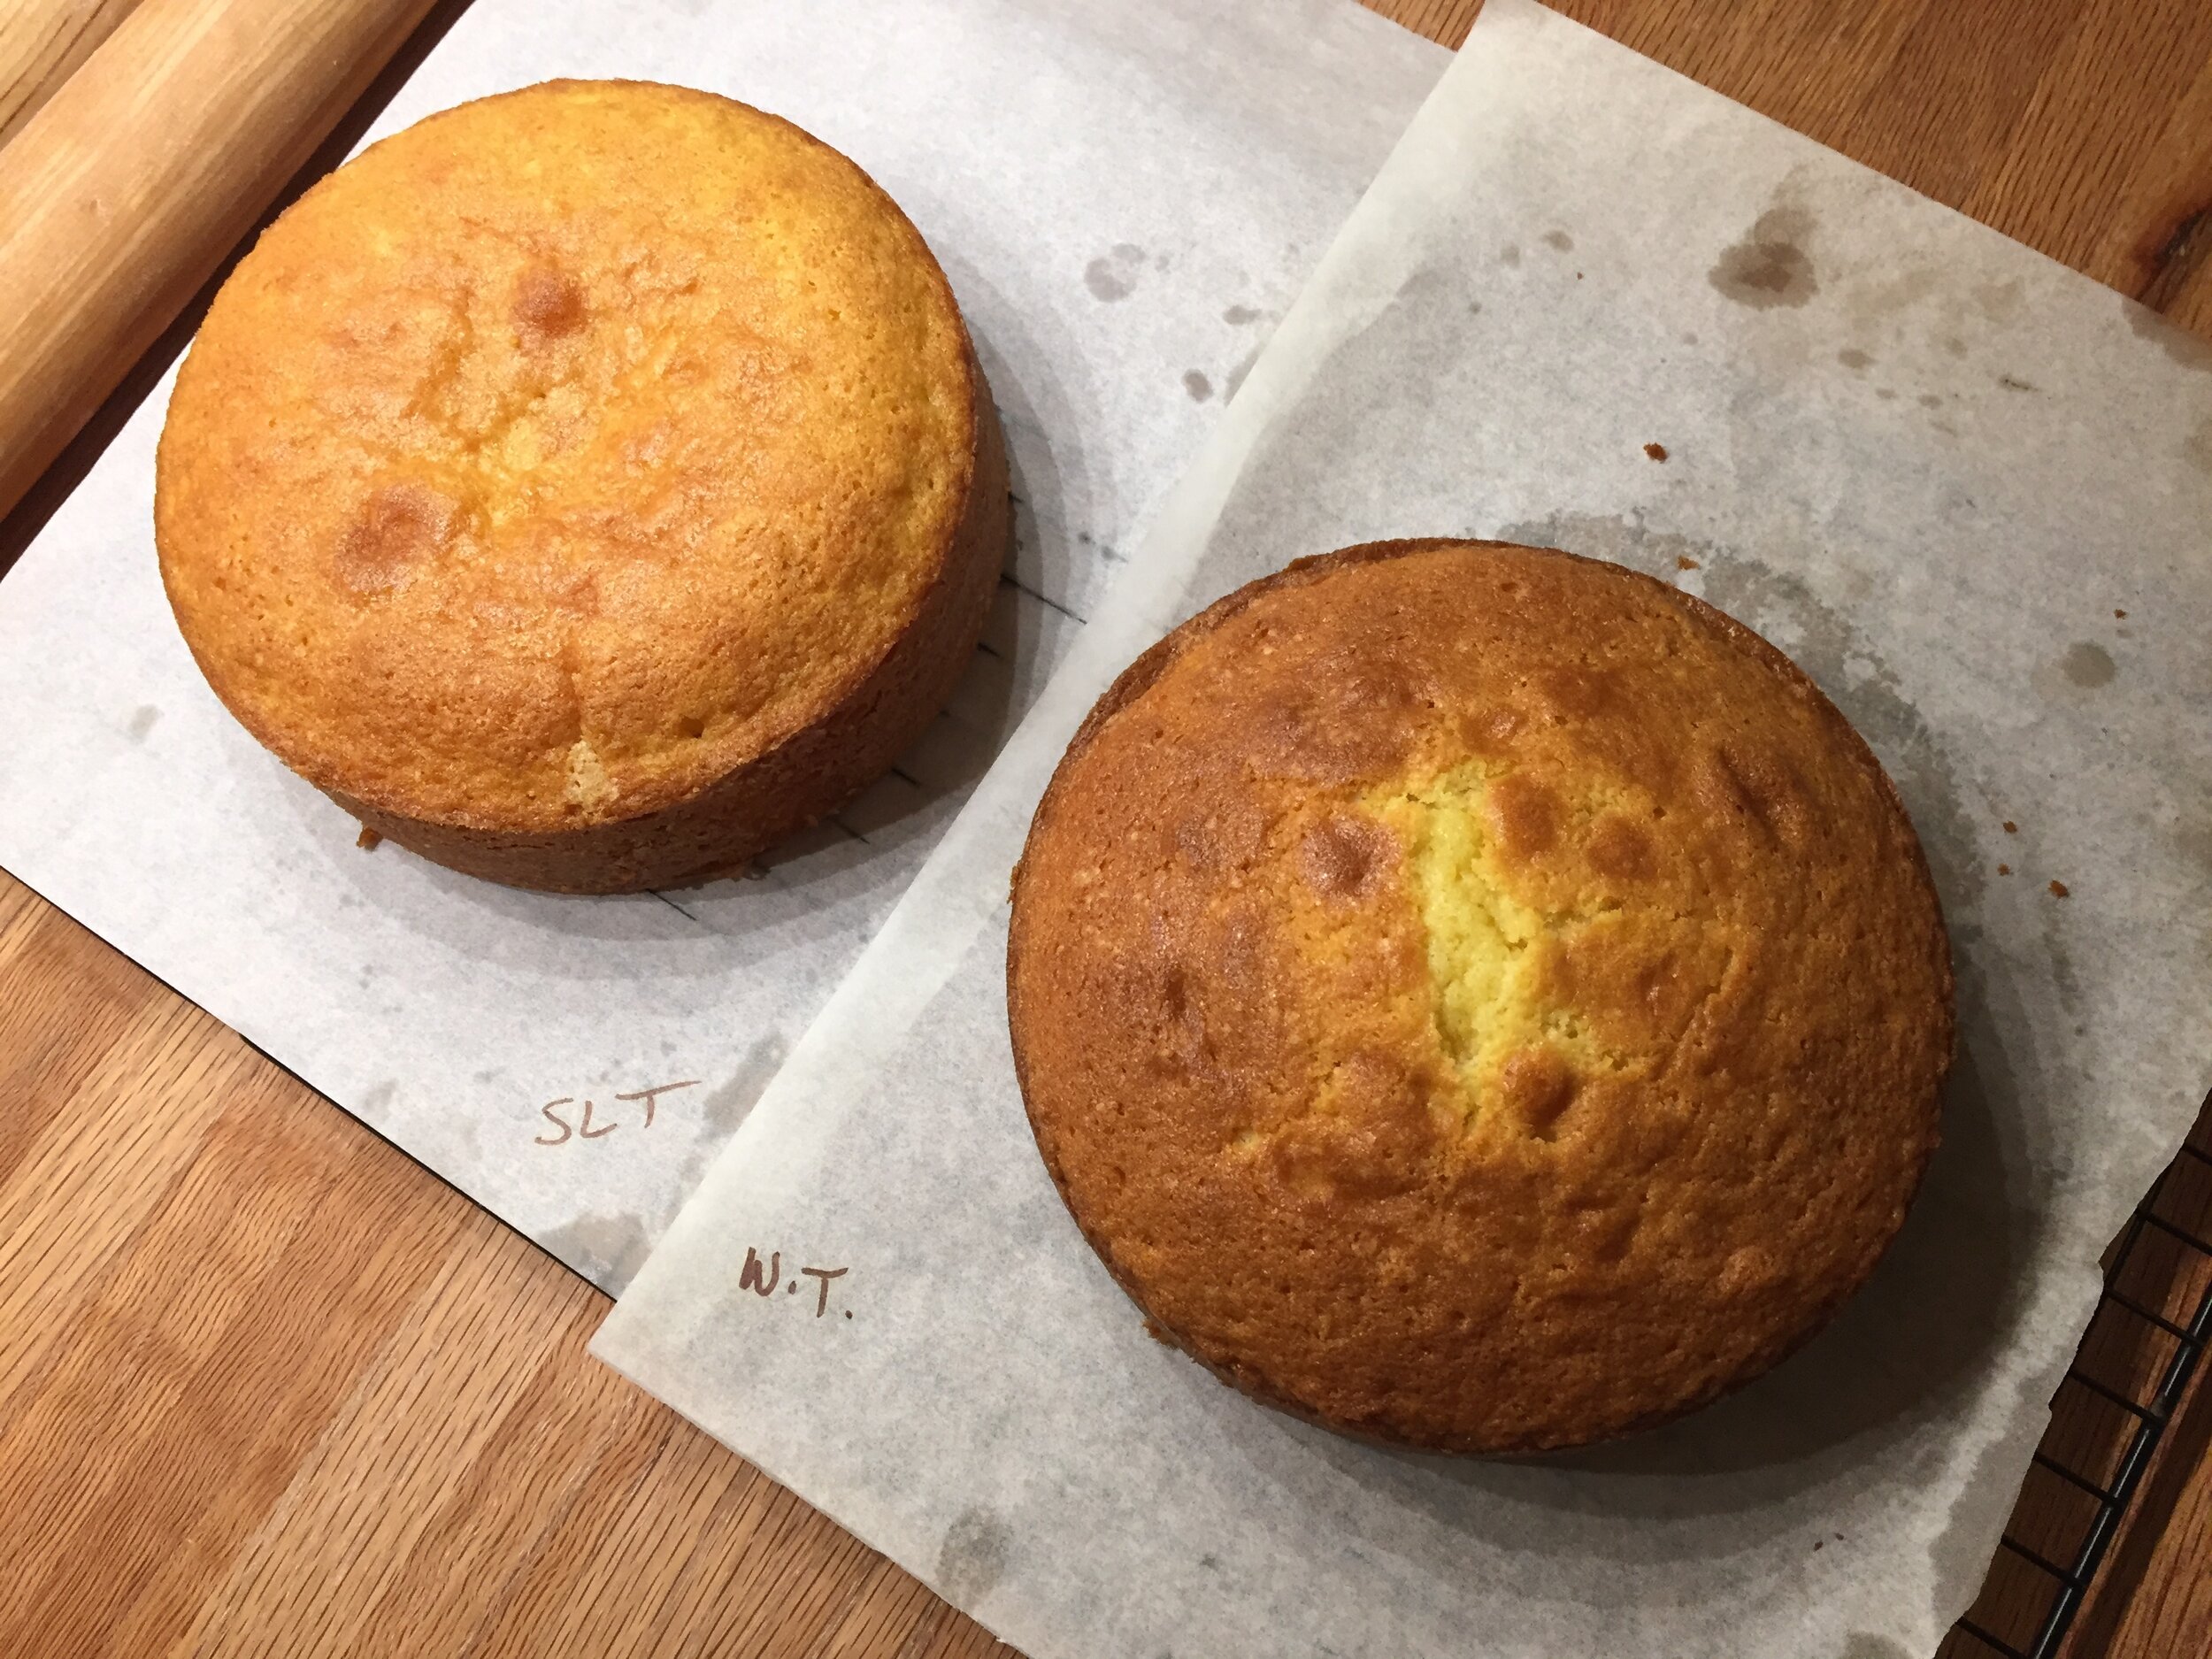
See the before-oven (liquid) above and after-baking (set) difference below?

IMG_1020.JPG

Once out of the oven, lift the ramekins out of the hot water bath and place on a rack to cool fully. Then cover with plastic wrap and refrigerate to chill thoroughly, at least several hours. They’ll keep for several days - remember the planning ahead approach? It’s a good one.

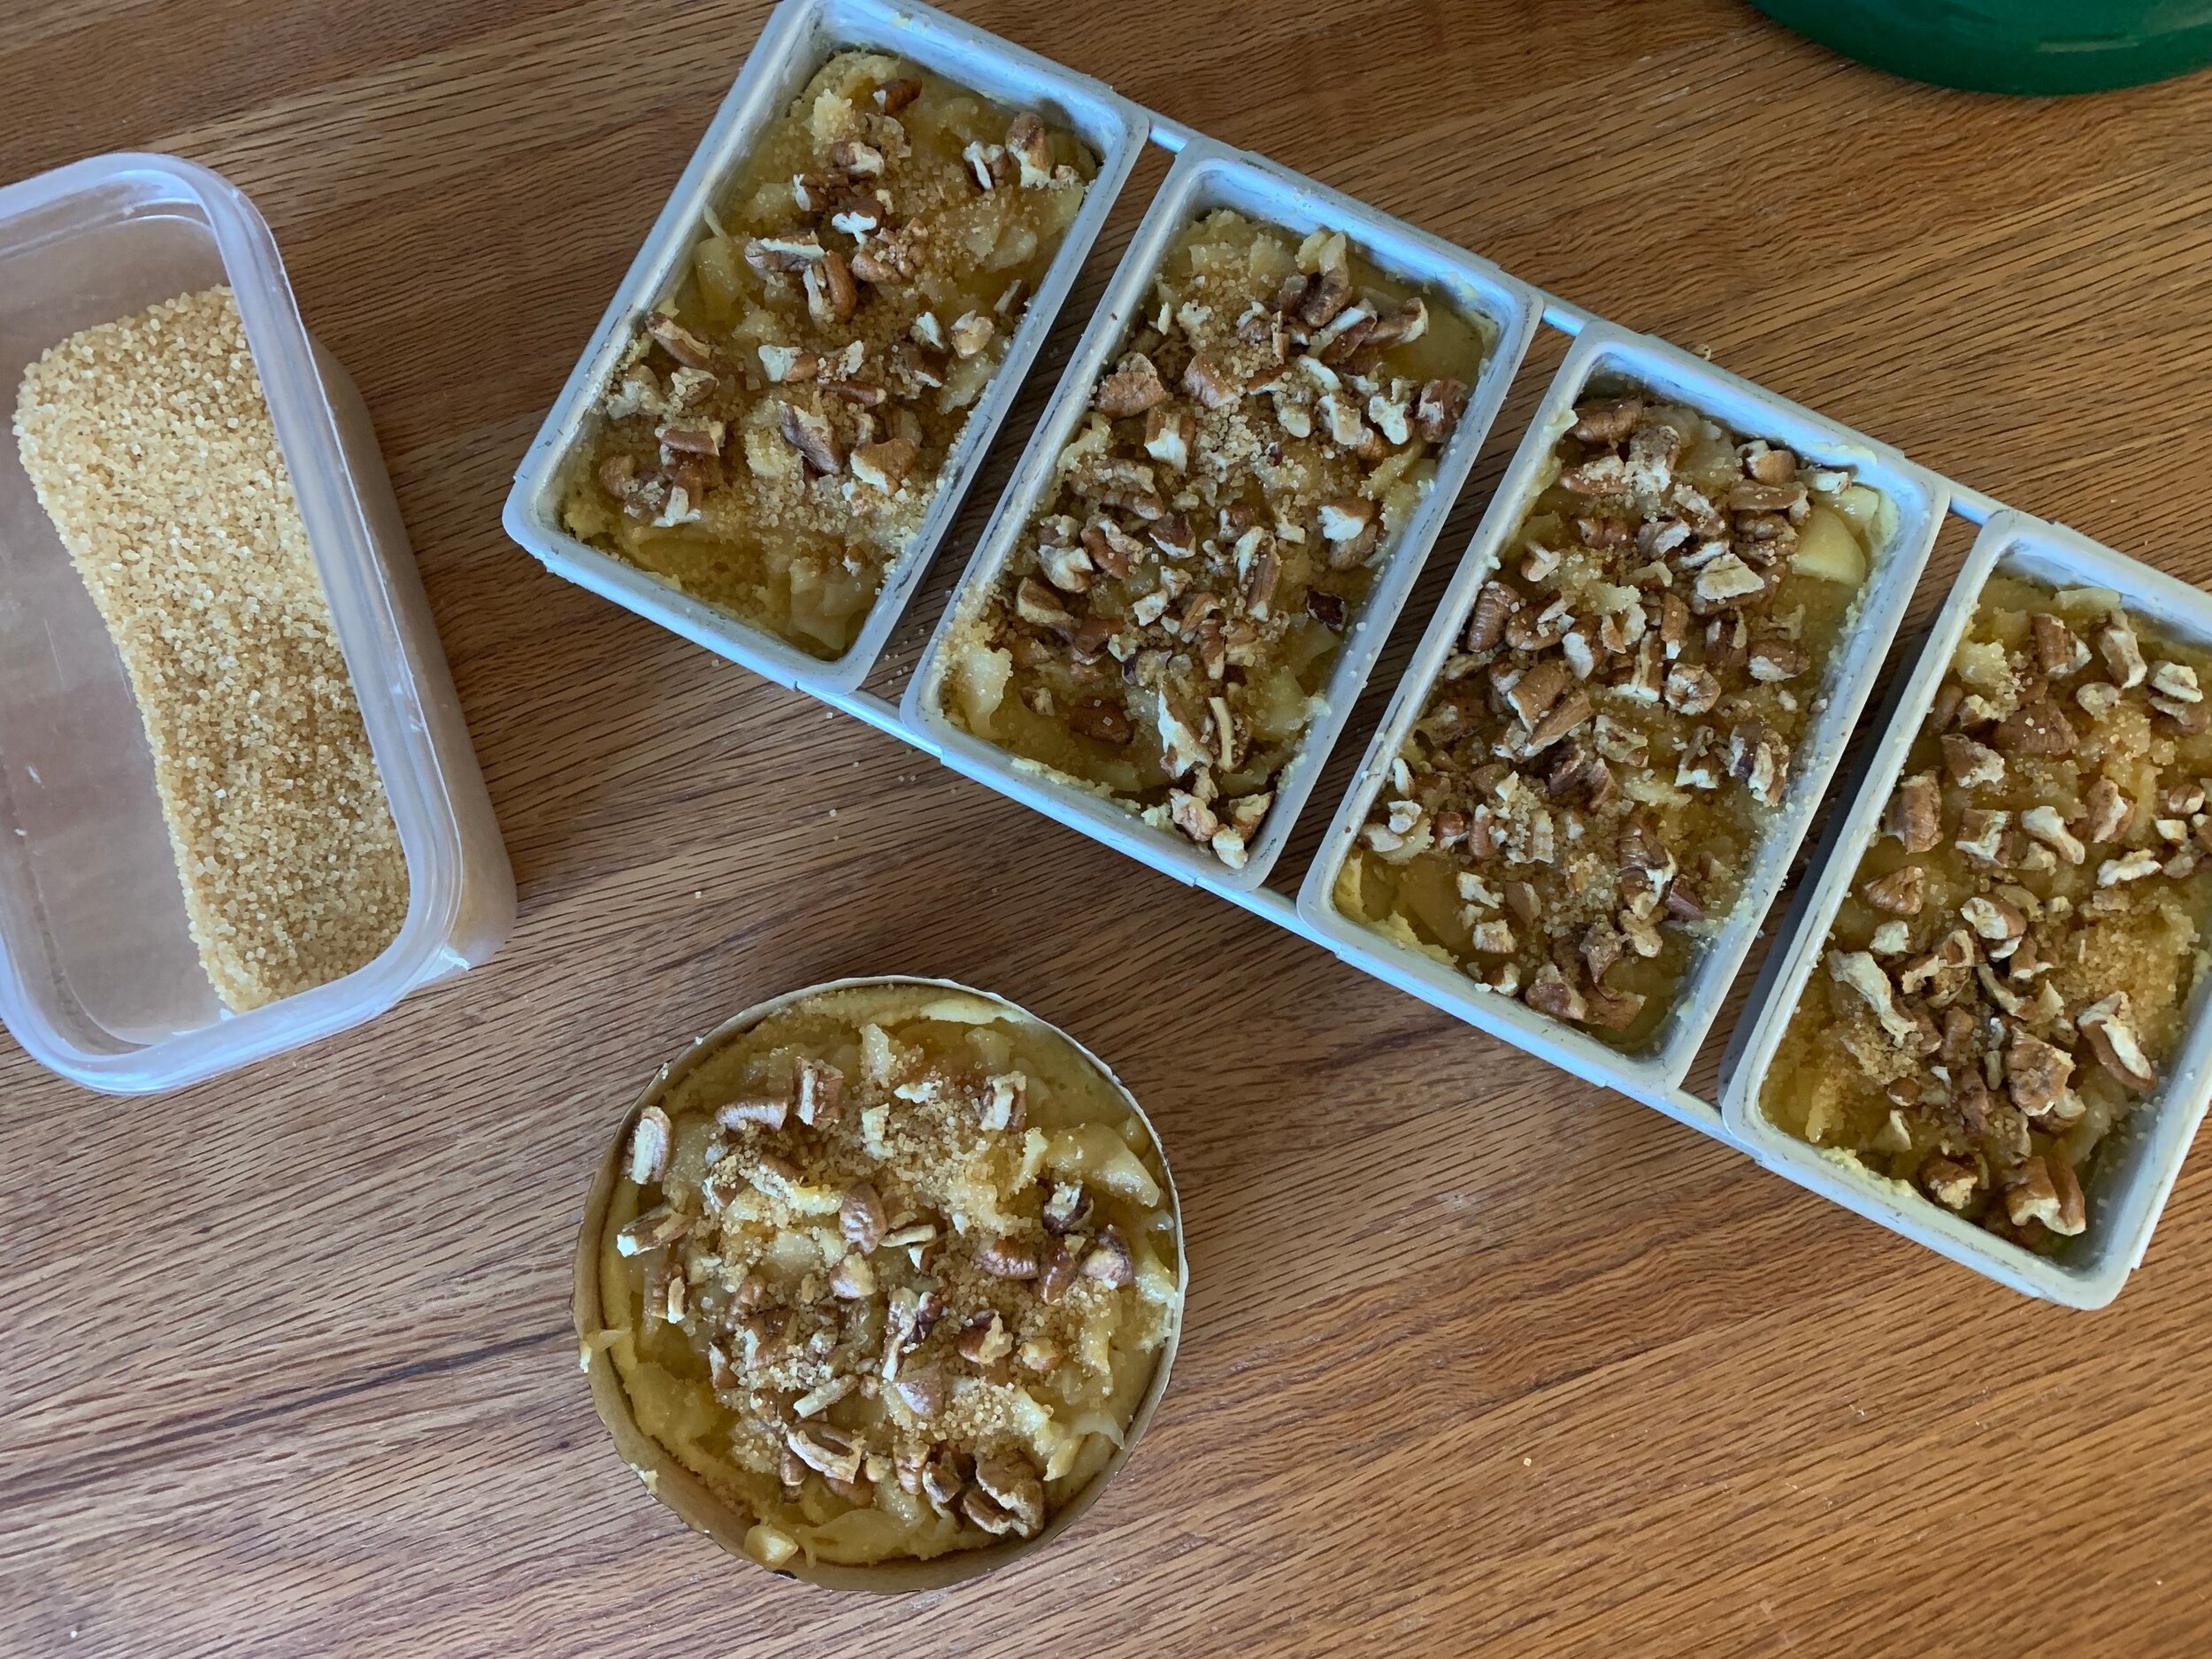
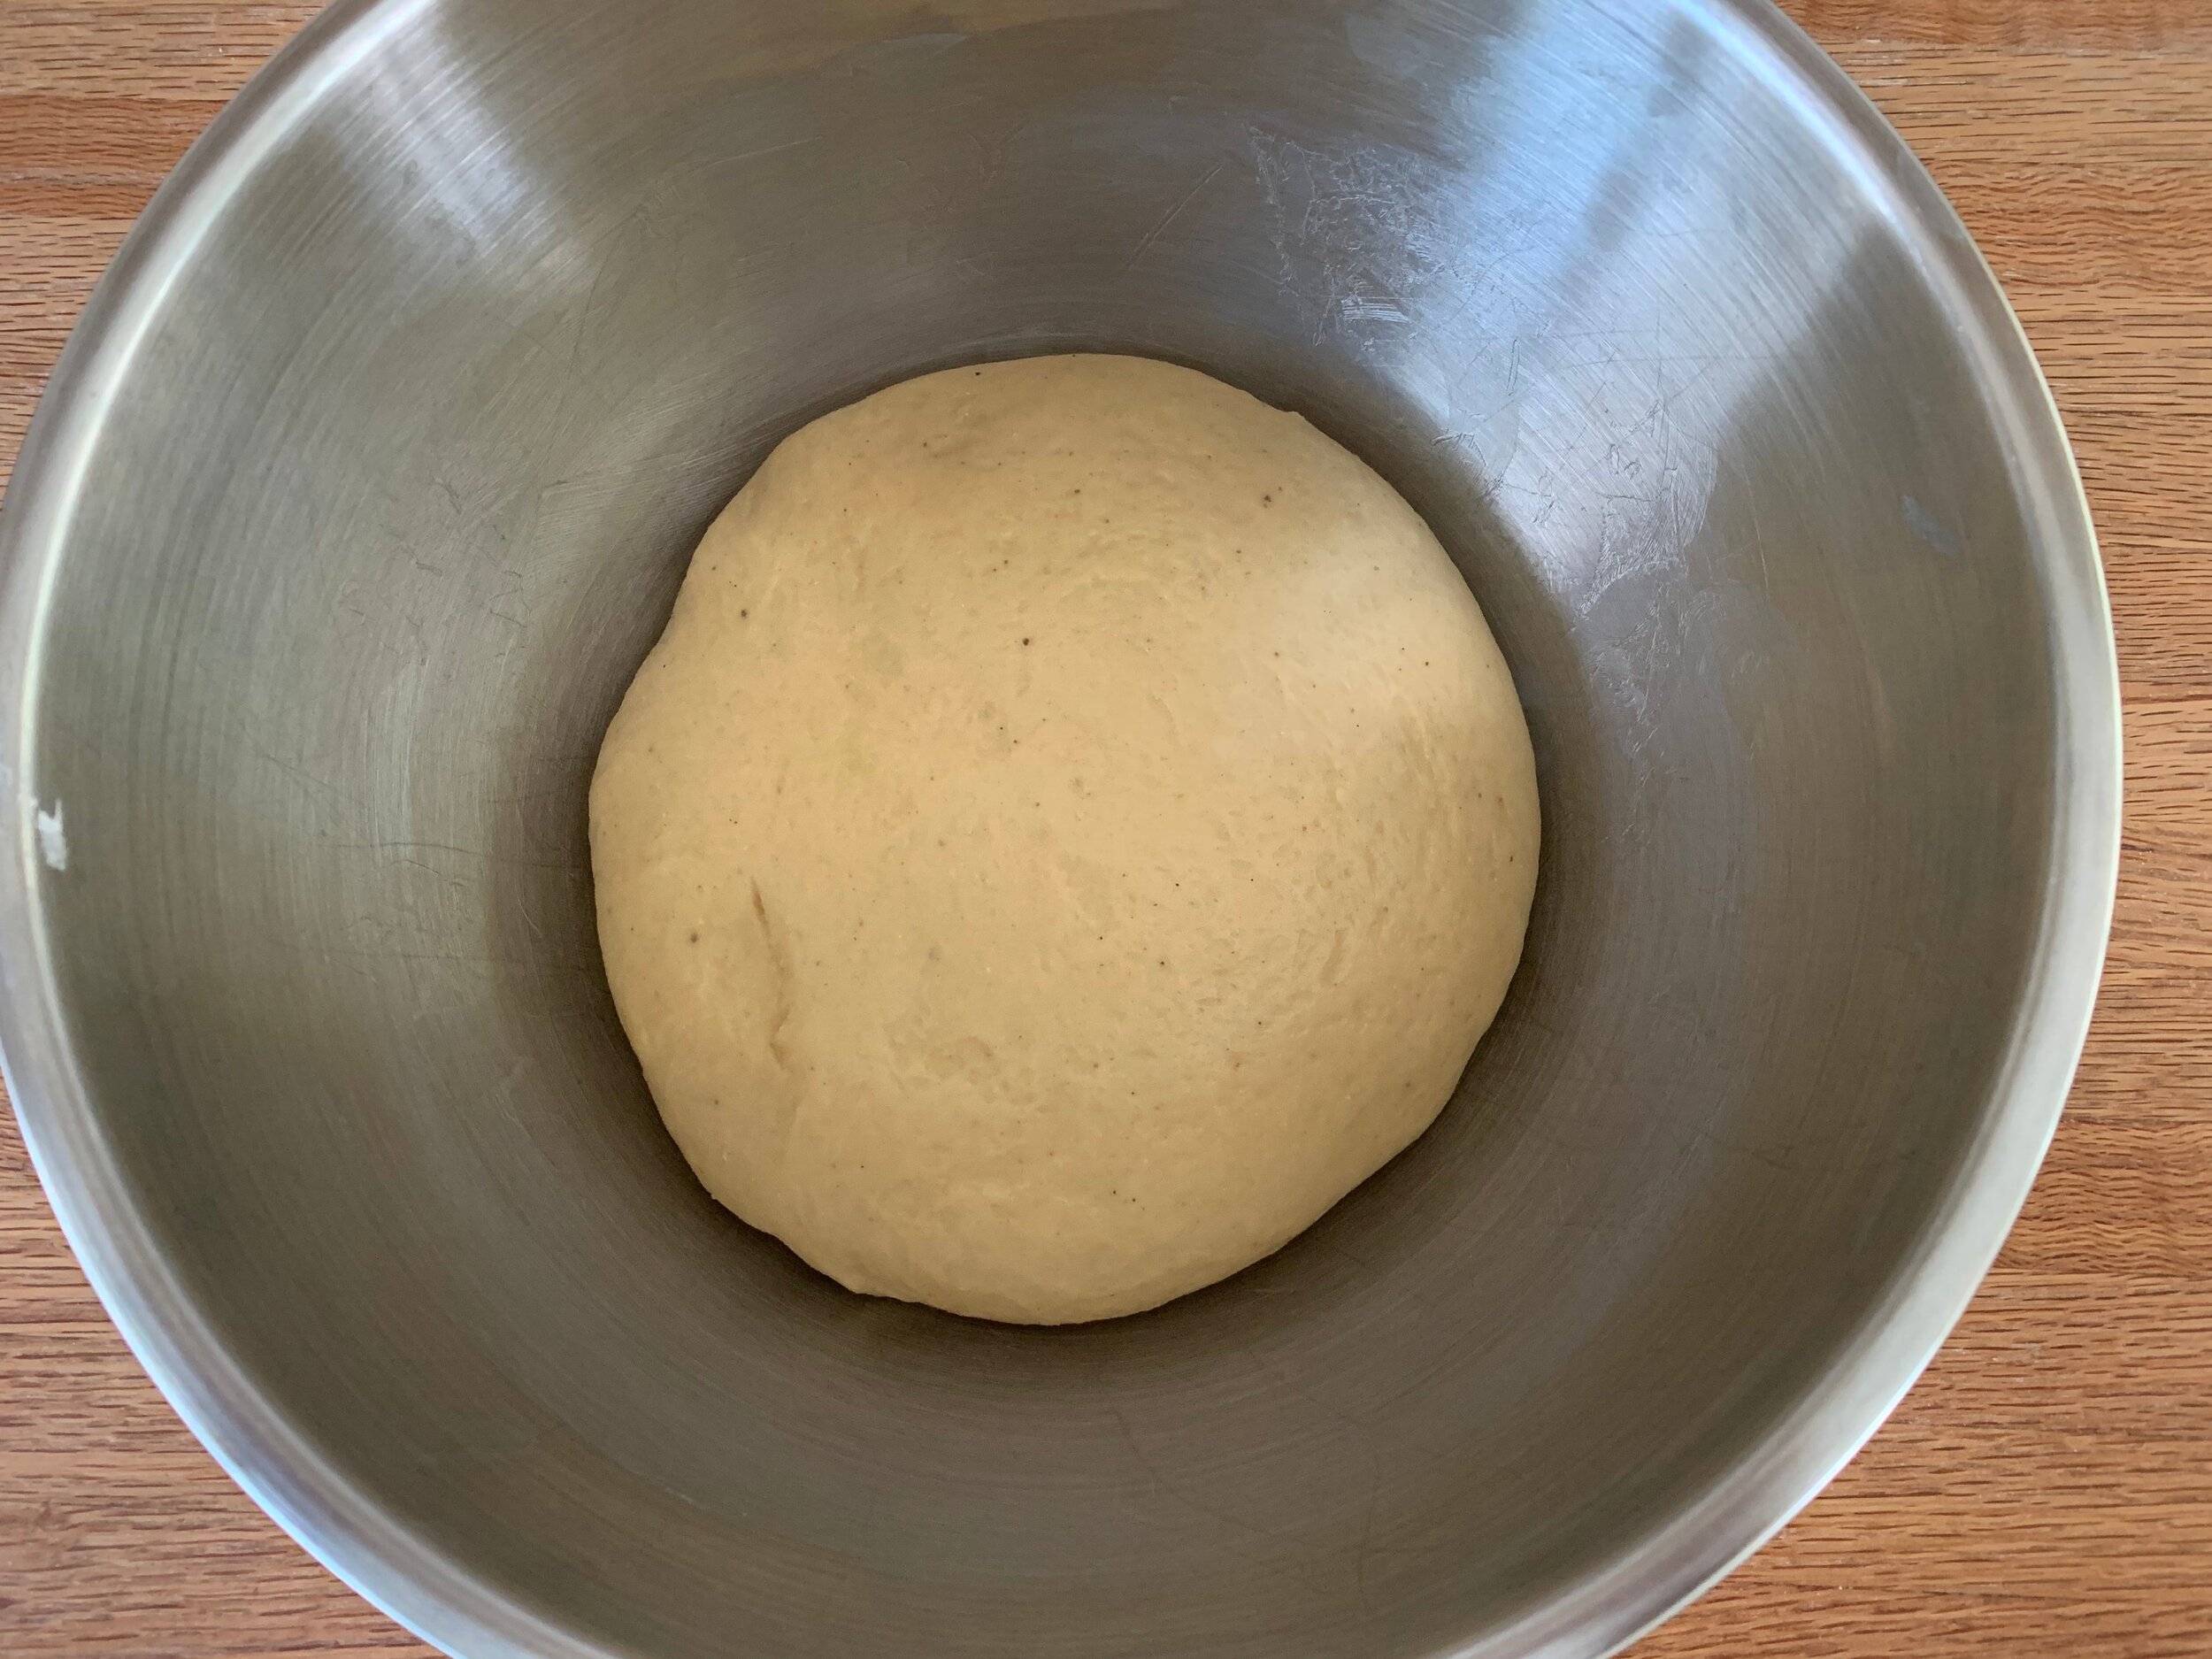
If you’ve made your custard base with an eye to both pots de crème AND fudgesicles, refrigerate the rest of the base for a day or two where it should thicken nicely. Fill your flexi-molds to the top, using a small offset spatula to smooth and remove any excess, then place the molds on a sheet pan and into the freezer to firm up. Once frozen I cover the surface directly with plastic wrap - the molds can stay in there for days up to a couple of weeks.

When you’re getting close to serving, give yourself an extra 10-15 minutes or so once you’ve popped them out of the molds. At least with my “deep” freezer, they freeze very firmly and do well with a bit of softening before enjoying their luscious goodness.

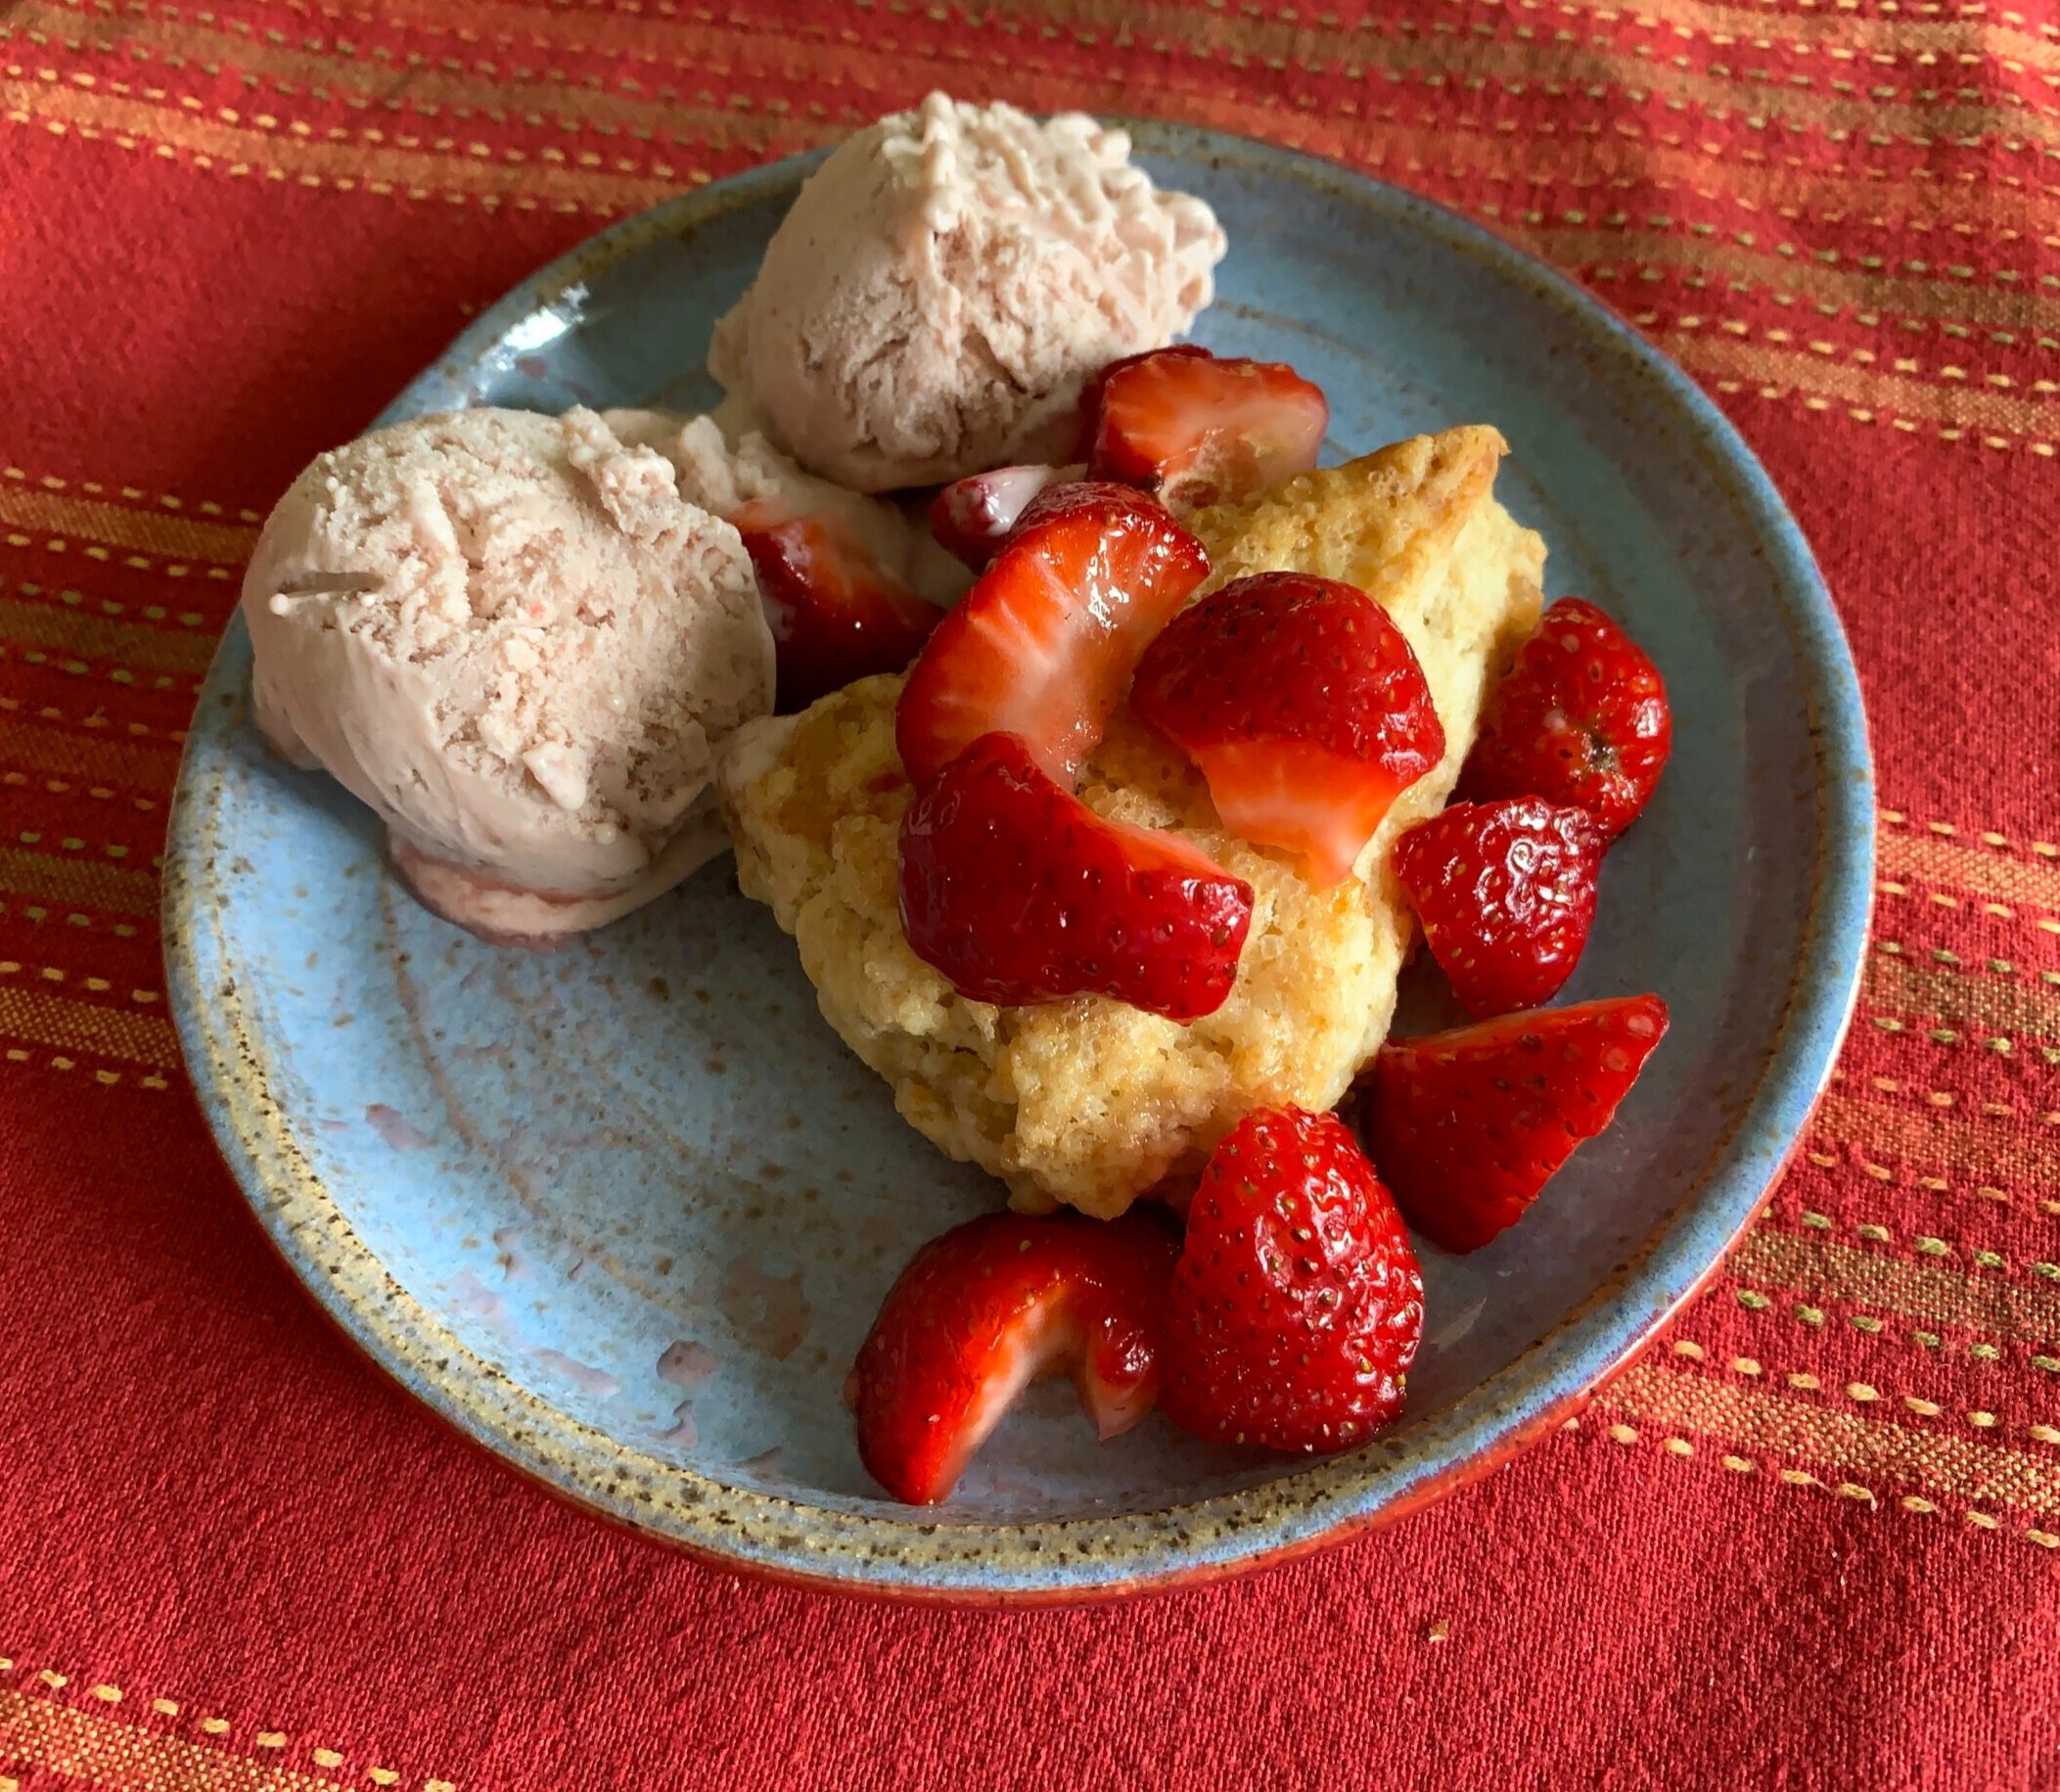
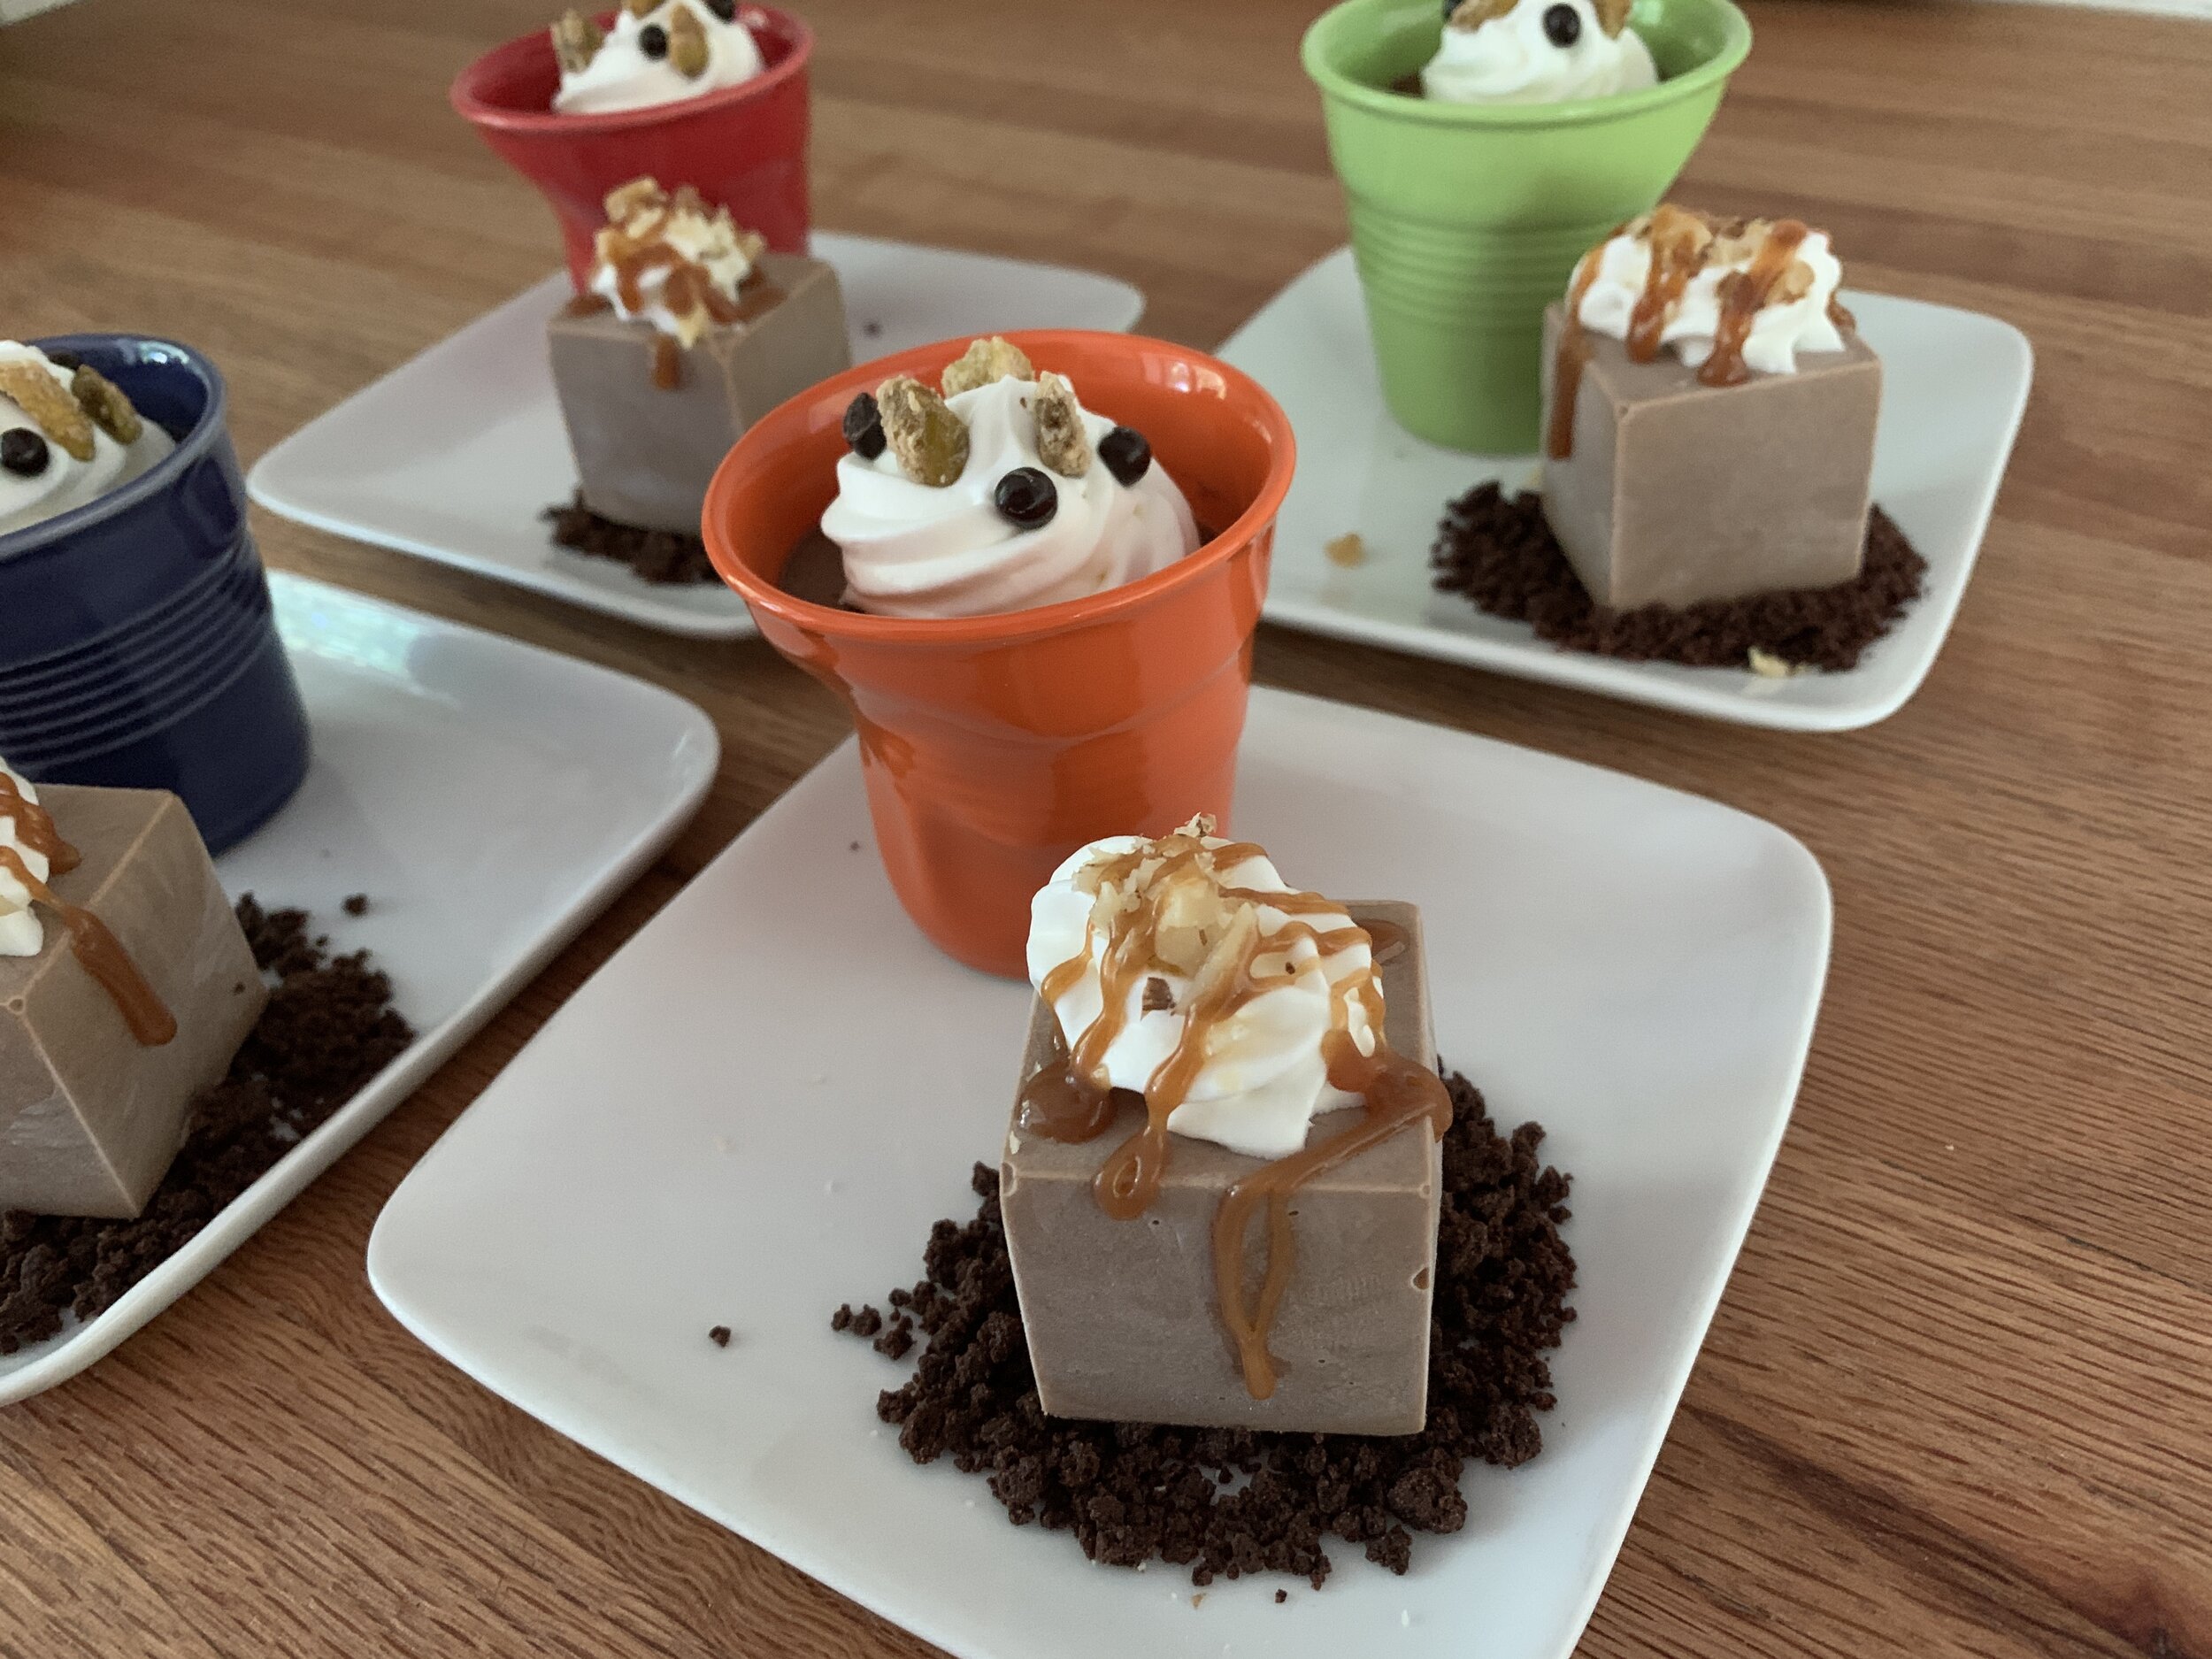
Serve them along side the pots de crème on small plates as I did or by themselves in a bowl with your favorite ice cream type toppings.

I love a dollop of whipped cream, cookie crumbs, caramel sauce and chopped toasted or candied nuts, but you could also choose a bit of finely diced crystallized ginger, toasted coconut or raspberry or cherry coulis all of which complement chocolate so nicely. Valrhona chocolate crunchy pearls aren’t bad either.

IMG_1047.JPG

Dense, chocolate-y, creamy and oh so delicious. Yes.

Please be safe out there. We still have a long way to go.

It’s officially summer - there’s still plenty of time to pot up some assorted annuals and make yourself smile!!

IMG_1061.jpg
IMG_1066.jpg
IMG_1069.JPG


Roasted strawberry ice cream and ginger shortcakes

IMG_1009.jpg

This is strawberry shortcake at it’s best! Roasted balsamic strawberries churned into a deelish ice cream, paired with fresh strawberries and ginger scones. Oh boy!

Recently I was perusing Rose Levy Beranbaum’s “The Bread Bible” (I can’t remember exactly why!) when I came across “Rich and Creamy Ginger Scones”. I had forgotten that she includes a section on quick breads, muffins, biscuits and scones in this wonderful bread tome of hers.

Never one to deny myself a new scone experience, since I had crystallized ginger in my cupboard (still working through the pantry!) and heavy cream in my fridge, I definitely wanted to give these a try.

IMG_0878.jpg

It also just so happened that I had purchased some strawberries at our local Meijer supermarket that wouldn’t necessarily be considered primo, if you get my drift. I decided to roast them up, purée em and make strawberry ice cream. The strawberry ginger shortcake idea was born.

IMG_1011.jpg

When you hear the terms scones, shortcakes and biscuits, one can’t help but ask “What’s the diff?” They’re pretty similar all-in-all although some have egg, some not; some heavy cream, some buttermilk or other dairy like yogurt or even ricotta; some softer self-rising flour like Lily White (i.e. biscuits) and some with a flour twist like replacing a portion of all purpose flour with spelt or whole wheat pastry flour. LOTS of options.

Most shortcake recipes I’ve used or reviewed contain flour, sugar, baking powder, salt, cold butter chunks and cream, all put together with a light touch. The word short refers to the fact that the butter coats the flour to prevent gluten strands from lengthening (hence short), keeping the product flaky, light, crispy and delicious all rolled into one!

Let’s make the principal players.

IMG_0879.jpg

To roast the berries hull and chunk up about a pound of strawberries, toss them with a tablespoon of good quality balsamic vinegar, a tablespoon of brown sugar (light or dark, it’s up to you) and 1/4 teaspoon freshly ground pepper. I used a Silpat but parchment is fine too. Roast them at 375ºF for about 20 minutes until dark and syrupy, stirring them a couple of times. Note to self - punch up the balsamic and pepper next time.

IMG_0880.JPG

Let the berries cool then either mash them with a potato masher or purée them if you’d like them a bit more refined. I made my usual ice cream base and blended in the berry mash while chilling the base over an ice bath. I let the strawberry blended base mature in the fridge for a couple of days before processing and freezing.

On to the ginger scones. The primary difference in this recipe from the one I normally use is more butter (170 g vs 113 g), twice as much sugar, no egg, same amount of cream (but whipped!), a teaspoon of ground ginger, zest of a lemon and the addition of 113 g finely diced crystallized ginger.

To get ready, whip the 180 g/3/4 cup cold heavy cream to soft peaks and cube the cold 170 g/6 ounces of butter - hold both in the fridge. The mixing steps are the same as for your typical scone, biscuit or shortcake: blend in a medium mixing bowl 260 g/2 cups all purpose flour, 66 g/1/3 cup turbinado sugar, 14 g/1 tablespoon baking powder, 1 teaspoon ground ginger, zest of a lemon and 1/8 teaspoon salt; rub and flatten the cold butter pieces into the dry ingredients to a mix of coarse crumbs and visible pieces of butter; add in the crystallized ginger; fold in the whipped cream. You got it!

Remember the key to scone mixing is cool, quick, decisive - don’t over handle the dough. Turn it out onto a lightly floured surface and give a few quick kneads to bring it together.

I like the way RLB divides the dough in half, forms 2 six-inch rounds about 3/4” thick, then cuts them in either 6 or 8 pieces depending on the size one prefers.

IMG_0881.JPG

Heat the oven to 400ºF with either a baking stone or a sheet pan on the middle rack. The scones go onto a second sheet pan, parchment lined, brushed with cream and sprinkled with raw sugar then placed in the freezer for 15 minutes or so to firm them up and keep that butter COLD!

Don’t forget that you can take it to this step and freeze them for baking another time. I love plan ahead projects.

IMG_0883.jpg

Pop the baking sheet onto the heated sheet pan and bake for 15-20 minutes. I usually give them 10 minutes, rotate the tray and check again in about 8 minutes. If they seem to be browning too quickly I turn the oven down to 375ºF.

IMG_0885.JPG
IMG_0888.JPG

These have an ethereal quality -crispy outside, light and flaky inside, just the right amount of ginger and oh so good.

I’m a firm believer in eating scones, shortcakes and biscuits the day they’re made, otherwise freezing them the day they’re baked to preserve their like-fresh quality. This time I did a little test: I took 4 baked scones out of the freezer, loosely wrapped them in parchment paper, left them at room temp and the next morning gave one a 5-8 minute warm up in a 300º oven. Still SO GOOD. Crisp out and light in, a match made in heaven.

I repeated this over the following 2 days and found they continued to offer that just baked enjoyment. For THREE days, they sat wrapped in parchment at room temperature and did not disappoint. Amazing.

Steve and I enjoyed the combo of roasted strawberry ice cream, great quality fresh berries that we happened upon at Kingma’s market and of course the perfect ginger scones. Thanks Rose.

IMG_1010.jpg

Swiss meringue buttercream

IMG_0771.JPG

Ciao everyone! It took me a bit of time to get this post together, but here it is at last. You’d think with all the extra time on our hands during our staying at home (11 weeks and counting), I’d have knocked this baby out in a few days. I decided to take some extra time to add some recipes for some base components that are great ones to have in your baking armamentarium, and you’ll find links for those throughout the post.

Remember - you can also go directly to my recipe page for a list of base recipes with links to their PDFs and in some cases to blog posts on that particular topic.

Let’s go for it.

Never a big sweet frosting lover, I usually turn to a simple lightly sweetened Chantilly cream, a flavored whipped mascarpone or a basic ganache to give my petite cakes a swirl of panache. Buuuuuuuuut . . . . . . in recent years I’ve become a huge fan of SMBC. So light, airy, buttery and not cloyingly sweet, it’s rife with flavor possibilities. Let’s take a look at just a few and see what you can create to tickle your taste buds.

The beauty of this process is that the base remains the same - egg white, sugar, butter - with flavor added once all the butter is incorporated. Depending on what I plan to use the buttercream for, I’ll do a full batch as a single flavor or divide it in two and create two different flavors. The half batches work well for my small portion cake projects in which a nice swirl or dollop per un petit gâteau is all that’s needed. How efficient is that?

It’s the perfect make-ahead component too since it holds well in the fridge for several days and in the freezer for months. Just remember to thaw and bring it completely to room temperature before rewhipping and using for its intended purpose. It’s most commonly used for filling and decorating layer cakes, garnishing petite cakes or for sandwiching French macarons. A squiggle on an èclair or choux puff might not be bad either!

I reviewed a number of recipes from different sources and found many variants in terms of sugar to egg white ratio (anywhere from 1:1 up to 2:1) as well as differences in the amount of butter added e.g. when using 6 large whites, the butter quantity can range from 340 g / 12 ounces up to a full 456 g / one pound or even more!

Here’s my full batch base recipe (includes flavor variations!) which makes about 4.5 cups of buttercream - generally plenty for a 2-layer eight or nine inch round cake with leftovers for decorating, or just the ticket for some dozens of small treats. And remember - you can freeze the leftovers!

Getting ready to go!

Getting ready to go!

On the day you want to make your SMBC, plan ahead and weigh out 370 g unsalted butter and cut it into 1/2 to 1 inch cubes. The butter needs to be at room temperature before adding it to the meringue!

Have your flavor ingredients ready to go too - from a pinch up to 1/4 teaspoon of salt to taste, 2 teaspoons vanilla (or other extracts) plus your chosen additions like caramel, fruit purée, melted/cooled yet liquid chocolate or lemon curd.

For the meringue place 6 large egg whites and 300 g sugar in a bowl over a steaming bain marie whisking constantly until the mixture reaches a temperature of anywhere from 145-155ºF. Transfer the mixture to the bowl of a stand mixer fitted with the whisk and beat on high until completely cool and marshmallow-y. I plan on a good 10 minutes for that.

Realize that the bottom of the mixing bowl may still feel a tad warm to the touch due to the heat of mixing. I test the meringue by putting a dab on my wrist - if it feels cool, I start adding the butter. You want to avoid adding it too early or you’ll end up with a soupy mess.

IMG_0572.JPG

Add the butter several pieces at a time, blending completely after each addition. The mixture should thicken and become smooth and creamy by the time all the butter has been added. If it’s too loose, pop it into the fridge or freezer to firm it up and then rewhip.

Butter added - just waiting for flavor additions

Butter added - just waiting for flavor additions

When incorporating flavor components, they should be at room temperature, added slowly and blended on medium low with the whisk attachment to keep the buttercream from separating. Then scrape down and give it a final high speed whisking for a couple of minutes. Some folks switch to the paddle to give it a final fluffing up.

For a full batch of apple cider caramel blend in 1/4 teaspoon salt, 1 cup caramel sauce with 2 tablespoons boiled cider (available from King Arthur Flour) and 1 teaspoon vanilla extract or vanilla bean paste.

Apple cider caramel

Apple cider caramel

For white chocolate mocha have ready 170 g white chocolate, melted and cooled yet still liquid, plus 2 tablespoons instant espresso powder dissolved in 2 tablespoon hot water and cooled. Blend it in. Yum.

White chocolate mocha

White chocolate mocha

Oh man - yes I know this isn’t gelato but these images remind me of those mounds of creamy, cold goodness on display in all the gelaterias in Italy!

In addition to the two above (let’s call them richer flavors), I also went for the lighter, springier choices of lemon, mixed berry and honey orange. You can find details on the flavor additions here.

Now what exactly might I do with all this buttercream?? Small cakes of course!

First a quick word on piping tips. Just three tip shapes - round, star and French star - can create a bevy of designs for you. For years I’ve relied on my round and basic star tips (closed or more open like the one in the rear) to pipe the simple designs I prefer, but the French star - oh my. It has finer spacing which creates more of a seashell or tighter spiral look. I LOVE it. The only one I have is the one you see below, but I think a couple more sizes would do me just fine. Yup.

BTW just so you have a sense of size, the round tips range from 6 mm at the bottom of the image up to 12 mm (~1/2 inch) at the top.

IMG_0871.jpg

I chose pecan cakes for the apple cider caramel SMBC, baking them in petite tinned steel brioche tins. NOTE: it’s very important to butter the tins thoroughly and pop the cakes out within a few minutes of coming out of the oven to avoid sticking. One could also use mini muffin tins like I did in a previous post where you’ll find the pecan cake recipe. Silicone molds would also work well although I think the cakes brown and crisp better in metal molds.

My small round tip served nicely to pipe a daisy like design to compliment the fluted ridges of the cakes. Pretty simple stuff.

Apple cider caramel on pecan pie cake

Apple cider caramel on pecan pie cake

For the white chocolate mocha SMBC a classic moelleux chocolat seemed just right, baked in one of my favorite square savarin silicone molds. The French star tip yields a lovely scallop like swirl. Those are some Valrhona dark chocolate crunchy pearls on top. Delicious.

White chocolate mocha on moelleux chocolat

White chocolate mocha on moelleux chocolat

The lemon cake is essentially financier batter to which lemon zest has been added. I baked these in mini-muffin silicone molds. So simple and nice.

Lemon on citrus financier

Lemon on citrus financier

Since I made a batch of lemon curd to add to the lemon buttercream, I also used it to create a center flavor burst in the cake before topping with the final flourish. Using a round tip I cut out a core piece (for snacking of course), filled it with the curd and finished it off with a star tip swirl.

IMG_0768.jpg
IMG_0770.jpg

For the mixed berry use your favorite base muffin recipe and fold in an assortment of berries like blue, red and black. I generally avoid adding fresh strawberries to cakes or muffins due to their water content and mushiness after baking. Once again a star tip provides the luscious ridges. Create different looks as you swirl, twist and lift your tip.

Mixed berry on triple berry muffins

Mixed berry on triple berry muffins

For the honey orange SMBC I again used my base financier batter, replacing 1/2 the almond flour with finely ground pistachios and adding orange zest for a lovely citrus touch. Similar to the lemon cakes above, I used my favorite mini-muffin silicone mold for the cakes and the star tip swirl for the top flourish with a few pistachios tucked in the center for a tasty treat.

Honey orange on orange pistachio financier

Honey orange on orange pistachio financier

For a different look I used another favorite ingot rectangular silicone mold which gives me a linear canvas for the buttercream using the French star tip. Same financier, more orange zest in the buttercream for a deeper orange color and a ridge of scallops or stars on top. Remember it’s all about how you twist, swirl and lift! Candied pistachios add just the right crunch. So deeeelicous!

IMG_0942.jpg

Have fun creating your own treats with luscious buttercream the Swiss way!

As spring moves into summer do your best to keep a positive outlook, stay safe and healthy. That’s what counts.

Giant allium

Giant allium

White lacecap Viburnum

White lacecap Viburnum

Fragrant lilac -oh the aroma!

Fragrant lilac -oh the aroma!

Spring catch up

IMG_0779.jpg

We’ve had a cool spring so far but of late the crabapple trees have been giving us quite a show. Above is an example of what I’ve been seeing on my daily walks - a much appreciated and welcome splash of color to brighten our otherwise homebound lives.

Walking is my musing time (according to Merriam Webster, muse can be used as an intransitive verb meaning to become absorbed in thought, especially to think about something carefully and thoroughly), a way for me to try and make sense of what’s going on, dreaming of visiting family, traveling long distance or once again being in front of an eager group of pastry students.

Through it all baking continues to be my companion (in addition to Steve of course), whether it’s reading one of my favorite pastry books or physically working in the kitchen enjoying the rhythm of mise en place, preparation or the enjoyment of the final result, no matter if it’s for our larder or to share with others.

Here are just a few things that have come out of the kitchen in recent weeks.

Sesame sticks for personal snacking!

Sesame sticks for personal snacking!

Caramel drizzled cinnamon star for Mother’s Day sharing

Caramel drizzled cinnamon star for Mother’s Day sharing

Baguette ooh la la - more on this one coming up!

Baguette ooh la la - more on this one coming up!

Petite gateaux au citron

Petite gateaux au citron

Graham crackers for snacking or crushing into crumbs.

Graham crackers for snacking or crushing into crumbs.

The project ideas continue to churn. What next, eh?

Meanwhile be reasonable, stay safe and take care of yourselves and those you love.

Happy Spring!!

IMG_0779.jpg

Couronne aux amandes et aux noisettes . . . . and more!

IMG_0629.JPG

During our weeks of staying home and sheltering in place I’ve been doing a variety of baking projects with an eye toward using ingredients I have on hand (hmmmm . . . this is starting to sound old). That also includes croissant dough sitting in my freezer waiting for just the right moment.

Wouldn’t you know I had two batches of said dough that were nearing their “use by” date - I don’t like unbaked yeasted dough to sit for longer than 6 weeks in the freezer since after that the yeast starts dumbing down and the dough doesn’t rise well at all. Trust me - I know.

Time to create! Get ready for it!

I decided to make four different pastries: a bit more than half of one batch for a couronne (can be translated as crown or wreath), the remainder of that batch for petite pain au chocolat, another half batch for apricot twists and the final half batch for what I refer to as cherry cream cheese “flip throughs”. Oh boy!

First up is the hazelnut and almond couronne which is shaped in a pretty cool way. A good rule of thumb when rolling this type of dough, no matter what you’re going to shape, is to aim for a finished piece of dough that’s about 1/4” thick. If you start getting much thinner than that, you’ll lose some of the discrimination of your layers and won’t have as lovely of a laminated finish.

I rolled ~680 g of croissant dough into a 8”x14” rectangle. I had my hazelnut filling ready to go - very much like remonce (which I wrote about in the recent Danish Kringle post), it combines equal weights of almond paste (I’m loving Mandelin premium), sugar and butter followed by the addition of three times that weight in toasted, finely ground hazelnuts - e.g I used 100 g EACH of almond paste, sugar and butter plus 300 g toasted, ground hazelnuts. Cinnamon or other spices can also be added.

My couronne required 340 g of filling so I had leftovers which I wrapped and froze for another day.

IMG_0599.JPG

Spread the filling over the dough and roll it up into a log.

IMG_0602.jpg

Once rolled, cut slits about 1 inch apart along one side, not quite all the way through.

IMG_0603.JPG

Then form the log into a circle, joining the ends. Twist each sliced portion outward so you see the filling.

IMG_0605.JPG

Brush lightly with egg wash and let rise about 1.5 hours. Toward the end of the rising time heat the oven to 350ºF.

Do a second egg wash and sprinkle with sliced almonds.

IMG_0621.JPG

Bake about 45 minutes until golden brown. I always check about half way through and rotate my tray to promote even baking.

IMG_0624.JPG

I decided to gussy it up a bit by making a simple orange scented glaze with some orange zest, confectioner’s sugar and fresh orange juice and drizzled it all over.

IMG_0627.JPG

Once cooled I sliced a section for testing and loved it! I’m a big fan of hazelnut and orange anyway, so this definitely did the trick. And the almond/hazelnut combo took it up a notch too. A big thumbs up!

IMG_0631.JPG

The petite pain au chocolat portion of the program was straight forward, a process I’ve done many times. A simple image will do this time around. Hmmm . . . . I’m getting low on chocolate batons.

IMG_0609.JPG

Next up - apricot twists. Using a half batch of croissant dough, I rolled it out to 12”x 14” rectangle with the long side facing me, parallel to my work surface. Brush the dough with melted butter then sprinkle on about 1.5 tablespoons of vanilla sugar (cinnamon sugar if you like). Roll lightly with a rolling pin to help the sugar stick.

IMG_0610.jpg

Fold the dough in half from one side so that you end up with a 12”x7” piece. Roll the dough to seal it and slightly stretch it.

Now cut seven strips, each 1” wide.

IMG_0612.jpg

Holding each strip at the ends, stretch it as you twist it several times then coil it up into a spiral.

IMG_0613.jpg
IMG_0614.jpg

Place on a parchment lined sheet pan, brush lightly with egg wash and let rise about an hour.

IMG_0615.jpg

I often use my cold oven as a proof box, placing a pan of warm water on the bottom shelf. However, if my oven is in use, I tuck my tray in a safe spot, place a small glass of warm water on the tray and cover with an overturned clear tote bin to provide moisture and a hint of warmth.

Once risen - they should look more pouf-y and the laminations appear more prominent. Brush again with egg wash, push down at a couple of central spots with your little finger tip or the end of a wooden spoon or chopstick and do your best to direct some apricot jam in there. Don’t fuss over it - just go for it. I added a sprinkle of vanilla sugar too.

IMG_0622.jpg

Bake at 375ºF for about 17-18 minutes until golden.

IMG_0632.JPG

To bring up the rear, last but not least are my “flip-throughs”. Once again using a half batch of croissant dough, I roll it out to ~8” by 13.5” and cut 12 pieces, each 4” by 2.25”. Each rectangle gets a slit down the center leaving the ends intact. I consider these my medium size - you can make them smaller or larger - just cut any size rectangle you’d like!

IMG_0617.jpg

Now take one short end, roll it downward then bring it up through the slit, essentially flipping it through to the top as the sides naturally twist. Looks kinda like a bowtie - just straighten the rectangle a bit and they’re ready to rise. The first time I did this way back when, I found it helpful to cut a piece of paper or felt and practice - you can visualize it immediately.

IMG_0618.jpg

Place on a parchment lined sheet, lightly egg wash and let rise about an hour. Egg wash again and top with your chosen filling - lemon curd, almond cream and jam are just some of the possibilities.

One of my favorite ways to finish these off is with a basic cream cheese filling made by blending 227 g / 8 ounces cream cheese with 57 g / 1/4 cup sugar, 3 tablespoons cornstarch, some lemon and/or orange zest, 1/2 teaspoon vanilla; beat on medium with the paddle until light and smooth; blend in 2 large egg yolks until fully incorporated. This made plenty for my purpose here but you can certainly double the recipe if you’re doing a larger batch of pastries.

NOTE: After the rise the center should fill in but sometimes there’s still a gap between the twisted sides. Just blob your filling/jam more along the edges if need be, otherwise just dollop a blob along the center and top with jam of choice - in this case cherry.. Once they bake it all blends in.

IMG_0637.JPG

Bake at 375ºF about 17-20 minutes until golden and the filling is set.

IMG_0639.JPG

Planning for properly timed rises and taking turns in the oven for each type of pastry made for a busy baking day and resulted in a wonderful assortment of goodies that I ended up divvying up amongst a number of our neighbors. A great way to use croissant dough that would have soon been over-the-hill after too long a stay in the freezer.

The neighbors were most happy!

Have fun, stay safe and keep on keepin’ on folks.

Swedish sand cake (sandkaka) - apple pecan version

IMG_0506.JPG

This one’s an eye opener folks. As I continue to work toward using up some less frequently needed ingredients I have on hand, potato flour is one that prompted further investigation. I originally bought it with an eye to making potato dinner rolls (which I did!), but of course I had some left. Sooooo . . . . . now what?

I did some online research and found this Swedish sandkaka recipe compliments of Jennifer Rao and Around the World in 80 Cakes. It also happens to be gluten free for those who are interested in that sort of thing.

I realize my flavor profile speaks more of autumn than the bursting out of spring but wouldn’t you know I had some sliced apples in the freezer left over from a mid-winter apple tart project? Vermont boiled cider and rum also remain at the ready, a combo I’m becoming very fond of.

Typically baked in a standard loaf pan, I opted to use my 4-well mini loaf pan (buttered) for a more petite cake offering. After a bit of calculation I figured the batter would fill 4 minis with some left for a 4” round panettone paper mold (no buttering needed here!).

Planning ahead: as you prep for this one, you want your eggs and butter at room temperature. I’m adding a mix of warming spices too so I shelled about 15 green cardamom pods then lightly toasted and finely ground the cardamom seed. It’s all about being ready, right?

IMG_0485.JPG

I also diced my thawed apple slices ( I had the equivalent of about a medium apple’s worth) and sautéed them in a bit of butter and sugar then added a tablespoon each of rum and boiled cider until reduced and the apples were golden and caramel-y; set aside until ready. I toasted up ~80 g pecans, then cooled and coarsely chopped them.

Heat your oven to 350ºF.

For the batter: sift 173 g / 1 cup potato flour and 2 teaspoons baking powder into a medium bowl. Add 3/4 teaspoon ground coriander, scant 1/2 teaspoon ground cardamom, 1/4 teaspoon cinnamon, 1/4 tsp salt, and 1/8 teaspoon allspice. I also threw in a large pinch of vanilla powder just because I could.

In the bowl of a stand mixer fitted with the paddle cream 227 g / 8 ounces unsalted butter with 150 g / 3/4 cup granulated sugar, 50 g / 1/2 cup confectioner’s sugar and 1 teaspoon vanilla extract. Beat on medium high for 3 minutes until light and fluffy. Scrape down the sides of the bowl.

Add eggs one at a time on low, blending about 30 seconds after each and scraping down. Then add the potato flour/spice mixture in thirds alternating with a mix of 2 tablespoons rum/2 tablespoons boiled cider. Scrape sides and blend well as you go.

Have the pecans and sautéed apples at the ready.

IMG_0486.JPG

For my purposes I divided the batter amongst the 4 mini-loaf pans and the panettone mold but feel free to use a standard loaf pan if that’s what you have available.

IMG_0488.jpg

Top with apples . . . . . .

IMG_0490.jpg

and finish off with chopped pecans and a sprinkling of raw sugar.

IMG_0492.jpg

I put the pans and paper mold together on a sheet pan - easier to grab when rotating or pulling them out of the oven. Bake about 20-25 minutes until the edges are nicely browned and a tester in the center comes out clean. (Note: if you are using a standard loaf pan, baking time is 40-45 minutes).

IMG_0503.JPG

Let cool 10-15 minutes then gently nudge out of the pans with a small offset spatula and finish cooling on a wire rack. Although a bit crumbly around the edges, they came out pretty well after all.

IMG_0504.JPG

This is good cake! It’s really hard to describe but it IS like sand believe it or not. I’m not saying that I eat sand but the texture of this brings that very thing to mind. Weirdly so, it’s dry yet moist and the flavor, along with the apples, nuts, spices and boiled cider tang, is delectable in my book. How about serving it up with your favorite vanilla or butter pecan ice cream? Yeah baby, why not!

Actually I enjoyed a small slice with my morning coffee for several mornings in a row (gotta have a little treat every now and then) and found that the cake held up well in a covered container for a few days.

Now you know - don’t hesitate to go for this gluten free Swedish treat (no apples and pecans necessary) when you have potato flour at the ready. Mmmm good.

Keep up the good work on the home front and stay safe!

IMG_0507.JPG

Milk chocolate malted ice cream profiteroles

IMG_0677.jpg

After that extensive Danish Kringle post (whew!) I knew it was time for a break with a quick note on a fun and delicious dessert experience.

This past weekend we celebrated Steve’s birthday in isolation, enjoying a tipple of champagne followed by his famous marinated flank steak on the grill, roasted little potatoes and a veggie mix of edamame and last summer’s freezer stashed sweet corn. Mmmm mmmm good.

As luck (or the fates) would have it, I had choux puffs in my freezer that were originally intended for an event that was canceled due to the pandemic, and I’d been scheming about how I might use them. Since anything made with choux paste is on Steve’s favorites list, I knew they would have to be part of his birthday dessert.

I recently posted on making chocolate chunk bars as a way of using up some of the chocolates I had in my cupboard. I still had some Valrhona milk chocolate on hand, as well as Carnation malted milk powder which I originally purchased some months ago to make brown butter shortbread cookies. Inspired once again by Claudia Fleming’s “The Last Course”, milk chocolate malted ice cream was officially on the menu. Profiteroles here we come!

IMG_0686.jpg

What a great plan ahead dessert. Make your choux puffs using your favorite recipe and stash ‘em in the freezer where they’ll be fine for some weeks. Make or buy any flavor ice cream you choose a few days, or even a week or two ahead and you’ll be ready to assemble on the big day.

I made my usual ice cream base and, once cooked and off the heat, blended in 113 g / four ounces chopped milk chocolate, 28 g / one ounce 64% Guittard chocolate discs and a scant cup of Carnation malted milk powder (sift before whisking it in). Then strain and chill.

I usually keep my ice cream bases refrigerated for a day or two before processing. Once the ice cream is churned it needs a good 3-4 hours in the freezer to firm up. But you can make it ahead and it should be fine in the freezer for a week or two.

On the day you plan to serve the profiteroles, take out as many as you want, put ‘em on a parchment lined sheet pan and warm them in a 300ºF oven for 10 minutes or so to thaw them and crisp them up a bit. Cool before slicing the tops open and filling with lovely scoops of frozen goodness. Then simply put them back in the freezer to hold until serving.

IMG_0667.JPG

A quick note about ice cream - this malted milk version was easy to scoop right out of the freezer (maybe due to the malted milk powder??), but some flavors of ice cream will freeze harder than others. Give yours a feel and if it’s rock hard, take it out 10-15 minutes ahead of scooping for greater ease of assembly.

IMG_0668.jpg

For a lovely ending to Steve’s birthday meal I just popped a few in each of our bowls, topped them with chocolate sauce, caramel drizzle and chocolate shortbread cookie crumbs et voilà - un dessert três délicieux!

The next day I had empty puffs on hand and more ice cream so I filled them all and froze them for enjoyment later. I found that once they had firmed up over the next hour or two, I could turn ‘em upside down while gently holding the tops on and dip them in a chocolate glaze made by melting 113 g / 4 ounces dark chocolate with 42 g / 3 tablespoons unsalted butter, then back into the freezer they went.

In case you’re wondering, I had a few crunchy topped puffs in the mix which I left unglazed.

IMG_0674.jpg

Even though we work at keeping our meals pretty darn healthy, during these days of ongoing isolation it’s nice to be able to anticipate a little sweet treat every now and again don’t you think?

Stay home, stay safe and keep on baking!

IMG_0677.JPG

Danish Kringle

IMG_0454.JPG

More fun with laminated dough - an interesting project indeed!

As I was researching and reviewing the pastry known as Danish Kringle I learned that kringle is the word for pretzel and that Danish bakeries typically have a sign outside their shops shaped like a pretzel topped with a crown. A sure sign of good things inside.

Scandinavia is on Steve’s and my travel hit list, although it’s strange to contemplate when we might be able to travel again given our current times. We can only hope. In the meantime I’m reading and learning more about the types of baked goods that come from that corner of the planet. Cool stuff.

IMG_0446.JPG

Made with the Danish version of laminated dough (wienerbrød in Scandi talk), this is a traditional almond filled pastry, popularly served in Denmark for occasions like birthdays, anniversaries and other festivities. Much like croissant dough in its preparation, the primary difference is the addition of egg to the dough. As is true when comparing a number of recipes for a particular pastry, the range of ingredient quantities can certainly vary, particularly the amount of butter used for the laminations.

Inspired by Brontë Aurell’s version in her book “Brontë at Home”, I compared her Danish dough base recipe with several others, most notably the one in my 2004 first edition of CIA’s book “Baking and Pastry - Mastering the Art and Craft” (there have since been two further editions in 2009 and 2015).

It was the first pastry tome I purchased upon our return to the USA after completing my stage at Pâtisserie Pascal Pinaud in Paris’ 5th arrondisement in March of 2007. I used it as my primary reference source (and still refer to it all these years later) during my first summer job that year at JM Gerrish Provisions in Winter Harbor Maine. My how time flies.

IMG_0642.jpg

I ended up creating my dough recipe based on an amalgamation of Aurell’s and CIA’s - pretty similar actually, save for the lesser butter block quantity in CIA’s version. I tend to take a “less is more” approach in my croissant dough too.

The dough: remember if you’re going to mise out your ingredients ahead of time, keep the yeast separate from the salt until ready to actually start mixing since the salt can inhibit the yeast.
Using a stand mixer fitted with the dough hook, mix 375 g / scant 3 cups bread flour, 43 g / 3 tablespoons granulated sugar, 6 g / 2 1/8 teaspoons instant yeast, 6 g / 1 teaspoon salt, 40 g / 3 tablespoons soft unsalted butter, 1 large egg, 1 large egg yolk and 175 g / 3/4 cup room temperature whole milk. Blend on low speed for 2 minutes then increase to medium speed for 4 minutes.

Place the dough in a lightly greased bowl, cover and let rise for about 2 hours. Gently turn the dough out onto a lightly floured work surface, fold it over and form a rectangle on a parchment lined sheet pan. Wrap tightly and refrigerate overnight.

Form 243 g / 2 sticks + 1 tablespoon unsalted butter into a ~8”x8” square by tapping/rolling it between plastic wrap. Keep it wrapped and refrigerated until you’re ready to perform the butter incorporation and the laminations.

Let’s review the steps of creating a laminated dough. Take the butter out of the fridge about 20 minutes before you’re ready to go, then tap it with your rolling pin to make it more malleable - you want it cool and bendable.

Remove the dough from the fridge and roll out to ~8”x 16” rectangle. Place the butter in the middle of the dough and fold one end over it to cover half of the butter as seen below. Do your best to keep the corners square.

IMG_0420.JPG

Fold the other portion of dough over the remaining butter. You can stretch the dough a bit to square off the corners and pinch the edges and center seam together so as to completely envelope the dough. This is called the “lock-in” or le beurrage en Français.

IMG_0421.JPG

Next you’ll roll the dough out to an ~8”x 24” rectangle, paying attention to the edges and center seam to keep things together and prevent any butter from sneaking out. I like to roll the dough with the sealed edges positioned at top and bottom and the center seam vertical to me. Feel free to flip the dough seam side down as you roll.

If your dough ever becomes too warm and butter starts breaking through, wrap and chill it for 15-20 minutes to firm things up again.

IMG_0422.JPG

Typically croissant and Danish dough are put through three 3-folds (also called letter folds), but for this project I started with a 4-fold or book fold. Visualize the center of the dough, fold each end into the center to snuggle up to each other (leave a skosh of a space to allow for folding it) . . . . .

IMG_0423.JPG

then fold it on itself like a book.

IMG_0424.JPG

An important thing to remember when making laminated dough is that after each fold you turn your dough 90 degrees before you roll it out for the next fold. Think of it as the spine of a book on your left.

IMG_0425.JPG

Now wrap the dough in plastic wrap and refrigerate it for 30 minutes before doing the next fold. That keeps the dough/butter cool and stable and allows the dough to relax as well.

Roll it out again into a rectangle but this time visualize the dough in thirds and fold it like a business letter. One end up . . . .

IMG_0434.jpg

the other end down.

IMG_0435.jpg

Wrap and chill another 30 minutes. Making sure the “spine” is on your left, roll it out and repeat another 3-fold. Now the dough is complete. Wrap and chill for at least 30 minutes or up to overnight before rolling it out for its intended use. It can also be frozen up to a month.

Check out these layers!

IMG_0453.JPG

Before rolling the finished dough out for the Kringle, make the almond filling (remonce) by blending together 100 g EACH of almond paste (Mandelin brand is great!), softened unsalted butter and confectioner’s sugar. This is enough filling for one full Danish Kringle. Many Kringle recipes also include raisins but I opted out on that one.

Side note: New word alert for me! Remonce is said to be a Danish word and creation and refers to a commonly used filling in many Nordic cakes and pastries. Almond is a common flavor but it can be made with other nut pastes like pistachio or hazelnut or flavored with cinnamon, cardamom and/or vanilla, depending on what you’re making. For cinnamon rolls the confectioner’s sugar is often replaced with dark brown sugar. Life is full of variations, eh?

IMG_0419.JPG

For this my first Kringle attempt I followed Aurell’s instructions for rolling, filling and shaping the dough. Because her description of the process wasn’t terribly clear (there are no images in the book to help), I checked out a couple of YouTube videos and also went somewhat by instinct.

On a lightly floured surface roll the dough lengthwise to a rectangle about 7”x20” then split it right down the middle length wise. A pizza cutter is a great tool for this.

Then roll each piece again length wise to achieve a width of 4” and a length about 24”.

IMG_0428.JPG

Working with one piece at a time, place half the remonce in a line down the center. Fold the top edge over the filling . . . . .

IMG_0429.jpg

Then bring the bottom edge up and over to make a log.

IMG_0431.jpg

Repeat with the second piece then place both pieces on a parchment lined sheet pan in horseshoe shapes with their ends touching each other.

Turns out there’s actually supposed to be a narrow gap down the centers exposing the filling (that’s what I get for not paying attention) but, once the dough had risen, a gap developed during baking so it all worked out okey-dokey.

IMG_0432.jpg

Now grab one end of each horseshoe and bring them toward the other side, crossing each other to form a pretzel. This is one monster of a pastry! Reminds me of some kind of sea snake or something.

IMG_0433.jpg

Egg wash and let proof in a closed space (I often use an overturned clear tote bin for my cover) for about an hour. About 20-25 minutes before the end of the rise heat the oven to 375ºF.

Repeat the egg wash then sprinkle with toasted, coarsely chopped hazelnuts or sliced almonds (or a combo!) and some raw or pearl sugar.

IMG_0437.jpg

Bake for 10 minutes, turn the oven down to 350º and bake an additional 15-20 minutes. Since the thickness at the crossover point is essentially double the rest of the pastry, I tried to be sure that it had baked through. Not necessarily an easy task. I reduced my oven temp by 25º and continued checking every 5 minutes or so, but it’s not really until you cut into something that you know for sure.

Wow - check this out!! Nice and golden, plus you can appreciate the layers and how the top opened up to reveal the filling. Actually quite a messy looking end result, eh? But after all, it’s about sharing the experience and learning from it!

IMG_0438.jpg

Once it had cooled I started carving. While a bit gooey at some points the flavor and flakiness are definitely there, and our taste testing ended with a thumbs up.

IMG_0442.JPG

Slice it up, dust it with some confectioners sugar and share it with all your friends (safely distancing of course). They’ll thank you for it.

IMG_0456.JPG

Wait - I’m not finished yet! As if you haven’t had enough already, I made one more Kringle with a half batch of dough, hoping to make a more petite pretzel without the overlap.

The dough was a bit wider than I would have liked, but I proceeded with the filling and the folding over, leaving the gap in the center.

IMG_0551.jpg
IMG_0552.jpg
IMG_0553.jpg

It was too thick and bulky to form the pretzel I was envisioning, so ultimately it became a circle. Hmmm . . . those ends don’t really want to stay together. Oh dear.

IMG_0554.jpg

Once risen I topped it with sliced almonds and pearl sugar and baked ‘er up.

IMG_0560.JPG

Even though the risen Kringle looked pretty good, my ends did not stay together in the oven. This baby baked into a shape not unlike those leather horse harness collar thingies that you might see on a team of Clydesdales.

IMG_0563.JPG

Not to worry however. This one baked up beautifully with nice flaky layers, delicious flavor and came with the confirmation that I am now an official fan of remonce filling.

IMG_0567.JPG

Quite a project all-in-all. I’m not giving up on this one folks. It’s so important to share the processes, especially the first time around. Remember, if at first you don’t succeed . . . . you know the rest.

More Kringle? You bet! Stay tuned.

Happy baking, stay safe and think of the good days yet to come.

Quadruple chocolate toffee oat bars - a blast from the past

IMG_0543.JPG

This takes me waaaay back to earlier baking days before pastry school had even become a glimmer in my mind. Perhaps a number of you remember the “365 Ways” cookbook series from the early 90s - many different topics on cooking, baking, soups, pasta, salads, chicken, Chinese, Italian and so much more. It turns out they’re still available through various online sources. Steve and I used to have a number of them but over the years as we moved, downsized etc. we either gave away, sold at garage sales or donated them to libraries. But not this one . . . . .

IMG_0526.jpg

My baking bug had only been strengthening and no way was I going to part with this baby. It was published in the fall of 1993, and, although I don’t recall exactly when I purchased it, over the years I made many of the recipes, making notations on when I made them, how they baked (too flat, too gooey), whether I would bake them again (sometimes a big NO), possible additions or substitutions or adjustments for different pan sizes. NOTE: the book is still available on Amazon for $22.99 hardback.

Most of the dates I logged were from 2001 to 2005, the years of our Rutland, Vermont life during which I was moving away from medicine and definitely toward pastry. It made me so happy to bring baked goods in for monthly staff meetings or into the ER when I had to work the night shift (not my fave), just to see the smiles appear. Now that I think about it, that practice went way back to med school days when I’d bake chocolate chip cookies for my roommates and banana bread to take in to the hospital during clinical rotations. My oh my.

As I now page through the book it’s clear that certain sections caught my eye back then: “In the Chips”, a whole chapter devoted to chocolate chip cookies; “Chocolatey Brownies”; “Golden Brownies”; “Other Squares and Bars”. Below are a couple of well marked pages - note especially the “Unbelievably Almondy Almond Bars” notations - yes indeed!

My how my repertoire has changed.

IMG_0589.jpg

I also found a couple of recipes in the “In Great Shape” section that gave me pause and took me back. These are the kinds of cookies that, once the dough is made, are rolled into ball/crescent/pretzel or what-have-you shapes, sometimes flattened/sometimes not and baked. Both “Almond Chews” and “Chocolate Peanut Butter Cookies” were two goodies that I made a number of times and noted on both recipes that the last date I baked them was 9/29/05 with “last shift!” written in. Oh the memories.

As I think of those ER days and my desire (and need) to leave the medical arena, I want to and must offer a HUGE thanks to all those on the front lines right now - my heart goes out to all of you, your patients, your families and friends.

IMG_0590.jpg

Whew! Enough reminiscing. This quadruple chocolate bar is actually one of the recipes from “In the Chips” entitled “Chocolate Chip Dreams”.

When I was pastry chef at Gracie’s in Providence RI from late 2007 to spring 2010 I used to make a chocolate chip cookie that had ground oats in it. So good. Wouldn’t you know it? For the life of me, I could not find said recipe! But wait - this one seemed like it might be close. I thought I’d share the recipe with you this way - much easier than writing it out step by step. Note the date and my scribbles.

As you’ll see, I baked some cookies first (too flat) but then moved on to the bar form - hence the title of this post.

IMG_0593.jpg

My recipe changes include subbing in whole wheat pastry flour for some of the all purpose; toasting 85 g / 1 cup rolled oats, cooling and grinding them before mixing in with the flour, baking powder and baking soda; adding a heaping tablespoon of malted milk powder to the dry ingredients; using all butter (227 g/ 8 oz); for the granulated sugar I used Morena cane sugar which is slightly coarser and more golden than basic white granulated sugar; and last but not least adding 4 different chocolates at the end. This is just one of the ways I’m clearing out my pantry cupboard - yay!

Hmmmm - how’s this for a future project - milk chocolate malted ice cream? Bring it on.

IMG_0513.JPG

For the chocolate portion of the program I coarsely chopped 113 g / 4 ounces each of Guittard’s lever du soleil wafers (my go to chocolate staple), Valrhona’s Jivara milk chocolate (on hand after buying it on sale at Sur La Table some months ago -it was time), Callebaut white chocolate (purchased over the holidays at the grocery store for what reason?) and then finely grated 28 g / 1 ounce of Montezuma’s 100% chocolate with cocoa nibs that I bought at Trader Joe’s for some cookies before Christmas.

IMG_0522.JPG

Once the dough was put together, my first step was scooping cookie dough balls with my 3/4 ounce (~1.5 tablespoons) cookie scoop and spacing them on a parchment lined sheet pan. Since I wanted a trial first, I did one batch on a 1/4 sheet pan and popped the tray into the freezer while heating the oven to 350ºF.

The remainder of the dough balls went onto a 1/2 sheet pan for the freezer and baking at a later date.

IMG_0527.JPG

Bake 11-13 minutes until golden. I tend to take these kinds of cookies out a little sooner than later so as to preserve some softness and chew to complement a bit of crispy edge.

IMG_0531.JPG

While the cookies were tasty and full of chocolate-y, toffee-caramel-y flavors, I was disappointed in the spread and flatness. Probably due to using all butter rather than butter/shortening combo. But I’m an all butter kinda gal, so there. They simply weren’t like those Gracie’s cookies of yore. Rats Charley Brown - I wish I still had that recipe.

So now what? The following day I took the tray of dough balls out of the freezer and let them thaw. I prepped a 1/4 sheet pan (buttered/parchment-lined/buttered and floured the parchment) and pressed all the dough into it in an even layer. Feeling good.

Bake at 350ºF for 20-30 minutes depending on your oven. The edges will rise and set nicely, the top lovely and golden and be sure when you jiggle the pan a bit that the dough doesn’t still have a bit of subtle slosh to it. Once set, cool on a wire rack then cut and enjoy.

This recipe is oh so much better as a bar than a cookie: chewy edges to die for; dense texture, chock full of chocolate that seems to have become one with the dough; just the right hint of coarse oat-y bits; dark brown and Moreno sugars along with the malted milk powder lend that lovely toffee caramel essence.

So here’s the deal. If making the full recipe, press it into a prepped 9x13 pan which should accommodate things very nicely (remember I had baked some cookies first and then put the rest of the dough into a 1/4 sheet pan which is about 9”x12”).

IMG_0536.JPG

These store well covered in the fridge for some days. Steve and I continue to enjoy them when a mini sweet attack hits us.

Stay home, stay safe and happy baking!

IMG_0537.JPG

Toasted coconut pound cake

IMG_0404.jpg

A can of coconut milk, some unsweetened coconut chips, a lone lime in the fridge, a bottle of rum - how about toasted coconut milk pound cake and some toasted coconut ice cream to go with it? Right-o.

IMG_0584.JPG

Some months ago I had purchased a bag of Trader Joe’s unsweetened coconut chips and felt it was high time to adios that bag from my pantry cupboard. Same for a can of Thai Kitchen’s full fat coconut milk that had been destined for . . . . . hmmm, now what was I going to do with that again?

I searched my recipe files for some basic pound cakes and came up with a recipe that felt just right. I made a few of my own substitutions/additions and was ready to go.

IMG_0384.JPG

Here’s what I came up with. There’s coconut milk in both the cake and the glaze, plus I used the rest of the 13.66 fl. oz. can in my ice cream base. Good show - no leftovers!

Ingredients:
Cake
170 g / 3/4 cup unsalted butter, softened
140 g /scant 3/4 cup packed light or dark brown sugar
185 g /scant 1 cup granulated cane sugar
zest of one lime (or two if you have ‘em!)
3/4 cup full fat unsweetened coconut milk (it separates so open the can and mix it up thoroughly before measuring)
260 g / 2 cups flour (I used 60 g whole wheat pastry flour and 200 g all purpose but you can use just all purpose if you like)
3/4 teaspoon baking powder
1/4 teaspoon salt
1/2 cup shredded unsweetened coconut, toasted and cooled (I used coconut chips and simply crushed them up after toasting and cooling)
4 large eggs at room temperature
1 tablespoon vanilla extract + 1/2 tablespoon rum + 1 teaspoon lime juice

Glaze (optional)
42 g / 3 tablespoons unsalted butter
50 g / 1/4 cup brown sugar (light or dark - you decide)
1/2 teaspoon vanilla extract (plus an optional splash of rum)
1/2 cup unsweetened toasted shredded coconut
2 tablespoons coconut milk

For the cake:
Heat oven to 325ºF. Butter and flour a standard loaf pan (9'“x5”). I used my mom’s longer, narrower Mirro “teacake” pan.
Cream butter, sugars, lime zest on medium high for 2-3 minutes until light and fluffy.
Meanwhile blend flour, baking powder, salt and cooled coconut in a separate bowl.
Add eggs to butter/sugar mixture one at a time, scraping down after each addition.
Add vanilla, rum, lime juice and blend.
Add flour mixture alternating with coconut milk, beginning and ending with flour mixture. Blend just until combined.
Transfer into prepared loaf pan. Bake 1 to 1 1/4 hours until nicely browned and a tester inserted in the center comes out clean.
Cool in the pan for 10-15 minutes then turn out onto a wire rack set over a sheet pan. Top with glaze (if using) and cool completely.

IMG_0389.JPG
IMG_0401.JPG

If making the glaze, place the butter and brown sugar in a saucepan over medium heat until the butter has melted and brown sugar dissolved. Stir in toasted coconut, vanilla and coconut milk, let cool slightly then pour/brush over the still warm cake.

IMG_0402.JPG

Once cooled, slice and enjoy.

IMG_0405.JPG

Our first taste was for an afternoon snack accompanying our coffee time. So good.

My baking goals typically focus on a balance of flavors - subtle yet playing well together. “Some” (hint, hint - Steve) say I’m often too timid with flavor additions but in this case - bam! The moisture, the toasted coconut, the caramel-y-ness from the brown sugar and rum (without being overly rummy) are deelish.

I will admit that not much, if any, lime comes through, but at least I used up the one lonely lime that was crying out to me from the fridge. Next time I won’t even bother since the other ingredients do the trick .

As mentioned I used the remainder of my can of coconut milk to make toasted coconut ice cream, replacing the whole milk in the recipe with coconut milk and infusing the dairy with toasted coconut before making the base. Check out this link for more on that, as well as additional ice cream making fun! Summer here we come.

We had a very quiet Easter Sunday at home with a simple evening meal of grilled chicken salad over greens, a side of Bush’s baked beans and some oven fried potato wedges. And for dessert? Toasted coconut pound cake with luscious, creamy coconut ice cream of course!

Once again - stay home, stay safe and happy baking!

IMG_0585.JPG


Chocolate pistachio swirls

IMG_0342.jpg

Time for more fun with croissant dough! Thinking along the lines of pain au chocolat , how about using the classic chocolate batons in smaller pieces to create a chocolate pistachio swirl? Sure thing!

IMG_0318.jpg

I’ve been using Callebaut’s chocolate baking sticks ever since my Paris internship days at Pascal Pinaud’s pâtisserie on rue Monge in the 5th arr. The box in the shop looked EXACTLY like this and here I am 13 years later still buying the same brand. They’re delicious and hold up well during baking - the only problem is that Steve likes to snitch a couple every day for that oh so needed chocolate fix.

IMG_0319.JPG

I love making petite pain au chocolat with my basic croissant dough. Just the right size for a treat along side one’s morning coffee.

IMG_0132.JPG

For this project I took a slightly different approach. I had a full batch of dough on hand but, since I wanted to bake some straight-up all butter croissants for the freezer (croissant aux amandes here we come!), I used a half batch for those and the other for my choco-pistachio swirls.

I made a pistachio version of crème d’amandes by replacing the almond flour with toasted and ground pistachios. Blend butter and sugar, add in the ground pistachios, blend in egg and a bit of flour and you’re ready.

I prepped my muffin tins by buttering and coating with raw sugar.

IMG_0323.JPG

I spent a few minutes plotting the size to which I wanted to roll the dough out as well as the width of each spiral. Turns out I used 1/3 portions (~1 inch wide pieces) of the chocolate batons to create my spirals.

I planned 9 swirls from a half batch of dough. Roll the dough out to ~ 9 inches wide and ~ 12 inches high. Spread a layer of pistachio cream over the dough and place 4 rows of the 1” baton pieces across the dough, spacing the rows about 3 inches apart as seen below.

IMG_0324.JPG

Cut one inch strips, roll them up and tuck them cut side up in the prepared muffin tins.

IMG_0325.jpg
IMG_0327.jpg
IMG_0328.JPG

Cover the pan lightly with plastic wrap and let the spirals rise about 45 minutes. You should appreciate some poof and greater prominence of the laminations.

About 20-30 minutes before baking heat the oven to 375ºF.

IMG_0330.jpg

Bake approximately 20-25 minutes until golden brown and the pistachio cream is set. I typically bake 10 minutes, rotate my pan and, depending on the degree of browning, I may reduce my oven temp to 350ºF to finish the process.

I find that when baking these in a muffin tin, even when the visible portions of the swirls look nicely browned, once I pop them out of the pan there can still be paleness to the sides and bottoms. If so, I transfer the swirls (OUT of the tin) onto a parchment lined sheet pan and put them back in the oven at 325ºF for another 5-10 minutes to finish off the baking and have a nicely golden end result. It’s a bit more fuss but it does the trick.

Another way to approach this is to use buttered 80 mm open rings instead of a muffin tin or simply space the pastries an inch and a half or so apart on a parchment lined sheet pan and bake them unfettered by any type of form. They’ll probably unfurl a bit as they expand but will be “held” by their neighbors.

IMG_0333.JPG

Once cooled (or even when still a bit warm!) enjoy with a fresh cup of coffee or your favorite tea. No fancy plated shot here - just go for it!

Flaky, buttery, pistachio-y with just the right balance of chocolate. Good and good for ya as Steve loves to say!

Stay home and happy baking! We’ll get through this yet folks.

IMG_0339.JPG

Orange olive oil cake

IMG_0377.JPG

My baking focus during these self isolation/shelter-in-place days has revolved around ingredients on hand that I’d like to use up or at least pare down - white whole wheat flour, whole wheat pastry flour, potato flour, semolina, rolled oats, coconut milk, coconut chips, a lime, rum, almond paste, dried cranberries, sesame seeds, chocolate batons, oranges/zest just to name a few.

So far I’ve made chocolate pistachio swirls (stay tuned), coconut pound cake with coconut ice cream (coming up soon), Danish dough destined for almond Kringle (I’ll write about that too), chocolate chunk cookies (whole wheat pastry flour), white whole wheat sandwich bread, cranberry-walnut whole grain bread & rolls (oats, whole wheat flour, sesame seeds), potato dinner rolls (potato flour) and pizza dough (white whole wheat, semolina). Who knows what else I’ll be getting myself into.

Boy oh boy. We, our neighbors and our freezer are all the better for it!

On to the task at hand. Some months ago I purchased Food52’s “Genius Desserts” - chock full of tempting treats, wonderful inspiration and so many recipes to try. This orange olive oil cake is one of them. Credited to NYC restaurant Maialino, part of the Union Square Hospitality Group owned by Danny Meyer (now hit hard by COVID-19 like so many others), the cake was developed by a former pastry chef there, Rachel Binder. The link I’ve given you takes you to the current recipe for said cake by the present pastry chef, Geoffrey Koo - very much like the one printed in “Genius Desserts” with a few tweaks in ingredient portions.

Described as having “a crackling crust” and a center that is close to pudding-like, it’s an easy one to put together. Buuuuutttt . . . . . first let’s take a quick detour.

IMG_0481.JPG

I’ve been meaning to tell you about a local business here in Grand Rapids. It’s called Long Road Distillers and boy do they make some good stuff. They’ve got award winning spirits and plenty of inventive cocktails (usually available at their retail/restaurant space until the current crisis), but we particularly enjoy their amaro and liqueurs. We even took several bottles to the UK as hostess gifts last fall.

They’re available from a number of wine and spirits vendors around town, plus Long Road is offering online ordering/pickup now as well. And to top it all off we recently learned that they’re now contributing to the COVID fight and making hand sanitizer - how cool is that??!!

The Michigan fruit liqueurs are great in Swiss meringue butter cream and basic crème pâtissiére, or joined with vanilla extract in fruity cakes or blended into crème d’amandes for a baked almond fruit tart or cherry-berry version of croissant aux amandes.

The Amaro Pazzo (pazzo means crazy in Italian) is a wonderful coffee essence’d digestif made with Madcap Coffee, another local GR company. And the green walnut Nocino is superb. Hmmm . . . . how about those in buttercream too? Add it to the to-do list!

Time for cake.

IMG_0379.JPG

The recipe calls for Grand Marnier or Cointreau, well known orange liqueurs, but I had neither on hand so decided to use Long Road’s raspberry just because I could.

I’ve been eating a lot of oranges lately and, since I don’t like to waste any citrus, I zest them before sectioning and store the zest packets in my freezer - et voilà, I have orange zest at the ready. Needless to say I have a LOT of orange zest on hand.

IMG_0362.JPG

I’m giving you the recipe as presented in “Genius Desserts” but you can also click on the Maialino link above for the current recipe.

Heat your oven to 350ºF. Butter a 9-inch round, 2-inch deep cake pan, and line the bottom with a round of parchment.

Do your mise and have a medium bowl and a medium-large one on hand. You’ll blend dry ingredients in one and wet in the other.

Dry: In a medium bowl blend 260 g / 2 cups all purpose flour (feel free to sub in 50-60 g or so as whole wheat pastry flour); 350 g / 1.75 cups sugar; 1 1/2 teaspoons kosher salt; 1/2 teaspoon baking soda; 1/2 teaspoon baking powder.

Wet: In a medium-large bowl blend 285 g / 1.33 cups extra virgin olive oil; 300 g / 1.25 cups whole milk; 3 large eggs; 1.5-2 tablespoons orange zest (the more the merrier I always say); 60 g / 1/4 cup freshly squeezed OJ; 1/4 cup liqueur such as Grand Marnier or Cointreau - I used Long Road’s raspberry liqueuer instead.

IMG_0363.jpg

Now blend the dry ingredients into the wet, and scrape into the prepared pan.

Note: My springform seemed a tad askew (I’ve had it a long time), and I could see light coming through along one of the bottom edges. Since this is a pretty wet batter, I wrapped foil around the outside of my pan to insure against leakage. It worked.

IMG_0366.jpg

Bake about an hour until the top is golden, the center set and you have a dry or few crumb-ed tester poked in the middle. I baked mine 10-15 minutes longer than suggested since I could still see a bit of gooey-ness in the top cracks until finally I achieved the tester result I wanted. Moist is good, gooey and under baked isn’t.

IMG_0369.JPG

Cool in the pan about 20-30 minutes then un-mold and cool completely.

Once sliced, the moist nearly pudding like center is clearly appreciated, making one harbor some concern as to whether it baked long enough. But do not fear - all is well.

IMG_0374.JPG

For our initial taste test, I sliced a couple of thin portions to try au naturel. With a tender yet dense crumb, the olive oil and lovely hint of orange offer a completely different experience than a basic butter-made cake. The flavor is hard to describe - at first one questions its uniqueness, but then it starts to grow on you and becomes almost ethereal.

Next I accompanied it with lightly sweetened whipped cream and some fresh berries. What a delicious combo! I must admit that the raspberry liqueur didn’t provide that particular essence to the cake but that’s OK. Come to think of it, I could have drizzled some over the berries and cream!! Duh. Next time.

Of course Steve and I have to ask ourselves “what are we going to do with all of this?”. Well, as it turns out, we were experiencing a particularly beautiful day and some of our neighbors had social distanced themselves into lawn chairs out in the street. At another appropriate distance we set up a small table and brought out a tray of individual servings of cake with berries and cream for all to enjoy. Each person could approach safely, pick up their own and head back to their chair. What a great way to share!

As always, stay home, stay safe, stay healthy.

IMG_0382.JPG


Savory cheesy quick bread

IMG_0314.JPG

This one is thanks to my French teacher here in Grand Rapids, Rita Selles. Even though I have’t taken classes for awhile now, I certainly enjoyed our group sessions, learned a lot and still do my best to practice speaking en Français with myself when I’m out for my daily walks.

A few years back, at the end of our fall session of classes, we all brought something to eat as a mini holiday celebration. Rita provided this savory cake (is it bread or cake?), and I immediately asked her for the recipe. It’s one that you can suit to your own tastes using different veggies and cheese.

I opted for Rita’s suggestion of diced, sautéed zucchini, a vegetable I don’t often use. Truth be told Steve and I are avid broccoli/cauliflower fans pretty much all year long but also rejoice at the fresh green beans, juicy tomatoes and succulent sweet corn that we’re able to acquire at our local Fulton Farmer’s Market each summer.

For my loaf pan I used my mom’s longer/narrower aluminum Mirro brand pan that she’s had for beaucoup years (click the link for Wikipedia’s interesting history of the company, now defunct). I love the shape compared to a standard, wider 8 or 9 inch loaf pan - it reminds me of what might be called a “tea loaf” pan. Now that she’s living in her lovely apartment at Pilgrim Manor, her meals are provided and her baking days are a fond memory for all of us. Those blueberry and apple pies - man oh man! But I digress.

Lightly butter the loaf pan, line with parchment then lightly grease the paper as well. Heat the oven to 400ºF.

For your mise en place weigh/portion out 250 g / scant 2 cups all purpose flour; 8 g / ~1 tablespoon baking powder; 120 ml / 1/2 cup heavy cream; 60 ml / 1/4 cup milk (whole, 2% or !% all work) OR, as in my case, I used whole milk ricotta instead; 3 large eggs; 140 g / 5 ounces cave aged gruyère; one medium zucchini; 1 teaspoon herbes de provence (or herb of choice); pinch of sweet paprika; salt and pepper to taste.

IMG_0290.JPG

Grate the gruyère and set aside. Dice up the zucchini, heat a bit of olive oil in a sauté pan and stir fry it for several minutes to soften and brown it a bit. Let cool.

IMG_0292.jpg
IMG_0296.JPG

Mix the flour, baking powder, paprika, salt, pepper and herbes de provence in a medium bowl. Add the eggs, cream, ricotta and blend then stir in the cheese and zucchini. Pretty straight forward.

IMG_0298.JPG

Transfer the thick batter into the prepared loaf pan and smooth. I grated some extra cheese on top too.

IMG_0300.JPG

Bake for 30-40 minutes until the top is golden and a toothpick comes out clean. Ooooh -eee look at that cheese!

IMG_0303.JPG

I let it cool for 10-15 minutes, then turned it out of the pan onto a wire rack to finish that process.

Once cooled, Steve and I did our requisite taste test - yup it’s good all right!

We enjoyed a few slices with a hearty, bean-y chili that evening. For another meal Steve toasted a couple of slices up, put ‘em in the bottom of a shallow bowl and topped them with another tomato bean concoction with some pieces of grilled pork. Perhaps you don’t know this, but he is THE leftover king of the house!

The bread kept well wrapped for 2-3 days as we nibbled our way through it. Warmed a bit with a schmear of ricotta and some chopped roasted tomatoes for lunch wasn’t too shabby either.

As Rita suggests, try your own version with different sautéed or roasted veggies, add some chopped black olives, take it up a notch with some crisp bacon bits or sub in your favorite grating cheese. How about some toasted and chopped nuts like pecans or pistachios? I’m liking this. I hope you will too.

IMG_0316.JPG

As usual during these times in which we find ourselves, stay safe, be well and enjoy the simple things. And remember - spring is coming!

IMG_0415.JPG

Sablés au parmesan et pecan

IMG_0211.JPG

Cheese and nuts - mmmm, mmmm good!

Here’s the question: how about the real deal Parmagiano-Reggiano from The Cheese Lady along with toasty pecans combined in a luscious shortbread cookie, one of my favorite baked treats? A big YES from this corner of the planet.

parmreg.jpg

Over the years I’ve made the occasional savory shortbread, a couple of my favorites being honey herbes de provence and nutty rosemary. Such wonderful marriages of sweet, salty and herby all rolled into one. So when I was presented with another savory take on the buttery, crumbly cookie I love so much, I had to give it a go.

This one comes from La Cuisine de Mercotte , a blog I was first made aware of several years ago thanks to Parisian friend Valerie, a classmate of mine (and a translating life saver in the practical kitchen!) during the basic pastry course at Le Cordon Bleu back in 2006. Val, an engineer by profession, had previously lived in Las Vegas for 5 years and speaks English like an American, so I was often able to turn to her for language assistance during those early days of incomprehension.

The blog is orchestrated/written by Jacqueline Mercorelli, (a.k.a. Mercotte) a well known French food critic, blogger and gastronome. Full of recipes, tips and techniques, it’s available in English too!

IMG_0214.JPG

This Mercotte shortbread recipe calls for parmesan and black garlic, something I didn’t even know existed. Since I didn’t have that particular ingredient, why not use pecans instead!

Nothing fancy or difficult about this one folks. Make the dough, divide and log it up, wrap/chill then slice and bake when you’re ready. I had planned on baking these for a March 20th appetizer event, but since that was canceled due to the current health crisis, the logs went into the freezer to be baked at a later date. They’ll keep a good 3-4 months.

IMG_0411.jpg

Get started by doing your mise en place: 160 g / 11.5 tablespoons unsalted butter, cubed and softened; 250 g / scant 2 cups all purpose flour; large pinch of salt and fresh ground pepper to taste; 150 g / 5.2 ounces grated Parmagiano-Reggiano; 60 g / ~1/4 cup lightly toasted pecans, cooled and finely chopped; have on hand a splash of heavy cream and 2 teaspoons of water..

Once you have everything ready to go (don’t forget to grate that cheese and toast/cool/chop those nuts!), place the butter, flour, salt and pepper in the bowl of a stand mixer fitted with the paddle attachment. Blend on low, adding the parmesan and pecans soon after and continuing to blend.

As the dough becomes more crumbly, stop the mixer, pick up a handful and see if it holds together. If still pretty crumbly, add a splash of heavy cream and 2 teaspoons of water. Continue to blend for a minute or two and test again. The dough should hold together. NOTE: after making this dough a couple of times, going forward I plan to routinely use the cream and water - it works!

Divide the dough into four portions and form each into a compact log about one inch in diameter (or a bit larger if you’d like) and about 7-8 inches long. Wrap snugly in plastic wrap and chill for several hours or overnight. Remember you can freeze them too!

The recipe yields about 65 cookies, depending on the diameter you choose.

When ready to bake, heat the oven to 400ºF. Line a half sheet pan (or two if baking all the dough in one go) with parchment paper. Slice the log(s) into 1 cm slices and place on the prepared sheet(s).

Bake 8-10 minutes until golden brown. Cool and enjoy.

Set out your own appetizer platter with toasted nuts, assorted cheeses and jams to go along with these buttery gems. I think you’ll like them!

Stay safe, shelter in place and be well.

IMG_0210.jpg

Orange pecan crumble pull apart rolls

IMG_0225.JPG

This one is great fun! Add some spices to your favorite sweet roll dough, let it rise, roll it out, spread with an orange zesty sugar/butter filling, cut it into squares and create your own pull-apart shapes. Top it off with a nutty pecan crumble and you’ll be happy you did!

The dough I used is easy to work with, soft and pillowy and quite delicious. The yield is either 7 or 9 rolls depending on how many squares of dough you use per roll to create your version (as you’ll see coming up). Note - the images below show ingredients and steps for my base recipe test batch with a 9 roll yield.

IMG_0158.jpg

Base recipe: put 120 ml / 1/2 cup whole milk in a microwaveable container (a 2 cup Pyrex measurer works well here), heat just to boiling then add 56 g / 2 ounces cubed, unsalted butter to the milk. Stir to melt the butter and let the mixture cool to tepid ( ~105ºF).

Now add 1 lightly beaten large egg and 1 tablespoon vanilla extract to the milk/butter mixture and keep it on standby.

In the bowl of a stand mixer combine 130 g / 1 cup all purpose flour, 130 g / 1 cup bread flour, 50 g / 1/4 cup packed light brown sugar, 5 g active dry or instant yeast, 1/2 teaspoon kosher salt, 1/2 teaspoon ground coriander, 1/4 teaspoon ground ginger, a pinch (or more to taste) of cinnamon and, in my case, I threw in some vanilla powder that I had made by grinding down and sifting some dried vanilla beans. Even though there’s vanilla extract in the dough, I figured a dash or two of the powder would only enhance the flavor.

Stir in the milk mixture and mix with either the paddle or a large spatula or wooden spoon until combined.

Fit the mixer with the dough hook and knead on low speed for about 6-7 minutes until smooth and elastic. Or knead by hand for about 12-14 minutes.

Place the dough in a lightly buttered bowl . . . .

IMG_0163.JPG

cover with plastic wrap and let rise for anywhere from 45 minutes to a couple of hours depending on the ambience of your room. You’re looking for about double in size.

IMG_0164.jpg

While the dough is rising make the filling by blending 66 g / 1/3 cup sugar, 2 tablespoons orange zest, 1/4 teaspoon kosher salt and 42 g / 3 tablespoons soft unsalted butter.

IMG_0165.jpg

For this test batch I wasn’t sure what pan/form would be best for what I had in mind, so I did some comparisons with standard muffin tin, individual cake pan and panettone paper.

Turn the dough out onto a lightly floured surface, gently de-gas then roll it out to a 9”x9” square. Spread the filling over it then cut into thirty-six 1.5” squares.

IMG_0167.JPG
IMG_0168.jpg
IMG_0169.JPG

Stack 4 squares together (for a yield of nine rolls) and tuck ‘em into buttered and sugared pans (FYI - no need to butter and sugar the panettone paper).

IMG_0170.jpg

Cover loosely with plastic wrap and let them rise for about an hour. About 30 minutes before you plan to bake, heat the oven to 375ºF.

Top with pecan crumble before baking.

Note: for the crumble combine 60 g all purpose flour, 60 g sugar and 60 g cold, diced butter. Sand the butter into the dry ingredients to achieve coarse crumbs and add in anywhere from 30 - 60 g toasted, then chopped pecans, depending on how nutty you like your topping. I usually double or triple any crumble I make so I can stash the rest in the freezer for another time. Nothing like planning ahead.

IMG_0176.jpg

Bake from 20-25 minutes until golden brown.

Each form yielded a slightly different end result. Not being rigid, the panettone paper roll skewed into an oblong pull apart, while the individual cake pan held the dough nicely in place.

IMG_0186.jpg

The standard muffin tin, being more shallow than the cake pan, allowed for more rising and flaring out of the dough, kind of like one of those wide curved balloon-y kind of kites that billow out into a big, rippled rectangle.

IMG_0191.jpg

Once out of the pan, they almost pulled themselves apart!

IMG_0190.JPG

The taste test received a big thumbs up from both Steve and myself, and I knew I wanted to make these again.

This time I doubled the dough batch (here’s the recipe PDF) and rolled out each HALF of the dough into the 9”x9” square, spread on the filling and cut the thirty-six 1.5” squares. NOTE: I found it easier to work with the 9” square portions then a full double batch of dough.

I had done a bit of calculating and decided to use 5 pieces for each pull apart (for a yield of 7 rolls per dough half or a total of 14), arranging them more as a flower than a rectangular stack. I buttered and sugared my individual cake pans and tucked the pieces in an overlapping, rough swirl fashion. Having a couple of extra squares of dough, I tucked those in where they seemed to be most needed.

Since I own only 12 of the aluminum Fat Daddio cake pans (which I LOVE!), I used 2 ramekins to fill the bill.

IMG_0207.JPG

After the rise they also received the pecan crumble top . . . .

IMG_0219.JPG

and baked up like a dream.

IMG_0221.jpg

After 5-10 minutes of cool time I gently loosened the edges with an offset spatula and popped them out onto a wire rack to finish cooling.

IMG_0225.JPG

Boy are these babies good! I made these as part of a pastry assortment for a neighbor’s Saturday morning gathering, and the followup reports were A+. Steve and I enjoyed some of the extras, plus a few went into the freezer for later. They kept well for a day or two in a covered container and were even better with a few minutes warm up in a 325º oven.

Love that pull-apart feature! I’m already planning another round soon.

In the meantime Steve and I are wishing everyone calm days and peaceful nights as we continue to try to understand what’s happening in our world day by day.

IMG_0227.JPG

Saint Angel tart

IMG_0201.jpg

Along the lines of the tarte au fromage blanc that I made during the summer of 2018 as part of my baking with cheese series, this Claudia Fleming inspired tart is reminiscent of a soufflé, using a pastry cream base to which is added triple crème cheese and a lightly whipped meringue. Yum!

In preparation for this project I returned to our favorite cheese shop, The Cheese Lady, here in Grand Rapids. Steve and I never turn down an opportunity to drop by to chat, taste and buy (and they sell some great wines to boot). Love it!

After tasting a few triple crème options I went for Saint Angel, a creamy cow’s milk cheese from the D’Affinois group. It has a lovely, slightly nutty taste with just a hint of salt - perfect for a tart just like this one.

IMG_0181.JPG

I used my favorite pâte sucrée d’amandes with the addition of ~ 60 g of toasted and coarsely chopped hazelnuts (following Claudia’s lead) for the crust. Below is the lined tart ring before blind baking.

By the way, the base dough recipe makes enough for two 9-inch tarts so I simply wrapped and froze the portion I didn’t use. Nothing wrong with that!

IMG_0182.jpg

The tart shell can be blind baked at 325ºF and set aside for several hours before filling or even frozen a few days ahead to give your project a jump start before the day you wish to serve it.

With your blind baked shell at the ready, heat your oven to 350ºF.

For the filling I prepared a HALF recipe of my basic crème pâtissière using 3 large eggs, divided - yolks for the crème and whites placed into the bowl of a stand mixer and set aside. Once the crème has cooked and thickened, blend in 283 g/10 ounces Saint Angel cheese (rind removed and cut into pieces), then strain into a large bowl and set aside.

IMG_0193.jpg

Using the whisk attachment, whip the 3 egg whites on medium-low speed until foamy then slowly shower in 150 g/3/4 cup granulated cane sugar. Once all of the sugar is added, whip on high speed until medium stiff peaks form.

Gently fold a third of the beaten whites into the triple crème mixture, then fold that mixture back into the remaining meringue in two additions.

IMG_0195.jpg

Transfer the filling into the baked tart shell . . . .

IMG_0196.jpg

and bake for 20-25 minutes until puffed and golden.

IMG_0200.JPG

You can certainly plan to serve this soon after baking, yet knowing full well that it would collapse, I opted for letting it do just that, cool down and then give it a try.

Delicious, light, creamy, a hint of salt and a sublime taste treat indeed.

IMG_0203.jpg

Thinking about accompaniments to a good triple crème cheese, I tried a dollop of cherry jam on top - not bad although Steve wasn’t a big fan. Otherwise toasted nuts, a drizzle of honey, roasted fruits/fruit compotes, berry sauces or coulis would be deelish too! Give it your own spin.

Good news! The tart held up well in the fridge (covered) for the next couple of days. Hurray!

Here’s to everyones health, safety and getting through the uncertainties in today’s world. Take care all of you.

Apple pie tart

IMG_0032.JPG

It’s a pie! No wait, it’s a tart! What?? Frankly, it kinda looks like some kind of coral reef creature.

For a recent supper at cousin Jen’s, I was in the mood to make something apple. Besides that, I had sprung for a bottle of boiled cider from King Arthur Flour and was so ready to try it out. It’s made in Springfield VT, a state which Steve and I called home for nearly 12 very enjoyable years.

IMG_0022.JPG

If you’re a regular reader of this blog, you’ve most likely realized by now that I LOVE reading baking and pastry books, comparing recipes and techniques and continuing to gain knowledge about this craft. They give me much pleasure and inspiration to boot! Some of my faves are FOOD 52’s “Genius Desserts” and anything by Rose Levy Beranbaum. They are chock full to overflowing with cool stuff.

As I approached this apple project I reviewed apple pie recipes (again!) from “Tartine”, “Art of the Pie”, “The Baking Bible” as well as “Genuis Desserts”. GD’s is essentially a review of RLB’s recipe for fruit pies, creating a filling with concentrated flavor by cooking down the juices. I’m IN!

In my fall 2018 post on a couple of apple/pear/berry tarts, I followed Tartine’s method of cooking the apples in butter and sugar first then draining off the liquid and cooking that down. They were deelish! The Genius Desserts/Rose LB approach is a bit different - macerating but not cooking the fruit, then reducing down the drained off liquid to a lovely caramel.

Here goes! This go-around I used a combo of Granny Smith and Jonagolds. Years ago I used to think peeling and coring apples was such a chore, but it’s amazing how one can get into a rhythm and actually make a bit of sport out of it, racing against the clock to see how fast you might finish. It’s so satisfying!

IMG_4383.jpg

Once the 2.5 pounds of apples for a 9-inch tart are peeled and cored, slice them up into ~1/4 inch slices and toss them in a large bowl with 50 g light brown sugar (or dark if you prefer), 50 g granulated sugar, a tablespoon freshly squeezed lemon juice, 1/4 teaspoon fine sea salt, some freshly grated nutmeg and 1/2 teaspoon cinnamon. Cover and allow to sit a room temperature for at least 30 minutes and up to three hours to juice ‘em up.

In the meantime take your favorite pâte brisée, roll it out about 1/8” thick and line your chosen tart pan or pie plate. I chose an open 220 mm tart ring this time, and since I planned a lattice top I made sure I had a 2-crust quantity of dough on hand. Cover the dough with plastic wrap and hold in the fridge until ready to fill.

IMG_0018.JPG

I rolled out the dough for my lattice as well, cut my strips and held them in the fridge until ready for final assembly. I thought I’d be creative and cut curvy pieces, but, when it came time to create my lattice, the strips didn’t really feel like staying very curvy until I coaxed them into submission. I made the best of it and it worked out just fine and dandy.

IMG_0024.jpg

Ready to finish the filling! Transfer the apple mixture to a colander set over a bowl and let drain to release anywhere from 1/2 - 1 cup liquid. Sounding good already.

Pour the juice into a small saucepan along with 2 tablespoons unsalted butter and bring to a boil. Cook until caramelized and reduced to about 1/3 cup. Then I added a tablespoon or so of boiled cider to intensify the apple flavor.

Transfer the drained apples back into the large bowl and mix them with 1 tablespoon plus 1 teaspoon of cornstarch.

IMG_0026.jpg

Place a baking stone or empty sheet pan on the bottom rack of your oven and heat to to 425ºF.

In the meantime blend the reduced apple caramel liquid into the apples and transfer it all into the lined tart ring. Create the lattice, trim, tuck and crimp or flute the edges. Brush with milk and sprinkle with raw sugar. Hold in the freezer while the oven heats.

IMG_0029.jpg

Bake approximately 50-55 minutes. If your crust edges are browning too quickly, place an aluminum foil ring over them. Watch for bubbling juices and tender fruit when poked with a small, sharp knife. My pie-tart baked about an hour before I was happy with the bubbles and texture. Looking pretty tasty!

IMG_0031.JPG

One problem with this baby is that a small section of the crust bottom and edge seemed to collect a lot of juice and didn’t bake through. It was also an interesting challenge to get it out of the tart ring. I ended up cutting a cardboard round slightly smaller in diameter, slid it under the pie/tart and lifted it up and out of the ring. Whew. Maybe a solid pie plate or lovely fluted ceramic pie dish next time, eh?

No matter - it was delicious, the boiled cider adding just the right tang and deep apple flavor. A classic, particularly topped with a scoop of vanilla ice cream.

IMG_0033.JPG

Always remember - there’s more than one way to skin a cat!

Now can’t you just imagine the hint of spring just around the corner? It won’t be long folks. Happy baking!

Rye buns

IMG_4527.jpg

These buns are a true delight! Based on a recipe from “Brontë at Home: baking from the Scandi Kitchen” by Brontë Aurell, they come together like a dream, are great for any type of sandwich, have a lightness about them yet are sturdy enough to hold up to the juiciest grilled burger (which Steve’s tend to be!).

We’ve discovered that they’re great with most any sandwich you can dream up - one of our favorites is thinly sliced dried beef from our local Kingma’s market (no not the stuff you buy in packages in the cold meat section) with crisp lettuce and a schmear of mayo - yum! And a bit of cheddar never hurt either!!

IMG_0120.JPG

Here’s an interesting bit of trivia: in Aurell’s book she mentions these buns are especially good for Biff Lindström. Now what in the world is that I ask? Biff is the Swedish word for beef and, as it turns out, there’s a Swedish specialty named after one Henrik Lindström, a prominent industrialist back in the 1800s. It’s a fried burger made with ground beef, egg, onion, pickled beetroot and a bit of its juice, capers, seasonings (salt and pepper) and optional chopped chives. Hmmm . . . . not being a beet fan, I’m not sure I’ll go for that one, but you might like it - you never know!

Even though they’re called rye buns and contain dark rye flour, these buns have only the teensiest hint of rye flavor. That’s neither good nor bad, just a simple observation.

For this project I used Bob’s Red Mill, a line of wonderful flours readily available at local markets around here. While I’m a big fan of King Arthur Flour’s range of products and can buy the standards (i.e. all purpose, bread, whole wheat, white whole wheat, self rising and even the sprouted wheat) at the grocery store, their specialty flours have to be ordered from the company which obviously requires some planning ahead. Cue Bob’s - yes!

IMG_0039.JPG

The range of rye flours available go from white/light rye, medium rye, dark rye and pumpernickel. Here’s a great overview of rye from King Arthur Flour. Since rye flour doesn’t contain as much gluten as its wheat flour counterparts, for a better rise and lighter texture it’s best to combine it with all purpose. Using all rye flour makes for a dense loaf, plus the larger percentage of rye you use in your bread, the slower the rise.

No matter - this recipe works. You can accomplish it in a morning or afternoon and have fresh buns for supper. What’s not to like. Here’s the link to the recipe in PDF form.

I use instant yeast as my go to dried yeast. It doesn’t require jump starting in tepid liquid like active dry does, however, if you’re proceeding with the recipe to complete that day, it’s doesn’t hurt to give the instant yeast a little bath in the warm liquid - gets it going just a tad faster.

IMG_0063.jpg

In the bowl of a stand mixer fitted with the dough hook, mix 10 g / ~3 teaspoons instant yeast with 160 ml (2/3 cup) EACH of tepid water and whole milk. Let stand 10-15 minutes to become frothy. Add 50 g (1/4 cup) light brown sugar and mix until dissolved.

Have 200 g (1.5 cups) dark rye flour and 390 g (3 cups) of white bread flour at the ready, as well as 1.5 teaspoons salt, 1 large egg, 84 g (6 tablespoons) softened unsalted butter.

On low speed add the rye flour to the yeast/milk mixture along with the salt, then the egg and butter. Increase speed to medium low and start adding the bread flour. You may not need all of it. Continue to mix for about 5 minutes.

IMG_0068.jpg

You’re looking for a slightly sticky dough that’s pulling away from the sides of the bowl. FYI - I did end up using all of the bread flour.

IMG_0064.jpg

Place dough in a lightly oiled bowl, cover with plastic wrap and let rise in a warm place about an hour until doubled.

Before the first rise

Before the first rise

After the rise

After the rise

Turn the dough out on a lightly floured work surface, gently knead to form a log that you will then divide into your chosen sizes.

IMG_0079.jpg

Note: the recipe yield will vary depending on the size you wish to make. For example, if making 9 buns (as the base recipe suggests), each one comes in at a hefty 122 g (4.25 ounces) which is a bit too generous methinks. For my first batch I chose 85 g (3 ounces) which gave me a yield of 13 buns, but since Mr. Steve prefers his burger buns a little larger, my second go-around yielded 11 buns at ~100g each.

Into the slider thing? Make them even smaller!

IMG_0080.jpg
IMG_0082.jpg

Shape each piece into a nice boule, place on a parchment lined sheet pan, cover with a damp towel or a lightly oiled piece of plastic wrap and give them a second rise for about 1/2 hour.

Meanwhile heat your oven to 350ºF. Brush lightly with egg wash and sprinkle sesame seeds (white or black or both) on top (or any seed mixture you like).

IMG_4524.jpg

Ms. Aurell suggests moisture in the oven during baking. Place the sheet pan of buns onto the middle rack and place a shallow heat proof pan with a cup or so of hot water onto the bottom rack. Bake about 13-15 minutes until golden and sound hollow when tapped on the bottom.

Great buns!!

IMG_4526.jpg

So far we’ve had grilled burgers on these babies twice and a couple of different sandwiches. Definitely a keeper. Give ‘em a try - you won’t be sorry.

IMG_0122.JPG

Happy Valentine's weekend!

IMG_0128.jpg

Take your basic favorite choux paste, pipe it into lovely hearts . . .

IMG_0047.jpg

topped with central smaller hearts of lime scented crunchy dough . . .

fullsizeoutput_256.jpeg

bake ‘em with all the love you can muster . . .

fullsizeoutput_253.jpeg

then top with red fruits Swiss meringue buttercream, a dollop of Chantilly and a fresh raspberry. Enjoy!

Wishing all of you a wonderful weekend and lots of fun creating your own special treats for those you love.

IMG_0128.jpg

Victoria sponge

IMG_4556.jpg

Sur La Table is currently offering a “Great British Baking” class on the winter/early spring calendar and I’m on the docket to teach these British specialties.

In addition to sticky toffee pudding and sausage rolls, the classic Victoria sponge cake is on the menu, so why not trial SLT’s recipe along side another one by British chef Will Torrent - just for fun of course!

Chef Torrent has written a number of books, one of which I purchased a year or so ago. It’s chock full of goodies for one of my most enjoyable past times - afternoon tea. His recipe for Victoria sponge is a tad different due to the replacement of about a quarter of the all purpose flour with cornstarch, the result being a lighter texture.

IMG_4534.jpg

I also reviewed a number of other Victoria sponge recipes and found that some call for self-rising flour (or self-raising as the Brits say) which is a softer flour with baking powder and salt already in the mix. Some call for cake flour, another softer flour without any leavening additions. Many simply use all purpose flour. As always, there’s more than one way to skin a cat!

I’m sure many of you know the substitution if you don’t happen to have cake flour in your pantry - place 2 tablespoons cornstarch in a one cup measure, top it off with all purpose flour to yield one cup. Sift it together and voilà! Cake flour.

The base recipe for Vic-sponge is similar to pound cake: equal weights butter, sugar, and flour, plus eggs (usually a bit less by weight), baking powder, salt and vanilla. Many also have a small amount of milk blended in at the end - some give a specific amount, some a range of anywhere from 1-4 tablespoons (depending on the amount of batter/size of the cake). The milk is intended to “slacken” the mixture making it less stiff for spreading evenly in the pan.

This recipe is for a six inch double layer cake. The batter can be baked in ONE buttered/parchment lined/buttered again/floured pan and then sliced into two layers once cooled OR in TWO prepared six inch-ers which takes out the layer slicing step. Just remember the two shallower layers won’t need quite as long to bake.

Note: double the recipe for an 8” cake, either baked in one pan sliced into two layers or two pans with shallower layers ready to assemble.

IMG_4531.JPG

All ingredients should be at room temperature. The differences between the SLT and Torrent recipes are a tad more baking powder in SLT’s and the replacement of about a quarter of the flour with cornstarch in Torrent’s.

Here you go:

Heat your oven to 350ºF. Butter the bottom of your cake pan(s), place a round of parchment down, butter parchment and sides of pan(s) and dust with flour.

Break 2 large (~ 100 g) eggs into a small bowl and lightly beat them. In the bowl of a stand mixer fitted with the paddle attachment, cream 113 g softened unsalted butter with 113 g granulated sugar on medium high for 3-5 minutes until light and fluffy. Scrape down the bowl. Reduce speed to medium low and add 1 teaspoon vanilla extract (or vanilla bean paste) and the lightly beaten egg in three additions, blending fully and scraping down after each addition. On low speed add 113 g all purpose flour (88 g ap + 25 g cornstarch in Torrent’s version), 1.5 teaspoons baking powder (1 tsp in Torrent’s) and 1/4 teaspoon fine sea salt and mix just until combined.

I like to take my bowl right off the mixer and finish things up by hand with a spatula - it helps to get down into the bottom to be sure everything is blended in. Then fold in 1-2 tablespoons whole milk as needed to slacken the mixture. I went with the smaller quantity and both batters came out with a bit of heft, yet nice and smooth and easy to work with.

IMG_4532.JPG

Transfer batter to the prepared pan and smooth the top . Below is SLT’s - they both looked pretty much the same going into the oven.

IMG_4533.jpg

Bake about 25 minutes until springy to touch in the center and a cake tester comes out clean.

Torrent’s rose into a dome while SLT’s stayed flat with just a bit of a dent in the center. Not to worry.

IMG_4542.JPG

Once cooled, slice into two layers. A little tighter crumb on Torrent’s perhaps.

IMG_4547.jpg

Spread a layer of strawberry (or jam of your choice) on the bottom and then spread a layer of lightly sweetened whipped cream over the jam. Sandwich ‘em up!

IMG_4548.jpg
IMG_4549.JPG

Dust with powdered sugar and you’re good to go!

When slicing you’ll invariably get some cream and jam ooze but it certainly doesn’t affect the flavor. On the right below is Torrent’s more domed version. They both have a nice crumb and golden color.

IMG_4561.jpg

And guess what! They both taste great. What a lovely combo of jam, cream and vanilla cake. Steve and I noted that Torrent’s texture was a bit lighter but not really a huge difference at all.

Store covered in the fridge and enjoy a slice for several days to come. Not bad.

IMG_4562.JPG

Until next time. Stay warm and think spring!

IMG_4555.JPG