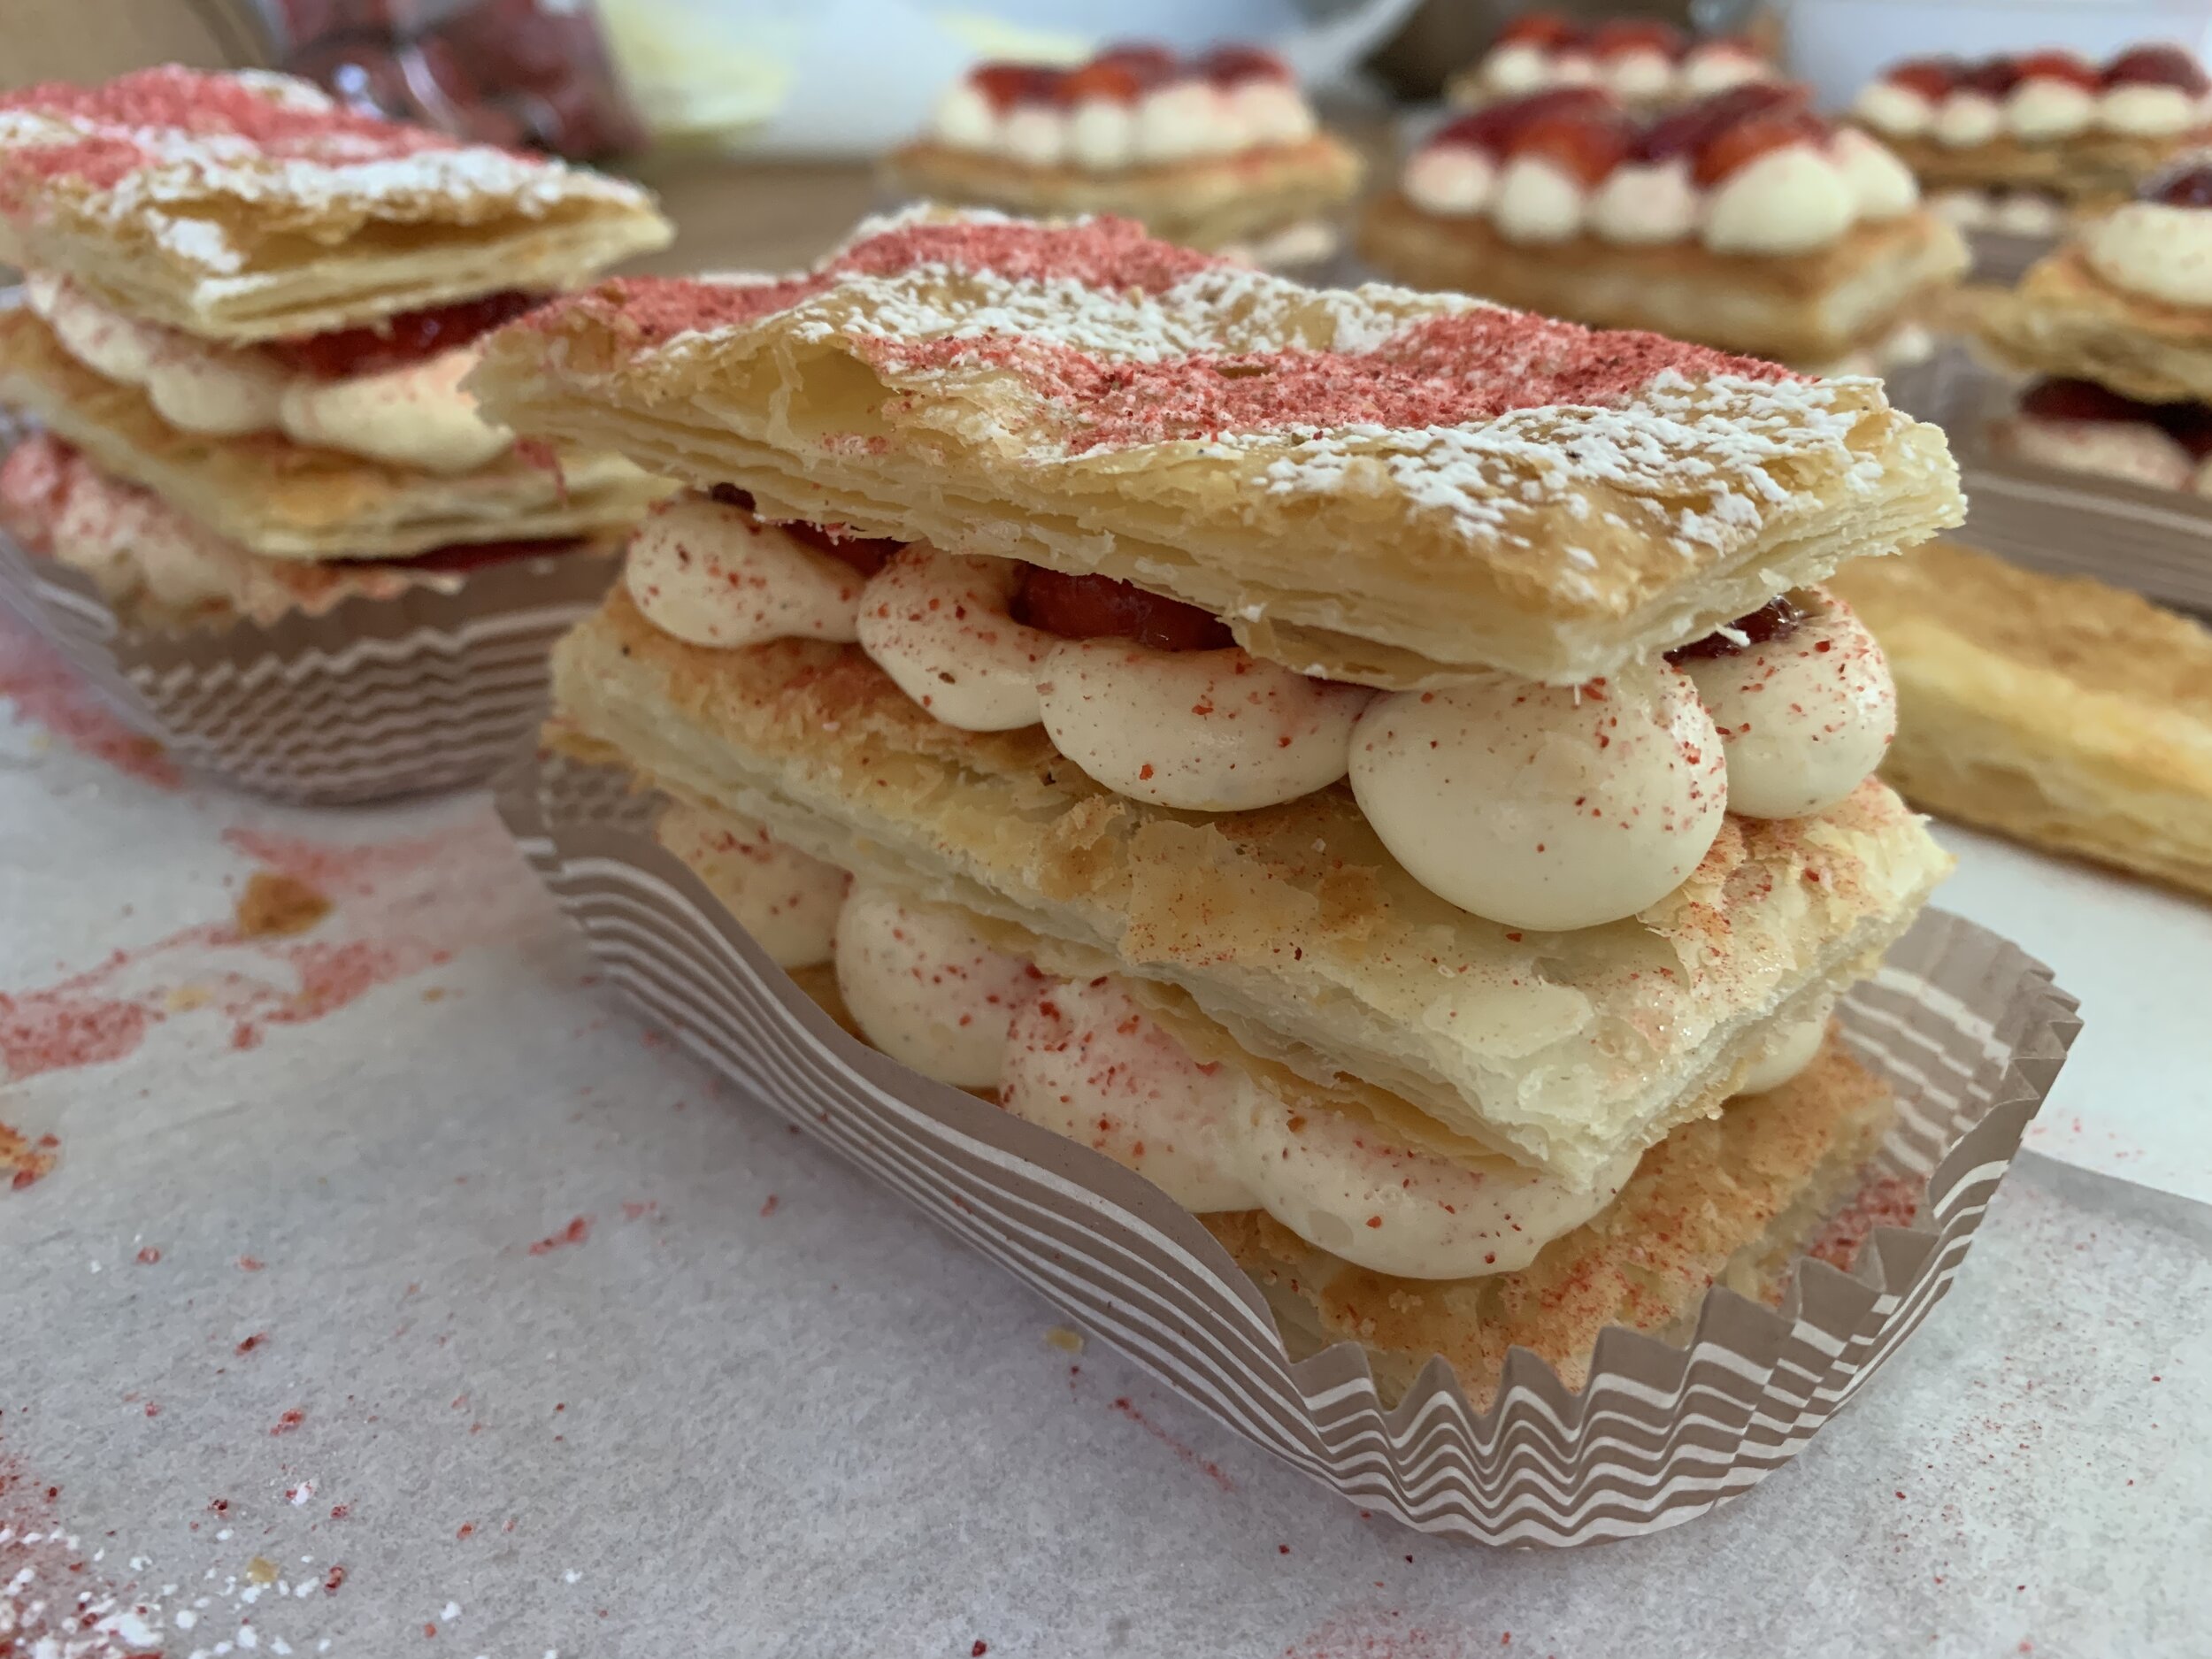
Favorite garnishes part 1: candied nuts

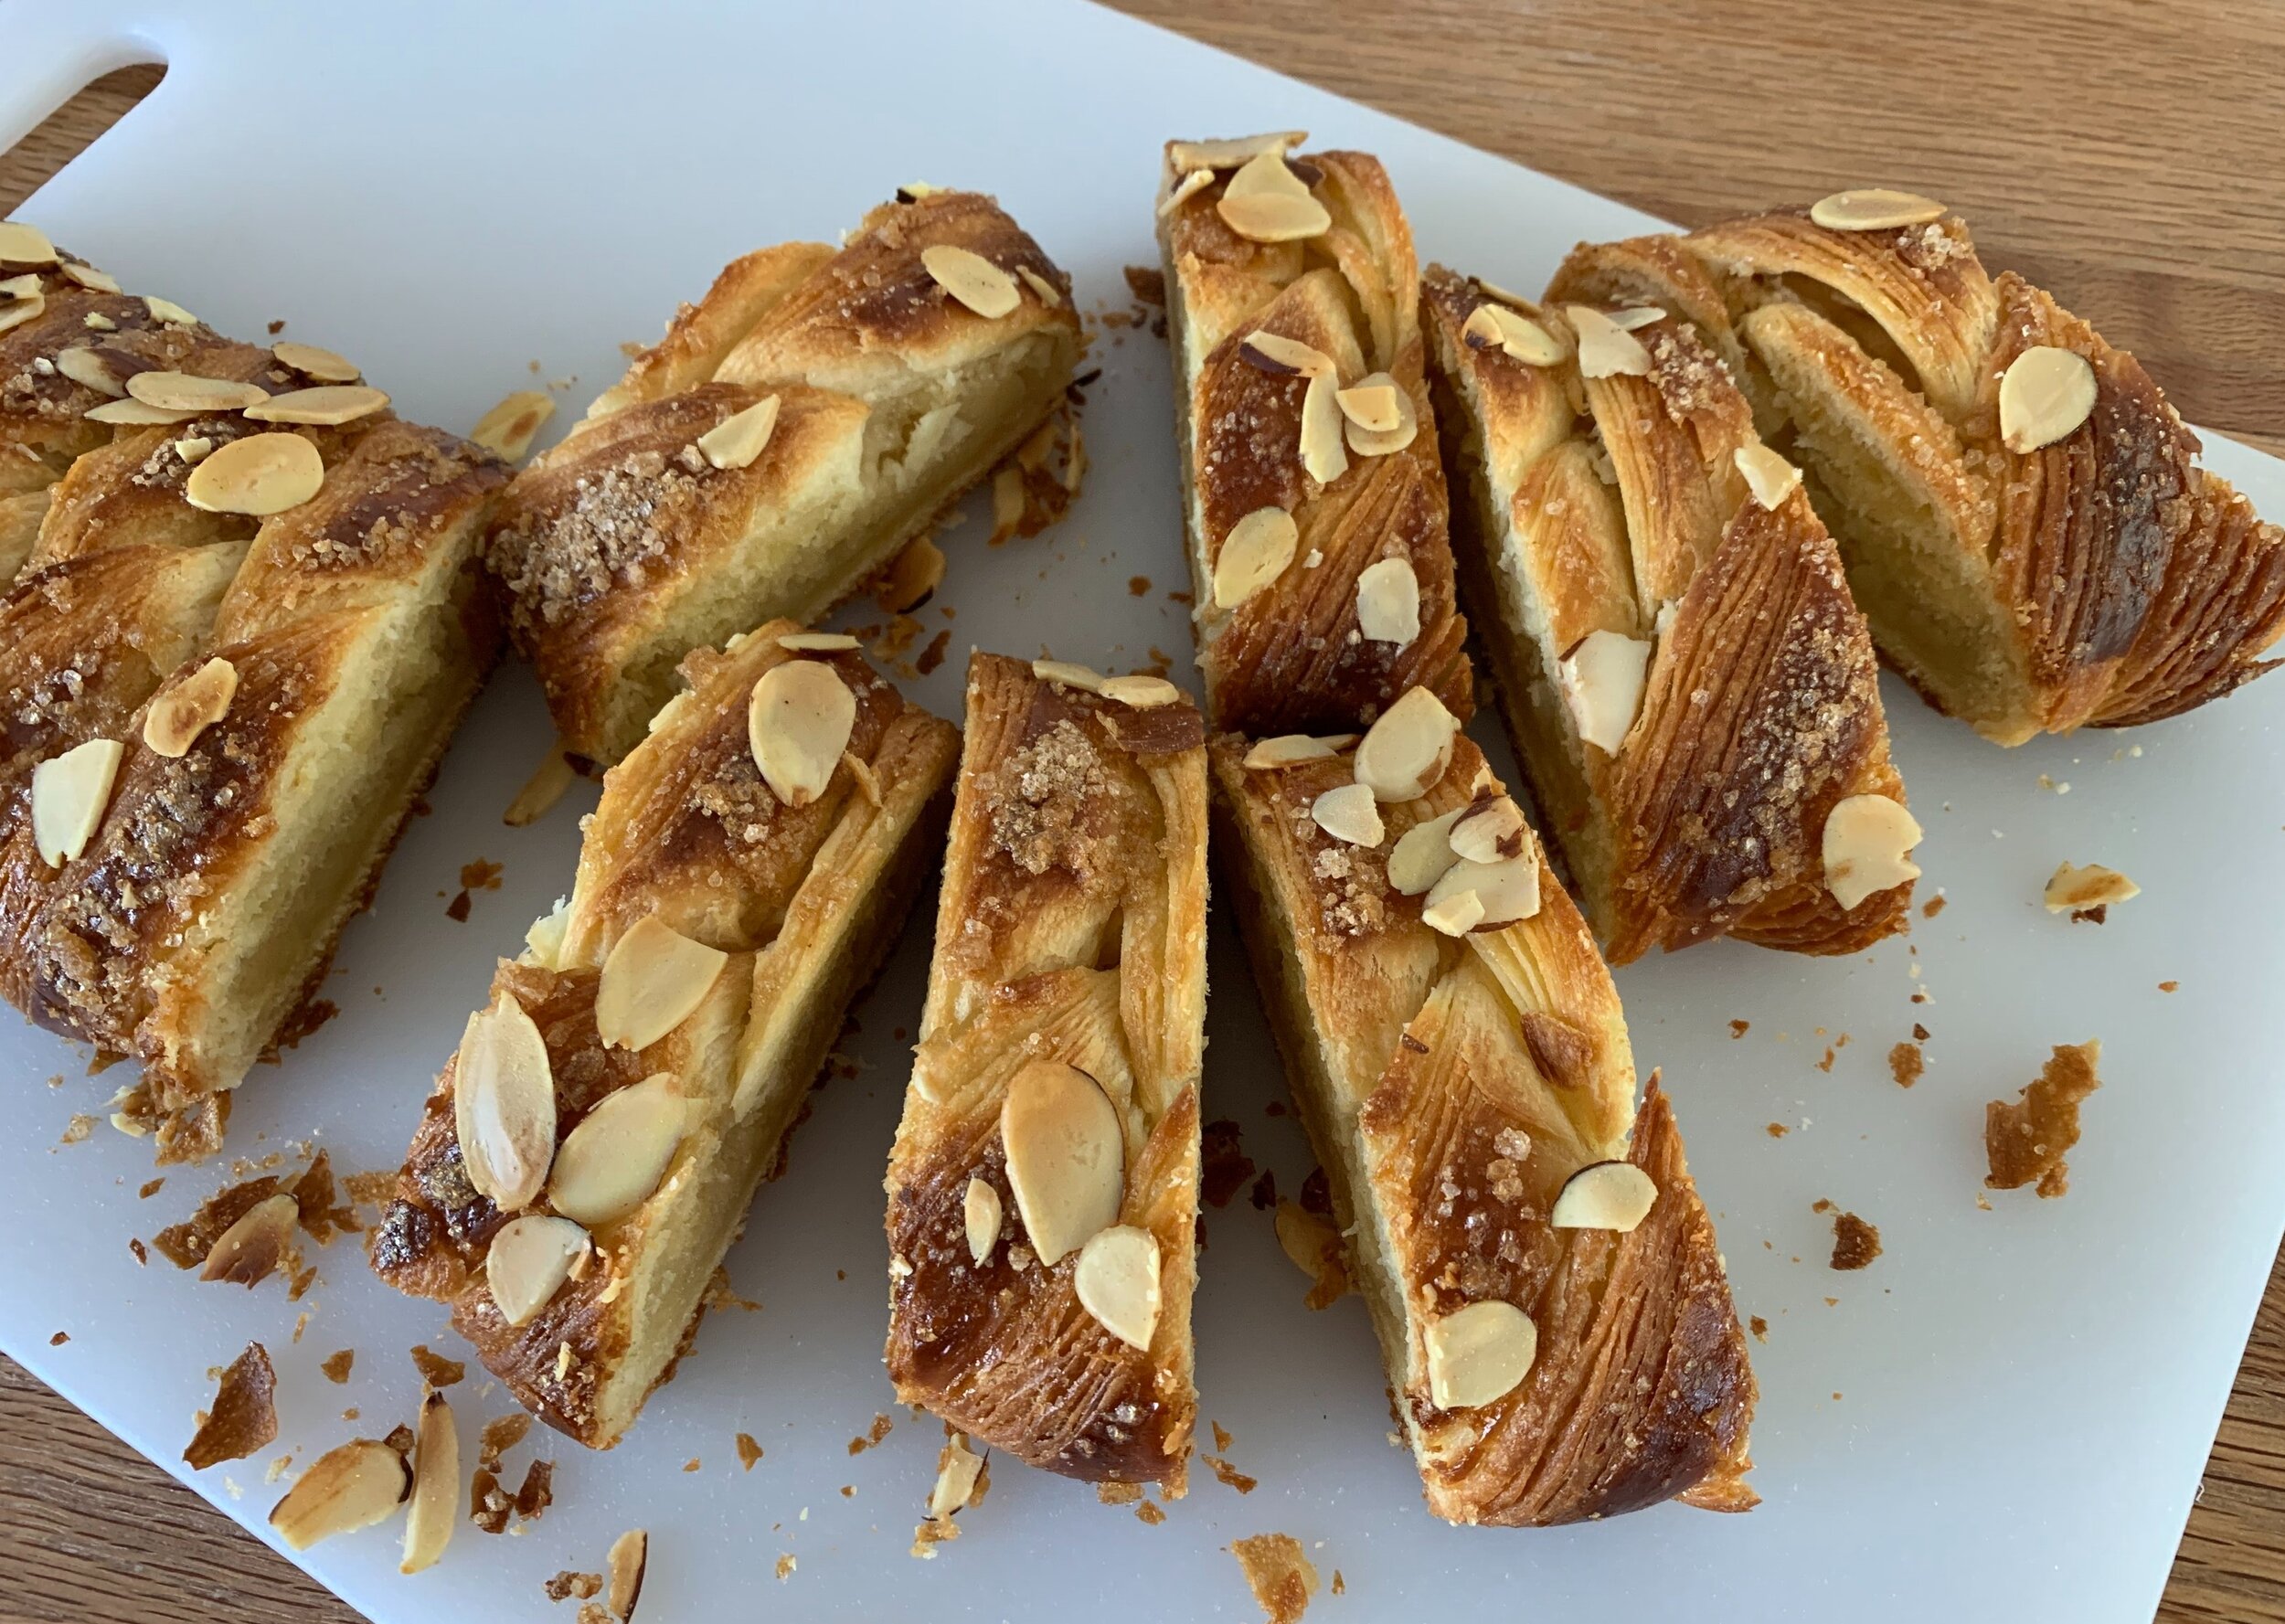
Lightly candied sliced almonds

Lightly candied sliced almonds

Wow! It seems like this one’s been awhile in the making. Let’s just say that life has a way of taking us on a variety of paths and unknowns.

Now let’s talk about garnishes! It’s time to take your pastries and desserts to the next level with . . . . . . . Crunchies!!

Whether you choose cookie crumbs, candied citrus, nutty crumbles, brittles or candied nuts, they’ll all add that extra splash your creations deserve. Use as garnishes on top of ice cream, teacakes, baked fruit and custard desserts or tuck them into creamy layers between your favorite cake slices and you’ll be the happier for it. It’s the little things that make all the difference.

I’ve touched on many of these when writing about different projects over the years, but now I’ve attempted to organize some of my favorites in separate posts so as not to overwhelm with too much info.

Let’s talk nuts. I’ll explain three approaches to candied nuts. Generally you’ll need the stove top and in some cases the oven. I find silicone mats perfect for these projects - no sticking plus easy cleanup.

Start with a clean slate, as it were - use raw, non-salted, non-roasted nuts. I typically have almonds, pecans, walnuts, pistachios and hazelnuts in my larder and, unless I know I’m going to use them within a few weeks, I keep them in the freezer up to six months to preserve freshness.

Here we go. The first approach calls for making a syrup on the stovetop, stirring in your choice of nuts (whole or sliced) and then baking in the oven to crisp things up. Sounds good.

Heat your oven to 350ºF. In a small saucepan stir together 1/4 cup (50 g) sugar, 2 tablespoons water, 1 tablespoon corn syrup and a large pinch of kosher salt. Bring it to a boil over medium heat then remove from the heat and stir in 1.5 cups (~ 200g) of nuts until coated. Then spread the mix out on a parchment or silicone lined 1/2 sheet pan and bake for 5 minutes. Stir them up and bake another 8-10 minutes until golden brown. Let cool and store in an airtight container at room temp. They should last several weeks and are great for garnishing ice cream, custards, crisps, tarts or whatever your little heart desires. Even your morning oatmeal. And they’re not bad all by themselves!!

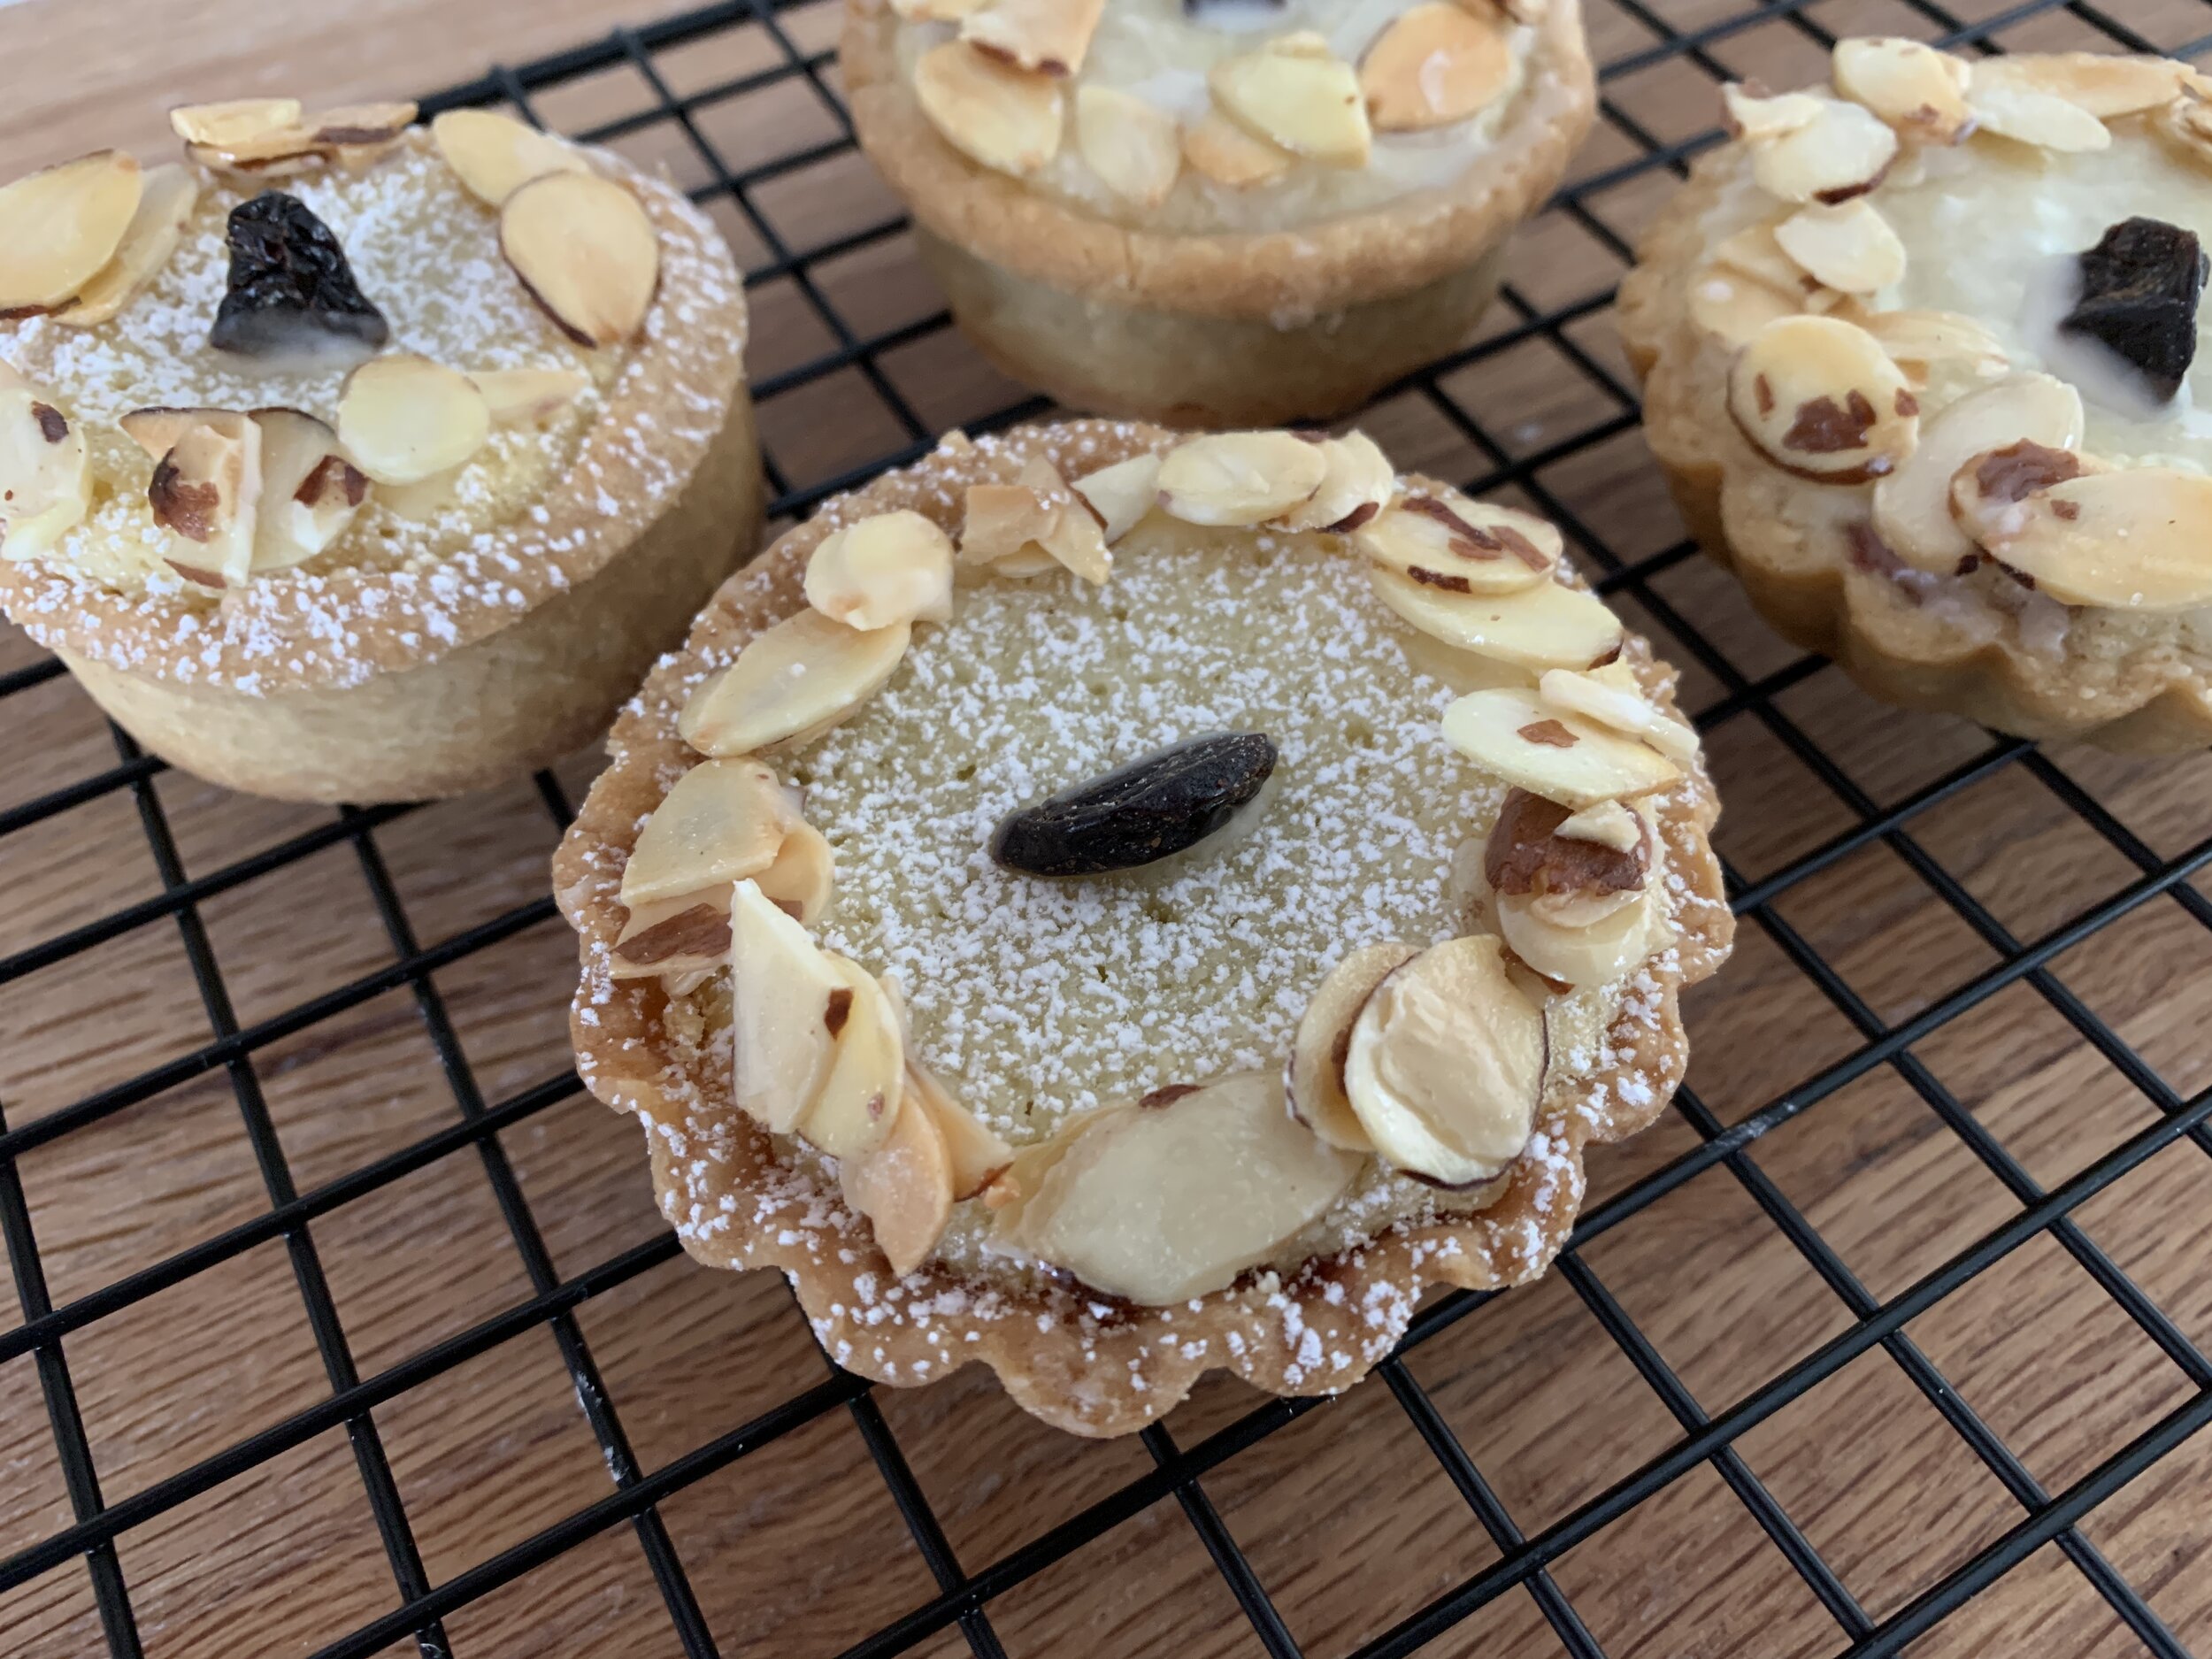
Cherry almond Breton tartelettes with almond crunchies

The next approach (which I refer to as the egg white method) uses a bowl, whisk, rubber or silicone (my preferred) spatula and the oven (no stovetop). I particularly love making pistachios this way, coarsely chopped and blended into my favorite Breton shortbread dough for just the right touch of crunch. Yum.

Halve or double the recipe to suit your needs. Prep note - you’ll be toasting and cooling the nuts first before blending them into the egg white mixture and then back into the oven. You can do the toasting a few days ahead of time and store the nuts at room temperature in a covered container.

Heat the oven to 300 - 325ºF depending on the nuts you’re using (325º for whole almonds, walnuts and hazelnuts; 300º for pecans and pistachios which tend to burn more easily). Spread 2 cups (about 227 g / 8 ounces) of nuts in a single layer on a sheet pan and toast them about 8-10 minutes to bring out the fragrance. Let cool. Keep the oven on at the same temperature at which you toasted the nuts.

If you’re like me and save your egg whites for various purposes, this is just one way to use ‘em. In a medium bowl whisk 1/2 or ~ 16 g (give or take) of a large egg white with about 75 g of granulated sugar and a pinch of salt until the mixture has thickened and looks like a loose meringue. Don’t fret about the egg white - using one large white will simply give you a frothier coating.

NOTE: change things up by using brown sugar instead of white and adding spices like ginger, cardamom, cinnamon or coriander (or a mix!) for a tasty option.

Blend the nuts into the mix and spread out on a parchment lined pan.

Bake 20-30 minutes, stirring every 10 minutes or so until the egg white mixture appears dry and crunchy, coating the nuts. Let cool and store in a covered container at room temperature for a couple of weeks.

Use whole as a teacake topper; coarsely crush/chop as a garnish for your favorite ice cream; pulse them up in a food processor and blend into buttercream for your favorite layered cake or dessert creation.

Cocoa hazelnut teacakes with white chocolate-mascarpone cream

Buttercream anyone?

The last method also involves toasting the nuts first so have your oven ready. The nuts should be warm when blending them into the caramel for which you’ll need a medium-large saucepan. Have a silicone-mat-lined or buttered baking sheet on which to spread the caramelized nuts. This is akin to making brittle (coming up in a future garnishes post) but no baking soda here.

During my schooling at Le Cordon Bleu in Paris and internship at Pâtisserie Pascal Pinaud, we referred to this concoction as nougatine - caramelized nuts, spread out and cooled, then ground up into crunchy goodness for layering the many entremets that the French love to make and eat. Here’s just one entremet example.

I’m making a pistachio nougatine here. I’ve toasted 170 g / 6 oz pistachios and have them waiting warmly on the side. Have a silicon spatula lightly oiled at the ready.

Place 300 g / 1.5 cups granulated sugar and 60 ml / 1/4 cup water in your saucepan on low to dissolve the sugar.

Once the sugar is dissolved turn the heat up to medium high and bring to a boil.

Cook the sugar to a lovely medium amber. The image below is almost there. When I get close, I give it another 30 seconds or so to reach my desired color. Don’t wait too long - you don’t want burned sugar. After you’ve done it a bunch of times, you just know when to snatch it off the heat.

Remove the caramel from the heat and stir in the nuts with the oiled spatula. Scrape out onto the silpat lined sheet pan and spread into a single layer. Don’t hesitate - just do it.

Let cool. Your options now are to break it up into smaller pieces (a mallet is great for this!) as a topping for ice cream or process it to medium fine crumbs and use it as a garnish or layer for your chosen dessert.

Pistachio nougatine

WARNING! Please be careful when breaking this up since edges of caramel can be extremely sharp. Believe me, I’ve been there.

That’s it for now. You have a number of things in your dessert armamentarium that will add just that special touch. Go for it.

Next time - candied citrus . . . . . and more to follow that. All in due time.

On a final note, as noted at the beginning of this post, it’s taken me awhile to get this one finished. Life events tend to trap our attention when we least expect it. The main thing is to stay positive, stay safe and have a wonderful holiday season.

See you next time around!

A last gasp of bittersweet

Late autumn update - the holidays are coming!

In the japanese garden at Meijer gardens

Hi all. It’s still autumn here in West Michigan with the remaining late season colors as striking as ever.

I’ve been baking here and there and working on some holiday ideas. Keeping it simple, think classic shortbread, teacakes and tartes. Pumpkin, pear, chocolate and pecan are a few of the tastes I’m imagining.

I’ve added Earl Grey and espresso nib to the shortbread menu. Choose four flavors for either the 2 dozen or 4 dozen gift boxes. This year I have a new petite box holding 12 cookies (single flavor or choose up to 4 flavors), perfect as hostess gifts or just that perfect little something for teachers, co-workers or as stocking stuffers.

Petite box example

Teacakes are deelish: caramel apple and chocolate ganache are de riguer at the moment and now pumpkin, pear cocoa hazelnut and orange pistachio are on the docket. Hmmmm . . . . . sounds pretty good, don’t you think?

Caramel apple and chocolate ganache teacakes, boxed

Caramel nut tart here we come. If you’e a nut lover like I am and you’ve never experienced this one, now’s the time to give it a try. Chock full of nuts baked in a lovely, not too sweet caramel, it’s like the best nut bar you’ve ever had.

Caramel nut tart sharing size (5.5 inches)

Now’s the time to plan ahead for the holidays. Check out the menu page and contact me if there’s something that looks good.

Happy planning! Stay safe and stay well.

Japanese garden again

Chocolate babka buns

3B564E9B-75EC-46B6-BE88-1E49DA77C0B2_1_201_a.jpeg

These are NOT the prettiest pastry in the case BUT! They are dee-licious. Mmmmmm!!

I was on a mental chocolate bun kick, trying to decide what chocolate-y goodness I might create for “Pastry Friday” at a nearby assisted/independent living facility. Thinking of something twisty or swirled, babka came to mind as the basic idea but this time in individual bun form.

I wrote a series of babka posts during the spring of 2017 but haven’t returned to that particular pastry for awhile now. It’s time.

I had a chocolate babka recipe in my files from Sur La Table teaching days - it was one we never ended up making in class, but I saved it nonetheless. The filling looked very intriguing but different from other filling iterations I’ve seen. The ingredient portions had me wondering so I went to the “trusty” internet to google “best chocolate babka filling”. And what to my wondering eyes did appear? A NYT article/recipe on chocolate babka by Melissa Clark that was EXACTLY the same as this particular SLT version. My oh my, how intriguing is that?

At any rate, I decided to go for it and go for it I did.

The dough is a brioche like number that gets a first rise and then an overnight in the fridge - gotta develop that flavor! Compared to my usual brioche recipe in which I keep ingredients cold, Melissa’s is less enriched with half the milk (slightly warmed), one less egg and about half the butter (egg and butter at room temperature.) Vanilla and nutmeg add some wonderful flavor too.

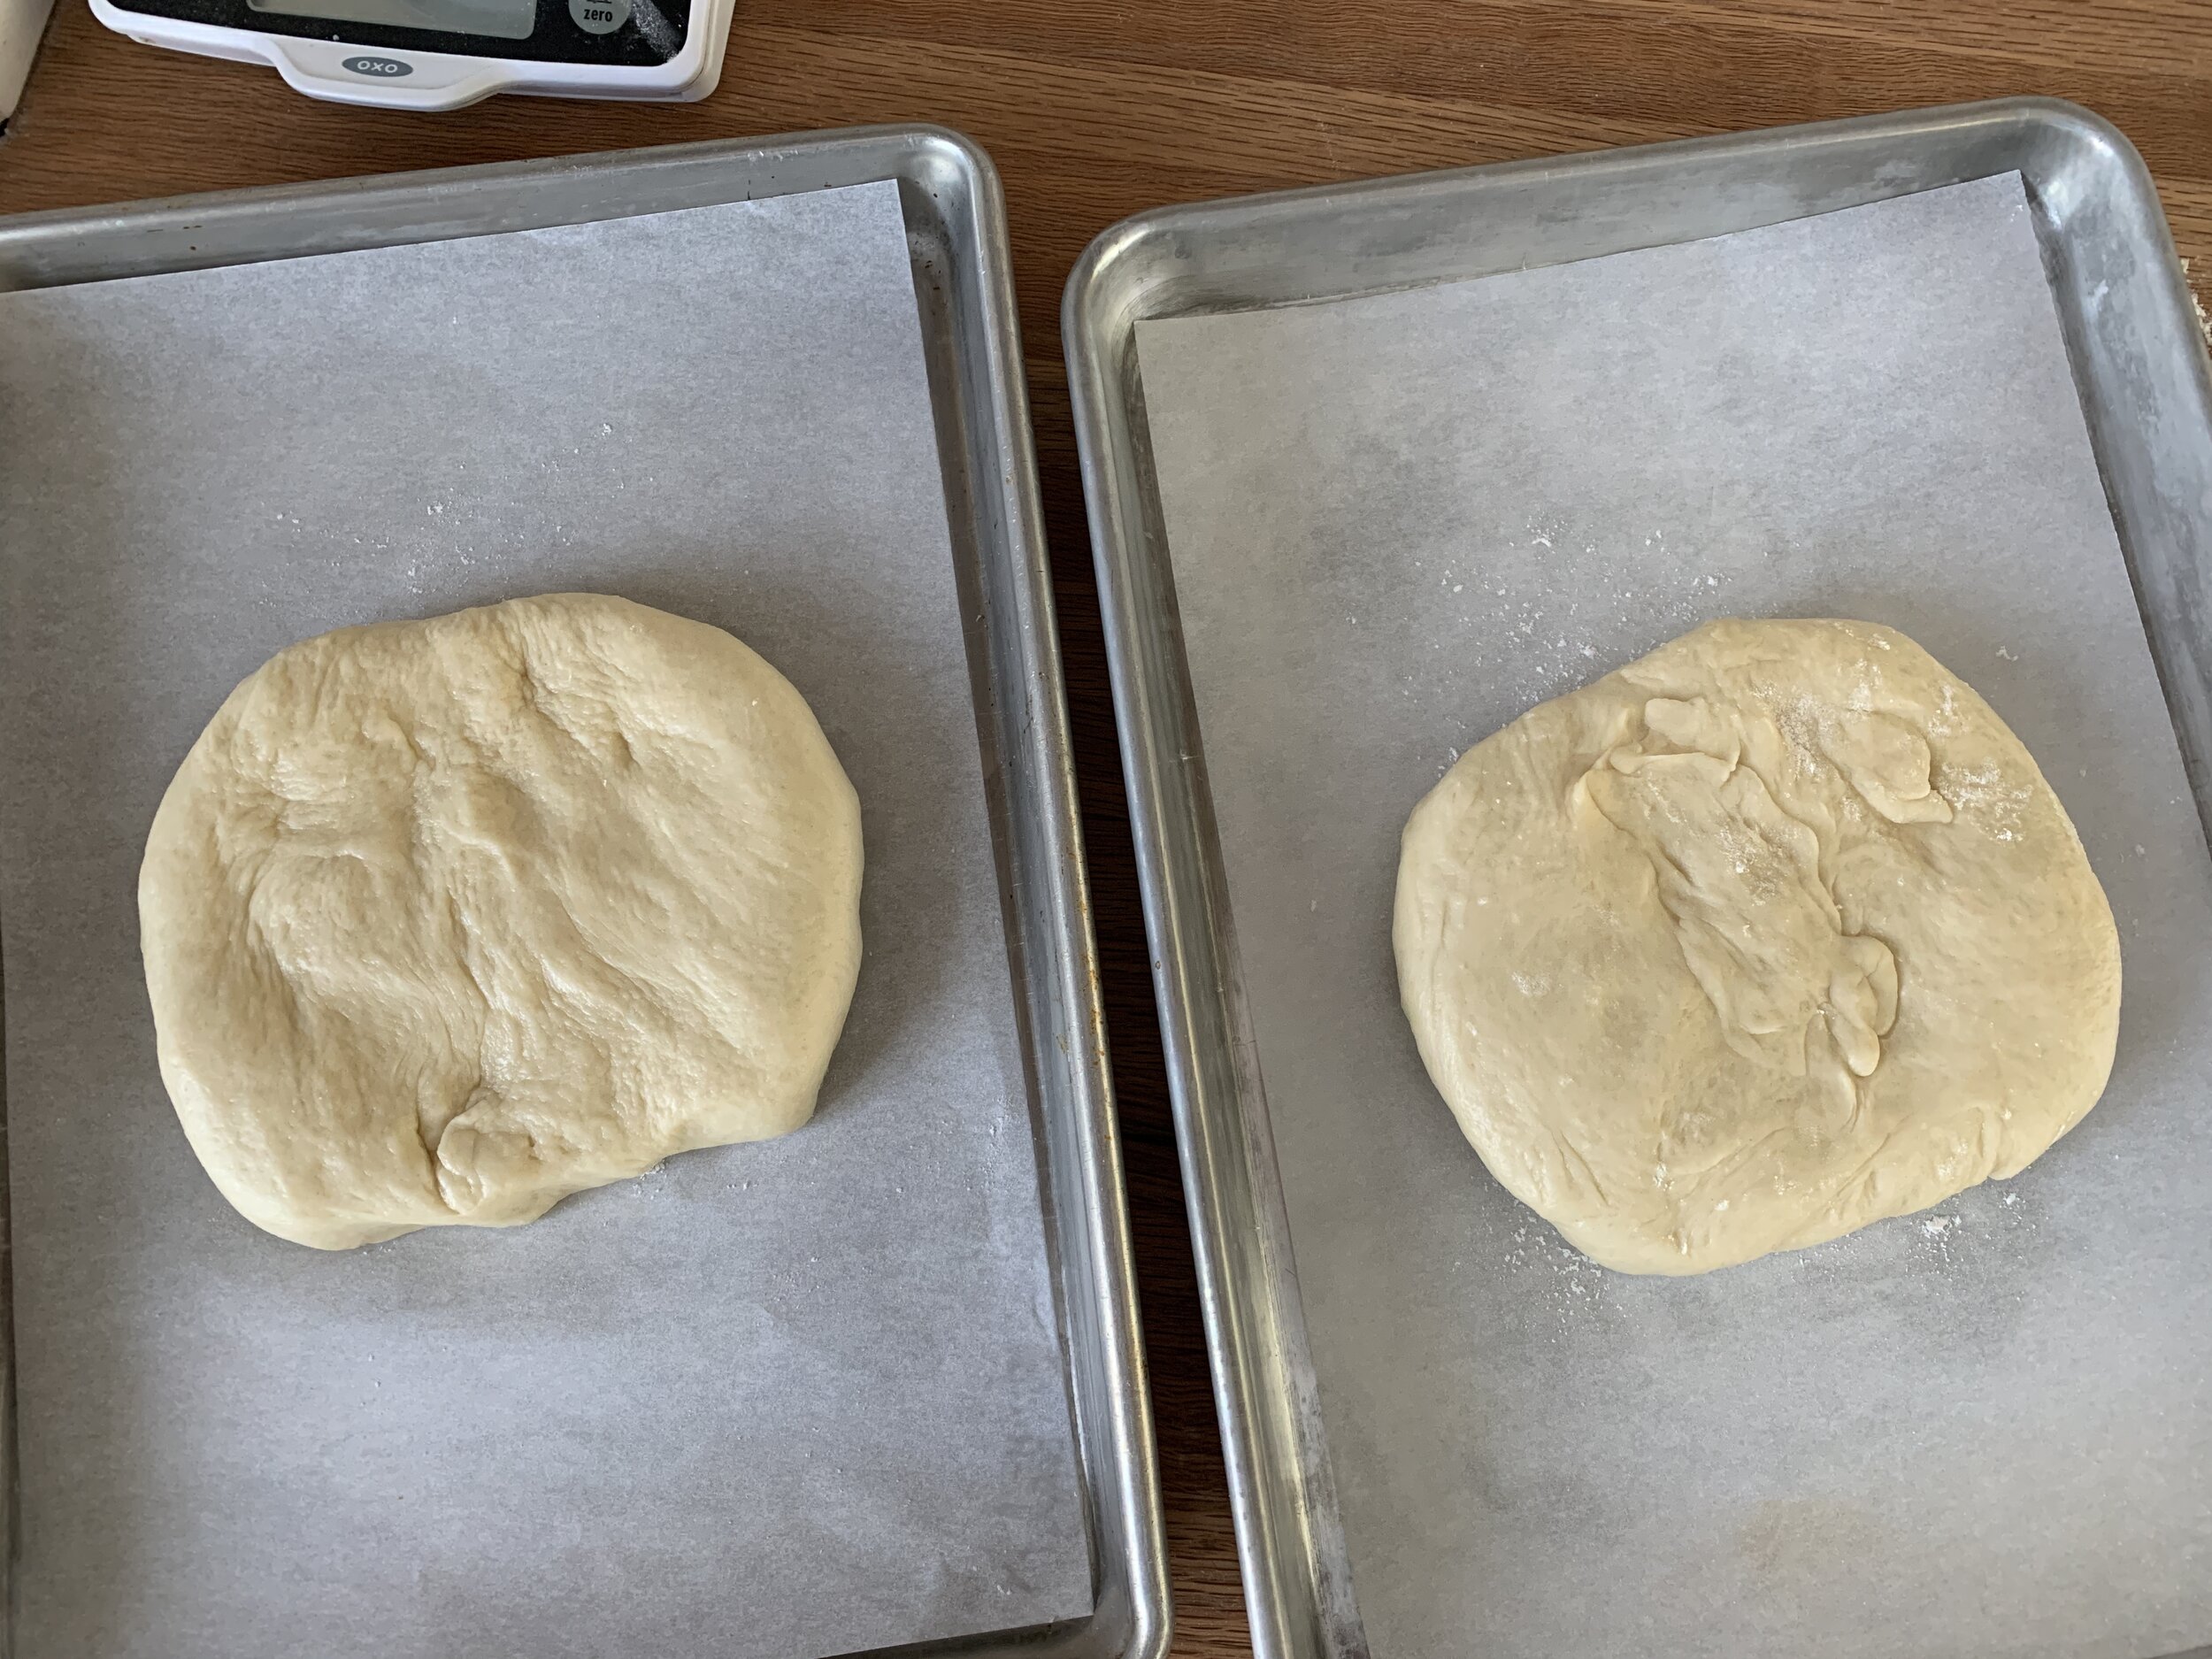
Here’s the dough after initial mixing;

A513BC37-F037-4D25-9B93-C37CF3F182F5_1_201_a.jpeg

and after a 2 hour rise.

43BEF7DB-6207-48A4-A33C-DBCC08485C79_1_201_a.jpeg

Gently deflate, form a ball then wrap and refrigerate overnight.

3F21B2CB-C431-4C9C-9ABE-16A2E407B833_1_201_a.jpeg

There are three more things that have to be prepared for assembly and final garnishing. They can all be prepared the day before and refrigerated, but I found it easiest to do it the day of baking.

The filling is fudge-y and oh so tasty. Make it 30 or 40 minutes ahead of taking the dough out of the fridge, since it has to set up a bit to make it perfectly spreadable. I reduced the sugar in Melissa’s recipe from 100 g to 50 g. Here’s how it goes: medium saucepan; 50 g sugar, 180 ml heavy cream, pinch kosher salt; simmer, stirring on and off for 5 minutes to dissolve sugar; scrape into a bowl and blend in 170 g chopped dark chocolate (66% is nice), 113 g unsalted butter (cubed and at room temp) and 2 teaspoons vanilla extract until smooth; cool to room temp.

The chocolate streusel is for final garnishing just before the bake so you can put that together easily during the proof. Here’s how it goes: stir 60 g all purpose flour (or whole wheat pastry if you have some), 45 g granulated sugar, 11 g cocoa powder (Dutch processed is my go to) and 1/2 teaspoon kosher salt together in a bowl; stir in 64 g melted butter with a fork to form large moist clumps. Melissa adds 50 g mini chocolate chips too but I left those out. Set aside.

Next is a simple syrup that will be brushed on after the bake. Here’s how it goes: combine 2/3 cup granulated sugar with 2/3 cup water in a small saucepan; bring to a simmer and simmer a few minutes to dissolve the sugar. Set aside.

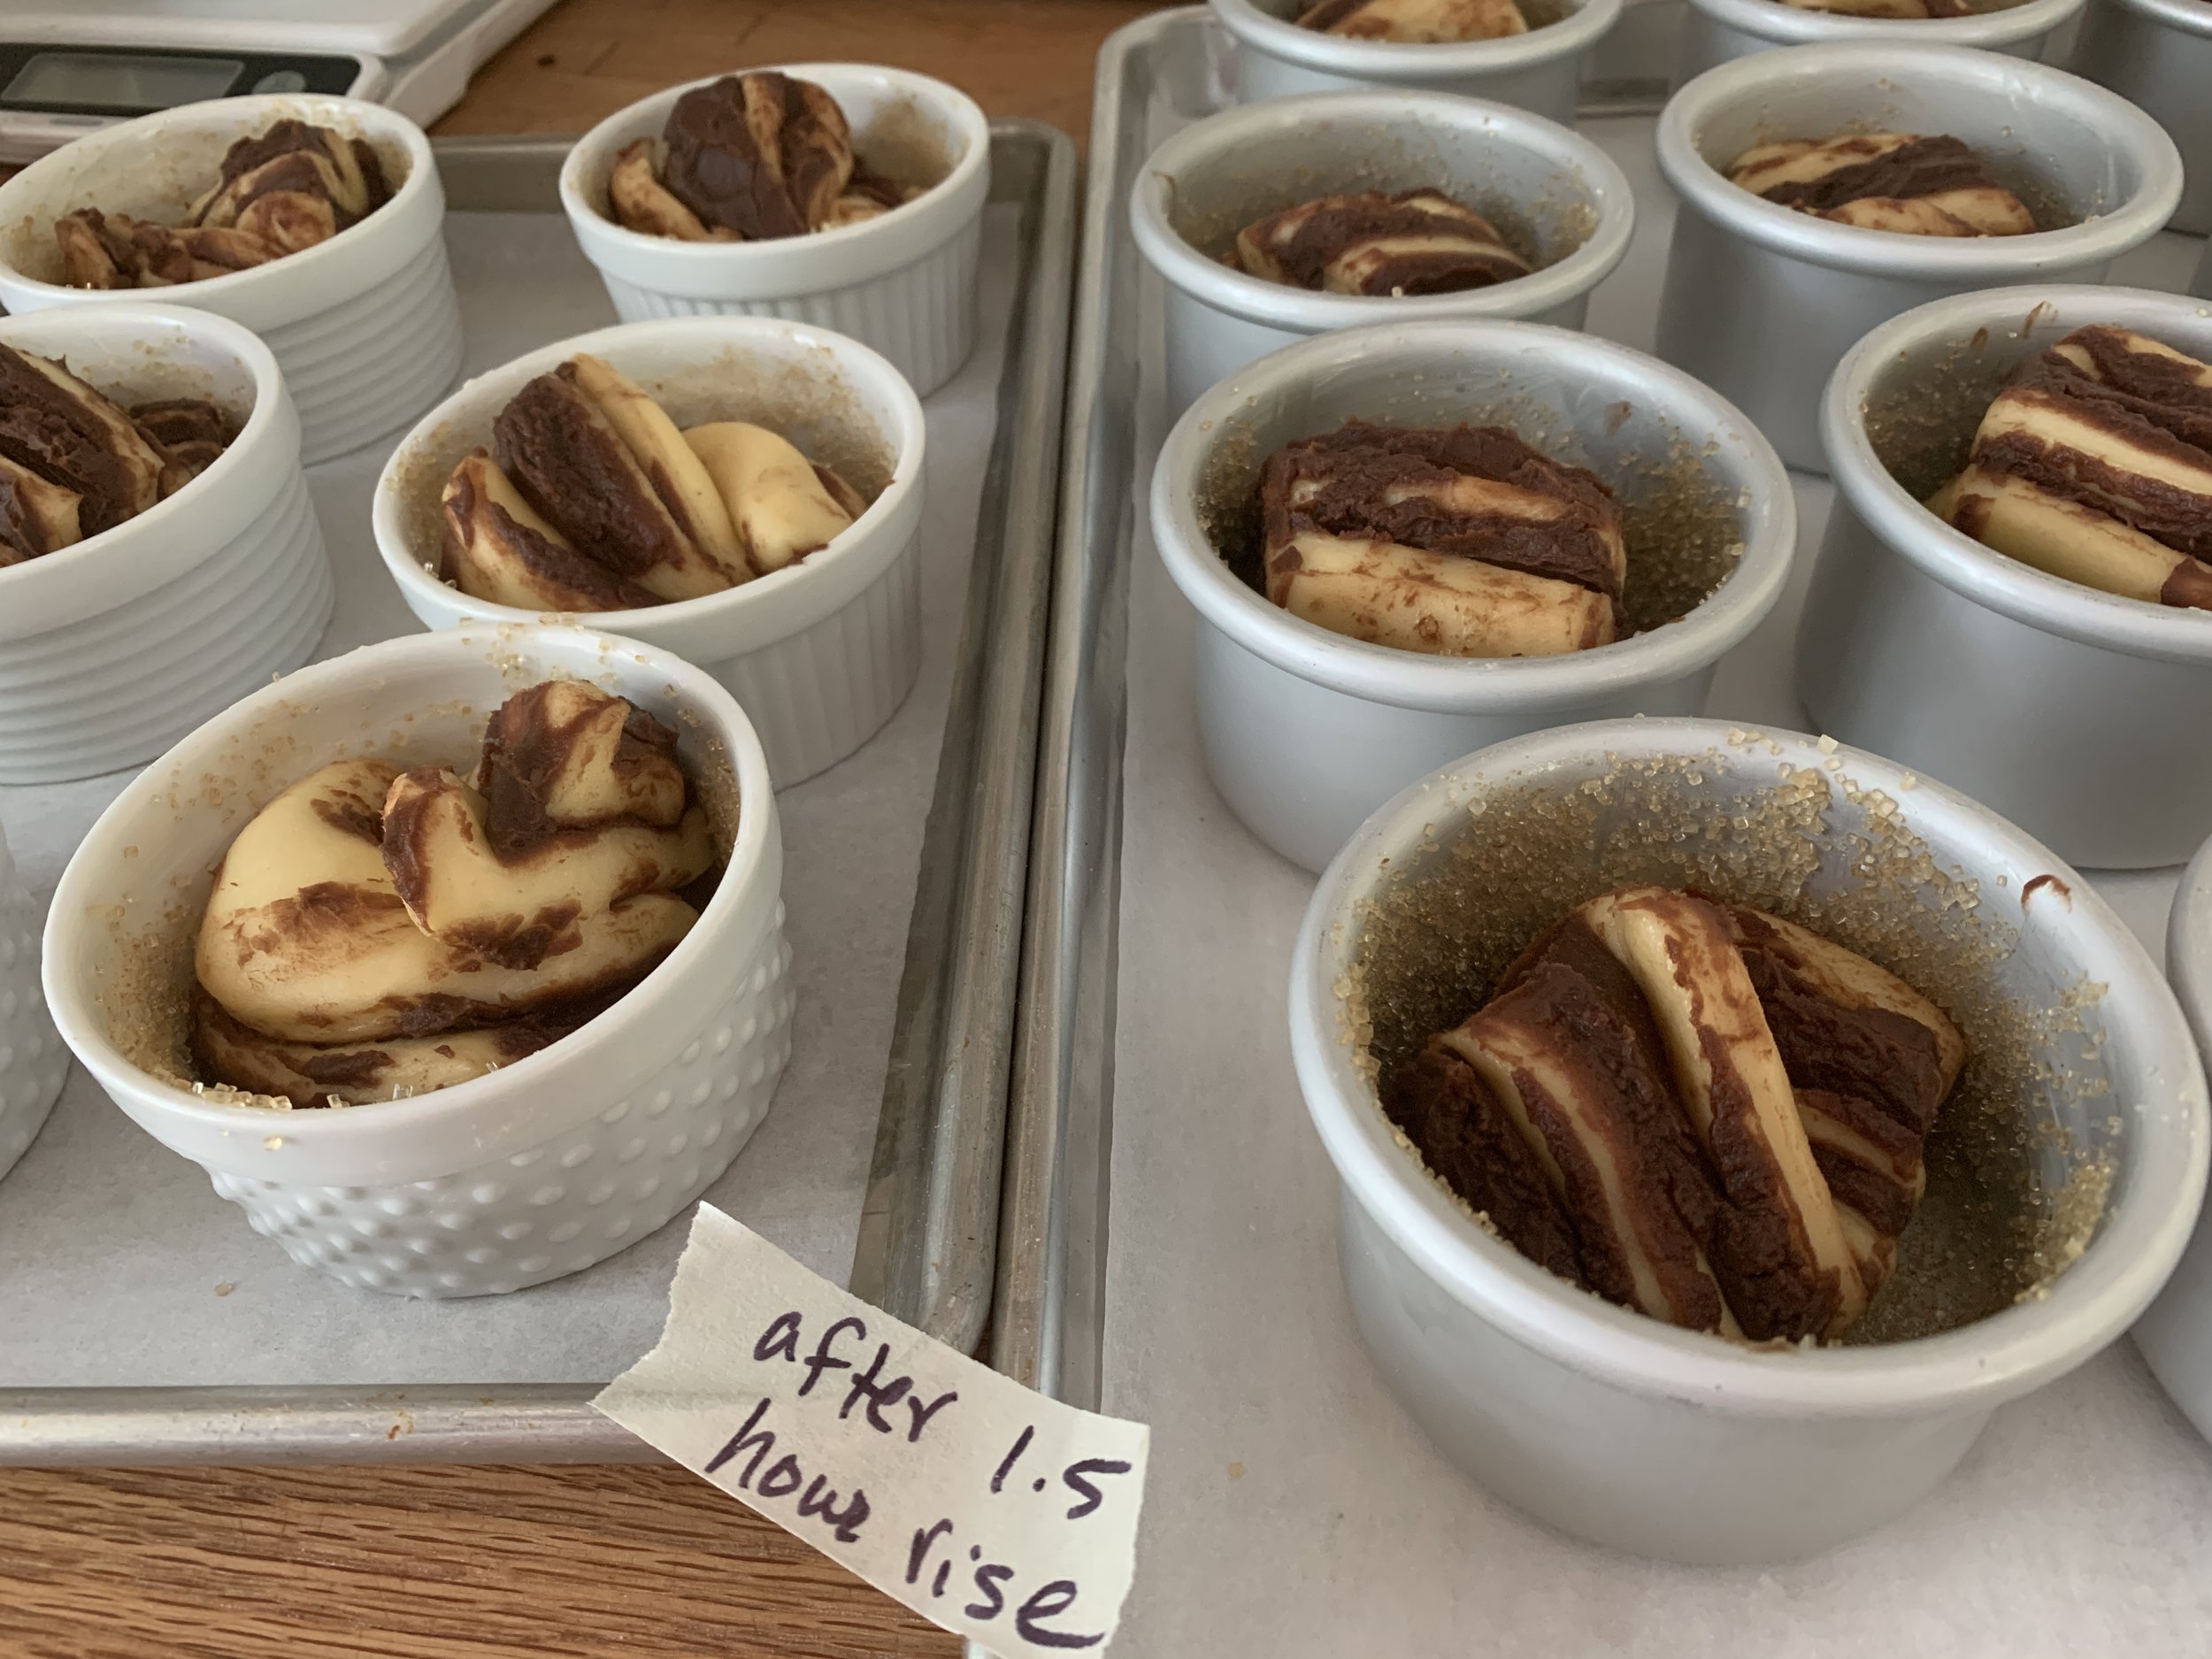
When ready to proceed with roll out and assembly, remove the dough from the fridge and divide it in half (it won’t have risen much). Going for a yield of 18 portions, I had my 3” Fat Daddio cake pans buttered and coated with raw sugar standing by. P.S. I have only 12 Fat Daddio pans and used 6 ramekins in addition.

4EAB6249-6954-4053-AA40-E50A18694B61.jpeg

The next few steps are the same as if you were making classic babka in loaf pans. Work with one half at a time, keeping the other half in the fridge until ready.

Roll each half into a 9”x18” rectangle.

2D5509E8-3C5A-41A2-BF50-7B12EEA493C3_1_201_a.jpeg

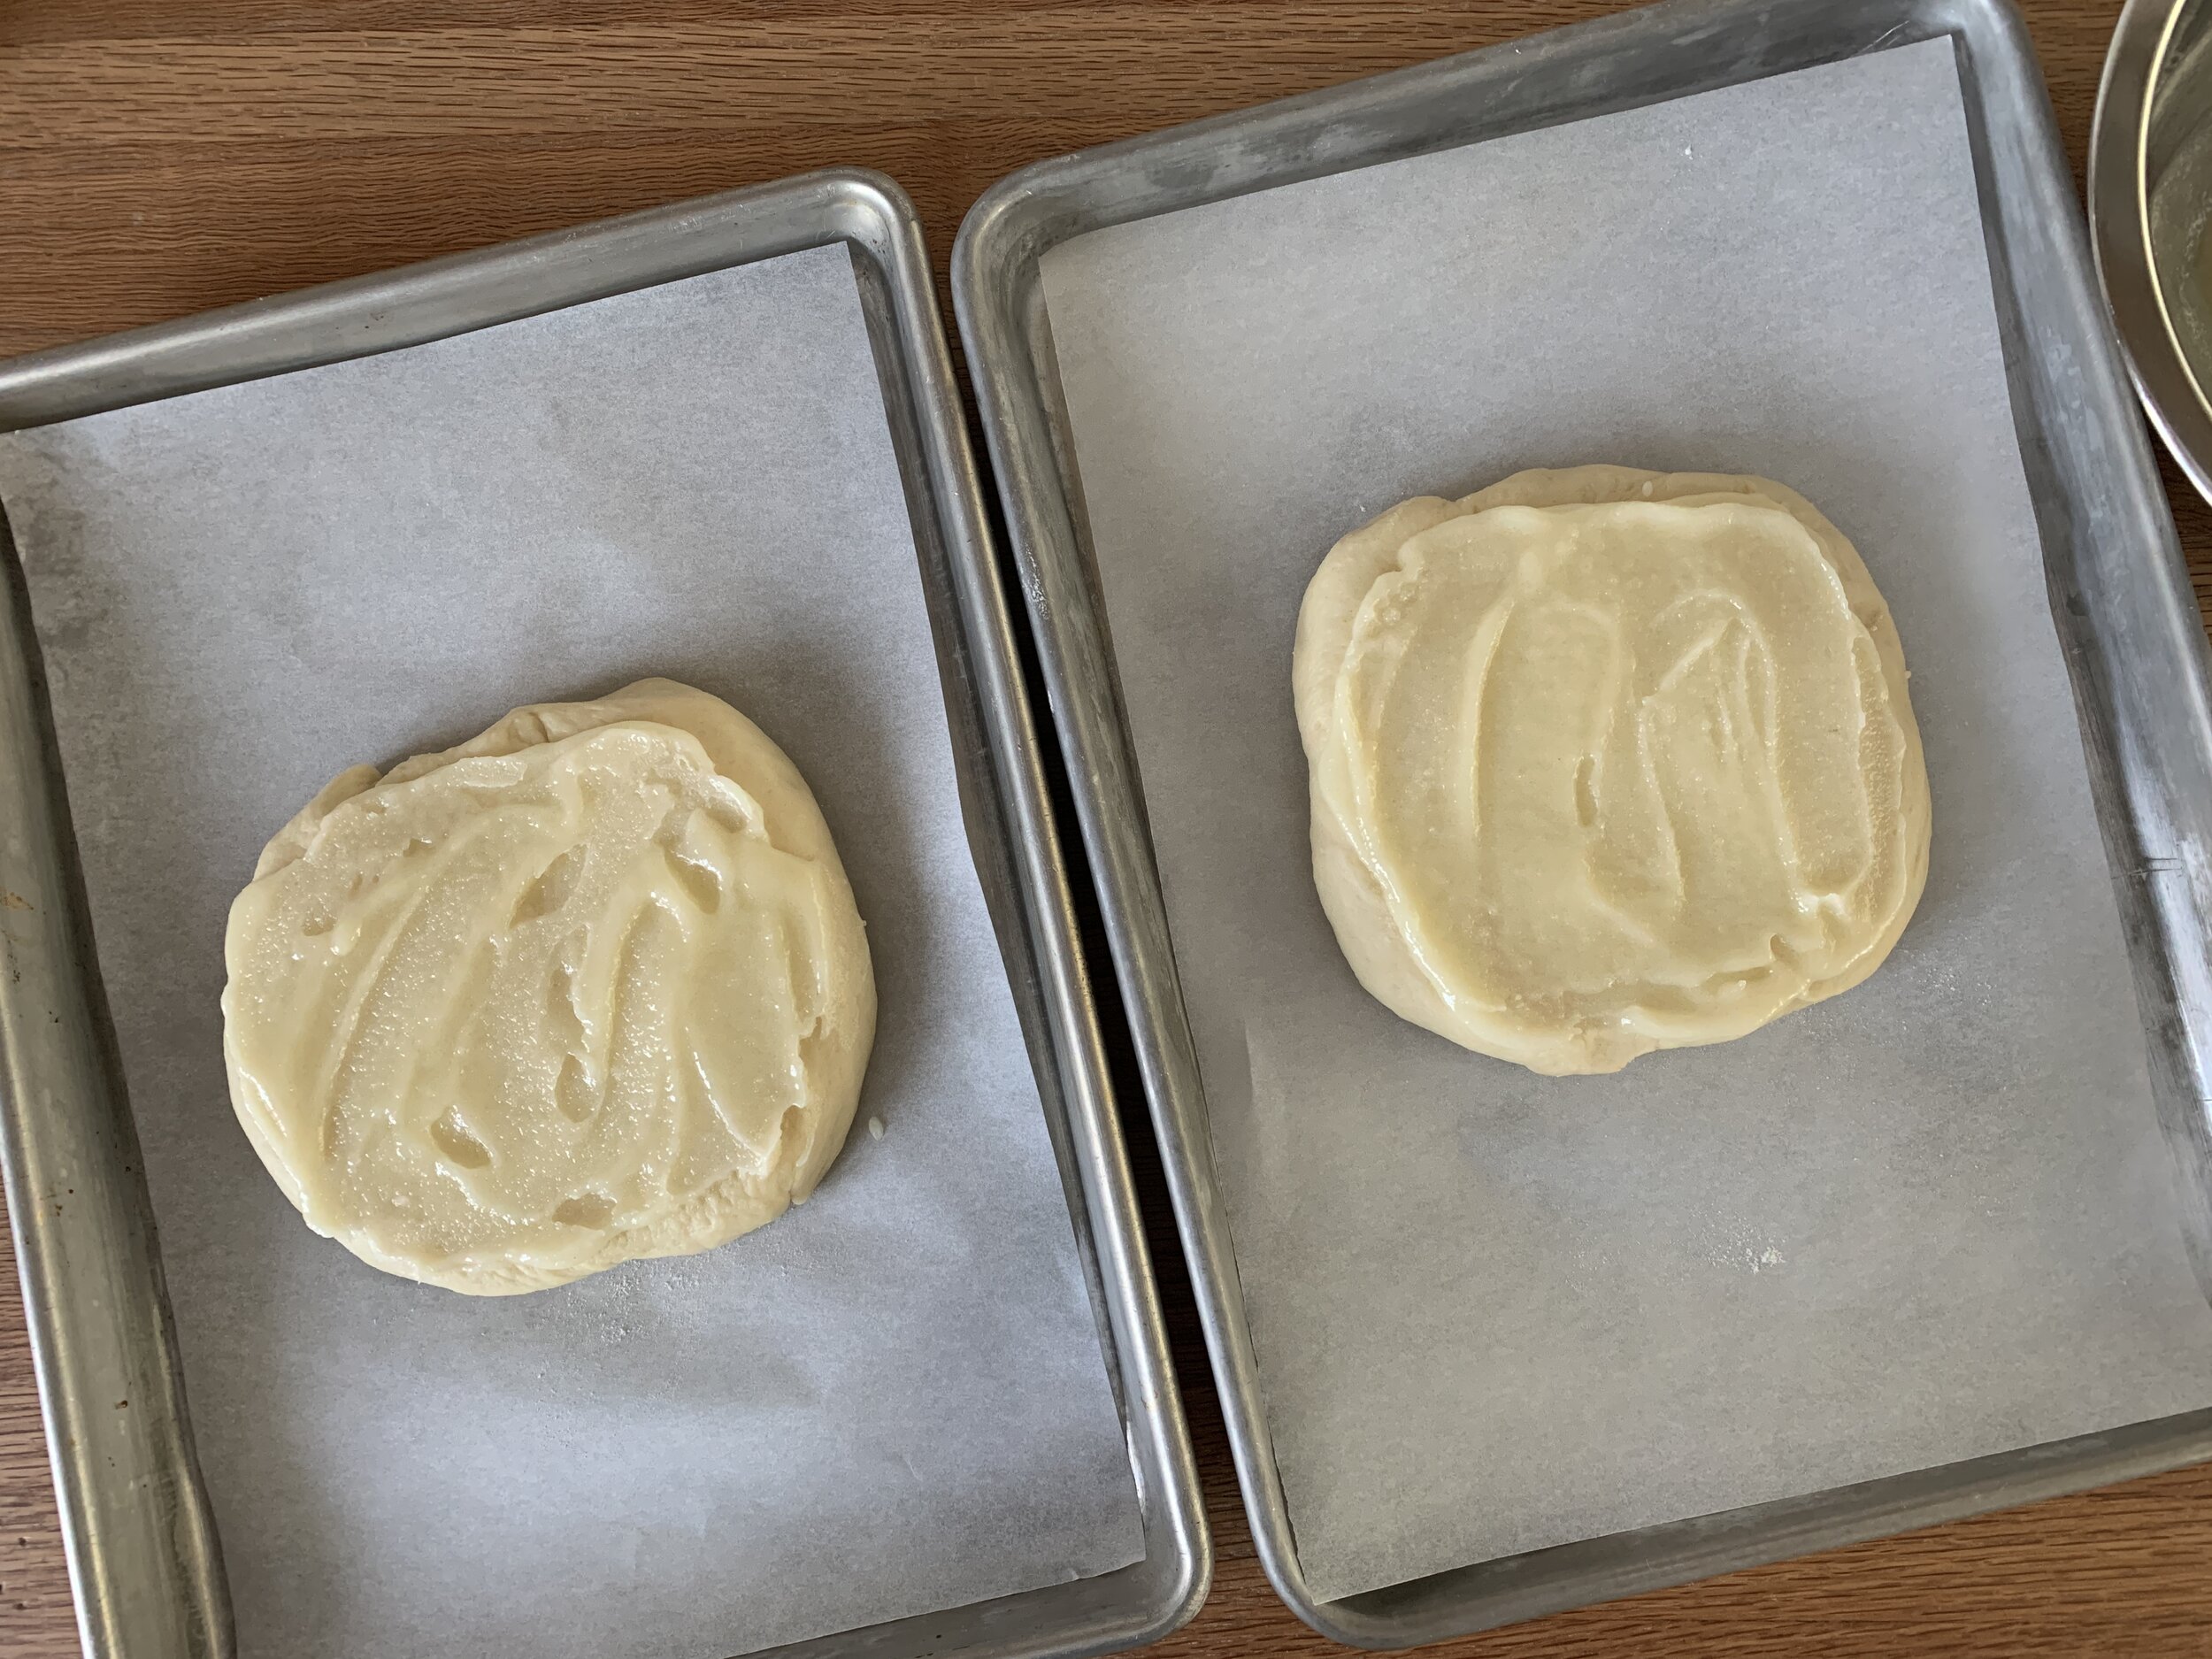
Spread half the chocolate fudge mixture on each. Heaven.

15A3A31A-1E42-4C95-9CF4-E241AECC8A94_1_201_a.jpeg

Roll into a tight coil then place on parchment and into the freezer for 15 minutes or so.

Rolling, rolling, rolling . . .

Rolling, rolling, rolling . . .

Place the chilled log on your work surface, seam side down, and slit it right down the middle, turning the pieces outward to expose the filling. I used my trusty bench scraper.

6C393F37-46FB-4700-A98C-01C3211816D2_1_201_a.jpeg

Now twist the 2 pieces around each other, keeping the filling facing up.

I gave the twist a good final snugging up before dividing.

Here’s where I veer away from the classic loaf babka. I cut each twist into nine 2” lengths for a total yield of 18 portions. Tuck each piece into the prepared pans.

Cover with lightly buttered film wrap and let rise for 1 to 1.5 hours. At about an hour in, heat the oven to 350ºF.

They won’t achieve a significant doming and filling the pan type of rise but you should appreciate puffiness.

Just before going into the oven, divide the streusel over the tops of the buns using a fork and your fingers to separate clumps a bit.

Bake about 20-25 minutes, rotating the trays half way through. NOTE: if you’re making two full size loaf babkas, baking time is 40-50 minutes.

I look for browning of the dough edges and a tester coming out clean. It’s a bit messy with the chocolate and streusel so aim the tester into dough (rather than chocolate goo) as much as possible.

Just out of the oven, brush with simple syrup as best you can. The streusel and chocolate on top makes it a bit tricky, but I tried to focus the syrup on the obvious browned dough edges.

Let sit about 10 minutes then ease out of the pans/ramekins with a small offset spatula, running it around the edges to loosen the crunchy bits.

At first I was afraid these would fall apart like a pull-apart roll but as I gently released them and placed them on a cooling grid, they held their shape just fine.

Once fully cooled they maintained their integrity very nicely. Whew!

Taste test time!!

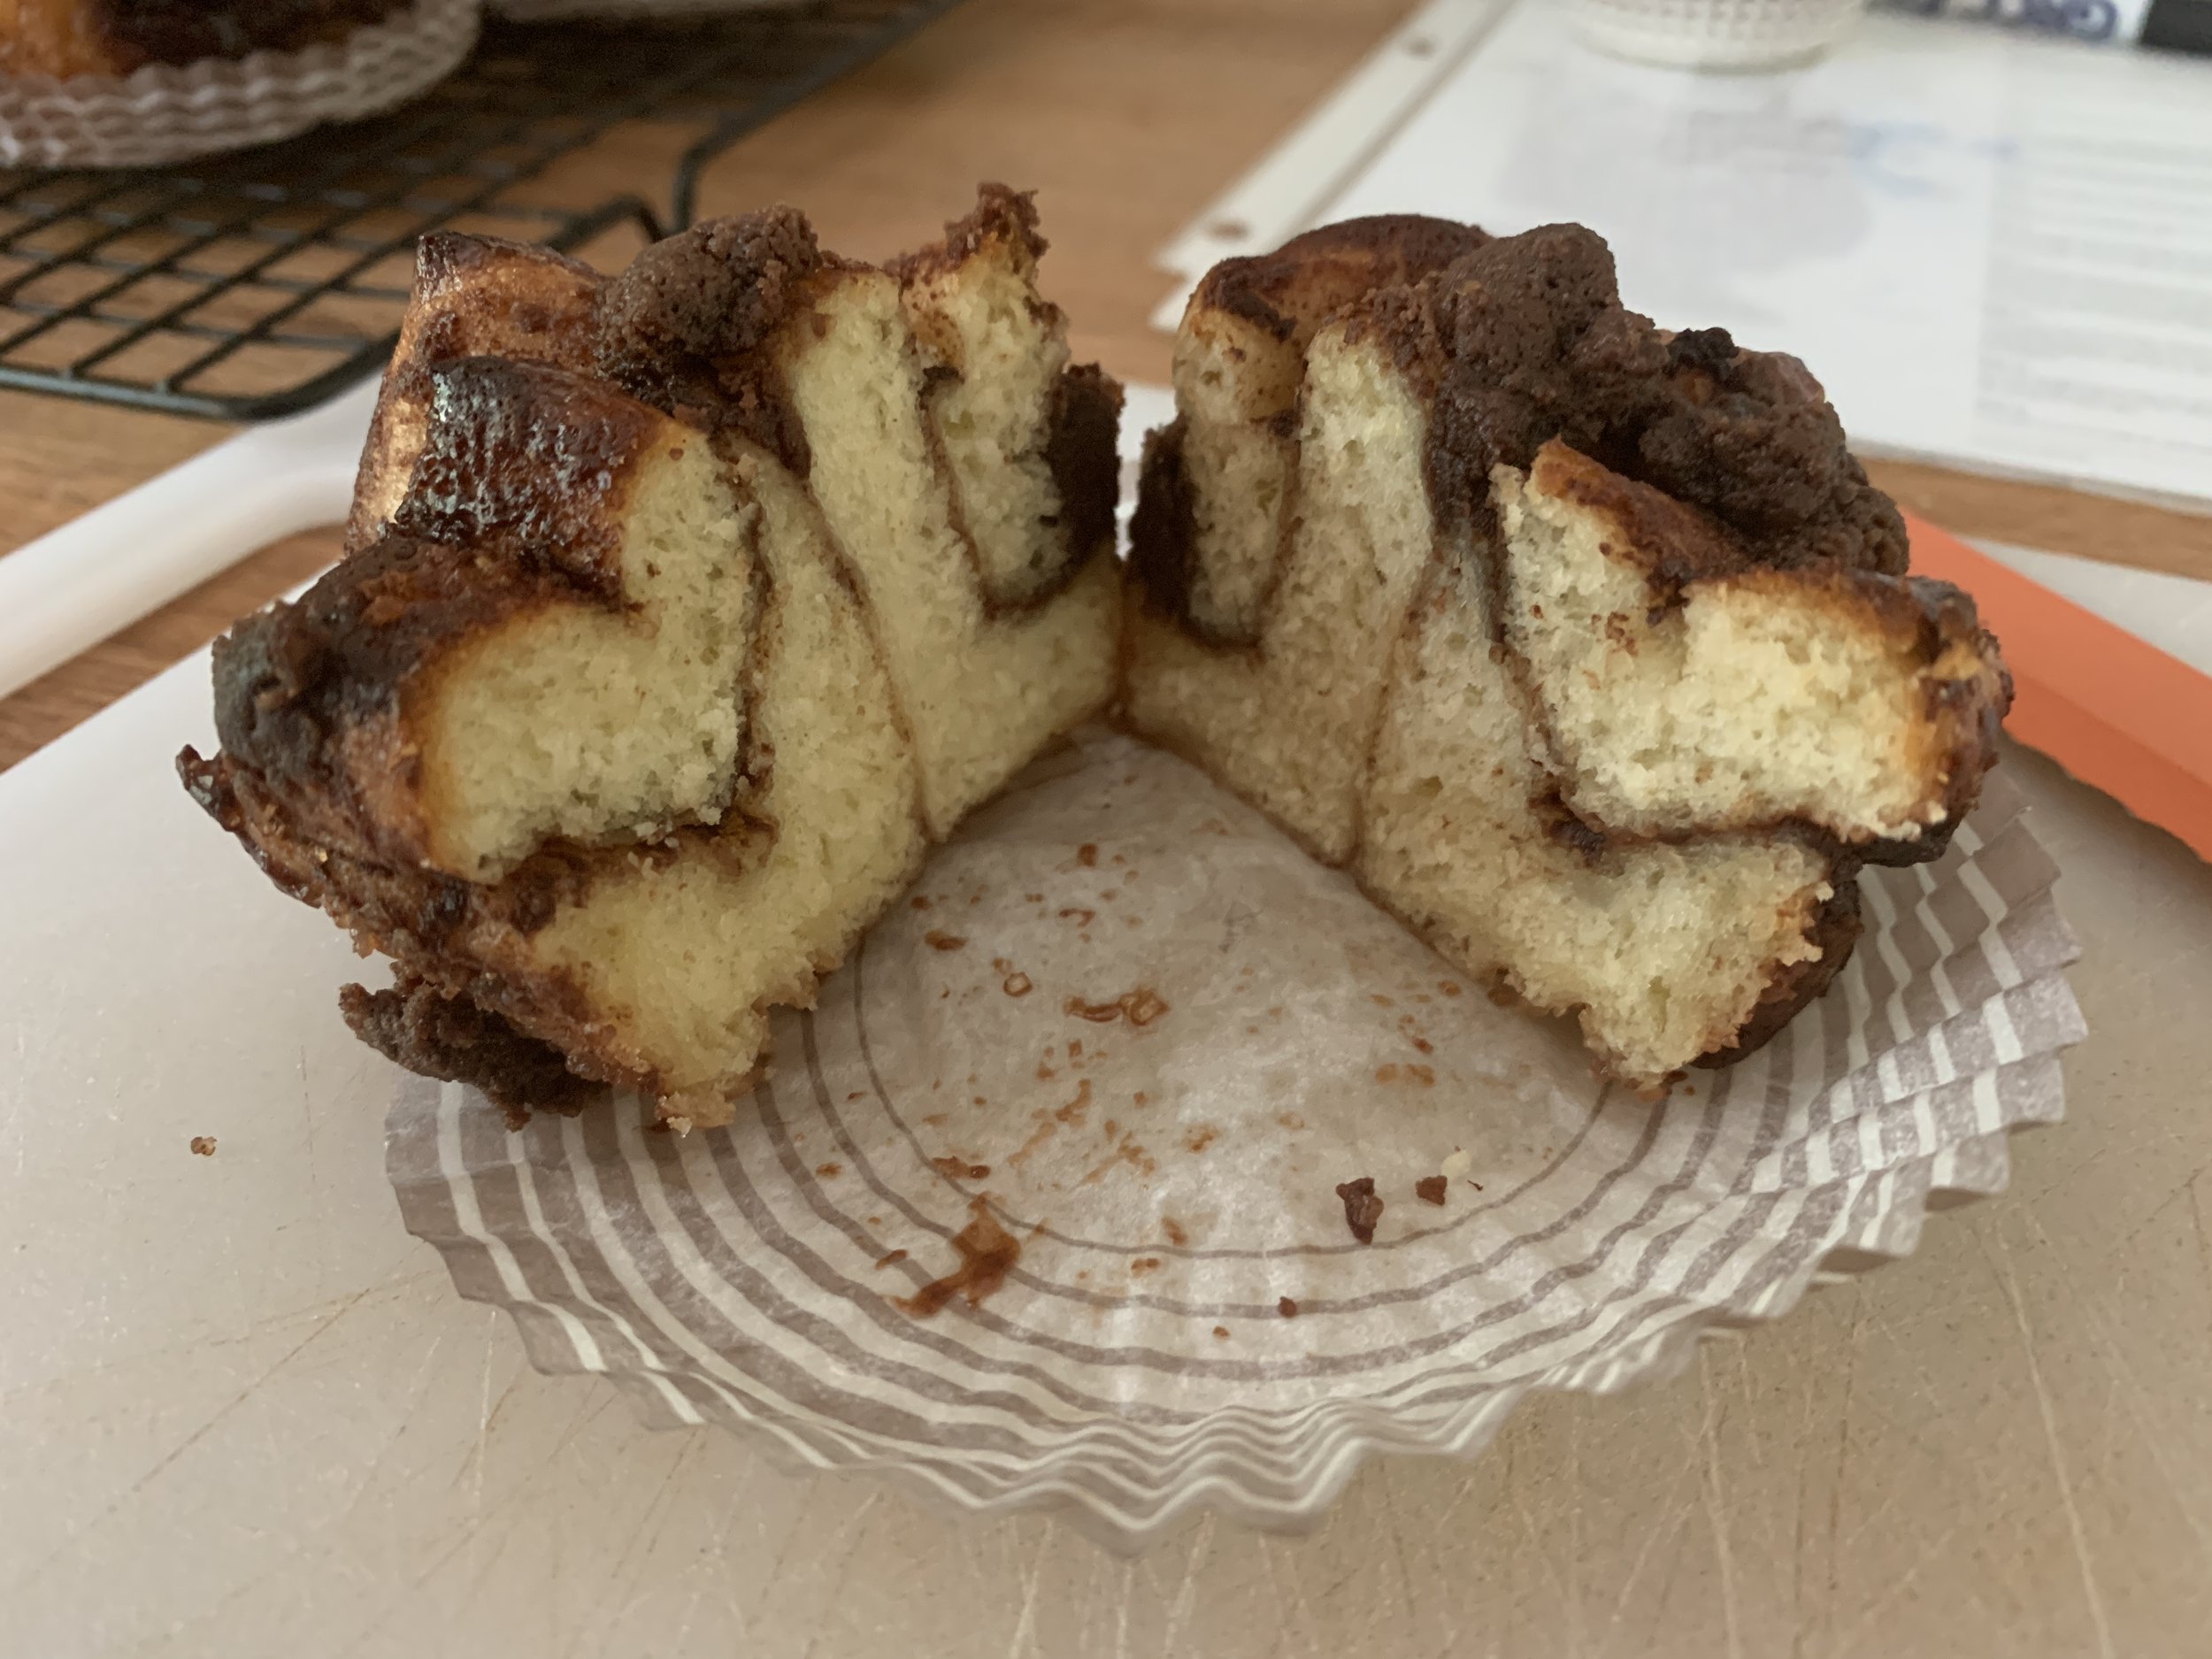
Based on the exterior appearance, I thought I’d find more chocolate inside. Not so, but the subtle swirls in the oh so tenderly textured dough, the hint of saltiness in the streusel and the all around delicious flavor of the whole are a winner in my book - and Steve agrees!!

You can use the same approach with your own favorite brioche or cinnamon roll type dough. Just go for it!

Meanwhile, autumn colors are finally appearing much later than usual. Here are a few images from some of the colorful inside displays at nearby Meijer Gardens.

Enjoy and I’ll “see” you next time around.

Coriander buttermilk "bouchon"

4EB2E90F-732A-47F2-9372-9D24BF4EDB79.jpeg

If you’re dreaming of the perfect buttermilk pancake and donut hole rolled into one, this is it! Moist with hints of nutmeg, coriander and ginger, these small bites go down so smoothly that you’ll clamor for more. I first made these in 2012 in my small shop inside Hope Artiste Village in Pawtucket RI. When Steve and I saw them, we immediately knew what they should be called.

Bouchon is the French word for cork, and the champagne cork shape develops as they bake in small round flexi-molds. The key is to fill the wells enough so that the top poofs out over the edges as the cakes rise, giving that signature look.

C96BA31E-C45A-4E25-A209-745282A6BE15.jpeg

The process is your basic creaming method of cake prep. In a nutshell: cream butter and sugar, add eggs and vanilla, blend in dry ingredients alternating with wet (1/3 dry, 1/2 wet, 1/3 dry, 1/2 wet and end with 1/3 dry), scraping down after each addition.

In the plan ahead phase, bring 170 g / 6 ounces unsalted butter, one cup buttermilk and 2 large eggs to room temperature. While not a complete deal breaker, this will cut down on any curdling that can occur during mixing when things are too cold.

Heat the oven to 425ºF.

In a medium bowl whisk 200 g all purpose flour, 146 g whole wheat pastry flour, 3/4 teaspoon salt, 1.5 teaspoons baking powder, 1/4 teaspoon baking soda, 1 teaspoon ground coriander, 1 teaspoon freshly grated nutmeg (I eyeball it and probably end up using less) and 1/4 teaspoon ground ginger.

Place the 170 g room temp butter with 75 granulated sugar and 67 g dark brown sugar in the bowl of a stand mixer fitted with the paddle. Cream for 2-3 minutes and scrape down the bowl.

F6A292E1-B87B-4ADD-BCA7-89C3082631D9_1_201_a.jpeg

Add the eggs, one by one, as well as a teaspoon of vanilla extract. Do the dry/wet additions as mentioned above.

In the image above you can see the Demarle Flexipan mold 2266 I use for this - at purchase it is a 48 well mold, but I cut it in half to fit on a half sheet pan. I probably haven’t mentioned this for some time now, but I always set silicone flexi-molds on a wire grid on the sheet pan. This allows for better oven heat circulation and more even baking.

This cake batter is quite thick so I use a wide round tip (20 mm / 3/4” diameter) to pipe and hold my offset spatula in the other hand to cleanly “cut” the batter away from the tip as I go. Works like a charm.

1C7EFC8F-AE31-46CC-AB97-ECDAC5D20ACF.jpeg

Pipe the batter to nearly the top of each mold with a nice dome at the finish. Not having made these for some time, I had to fine tune my piping as I went. The yield varies but I typically get 32-34 cakes from a recipe. I ended up with 42 this time which tells me I need to be more generous with my piping for the next go. Gotta get those cork tops!

10882B23-27EA-4C10-AE5F-A41B616508ED.jpeg

Bake about 15 minutes until golden. The cakes should feel firm when gently pressed on top.

While the cakes bake, melt 4 tablespoons butter in a small bowl; in another small bowl mix 1/2 cup sugar with 1 teaspoon ground coriander, 1/4 teaspoon ground ginger and a few grates of fresh nutmeg.

Once out of the oven, let cool about 5 minutes then pop the cakes out onto the wire racks.

4C546743-233F-4898-AFA3-70A5F8E9D097.jpeg

Working in small batches, dip the tops in the melted butter, give them a couple of minutes for the butter to absorb and then dip/roll them in the coriander sugar mixture.

CD2DC2B3-368E-4767-BEA3-7DCE944F77C1.jpeg
4401CEBC-E22A-49F8-AF99-DC81818DC89E.jpeg

I didn’t dip and roll the whole batch since I wanted to freeze some au naturel to have on hand for later. You never know when a bouchon occasion might arise.

These babies are dense yet light, not too sweet and with just the right warmth from the spices.

B27D230E-B550-4F2A-97EC-F7F9E5FDBEDD.jpeg

My inspiration for making these after a number of years was two-fold: I was dreaming about them and just happened to have some buttermilk in the fridge, plus a weekend visit from sister Joyce for whom I had to have a little treat or two on hand. Thanks for your visit Joybell!

Oh - and let’s not forget that Steve loves them!!

47285A62-0BCD-4763-B726-E79C630FC89A_1_201_a.jpeg

Happy bouchon making everyone and here’s to more autumn baking adventures.

Ciao for now.

Late summer veggie focaccia

74D48926-F6CE-4A7D-8929-BBADB6ED70CA_1_201_a.jpeg

This is what I’m talking about - sweet corn, tomatoes and a delectable focaccia for summer perfection on a sheet pan. Yes!

Even though it’s officially autumn on the calendar, there’s still time to reap summer’s bounty. As a matter of fact, Steve and I have amassed a wonderful stash of sweet corn in the freezer for fall and winter soups, chowders, frittatas, baked corn pudding, cheesy corn muffins and more.

I simply had to give this one a go. Based on the recipe from Melissa Weller’s “A Good Bake”, it’s focaccia with an interesting twist. Whipped cream! Can you believe it??

I’ll go through the steps with you so as to share my experience with the process. If you’re a fan of very detail oriented recipes/instructions, you should put Melissa’s book on your list.

You’ve got the basics of bread making here - flour, water, yeast, salt - put together using my favorite poolish approach.

Make the poolish (blend 120 g bread flour, 1/2 cup room temp water, 1/16 teaspoon instant yeast in a bowl and cover) the evening before so it sits at room temperature overnight for about 12 hours as it “pre”-ferments. You see it below in its bubbly goodness. Let’s hear it for planning ahead, eh?

To make the final dough place 313 g room temperature (70-75ºF) water in the bowl of a stand mixer and add the poolish and 450 g all purpose flour. Mix with the dough hook on low speed for 2-3 minutes. Remove the bowl from the mixer, place a teaspoon/3 g instant yeast and 12 g fine sea salt separately on top of the dough and let sit uncovered for 30 minutes. This allows the dough to autolyse (flour and water have a chance to start developing gluten before introducing the salt and yeast to the mix).

Autolyse step

Autolyse step

Return to the stand mixer with the dough hook, mix on low speed for a couple of minutes then increase to medium speed for three minutes. Remove the dough hook and bowl from the stand, cover the bowl with plastic wrap and let ferment for 2 hours. Turn once half way through.

The following images give you a sense of what’s happening.

Dough at the end of mixing

Dough at the end of mixing

The one hour mark

The one hour mark

End of bulk fermentation

End of bulk fermentation

Focaccia tends to be what I call a rough and tumble sort of dough - I think you can appreciate that in the photos above.

Now it’s time to pan it up! Have a half sheet pan on hand, pour 75 g (5-6 tablespoons) extra-virgin olive oil into it and spread it around evenly with your hands. Another thing about focaccia - LOTS of olive oil!!

Using a bowl scraper, scrape the dough onto the sheet pan in a pile and coat it with oil. Let it rest 20 minutes then proceed with stretching and dimpling it with your fingertips to work it into the corners and edges. It’s fun!

It will start to spring back so give it another 20 minute rest.

First stretch and dimple

First stretch and dimple

Finish stretching and dimpling to get the dough into the corners of the pan. Now set it aside to proof about 45 minutes.

Ready to top!

Ready to top!

Heat the oven to 425ºF. Meanwhile whip 3/4 cup heavy cream to stiff peaks, dollop it onto the dough and gently spread it with an offset spatula.

Cream dolloped

Cream dolloped

Cream spread - oh boy!!

Cream spread - oh boy!!

Let’s assume that any health benefits from the olive oil are pretty much erased by the whipped cream. You gotta live, right?

To top - a pint of small, sweet variety tomatoes, halved and placed over the cream . . . . . .

55261DC8-59F6-43BB-9BE7-8F32837339A4_1_201_a.jpeg

then sprinkle on the kernels cut off of one ear of corn . . . . . .

9550A64A-5B70-4A5A-8EDD-82157FF8AEE2_1_201_a.jpeg

then sprinkle with 1 1/2 teaspoons flaky sea salt, chopped fresh or dried herbs of choice (we use a salt free pizza seasoning mix) and 1/3 cup grated Pecorino Romano.

68FF46AC-26D6-48DF-970F-3058B72E58AF_1_201_a.jpeg

Bake 30-35 minutes until golden brown, rotating the sheet pan 1/2 way through. Remove the focaccia with a large spatula onto a cooling rack.

I’m here to tell you that even with all of that olive oil, there can be some sticking so use some elbow grease and determination if needed to do the deed. I ended up cutting it in the pan and getting the pieces out without too much trouble with the help of my trusty spatula.

We were so eager to try it that I forgot to snap a picture just out of the oven. Oh well.

74D48926-F6CE-4A7D-8929-BBADB6ED70CA_1_201_a.jpeg

This is good stuff! Just the right thickness, chewy and superb with the fresh veggies. We enjoyed it with a simple green salad and cut the rest (save for two pieces) to freeze for later.

The next day for lunch we warmed those two pieces up with an egg on top - about 20-25 minutes in a 350 oven to set the egg then a short broil to lend just the right crunch. Delicious!

F22E4103-9EEE-4560-9EEA-A7802D180A4A_1_201_a.jpeg

Enjoy autumn everyone. It’s my favorite time of year, and I hope you love it too!

Roadside asters

Roadside asters

Late summer update

toms.JPG

August is almost over! Baking continues now and again, tucked in amongst hosting out-of-state family visitors, hot/humid weather, household and outdoor projects and the occasional country drive to feel the wind in our hair. Through it all I always circle back to the kitchen and thought I’d share a few of the treats I’ve made of late.

This time of year the likes of peaches, blueberries, tart cherries, tomatoes and sweet corn enter into my baking projects.

Thinking of tarts? Grab your favorite pâte brisée, create your filling and go for it!

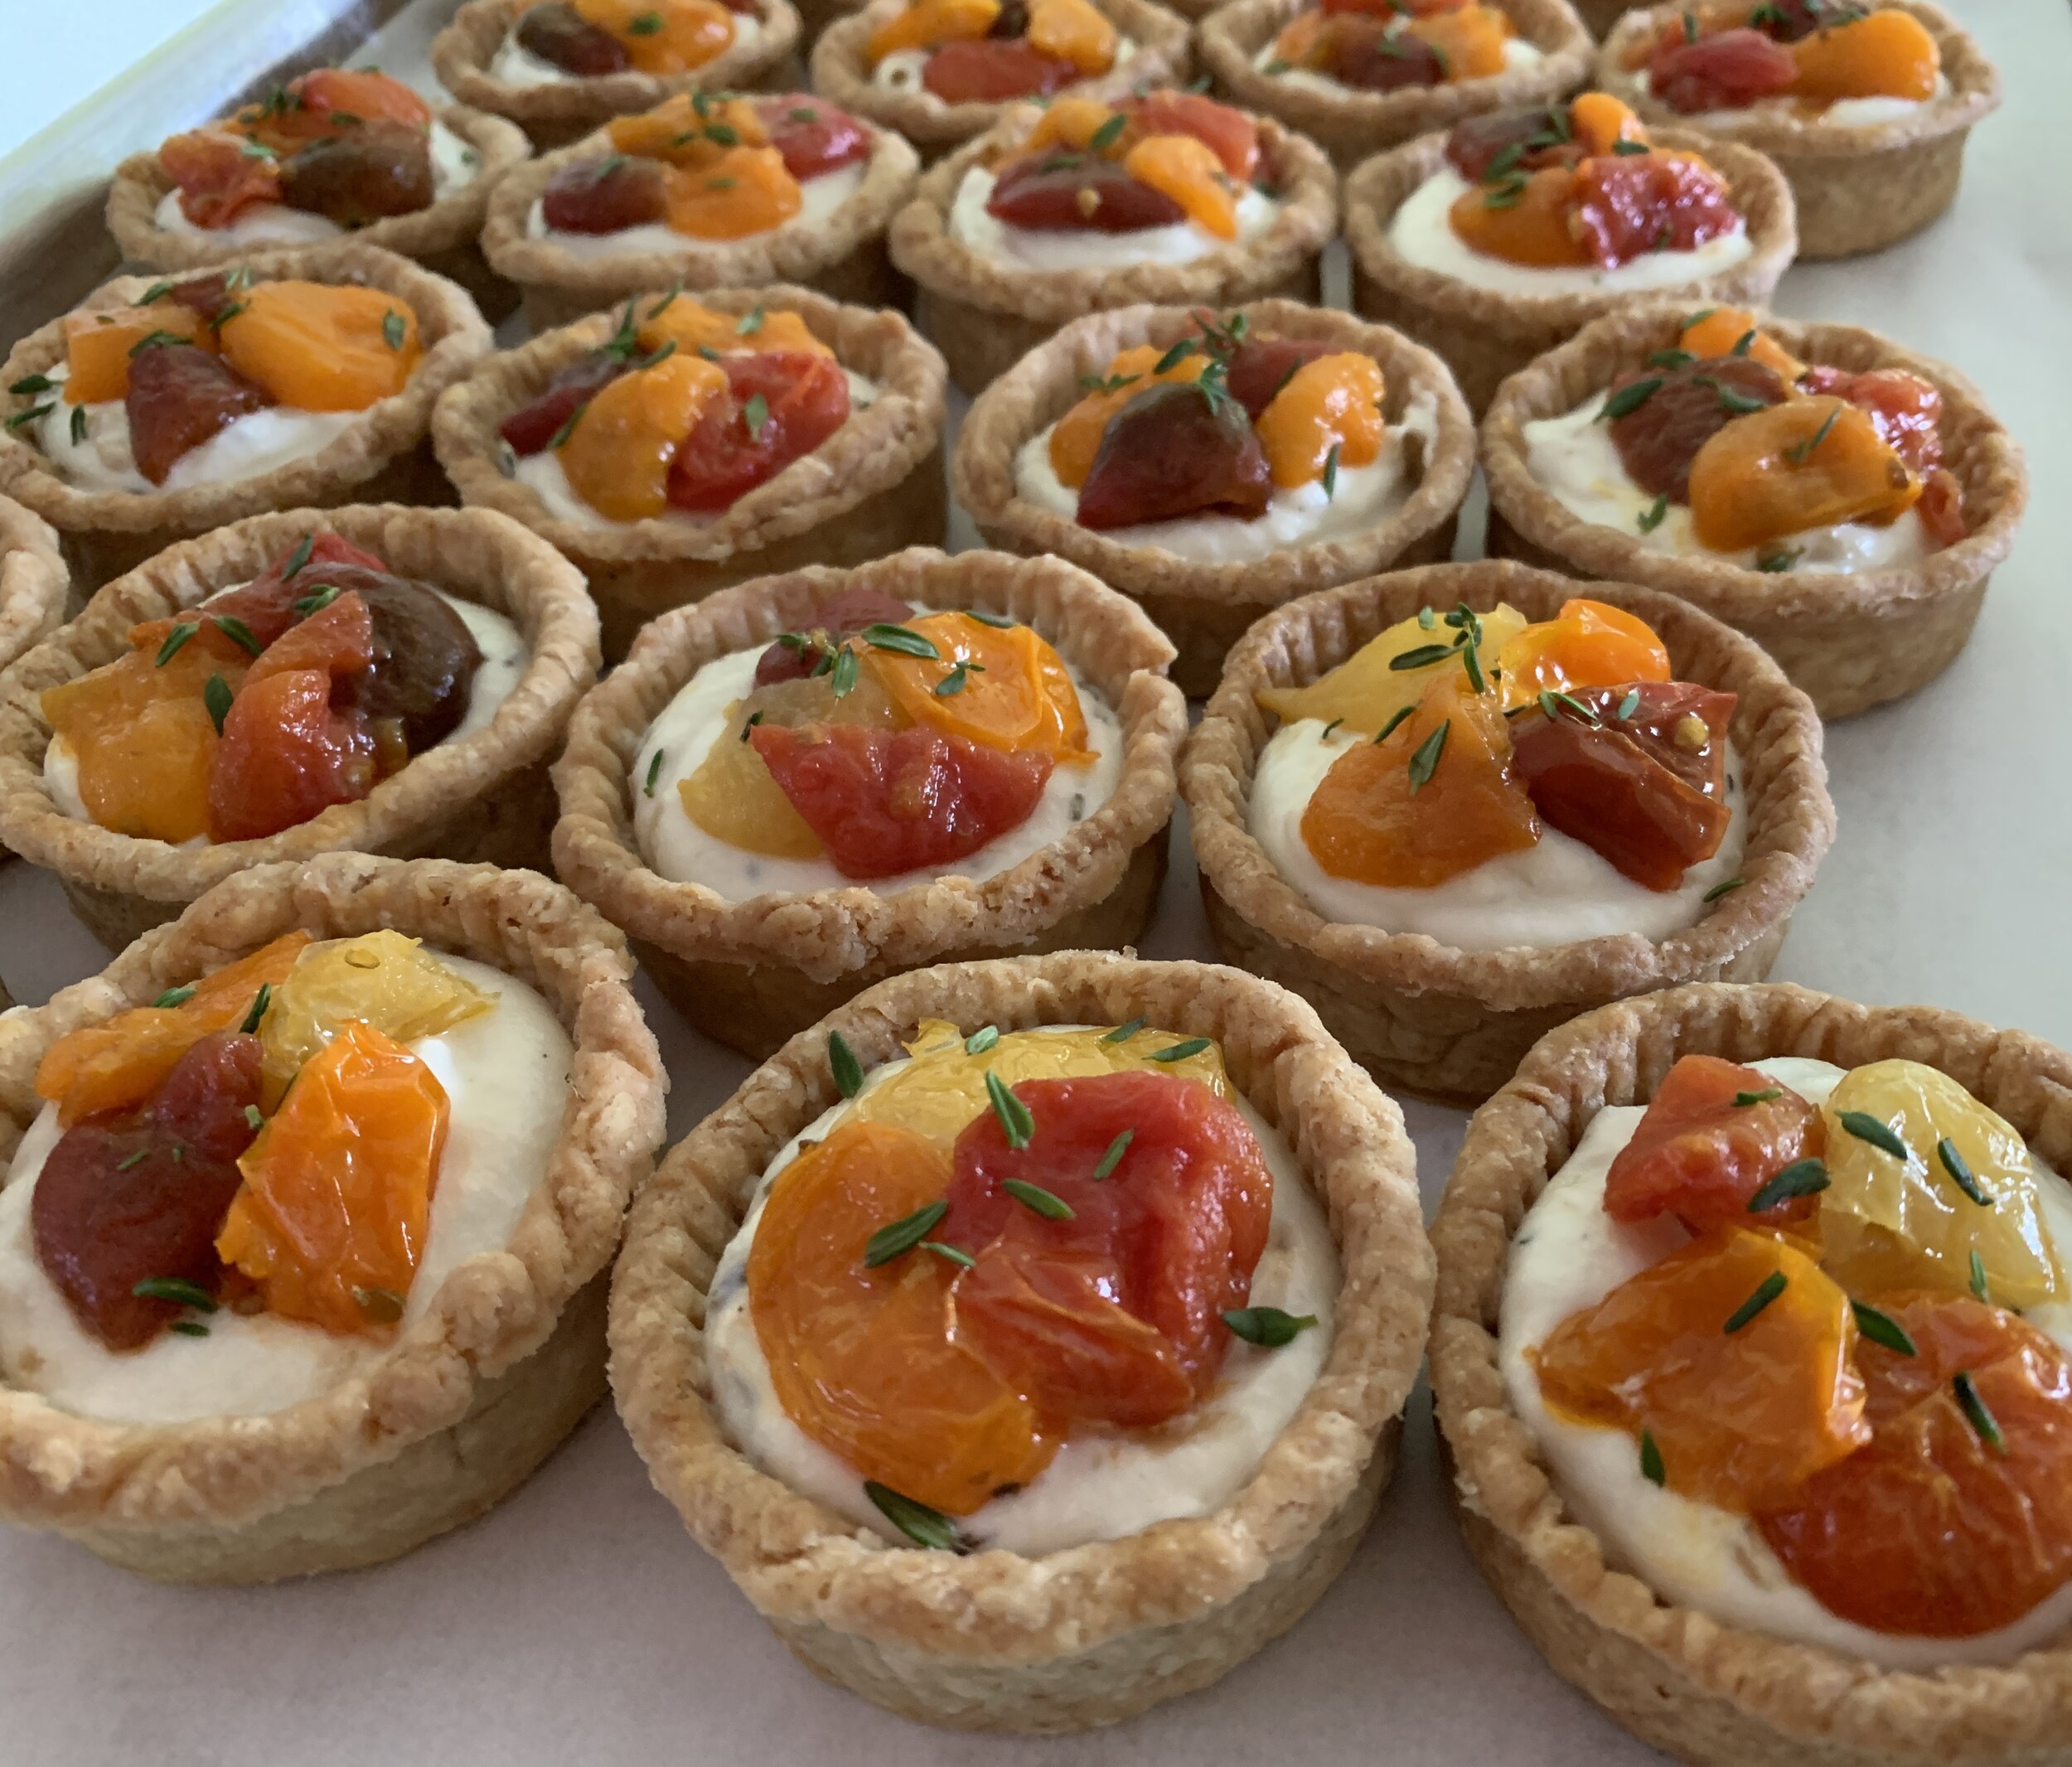
For a savory treat, blind bake the crust, let cool, fill with a whipped goat cheese/ricotta filling and top with roasted tomatoes and fresh thyme. I think you’ll like it.

Roasted tomato goat cheese tartelettes

Roasted tomato goat cheese tartelettes

Blue, blue, blueberries!! These are individual versions of the double blueberry tart I wrote about here. I tweaked my pâte brisée by replacing some of the all purpose flour with whole wheat pastry/spelt/rye flours which resulted in a delectable crust that seemed so right with the blueberries. Love it.

Fresh blueberry tartelettes

Fresh blueberry tartelettes

On another tart note, how about fresh raspberry tarts - pâte sucrée d’amandes with frangipane (blend of crème pâtissiére and crème d/amande) baked in, topped with fresh raspberries and finished off with raspberry coulis glaze - delicious!

0AA7B2F6-7CDF-4DE8-9EDC-DD867161A2AE_1_201_a.jpeg

Back to the savory side, here’s pizza topped with local fresh corn, tomatoes, broccoli, cauliflower and our go to favorite grated fontina cheese (soooo much better than traditional mozzarella in our book). Thanks Cheese Lady! TIP - pop the cheese into the freezer for 30-40 minutes then grate - it’s much easier.

0C3A3125-8F31-4850-BDEF-30AE95CF1D1C_1_201_a.jpeg

Here are individual cherry puff feuilletées, a twist (hah!) on the free form cherry tart using the same components (puff pastry and tart cherry filling) but in a different form.

Tart cherry feuilletées

Tart cherry feuilletées

My go to favorite cakes of late, based on a financier like recipe (no brown butter here) - these are blueberry lime with roasted strawberry Swiss meringue buttercream - both petite and standard versions. Change up the flavors to reflect the seasons. Mmmmm!

Petite

Petite

Standard

Standard

While these have nothing to do with fresh summer produce, you should know by now that I have to include some of my favorite laminated pastries.

Classic butter croissants can’t be beat. Pay close attention to the steps, how you handle the dough, the resting and rising times. They’re all so important in achieving the lovely airy center with crispy exterior.

0C8EC535-4E36-42BE-AB7C-6D726607D3BC.jpeg
EDB2D40A-5745-432E-97E9-D9EEAF6F0CA6_1_201_a.jpeg

Next up - maple glazed cinnamon buns made with laminated Danish dough. I’ve done versions of this sort of thing many times, yet some treats simply bear repeating (just like the croissants!).

I made the laminated dough this go around by adding 120 g butter to the dough and using 180 g for my butter block. Putting the dough through one 4-fold and one 3-fold yielded some lovely layers.

For the filling (I’m always tweaking the mixture) blend 100 g dark brown sugar, 2 tablespoons maple syrup, 42 g melted butter, 3 tablespoons flour, 4 teaspoons cinnamon (I use King Arthur’s Vietnamese version), a pinch of salt and a splash of vanilla extract. Feel free to go up to 2 tablespoons cinnamon to amp up the flavor.

Roll the finished dough into a 10” x 17”-ish rectangle with the long side parallel to the work surface. Spread the filling evenly and roll up into a log. Trim ends a tad, cut 16 one inch slices and place cut sides up/down into buttered muffin tins or open rings.

I have some 80 mm one inch high open tart rings that I love for this type of pastry. They hold the dough just right to allow for rising and preserving a pleasing round bun shape in the oven.

Bake about 18 minutes at 350ºF. Mix 3 tablespoons maple syrup with 3/4 cup confectioner’s sugar and thin with a bit of cream or milk to your desired consistency. I prefer thinner for a not too heavy coating.

Scrumptious, tender and buttery, lightly glazed - just what the doctor ordered!

EEE73D18-1EEF-4085-A779-F7A721EE1451.jpeg

Even though it’s HOT here right now, I can’t help but dream of apples, pears, nuts, pumpkins and more as the seasons continue to change.

Hang in there folks! We can do it. Here’s to a beautiful autumn.

apples.JPG

Peaches and cream Breton tart

355913C0-8010-427E-A0FB-B2737EDBF1EC.jpeg

Oooh my, soooo good! My favorite Breton dough, a thin layer of peach jam, fresh Michigan peaches and an easy custard all baked up into a golden buttery treat. What more could you want on a summer August day?

freshpeach.JPG

August and fresh peaches go hand and hand for me. Growing up, my early August birthday dessert choice was most often pound cake with fresh peaches and ice cream. Oh those memories.

Being in a tart mood as I planned some assorted treats for folks down the street, I knew a Breton dough base would be just the thing. While I typically make individual portions for such occasions, my brain asked - how about slices for a change? Two rectangle tart forms coming right up.

I’ve written several times about the beauty of using Breton dough for its versatility. Bake it thick and plain to create a gateau Breton, roll it more thinly and bake it topped with jammy fruit and crumble or make simple crisp cookies to go with your afternoon tea.

When making Breton tarts, I lean towards a thicker base crust to put the texture somewhere between cookie and cake. Thicker more cake-y, thinner more crisp.

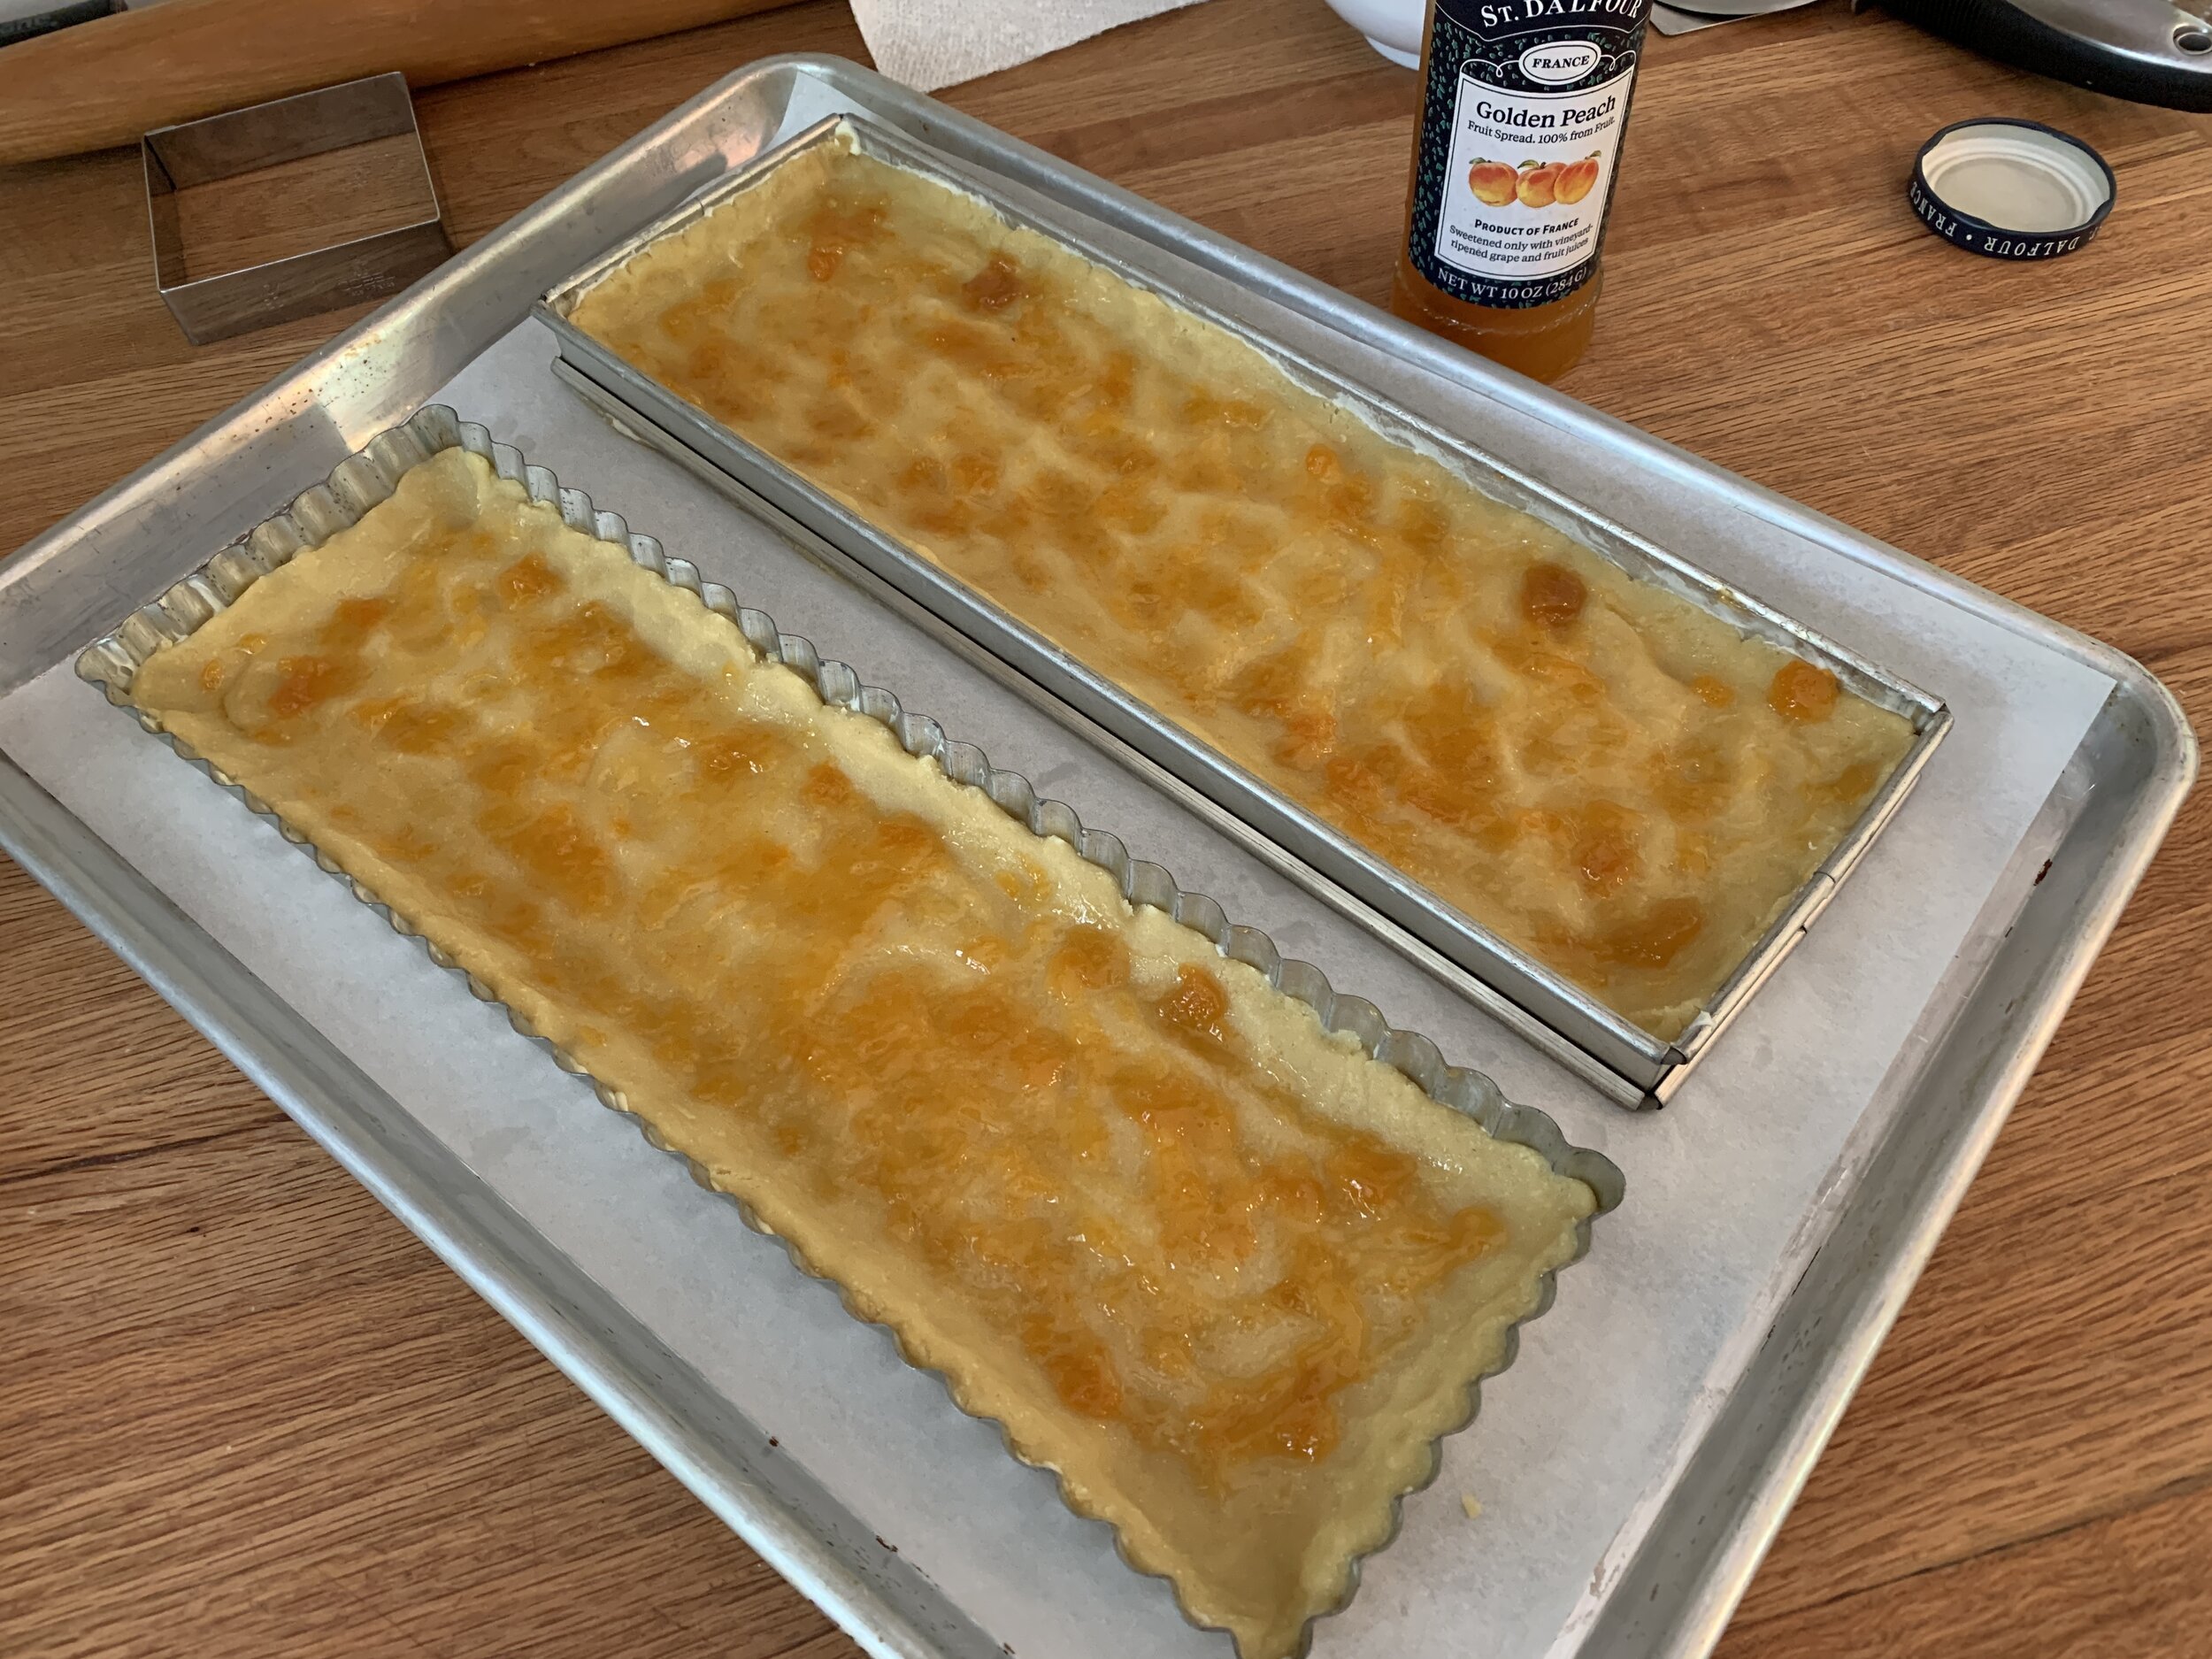
As you see below, the straight sided form is slightly wider so I gauged my dough quantity to give me a thickness of about 3/8”, ending up with 400 g of dough for the slighter smaller fluted form and 475 g for the straight sided one. Butter the forms (it helps so much with removal later - trust me).

Place the dough between plastic wrap and roll or press it into its rough shape . . . . .

F09E8623-62B2-40E8-A6EC-C20565FCF917_1_201_a.jpeg

then transfer it into the form, pressing it evenly and also building up an edge to provide a dam for the upcoming custard. Please note - I left the bottom out of the fluted form - I’ll come back to that later.

D6C66C6B-EC81-42F3-9CA8-935074C19A70_1_201_a.jpeg

Once both forms are “doughed” up, place plastic wrap directly on the dough surface to cover and chill until ready for assembly. The lining step is one you can complete even a couple of days ahead if desired. While the chilling step isn’t absolutely essential, I find that dough always bakes a bit better when it’s cold going into a hot oven.

Heat the oven to 350ºF. Spread a thin layer of peach jam over the dough and bake about 20 minutes to set the dough. You should see the dough risen up and starting to brown a bit.

A quick jam note - every year I contemplate a jump onto the jam making band wagon, yet thus far that process hasn’t finagled its way into my summer repertoire. There are some wonderful jams to be found on well stocked supermarket shelves. I lean toward French made brands like St. Dalfour and Bonne Maman which both offer an interesting line up of flavors.

Before baking

Before baking

The par-baking gives me just the amount of time I need to prep my fruit and make my easy custard.

Par-baked

Par-baked

For the custard: in a medium bowl whisk together 80 g cane sugar, 160 ml heavy cream, 2 large eggs, 1.5 tablespoons all purpose flour, 25 g almond flour, 1/2 teaspoon ground coriander, a few grates of fresh nutmeg and a splash of vanilla extract. You can leave out the spices if you prefer and, instead of vanilla, add 1/2 tablespoon of peach brandy or your favorite almond liqueur.

The beauty of this custard filling is not only its ease of preparation but you can whip it up earlier in the day and hold it in the fridge - when ready, give it a quick re-whisk to bring it all back together.

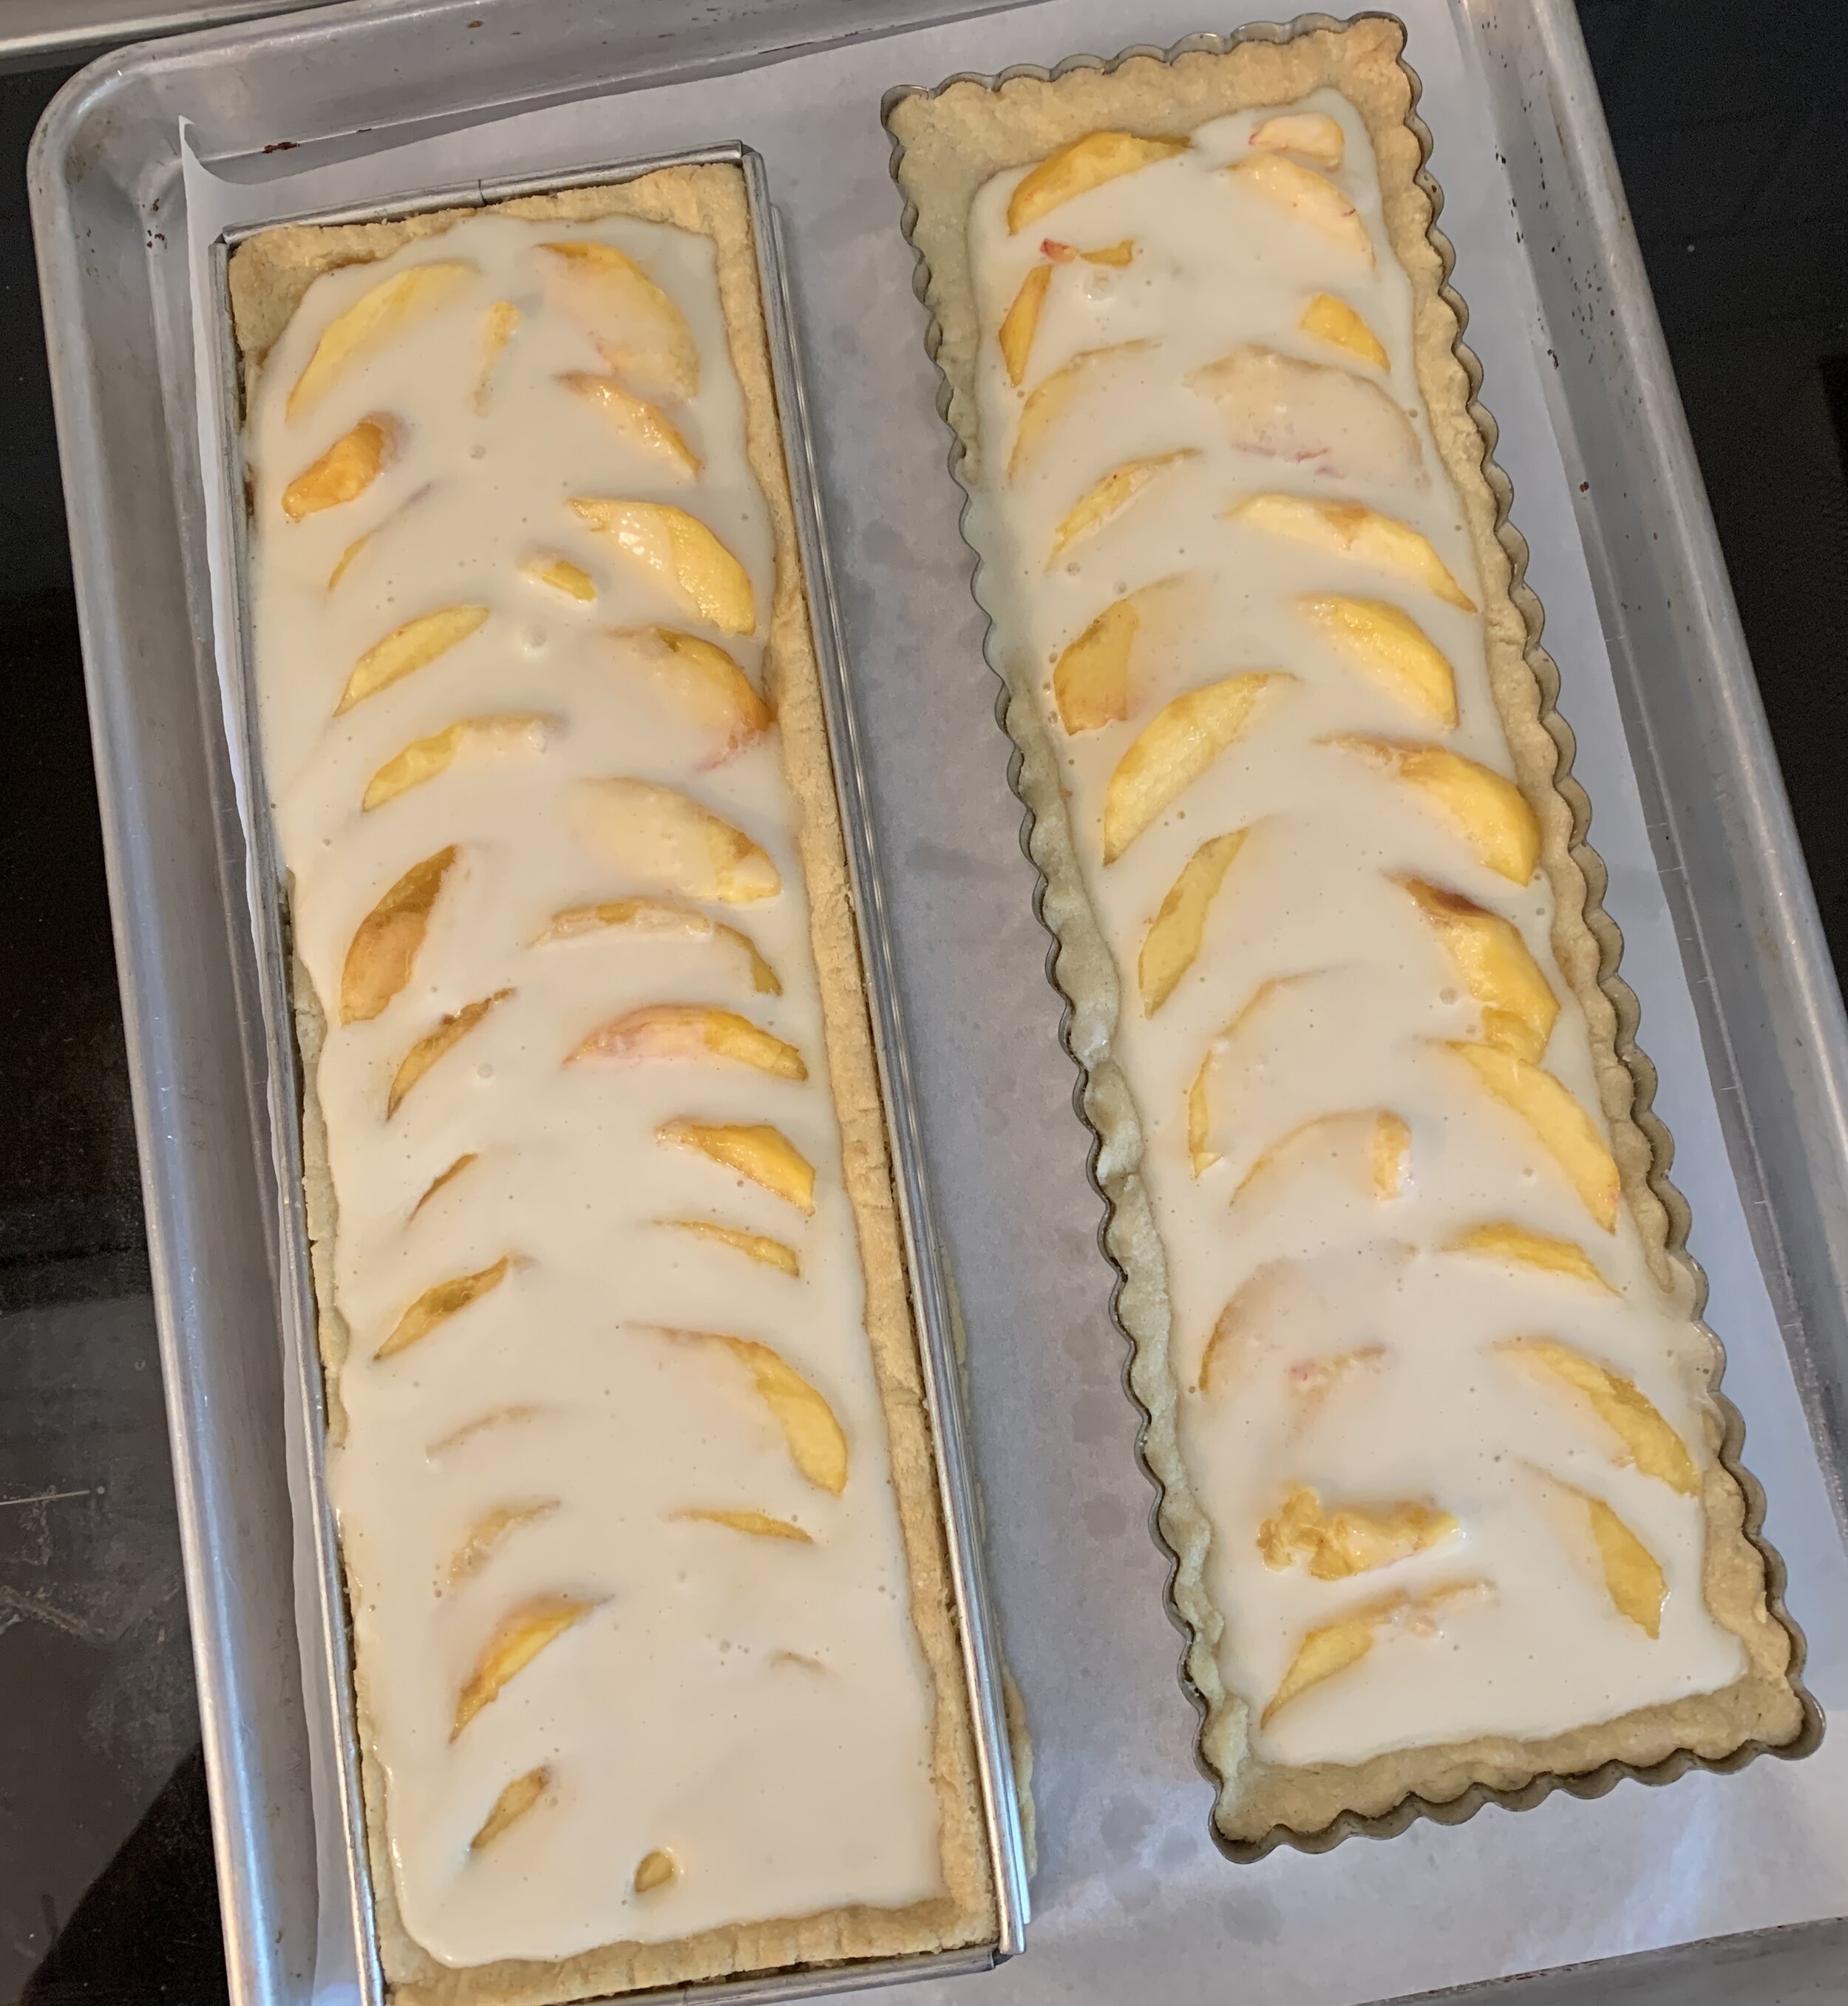
Two ripe peaches for each tart were perfect - peel, slice and line them up something like this.

6725A105-FC4B-4F06-91A4-71705D7221B3_1_201_a.jpeg

Carefully pour the custard over the peaches as far up to the edges as you can without overflowing (whoops - a little bit there on the left). There will most likely be a bit of custard left.

Bake for 10-15 minutes to start setting the custard and then you should be able to add the remainder, drizzling it over the top. Don’t worry it you don’t use quite all of it.

9429E1D2-7360-4F79-A075-943AADEBB4D5_1_201_a.jpeg

Bake for an additional 20-30 minutes until the custard is set, a bit puffy and nicely golden.

DA09ED48-CC3E-4917-B595-6837AE62F78C_1_201_a.jpeg

Looking pretty good!

84835AF6-7939-4620-BBDA-36233EEBF64C.jpeg

Cool for 5-10 minutes then gently loosen the edges using a paring knife or offset spatula to reduce the stick factor from any stray custard. As noted on the left above, Breton dough can sometimes sneak out under the edges of open tart forms during baking - just trim away any edge bits.

Cool an additional 30 minutes or so. The straight sided open form should lift off pretty easily. With a removable bottom fluted form, double check that the curvy edges are free before pushing the bottom up to lift it out of the form. Let cool to room temperature.

NOTE: you may have noticed I baked my fluted tart WITHOUT the removable bottom. I find the crust browns more thoroughly that way. For ease of release, I pop it into the freezer for 20-30 minutes to finish cooling and firm it up. It’s much less fragile that way and is easier to remove from the form.

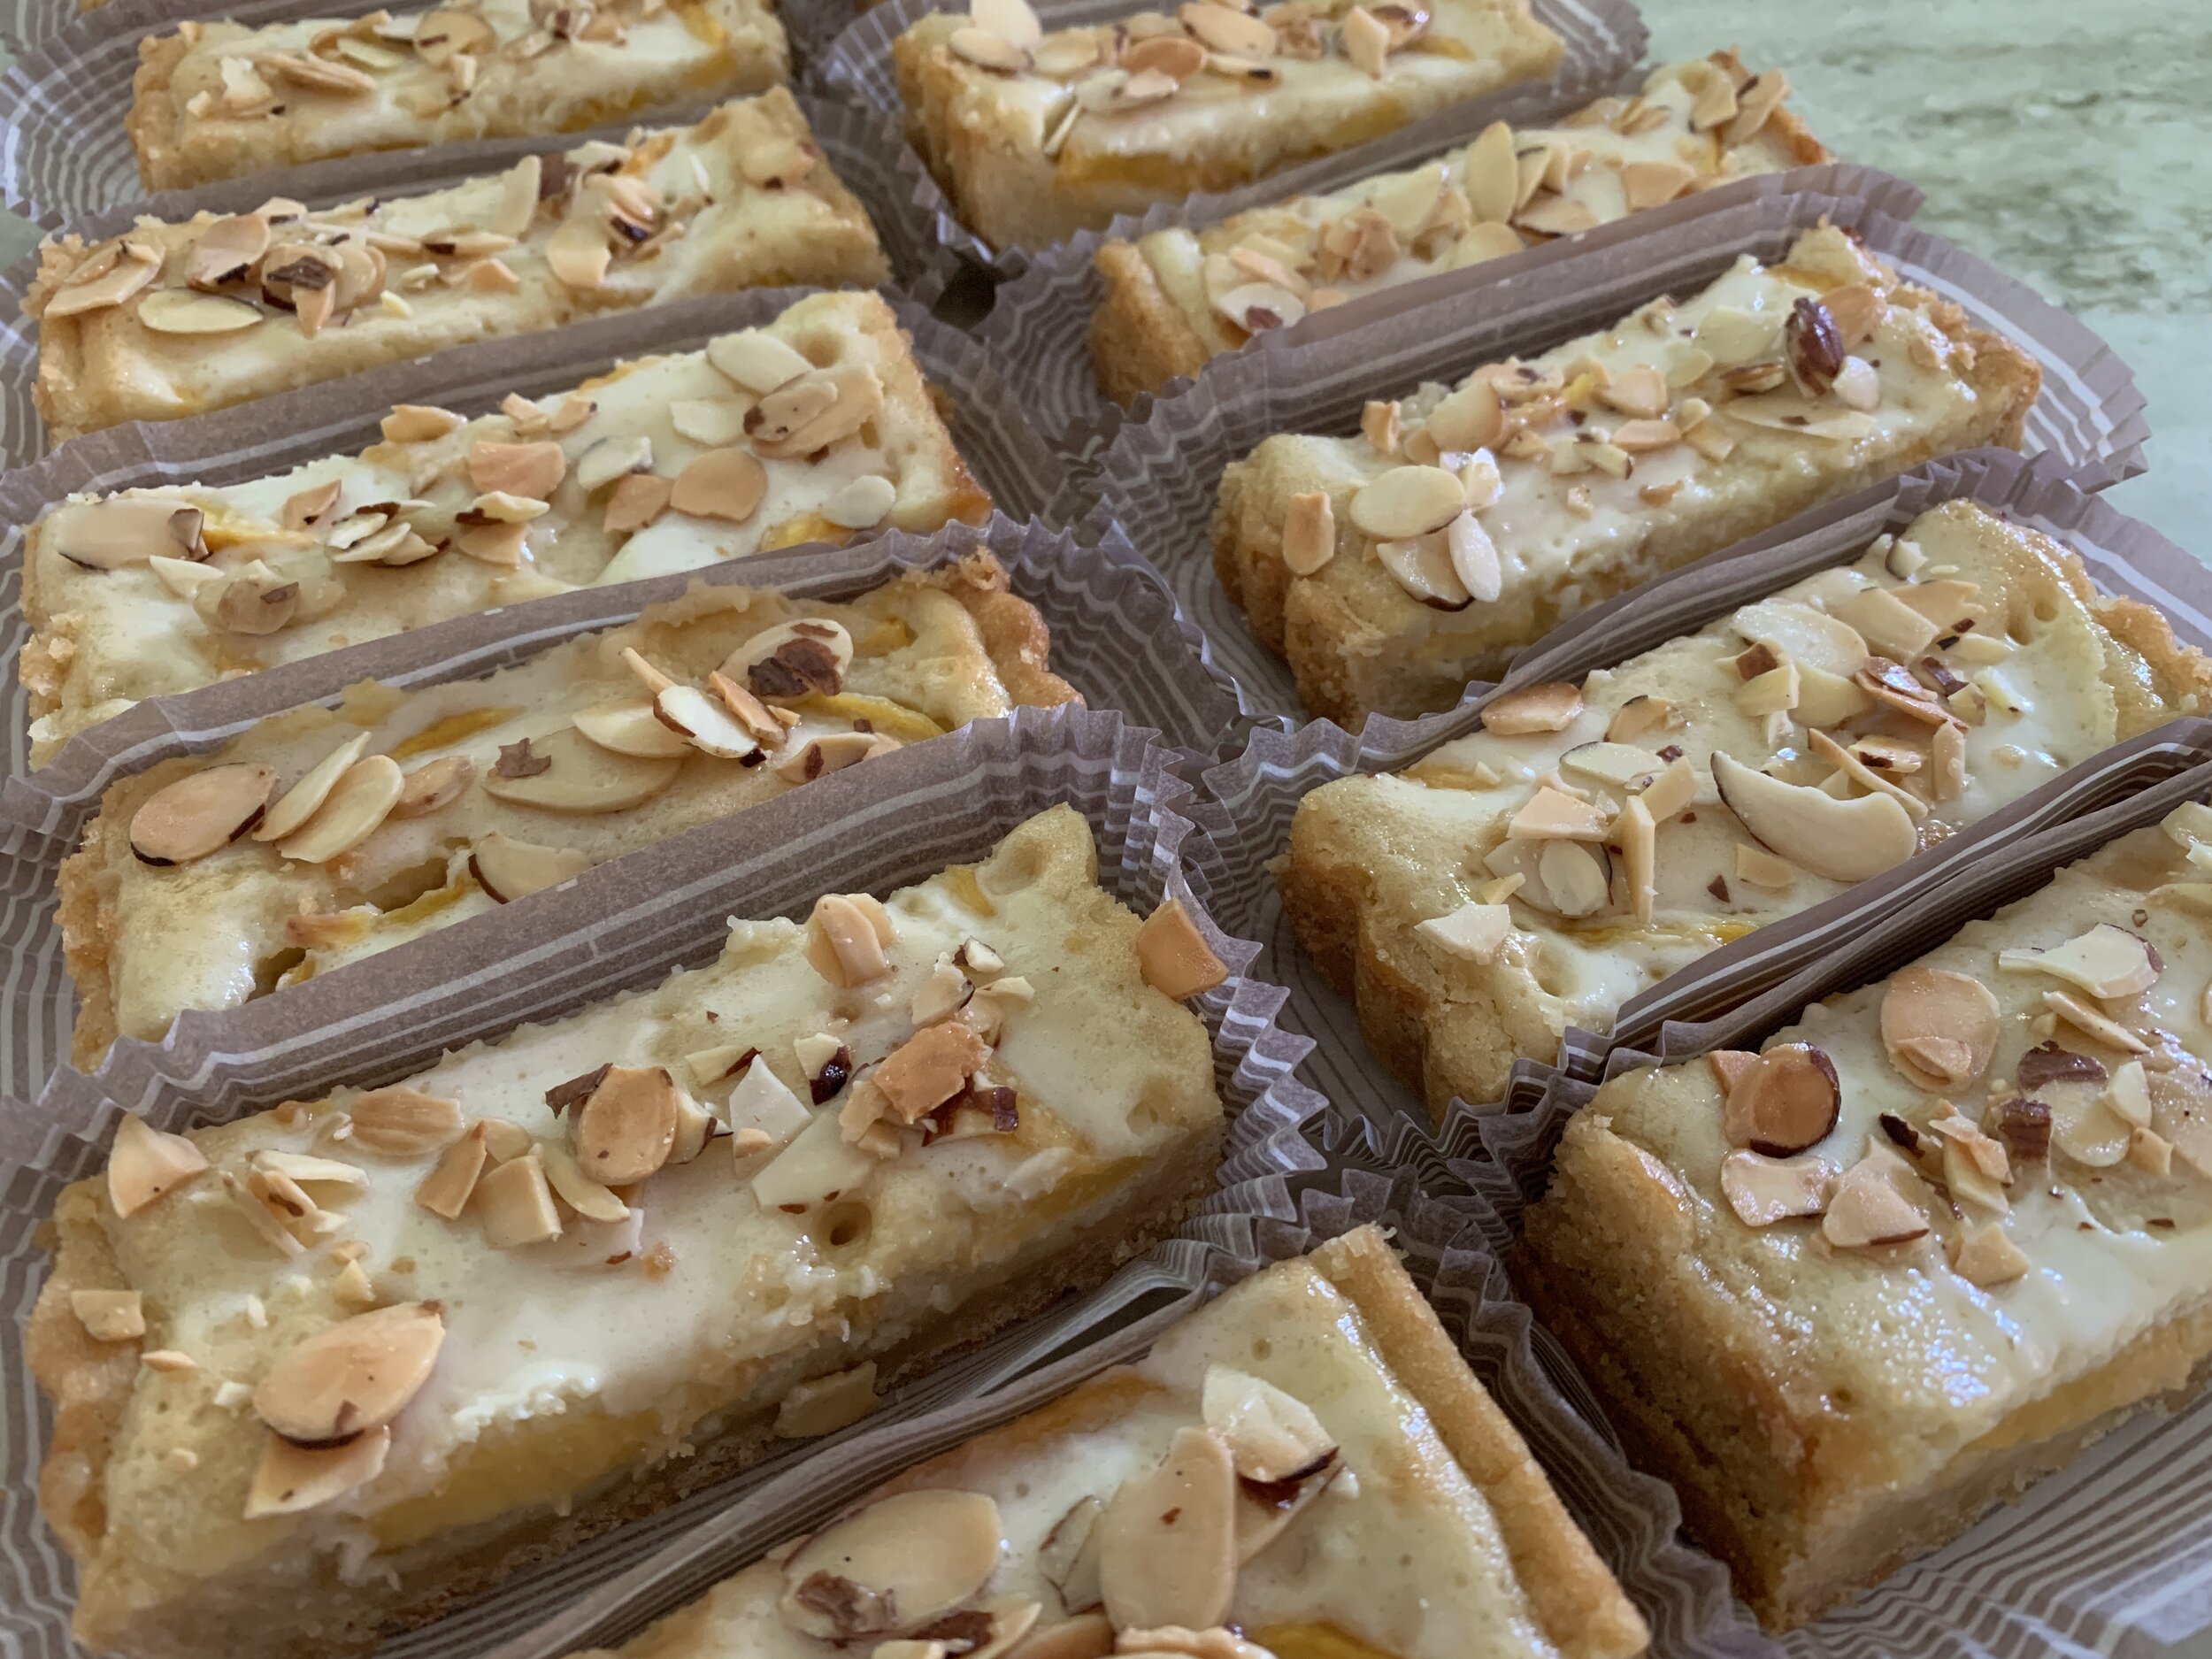
This tart keeps in the fridge a couple of days at least. Slice into rectangles and top with candied almonds for serving.

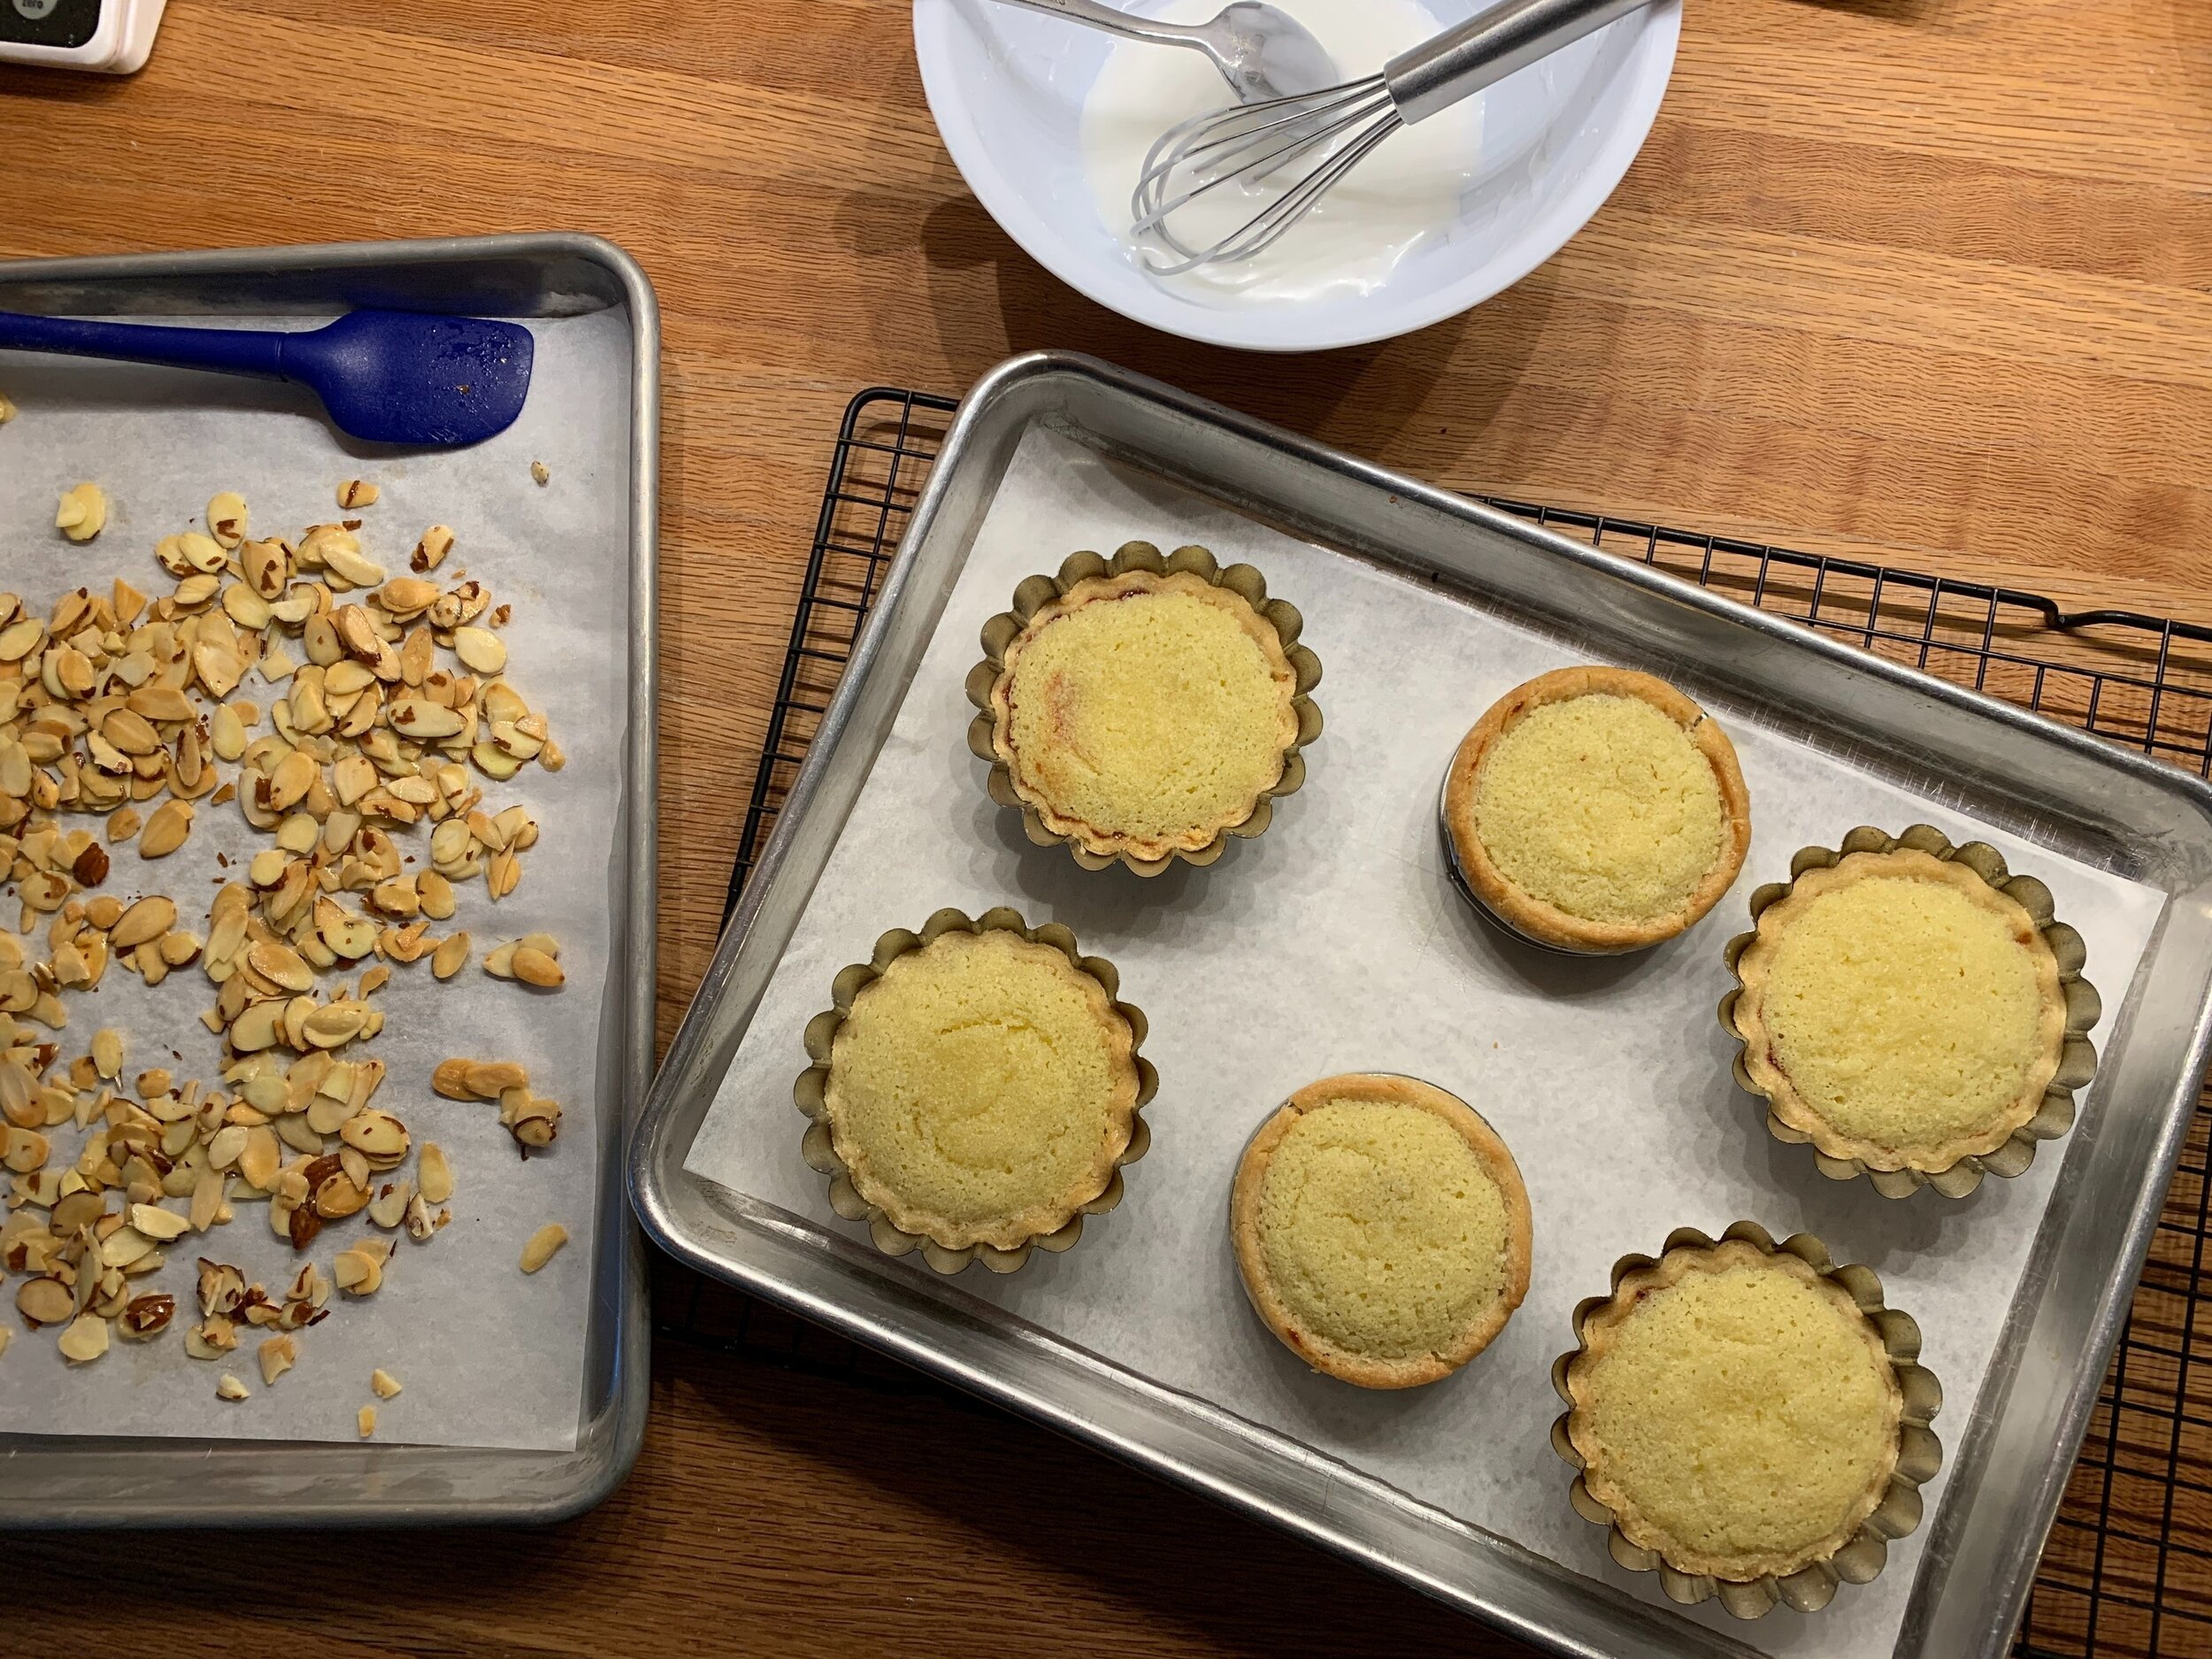
For the almonds: oven at 350ºF; parchment lined sheet pan; place 1/2 cup sliced almonds in a medium saucepan along with 1/4 cup sugar, 1/4 cup water and 1/4 teaspoon kosher salt; bring to a boil over medium heat and cook 1 minute; strain (discard the liquid) and spread the nuts on the prepared sheet pan; bake ~15 minutes, stirring half way through, until nicely browned; let cool. Keep in a covered container at room temperature and enjoy as a garnish on whatever you fancy!
8840E1FD-D534-45A8-B58F-95015ACC7E98_1_201_a.jpeg

Let’s just say that all of those who tasted these delectable slices (including Steve, the tasting maestro!) were very happy indeed. I love that.

8BAAE9EE-5D38-4BC1-8915-242E77AABF0D.jpeg

Summer’s waning, autumn’s coming. Meanwhile please take care of yourselves and those you love.

Lovely color at nearby Meijer Gardens

Lovely color at nearby Meijer Gardens

Tarte au lait au chocolat (milkshake tart)

62D32CAF-56C5-4ED8-B572-542D217C532D.jpeg

It’s time for more tart fun. This nine inch tart is an amped up version of what I called a chocolate milkshake tart back in the day when I was the pastry chef at Gracie’s in Providence RI. It’s a bit over the top from my usual not-too-sweet approach to baking and pastry, but most chocolate lovers won’t say no to a piece.

The chocolate pâte sucrée is fully baked (the only oven use portion of the program) and can be done earlier in the day of assembly or even a few days ahead and held in the freezer until ready. I placed mine on a doily covered cardboard cake round since it was being delivered to someone else, but you can place it on your favorite platter or plate as you wish.

A necessary part of the make ahead-ability is to make a milk chocolate ganache with 140 g milk chocolate and 260 g heavy cream then chill it down thoroughly. Plan for a good 4 hour chill, but you can make it a day or two ahead and keep it refrigerated as well. It will ultimately be whipped and is the essence of the milkshake nature of this tart.

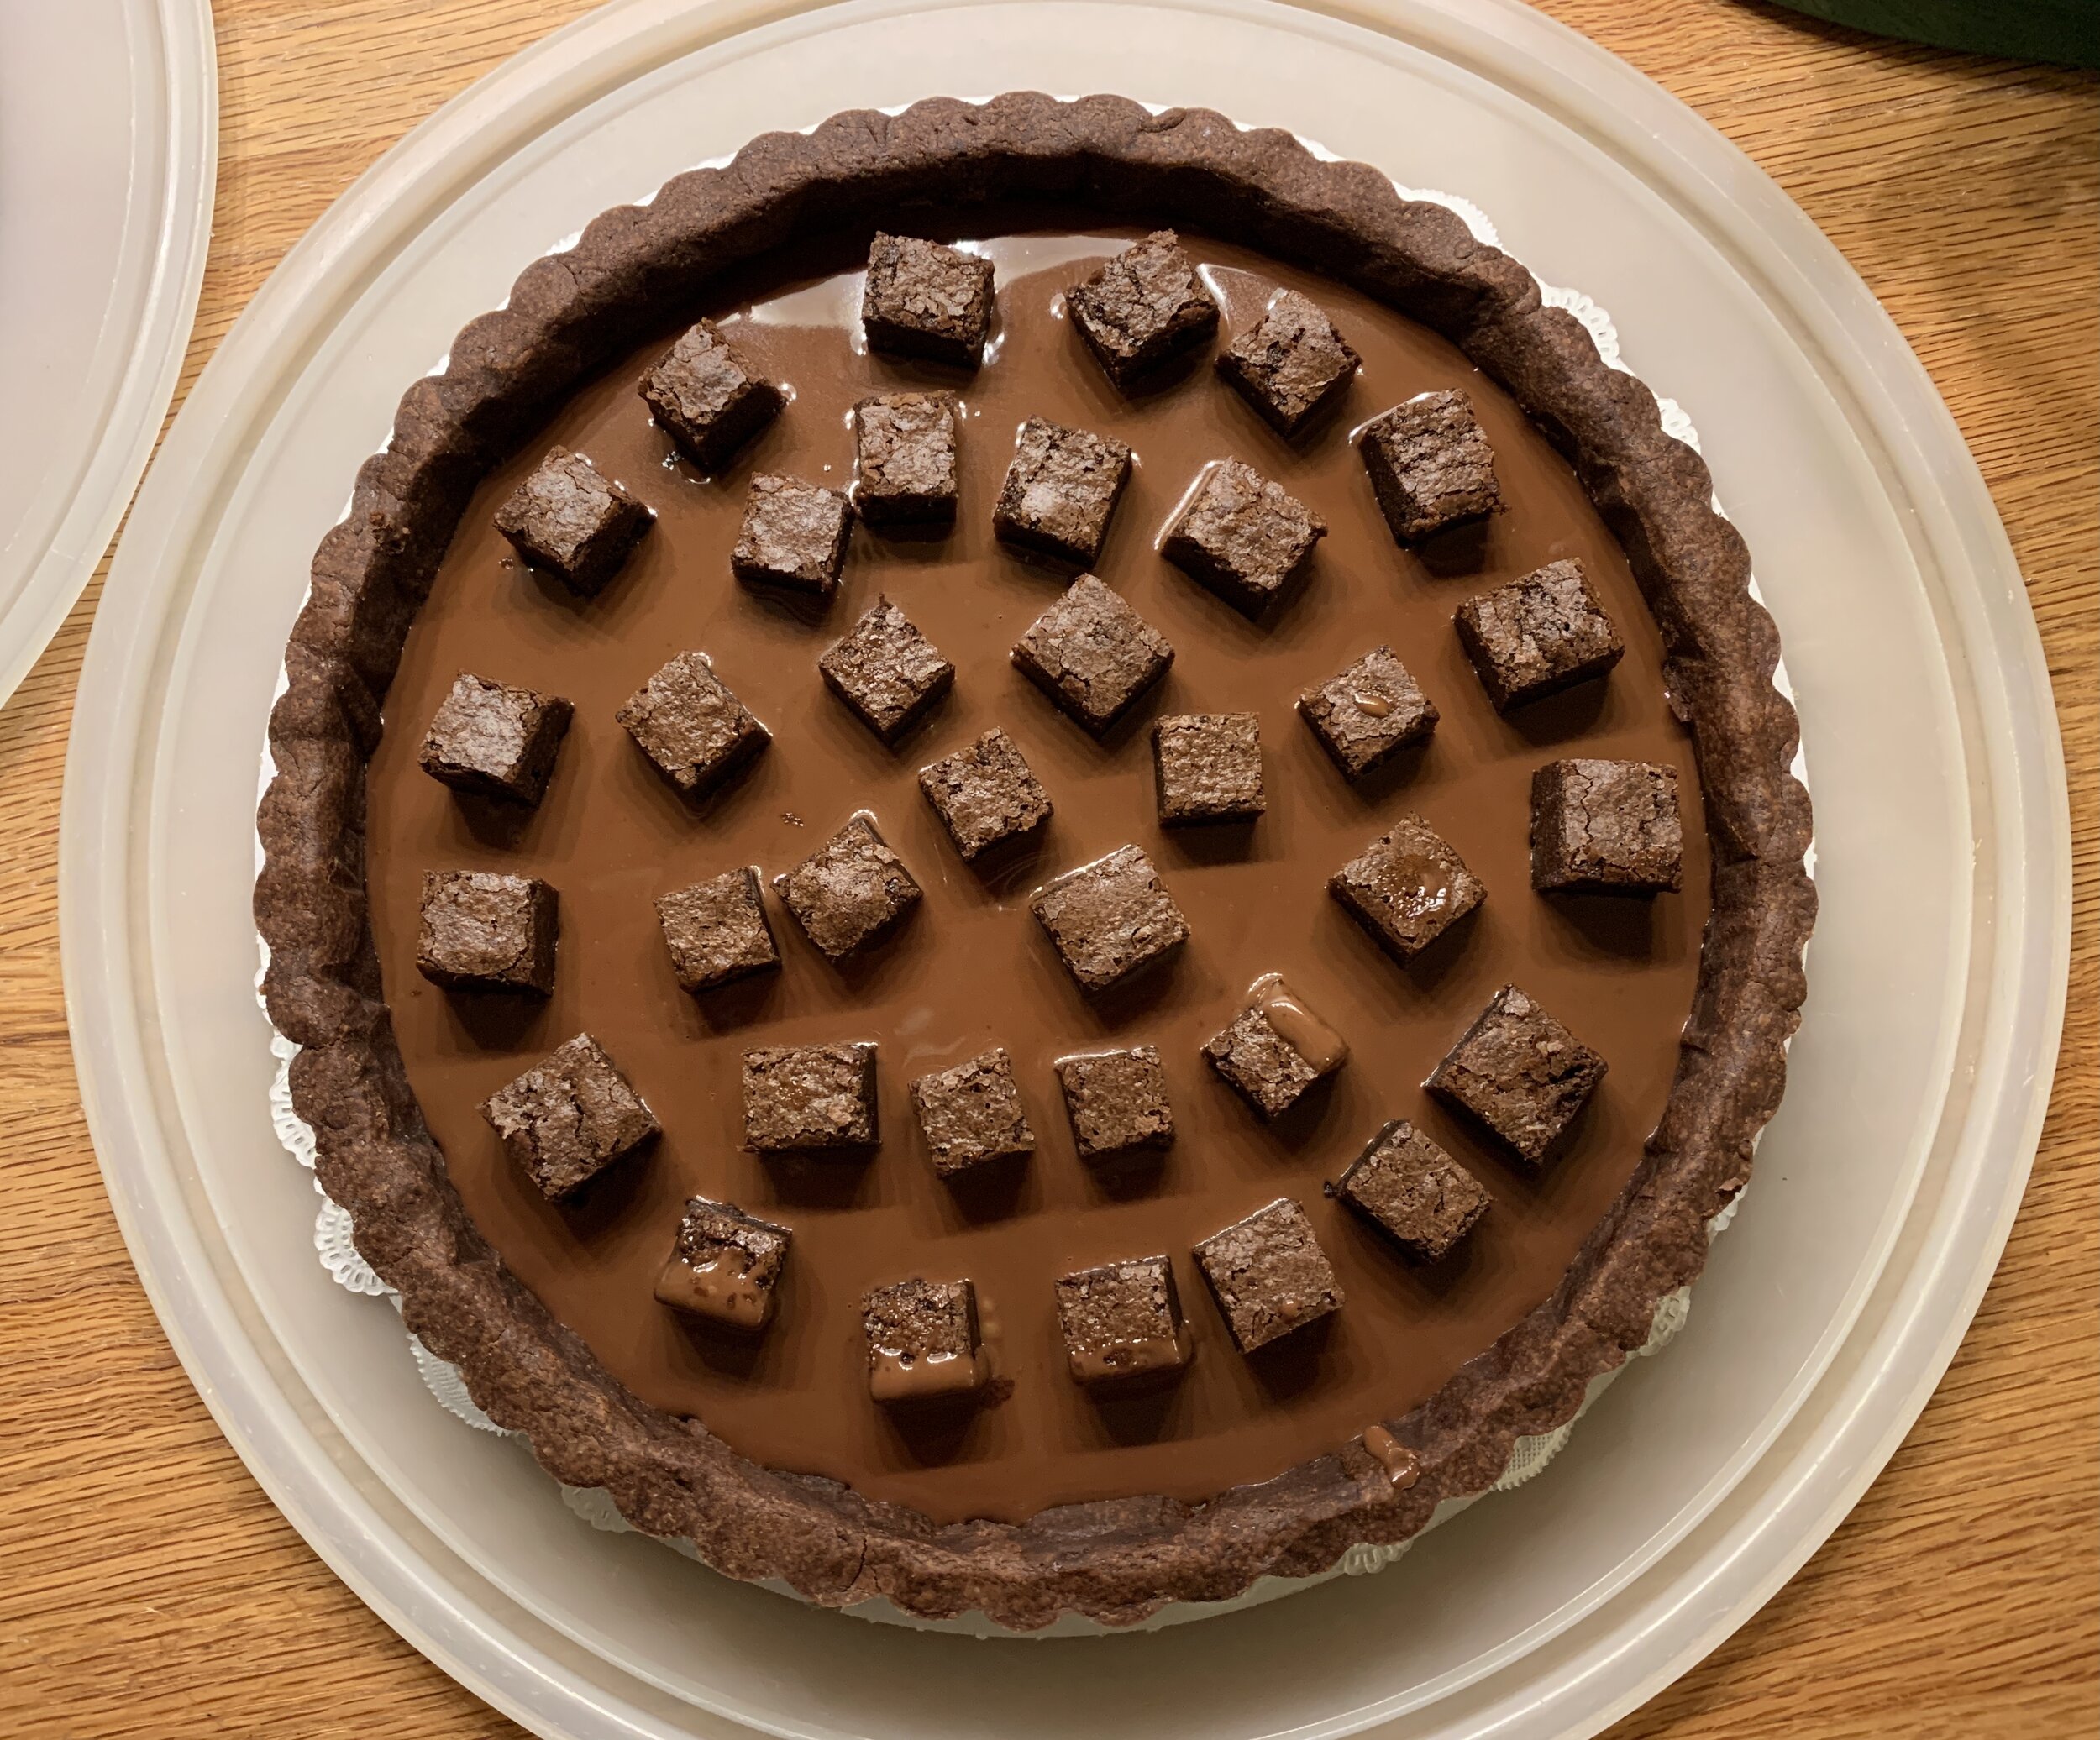
When you’re ready to go, have your prepared crust at the ready. Now make a dark chocolate ganache with 2 parts (by weight) dark chocolate to 3 parts (by weight) heavy cream. For the thin layer in this tart I used 100 g chocolate to 150 g heavy cream but you can certainly make a larger quantity if you have other ganache plans going on in your head - ganache keeps in the fridge for many days. Gently rewarmed, you can dip choux puffs into it, drizzle it over ice cream or make a bunch of smaller tarts for a dessert table. And that’s just the beginning.

Pour the warm ganache into the baked crust then, using your own favorite brownies (I’m a fudge-y fan myself), dot brownie cubes all around. Chill it an hour or so to set the ganache.

CACB2DD7-5FF8-4BD0-B4DB-9651A20AF2C5_1_201_a.jpeg

Time to whip the milk chocolate cream - yay! You’re going for medium firm peaks.

99CA8F25-AAAB-43CF-A874-E5719B8E2544.jpeg

I piped the cream using a star tip to give it the circular zen-garden-like ridges. As you pipe be sure to let the cream sort of fall among the brownie pieces so you have a nice fill of cream throughout the tart. Don’t be too fussy with it all.

C35C3169-43F5-417F-8EFE-E22F9694745A_1_201_a.jpeg

Garnish with caramel drizzle and a sprinkle of chocolate cookie crumbs and you’re all set. Hold in the fridge until time to serve and enjoy your creation. Now that’s some tasty creamy, crunchy, caramel-y, fudge-y goodness!

While we still have some summer left, have a grand time whatever you do. Cheers!

Queen Anne’s lace along my walking route

Queen Anne’s lace along my walking route

Canadian butter tart trials

Please note: when this post first published, the text mistakenly read the “left half of the pan was eliminated”. That has been corrected to “the right half”. Apologies!

7E720EA9-E600-4B82-8506-5CFE869FBB1B_1_201_a.jpeg

It’s so cool when I come across something new (for me) in the baking and pastry world and not long thereafter I receive a request to make just that very thing. The ever popular Canadian butter tart is one of those. It’s kismet!

75D12CD5-87C8-4AB1-97B9-53891244E0A0_1_201_a.jpeg

It turns out that a local Grand Rapidian has a Canadian friend who adores butter tarts, and she wanted to gift some to said friend for her birthday, a lovely gesture indeed. Being confident that I could deliver, I took to reviewing a number of recipes including one from NYT (the one I remembered reading not too long ago.)

For my money I’d call it a sugar tart since the filling and taste experience are indeed quite sweet (true confession - a bit over the top for me!).

As I reviewed the dough portion of a number of recipes, I found most of them contained whole egg or yolk in addition to the typical crust components of flour, butter and ice cold water. Some used a combo of lard and butter and some went with my preferred method - all butter.

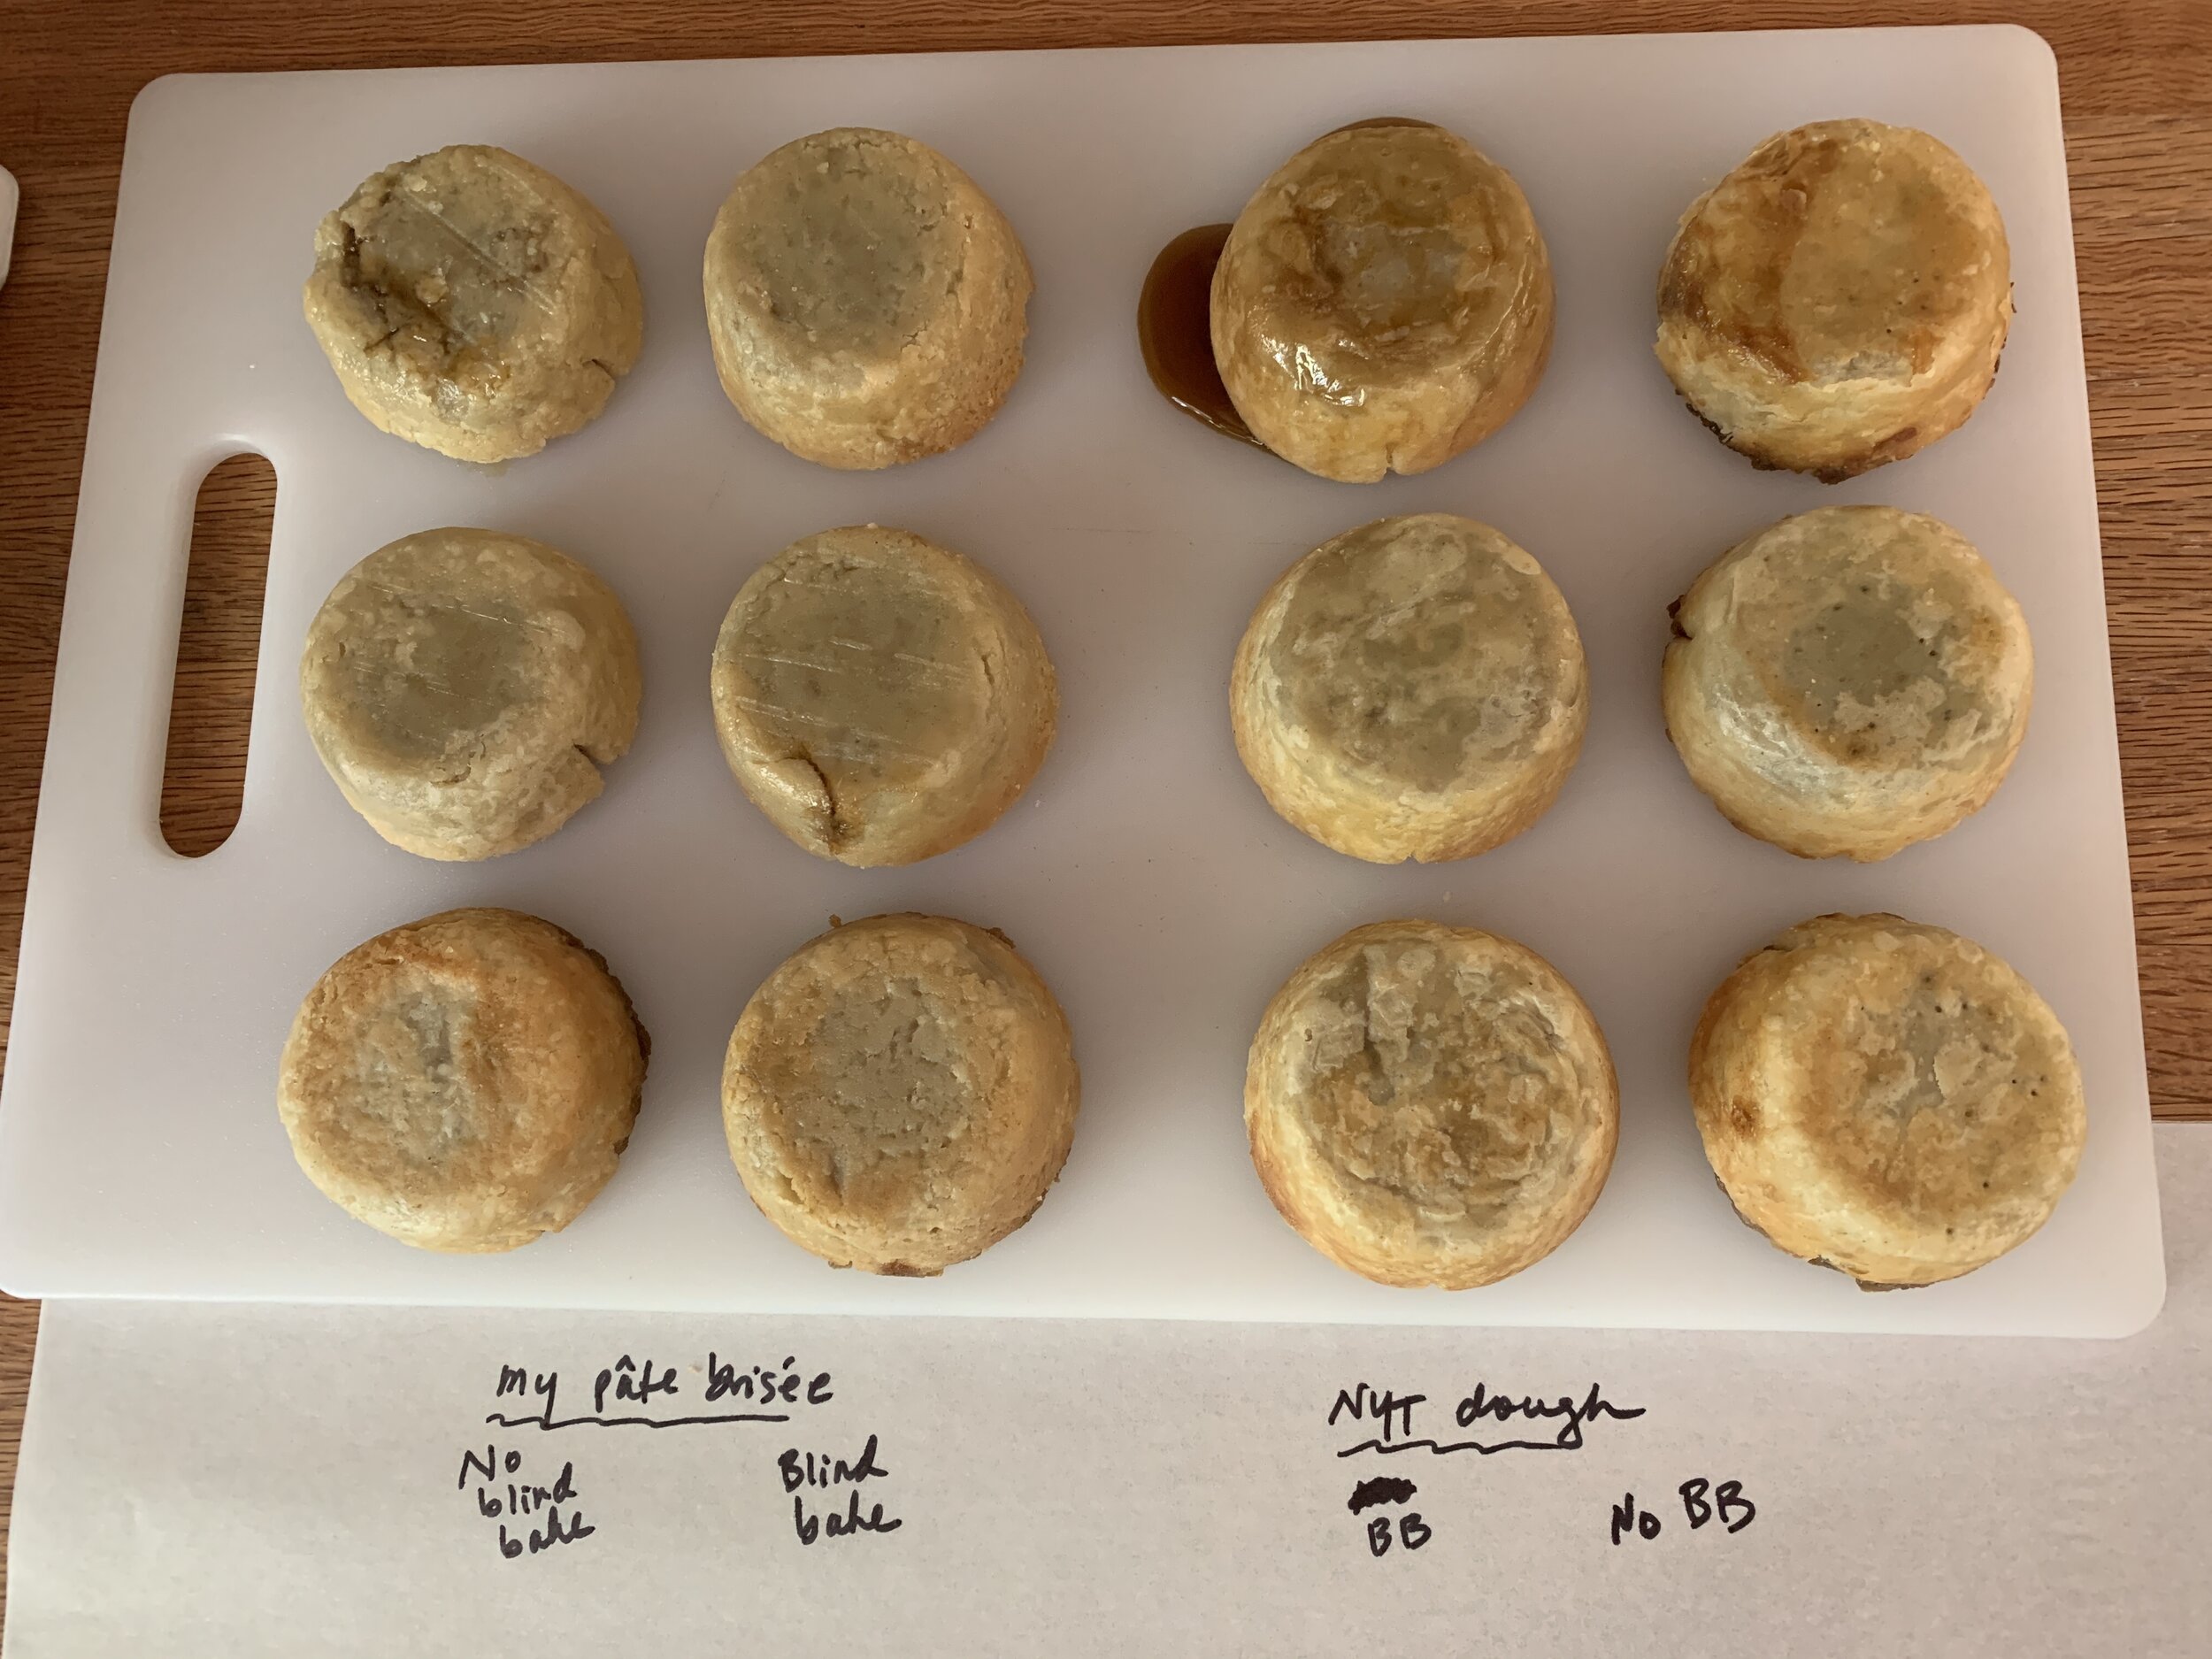
I decided to follow the recipe from the NYT article and compare the dough with my standard pâte brisée (no egg). For the filling I made two versions of NYT’s and found another filling that spoke to me from the site Little Sweet Baker - less sugar and more butter plus a splash of cream - it’s a BUTTER tart after all!

Mine is certainly not a scientific study but simply my way of sharing my inaugural (and limited) experience with the butter tart world. The results are frankly hard to fully explain in terms of why a certain filling baked the best in a particular dough. Hmmm.

BCA2FDCE-D7CC-47AE-B473-E7B4997E938C.jpeg

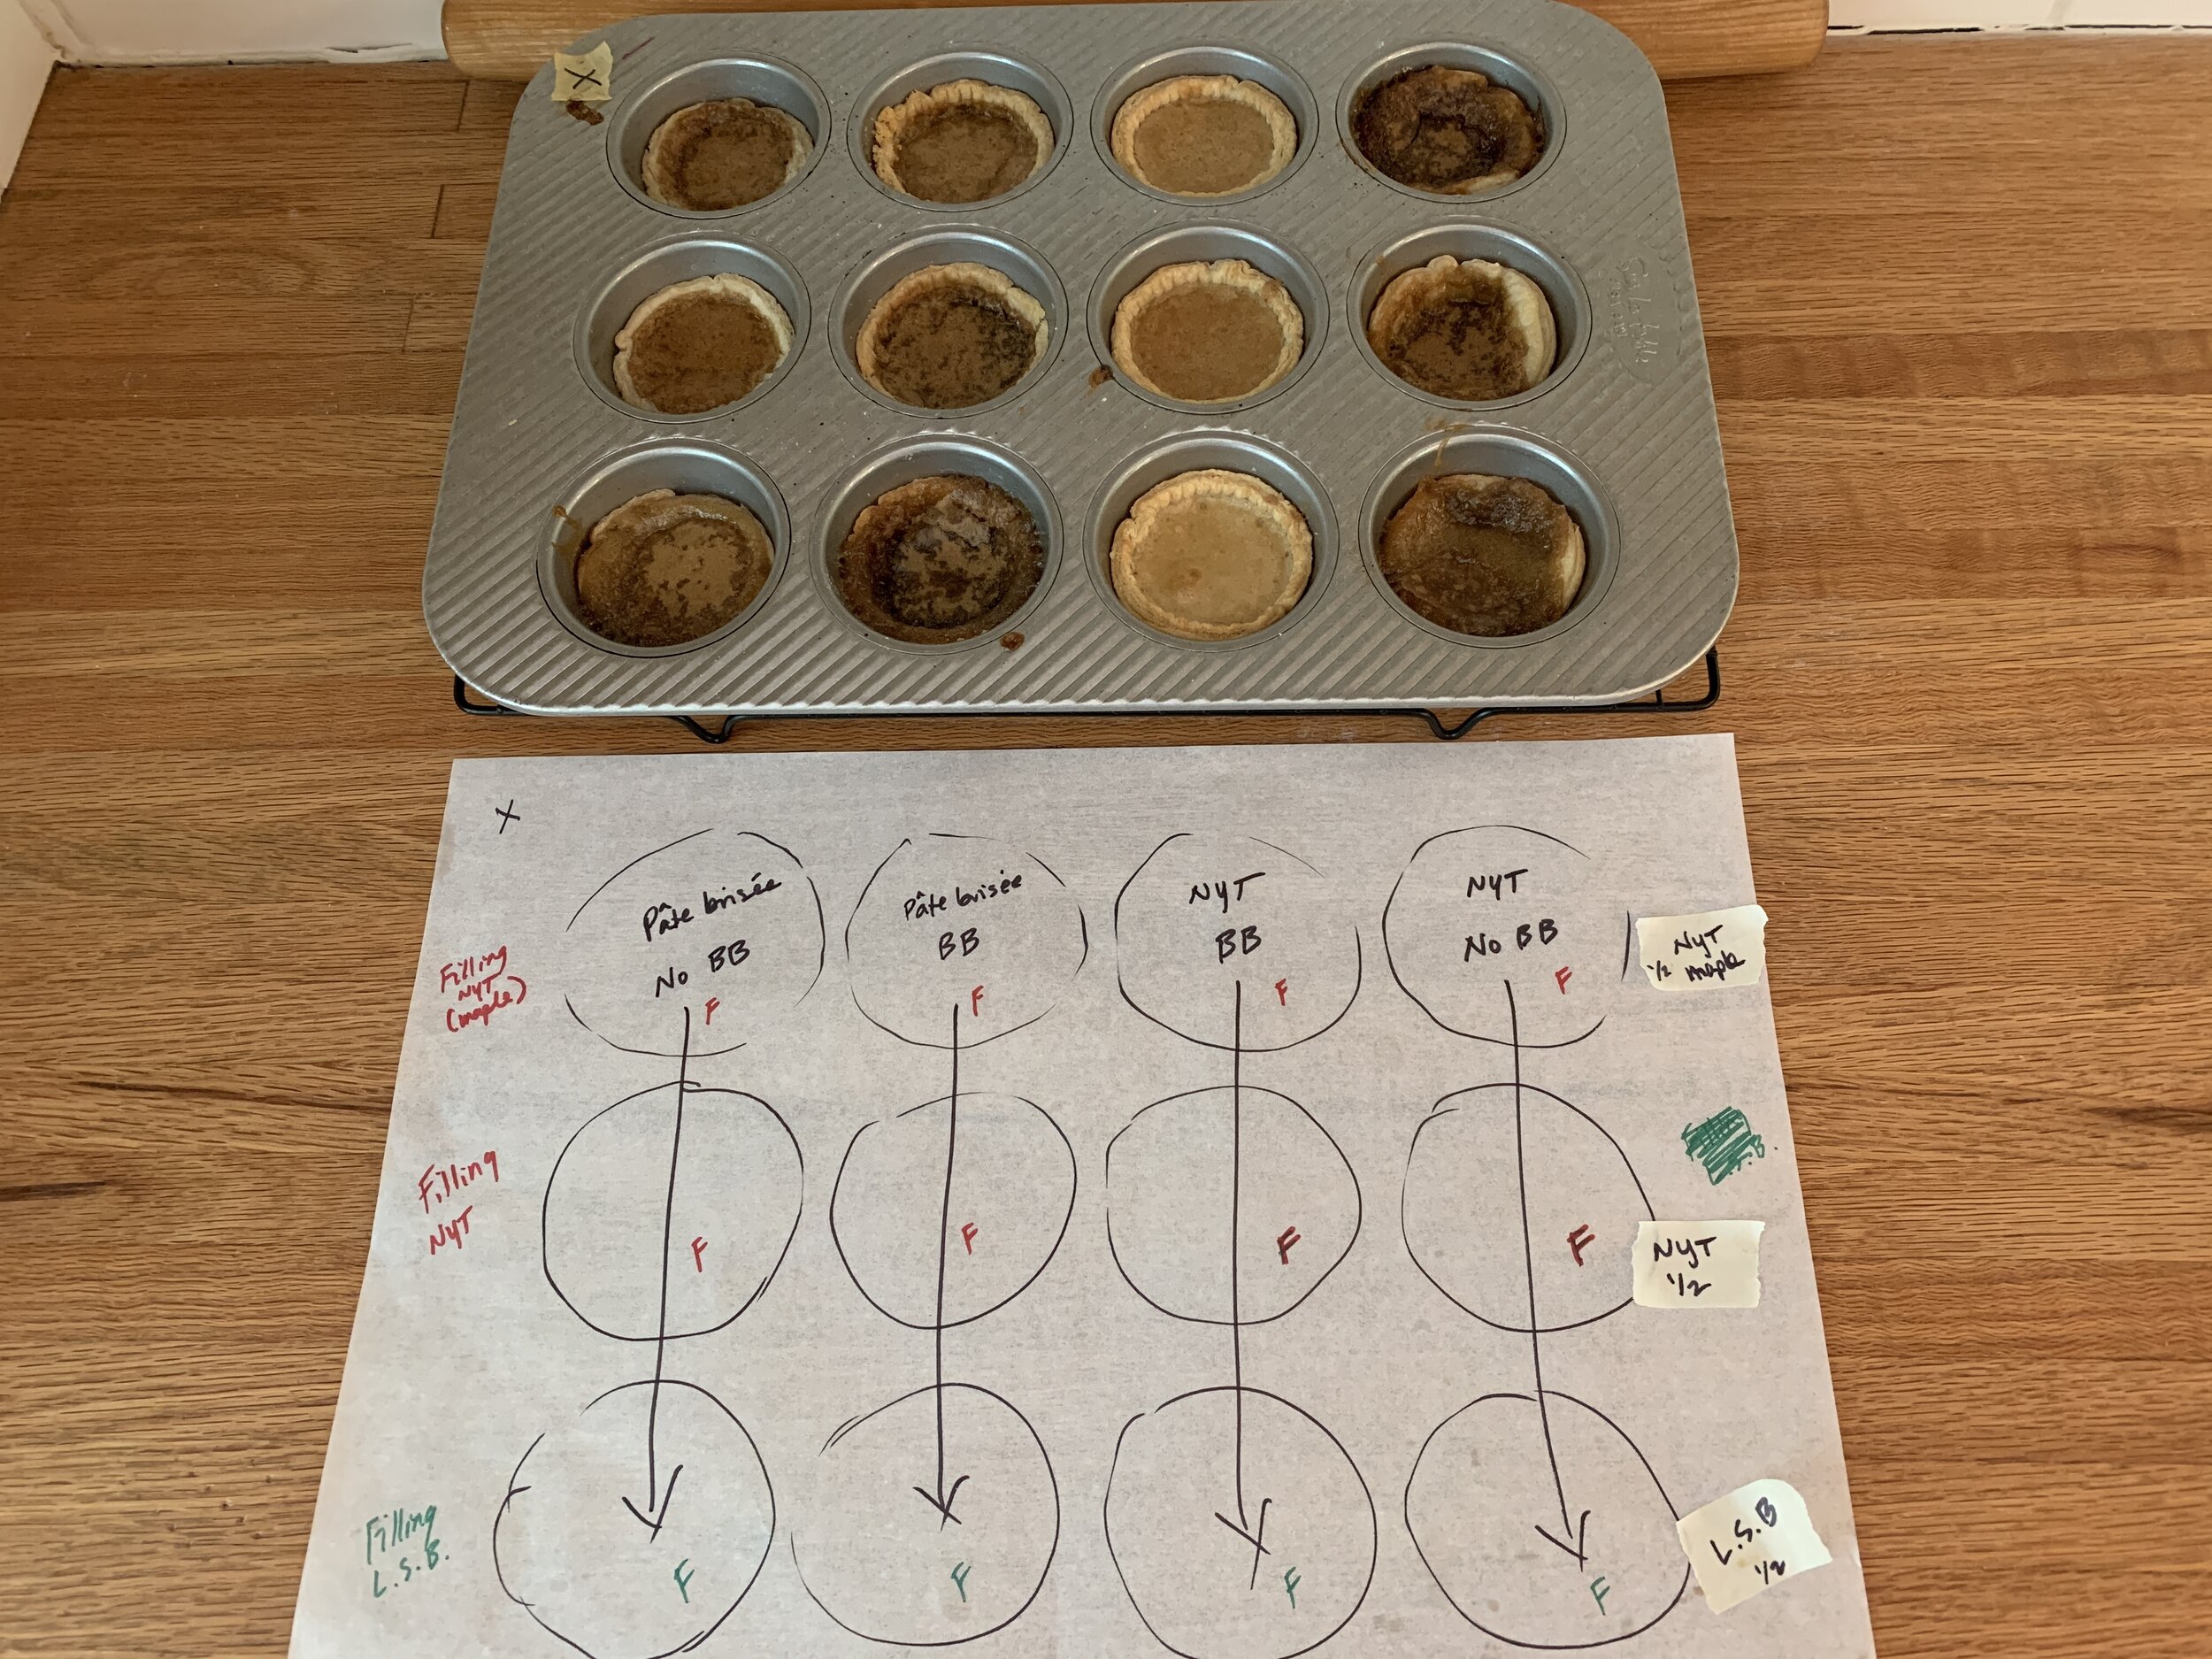
I blind baked the two doughs by lining a standard muffin tin (3 wells for each dough), freezing it to firm up the dough, then lining with papers and using sugar in place of dried beans as my weight, a tip learned from Stella Parks of “Brave Tart” fame. While the sugar doesn’t toast for very long this way, you can still save the sugar and use it in your shortbread or tart dough recipes to give them a hint of toasty-ness.

Once the blind baked shells were cool, I lined the remaining empty wells, 3 with each dough and proceeded with the fillings.

When making the filling, it is suggested that one use very soft or melted/cooled butter and blend the filling by hand so as to avoid incorporating air into the mix, resulting in a final, enhanced gooey-ness. I chose to keep it simple, not adding nuts or raisins as some iterations do.

The full NYT recipe blends 200 grams brown sugar ( I used dark) with 1/2 teaspoon salt; blend in 57 g soft, unsalted butter by hand until smooth, followed by 1 large egg and a teaspoon vanilla (pretty easy, eh?). The second NYT version I made replaces the 200 g brown sugar with 150 g brown sugar and 1/4 cup maple syrup with the remaining ingredients the same (meant to result in a runnier filling that some reportedly prefer).

Little Sweet Baker’s filling blends 150 g brown sugar with 75 g melted and cooled butter; add in 1 large egg, I teaspoon vanilla and 1 tablespoon heavy cream. Again, easy-peasy.

For my testing purposes I used half recipes (for the egg, whisk up one egg then weigh out 25 g which is about half a large egg.)

05F8FDD1-B805-48C9-8C25-1618A97E8A27_1_201_a.jpeg

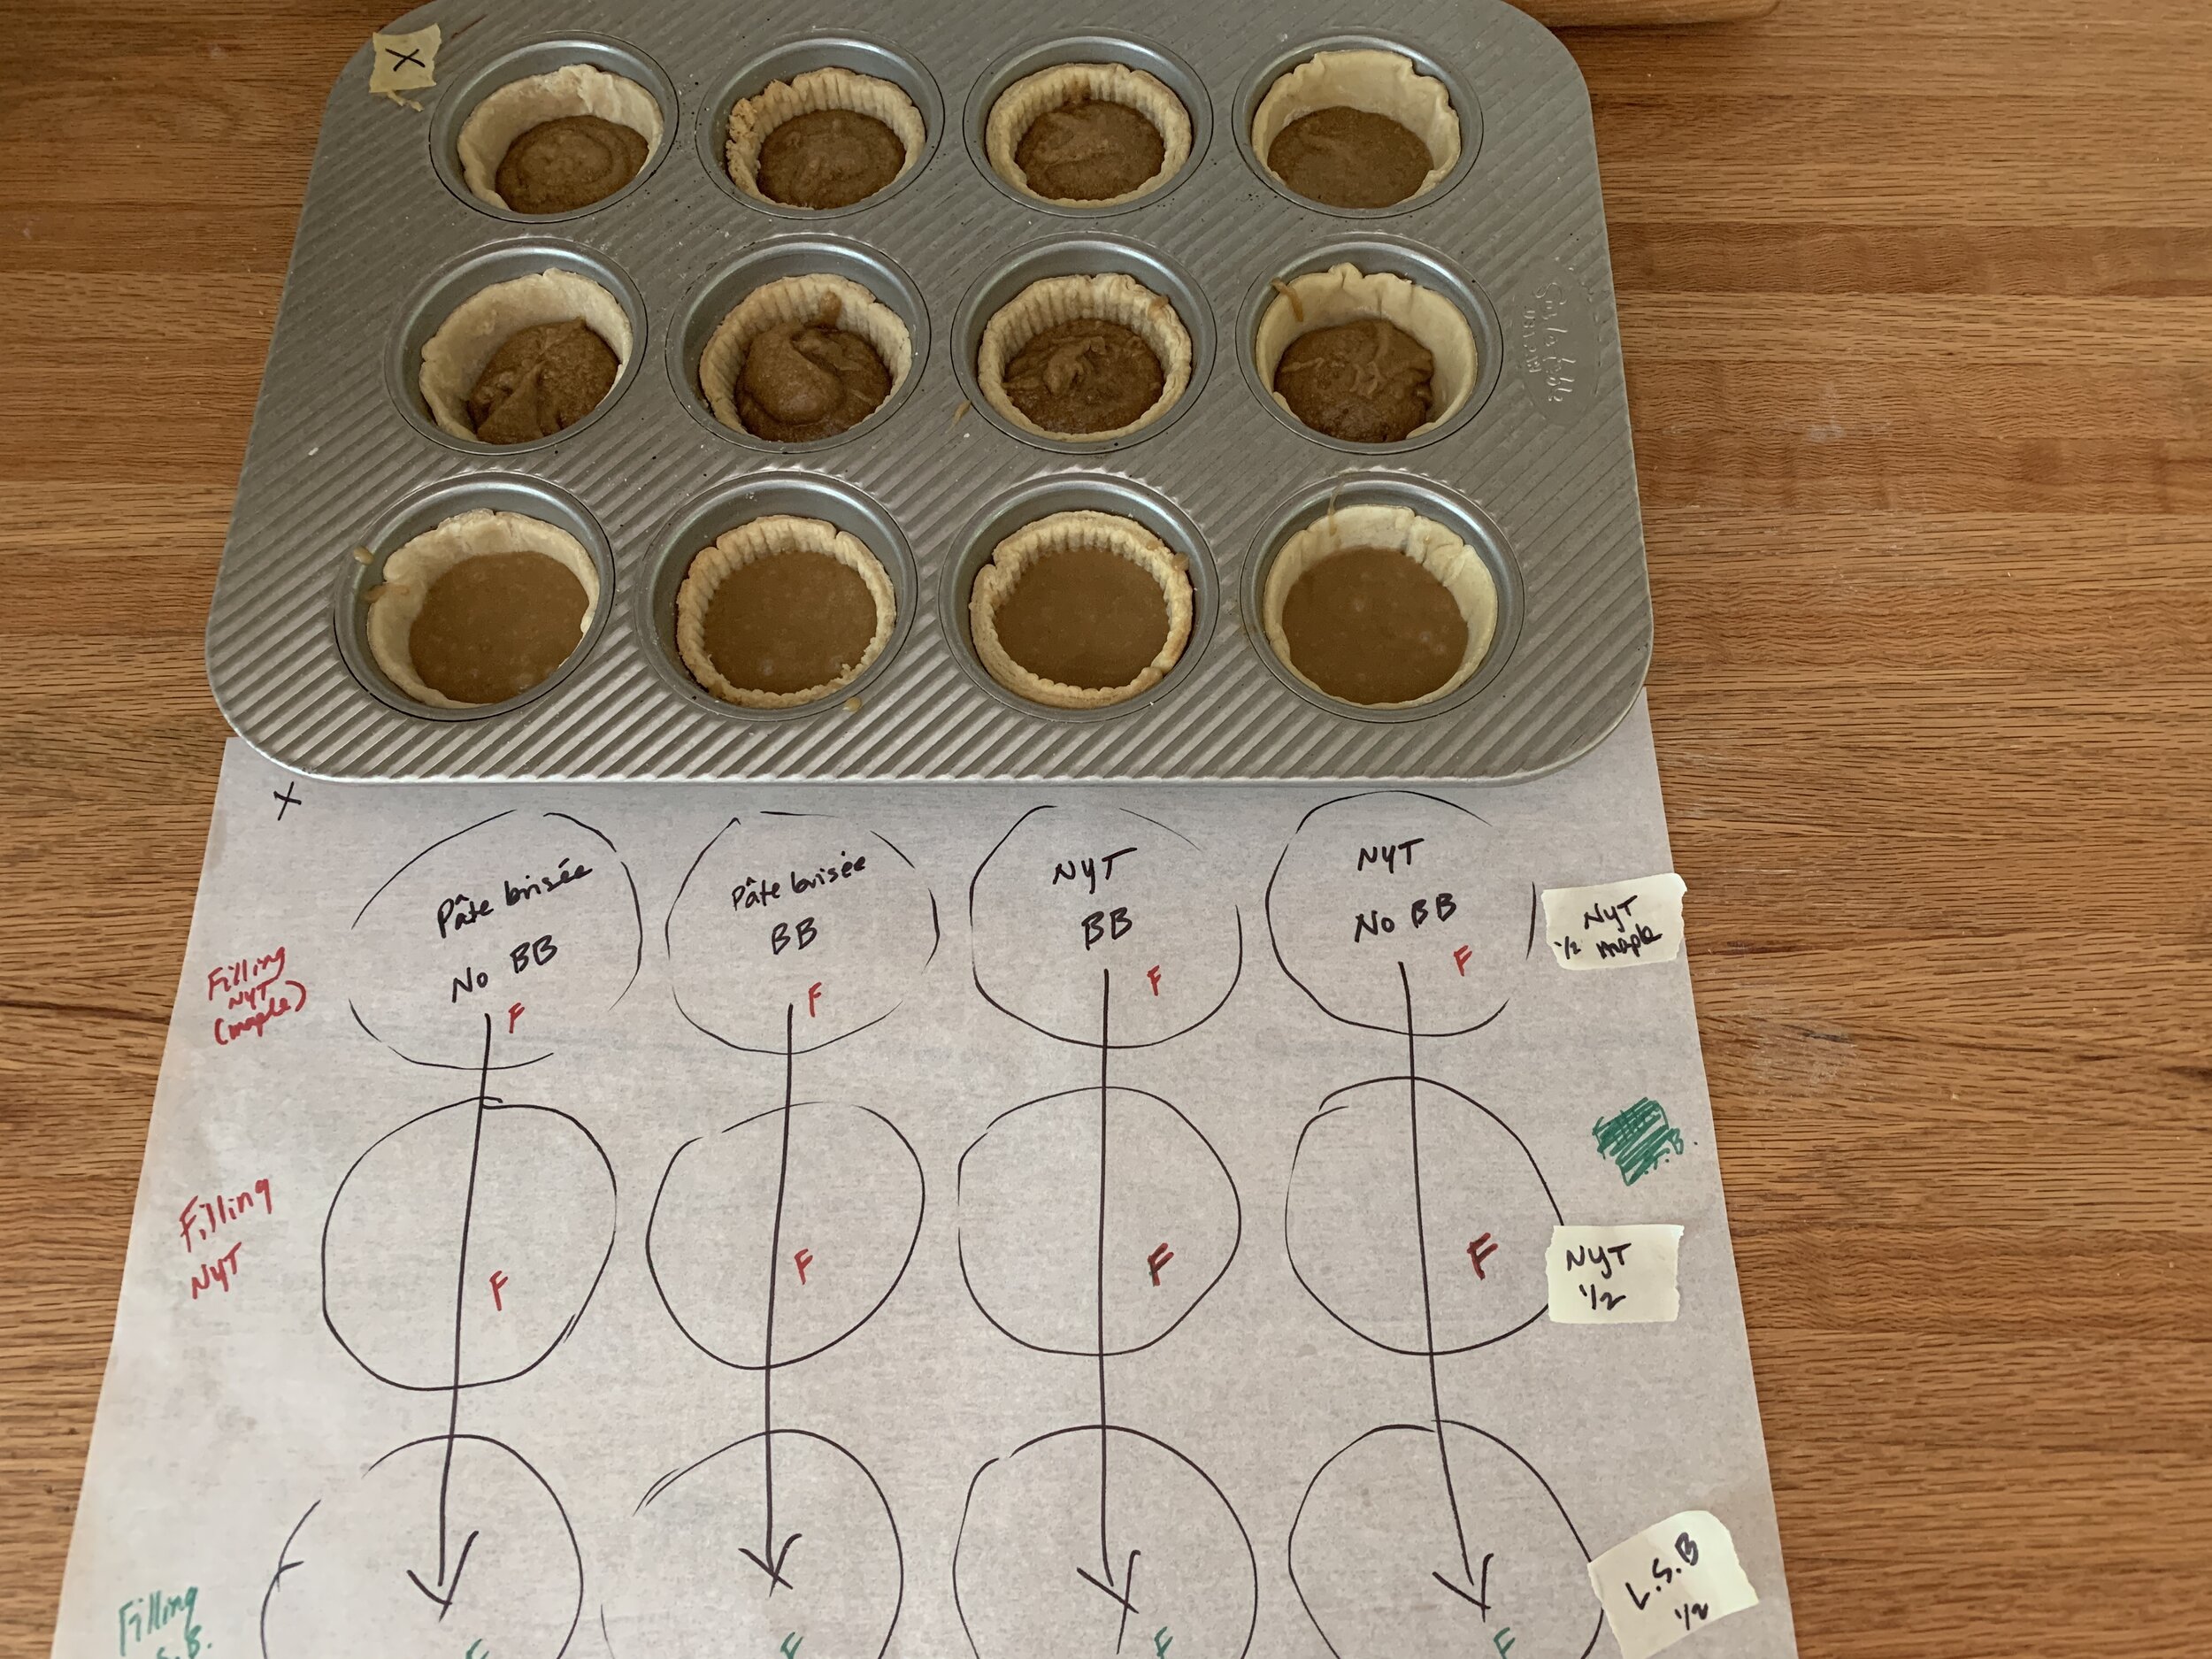
I guestimated about 28 g or so of filling for each tart and proceeded to dole the different fillings into the shells. Remember the central 6 wells are blind baked and the outer 6 are not.

B9F5ED14-AF96-49BA-AAE3-B23C5C2DEA8A.jpeg

Here they are, all filled up and ready to go.

129D2521-A69F-4682-8608-0983D39927B3_1_201_a.jpeg

Bake at 400ºF for about 13-15 minutes for a gooier result or up it to 17-19 minutes for a firmer result. I went for the gooey time frame - you want the crust to be nicely browned and the filling looking set and deeper brown. What surprised me is the stark difference in the color of the third (from the left) column of tarts (the NYT blind baked ones) - much lighter golden vs the deep caramel-y brown of the others.

7E720EA9-E600-4B82-8506-5CFE869FBB1B_1_201_a.jpeg

Once baked, run a small offset spatula (my FAVE tool!) around the edges to loosen any sticky goo before it hardens. Then let them cool completely, lift them out of the tins and enjoy.

I turned them all out upside down (note the filling oozing out of the top, 3rd to the left tart) to assess the bottom crusts. I must say I’d be hard pressed to tell which were blind baked and which were not if I didn’t already know.

B84A839E-4F7F-4A4F-A429-E12A71FB5393_1_201_a.jpeg

Time to taste! Steve was a good sport for this one - we agreed that too many tastes became quite overwhelming with the sweetness of it all.

There was no rhyme nor reason to which fillings baked up runny and which gooey - you can see below that the NYT dough/blind baked threesome yielded a runny result for all three fillings. Go figure! Lucy I just can’t ‘splain it.

4082F727-347A-4D56-8C36-62E7E4175C95_1_201_a.jpeg

The NYT dough was unpleasant in the mouth - chewy and less flaky than good old pâte brisée - and the maple syrup filling was simply too runny. Due to those two things, the right half of the pan was eliminated.

Our final analysis: the pâte brisée plus Little Sweet Baker filling won the day, and it didn’t seem to matter at all whether the crust was blind baked first.

EA001655-E6C2-444E-8B93-8C5CA2AE515F_1_201_a.jpeg
257BA32C-31D0-41D7-99A5-4FB46E1C7D49_1_201_a.jpeg

For my final round of butter tart baking for the actual birthday order I used my classic pâte brisée, no blind baking needed. I upped the Little Sweet Baker filling recipe by 50% since I found the base recipe meant for 12 tarts to be meager. Of course, let’s remember I’d had no prior experience making these but it just felt right.

The final bake: 400ºF for 7 minutes; rotate the pan 180º and bake another 5 minutes; decrease to 375ºF and bake another 3 minutes. Since I had 12 of these for the order, I didn’t have an extra one to cut into but . . . . . imagine the end result looking like the close up above with a skosh more filling to enjoy. Sounds pretty darn good to me.

Et voilà! All boxed up and ready to go. And the feedback from the Canadian birthday girl: “a big hit”! Yippee!!

75D12CD5-87C8-4AB1-97B9-53891244E0A0_1_201_a.jpeg

Any tips or tricks of the trade from all of you butter tart aficionados are welcome!

Stay healthy everyone!!

Strawberry lime cream stacks with berry sauce

1CEF2EC6-8A05-4229-B697-E2F4B07926D7.jpeg

Oh boy! This one was fun indeed!! Remember the vanilla chocolate dacquoise I wrote about recently? Well, here’s another creation using leftovers and ingredients that needed to be used. This time lime curd from a teacake project, mascarpone (tarte aux fraises fraîches project) and a block of cream cheese just sittin’ in the fridge.

My inspiration often comes from things I happen to have on hand, and let’s be honest - how often do we buy something simply because we have a coupon for it, not knowing exactly what we might do with it? I do! That’s how cream cheese often comes into the equation - good old Philly.

Truth be told, I’m a sucker for custards, particularly baked versions like crème brulée and pots de crème, so I tweaked a ricotta/cream cheese recipe I’ve used a number of times to create a mascarpone version instead. Cue in roasted strawberries and you’ve got yourself something pretty fantastic.

6CE95A7F-CDBB-4949-93A6-571846A9CA52.jpeg

I took advantage of west Michigan’s strawberry season to roast up a bunch and purée them. So tasty in ice cream (yum!) but also to freeze to have on hand for whatever. Here it is quick and dirty - clean, hull, cut up a quart of strawberries into equal pieces. Toss them in 2 tablespoon brown sugar (light or dark, either way), spread out on a silicone mat and bake in a 300ºF oven for 30 to 45 minutes, stirring every 10 minutes or so until juices appear thickened and jammy. Let cool (things will thicken up), then purée.

Where am I going with all this you might ask? OK - cookie base/roasted strawberry mascarpone custard/lime cream/stacked with graham crumbs and caramel/topped with mixed berry sauce. Whoa!

It’s all about planning. The custard/cream can be done ahead and frozen for up to a couple of weeks. The base can be shortbread, meringue or cake depending on your vision. I always have caramel sauce in my fridge and graham or cookie crumbs of various sorts in my freezer.

Lemon or lime curd (just sub in lime juice for lemon) is great for making a citrus cream (2 parts curd to 1 part whipped cream) that can be doled out into silicone molds and frozen until your plan for use starts to take shape. In this case I blended 260 g lime curd with 130 g whipped cream and filled 8 of my favorite muffin shaped wells about 1/2 way. The mold, seen below, is Silikomart’s SF028. My favorite source for this line of molds is Kerekes at Bake Deco.com

7B856BB7-DA6C-4362-8E20-F90B6CA21199.jpeg

I baked my mascarpone custard in the same sized mold (I have several at my disposal!) then cooled and froze the rounds until ready for assembly.

Now for the base. I chose Breton dough for mine, rolling and cutting the rounds a bit larger than the diameter of the molds. Breton dough contains baking powder so the cookies do spread. Just out of the oven, simply trim them up with the same cutter and you have the perfect base on which to set the custard stack. And you can save the crumbs for garnish too!

NOTE: I’d roll the cookies out more thinly next time - although a delicious cookie, it didn’t yield well to a fork. Something flat is best for stacking so a more tender crumbly shortbread or either sponge cake or dacquoise rounds would all work well here.

5009F1B2-A686-45DA-8BD2-3F73DD2ADC31.jpeg

Let’s assemble! Cookie bases in papers (again for ease of placing on an individual serving plate) and components at the ready . . . . . .

EF28C1C4-6D04-4E4D-8A9A-180A9DD5E969.jpeg

Caramel drizzle topped with strawberry custard. . . . . .

36327C7C-47CE-4CE0-9814-E5D20CEE3850.jpeg

then more caramel drizzle topped with graham crumbs and finished off with lime cream.

C99D2574-D86C-4F3D-B620-6CDC63164A48_1_201_a.jpeg

All stacked up!

C8C2DF0C-412D-4F39-999F-5990848F49DE_1_201_a.jpeg
 
5831E154-8200-4B9D-A895-70674E871FFE.jpeg

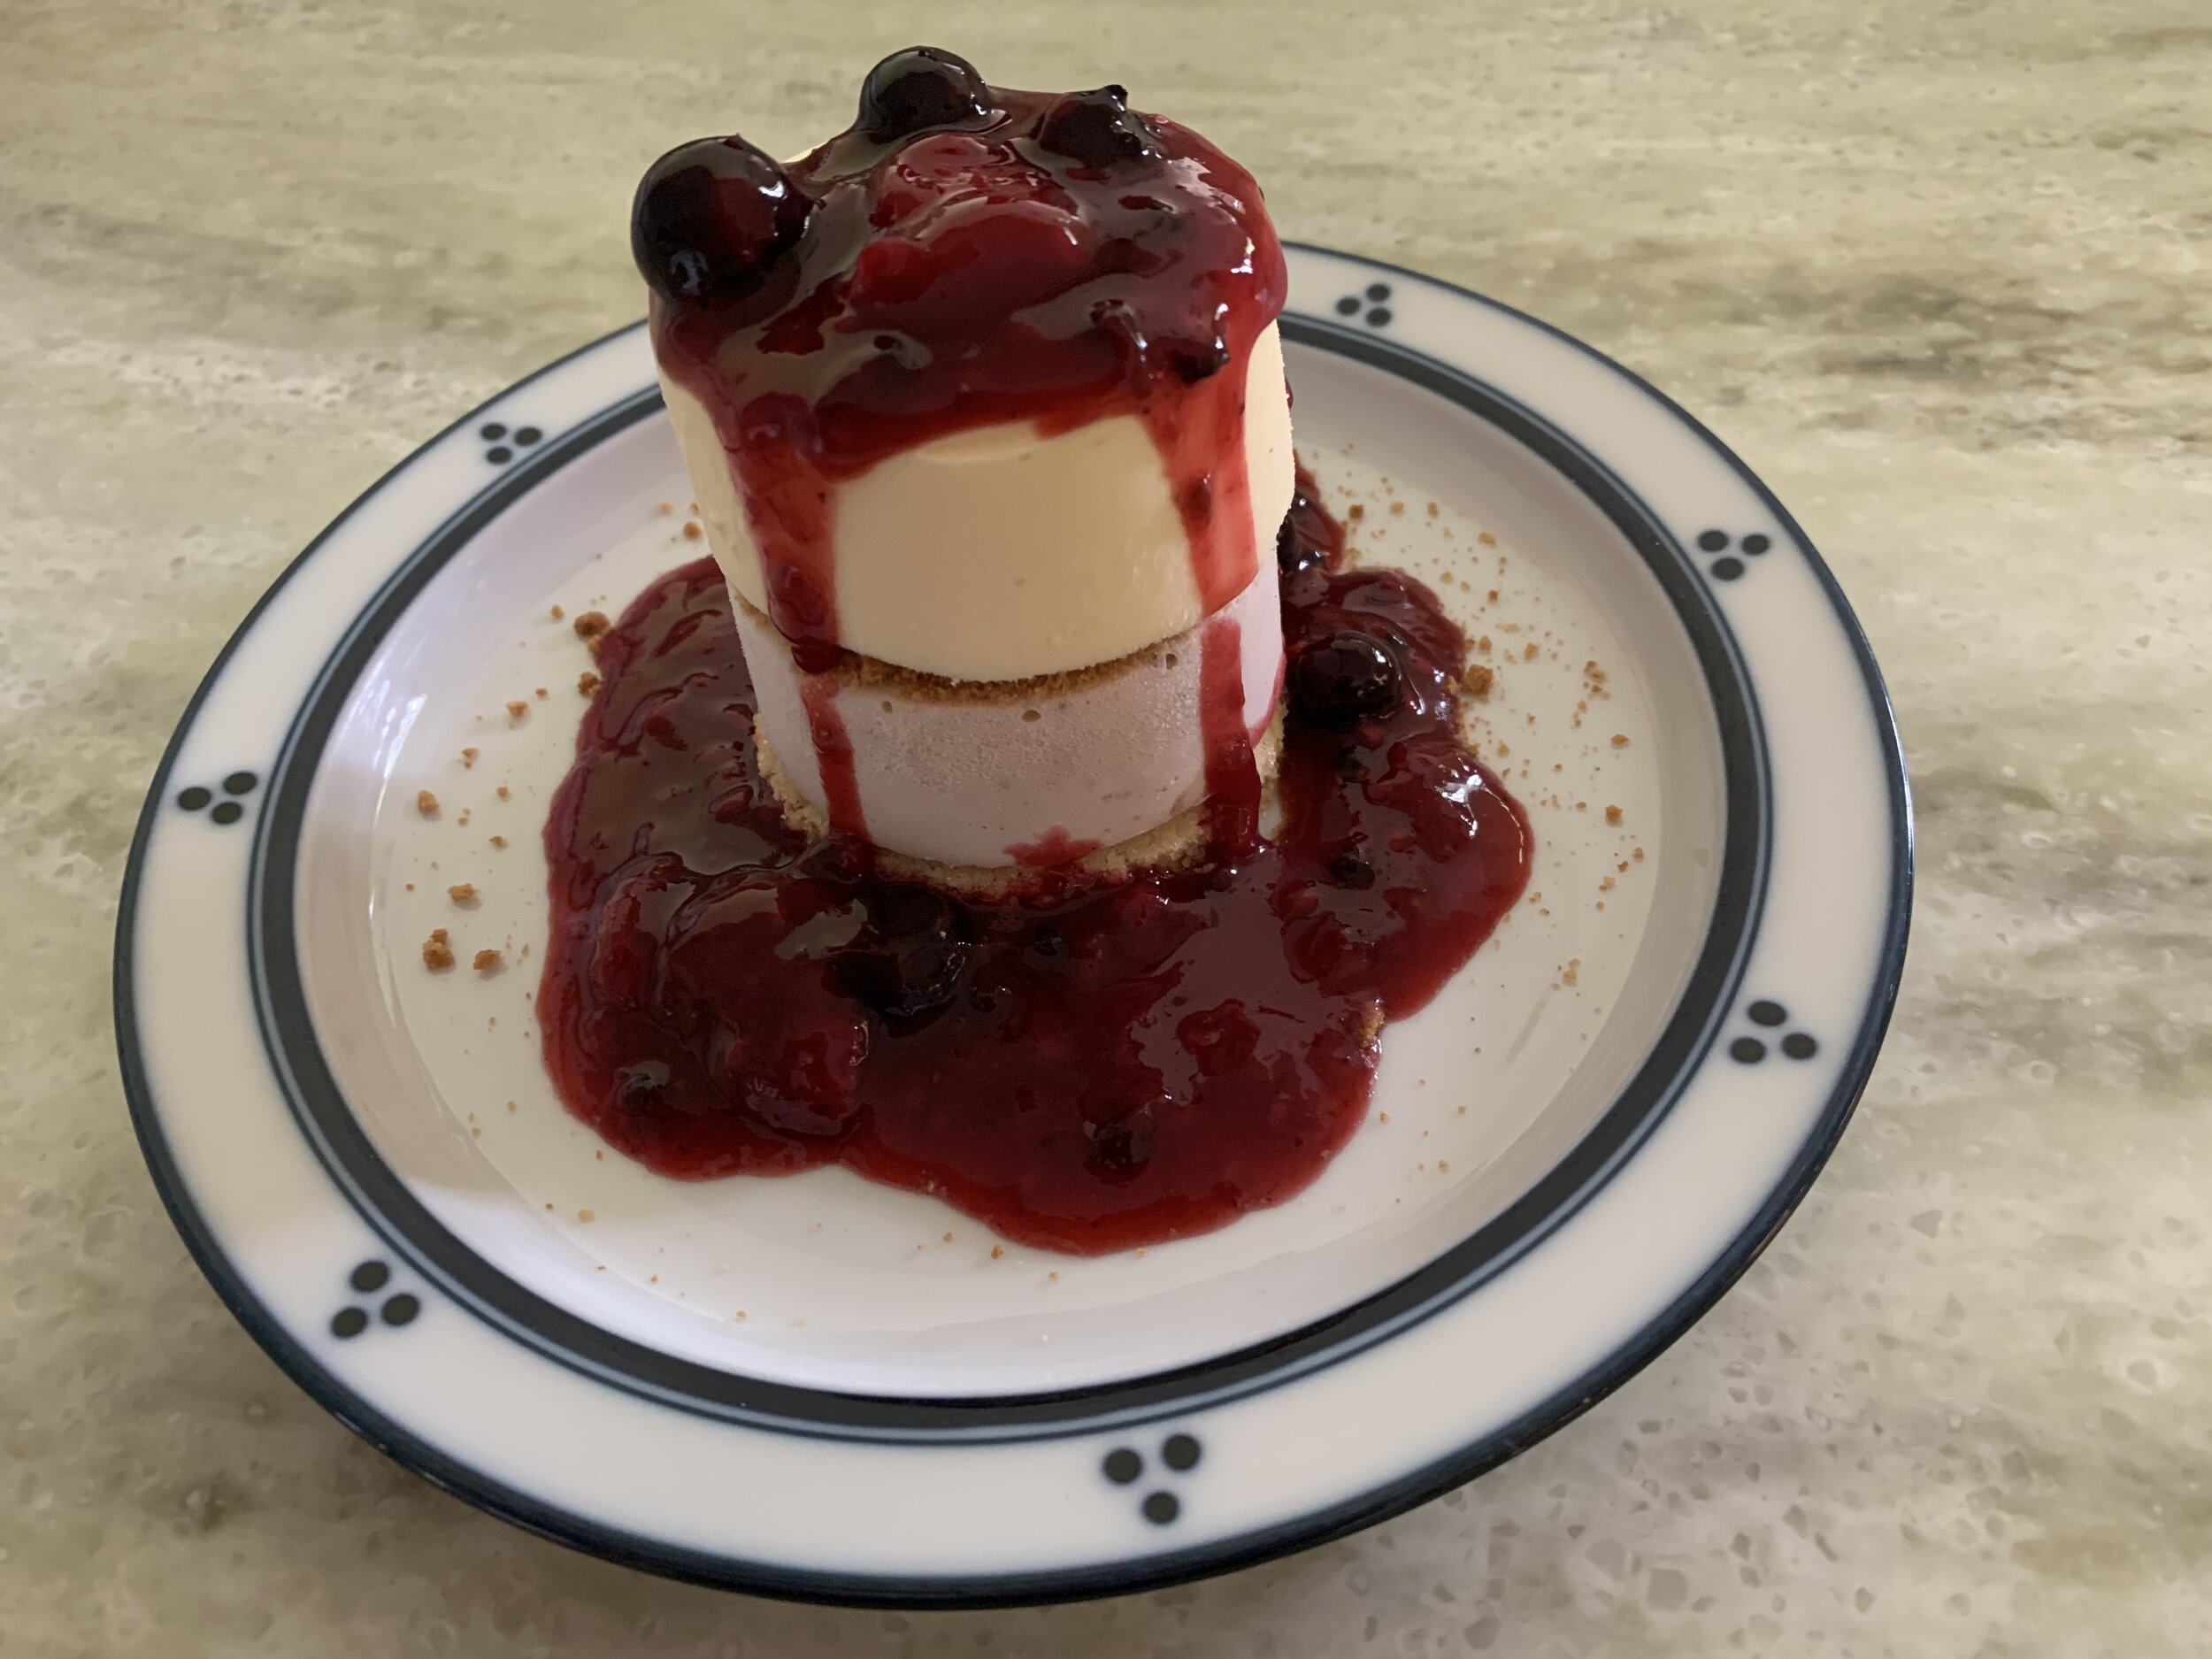
Plan your assembly a few hours ahead of serving to give the custards time to thaw in the fridge. Don’t worry, they’ll hold their shape. Just before serving add whatever garnish you have in mind. I drizzled more caramel and spooned berry sauce over the top with a sprinkling of graham crumbs on the plate.

Delicious all the way around.

News flash! We’re moving into blueberry season - can’t wait!

E621EB9E-3BC4-4CA9-B002-CF2910B169F7.jpeg

Tarte aux fraises fraîches et à la crème

930BCED4-2B0F-405C-A6C9-75B3166CC6C8.jpeg

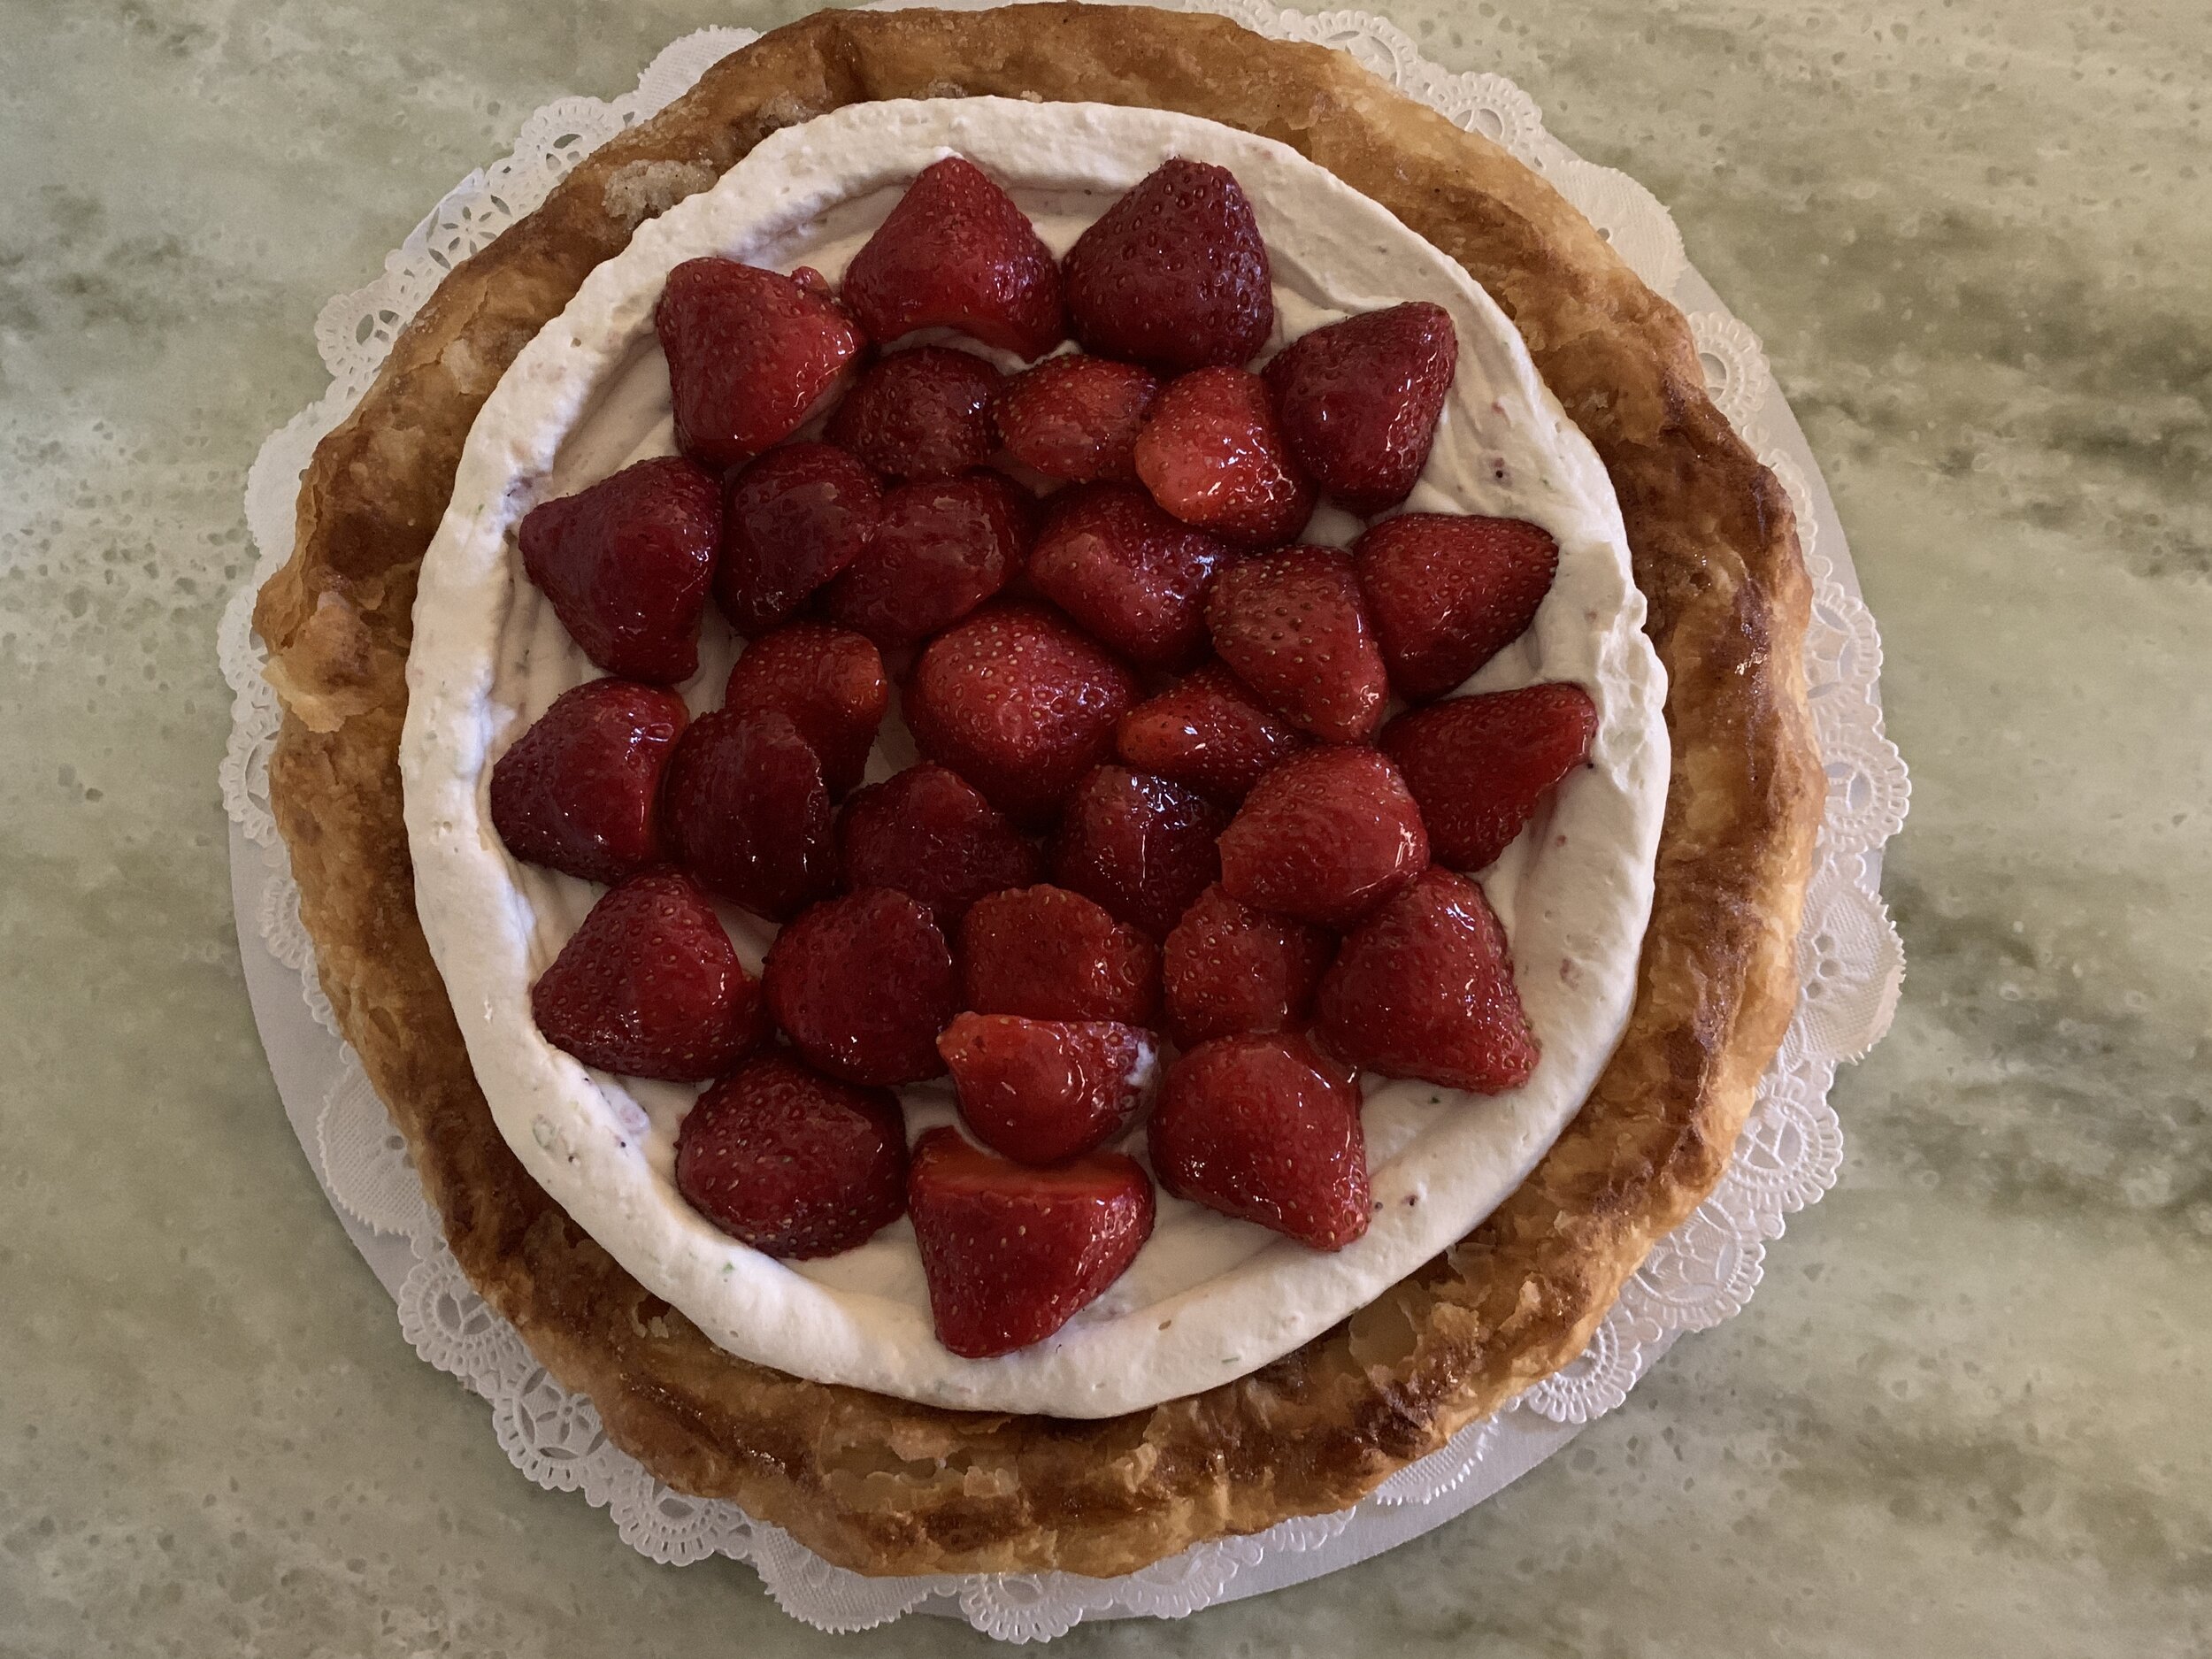
It’s fresh strawberry season here in west Michigan! It doesn’t last long so we have to enjoy it while we can and what better way than nesting these succulent gems atop a whipped lime mascarpone cream in a flaky, buttery puff pastry base. Now that’s summer!

DAC727EA-C736-4E3B-B19E-130F0CEF2F16.jpeg

This is yet another great example of putting together a couple of favorite base recipes to create a delectable dessert. In this case I made a batch of rough puff pastry using 1/2 spelt and 1/2 ap flour. You can make the dough ahead and keep it frozen, well wrapped, for at least a couple of months. Thaw it in the fridge overnight the day before you want to use it.

It’s best to work with the dough cool so if your kitchen is pretty warm as can happen during these summery days, don’t be shy about popping it back into the fridge or freezer for a few minutes to keep it chill during any rolling session.

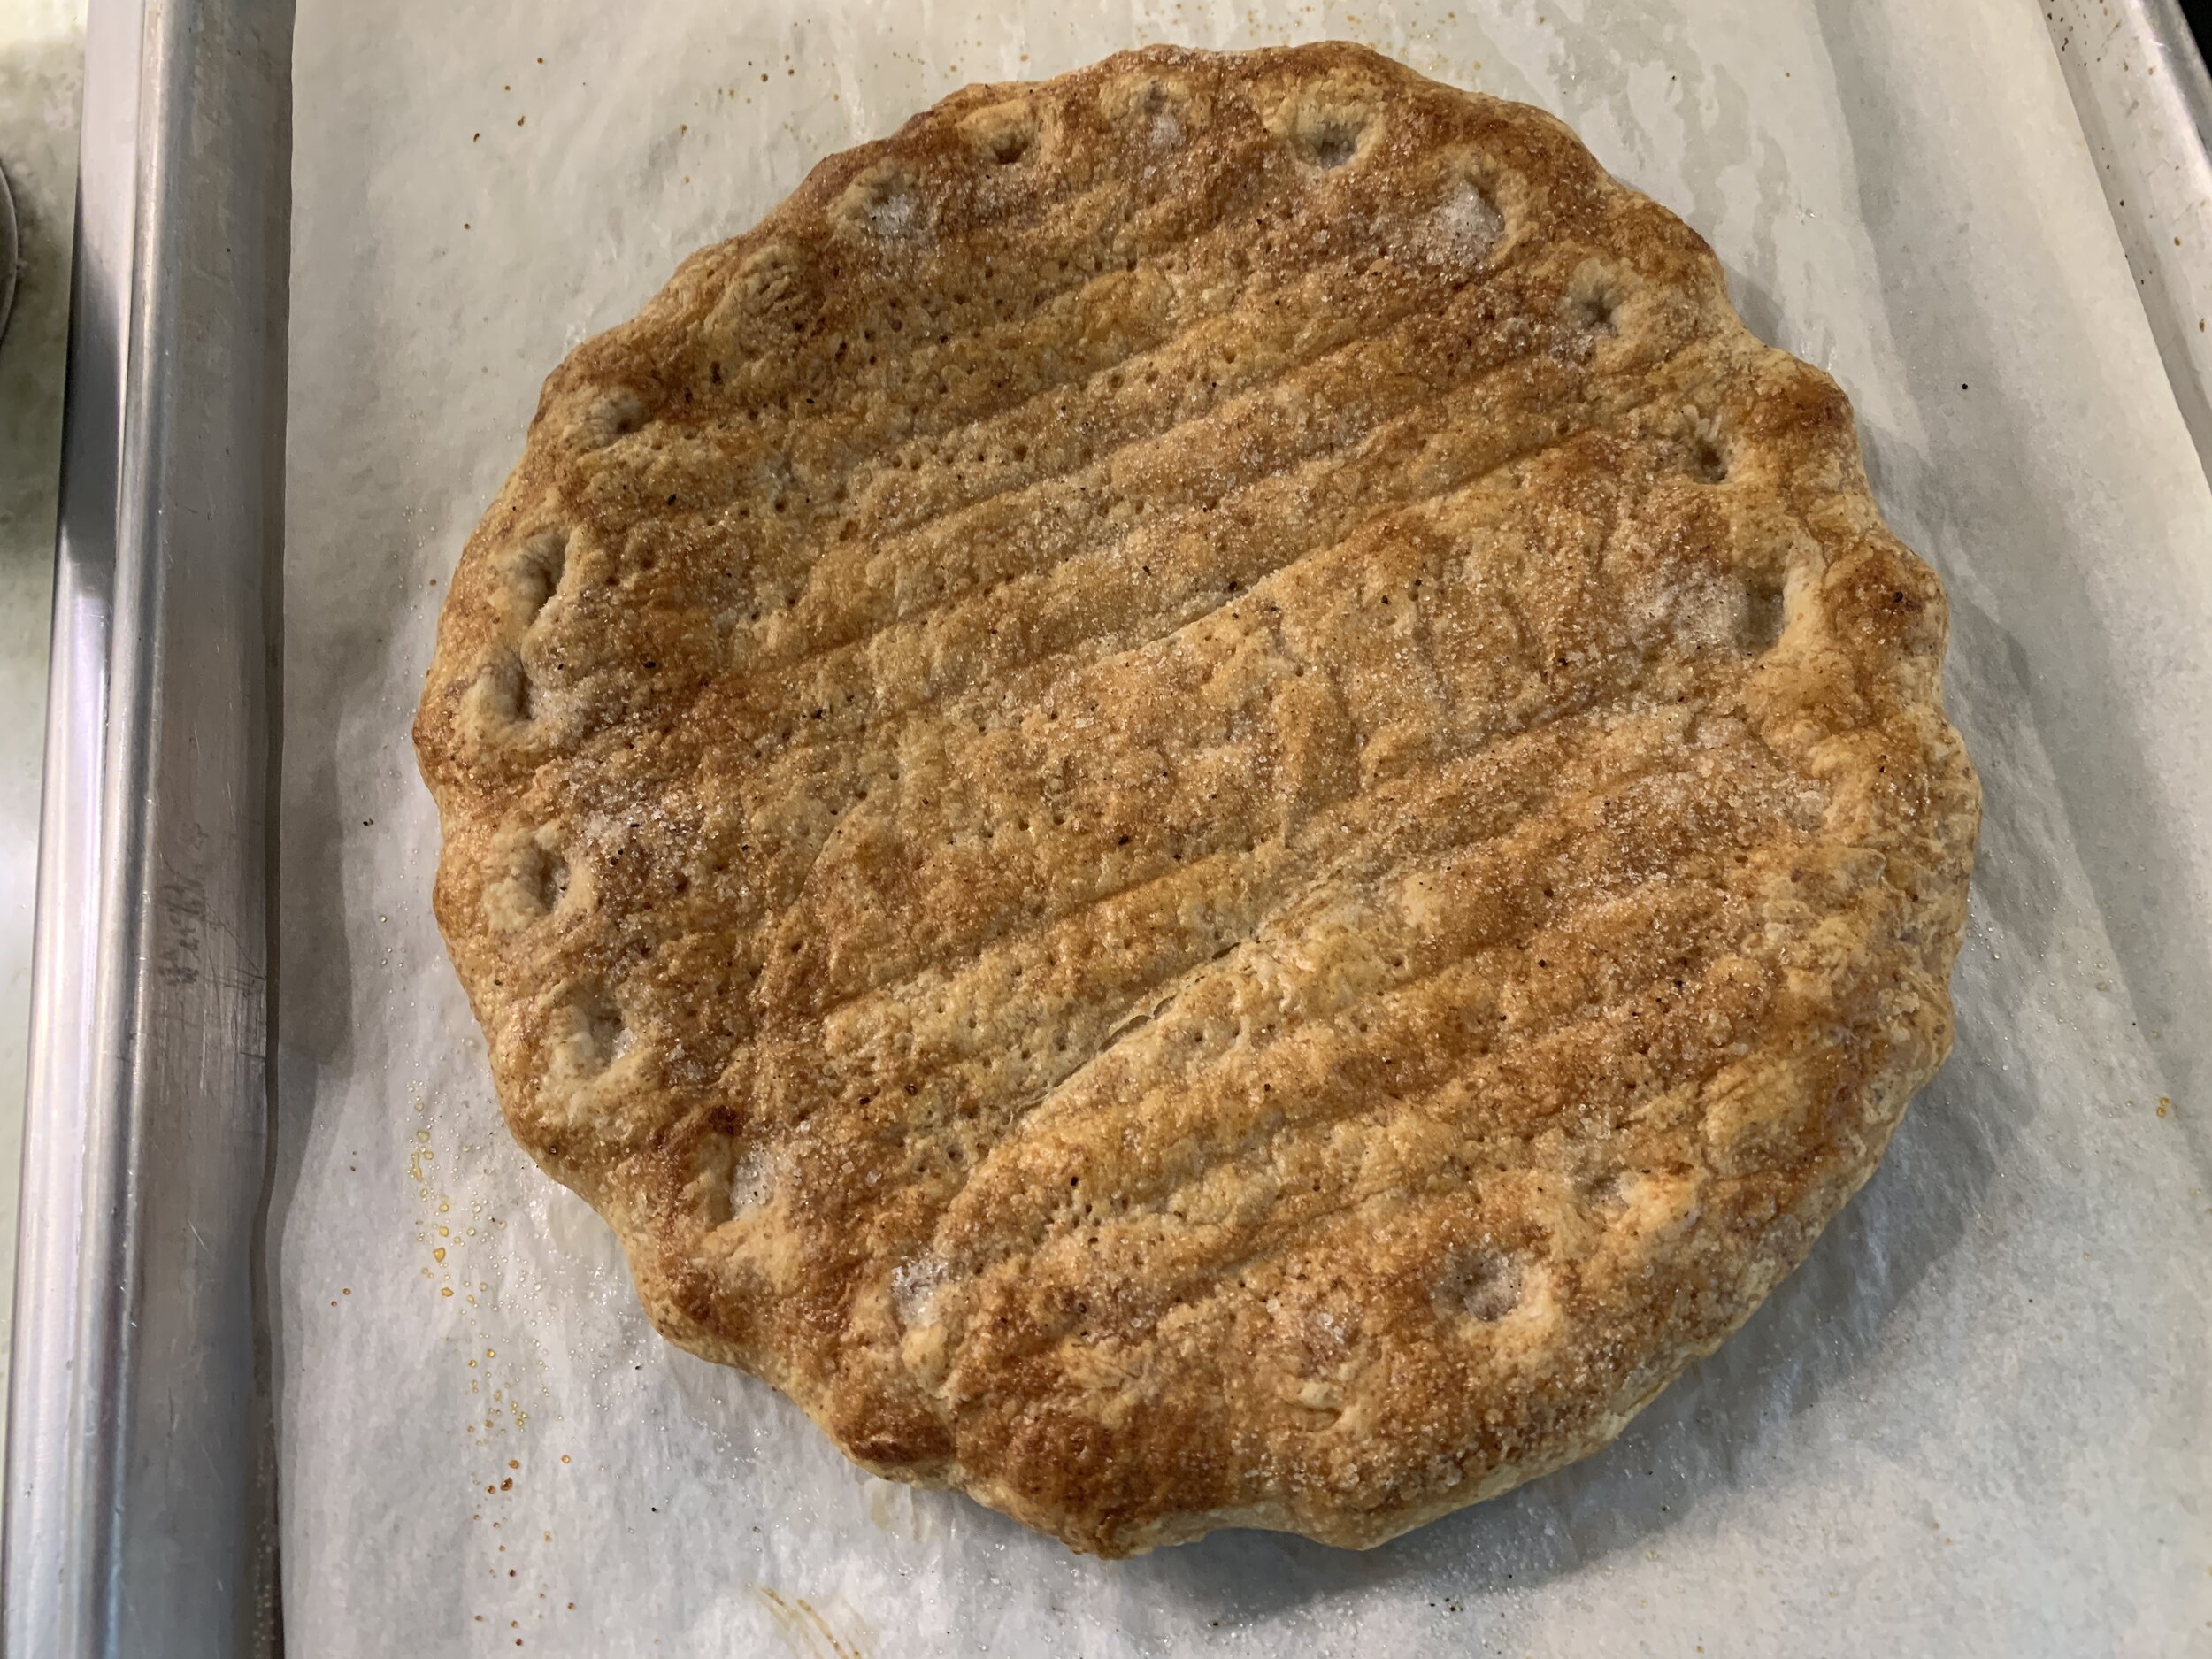
Using about 275 g of finished dough, roll it out to an approximately 11” inch square or as close to a circle as you can. Using a 9” tart form as a guide, trim the dough to a 10” circle; fold the edges under about an inch to form a lip, flute them if you’d like, brush it all with cream and sprinkle with vanilla sugar. Give it a good fork pricking, then into the freezer it goes for a least 30 minutes (while your oven is heating). Cold dough into a hot oven makes for good puffing. You can also roll and shape the dough ahead and hold it frozen for a day or two before baking (bake right out of the freezer - no thawing needed).

Remember when rolling out the dough, give it a rest for a few minutes a couple of times along the way before you finish to your desired size. It gives the dough a chance to relax (something we all need now and then) and will hold its shape better during baking. Give it a final rest before cutting - if you’re in a hurry, your dough may shrink back and loose it’s lovely shape.

799756C9-829E-41CF-A1E5-DABA6E0BB8FC_1_201_a.jpeg

For this tarte the crust is fully baked before adding the mascarpone cream and strawberries. I heat the oven to 425ºF to give my freezer stashed puff a nice hit of heat to start the puffing process. I place overturned wire grids across the sheet pan to give the puff an even rise and bake for 10 minutes before turning down the temp to 400ºF.

37C49C85-6778-4357-8C51-4D08D8FBD760.jpeg

After another 5-8 minutes I remove the wire grids, decrease the temp to 375ºF and continue baking until nicely golden brown, another 5 minutes or so. Don’t be afraid to tweak your oven temps as you watch what’s happening in there. You be the judge.

All baked up

All baked up

Once cooled, I take a sharp knife and develop a border to delineate where my filling will go, gently pushing the puff down in the center (not too much!).

3BA7813E-F54E-468B-AA30-34690F9592CA.jpeg

Make the mascarpone filling and either pipe it or spread it over the crust, leaving the border free. For this size tarte a half recipe is just right. I used caramel as my sweetener, added the zest of a lime and a dollop of roasted strawberry purée to give it that special something.

A7D7EF68-9BA1-43B6-8B95-14C6677F9239_1_201_a.jpeg

The big challenge is how to arrange the fresh strawberries. While my heart tells me to be devil-may-care about it, my orderly personality makes me reluctant to throw caution to the wind. I made several of these for Father’s Day gatherings and created three different versions just because.

The first one, at least around the edges, reminds me of the humps along a cartoon dinosaur’s back . . . . . or a multi-pointed star.

One

One

The second is the most jumbled of the three - I sliced whole strawberries and while keeping the slices together tucked the berries rather higgle-dy/piggle-dy over the cream. Hmmmm . . . not sure about this one but there’s no going back now. Let’s remember it still tastes delicious!

Two

Two

The third is simple yet classy (Steve’s favorite).

Three

Three

I used some strawberry jam diluted with a bit of water and strained to give a light brushing over the berries for a bit of shine. It makes all the difference.

I had also assembled a small test tarte for us to sample, refrigerating it all day before tasting so as to assess how the puff would hold up. We finished it off the next morning after continued refrigeration over night, and I’m here to tell you that it handled it very well. Yay! I’m a stickler for serving things as freshly made as possible, but it’s always good to know when there’s some staying power to provide a bit of timing leeway.

At any rate, summer is officially here and I wish all of you a fantastic reopening full of good times ahead.

Smile!

67DC8FF0-B602-467F-B51E-9BE865996D5E.jpeg

Early summer update

Maple glazed pecan Danish

Maple glazed pecan Danish

Though it’s not officially summer by the calendar, it certainly feels like it here in West Michigan. Hot and humid! The inspiration to bake is low on the priority list at the moment, but I can certainly dream, plan and write about baking, can’t I!

It’s been a bit since I’ve posted so I wanted to take the time to share a few of the goodies I’ve made in the past couple of months. Relying on favorite base recipes is de rigueur for me, and where appropriate I’ll share links to those recipes and give you any little changes I might have incorporated.

Chocolate dacquoise bites

Chocolate dacquoise bites

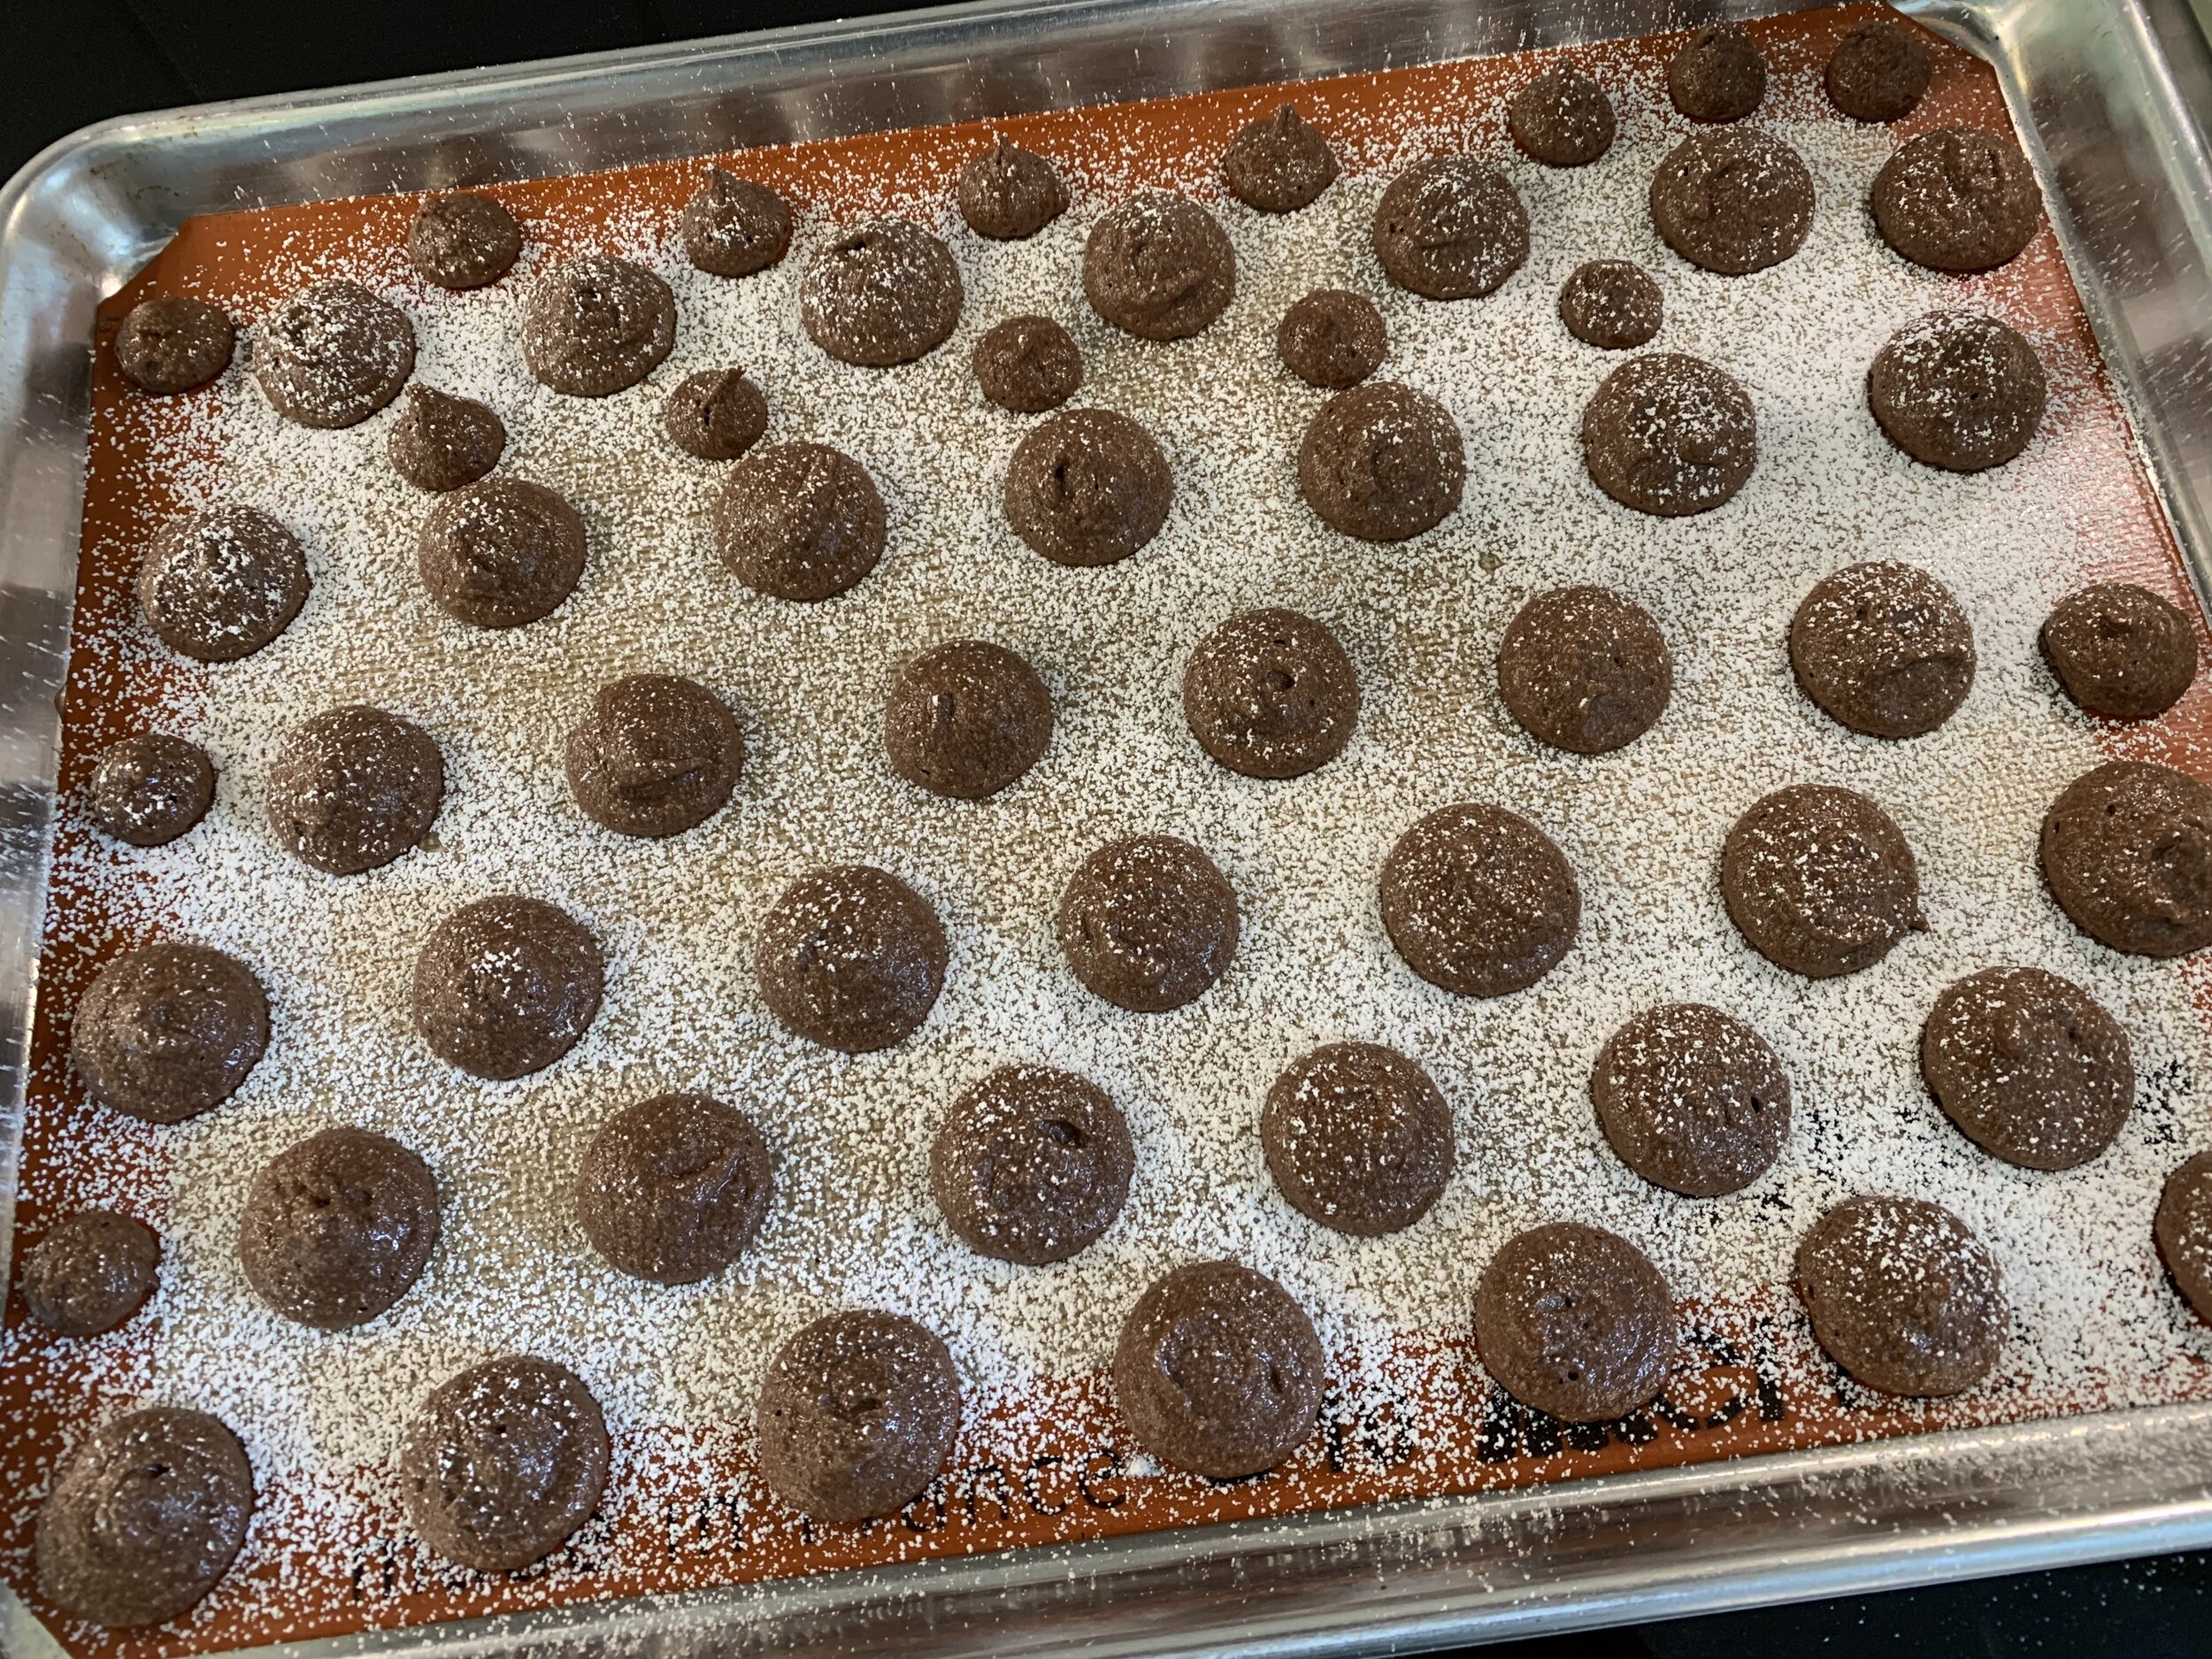
First up - I refer to these as rustic macarons. Made using my standard dacquoise base (remember my last post on vanilla-chocolate dacquoise?), I added 30 gm Dutch process cocoa powder to the almond flour/confectioners sugar to create a chocolate version, piped/baked simple rounds then sandwiched ‘em with salted caramel buttercream. The result is less sweet than the ever popular French macaron, a characteristic I prefer.

The buttercream is basically a combo of about 1 3/4 cups stove top caramel sauce whipped until cool then blended with 113 g (one stick) cubed/room temperature unsalted butter. Add the butter cubes bit by bit as you whip, just like you would when making Swiss meringue buttercream (you could make a caramel version of that instead if you prefer).

These freeze extremely well and can be eaten pretty much as soon as you take them out to enjoy.

Chocolate caramel dacquoise bites

Chocolate caramel dacquoise bites

These treats became part of a small gift box for a volunteer at a nearby assisted living facility, combined with Breton cherry/pistachio tartes topped with tart cherry Swiss meringue buttercream and candied pistachios. Yum.

547781AD-1060-42C1-96D5-AF9560A64093.jpeg

For the Breton tartes, use this dough recipe and add some chopped tart dried cherries and chopped pistachios to the dough (just eyeball it). I use about 40 g of dough for my 65 mm / 2.5” open tart rings (buttered). There are so many options one can create!

Next - maple glazed Danish buns.

05092172-07DC-4578-96F9-4B07477E212A.jpeg

I had a couple of batches of laminated Danish dough in the freezer and decided to create a few things with them: cherry cheese Danish, Danish almond braids and these buns for which I used a half batch of dough for a yield of 9 buns. Roll the dough out to a 12” high x 9” wide rectangle (for a full batch of dough roll to 12” high x 18” wide).

Make a filling (double it for a full batch) by blending 50 g almond flour (or sub in toasted and ground pecans for extra pecan-ness), 43 g dark brown sugar, 30 g egg white (1 large), 15 g maple syrup plus 1.5 T unsalted butter and a tablespoon all purpose flour. Spread it over the rolled out dough then sprinkle toasted, chopped pecans over, pressing them down to help them adhere.

Roll it up cinnamon roll style then slice into nine 1” rolls. I decided to bake these in a buttered and sugared 9x9 pan (again cinnamon roll style) rather than individually placed on a baking sheet. It’s easiest if you line your lightly buttered pan with parchment with an overhang on two opposite sides then butter and sugar the parchment.

After an hour or so rise, they baked up beautifully! Once baked you can simply lift the whole thing out, no muss, no fuss.

Mix 3/4 cup confectioners sugar with 1-3 tablespoons maple syrup to a thin-ish, brush-able consistency and give the buns a good coating.

1836FE29-7D0A-4042-821A-8CFE0B373996.jpeg

Let cool completely or feel free to gently pull them apart and try one still warm. You won’t regret it! So good.

C0D4750B-1E2A-4A01-A322-D228880855FB.jpeg

Next - roasted garlic/dill/cheddar bread created using a poolish approach. It came out pretty tasty although I’d like to tweak the hydration level and kneading/rising times to create a more chewy, rustic style bread. I hope to post about that adventure later this summer.

Roasted garlic/dill/cheddar boule

Roasted garlic/dill/cheddar boule

E94AC5B2-B77E-49CC-A924-961AF2207B33.jpeg

I don’t want to keep you much longer in describing my kitchen shenanigans. There’s always something going on in my head or in my oven so stay tuned for Canadian butter tarts and more.

Meanwhile we have a couple of sandhill cranes hanging out nearby, and we’re just waiting for a baby or two to appear.

Stay cool and calm and enjoy summer!

Mom or Dad??

Mom or Dad??

240A9599-639A-4988-9CD7-B80432E8E3F9.jpeg

Vanilla/chocolate dacquoise

vanilla chocolate dacquoise

Here’s a perfect example of taking oft made and familiar components from your repertoire and putting them together for a delicious dessert. It’s a wonderful way to create a layered entremet either from new beginnings or as a means of using a leftover cream or ganache that’s begging to be saved. BTW - the freezer is your friend here.

As a reminder, don’t forget to check out my recipe page where you’ll find some of my favorite base recipes that can be combined as you see fit to make your own version of tastiness.

This one came together after making the mille-feuille aux fraises that I wrote about here. I had enough vanilla crème légère left that I simply couldn’t throw away, so I went with my favorite dacquoise as the base for my creation.

The full dacquoise recipe is intended to be good for a half sheet pan but I wanted only two 16 cm (just a tad over 6 inches) squares so I used 3/4 of a recipe. I’ve shared this trick with you before - place your intended mold/shape on the Silpat and dust confectioner’s sugar over it to give you the outline.

EC9E47B6-6DAA-44E6-973E-662E7D635161.jpeg

Pipe your meringue mixture evenly within the outlines and sprinkle with additional confectioner’s sugar. It’s OK if you’re a little outside the lines - you’ll trim the edges before assembly anyway.

Ready for the oven

Ready for the oven

Bake at 325ºF for about 20-25 minutes until lightly browned.

All baked up!

All baked up!

Let cool. Once cooled, I like to pop the sheet pan into the freezer for 10-15 minutes which allows for easier release from the Silpat.

When ready to assemble, I first neatened up the edges using my 16 cm form as a faux cutter. BTW - never cut with anything sharp on a Silpat. You’ll regret it.

BD70B852-FA40-4F6B-B4EB-82E6C1F992C0_1_201_a.jpeg

Place the 16 cm form on a cake board (I used a cardboard square covered with foil), have your intended cream and any other garnishes at the ready, then set in the first layer of dacquoise.

90C856F6-7568-4E28-A635-A704384C9ACD_1_201_a.jpeg

I proceeded with caramel drizzle topped with chocolate shortbread crumbs . . . . . .

BA0FB448-217D-4791-B678-6539D0DFC666_1_201_a.jpeg

followed by a layer of vanilla crème légère spread evenly. Eyeball the amount of cream you use depending on the height of your form and the other layers you’re planning to add.

My form is 4.5 cm (1.75 inches) high and, since I wanted to leave room for my second dacquoise layer and some whipped ganache, I took my cream about 1/2 way up.

5FAFFA95-D98F-462D-B2ED-34CABEA6AB46_1_201_a.jpeg

Top with the second dacquoise layer and hold in the freezer to firm up a bit before the finale.

45C9A53D-DD16-418F-B42E-86F747AA4ABD_1_201_a.jpeg

For the ganache I used 50 g of Guittard’s 61% Lever du Soleil . . . . .

3748CB81-7E5B-47A8-89EF-1FB7072FB2AB_1_201_a.jpeg

and three times that weight in heavy cream. I knew I didn’t need much and this turned out to be the perfect amount. Of course, if you make more, you can always use the extra for something else, eh?

C1E8FB08-C2F3-4238-B33B-E22B2013675F_1_201_a.jpeg

Make as you would any ganache by boiling the cream, pouring it over the chocolate (chopped if you don’t have it already in discs), and gently blending until smooth. I suggest making this early in the day - it has to chill completely before you whip it. When you’re ready to add it to your entremet, just whip to soft peaks and spread it on top.

Whipped ganache - the best stuff ever

Whipped ganache - the best stuff ever

4D6DDDE4-8FCE-4788-9F40-9DD0AC3DB5B5_1_201_a.jpeg

Place the whole thing in the freezer. Once firm, cover the top with a piece of parchment or waxed paper, pressing down gently to exclude air. Wrap it all in foil or plastic wrap. It can remain in the freezer for some weeks. Mine was frozen for about a month before Steve, my mom, and I enjoyed it for his recent birthday supper.

The day you wish to serve, take it out of the freezer, put it in the fridge for an hour or so, then use a knife warmed in hot water and wiped dry to cut around the edges to loosen the form. Lift off the form then cut into slices of desired size, again using the warmed knife technique. It’s much easier to slice when still semi-frozen and firm.

Hold the portions in the fridge in a covered container where it will continue to thaw and be ready to eat several hours later.

65928896-DE23-4972-8BE9-4ABCF97813A5.jpeg
BC9AEFEE-E90D-4D71-9719-AB8CF684AB7B.jpeg

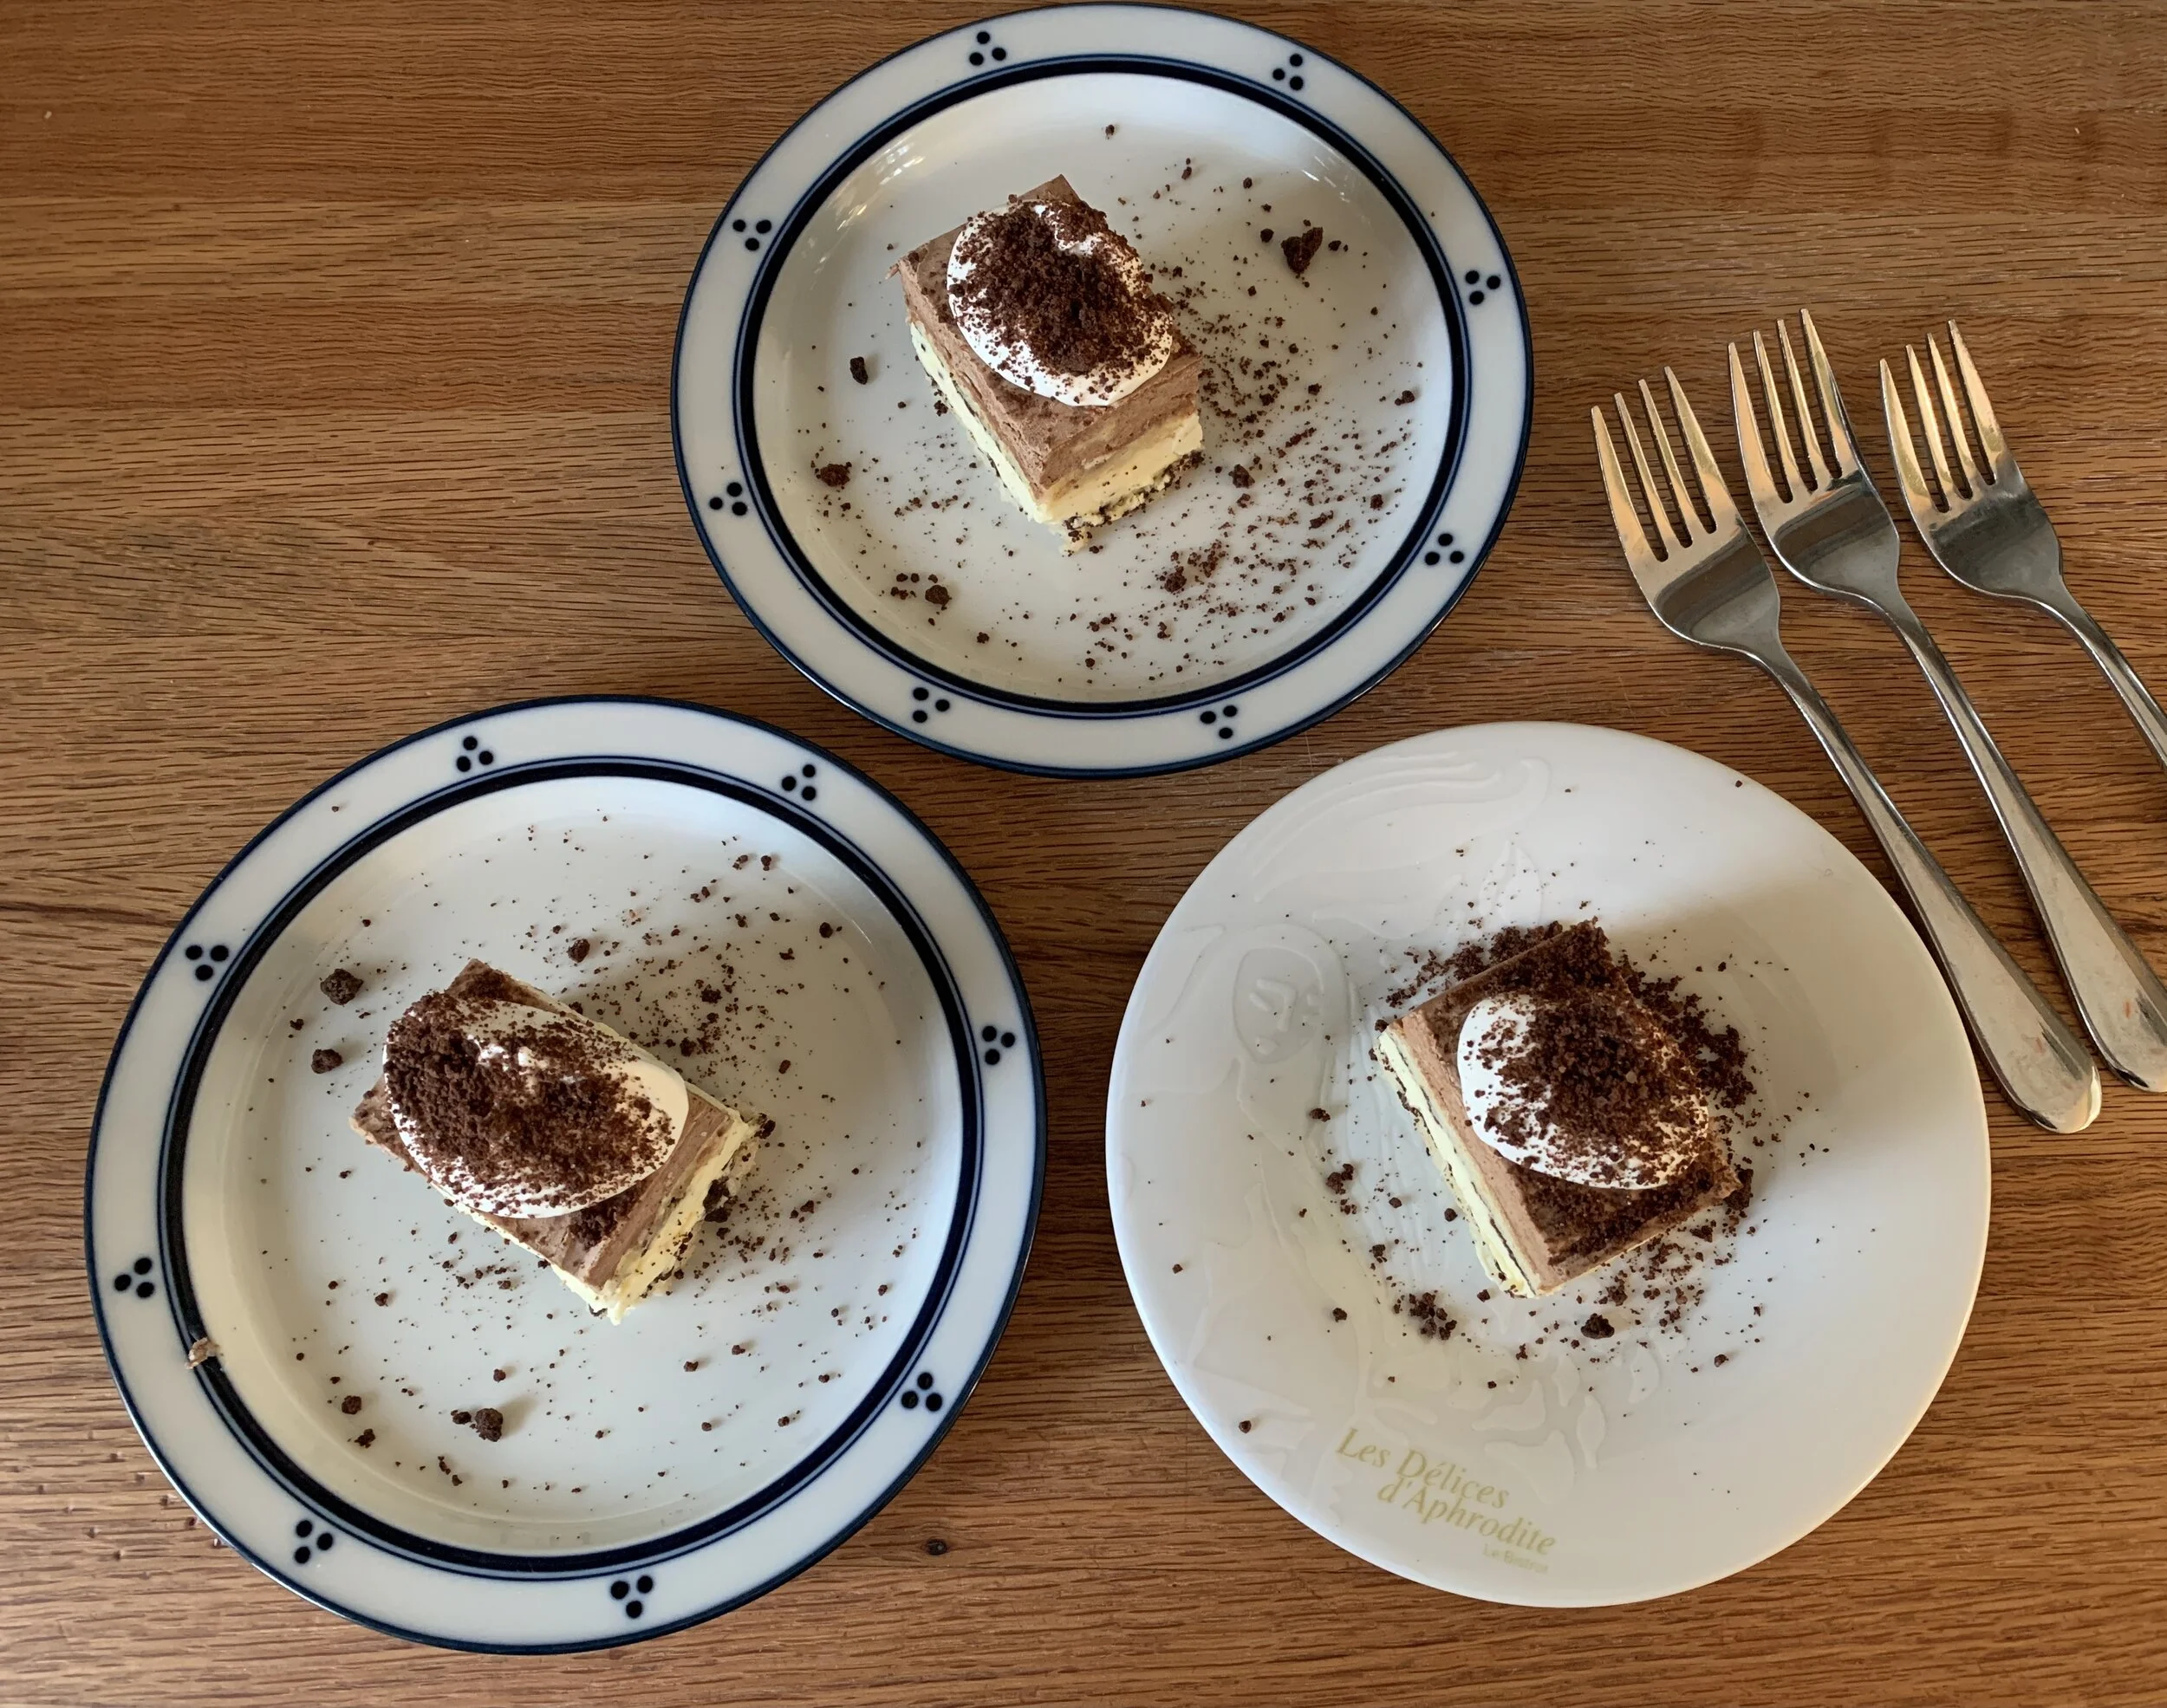
I garnished with a simple dollop of whipped cream and a sprinkle of chocolate crumbs for serving and enjoying.

377BE83C-8210-43B0-B62E-5EE6253FFED3_1_201_a.jpeg
8F6E2689-5CE6-44D2-8167-B9370C20C68E.jpeg

Steve the birthday boy’s conclusion - yum, yum, yum. Oh so light, creamy and smooth, a hint of crunch and the soft slightly chewiness of the meringue layers all made for a memorable dessert (and the leftovers kept for 2-3 days in the fridge!)

Now think about creating your own version of deliciousness. You can do it!

May you have a song in your heart and a spring in your step.

34CC6476-F824-4998-96DE-6BF48B8F2E34.jpeg
Whatever it is, the way you tell your story online can make all the difference.

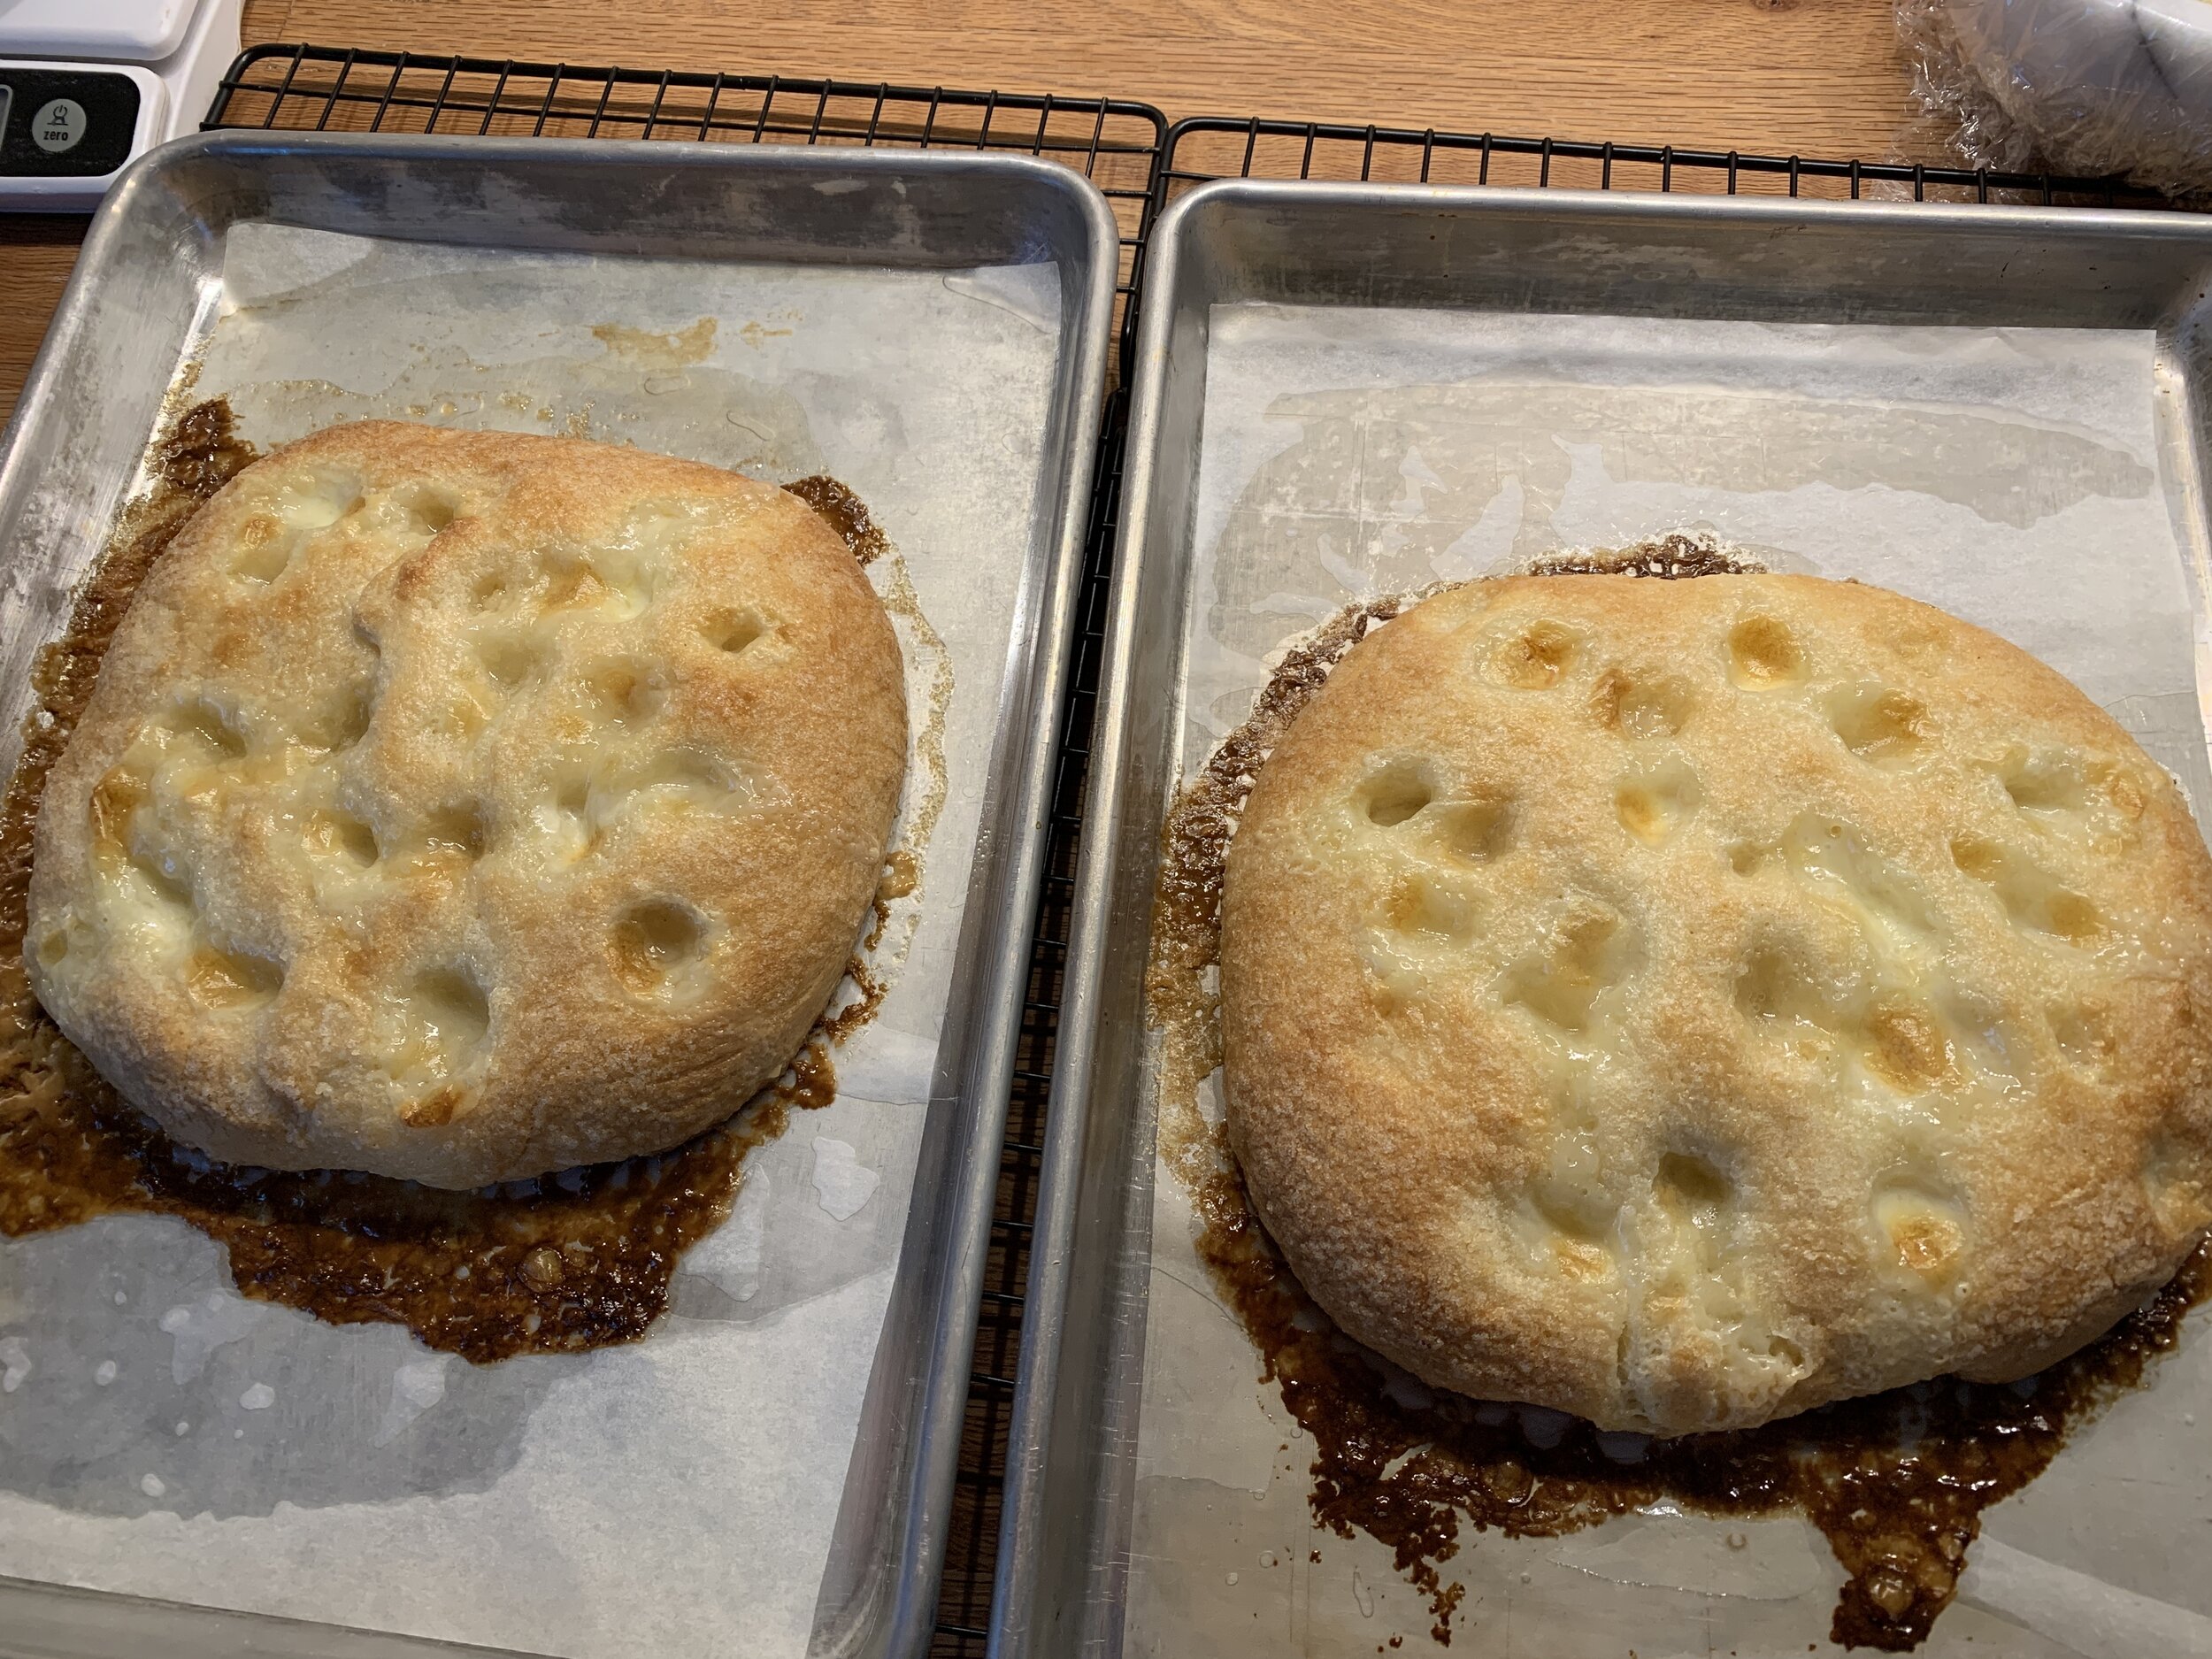
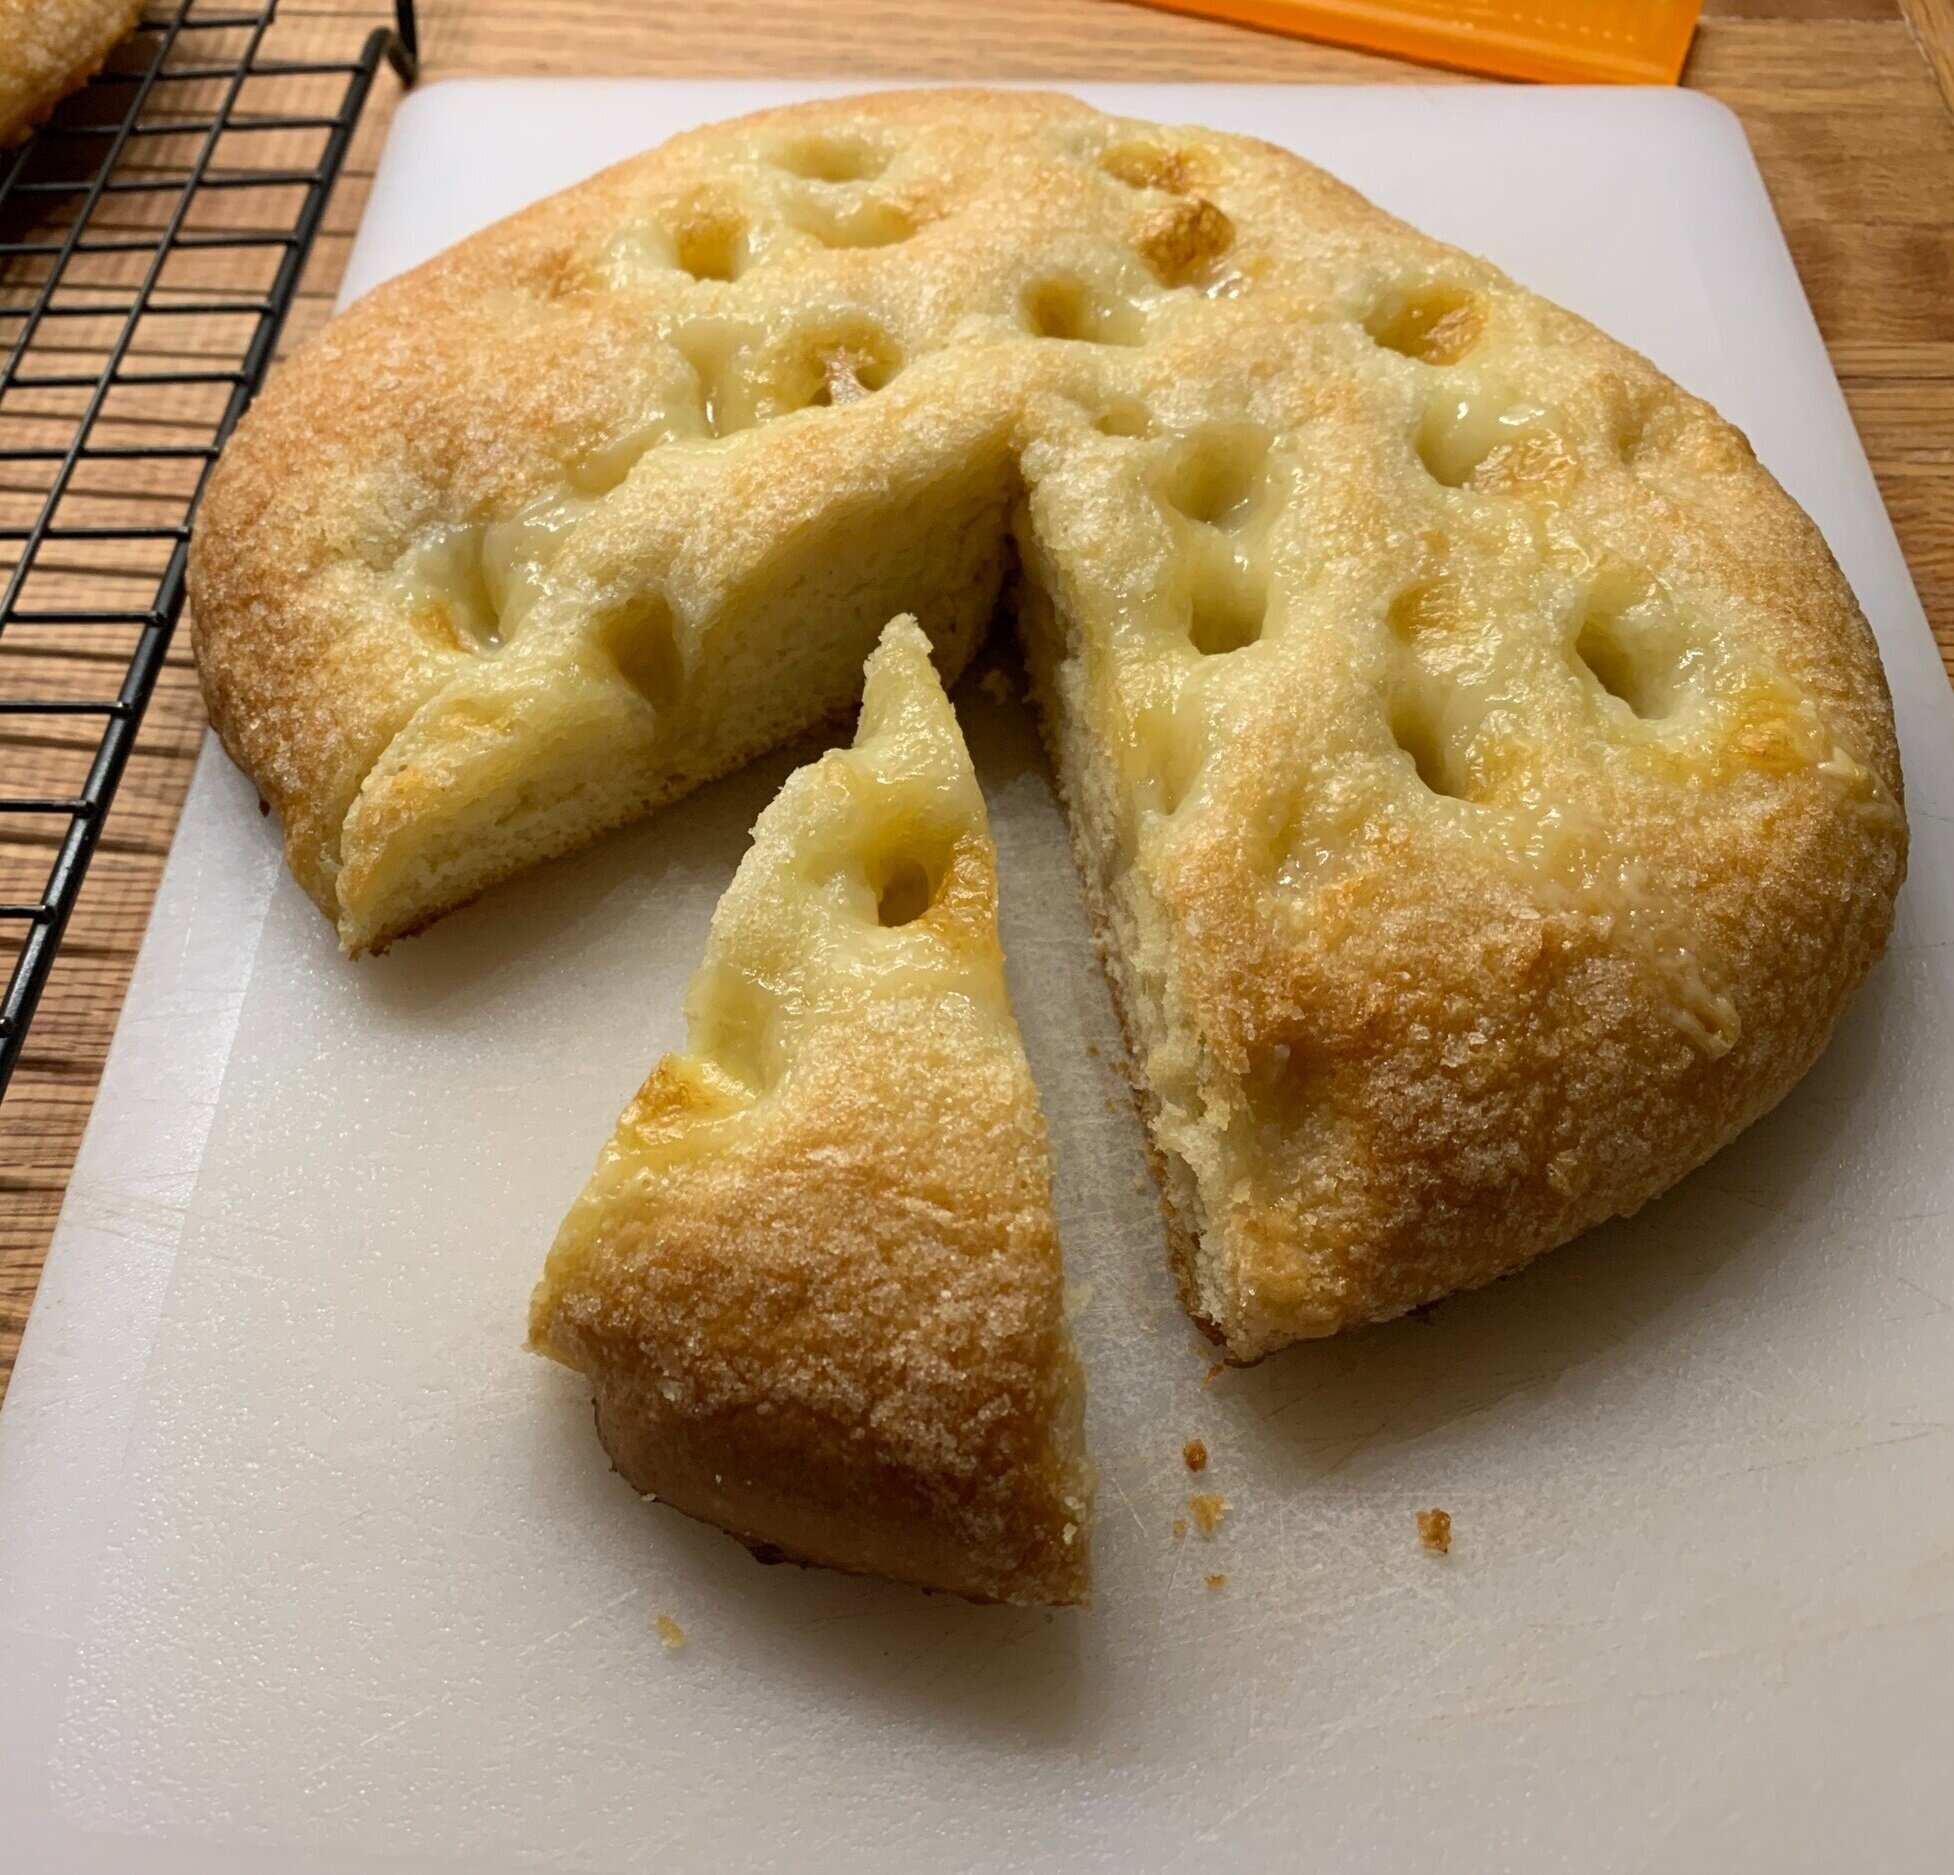
Fougasse au sucre

A663E321-940C-44CE-B3D4-4584D295CE9A.jpg

Time for something a little different - a sweet version of fougasse, that classic Provençal flat bread that many of us recognize as a savory treat. Often referred to as the French version of Italian focaccia, it’s usually baked with olives and herbs but you can certainly play around with it - leave the olives out and top it with thinly sliced potatoes, grated cheese and a nice sprinkling of sea salt.

On the sweet side, a bit of quick research finds this brioche like bread is traditionally associated with the Camargue region (known for its fleur de sel ) at the mouth of the Rhone, in between Montpellier to the west and Marseilles to the east. The recipes I perused use butter, milk and eggs in the mix (hence its brioche-ness) and the top is sprinkled with orange flower water and sugar before baking to create a crunchy top.

However . . . . . This recipe comes from “The French Baker” by Jean Michel Raynaud, a native born Frenchman who lives and works in Australia. He has fond childhood memories of staying with his sister at their grandparents home in a small village in Provence and enjoying “two slices of crunchy, buttery fougasse . . . . with a bowl of chocolat chaud” on Sunday mornings. Ahhh youth!

His dough base is more along the lines of focaccia, using all purpose flour, water, olive oil, salt and yeast with some added sugar and butter but no milk or eggs,

E39362F3-D85B-4732-A65C-9B09ABC661B8.jpeg

It’s a straight forward direct dough (no poolish or preferment) that yields two loaves.

You’ll need 100 g each unsalted butter, granulated sugar and heavy cream for the topping so be sure you have those on hand. The butter/sugar will be spread over the shaped dough before the second proof, and the cream will be poured over the dough after it goes in the oven. Imagine that!

For the dough you’ll need 40 g unsalted butter at room temp so have that set aside - it’s added last. In the bowl of a stand mixer fitted with the dough hook combine 340 g all purpose flour, 190 g cold water, 70 g granulated sugar, 30 ml (2 TBSP) extra virgin olive oil, 6 g fine salt and 3 g instant yeast. Knead on low for 2-3 minutes until the dough comes together. Increase to medium and knead for 8-10 minutes. You want the dough to come away from the sides of the bowl as it becomes smooth, soft and elastic.

Now add the 40 g of butter and knead another 2-3 minutes to incorporate it. I found that at first it smeared quite messily and buttery around the sides of the bowl but it all blended together just fine in the end.

CE676ABA-5C83-4186-8A2C-55AEA44F3E37.jpg

Cover the bowl with a towel and let proof about an hour until increased by about two-thirds.

After first proof

After first proof

Now it’s time to divide the dough in half - each should weigh about 345 g, give or take. Place a portion on a lightly floured surface and flatten the dough to a round about 2 cm thick (about 3/4 inch). Do the same with the second portion. Don’t be too fussy with it. Put each on a parchment lined 1/4 sheet pan (or you can put them both on a 1/2 sheet pan with space in between if you’d like) and place in the freezer for about 20 minutes.

92D77340-5808-4DBC-8845-000708E514EC.jpeg

Meanwhile place 100 unsalted butter and 100 granulated sugar in a small saucepan over low heat to melt the butter and blend it. You don’t want it to boil ‘cuz you want to preserve the sugar crystals which give the finished bread it’s crunchy top. Remove from the heat and let cool to touch. (Note to self: next time melt the butter, cool a bit, stir in raw sugar and finish cooling - more crunch in the end methinks.)

Take the dough out of the freezer and spread half of the cooled butter/sugar mixture over each round. Hmmmm . . . . this is becoming interesting.

5292BB2C-57E9-46D1-A631-7FAEE7754187.jpeg

Here’s where I had to do a bit of quick thinking when realizing I was supposed to cover these with a cloth for the second proof. To avoid top smearing, I over turned a wire grid cooling rack across each sheet pan . . . .

624D6463-BAA5-4849-BD90-5F2B7E698F4E.jpg

and now I could easily lay a cloth towel over them. Yay!

Give them an hour or so to double, heating the oven to 400ºF during the second half hour. It was a bit difficult to assess the amount of the rise although I could appreciate more poofy-ness and fullness to the dough. I even gave them an extra 15-20 minutes.

61825726-41A1-44A5-A2B8-15BAFD6DAAD6.jpeg

Just before putting these in the oven, dimple the tops all over with your fingertips. Fun!

7413EDBF-367C-4F30-8F0D-E6E8B87548E7.jpeg

Bake for 10 minutes then open the door and pour the cream over the top of each. The dimples are meant to hold the cream so it won’t run over the sides. I actually had to re-dimple after the first ten minutes since my first dimplings puffed up.

Re-dimpled

Re-dimpled

Cream poured over with a bit of spillage

Cream poured over with a bit of spillage

Bake for 10 more minutes or until golden brown. Voilà!

D7D66B34-AF45-4948-85C1-51067E018D0E.jpeg
 
08C606EA-9CC9-46FB-ABFA-8FE0F3A1AB39.jpg

I can certainly appreciate how one might enjoy a slice of this dipped in chocolat chaud. With a pleasant flavor, light/sweet bread-y crumb, not too heavy and a hint of crunch on top - not bad at all.

0CDC7286-87E0-4584-AA65-A632D50D79D6.jpg
A663E321-940C-44CE-B3D4-4584D295CE9A.jpeg

Til next time, keep your chin up and think positive! I’m certainly trying to do just that.

And spring marches on!

3CF7F3AD-473E-4676-9197-8208C0A223D9.jpeg

Blueberry hazelnut tarte Bretonne

Petite version

Petite version

I’ve extolled the virtues of sablé Breton on a number of occasions over the years and simply must return to it now and again. The dough is versatile and one that I can make ahead and keep handy in the freezer for a couple of months. As we ease into the late spring and summer seasons, a Breton dough base is perfect either baked with fruit or jam or baked au naturel and topped with fresh fruits and luscious creams. Mmmmm . . . I can just taste them now. Fulton Farmers Market here I come!

Just one of the beauties of this dough is it’s made with egg yolks so . . . . . . When I need to amass egg whites for some of my faves like financier, dacquoise or Swiss meringue buttercream, Breton dough comes to the rescue. Separate the eggs, yolks go into the dough and whites (which can sit in the fridge for a week or so and can also be frozen) are on hand for whatever. I love that.

As an aside, a few other basics that offer me the same egg white saving opportunities are the classic custard sauce/ice cream base crème anglaise or the familiar crème pâtissiére, crème brulée and pots de crème. Of course it’s generally best to make these egg and dairy based goodies within a couple of days of enjoying them, so some planning ahead is important. But they’ll all give you plenty of whites to add to your stash.

I do digress. On to la tarte Bretonne!

The dough comes together easily - one plan ahead note is the butter should be soft. Let it sit out an hour or so, mise out the rest of the ingredients and you’re ready to go. Once mixed you can either wrap in plastic and chill for later or you can shape a rough circle and simply press it into a buttered ring or mold. NOTE: I love baking this dough in silicone flexi-molds which don’t have to be buttered. Yay - one less step!

Here I sub in hazelnut flour for the almond but you can do the same with pretty much any ground nut. Using a buttered 220 mm / 9” tart ring, I guestimated about 360 g of dough to press in the bottom and build up the sides. It’s up to you to experiment a bit, depending on how thin or thick you want your finished dough to be. Thicker than a typical tarte crust is my preference here. You can use even more dough (up it to 400 or 425 g) for a base that’s a delicious, buttery cross between tarte and cake. Yum.

Just for comparison sake, if I’m making a standard tarte with let’s say pâte sucrée, a good rule of thumb is to take the diameter of your ring (e.g. 220 mm), add 30 g to that number and that gives you a decent estimate for the amount of dough for that size ring - 250 g. It works pretty well with inches/ounces too - 9” tart uses about 9 ounces of dough.

998021B8-862D-4609-A6A0-E076FDB324CD.jpeg

Once the dough is pressed into the ring, you can cover and refrigerate it for a few hours or overnight if you’re not quite ready to proceed.

I made a quick hazelnut crumble with 50 g sugar and 75 g whole wheat pastry flour (all purpose is fine too) mixed in a medium bowl; sand in 60 g of cool, cubed butter to coarse crumbs and add 30 g of toasted and chopped hazelnuts. It yields plenty for this type of project and you can freeze any leftover for next time.

My store bought blueberry jam is Bonne Maman, but I also like St. Dalfour, both of which have some great flavor options.

Heat the oven to 350ºF.

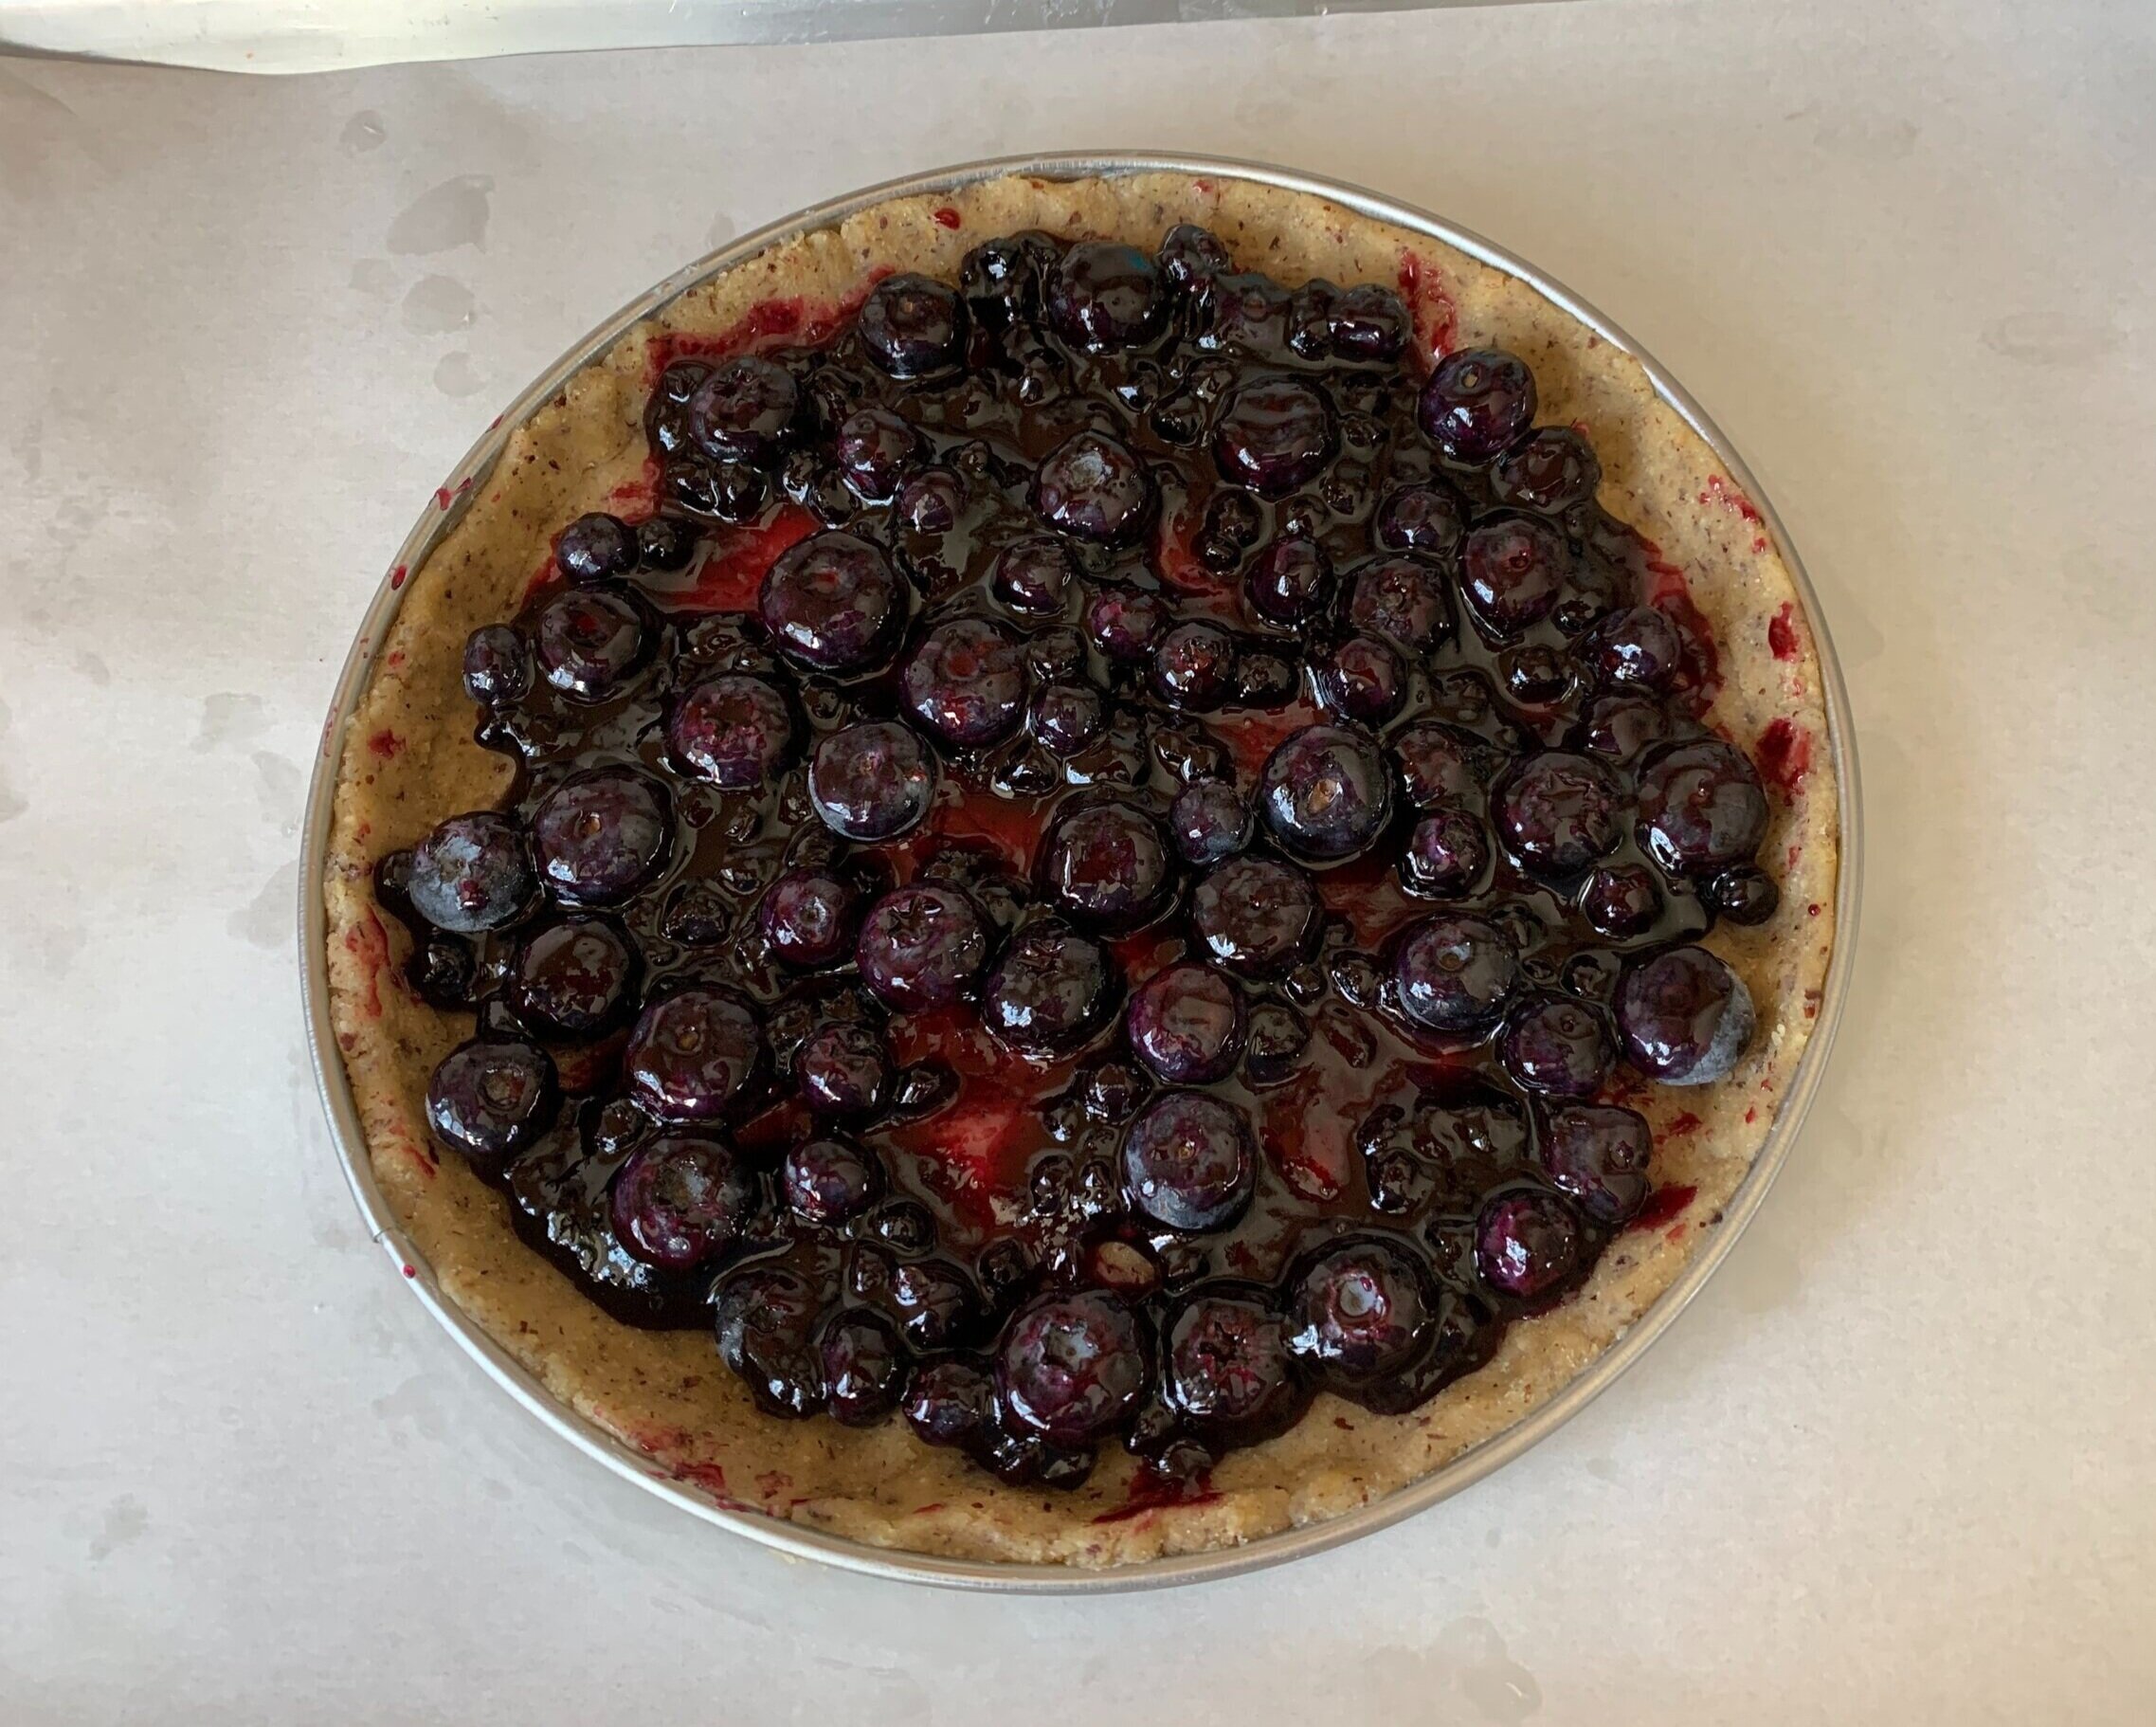
Create a layer of fresh blueberries mixed with a few spoonfuls of jam (eyeball it) over the dough. No fancy fillings here folks!

AD5ACA4A-199B-4E0B-A84D-7EC84214C368.jpg

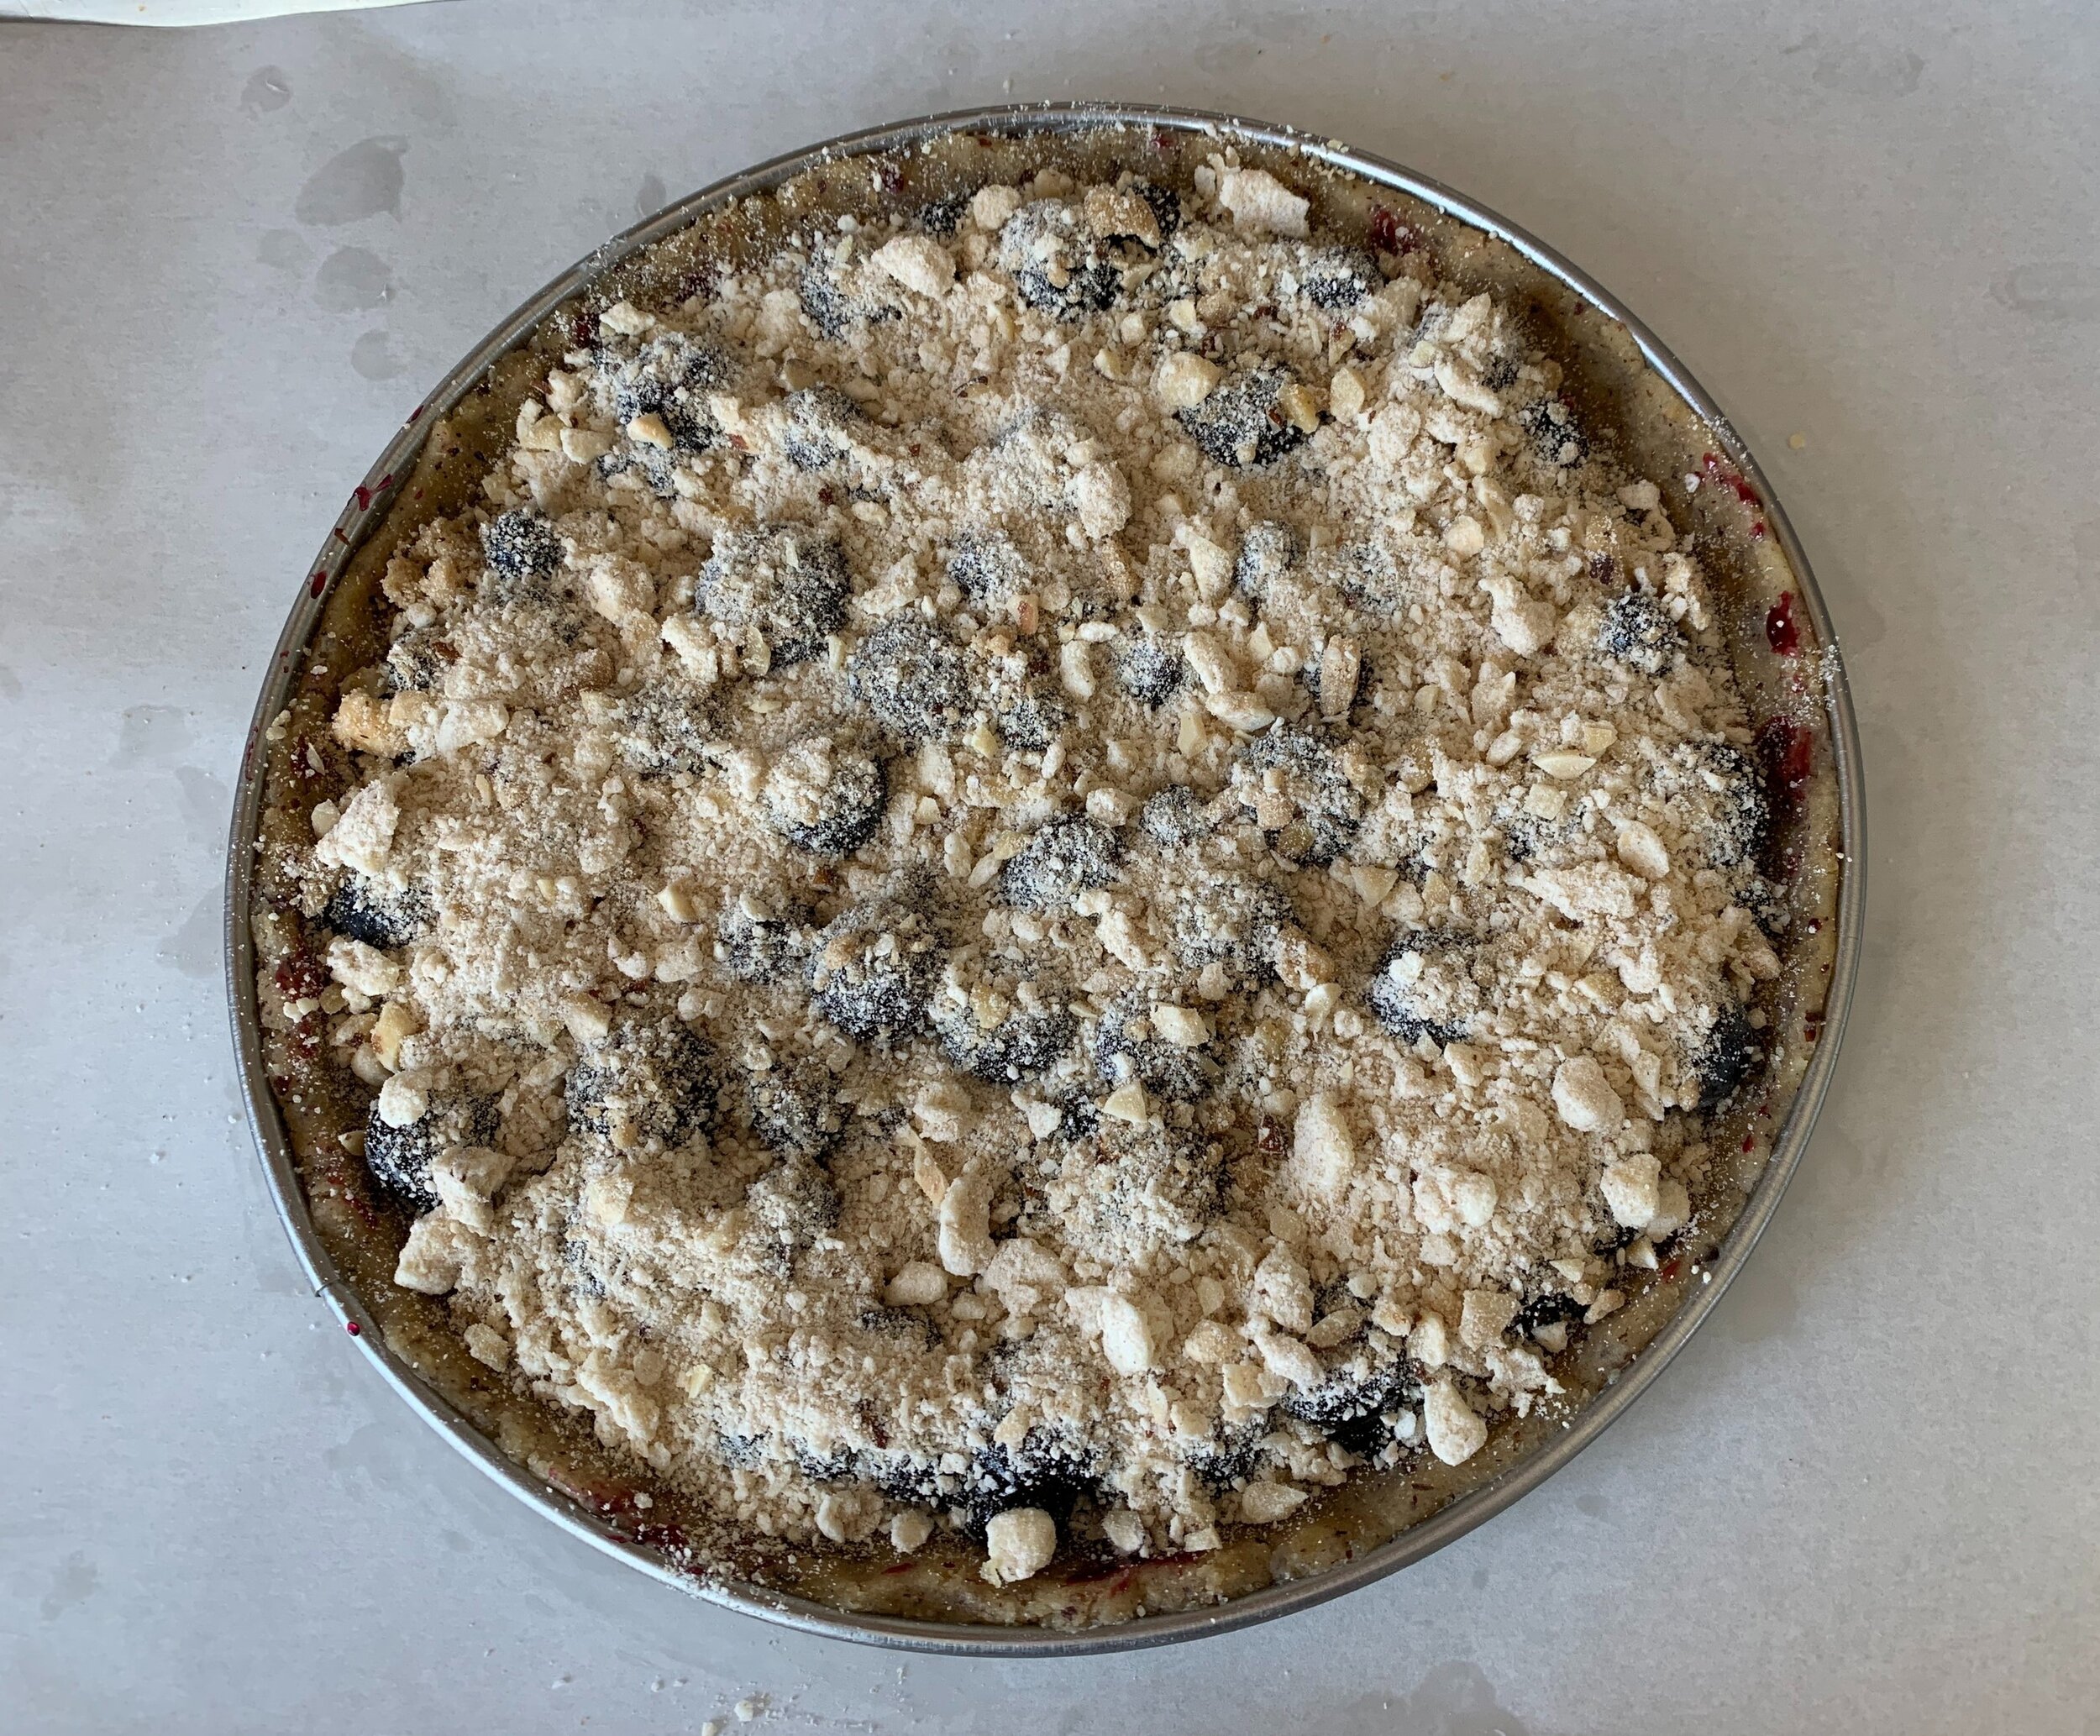
Top it with a decent layer of crumble.

68D8D8D9-ACD6-491E-917F-F435171D62D9.jpg

Bake about 25-30 minutes until the edges and crumble are nicely browned and the jam/berries look bubbly and set. Reduce oven to 325ºF if you feel your edges are browning too quickly. It’s up to you to keep on eye on things!

478CDEBC-5EE7-49F1-8120-45C11B67F05F.jpg

I made this baby for Easter dessert, served with homemade raspberry ice cream. The end result was a nutty, chewy, buttery, jammy, fruity and delicious treat which paired so beautifully with the creamy raspberry.

Truth be told, I prefer small individual desserts to larger, sliceable versions. I made a petite version ahead of time as a test, and it worked so well with a rustic scoop of ice cream right on top. Steve and I enjoyed our taste test while the tartelette was fresh and still a tad warm. Oh my.

E02D9501-C815-468A-97EB-DD1CBA277249.jpg
E5E79400-8188-4574-82DC-AB4326796713.jpeg

There are so many ways to create your own tarte Bretonne. Trust me, you won’t regret it!

Meanwhile spring keeps springing with flowers popping, sightings of turtles on logs, herons flying overhead, red wing blackbirds with their shrill call, garter snakes on the path and spring peepers singing to us all.

Enjoy the season and stay safe.

80881E5D-722B-4B7A-AD7B-25E567586C19.jpeg
7A8FA5C7-2D42-457A-8EBE-FFFF9C231D14.jpeg


Not your mother's (or grandmother's) cherry pie: free form cherry puff pastry tart

6B3CBB64-6FEB-4983-A3D7-B1EAF59FB71B.jpg

Yum yum yum. On the heels of the mille-feuille that I recently posted on, I came up with a free form cherry tart for cousin Melissa’s husband Jeff’s 60th birthday. I had rough puff and my last bag of Michigan sour cherries from summer 2020 in the freezer. What better way to use them than to create a spur-of-the-moment dessert!

DD3DF47B-861A-4C0A-9E9E-2A2FCA615452.jpeg

I let my generous 2 cups of cherries (~350 g) thaw at room temperature for an hour or two then put them in a medium saucepan along with 100 g / 1/2 cup cane sugar and a pinch of salt. I opted for a few grates of fresh nutmeg, 1/2 teaspoon ground coriander too. Heat on low, with occasional stirring, until the cherries release some juice and the sugar dissolves. Blend a tablespoon lemon juice with 2 tablespoons cornstarch and stir it into the cherry/sugar mix. Bring to a boil then cook for several minutes until thickened. Add a splash of vanilla or almond extract if you like and let it cool. You can prep the cherry filling a day or 2 ahead and hold it in the fridge until baking time. Just look at these jewels!

1DE3C61D-E679-4FD4-9798-AA0F452092A9.jpg

The beauty of a free form tart is being able to make any size or shape your little heart desires. For this one I used about 300 g of puff, rolled it out to a 6-ish by 13-ish rectangle and put it on a parchment lined sheet pan. I then cut ~1/2” wide strips from each border and “glued” them around the edges with a brush of egg white. I had some scraps from which I cut small diamonds and spaced those along the edges too. Those touches give a bit of a border for the end result.

You can go even more decoratively as I did for this small savory tart some years back. Make it your own!

freeformpufftart.jpg

Brush the puff with egg white or wash, add a sprinkle of vanilla sugar over the dough and freeze the puff while heating your oven (helps keep down shrinkage), then bake fully at 400ºF for about 20-25 minutes until golden toasty brown (reduce oven heat as needed). I overturn a wire grid across the sheet pan to keep the rise even.

Reduce the oven temp to 325ºF. Let the pastry cool 5-10 minutes (so you don’t burn your fingers), gently push down the puffed center and layer the already cooked filling over the dough. I had just enough cherries for a single layer. Return to the oven for about 20-25 minutes to warm and set the filling a bit more.

7103DB85-40AA-481E-B885-9E3668DFBDF7.jpg

I had frozen a bunch of leftover baked puff scraps from the mille-feuille project so I crushed/cut a bunch of those up to use as a rustic topping.

1DE3C61D-E679-4FD4-9798-AA0F452092A9.jpg
2B8D7701-73E1-4F60-BB09-6E01F7C8D341.jpg
A49EF8C4-C587-4C4B-A458-1B2BC8B62A78.jpeg

A drizzle of caramel to top it off plus a dusting of powdered sugar before serving. Ohhh . . . . the tartness of the cherries with just the right hint of sweetness and spice. Love it!

It’s great au naturel but a scoop of vanilla ice cream wouldn’t hurt a thing. Your choice.

6B3CBB64-6FEB-4983-A3D7-B1EAF59FB71B.jpg

I saved some of the cherry syrup from the filling and used it to make a batch of cherry Swiss meringue buttercream which is currently residing in my freezer. Hmmm . . . I wonder what I’ll create with that! Time will tell.

Keep moving, stay safe, everything in moderation and enjoy spring wherever you are.

Danish almond braids

1977E852-2388-46B1-BCCB-834C943537D7.jpg
637069C3-6987-4CE8-8AD2-538066C5AE95.jpg

It’s time for more Danish dough fun!

After I posted on Danish Kringle last spring, I knew I would return to this laminated dough and the wonderful things that can be made with it. I’ve been spending more time with Beatrice Ojakangas’ book “The Great Scandinavian Baking Book” (let’s call it TGSBB) and continue to be amazed at the array of dough and almond filling recipes she presents. Whoa.

I made two versions for this project so as to compare recipes from Ojakangas (BO) and one from Melissa Weller’s (MW) recently published book “A Good Bake”. She refers to it as her “laminated babka dough”. Their recipes are similar to mine although with variations in the amounts of sugar, egg and butter as well as how much butter is used in both the dough and the butter block. So many options in the baking world!

Here’s one of my favorite ways to compare recipes - hand written columns to show you just a few of the differences one might discover when researching different Danish (or any!) recipes. You see my recipe vs. the other two as well as the adjustments I made to those two noted in (parentheses). You can use the same mixing/kneading approach for all three - just look here. Each recipe is enough for two braids.

1433E2FC-9297-4D97-A7C1-1E21B8F690DC.jpg
Almond braid No. 1 (BO)

Almond braid No. 1 (BO)

Almond braid No. 2 (MW)

Almond braid No. 2 (MW)

Before we delve into the braid steps let’s talk briefly about almond paste. In my recent post on Bakewell tart, I mentioned frangipane and almond cream as commonly used fillings for baked fruit/jam/almond tarts. But almond paste is a biggie when it comes to making fillings for many pastries, particularly in Scandinavia and The Netherlands.

You may see the terms almond paste and marzipan mentioned in various recipes, some of which use the terms interchangeably. Technically they aren’t the same. Typically paste is at least equal parts ground almonds and sugar, with higher quality pastes (my preference) having an even higher percentage of almonds (e.g 66% almonds to 34% sugar). Marzipan is more often used for modeling and molding, available in an array of colors (or create your own), and is generally higher in sugar (e.g. 33% almonds to 67% sugar).

BB30E044-98A9-42A6-9710-D57D9BC6DE10.jpg

I’ve been using Mandelin premium almond paste for a while now (they have several “levels” of paste which are well described on their site). I’ve also been buying my blanched almond flour and sliced almonds from them too. Great stuff.

For the almond filling (enough for two braids) cream 56 g soft unsalted butter with 100 g confectioners sugar; blend in 1 teaspoon almond extract (I reduce that to 1/4 teaspoon since my premium almond paste has some bitter almond extract in it already), 100 g almond flour (or finely ground almonds), 85 g almond paste and 1 large egg white until smooth.

The process of forming this braid (not a real braid, truth be told) is what I find so pleasing - it speaks to my simple artistic bent and is so satisfying once completed. The braid in the following images is with MW’s dough.

Start with about 600 g of your finished laminated Danish dough and roll it out to a rectangle of about 9”x 15”. Have your filling ready to go.

D7296593-FACB-43D7-A6A1-CAE6DFCC2AF4.jpg

As seen in the image above, make light marks (don’t cut!) along the length to create three sections then cut the two outer sections at 45º angles about every inch or so. I find using 2 bench scrapers works well so you can match the cuts up as you work your way down. Cool!

The almond filling goes right down the center. Remember you’re using a half recipe per braid. Here’s a tip - place the filling in a rough log shape in plastic wrap, use a rolling pin to lightly compress and shape it to the size of the dough center, keeping it in the plastic. Then gently turn it out of the wrap right onto the dough center. That way you don’t have to spread the filling directly on the dough and risk some smooshing of the laminated layers beneath. Call me crazy!

F2230CBE-E750-4489-A176-D2666EC11B13.jpg

Now start folding the strips across the center, alternating sides, to create a faux braid until you reach the bottom. Tuck the ends under.

Almost there!

Almost there!

Got it!

Got it!

Place the shaped pastry on a parchment lined sheet pan. Cover lightly with plastic wrap and let proof about 60 minutes until puffy. It won’t double but you should appreciate more prominence of the layers.

Just for comparison here’s an image of my first go at this with my version of BO’s recipe. I used a fluted pastry wheel to cut the sides to give it that certain je ne sais quoi, but my fold over pieces weren’t all quite long enough as I reached the end. That experience helped me pay closer attention to my cuts/strip lengths for the MW version.

CFA98446-E585-4D22-8BAE-7434B2CA31E7.jpg

While proofing, heat the oven to 350ºF (Weller’s version). I generally leave my baking stone on the bottom rack of my oven. Even if I’m not baking directly on it, I feel it helps keep the oven temp more even.

Egg wash, sprinkle sliced almonds and raw sugar or crushed raw sugar cubes on top, place on a second sheet pan (helps to protect the bottom from burning) then onto the center rack and bake about 30-40 minutes until nicely browned.

1E56797E-EB12-406F-8AD5-1B8BF089CC4C.jpg
657E865F-C24A-4DAD-BEC2-C0DDBA508643.jpg

For BO’s version heat the oven to 400ºF and bake about 15-20 minutes. Below is the baked version of BO’s - you can see how the fold over pieces pulled away, particularly at one end, exposing the filling. Still tasted good!

Let’s taste! Slicing into BO’s version, there’s a hint of doughiness to the bottom layers. The almond filling is deelish, although, in spite of the lovely flaky, golden and crisp exterior, Steve and I thought the pastry seemed a bit on the dry side and needed a touch more salt to punch up the flavor. The laminated layers are clearly seen (this one went through two 4-folds).

BO version

BO version

For MW’s version there was no doughiness at all to the bottom, and the top laminated layers look pretty good (this one went through only two 3-folds). The flavor of the pastry married with the almond-y filling is wonderful!! A big thumbs up.

MW version

MW version

Based on this project, I’ve tweaked my base recipe (NOTE the links above are for this tweaked recipe): hike up the sugar to 90 g, increase the butter in the dough to 113 g and make my butter block 227 g for a total butter of 340 g all told. I’ll stick with two 4-folds for my laminating for now but will most likely play with that too from batch to batch. The almond filling is a keeper for sure!

In the meantime stay healthy, remain prudent and enjoy spring! Aaahh, so beautiful.

EA093B08-6F52-4531-BC98-08910A35B795.jpg


Mille-feuille aux fraises

B6313D36-DA81-4EFE-813D-0CE12676FA61.jpg

It’s great fun to revisit a classic every now and then. It takes me back to 2006-7 to those pastry school/stage days in Paris. Chef Pascal of Pâtisserie Pascal Pinaud in the 5th arr. would offer a lemon-raspberry version only on Sundays as a special weekend treat. It’s best eaten soon after being assembled so it’s not one of those goodies that can linger in the pastry case for a few days. You want that puff flaky and fresh!!

Mille-feuille (often referred to as vanilla slice in Britain and Napoleon in the US) is truly one of those classics. Crispy, buttery, flaky pâte feuilletée layered with vanilla crème pâtissière is the usual combo but one has the option to change up the cream flavor or switch to something like a light whipped ganache or whipped mascarpone cream and add fresh fruit into the mix. Think chocolate raspberry or coconut mango and you’re off to the races to create your own version.

My project came about as the result of a request for a strawberry vanilla option for a small birthday gathering. Being pleased to accept, I opted for a crème légère au vanille (essentially pastry cream with a bit of gelatin to set and whipped cream to lighten). I had puff pastry in my freezer and kept a keen eye out at various markets around town for decent looking strawberries as the day approached.

731C61B7-B211-4B6F-B684-1E569ACD0841.jpg

If you aren’t up for making your own puff (rough or quick puff can also be used here), you can find decent all butter versions in most frozen food sections of well stocked grocery stores. Dufour is a popular brand.

The beauty of creating this dessert is the make-ahead-ability of the components. I baked my puff and cut my ~2”x4” rectangles 1-2 days ahead, then held them layered between parchment paper in the freezer until the day of assembly. I made the cream a day ahead as well. On assembly day it’s a matter of prepping fruit and having your puff layers and cream at the ready. It’s all about being organized. Not bad at all!

A few tips when working with puff: always work cool; roll the dough out close to your desired size then give the dough a “lift and fluff” to help it relax. Cover with plastic wrap and give it a 10 minute rest (at room temp if your kitchen is cool otherwise in the fridge) before a final roll out to desired size. Then place on a parchment lined sheet pan and pop into the freezer while you heat your oven. That helps relax the dough and reduce the amount of shrinkage that might occur during the bake.

palmierrollout.jpg

For mille-feuille I recommend baking puff in larger sheets and then cut to your desired sizes - that compensates for some shrinkage of the dough during baking and gives you the ability to cut neat edges. That also gives you the option to cut longer strips to stack that will then be cut into individual portions vs. cutting individual rectangles like I did.

I used about a pound / 454 g of puff rolled a scant 1/4” thick for a half sheet pan, baked two of those and had plenty for some test cases and tasting. Yup.

B8F1816D-482A-4A61-96CC-99FF074106BB.jpeg

I typically bake my puff at 425ºF to start. Most recipes you might see for millefeuille instruct you to place a layer of parchment paper or foil on the chilled rolled out puff and top it with another sheet pan or two to weight it and prevent it from rising too much in the oven. I’ve even added a couple of loaf pans on top to add to the weight, but . . . . . . . . .

I’m here to tell you that even with those measures, the puff will puff anyway! Since I want it nicely browned, I weigh it down for the first 10-15 minutes, pull off the extra sheet pan and parchment (or foil) and continue to bake with a wire cooling grid overturned across the sheet pan to allow the puff to bake/puff more evenly. It needs at least another 10-15 minutes to reach a beautiful golden brown-ess (which is difficult to achieve when it’s covered with foil). Don’t forget to keep an eye on it and turn the oven down as needed.

Once cool I gently press it down to flatten as I cut my rectangles. It works!

Then it’s a simple matter of matching up three pieces that seem to stack nicely together and identifying the one you prefer to be the top. In my case, since I decided to dust the tops, their surface appearance didn’t really matter. Some will coat their chosen top pieces with confectioner’s sugar and pop ‘em under the broiler to caramelize for a nice sheen.

I went for simple piped rounds of pastry cream and dusted them with freeze dried strawberry powder to add an additional hint of strawberry flavor.

14CE98F6-72A1-473F-BFBE-70DB0C349F82.jpeg

I was fortunate to find fairly decent strawberries at one our our local grocers, sliced ‘em up and coated them with a bit of strawberry jam for another flavor booster.

Let the layering begin. Puff/cream/strawberries/puff/cream/strawberries/puff. That’s it.

14CE98F6-72A1-473F-BFBE-70DB0C349F82.jpeg

For the top layer pieces I made a simple template so I could dust them with confectioner’s sugar then lines of strawberry powder. I buy freeze dried strawberries at Trader Joe’s and crush/sift them over whatever I want to dust.

B2B1F227-45AB-4210-8C45-0A105C9EDAB6.jpeg
2DDA6611-30B3-448B-8BEF-9CAC0DD76AD7.jpeg

Of course I made some test portions so Steve and I could give them a try. Yum! I even let one sit in the fridge for a day just to see how it would handle that down time. Not bad at all!!! The puff still had some crispy flakiness and the flavor remained delicious.

BCD5A579-484E-4A7E-B9F1-EBD5D99A2726.jpeg

Now that spring is pretty much here, start thinking about your own version of millefeuille. So many options. You can do it!

Meanwhile, Steve and I look forward to our second vaccine dose in a handful of days and . . . . . . my tulips are coming up!!! Yay!!

4CED9D9E-1D4E-41AB-AA89-1FDAA9962D7B.jpeg

Cherry almond Bakewell tartelettes

C2BBB01E-CAE0-4B10-9E6D-82D4F8E19828.jpeg

Let me just say that there’s nothing like the satisfaction of making a stellar tart. Just the right well baked, crisp and golden crust, the beautiful marriage of fruit with almond cream and a tempting garnish of toasted nuts. Mmmmmm!

Anything with almonds (or nuts in general) is a winner in my book. There are various almond based fillings that one may come across in the baking and pastry world, particularly in Scandinavia, Britain and Northern Europe. Many regions of the globe have their own love affair with almonds and the goods you can create with them.

The terms frangipane and almond cream (crème de amandes en Français) are often used interchangeably but, depending on where you are, they might mean slightly different things. In my Parisian schooling we were taught that frangipane is actually a blend of crème d’amandes and crème pâtissière (used for example in galettes des roi), whereas the term in Britain and Italy (and I’m sure many other countries) refers to what the French call crème d’amandes on its own.

Both will work nicely when making fruit or jam almond tarts, although more typically it’s crème d’amandes that fills the bill (or the tart shell - ha!).

51349C67-2871-4013-9C81-A033CD1B148D.jpg

Of course there are beaucoup des tartes one might create - anything from chocolate ganache to zesty, pucker-y lemon-lime as well as the classic almond cream/fruit combos that one sees in most pâtisseries In Paris and beyond. Think pear, fig/raspberry, plum (the mirabelle is a favorite), cherry, apricot or essentially any fruit or combo thereof you might imagine. So many tarts, so little time!

I usually bake tarts, whether large or small, in smooth edged open tart rings. The absence of a metal base allows for more thorough baking of the crust which is better exposed to the oven heat. Plus I like the simplicity of the straight sided, smooth finished tart. It speaks to me.

Buuuut . . . . . If I’m in the mood for a fluted edge, I have the option of removable bottom tart forms vs. solid bottom versions, in which case, depending on the filling, blind baking may come into play. While I love small brioche type tins for tarts, a well baked bottom can be elusive unless you blind bake first then fill and bake to finish.

News flash! I’ve had a Eureka moment in preparation for this post - the oven stone - yay! Prior to this recent discovery, my tendency was to use the open rings or remove the bottom of the fluted pans so as to be sure that my bottom crust baked thoroughly. My experience has shown, particularly with the almond fruit type tarts, that led to a successful bake. Can’t have a soggy bottom now, can we.

B69559DC-5F46-42AF-8535-619F7A0D9C21.jpg

The Bakewell tart is generally associated with England and the town of Bakewell in Derbyshire. Many say it’s a variation on the Bakewell pudding which has more of a jam/custard filling baked in puff pastry or a bottom sponge type cake. The tart version is typically made with an all butter short crust (as the Brits would say) and a jam/almond cream filling. Many recipes use raspberry jam but I decided on cherry from my favorite jam maker Bonne Maman.

I intentionally approached this one to see how well my pâte sucrée would bake in both closed bottom brioche tins and open tart rings. For my first go, I lined my forms and assembled the tarts with a dollop of jam in the bottom and almond cream piped over it. Don’t overfill since the almond cream does puff up during baking.

I baked them on my heated baking stone on which I had also heated a second sheet pan, thinking this would give even better heat transference. Ahhhh . . . . not so.

58D0F830-9B1E-495A-9108-D063FBE9016D.jpg

After a 20-25 minute bake at 325ºF (convection), the almond cream was set and lightly golden and the crust edges looked browned.

B33CA05E-65EB-49D5-8CF6-732E2FE7AACF.jpg

The bottom crust of the open ringed tarts was nicely browned, however, the solid bottom brioche tin tart bottoms were not baked all the way through (take my word for it). Fortunately I removed them from the tins and popped them back into the oven, baking another 5-10 minutes for well baked bottoms.

A confectioner’s sugar glaze, a ring of lightly candied sliced almonds and some tart dried cherry bits in the center finished them off.

EB4F7AED-280E-4804-998E-65589D847E05.jpeg

I have one word for you - delicious. While I thought the glaze was too sweet for our tastes (I admit I put it on a bit too thick), this is one stellar tart. Just the right marriage of jam and almond goodness; and the crunch of the candied almonds gives it that wonderful textural contrast.

6D4446FE-681A-4B01-B31B-7EF12A0458AD.jpg

But wait! Not quite finished. My results pushed me to give it one more go. This time I blind baked both an open ringed crust and a closed bottom brioche tin crust. Once cooled, I panned those up with non-blind baked versions. The assembly and baking were the same with one exception - I ditched the second baking sheet and put my sheet pan directly on the heated baking stone.

Here are the results. The blind baked crusts on the left are a bit browner but the other two look pretty darn good too.

CF47BCB7-D018-408D-A5B7-B1A81A6E1EA3.jpeg

And check out the bottoms! Not bad at all - no barely baked bottoms here.

5E76E66D-4C2A-4AEE-B444-EBC613289D8F.jpeg

This time I lightened up my glaze, giving two of the tarts just a light brushing. For a bit of visual comparison the other two got a light dusting of powdered sugar. I stuck the candied almonds around the edges with a bit of glaze et voilà! Steve and I liked these just as much as the first batch.

The lesson: no need for a second sheet pan heated on the stone - it actually seems to have reduced the heat transference, leaving my brioche tin crusts under baked.

The second batch benefited from the consistent heat coming from the baking stone allowing for excellent browning even without first blind baking. Yippee!

One quick note: in general, when baking a tart with a very loose or liquid-y filling, I typically blind bake first. The oven stone may change that perhaps?? We’ll see.

1B975BAF-2A2D-4232-A2B4-F9C3BA078AC9.jpg

I’ll leave you with a final wintry scene looking out our front door. That’s our metal sculpture, Clarence the praying mantis, peeking out of the snow.

Be safe, remain steady and let’s make it to spring in good shape!

4233F6A0-C443-4480-A2F9-3D67A18E20C6.jpeg